SEARCH FINESCALE.COM

Enter keywords or a search phrase below:

Airfix "Saint Louis" started

27174 views
28 replies
1 rating 2 rating 3 rating 4 rating 5 rating
  • Member since
    August 2008
Posted by tankerbuilder on Monday, April 13, 2009 1:09 PM
 Those are great pics . The ship below waterline is indeed white , but ,what a shame to cover such great wood looking planks. Did you paint the hull and if so with what ?? The colors are good and although that kit had it,s share of flaws right off the bat you got her lookin goood . I use clear fingernail polish to secure my knots . I am reading a book on the history of ships and it contradicts the comment about the footropes. I wouldn,t worry . This book says that some ship rigs had them in the late 1550s . The book I am reading is THE HISTORY OF THE SHIP-- RICHARD WOODMAN author .
DD1
  • Member since
    September 2008
Posted by DD1 on Friday, March 13, 2009 12:33 PM

Thanx for kind words

Well, I have read about the footropes being introduced a bit later - I recall the footropes appeared on the lower yard of the mainmast around 1650's, on fore-mast a tad later and then had spread to the upper levels towards the end of the century.

Of course I had read that AFTER installing the footropes on main and fore :)

Well, I wont be tearing them down, they look nice, and add visual interest to bare yards. Perhaps the model represents the ship after some years of service, in 1650's, it is certainly plausible it had lasted that long, right? I will not be adding footropes to any other yards :)

Installed gratings, and a boat on top of them. From what I had read, the lack of access from gratings to the waist is actally intentional - when the ship was boarded, attackers would have no way of getting below decks. In fact, small canons come with the model to be installed on both quarter-deck and for'castle facing inwards, into the gratings. They are tiny, and I am not sure I will be adding them. Anyhow, the whole arrangement makes sense to me.

Gratings shot:

I am starting to add running rigging: these are lifts (I think) for the main and the bowsprit

Unfortunately, I will have to do halyards last, as they thread through the channels on the mast caps, which are cast integrally with the next level's masts (spars?), and i dont want to add those just yet.

Does anyone have any experience attaching rigging with any glue other than super-glue? Will regular white glue work? 

  • Member since
    December 2006
Posted by woodburner on Thursday, March 12, 2009 6:05 PM

Look for a book by R.C. Anderson called "Rigging of Ships in the Days of the Spritsail Topmast, 1600-1720" which should be available fairly easily.   Footropes were not used in this period - sorry this comes after your work on the first two.

  • Member since
    December 2005
  • From: Colorado
Posted by CaptainBill03 on Thursday, March 12, 2009 10:33 AM

Good morning

 When I built Le Grand Saint Louis several years ago I did make one significant modification.

The split half deck can't possible be correct; this deck hasn't any guns, so it would be primarily for sail handling, however since you wouldn't be able to move from one side to the other, sail handling wouldn't possible.  Also there aren't any ladders or stairs so any access would have to be from behind, and further more the pin rail behind the main mast is completely beyond reach.   I used sheet wood to close the opening leaving an access hole with a ladder in the middle.

I did mount the ship in water and built a box to keep the dust off.  I donated it for a Living History fund raiser and they make $50 (not nearly what it was worth, but still acceptable).

Captain Road Kill
  • Member since
    March 2007
  • From: Portsmouth, RI
Posted by searat12 on Wednesday, March 11, 2009 9:05 PM
Here's a tip on the shrouds/ratlines.... Don't worry too much if they are a bit loose at first, as long as they are all equally loose.  Why?  Because you will be able to tension them properly with catharpins.......
DD1
  • Member since
    September 2008
Posted by DD1 on Wednesday, March 11, 2009 5:18 PM

Now

Once thing I would appreciate: criticism, and expecially so for the rigging, as I am by no means an expert.

Questions:

mizzen crossjack - does it have all the regular rigging? halyards, braces, lifts?
guns - based on a period were they more likely to be iron (and hence painted black) or bronze (and hence very dark bronze colour)?

  • Member since
    February 2008
  • From: San Bernardino, CA
Posted by enemeink on Wednesday, March 11, 2009 4:11 PM
thta just looks dang awesome. thanks for the pics.
"The race for quality has no finish line, so technically it's more like a death march."
DD1
  • Member since
    September 2008
Posted by DD1 on Wednesday, March 11, 2009 1:35 PM

OK

It has been a while since I had posted an update. Can't report much progress - I am in the rigging stage, and you know how that goes - SLOW!!!

So, what's done:

main and fore masts are up, fighting tops painted and attached. That's how they look:

I had installed both stays, and the footropes here:

I think I had overdonoe the rope thickness for the stays a bit, but it looks nicer that way. Bowsprit is also glued in, and blocks are installed on it, for future rigging. Both fore and main stays are attached to the bowsprit.

Shrowds! I had used the shrowd and ratline thingeys provided with the kit. They are not bad, although they had looked much better before I attached them :)

The biggest problem is getting them to sit straight, and not have any sag - each string of the shrowd is glued into it's channel deadeye separately, andit seems I would alsays pull one a bit more than the other. The result  - once that I had pulled a bit less sag and the appearance is ruined. This is how the shwowds are attached:

Now, to fix the sag problem, I would cut off the sagging parts at the bottom of each shrowd, and replace them with thin thread - little knots at the picture below show where that was done.

Overall I think they came out OK, but I have been sniffing crazy glue for days :) to get them look decent.

I am rigging the lifts now. I think I will finish lifts and braces for the lower yards, before adding next mast segments. Mizzen is still not attached, and I have no idea how to rig mizzzen stay now, after the main shrowds are in place.

  • Member since
    March 2007
  • From: Portsmouth, RI
Posted by searat12 on Thursday, December 4, 2008 9:14 PM
I think you have done a very good job, and i don't think at this point that I would change a thing as far as a paint scheme.  Very elegant!  As for spars, at the this time they were mostly just a very dark brown, much like your hull (spars coated with stockholm tar), with black for the wooldings (ropes wrapped around the mast to strengthen it), and that is how you have it now.  Good!.  Same for the fighting tops, though might pick out some of the details with black...
DD1
  • Member since
    September 2008
Posted by DD1 on Thursday, December 4, 2008 5:14 PM

Thanx a lot :)

I am hesitant to paint the galleries at this point, but will wee. I agree they should be blue, but I am afrais to mess up all the details.

I have a question: what colour should the masts, and the tops be? On some models of the [approximately] same era, I had seen them painted black (tops), along with the porton of the mast immediately below it, and up to the cap above it. Is that true?

Suggestions?

dd

  • Member since
    December 2006
Posted by woodburner on Tuesday, December 2, 2008 5:46 PM

Its coming along, very good - consider a blue ground colour for the areas of the stern, filling it out like the Wasa.

DD1
  • Member since
    September 2008
Posted by DD1 on Tuesday, November 25, 2008 1:30 PM

Thanks :)
Windows - silver coat, over which a heavily diluted mix of black, green and a tad of silver was applied. Painting golden window frames is a pain - not all windows are well-molded. I am still doing touch-ups.


  • Member since
    December 2002
  • From: Greenville,Michigan
Posted by millard on Tuesday, November 25, 2008 1:07 PM

That's a good looking model.I find your gallery windows unique.What paint or tinting did you use on the glass I like it.

Rod

  • Member since
    February 2008
  • From: San Bernardino, CA
Posted by enemeink on Tuesday, November 25, 2008 10:49 AM

"Lastly, below is the main fighting top. Out of the box it had came out without ANY slots on the sides, where the ratlines would be going through - I had to cut them out. Am I correct? Having the top solid (other than the openning in the middle for the mast) leaves no way of attaching ratlines, and it is not clear how there were supposed to be entered :)"

First off, your ship is beautiful! I ran into this same problem when I built the Wasa a couple of months back. i had to do the same thing to attach the ratlines. and from pictures that I've seen on the Wasa this is correct. also be careful with those crap plastic deadeyes. they like to break off rather easily when rigging.

"The race for quality has no finish line, so technically it's more like a death march."
  • Member since
    March 2007
  • From: Portsmouth, RI
Posted by searat12 on Tuesday, November 25, 2008 10:18 AM
First off, let me just say that you are doing a splendid job with this, and by the time you are done, you will be ready to tackle 'Sovereign of the Seas!'  As for entering the fighting tops, futtock shrouds are ordinarily attached to the upper part of the shrouds/ratlines, which lead to the upper edge of the fighting top itself.   This requires the sailors to climb almost upside down for a bit, but that's the way it was done!  Later ships fighting tops have a slot as you describe for additional entry, but this is referred to as 'the lubbers hole,' and only used as you might suspect, by lubbers.......
DD1
  • Member since
    September 2008
Posted by DD1 on Monday, November 24, 2008 4:47 PM

OK

It has been a while, but now I have plenty of pics to share.
What was done:

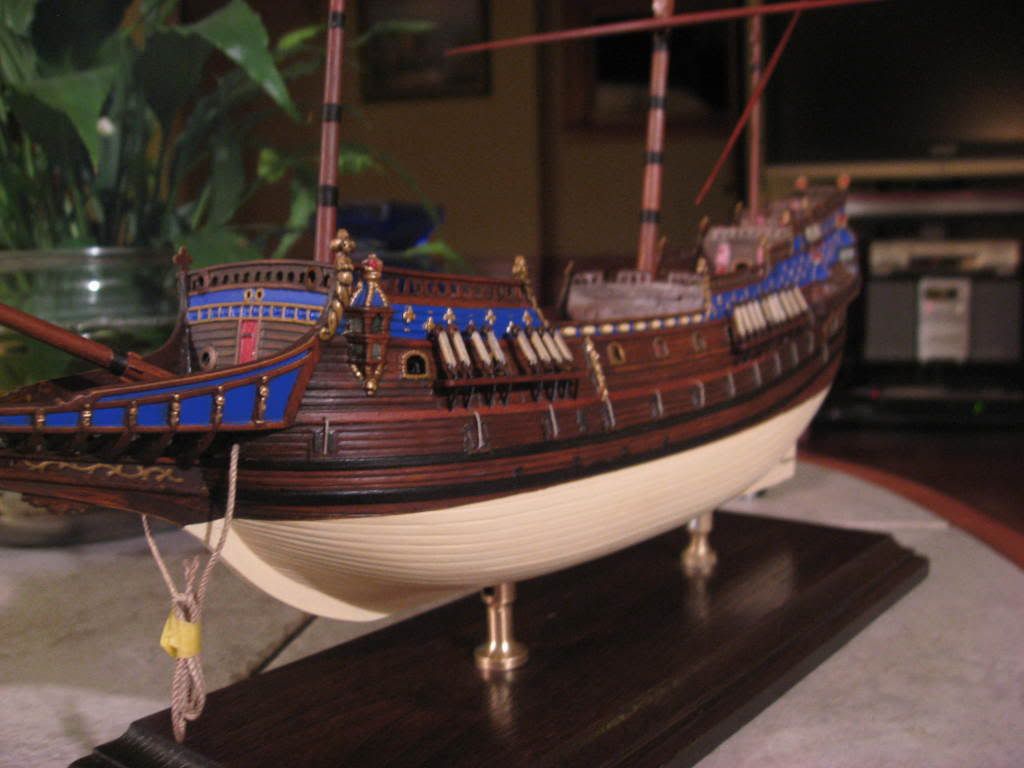
The model is mounted , as you can see below. The rear pedestal is a 3mm shorter than the front one, hence the model sits lower by the stern. I am not sure you can see it in the image below. Initial mounting has been a disaster: I had overdone the bow-stern difference, so I had to ramedy the problem by lifting the keel up from the rear pedestal by about 4 mm and sticking a styrene rod in there. You can't see it really, and overall I am happy with the way it is mounted. 
Underwater hull is, as you can see, painted as well.
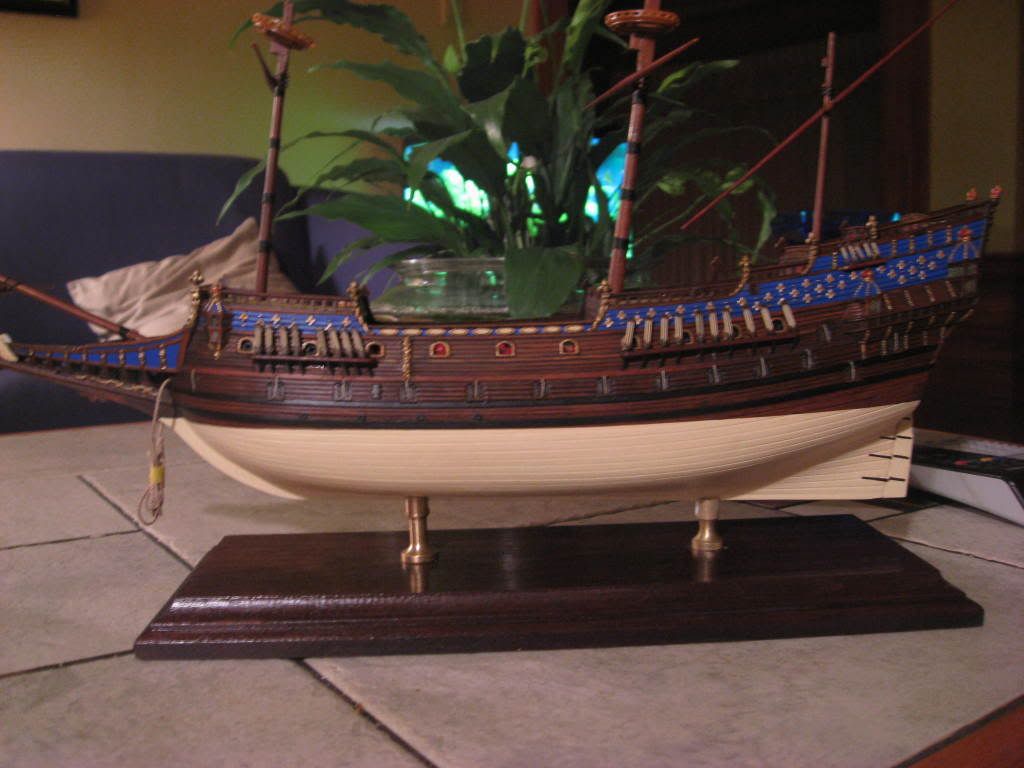
The bulkheads are in place, and so are the decks (masts are just hangin in there, they are still being worked on)

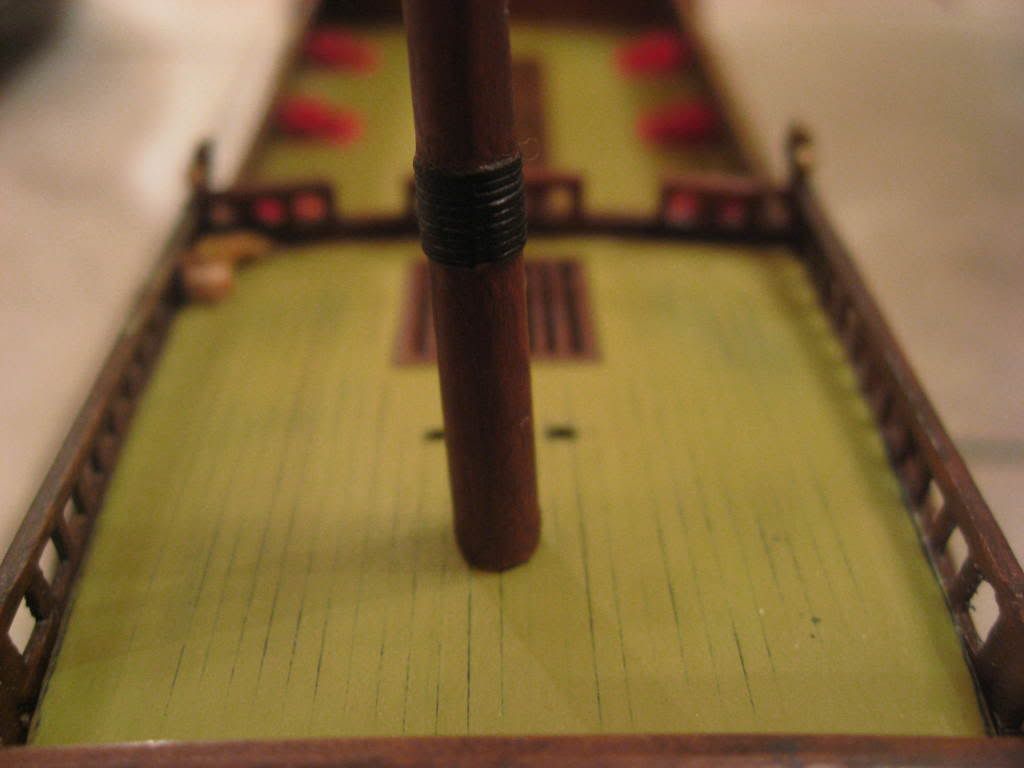


Now, the decks for some reason come out really yellow ini the picture, but this is not the case, in reality they are of a much paler colour - now idea why is this colour changed by my camera.
The gun carriages are installed in the waist, and can be seen in the image above. Once rigged, I will snap a better picture.
I had installed the gun port ropes, anchor cables, and channels:
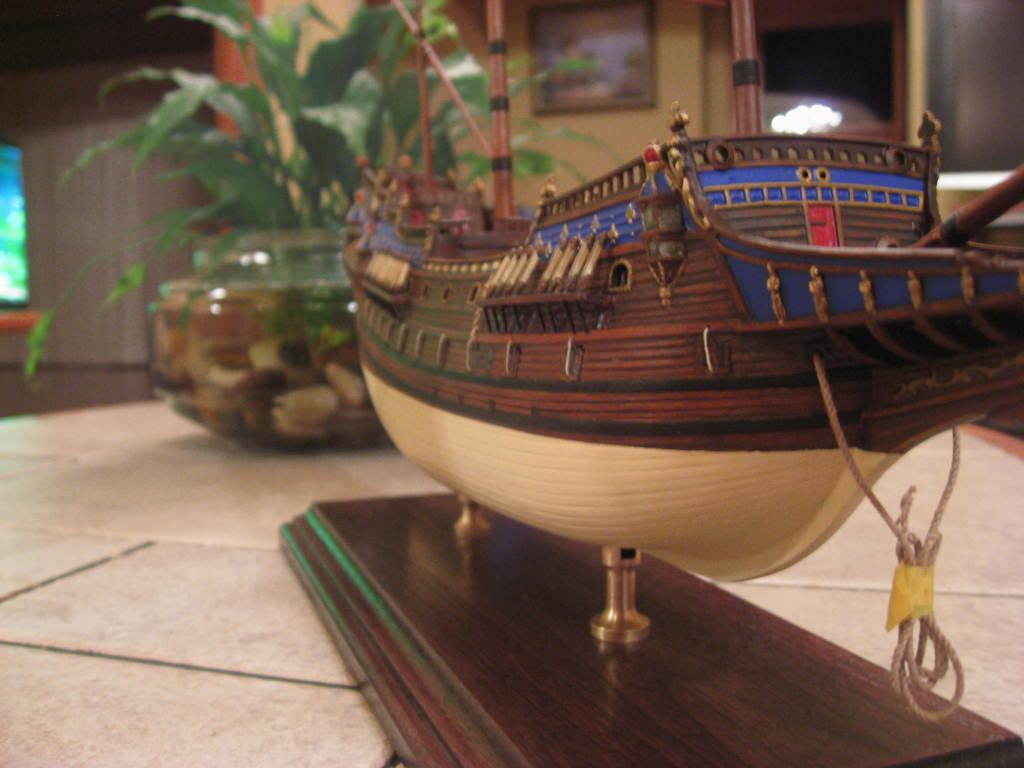
Why did I have to drill the holes for the port ropes in the gunwhale, is beyond me, at this point. In any case, that's how it will be :(
Paiinting is still going on. Gold decorations are very time consuming - each fler-de-lys has three layers of gold on it - initial coat, darker shade in the middle, and a highlight. The most annoying had proven to be the gallery windows, however:
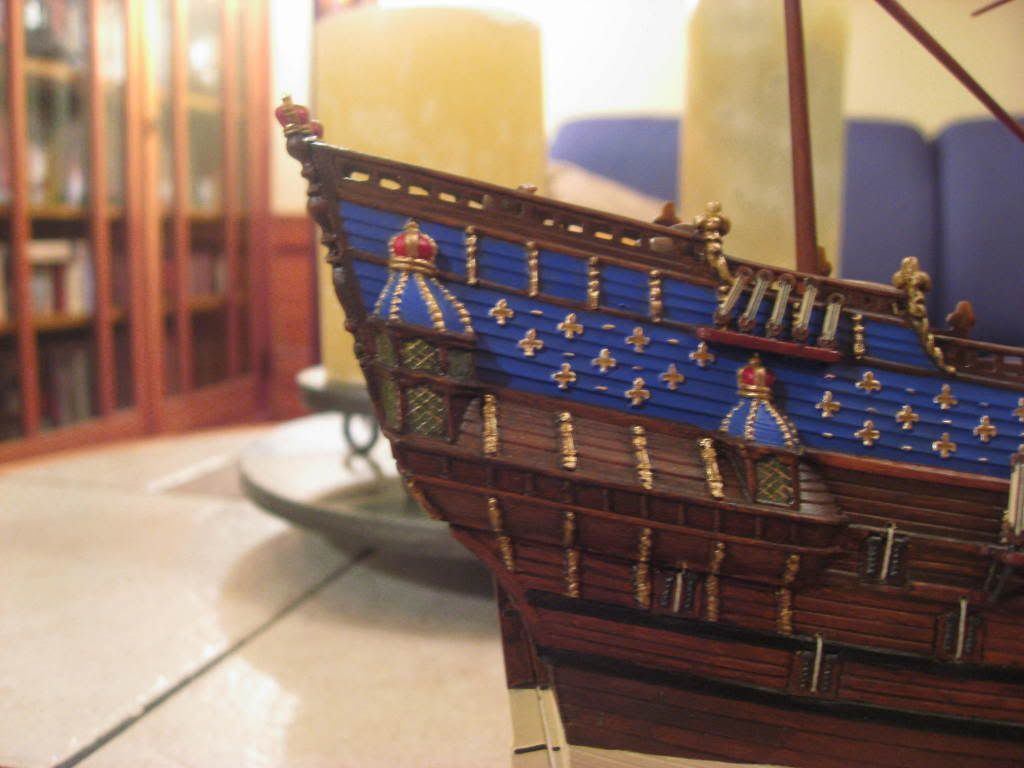
I am trying to get the gilted framing, and it's still a work in progress. Couple of shots of the stern:
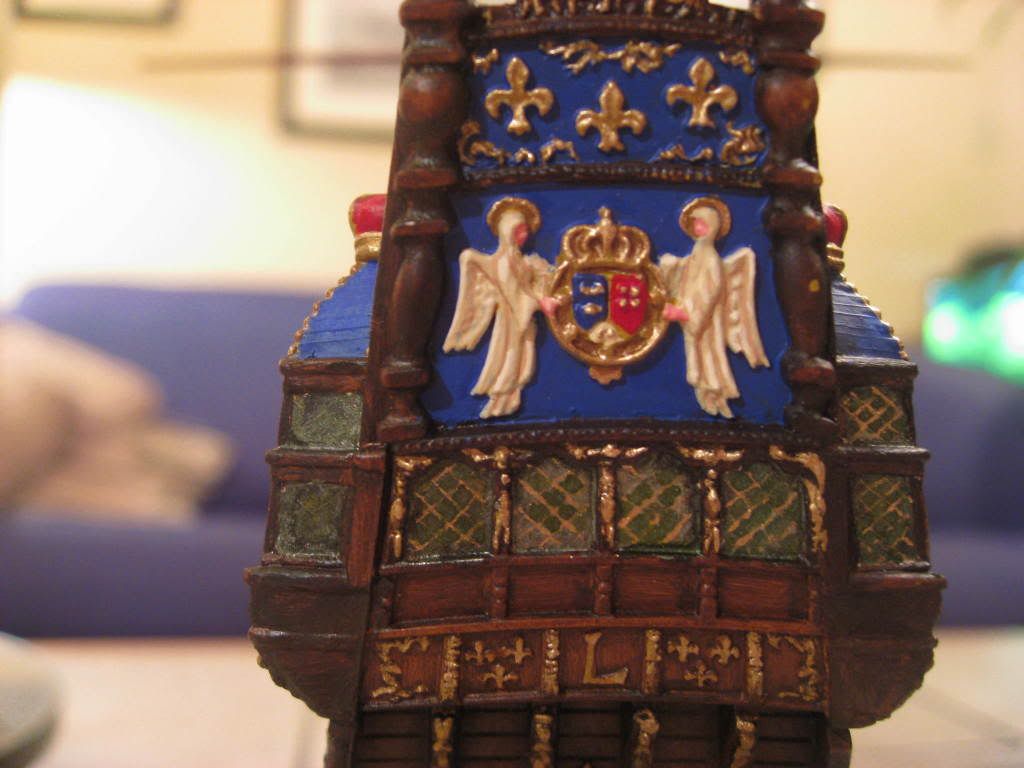
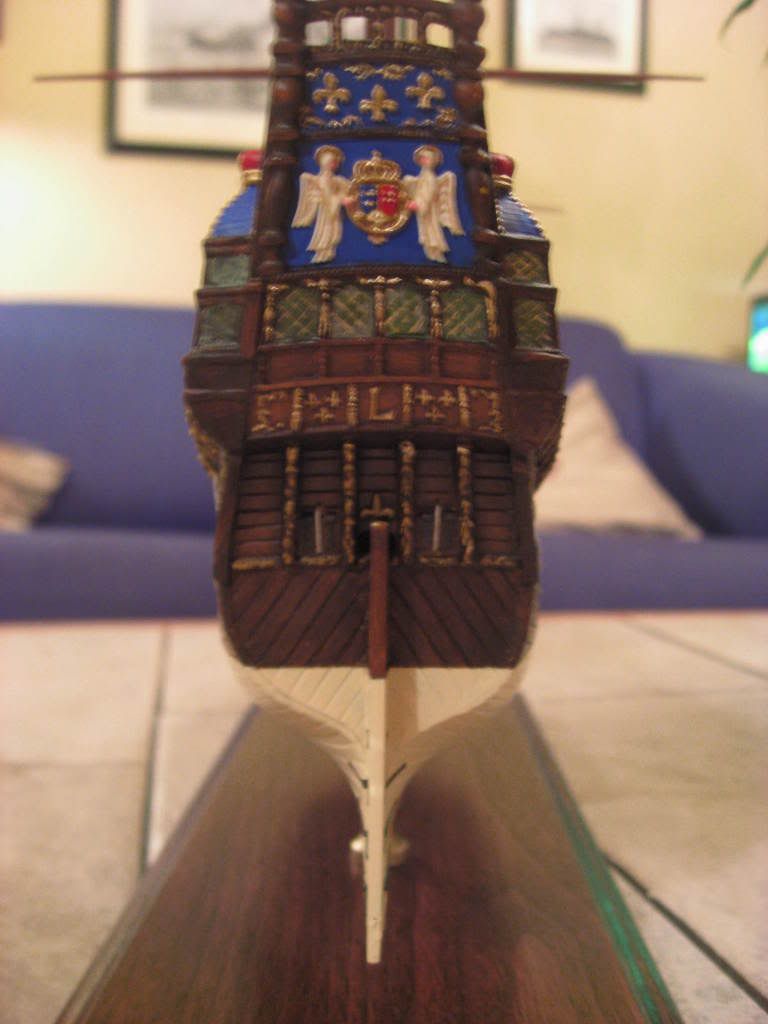
Some windows still need a bit of work, though.
I am used to painting 52mm model soldiers, and a level of detail I am accustomed to there is really holding me back now :)

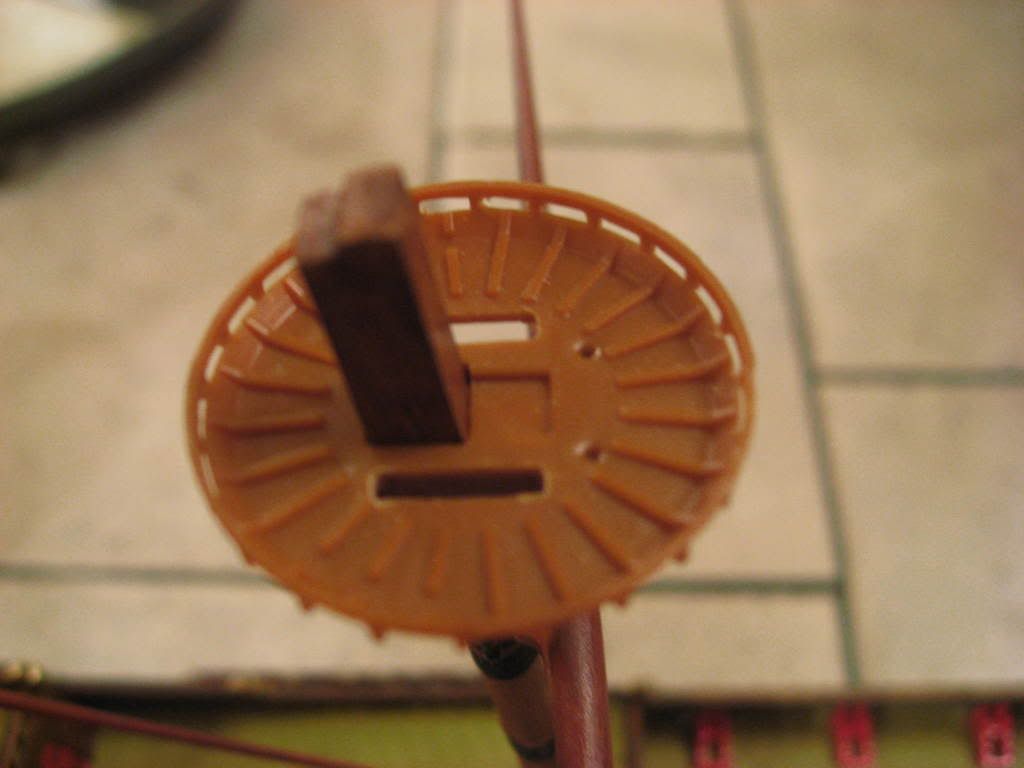
Lastly, below is the main fighting top. Out of the box it had came out without ANY slots on the sides, where the ratlines would be going through - I had to cut them out. Am I correct? Having the top solid (other than the openning in the middle for the mast) leaves no way of attaching ratlines, and it is not clear how there were supposed to be entered :)


  • Member since
    December 2003
  • From: 37deg 40.13' N 95deg 29.10'W
Posted by scottrc on Thursday, October 2, 2008 6:59 AM
Very nice on the construction and the finish.

  • Member since
    December 2006
Posted by woodburner on Monday, September 29, 2008 10:01 PM

The degree of angle to the keel is not too substantial, and the mast will only angle back slightly.   

DD1
  • Member since
    September 2008
Posted by DD1 on Monday, September 29, 2008 6:50 PM
There is a lithograph of "Saint Louis" I was referring to. It is clear, that tis picture was used as a primary source by 'Airfix' - model repeats it in every detail - the shape of the upper tier gun ports, figurehead and balconies are unmistakable.
Interestingly, ship is shown under Dutch colors., not French.


dd

DD1
  • Member since
    September 2008
Posted by DD1 on Monday, September 29, 2008 4:40 PM
OK
Thanks so much davros, your suggestion worked. I had reposted the images.
I have little progress to report - I am still going over the gold, adding second and third layer. See at least couple more days of doing that ...
I have a question, though: the ship, as explained in the instructions, drew more water by the stern - meaning it was never sailing on the even keel, but with the stern deeper. That explains the extreme 'curvature' of the quarterdeck.
How should I display the model - on an even keel, or as the ship would sit in the water, with a even deck (more or less) but a keel that sits lower in the back?
I was thinking about mounting the model on the pedestals of unequal height - 22mm back and 25mm front - is this a good idea?
If I do that, there is another problem: main mast on the model is angled backwards a bit, even if the ship sits on an even keel. If ship is tilted backwards, the rake of the main mast becomes quite unnatural. Any ideas?
dd

  • Member since
    June 2006
  • From: Netherlands
Posted by Grem56 on Monday, September 29, 2008 1:00 PM

Missed this one at first. Absolutely beautiful work you are doing there ! Keep the piccies coming, I want to follow this one.

cheers,

Julian Thumbs Up [tup]


illegal immigrants have always been a problem in the United States. Ask any Indian.....................

Italeri S-100: http://cs.finescale.com/FSMCS/forums/t/112607.aspx?PageIndex=1

Isu-152: http://cs.finescale.com/FSMCS/forums/t/116521.aspx?PageIndex=1


  • Member since
    December 2006
Posted by woodburner on Sunday, September 28, 2008 3:03 PM

The model is looking very nice now

  • Member since
    September 2005
  • From: Groton, CT
Posted by warshipguy on Saturday, September 27, 2008 10:12 PM

DD1

This is an OUTSTANDING build!  However, I agree fully with the off-white tallow hull below the waterline comments.  Model Shipways produces an excellent paint for this for Model Expo.  Good luck and I can't wait to see the continuing product!

Bill Morrison

  • Member since
    January 2003
  • From: Barrow in Furness, Cumbria, UK.
Posted by davros on Saturday, September 27, 2008 1:49 PM

 DD1 wrote:
OK
For the best of me, can't figure out how to make the images appear in their normal size :(
Seem to be doing everything right. Any ideas?
As to the color - yeah, I suppose you have seen the same paintings I have seen, but can't necessarily trust them - they only surviving image of the prototype is an etching by Stork (naturally in black and white). I know that for some time ship's bottoms were tarred (which would make them look black), until some time in the 17 century there was a general switch to the off-while bottoms.
Painting the gold detail is so-o--o time consuming!
dd

You seem to be posting the thumbnail images. I went to your album and just did a single left-click in the "IMG code" box and pasted the result here in my and this is the result.


  • Member since
    February 2008
  • From: San Bernardino, CA
Posted by enemeink on Tuesday, September 23, 2008 6:31 PM

 DD1 wrote:
OK
For the best of me, can't figure out how to make the images appear in their normal size :(
Seem to be doing everything right. Any ideas?
As to the color - yeah, I suppose you have seen the same paintings I have seen, but can't necessarily trust them - they only surviving image of the prototype is an etching by Stork (naturally in black and white). I know that for some time ship's bottoms were tarred (which would make them look black), until some time in the 17 century there was a general switch to the off-while bottoms.
Painting the gold detail is so-o--o time consuming!
dd

you should see the airfix Wasa that i did a couple of months ago. talk about time consuming detail Big Smile [:D] I also did some digging on the white bottom hulls. it was pretty much common practice from the early 1600's for the french to have the bottom of the hull painted white (from what i've seen in other ship models of the same era)

ps welcome to the forums

"The race for quality has no finish line, so technically it's more like a death march."
DD1
  • Member since
    September 2008
Posted by DD1 on Tuesday, September 23, 2008 4:19 PM
OK
For the best of me, can't figure out how to make the images appear in their normal size :(
Seem to be doing everything right. Any ideas?
As to the color - yeah, I suppose you have seen the same paintings I have seen, but can't necessarily trust them - they only surviving image of the prototype is an etching by Stork (naturally in black and white). I know that for some time ship's bottoms were tarred (which would make them look black), until some time in the 17 century there was a general switch to the off-while bottoms.
Painting the gold detail is so-o--o time consuming!
dd
  • Member since
    December 2006
Posted by woodburner on Tuesday, September 23, 2008 2:42 PM

A dirty white underwater hull would be correct.  It extended up to the lowest wale, following the lines of the wale. 


  • Member since
    February 2008
  • From: San Bernardino, CA
Posted by enemeink on Tuesday, September 23, 2008 10:47 AM

very nice build! the color of the hull is amazing. is there anyway that you can post larger pictures? when i click on the pictures they pop up at the same size as the icon....


"The race for quality has no finish line, so technically it's more like a death march."
DD1
  • Member since
    September 2008
Airfix "Saint Louis" started
Posted by DD1 on Monday, September 22, 2008 7:15 PM
This is the old Airfix 1:144 kit of Saint Louis. The kit, which has been discussed quite a lot on this forum is really nice.

I had never finished a ship model :), and frankly I suspect I may never finish this one, but it has been coming out nicely, and I decided to show off the paint job.


There is still lots of painting to do. The bottom part of the hull is not yet painted, for now I am using it to hold the ship. I am debating on the color - every illustration of Saint Louis I had seen has it in off-white, but based on the age of the ship, isn't black more appropriate?


dd
JOIN OUR COMMUNITY!

Our community is FREE to join. To participate you must either login or register for an account.

SEARCH FORUMS
FREE NEWSLETTER
By signing up you may also receive reader surveys and occasional special offers. We do not sell, rent or trade our email lists. View our Privacy Policy.