Glad to help.
Sounds like you have the basics of my process down. I first chuck the finial in my drill press vise by the topknot. I ensure that it is plumb & square to the 1/8 drill bit. I then drill through the bottom and out the top knot.
Next thread a 1/4-28 bolt with the hex head cut off into the bottom of the finial and chuck that in the drill press. Turn it on and cut off the top knot using a hack saw. Then lay a mill file flat on the drill press table and lower the turning finial onto it to smooth the cut. Alternatively you can file a groove into the finial to accept a keel. .
Then some fine steel wool is used while the finial is turning to polish the brass.
A shot of Krylon clear seals the polished brass and prevents tarnishing.
I build resin ships. I use brass threaded inserts to make the connection (another hardware store item). My favorite thread size is 6-32. Drill a 1/4 inch hole about a half-inch deep on the bottom of the hull. Epoxy the inserts into the hull. Ensure that they are square and vertical before the epoxy hardens. Fill any gaps arounf the insert with putty and sand smooth. Any putty in the insert can be cleaned out with a thread tap.
I have tried running a tap directly into the resin to make a threaded hole, but the resin is too brittle and you run the risk of stripping the threads if thenut is too tight.
I drill a couple of holes in the base at the desired distance apart. I elongate one of the holes slightly to account for any imperfections. The bottom of the finial will cover the larger hole. The hole on the bottom of the base is countersunk to allow for the head on the bolt. If the thickness of the base allows it make the countersink about 1/4 inch. The bolt that you will use to attach the ship to the base is then the thickness of the base plus the height of the pedestal. The depth of the countersink allows for the thread distance into the nut/insert on the bottom of the ship.
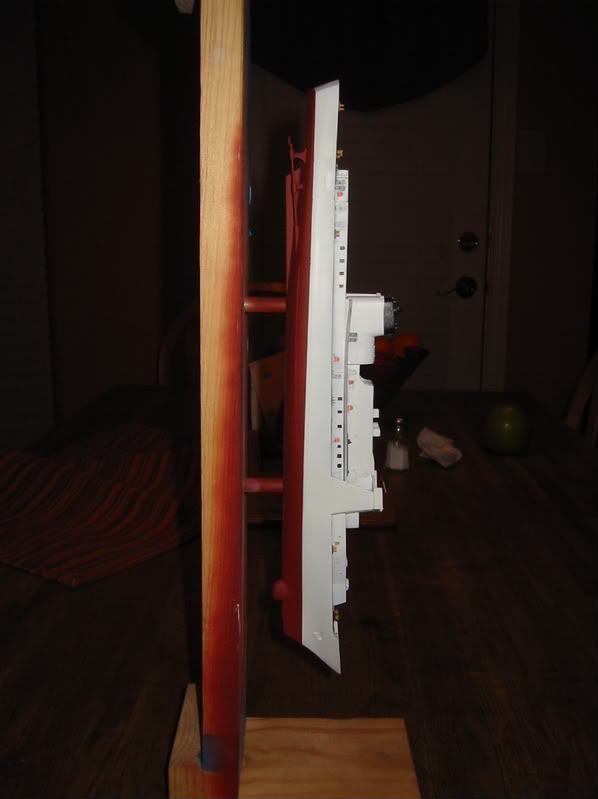
One of the benefits of the threaded insert and nut method of attaching a ship model to a base is it allows for easy removal and reattachment. I can use a building board to attach the model to the base. It minimizes handling of the model. Allows it to be painted easily. I can stand it as I want or lay it over to allow reach to hard to reach areas

This is the ISW USCGC Hamilton standing on its nose on one of my boards. The flange can be moved to the opposite end -- you don't need to swap the model. When completed, swap bases and use finished finials.