SEARCH FINESCALE.COM

Enter keywords or a search phrase below:

Lindberg HMS Bounty - WIP

27406 views
34 replies
1 rating 2 rating 3 rating 4 rating 5 rating
  • Member since
    May 2010
  • From: Berwick, La.
Posted by Tnonk on Friday, August 26, 2011 10:56 PM

Thanks for the comments, I appreciate it!

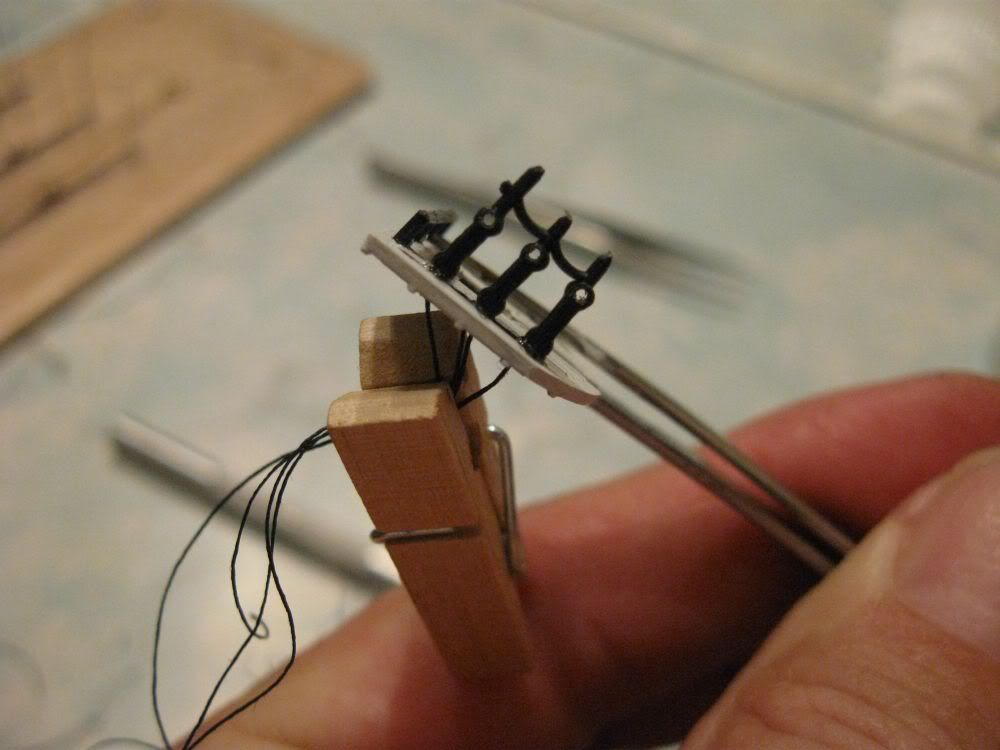
Yeh, There's not much room at all Spruce.  I'm doing about 95% of the rigging now with tweezers.  I try to pre-tie as much as possible.  On the mast tops I'll have everything tied off on one end at least.  I use two tweezers to finish the ties, a long angled pair and a shorter needle nose pair.  It gets frustrating some times when you have to tie the knots several times before getting them right..

Well Will, I'm not so sure on the skill part - I've made enough mistakes on rigging this little model, so it's not really skill but repetitive practice! A LOT of trial & error (mostly error BTW). This is my first real rigging job, I've built a number of sailing ships in the past (the last one I built was my 1/96 Constitution in 1979/1980 & I never rigged her) (yet!!)

I may have to pick one of the New Bedford Whalers just to make a separate ship, a Royal Navy Collier might do the trick I suppose. But I do want one of the old Pyro C.W. Morgan just for 'old times sake'

Thanks Bashmonkey, I appreciate it. Yeh, I noticed on a couple of small ship builds in the past that just wasn't quite right.  And, after working on my small Bounty, I understand how difficult it is to get it right on such small scales.  I'm not a perfectionist but I do want to get it as close as  can. Also, it's amazing ( & frustrating) at how many things the eye doesn't pick up until AFTER you photograph it!

As to the Mutiny subfixer - ah well, that may just have to wait till I launch her!  Been looking for some figures that might fit the scale as a matter of fact. Unfortunately I've only come up with a few N scale figures that MIGHT work. 


The first pic is of the main top rigged.  Sorry if the pics come out sideways again, don't know how to turn 'em in photobucket (it turns some of my pics for some reason).

I rigged the futtock shrouds, then rigged the upper shrouds next.  Tieing off the futtock shrouds between the deadeyes was pretty tight here - probably my tightest tie yet.  It's difficult not to get the tweezers tangled up in the rigging that's already done.

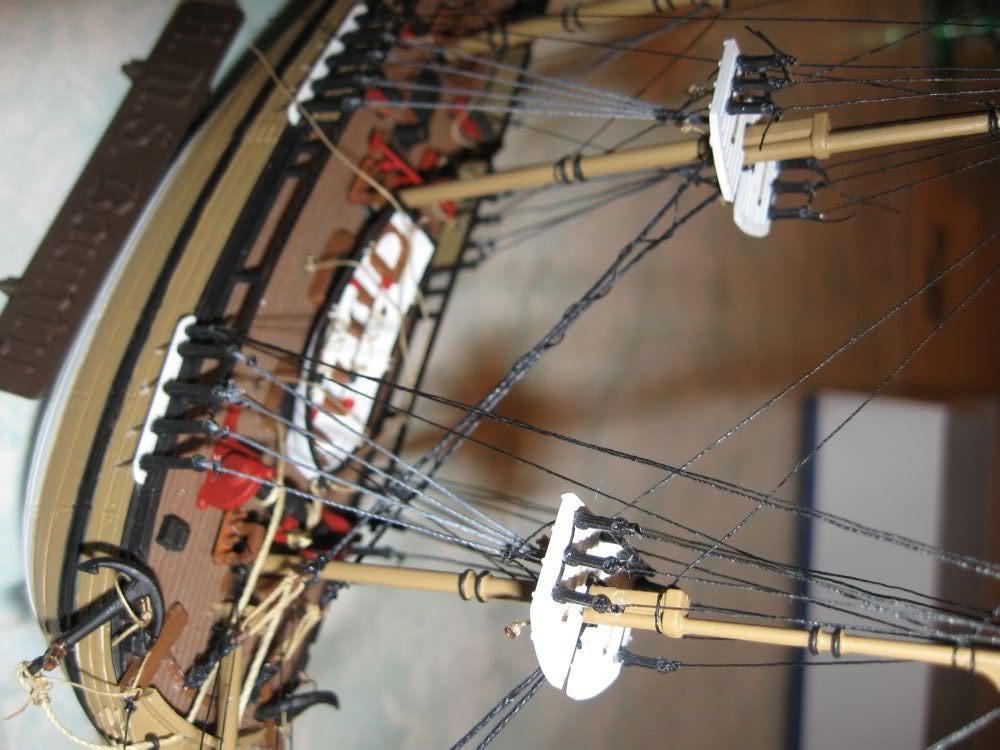
Profile view of the rigging so far.

Rigged the mizzen top.  A few things left & I'll mount it this weekend. I used a smaller set of deadeyes on this top, but I'll be using the same diameter thread.  The odd part with the mizzen is that there is no crosstree to mount the upper shroud to.  I guess I'll just have to rig a wire saddle to rig it & then tighten it up.

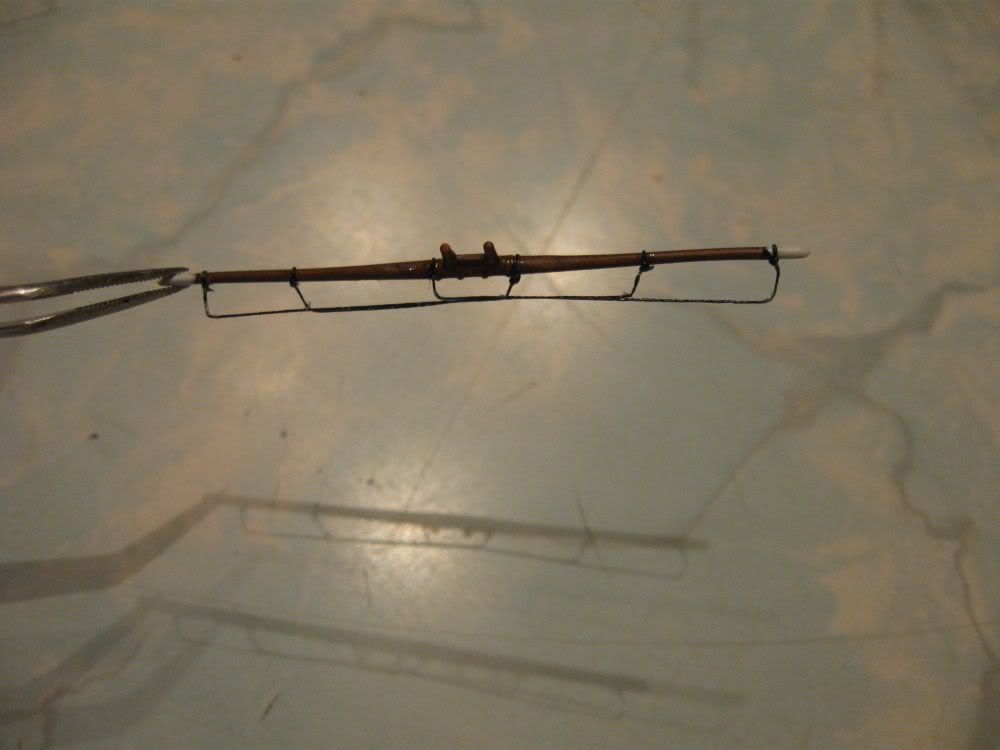
The Future stiffened up the foot-ropes pretty well, I'll start working on getting a nice sag to them after I get them mounted and rigged.  I'll be adding a rope & pulley on each end and two lift lines also.  I am also using the Revell instructions as a guide in regards to the spars - Lindberg gives you one too many for each mast.

Thanks for looking in, more coming soon.


Adrian


  • Member since
    July 2009
  • From: Jacksonville, Florida
Posted by Vagabond_Astronomer on Saturday, August 27, 2011 9:37 AM

Looking great, Adrian.

The footropes look effective. I've used Future in other modeling, never in ships; this, I must try.

Rob

"I have loved the stars too dearly to be fearful of the night..."
  • Member since
    May 2010
  • From: Berwick, La.
Posted by Tnonk on Wednesday, August 31, 2011 10:30 PM

Thanks for the comment Rob, I appreciate it.

Sorry to have been away & not responding sooner - been a bit under the weather lately.

My plan with the Future on the footropes is, after I get the spars mounted, to go back with a wet q-tip and moisten the Future and hopefully get a nice sag. Then,when the Future re-dries, I'll have some nice, stiff, sagging footropes.  We'll see what happens once I get to that point.

I did a bit tonight on Bounty starting with tieing some threads on my blocks for the mizzen top and for a spar.

Wrapped up the mizzen top.

I hung a 'block' from the main stay for the lifeboat lift while the glue set on the mizzen top. I shortened the harness on the boat and ran the lift line.

I installed the mizzen top.  I'll run the futtock shroud after the glue sets a day or so.  I also need to make a small wire harness so that I can run the upper shrouds on this mast.

I'm hoping my Future idea works on the footropes.  I don't know if the q-tips will fit but I'll get the footropes wet to soften the Future one way or another.  I also tied off the pulleys.  I used the Revell instructions for the rigging and it shows these ropes fairly long.  Most I've seen snug the blocks up to the spar.

Thanks for looking.  More coming soon.


Adrian


  • Member since
    June 2015
Posted by RONALD ALVAREZ on Friday, July 27, 2018 10:15 AM

Great job friend, I need the instructions of armed of this beautiful ship, will it be possible that you give me a copy by this means scanned? Big Smile

  • Member since
    November 2005
  • From: Formerly Bryan, now Arlington, Texas
Posted by CapnMac82 on Saturday, July 28, 2018 3:48 PM

As to scale, John McKay in Anatomy of the Ship gives:
Length of Keel 69'-9"           (21.2598m)
Length of lower deck 84'-6" (25.7556m)
Beam extreme 24'-10"        (7.5692m)

The main hatch is 9'-1" long by 6'-1" wide.  (276.86cm x 185.42cm)

The Launch is meant to be 23'-0" (7.0104m) by 6'-9" (2.0574m) and 2'-9" (83.82cm) deep.

Anchor cable to be 12" (304.8mm) circumference, cable laid; the shoruds to be 4.5" (114.3mm) circumference.  Diameter--using C/π =d--are ±3 51/64" (97mm) and
±1 2/64" (36mm) respectively.

Bethia, per McKay, was fitted with a capstan, so that, with a messenger, would have been used to handle the anchor cables.


JOIN OUR COMMUNITY!

Our community is FREE to join. To participate you must either login or register for an account.

SEARCH FORUMS
FREE NEWSLETTER
By signing up you may also receive reader surveys and occasional special offers. We do not sell, rent or trade our email lists. View our Privacy Policy.