SEARCH FINESCALE.COM

Enter keywords or a search phrase below:

1/350 IJN MUSASHI Build

9752 views
29 replies
1 rating 2 rating 3 rating 4 rating 5 rating
  • Member since
    September 2013
  • From: San Antonio, Texas
1/350 IJN MUSASHI Build
Posted by Marcus McBean on Tuesday, July 25, 2017 5:04 PM

Tamiya IJN MUSASHI 1/350

Been holding on to this kit for that past three years while slowly collecting aftermarket hardware.  Now I beleive I have enough to get started. 


There is also a wooden deck but at this time I am not sure if I will use it.  I not really a fan of them and prefer to paint the decks. 

I already started on the hull by drilling out the portholes and sanding off the deguassing cable moded on the hull.  Removing the cable was easy, cleaning up the hull has been a real pain in the back side. 

I also purchased this reference book on the Musashi and Yamato.  It filled with technical drawings on their construction and modifications they went through until their sinking.  The author claims the book is based on new photos and records discovered in the Japan archives.  The 3D drawings I believe are based on a model of the ship the author built or had commissioned.

I have not been very good at posting work progress in past builds, but those were on group builds where I felt pressure to meet the deadline and I only had a IPAD for a camera.  Will post pictures as I progress thru each step except for this week as I will be in Omaha for the IPMS National Convention starting tomorrow.  Heading Downtown to Omaha!

Marcus


  • Member since
    September 2012
Posted by GMorrison on Tuesday, July 25, 2017 5:40 PM

Look very much forward to this McBean.

If it were me I would start planning for a base and cover too. This'll be a real keeper.

I know what you mean about wood decks, I agree. Still...

 Modeling is an excuse to buy books.


  • Member since
    September 2013
  • From: San Antonio, Texas
Posted by Marcus McBean on Tuesday, July 25, 2017 9:59 PM

GMorrison

Look very much forward to this McBean.

If it were me I would start planning for a base and cover too. This'll be a real keeper.

I know what you mean about wood decks, I agree. Still...


I have a base for it.  Plan on having it sitting on blocks as if she was in drydock.  As for cover I have a enclosed shelve reserved for her in the office.


  • Member since
    July 2010
  • From: Tempe AZ
Posted by docidle on Tuesday, July 25, 2017 11:22 PM

I too am looking forward to seeing this Marcus. And that is a lot of beautiful brass your got there! 

Question on the mounting. I am building a 1/200 scale Arizona for a client and I too am going to mount it like it is in dry dock. What I am not sure of is whether I follow the contour of the hull with the blocks or have them the same size all along the length of the hull? 

How are you going to set your's up if I may ask?

Steve


  • Member since
    September 2012
Posted by GMorrison on Wednesday, July 26, 2017 1:20 AM

Whatever moves you.

I've posted the ASCE handbook on drydock procedures in the past, and there's no correlation to this type of display.

http://ascelibrary.org/doi/book/10.1061/9780784410875

To set a ship on blocks in drydock, there are towers built with crossribbed blocks, or pre sized piers, under the frames of the ship. 

It's a function of the weight of the ship, the location of the frames, and the capacity of the dock.

For big ships with flat bottoms, it is a more straightforward but by no means simple exercise.


 Modeling is an excuse to buy books.


  • Member since
    September 2013
  • From: San Antonio, Texas
Posted by Marcus McBean on Wednesday, July 26, 2017 7:01 AM

GMorrison

Whatever moves you.

I've posted the ASCE handbook on drydock procedures in the past, and there's no correlation to this type of display.

G. Morrison,

Thank you for the link on drydock procedures it should come in real handy. 

The Musashi has a flat bottom hull so it will be pretty straight forward has to how to place the blocks.  The blocks will be placed along the length of the keel and then under the frames unless I find something different in the ASCE handbook.  The Musahsi reference book I have has detail drawings of where each frame placement is located along the hull.  That will be a big help in placing them on the base.  The fun part (or not) will be cutting all of blocks, staining them and placing them. 

The question I need an answer from the drydock procedures is how high do I make the stacks?  Should they be tall enough for a average height man to be able to walk under the hull? 

  • Member since
    November 2009
  • From: SW Virginia
Posted by Gamera on Wednesday, July 26, 2017 7:37 AM

Oh wow, this is going to be friggin' epic!!! 

Good luck with her MM! 

"I dream in fire but work in clay." -Arthur Machen


  • Member since
    September 2010
Posted by potchip on Wednesday, July 26, 2017 9:04 AM
Unfortunately if you are going to use the latest AOTS reference book extensively, then a much better (as in less work required) starting point would be the Tamiya new tool Yamato + Pontos Musashi upgrade (intended for the new tool Yamato). The old Tamiya Musashi (as well as the old tool Yamato) are a fair distance from an accurate model, that will require a lot of scratch building to just complete the 'detail' department not to mention non-obvious profile issues. Sorry, I think the best option is just to super detail what you have and don't research too much, as it will just lead to more headaches.
  • Member since
    September 2013
  • From: San Antonio, Texas
Posted by Marcus McBean on Wednesday, July 26, 2017 12:03 PM

 Potchip, 

I agree with you about doing the detailing with what I have but there are little things that I can make changes to without a great effort.  For one, now I know where the ship's bell was located and will be able to add it to the build.

Marcus

  • Member since
    November 2005
  • From: Formerly Bryan, now Arlington, Texas
Posted by CapnMac82 on Thursday, July 27, 2017 9:22 PM

Marcus McBean
The question I need an answer from the drydock procedures is how high do I make the stacks? Should they be tall enough for a average height man to be able to walk under the hull?

That could be a tad Heculean a task.

USS Texas, a smaller ship, "by book" uses 572 keel blocks.  The under keel blocks are at least 5' tall--but, that's driven by the way the ship is drydocked.

In a graving dock, the bottom elevation is known, and the ships draft is known, so, you can pick a height that still allows the ship to float in.  In a floating drydock, the AFD can only submerge a given distance.  In which case you rig the blocks for the best average fit that allows access to ship's hull, as required.

Which is why the "cheat" is to cut wood strips square, about 2x the boot topping, or to some convenient dimension like 1/8" or 10mm square.  Then lay those thwartwise (parallel to the beam) and something near 1.161 the width the blocks (call it 5/16"/26-27mm on center.  These are then cut about the same length as the beam of the ship's main deck above them.

  • Member since
    July 2014
Posted by modelcrazy on Thursday, July 27, 2017 9:39 PM

:popcorn:

Steve

Building a kit from your stash is like cutting a head off a Hydra, two more take it's place.


http://www.spamodeler.com/forum/

  • Member since
    September 2013
  • From: San Antonio, Texas
Posted by Marcus McBean on Sunday, July 30, 2017 9:12 PM

Only had a little time to spend on the hull.  Installed one of the PE porthole covers to see how it looks compared to the flat covers molded on the hull.  I like how it looks.


Now I only have 161 pieces to install.

Tags: IJN Musashi
  • Member since
    July 2014
Posted by modelcrazy on Monday, July 31, 2017 7:37 AM

Quite an improvement MM

Steve

Building a kit from your stash is like cutting a head off a Hydra, two more take it's place.


http://www.spamodeler.com/forum/

  • Member since
    September 2005
  • From: Groton, CT
Posted by warshipguy on Monday, July 31, 2017 8:11 AM

There is one interesting fact about Musashi that few mention, let alone include on a model of the ship. She was fitted with 2x2 depth charge racks during her 1943 refit.  I believe that these are shown in the newest incarnation of the AOTS book.

Bill Morrison

  • Member since
    September 2013
  • From: San Antonio, Texas
Posted by Marcus McBean on Monday, July 31, 2017 10:11 AM

Bill,

I will have to check my references about the depth charges.  Some reason in the back of my mind you are right but they made have been removed during a AA upgrade in 1944.

Marcus

  • Member since
    November 2009
  • From: SW Virginia
Posted by Gamera on Monday, July 31, 2017 2:33 PM

Marcus McBean

Only had a little time to spend on the hull.  Installed one of the PE porthole covers to see how it looks compared to the flat covers molded on the hull.  I like how it looks.


Now I only have 161 pieces to install.


Wow!!!!!!

And that's why I drool over ship models but don't have the guts to build one...... 

"I dream in fire but work in clay." -Arthur Machen


  • Member since
    July 2014
Posted by modelcrazy on Monday, July 31, 2017 2:40 PM

Gamera
And that's why I drool over ship models but don't have the guts to build one...... 

Nothin to it, just patience.

Steve

Building a kit from your stash is like cutting a head off a Hydra, two more take it's place.


http://www.spamodeler.com/forum/

  • Member since
    September 2013
  • From: San Antonio, Texas
Posted by Marcus McBean on Tuesday, August 1, 2017 9:52 PM

warshipguy

There is one interesting fact about Musashi that few mention, let alone include on a model of the ship. She was fitted with 2x2 depth charge racks during her 1943 refit.  I believe that these are shown in the newest incarnation of the AOTS book.

Bill Morrison


Bill,

You are right about the depth charge racks.  The book I have states that the racks were in installed during a 1944 refit.  The author does not say what part of the year, but seeing how she was sunk in October 44 it had to be the April refit I believe. 

Marcus


  • Member since
    July 2004
  • From: Sonora Desert
Posted by stikpusher on Tuesday, August 1, 2017 9:58 PM

modelcrazy


Gamera
And that's why I drool over ship models but don't have the guts to build one...... 


Nothin to it, just patience.
 

And some Micro surgeon hand/eye skills to work with all the PE and rigging... 


F is for FIRE, That burns down the whole town!

U is for URANIUM... BOMBS!

N is for NO SURVIVORS...

       - Plankton

LSM


  • Member since
    July 2014
Posted by modelcrazy on Tuesday, August 1, 2017 10:50 PM

stikpusher


modelcrazy


Gamera
And that's why I drool over ship models but don't have the guts to build one...... 


Nothin to it, just patience.


And some Micro surgeon hand/eye skills to work with all the PE and rigging... 


Yeah well..there is that. Smile

Steve

Building a kit from your stash is like cutting a head off a Hydra, two more take it's place.


http://www.spamodeler.com/forum/

  • Member since
    September 2013
  • From: San Antonio, Texas
Posted by Marcus McBean on Wednesday, August 2, 2017 6:52 AM

[quote user="modelcrazy" 

Nothin to it, just patience. [/quote]
 
Ship building as taught me patience.  I also the ability to plan ahead and learn to work up and out.  They do look nice sitting in the den.
 
Marcus
  • Member since
    November 2009
  • From: SW Virginia
Posted by Gamera on Thursday, August 3, 2017 7:59 AM

modelcrazy


stikpusher


modelcrazy


Gamera
And that's why I drool over ship models but don't have the guts to build one...... 


Nothin to it, just patience.


And some Micro surgeon hand/eye skills to work with all the PE and rigging... 


Yeah well..there is that. Smile


Yeah, I assume it's mostly a matter of just keeping your head down and plodding along till you're finished. I just have burn-out problems when working with big projects. 


Marcus, please keep us updated. I enjoy following along with you even if it's something I couldn't keep interest up myself. 

"I dream in fire but work in clay." -Arthur Machen


  • Member since
    September 2013
  • From: San Antonio, Texas
Posted by Marcus McBean on Friday, August 4, 2017 9:45 PM

I was able to get a few hours work on her this week.  Finished installing all of the scuttles along the hull, both covered and uncovered.

 A few close ups.


Next step is to install the degaussing cables.  That should be a whole lot of fun.

Marcus

Tags: IJN Musashi
  • Member since
    July 2014
Posted by modelcrazy on Saturday, August 5, 2017 1:21 PM

Very nice MM, your making me want to get back on my ship again.

Steve

Building a kit from your stash is like cutting a head off a Hydra, two more take it's place.


http://www.spamodeler.com/forum/

  • Member since
    September 2013
  • From: San Antonio, Texas
Posted by Marcus McBean on Sunday, August 6, 2017 9:27 PM

Installed what I could of the degaussing cable along the hull this weekend. 


The white paddle shape object is to show where the armor cover for the entry/exit point for the degaussing cable goes.  I will install the last of the cable once the cover is in place. The cutout came from a drawing in the reference book, which is not to scale.  I didn't have thin enough styrene to make one today, placed an order in today. 


I used Tamiya's degaussing cable PE they sell for IJN warships.  The PE was not flimsy but bended easily and stayed in place using extra thin CA glue applied by a glue looper using the medium size applicator.


I think the PE degaussing cable looks much better then the raised line of plastic that ran along the hull.


Next goal is to get the degaussing cable cover made and then add the propellers and rudders and then painting of the hull.

Marcus


Tags: IJN Musashi
  • Member since
    September 2012
Posted by GMorrison on Sunday, August 6, 2017 11:50 PM

It does look much better. I've found really thin plastic in those clear report covers sold at the drugstore.

 Modeling is an excuse to buy books.


  • Member since
    September 2013
  • From: San Antonio, Texas
Posted by Marcus McBean on Sunday, September 10, 2017 8:33 PM

I haven't made to much progress since the last post.  Never gave it thought that I didn't have any red hull paint to do the lower hull.  The order just came in and then I just remembered that I forgot to order the paint for the upper hull and superstructure.  I expect that paint to show up this week. 

I did manage to finish the degaussing cable install.

Remove the molded on anchor chain from the fore deck.

This being the older Tamiya kit there are no internal supports to brace the hull or the main deck.  To keep the main deck from sagging with all of the PE I plan on installing I did some bracing using square styrene.

Started on one of the 18" gun turrets but after cleaning up the barrels that came with the kit I decided I really hate how the look.  So off to e-bay I went and made a purchase of some I hope really nice looking metal barrels.  Now I have to wait for that slow boat from China.  So it looks like my focus will be on the secondary guns and superstructure.

Will post as I make some progress.

Marcus

  • Member since
    June 2014
  • From: New Braunfels , Texas
Posted by Tanker - Builder on Sunday, September 24, 2017 11:51 AM

Mark :

   The idea is to support the ship Properly . Keel blocks a must . Yes , A man of any height should be able to walk under the ship !

 Depending on the scale the blocks can all be Basswood and that's easy to stain . You want an oily woody look . Now then Do you have any frame plans for her ?

 If so there should be a block with a contoured top at the bilge curve ( but just under it ) That is in place every fourth frame . I think that is correct . It's been a few years since I've drydocked a ship .   T.B.    P.S. The Bilge curve blocks would be a necessity starting forward of the main guns and running aft to behind the main guns .

 Sometimes , but rarely , the blocks are put under any prop shaft sponsons as well . . P.P.S. You ARE as bad as I . Drilling out and installing all those scuttles . Really ?

  • Member since
    September 2013
  • From: San Antonio, Texas
Posted by Marcus McBean on Sunday, September 24, 2017 2:55 PM

Tanker-Builder,

Good to here from you.

I just finishing staining the basswood to look old and well used.  I plan to run blocks alone the keel and then perpendicular across the bottom of the hull to look like they are supporting the hull at every fourth frame or so.  Basically where ever the hull looks like it should be supported.  I am almost at a point where I am going to have to mount the hull to the display stand so I can install the deck and start building the superstructure.  So I will need to divert my attention from the model to finishing the stand.

You think drilling out those scuttles was work, I am drilling holes to replace the aircraft dolley tracks with photo etch from GMM.  They give you a template to guide the drilling  using a #80 drill bit.  Being such a tiny drill bit I have to do it using a hand drill vise, which is slow going.  Then chiesel off the molded on track and then glue in the PE track.  This is going to be fun...NOT!  It should be sweet looking when finish.

Been taking pictures which I plan to post tonight.  I have put a lot of hours into this kit but you wouldn't know it as it seems I haven't made much progress, but things are falling into place.

Marcus

  • Member since
    September 2013
  • From: San Antonio, Texas
Posted by Marcus McBean on Sunday, September 24, 2017 9:44 PM

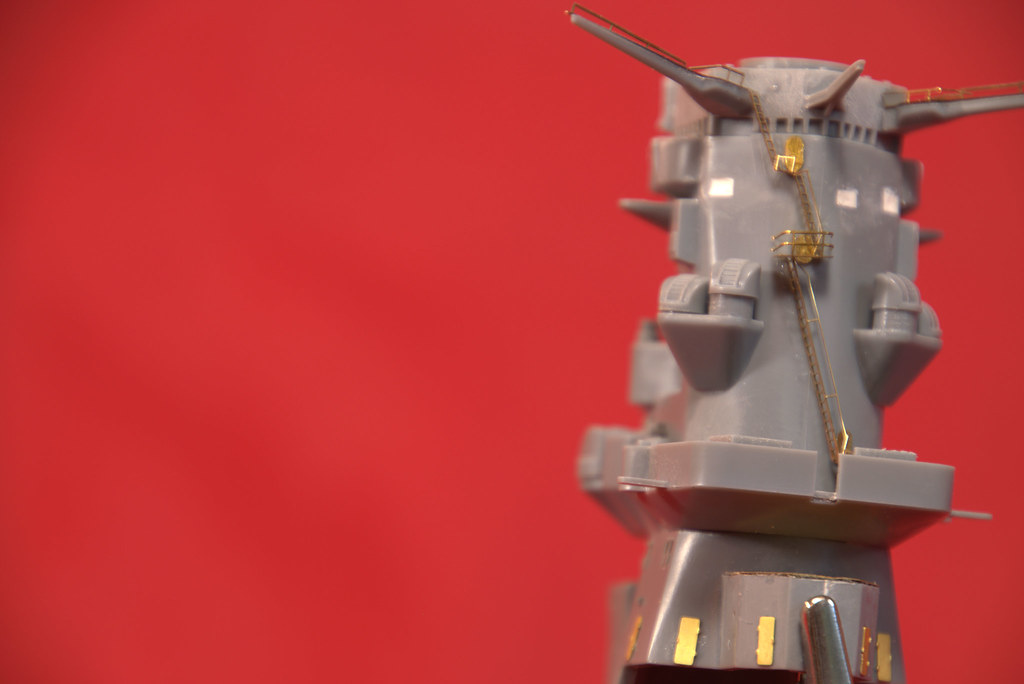
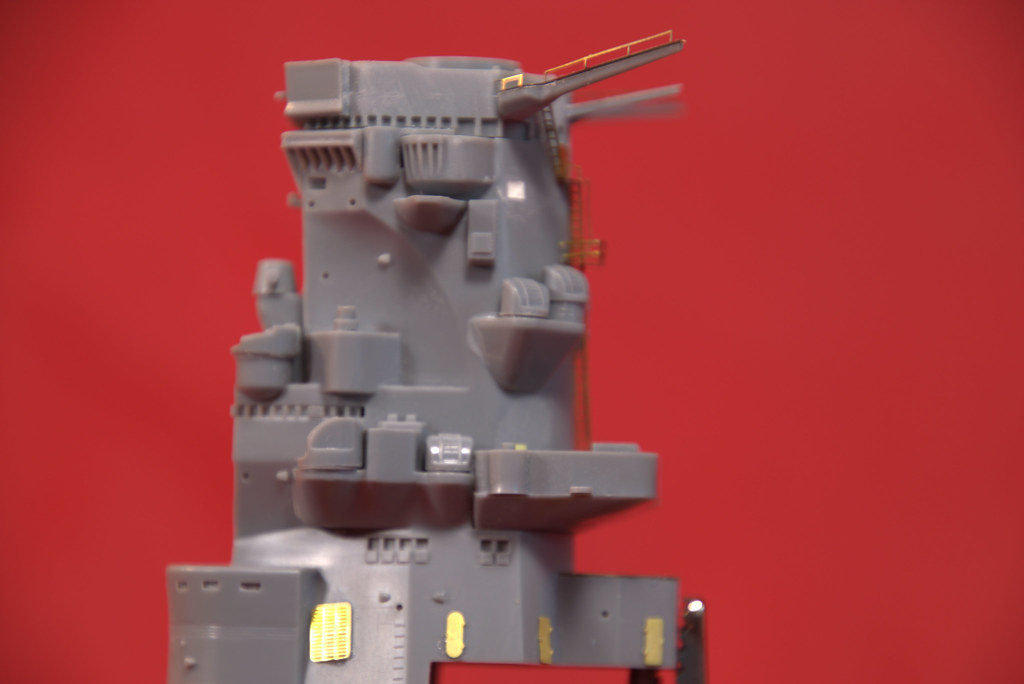
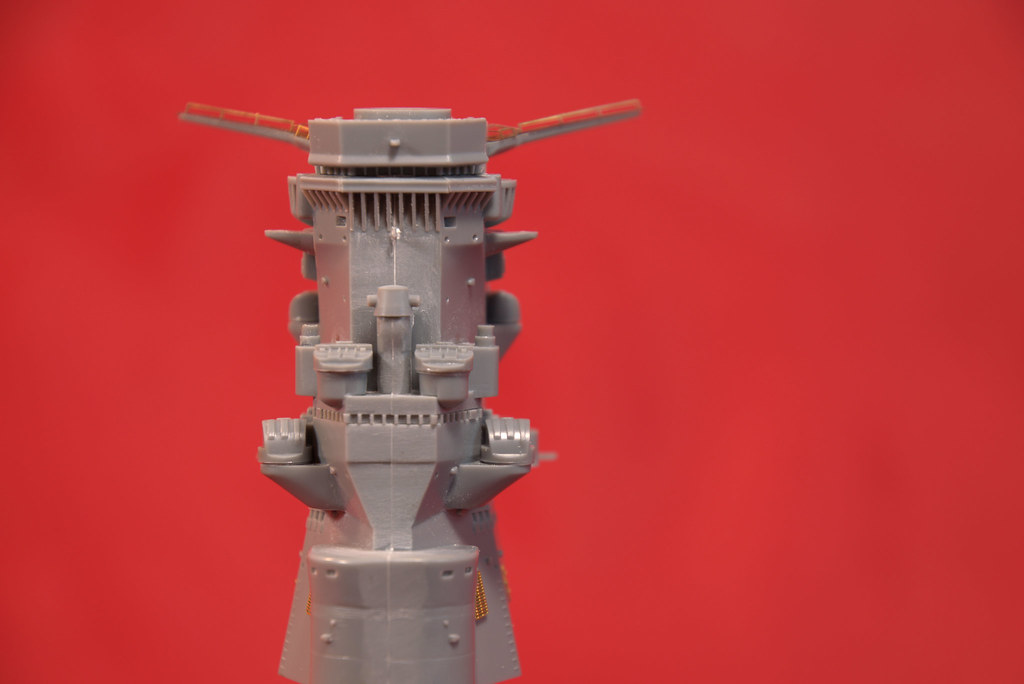
Thought I would post a few progress photos.  Most of the time has been spent on installing PE on the deck and superstructure,


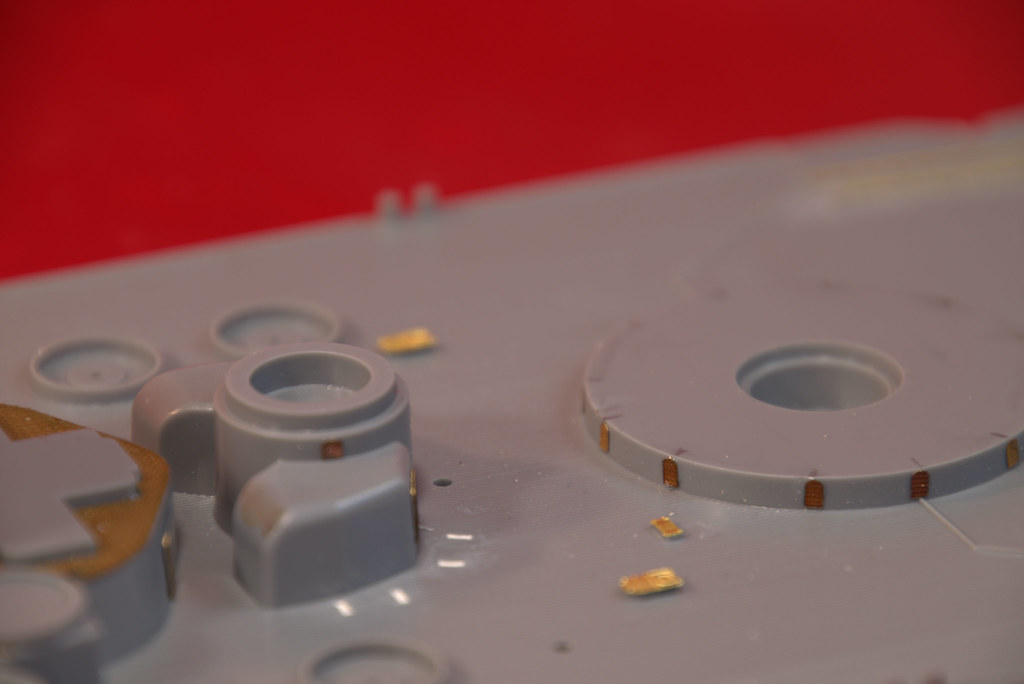
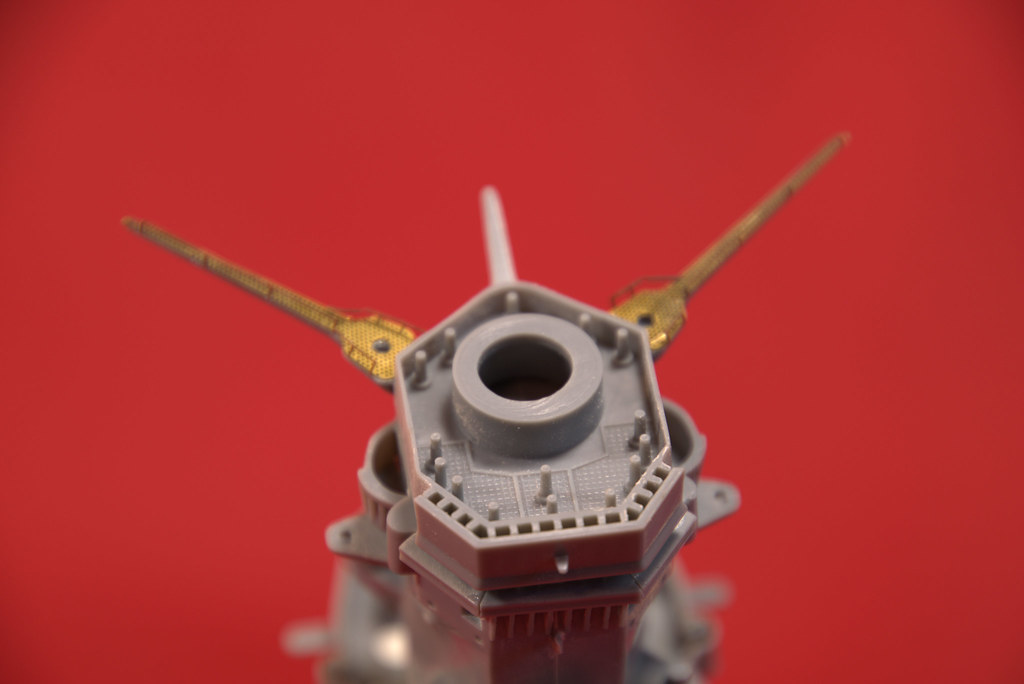
The PE being installed is a combo from Eduards and GMM.  In this photo is a comparison between the Eduards and GMM aircraft trolley turntable.  The GMM is slightly larger and the rails align closer to the trolley rails than the Eduards. 

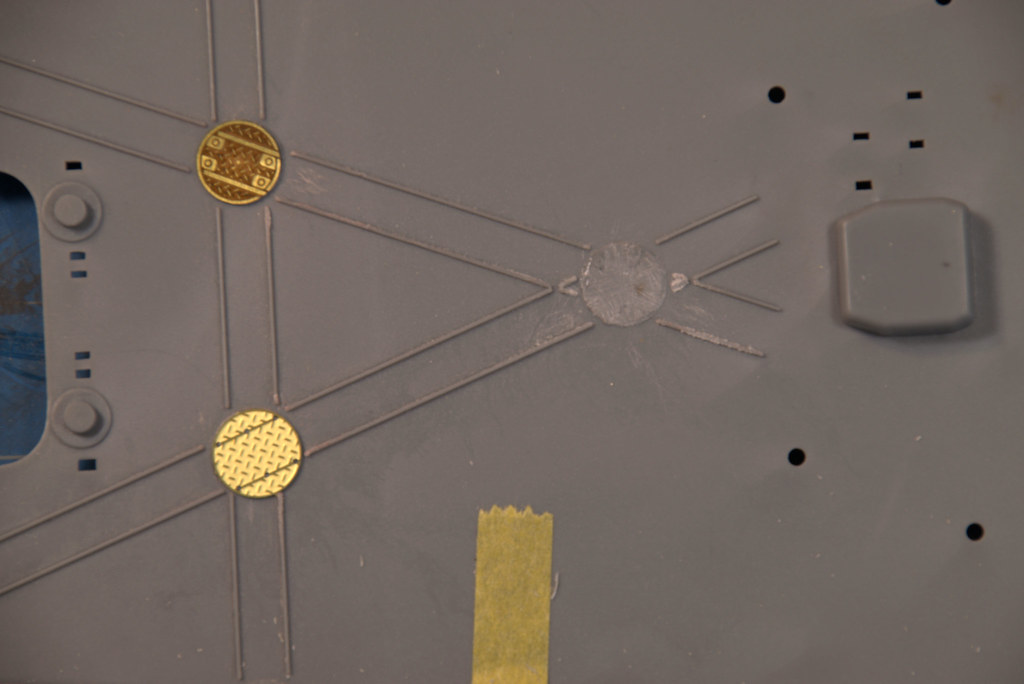
I decided to go with the GMM turntable.  GMM also comes with replacement rails.  GMM provides a gig to drill holes to set the replacement rails in place and keep them straight.

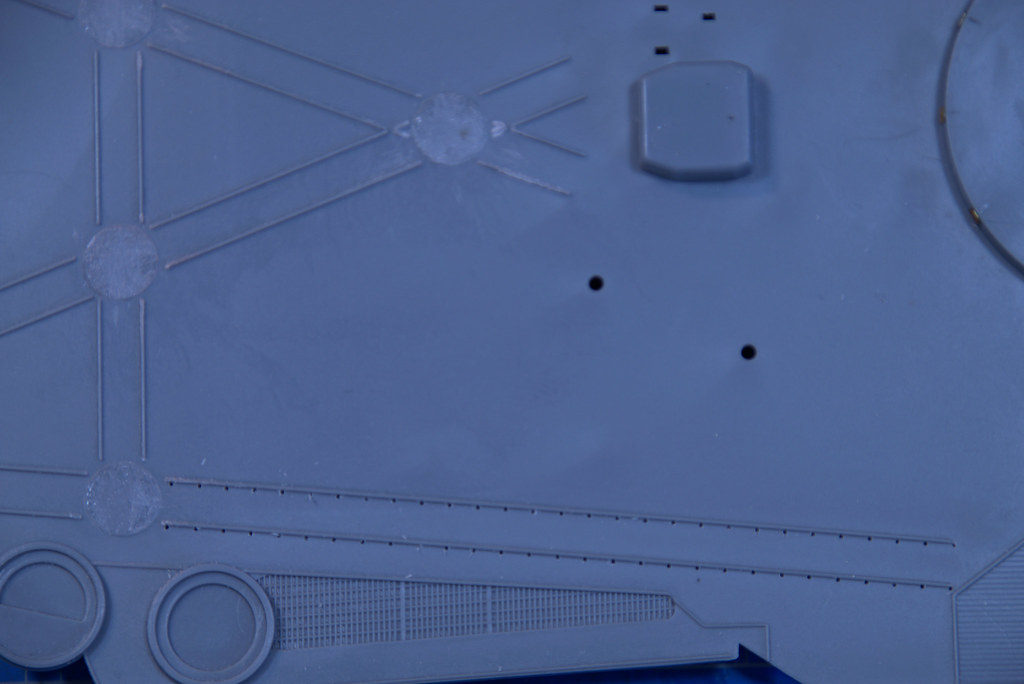
Then you have to remove the old molded on rails.

Install the new rails. 

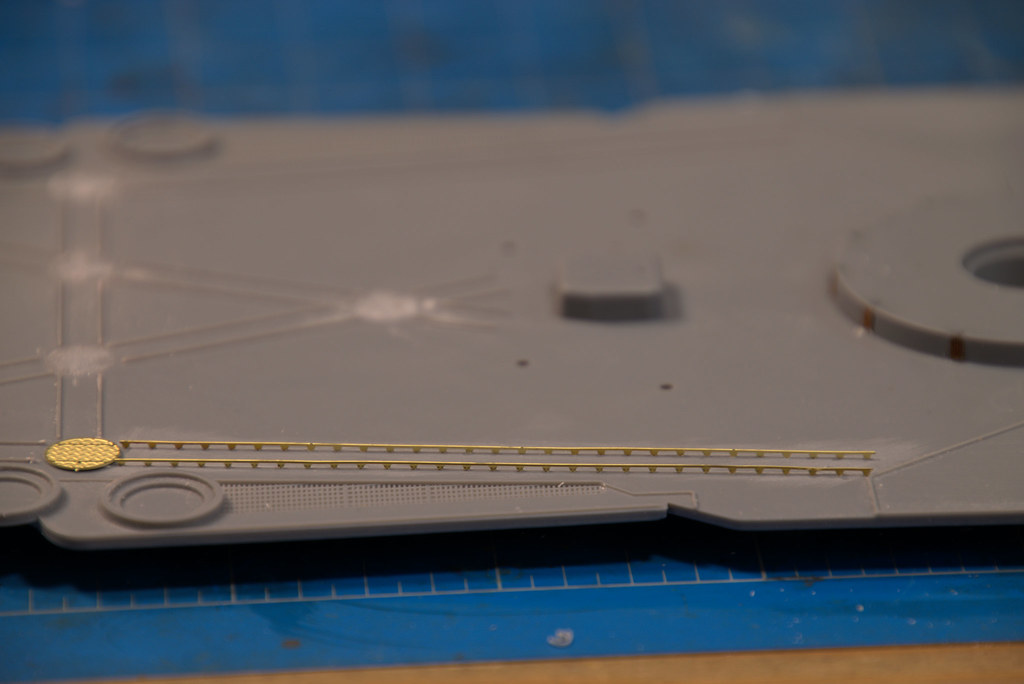
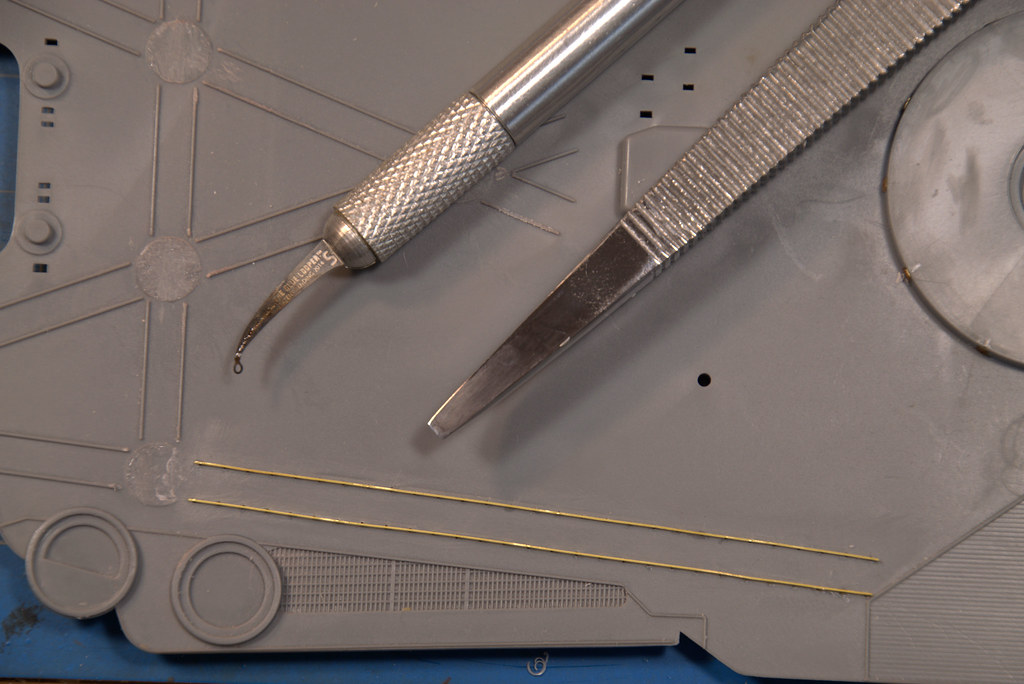
The glue looper and extra thin CA glue really made the job of gluing the rails in place a lot easier than I thought it would go.  This would have been a bear using a pin or toothpick. The scraper I purchased from Micro Mark last month really made this a breeze to remove the old rails.

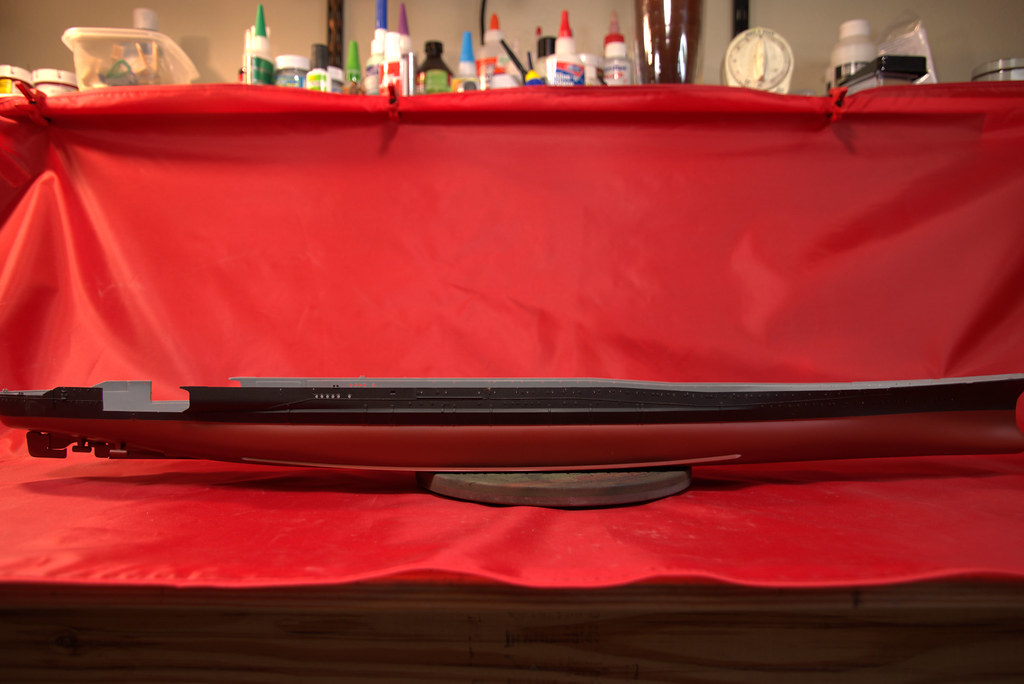
Also managed to get the lower hull painted using Tamiya hull red paint from the can 'TS-33'.

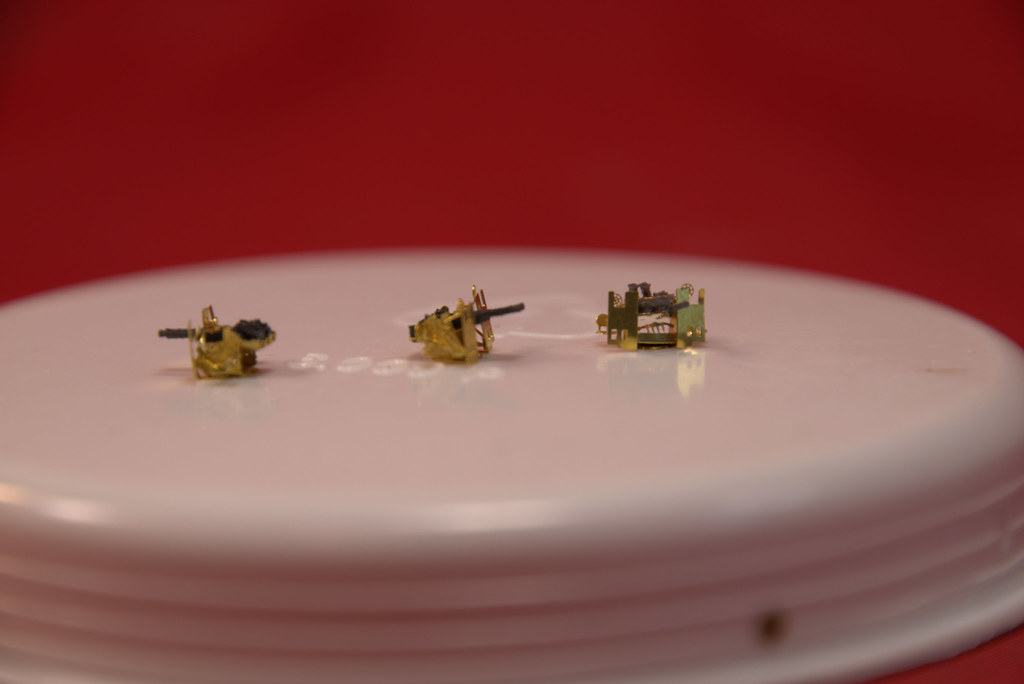
Build three of the triple 25mm MG mounts from 'Advance' just to see how much effort it was going to take.  My first one took me an hour the next 30 minutes and the third around 20 minutes.  I not use to working with such tiny PE so the fits aren't perfect but should pass once painted and installed. I also have the 25mm MG from Voyager but they are complicated and beyond my skills (really my patience) so I will be sticking with Advance.  Hopefully after the first ten they will be easier to assemble.

I do have a decision to make about the lookout deck above the bridge.  The kit only comes with the stands for the binoculars but no binoculars.  I have aftermarket resin binoculars for IJN ships that would work but they are already on stands.  My dilemma is should I remove the stands from the kit and replacement them with aftermarket binoculars or remove the binoculars from their stands and glue them to the existing stands.  My concern is I may make a mess of the deck removing the existing stands but the stands seem out of scale to the resin ones.  What to do?

Still have a lot more PE to install on the deck and superstrutures not counting having to remove all of the molded trolley rails and install the new one.  Making progress slowly but surely.

Tomorrow is another day.

Marcus

JOIN OUR COMMUNITY!

Our community is FREE to join. To participate you must either login or register for an account.

SEARCH FORUMS
FREE NEWSLETTER
By signing up you may also receive reader surveys and occasional special offers. We do not sell, rent or trade our email lists. View our Privacy Policy.