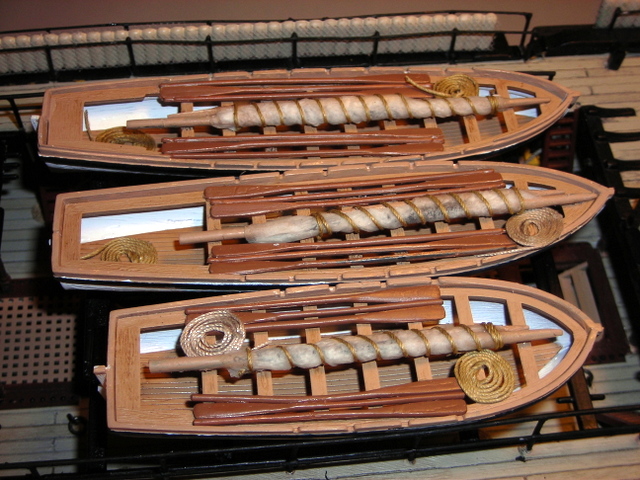
It took me 3 months to get back from my submarines, but I did build 8 of them. They were a little faster than the Victory. I just finished & installed my 3 lifeboats & here are the pictures .
I did one thing that worked well on them. I was trying to use .020 plastic strip & do a floor, but that didn't work so I used a sheet of Evergreen box car siding & used the seat casting as a pattern. I cut it down to drop in as a floor. I sanded a bevel on the bottom so it fit tight & I was done. Now with everything on top you can barely see it.