SEARCH FINESCALE.COM

Enter keywords or a search phrase below:

Building the HMS Fly by : Jamie build log

37133 views
34 replies
1 rating 2 rating 3 rating 4 rating 5 rating
  • Member since
    August 2018
Building the HMS Fly by : Jamie build log
Posted by Jamie Dominie on Tuesday, June 25, 2019 4:07 PM

So I have just bought the HMS fly kit (Victory models version) and am waiting for it to arrive sometime around next week.

I've been wanting to purchase this kit for a year now and am very excited for it to arrive. In the meantime I've been collecting my tools from my build last summer and experimenting with some nail details for the deck and maybe the hull.

If anyone knows any ways to produce nailing like this please let me know because I have no idea


The idea to do nail patterning came from my previous build of the Principe de Asturias last summer where the pins I had used to secure the planking when glued left nail like holes in the planks.

Just some pictures of that build which was my first wooden model kit build. As you can see in the first photo accidental nail marks are in the hull and this has inspired me to do nails patterns in the Fly's hull and decks. In the meantime I must wait for the kit to ship to my door and my next update will be then. I'm really excited to do this build and I hope you all enjoy reading this log of the build!

-Jamie

Intermediate builder from the lakes of Canada

  • Member since
    September 2012
Posted by GMorrison on Tuesday, June 25, 2019 6:20 PM

I'd be excited too! That's a pretty little rigged sloop. You are wise to work your way up from large scale simpler boats to more complicated ones. Fly will certainly keep you busy. So many modelers get a 100 gun ship kit for their first model and then burn out. 

That is a very well done launch too. Consider purchasing better rope. It will really upgrade the model from what the kits usually provide.

I look forward to the WIP.


Bill

 Modeling is an excuse to buy books.


  • Member since
    August 2018
Posted by Jamie Dominie on Tuesday, June 25, 2019 6:28 PM
Thanks Bill, glad to have you on as a reader!

Intermediate builder from the lakes of Canada

  • Member since
    August 2018
Posted by Jamie Dominie on Wednesday, July 3, 2019 11:49 PM

Today the kit finally arrived after a long week of waiting. I was very satisfied with the contents of the box and quality of parts within.

I got to work right away and dry fitted the bulkheads to ensure their fit and started the process of staining the exposed parts.

I chose to use dark ebony stain on the bulkheads instead of a red colour. This saves me the trouble of sanding the bulkheads to remove the burnt edges left from the laser cutter. And MDF doesn't have a grain like regular wood and a darker stain covers this up better.

I continued to glue the bulkheads into the false keel and decided to glue in the bulkheads supported by the bottom deck together and last.

I also left the last to bulkheads off while I decide whether or not I wished to modify the back two bulkheads to allow for the cabin to be made.

After the bulkheads where glued in the assembly was left to dry. Upon returning I decided to plank the barely visible parts of the bottom deck. This adds to the finish of the model but also gives me a first crack at deck planking.

I decided to cut the individual planks to 2 inches and blackend the edges with a pencil in order to bring out the seam lines in the planking.

I worked my way through the area and about halfway through realized that I had accidentally angled my planks. Good thing this deck is mostly covered up by the gun deck so this mistake is acceptable on this deck.

      While waiting for the planks to dry I decided I wouldn't modify the last two bulkheads and installed them on the false keel I also added the supports for the stern of the ship.

I also decided to add supports for the gun deck on the central bulkheads. This should reinforce the gun deck and make handling the gun deck easier and less risky in the future.

After the supports been secured and the glue dried I went ahead and sanded the planking to smooth it out and clean the dirty glue off its surface.

Because this deck will mostly be hidden I decided to try to do the nailing detail in the deck. I took a pin and poked the holes that nails would be located at. After I soaked the end of the pin in walnut stain from a stain marker and inserted the pin in each hole to represent the nails.

I'm very happy with the result of this technique and with a little more precise measurement and a template on more visible decks. I think this technique will produce very good nail detail in the decks of the ship and maybe even the hull planking.


That's where I left off today after about 5 hours of work. I'd say it's a good start to the process of building the Fly and I'm very happy with where I got to today.

-Jamie

Intermediate builder from the lakes of Canada

  • Member since
    July 2008
Posted by Est.1961 on Thursday, July 4, 2019 9:01 AM

Very happy to follow your journey from the start with this project. 

  • Member since
    September 2012
Posted by GMorrison on Thursday, July 4, 2019 10:04 AM

Nice! Might want to add nails on the other planks all the way across too.

 Modeling is an excuse to buy books.


  • Member since
    August 2018
Posted by Jamie Dominie on Thursday, July 4, 2019 10:36 AM

Thanks! Est.1961

Intermediate builder from the lakes of Canada

  • Member since
    August 2018
Posted by Jamie Dominie on Thursday, July 4, 2019 10:37 AM

Thanks for the suggestion GMorrison


Intermediate builder from the lakes of Canada

  • Member since
    August 2018
Posted by Jamie Dominie on Friday, July 12, 2019 9:56 PM

So the past week progress has been slow but a fair amount of work has been done to the ship. I’ll go back to where we left off and continue from there for this post. So in the last post,   had just finished assembling the bulkheads and planking the hidden third deck, I also added some reinforcements to the bulkheads to strengthen the gun deck. So continuing from there I bevelled the bulkheads and installed the keel with the exception of the rudder section.

The reason for leaving the rudder piece of the keel off for the time being is that I’ve yet to complete the beveling of the keel section as can be seen. I also started the planking of the gun deck while I waited for the keel to dry overnight.

Using the same method as the deck below I marked the edges of the planks with a pencil to bring out the seams but I decided to change the lengths of the planks to 2 bulkheads long and create a pattern that alternates between continuous run and seam at the bulkheads.

The following day I realized that one of the supports I added was in the way of a hatch. So I removed it and added some more material to the wide open spot in the middle of the ship to aid in reinforcement.

After this, I got to work on planking the gun deck. It took most of the week as I worked in small timeframes each day rather than for a long period. Ever new plank made me more excited for the process of sanding the deck and adding nails.

I left the area near the bulkheads in the center of the gun deck unplanked because I will need to cut those later in the build and will finish the planking then so it's flush. The next day after planking was completed I finally got to sanding the gun deck I started this process by scraping an Exacto knife against the deck to remove big lumps of glue and level the deck a bit. Then I sanded the deck with three different grits of sandpaper starting low and finishing with a high grit. The result looked like this.

I also cleaned up the cutouts in the center of the deck before sanding. After this, I continued to begin the process of adding the initial nail holes in the planks. I do this with the tip of a pin to add the holes then proceed to soak the tip of the pin with a dark stain from a furniture repair marker and insert it into the holes I had previously poked this makes the holes stand out and also represents the nail in the board as adding actual metal at this scale is way above my level of skill.

As can be seen in the image above the insertion of stain into the holes really brings out the false nails in the deck.

And finally were up to date to today. I finished the nail details this morning it took nearly two hours but its finished. I also corrected the upwards bow effect that can be seen in the above image of the dry-fitted gun deck one side with nails and one without.

Then I decided to start working on some of the deck furnishings which is one of my favourite parts of building models. I started with the front bitts and upon cutting and sanding the parts out I knew I wanted to reshape them into a more pleasing shape.

The reshaped on the left and freshly cut on the right. I also decided to leave a little bit of the laser burn on the parts that bring out the grain and will high light it upon staining. I then added some nail holes to the bitts for detail and set the pieces aside to work on the main mast Bitts.

Then I decided to dry-fit the gun deck and the bitts to check their fit and appearance.

So that's where I'm at so far. Right now om deciding what stain to use for the deck furnishings and waiting to get varnish for the deck. Next step will be assembling more deck furnishings and preparing to add the gunport ply pieces before finishing ad finally installing the gun deck.


-Jamie

Intermediate builder from the lakes of Canada

  • Member since
    August 2018
Posted by Jamie Dominie on Tuesday, July 23, 2019 7:30 PM

So a good amount of progress has been made over the last week on the Fly. Firstly I went ahead and stained the deck furniture that was made in the last post.

As can be seen above I also assembled the capstan and the pumps, which I decided to use a walnut stain on the lower piece and then the stain that was used on the bits for the upper piece.

It can also be seen that I made a mistake with the gundecks capstan. In the instructions, it said to use an 8mm dowel for the center, unfortunately, I used the wrong dowel and realized this later after fully assembling the capstan when I was starting hatches that I found the actual dowel for the capstan. While the mistake does slightly annoy me this capstan is mostly hidden so it's a mistake that will be mostly not noticeable. After I started working on the hatches originally building them to be fitted on top of the deck I decided to rebuild them to fit in the actual cutouts in the deck and stained the frames. I'm still undecided upon staining the gratings or leaving them the way they are.

 I also attempted to pre-make the open hatch but upon sanding, it fell apart

The following day I went ahead and prepared for what I call “the dreaded soak” of the plywood gunport pattern pieces. After soaking for an hour in hot water I clamped and pined the pannels onto the frames and left them overnight to dry.

Note the cannon used to check the height. The following morning I removed the newly shaped panels and proceeded to install the portside panel. Which took more pins and clamps.

I also after fully securing the pannel moved the deck away to prevent it from being glued in.

After this, I decided to finally build a capstan step which isn't mentioned in the kit but is on a few logs I've been reading, as a modification so I decided to do one on my Fly aswell.

So now I'm trying to deal with cannons. I'm undecided whether or not I want to use the kit cannons as they lack the quality of other cannons and I've been having trouble blackening them as well but I thought id give it one last shot. So using high grit sandpaper I've sanded off the finish that the cannons came with and have left them in a bath of vinegar and salt which I have no idea if that will work I hope it does though.


Hopefully, it works so that when I do decide on what cannons to use I can use this method to blacken the parts. 


-Jamie

Intermediate builder from the lakes of Canada

  • Member since
    August 2015
  • From: the redlands Fl
Posted by crown r n7 on Wednesday, July 24, 2019 10:09 AM

very detailed and complex, looking very good !!


 Nick.

  • Member since
    August 2018
Posted by Jamie Dominie on Wednesday, July 24, 2019 12:58 PM

Thanks crown r n7!

Intermediate builder from the lakes of Canada

  • Member since
    May 2013
  • From: Indiana, USA
Posted by Greg on Wednesday, July 24, 2019 1:10 PM

Having never been exposed to a wooden ship model, this is quite interesting to me.

Thanks for taking the time to post your progress pics.

  • Member since
    August 2018
Posted by Jamie Dominie on Wednesday, July 24, 2019 1:22 PM

Thanks for reading them and glad your enjoying it Greg

Intermediate builder from the lakes of Canada

  • Member since
    July 2010
  • From: Tempe AZ
Posted by docidle on Wednesday, July 31, 2019 12:07 AM

JD,

Great looking model you’re working on and great work. Also, you did a great job on your Sloop, especially since that was your first build.

I’m definitely pulling up a chair for this log! I’ve toyed with the idea of building a wooden ship, but at my modeling speed, I would probably have her finished 50 years after I have died....

On the nail head question, I used resin rounded tank boltheads on my Catalan ship to represent the nail heads and it came out fairly nicely. The WIP is on here somewhere if you want to check it out.

Steve


  • Member since
    August 2018
Posted by Jamie Dominie on Wednesday, July 31, 2019 1:26 AM

Thanks Steve! Glad to have you onboard!

Intermediate builder from the lakes of Canada

  • Member since
    August 2018
Posted by Jamie Dominie on Wednesday, July 31, 2019 7:24 PM

So the attempted blackening of the cannons did not work but lots of progress was made on the ship since the last post. 

So as always I will start from where we left off and go forward from there. After my attempt to blacken the cannons I went ahead and removed the bulkhead framing in the middle of the gun deck.

Then after cutting I went ahead and sanded the frames flush with the deck supports. I found it pretty challenging to sand these down due to them being in such a small place but I found just simple sandpaper folded in a square worked best. After that was done I went ahead and finished planking the gun decks and while the planks dried I decided to try my hand at filling the nail holes in the bits with metal wire.

I personally think this turned out pretty good and went ahead and did the other bits as well.

By the time I had finished this, the gun deck planks had dried and I proceeded to trim them.

As can be seen above I also dry fitted the deck to check its fitt with the new planks. 

I then proceeded to finish the other side as well the following day and sanded both sides in preparation for stain.

I also glued in some pieces of wood behind the puzzle joints on the ship. This should help with the connection between the pieces and prevent one from exiting the joint.

Then after this was done I went ahead and finally stained the gun deck.

I am very satisfied with how the nail holes Ii added were highlighted by the stain and the colour of the deck turned out great. After this was done the deck was laid to dry and the next day I went ahead and installed the last of the structural gunport pannels to the hull.

I also added tabs to the underside of the deck to strengthen it and add support. Later they caused me some issues while installing the deck but they did greatly strengthen the deck as well.

The following day I finally installed the gun deck.

I did my best to keep the pins in the nail holes and because I placed the holes where the frames are I was, for the most part, able to do this, with the exception of some places in the deck. 

The next day I installed the front hatch and built the ladder for it. I found the kit ladders parts to be very easy to work with and this made the process ten times easier.

I also installed the rest of the gun deck hatches aswell.

As can be seen from above I decided to stain the hatch gratings to match the deck I personally think this looks much better than the other option of unstained hatches. I also chose to install them now because once the hull is planked if a hatch were to fall through I wouldn't be able to recover it. It can also be noticed one of the areas where my deck support idea gave me some issues in the center of the gun deck. This will be fixed by sanding the area and restaining the center plank.

After this, I finally started the process of planking the hull. Initially, I was going to use the finish walnut planking for the first planking in order to use the lighter wood for the second planking in order to get a lighter finish.

I later discovered the thickness difference between the planks and restarted replacing the walnut plank with the actual first planking.

I also just like my last model I am soaking the ends of the planks to allow them to bend without snapping to the curves I need them to bend to. I glue them in and bend them as I do after they dry the plank is attached and warped to the correct shape. Today I continued planking finishing the other side and adding the second line of planks.

The next step is to finish the planking then sand it smooth and fill any holes or dips with wood filler in preparation for the second finish planking. 


-Jamie

Intermediate builder from the lakes of Canada

  • Member since
    August 2018
Posted by Jamie Dominie on Wednesday, January 22, 2020 7:07 PM

So it's been quite a while since my last post. Around 4 months to be exact. And in that time a lot of work has been done at a very slow rate. The reasoning for the lack of post is that I'm am in the planking stage and as I’m sure many of you know, it can take forever. Nevertheless, I’m proud of the work I’ve accomplished and I’m very excited for the hull work to be done. So where we left off I was just starting the planking. 

As you can see I have since finished the first planking after around 3 months. After laying the last plank I went ahead and sanded the planks down in preparation for the second planking.

I also started laying the interior gundeck hull planks on at the opening between where the future upper decks will be. 

After a long break of almost a month, I finally got around to the second and final "show planking”.

 Upon doing so I've decided that 4 beams spacing looks best for plank length on this layer which has resulted in a finish I'm quite pleased with. 

While doing so I also continued work on the interior planks as well which as you can see from my 2 sample planks will be stained red to get the colour but retain the details of the planks. 

It was at this point I came across a problem. The gunports. I had no idea how to cut them out. But after some testing on some spare planks, I decided a file would be my tool of choice, which I am very glad it was as it leaves a very clean finish. 

 I also found an old plastic parts storage container from my past build which came quite in handy with storing my parts.

 while the file has solved many problems for me and is a tool I will continue to use it has created a major issue. I have damaged the deck planking with it.

 Hopefully, a quick sand and restain in the damaged areas will work in repairing these scratches. At this point, I've been planking for quite a few weeks and making steady progress. 

I also started cutting out the drain holes in the gundeck which has gone as smooth as possible with only a few repairs.

 I also started to plank one beam behind the overhang of the upper decks so that all the gundeck interior hull that will be visible is planked.

 At this point I'm nearly past the gunports and looking forwards to being able to lay planks without carving holes in them.

 With this second planking, I've managed to get the planks to follow the ships curve, which from the side looks quite nice.

 I also began work on the exterior planking around the drain ports.

 I've also managed to surpass some of the back gun ports with planking and I'm quite thrilled with their turnout. 

I will not be lining the interior of the gun ports with a thin piece of plank as is a common practice, I don't really enjoy that look and my ports are the same size on all three layers so I plan to simply paint the interior the same red the interior planks are stained. I also did some dry fitting to see how everything is coming together and I'm quite happy with the result even though the deck is extremely dirty.

 note that I also removed some material on the beam that fits on top of the capstan so it would fit better.

so that's where the ship is now as of January 22nd, 2020. I hope to have the second planking done before the end of the winter and I'm really looking towards finishing the hull. At this point I've also decided I do not want to use the supplied cannons. 

 (from The Pegasus by Blue Ensign)

I simply don't like the look of them and still want to use wooden carriages that I can stain. So I have done some shopping as well as viewing other Fly/Pegasus builds and ended up purchasing the RB barrels

  (from The Pegasus by Blue Ensign)

 and Chuck's carriages from the SyrenShipModelCompany

as well as a pack of 5mm cleats as I find the supplied ones to be abnormally large. So that's where I'm at as of this point.


-Jamie

Intermediate builder from the lakes of Canada

  • Member since
    July 2010
  • From: Tempe AZ
Posted by docidle on Wednesday, January 22, 2020 8:05 PM

As I said before, I am always amazed and fascinated by wooden ship models. You’re doing a great job on her Jamie.

Steve


fox
  • Member since
    January 2007
  • From: Narvon, Pa.
Posted by fox on Thursday, January 23, 2020 1:04 PM

Great job Jamie. Coming along nicely. Toast

Jim  Captain

 Main WIP: 

   On the Bench: Artesania Latina  (aka) Artists in the Latrine 1/75 Bluenose II

I keep hitting "escape", but I'm still here.

  • Member since
    August 2018
Posted by Jamie Dominie on Friday, January 24, 2020 6:10 AM

Thank you so much Steve, as always I appreciate the support!

Intermediate builder from the lakes of Canada

  • Member since
    August 2018
Posted by Jamie Dominie on Friday, January 24, 2020 6:10 AM

Thank you Jim!

Intermediate builder from the lakes of Canada

  • Member since
    August 2018
Posted by Jamie Dominie on Wednesday, April 1, 2020 11:42 PM

So it has been some time since my last post. This being that the speed and progression of planking is like watching grass grow. Anyhow when I last posted I was just reaching the gunports and was waiting for the new cannons and their carriages to arrive, so I’ll start from there. While waiting for the new guns to arrive in late January, I finally cracked and decided the swell on my deck was bothering me. So about an hour of careful sanding later this is what I ended up with.

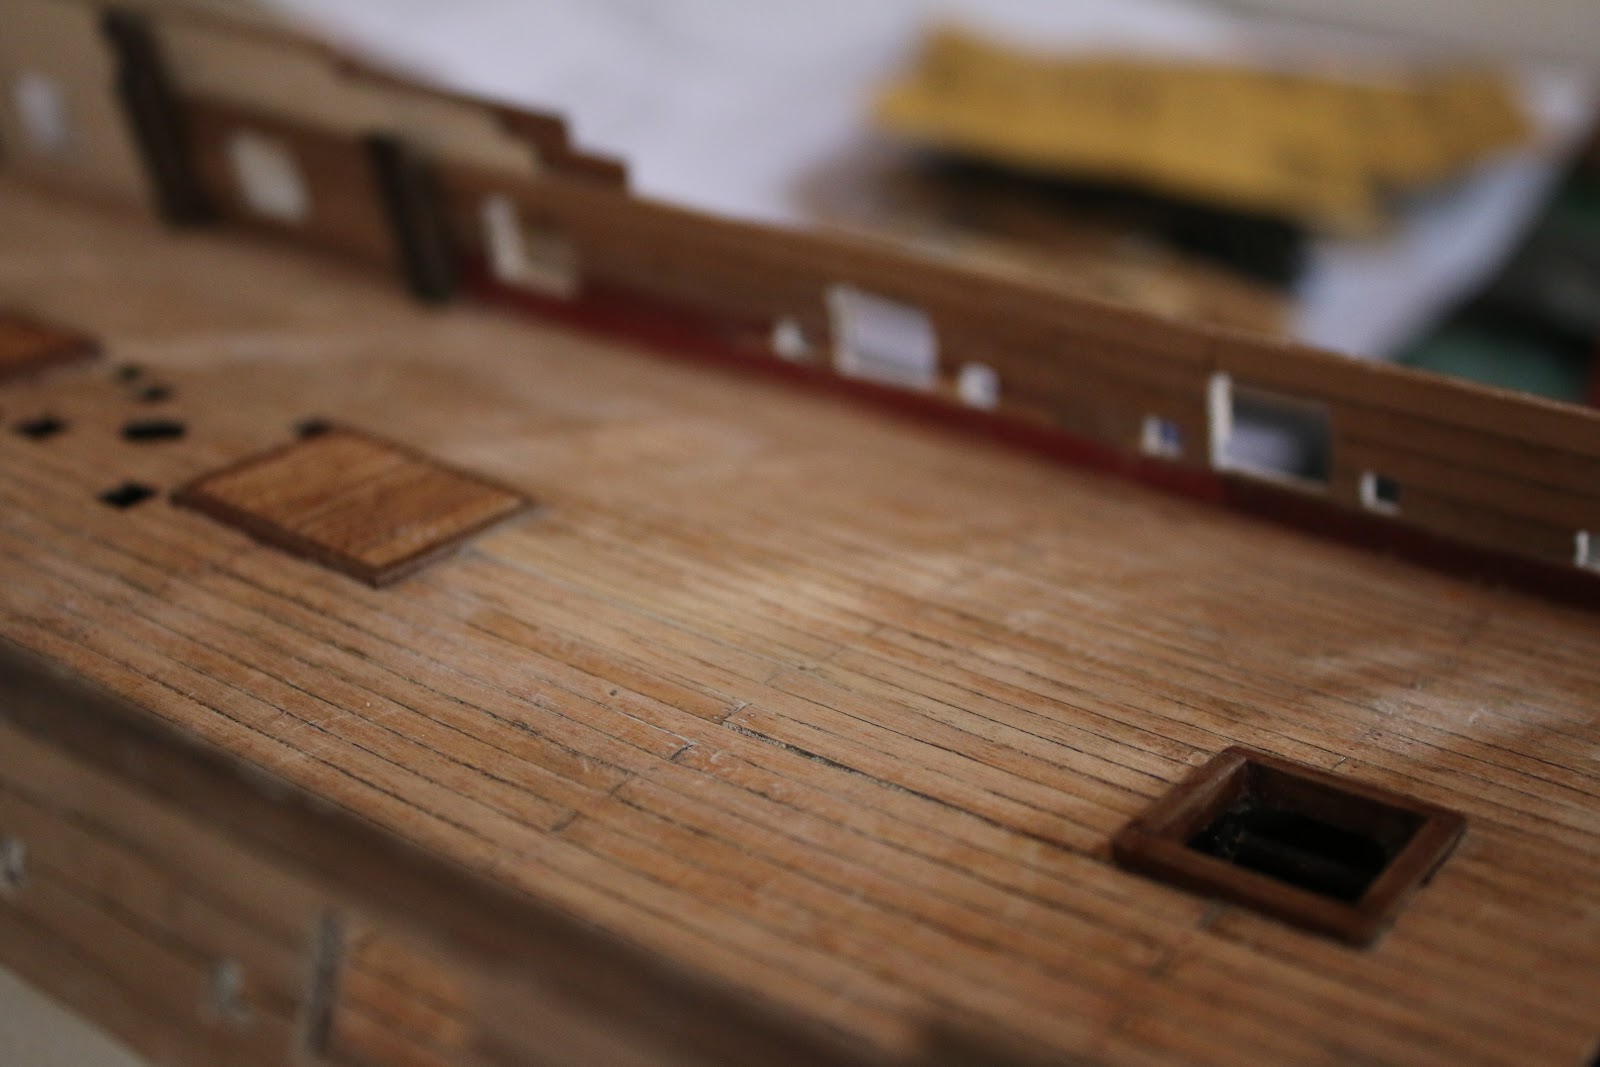
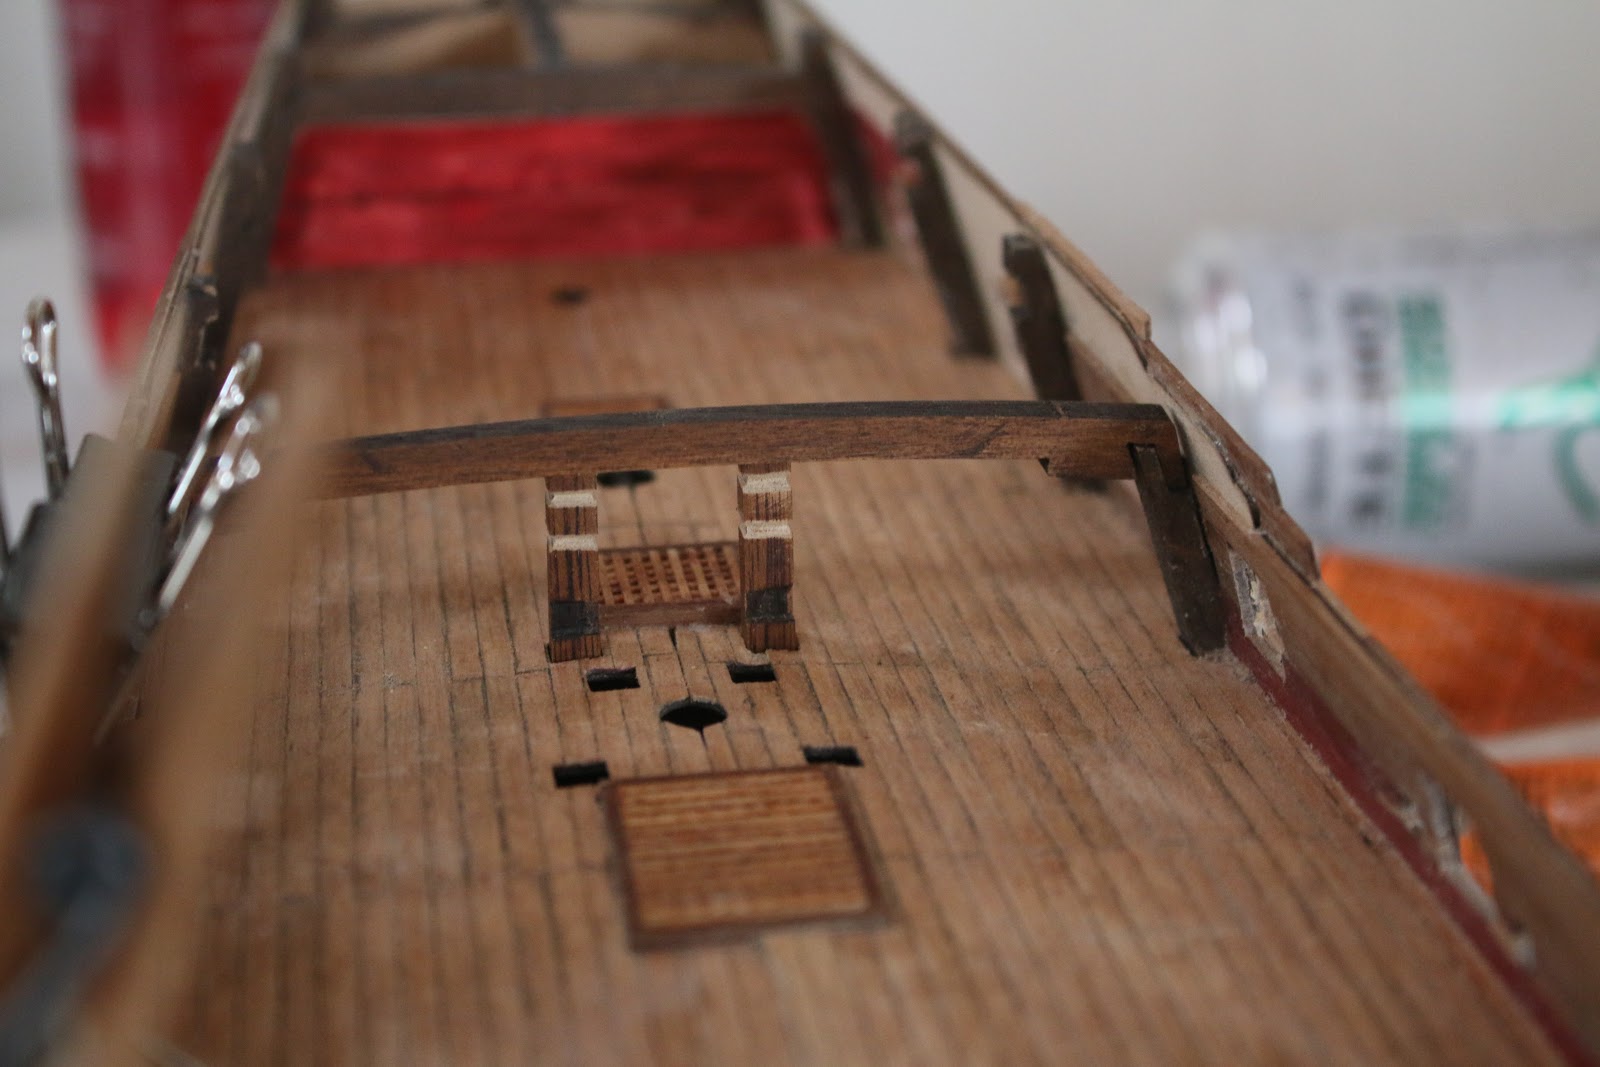
The deck was finally flattened out as much as I could get it without sanding past the planking and I'm so glad I did it. After fixing that I got a surge of confidence and decided to put it to use addressing the gallows. The kit provided gallows is not only too large but also inaccurate for a swan sloop.

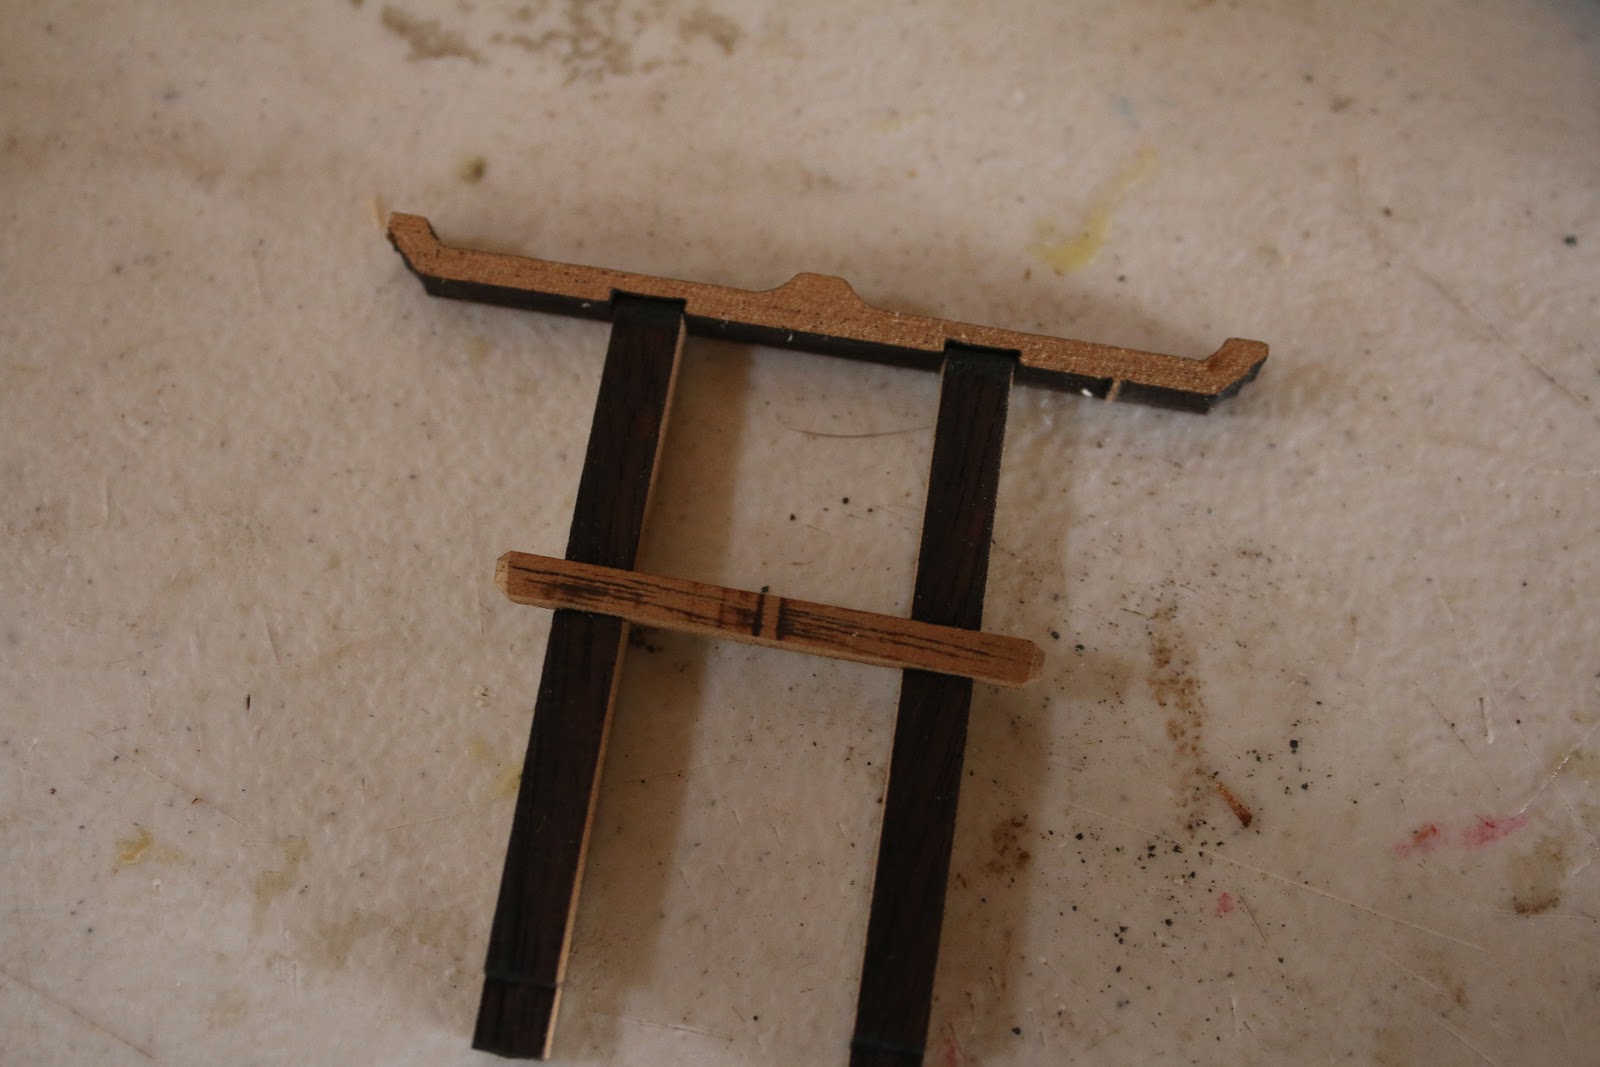
As seen here in this painting of a model of the Kingfisher by John Marshall the cross of the gallows is a completely different shape as the kit provided one.

Also in my hours of reading build logs I've seen other builders replicate this by scratch building the gallows.

(HMS Pegasus by Blue Ensign)

With all this, I decided the kit provided gallows needed to go and started scratch building.

So the first order of business was cutting a new crossbeam. So I went straight to the laser cut parts sheets and found a section between parts that was even and curved just right. It was not long before I discovered that the upwards beams were too long and the gallows too tall so I gritted my teeth in fear and chopped a chunk off of the beams.

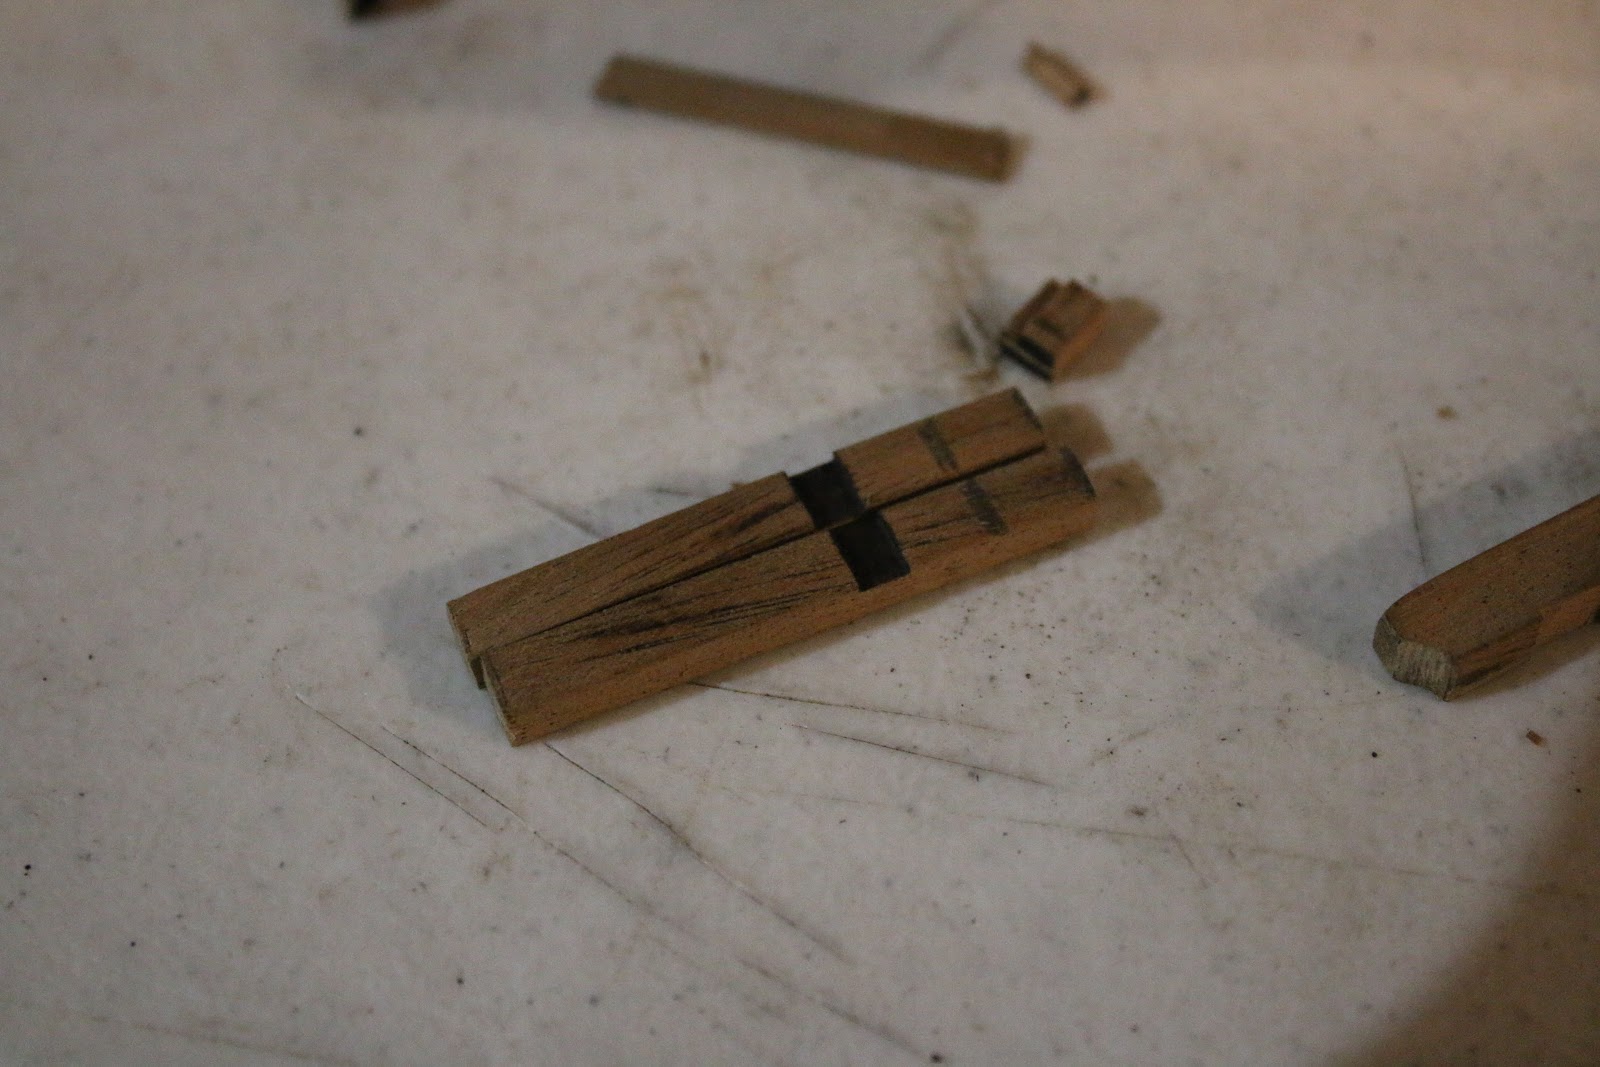
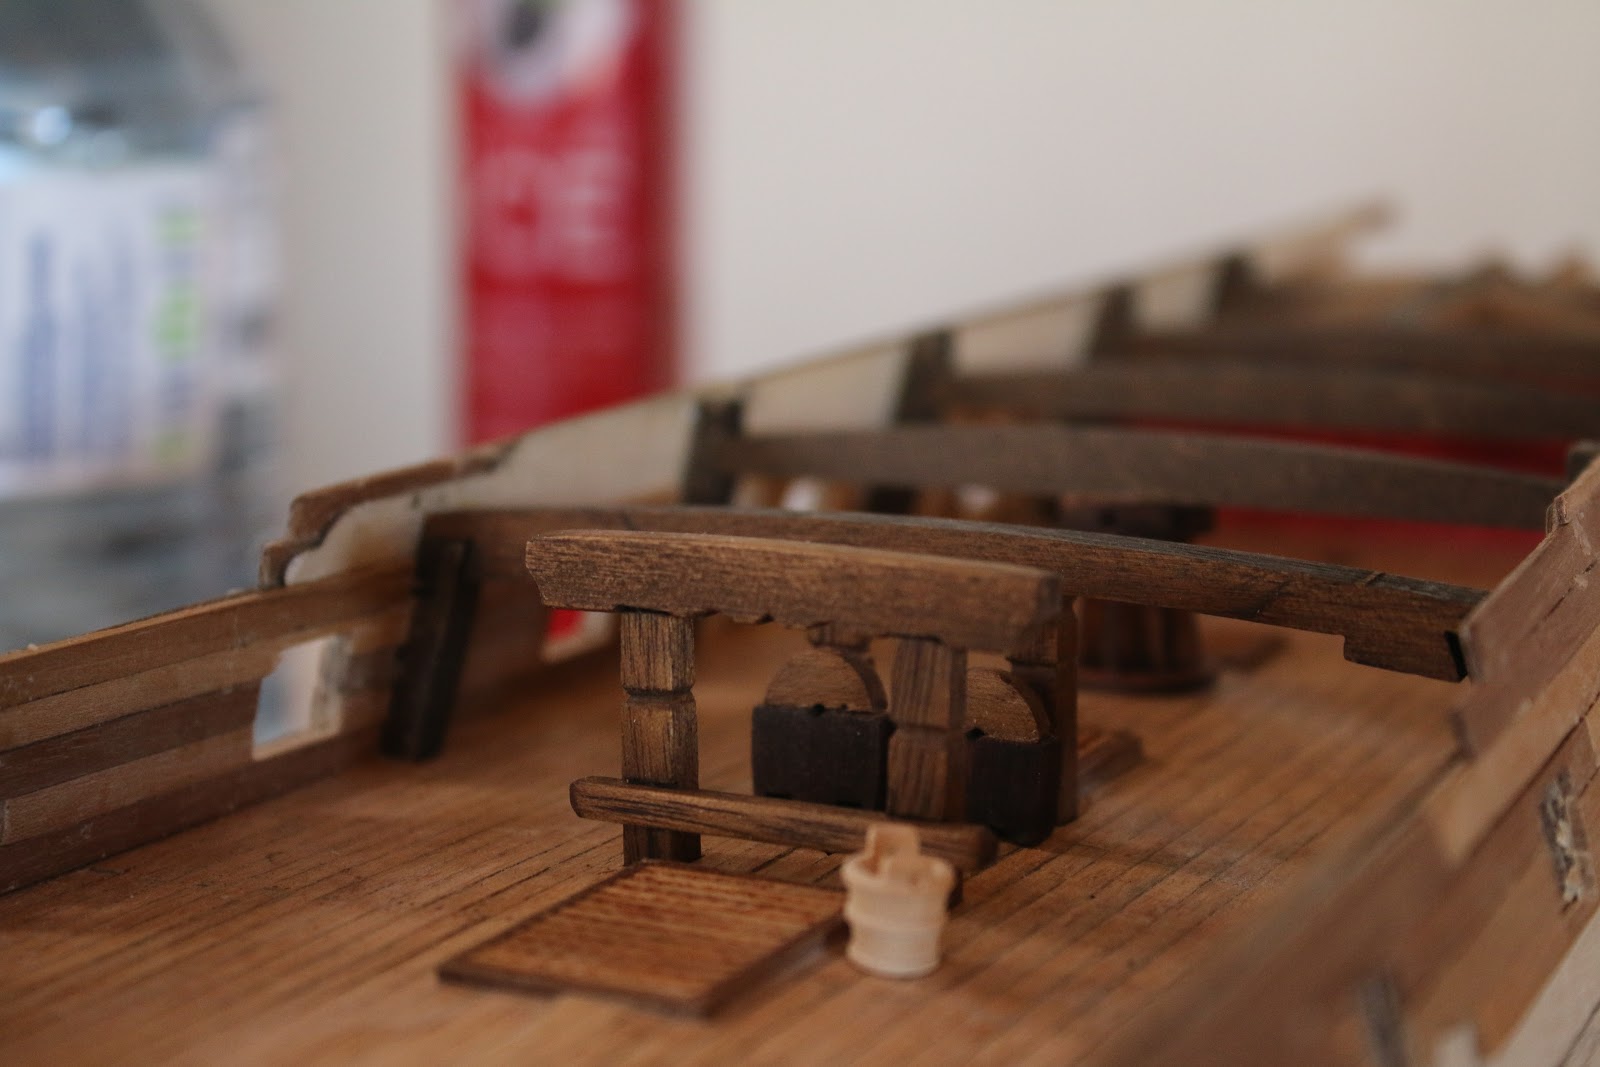
I then finished making the new crossbeam as well as decorated the vertical beams a little and came up with this.

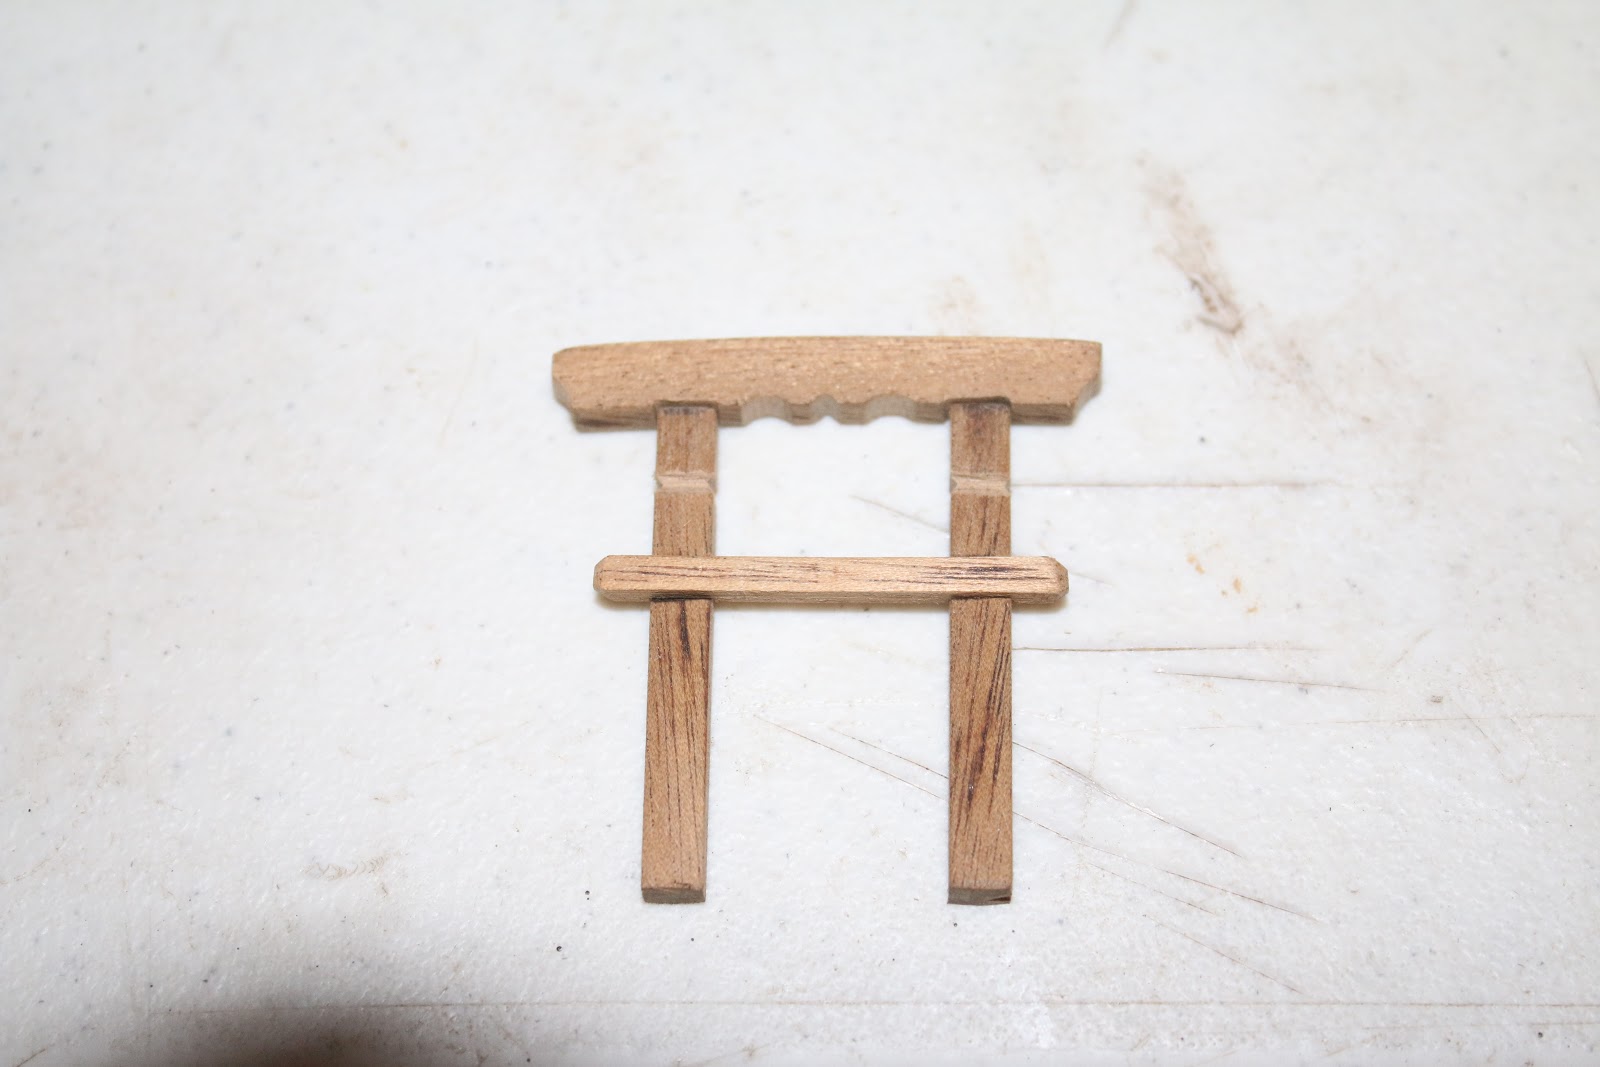
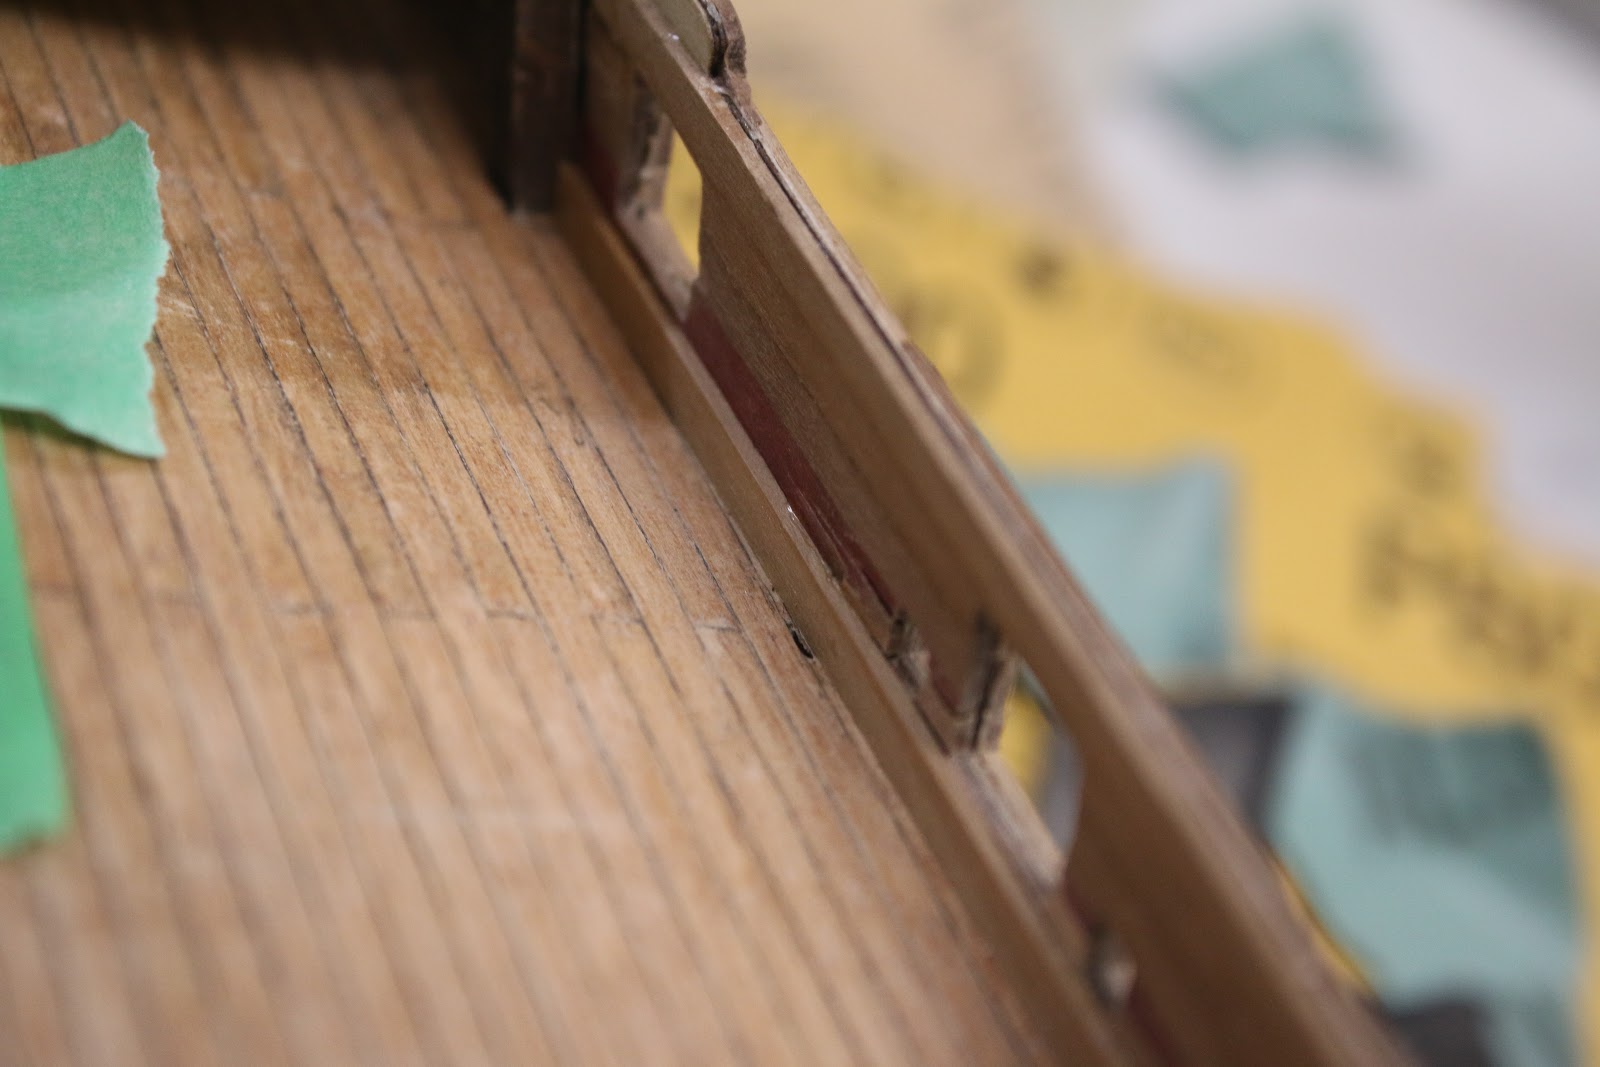
Being very pleased with the turnout I decided the bitts needed a bit of dressing up as well. So I grabbed a pencil and my file and went at it.

Following this, I went ahead and stained the parts And I also dry fitted them.

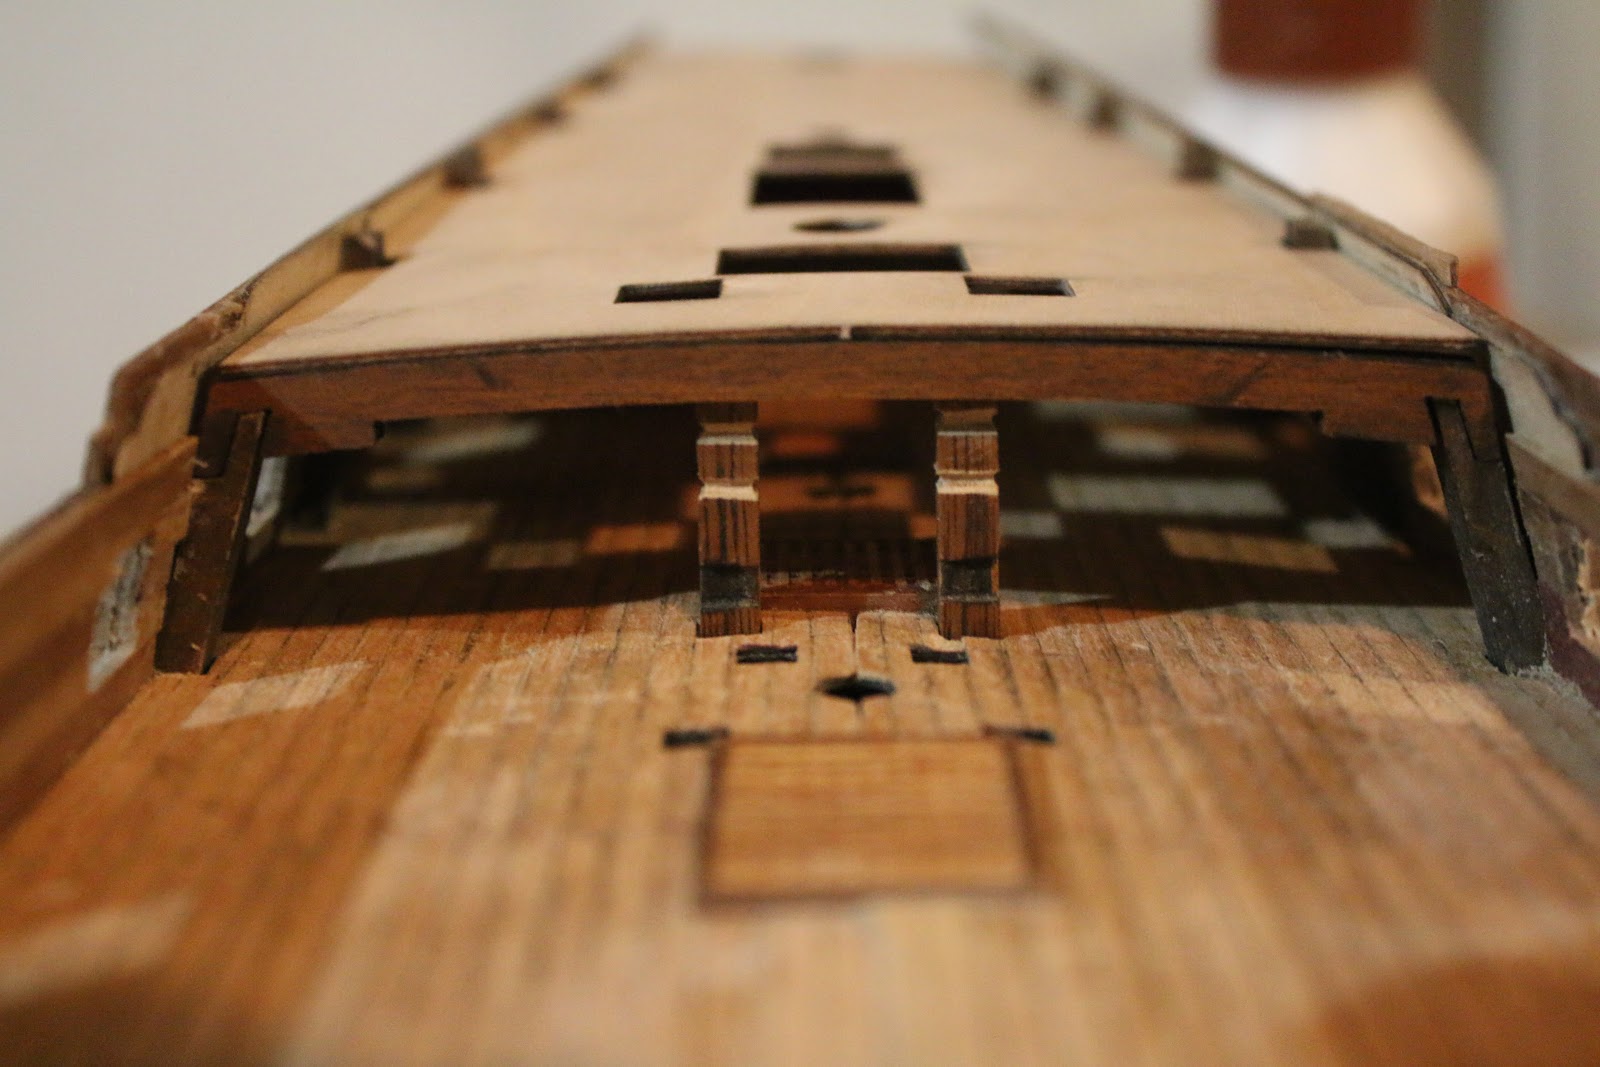
With that, I also started work on the foredeck bitts.

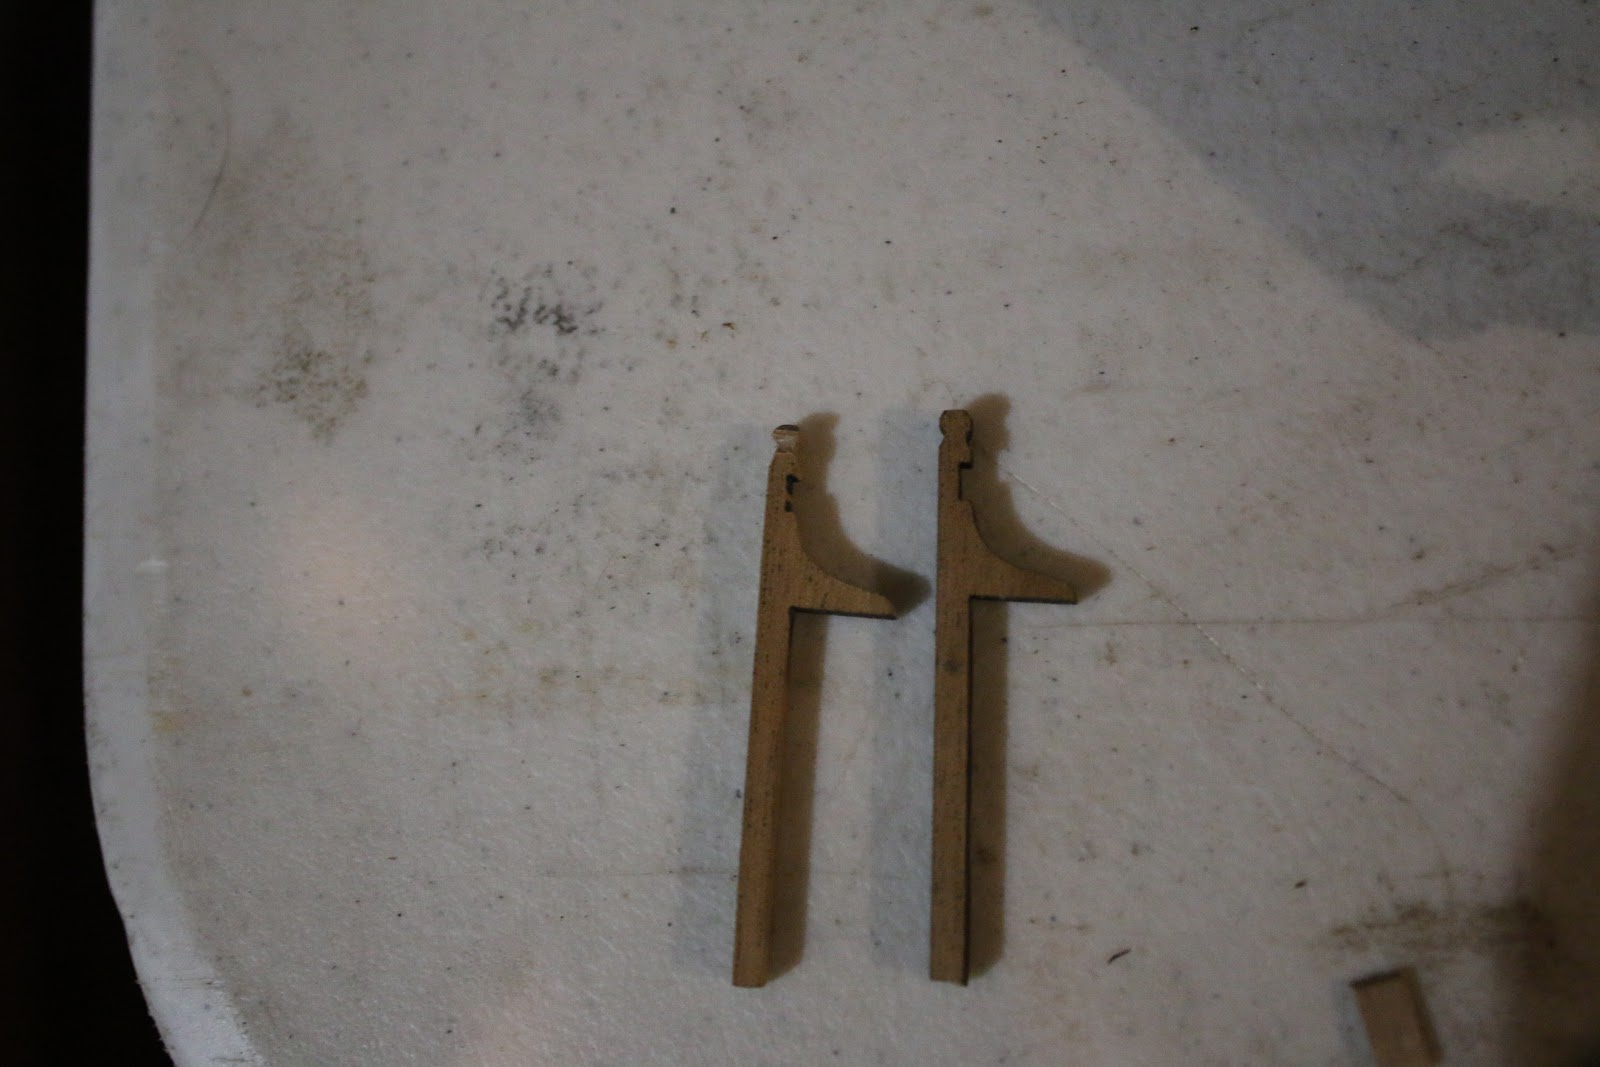
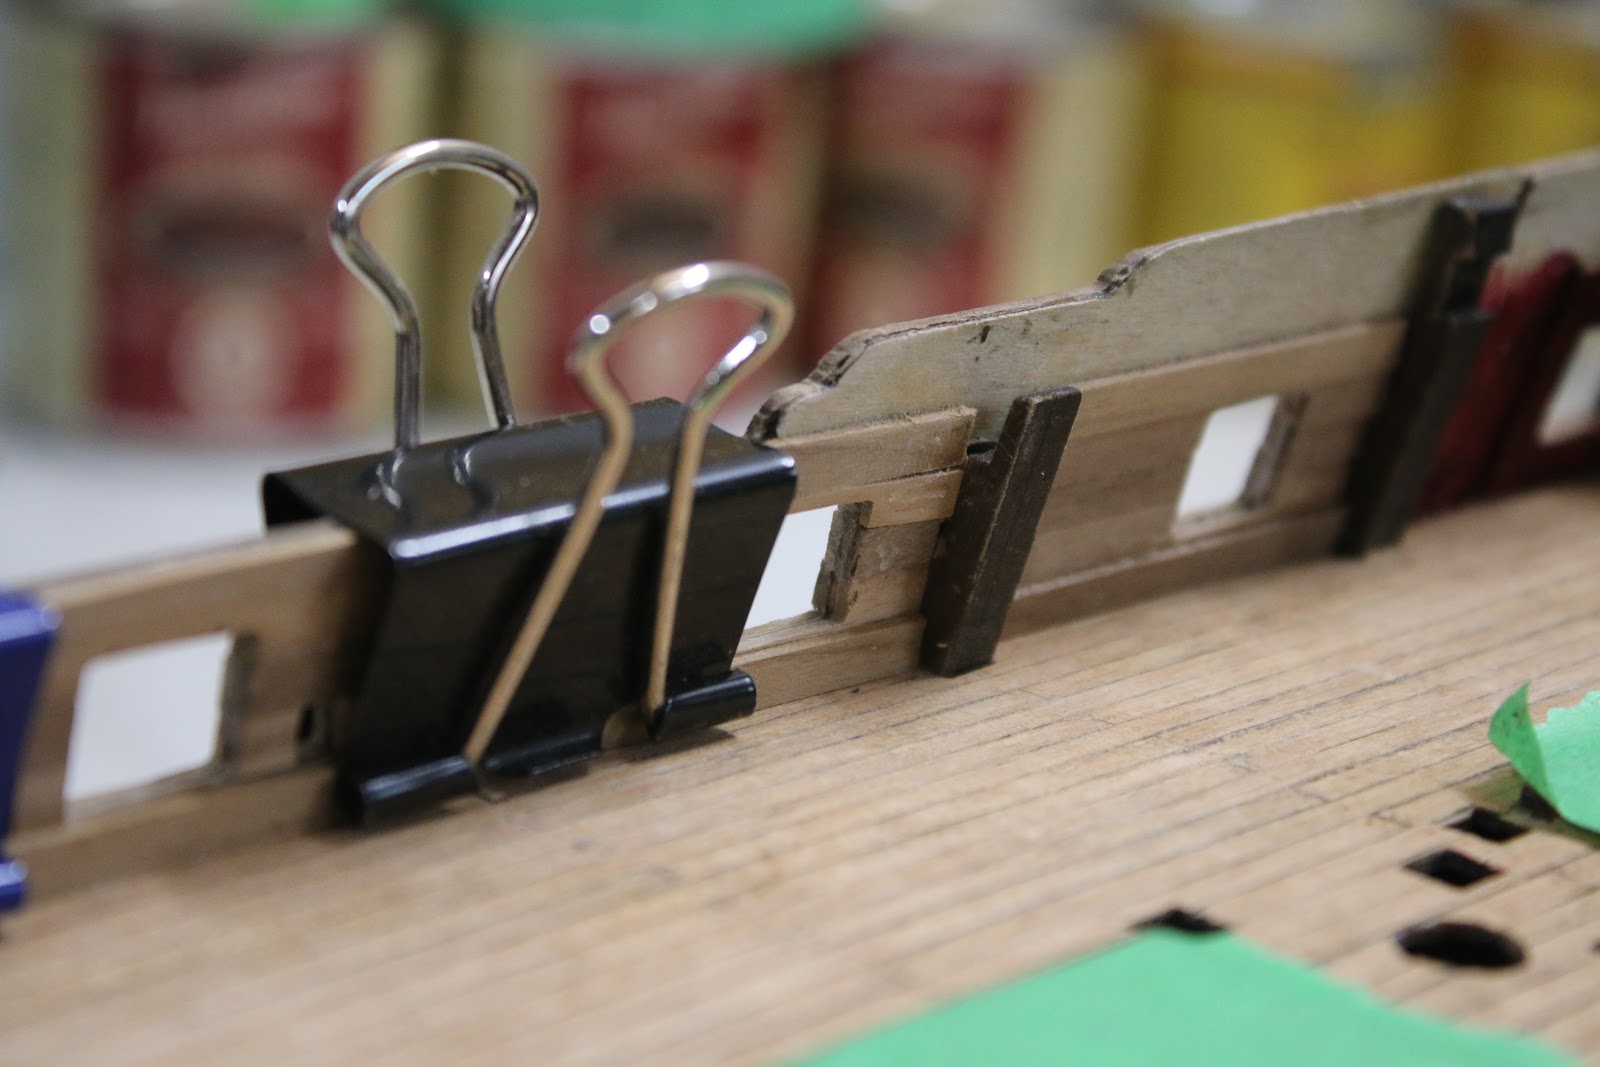
I also started framing the back most gunports on the inside to recreate the width of the hull without where there isn't interior planking.

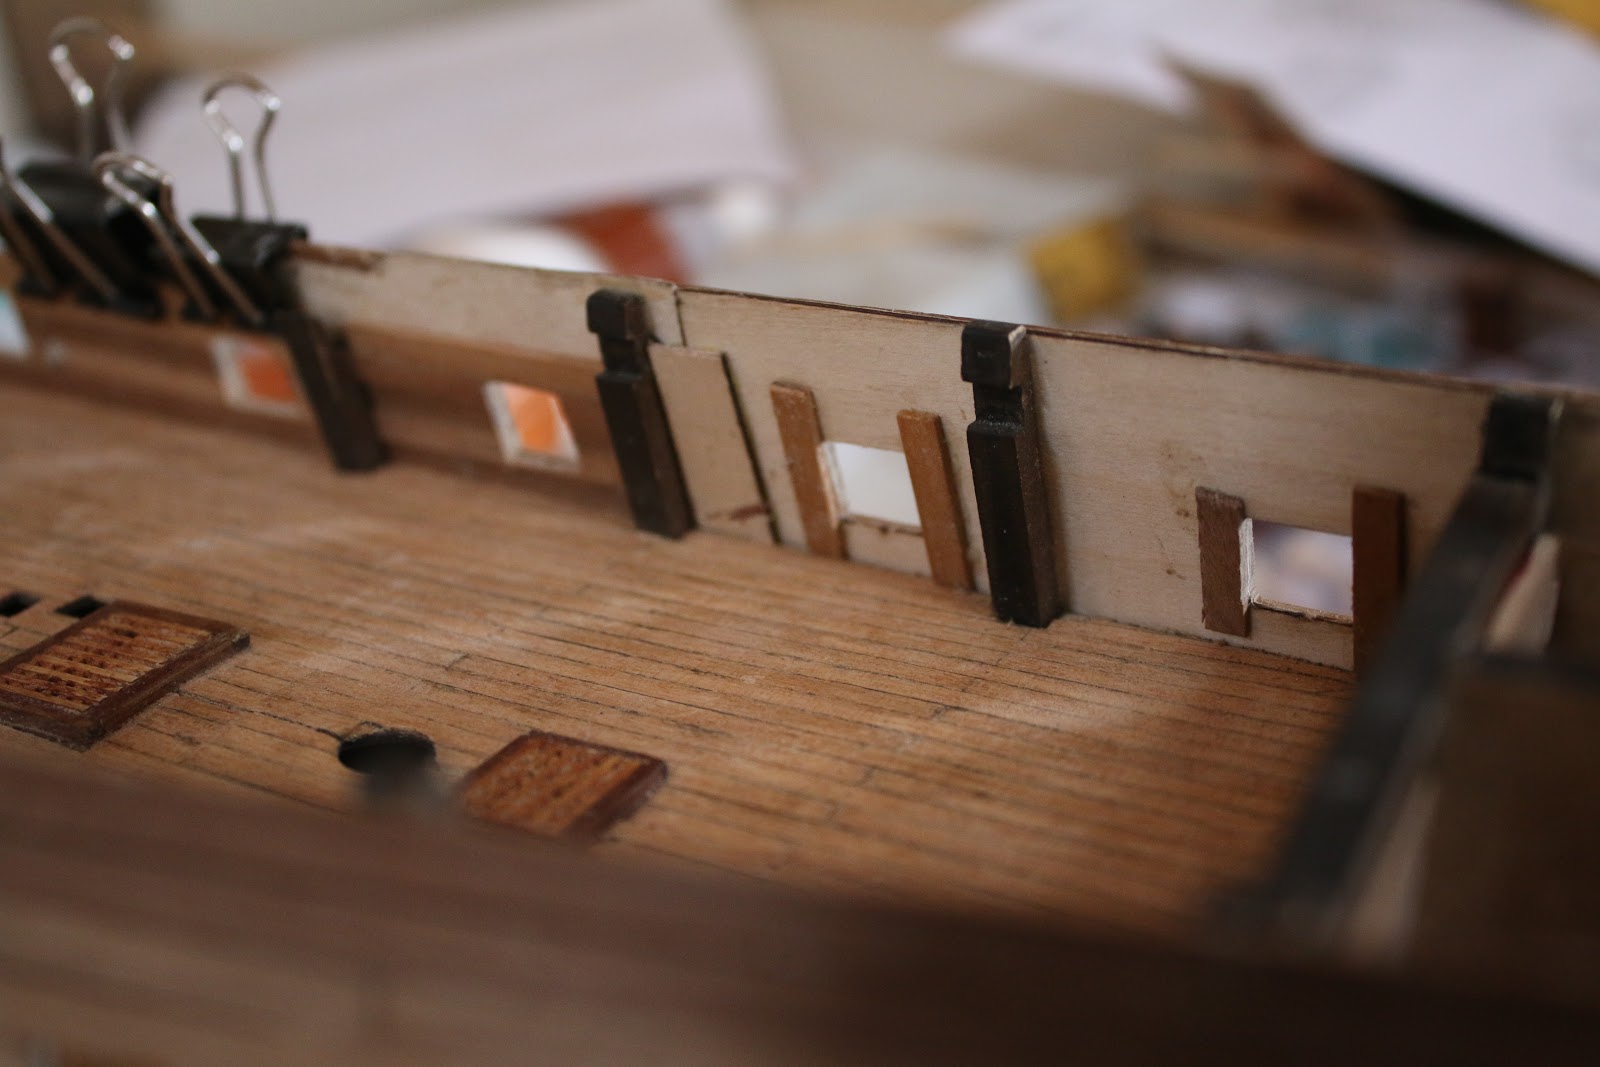
As well as adding some decor inside the what will be barely visible captain's cabin.

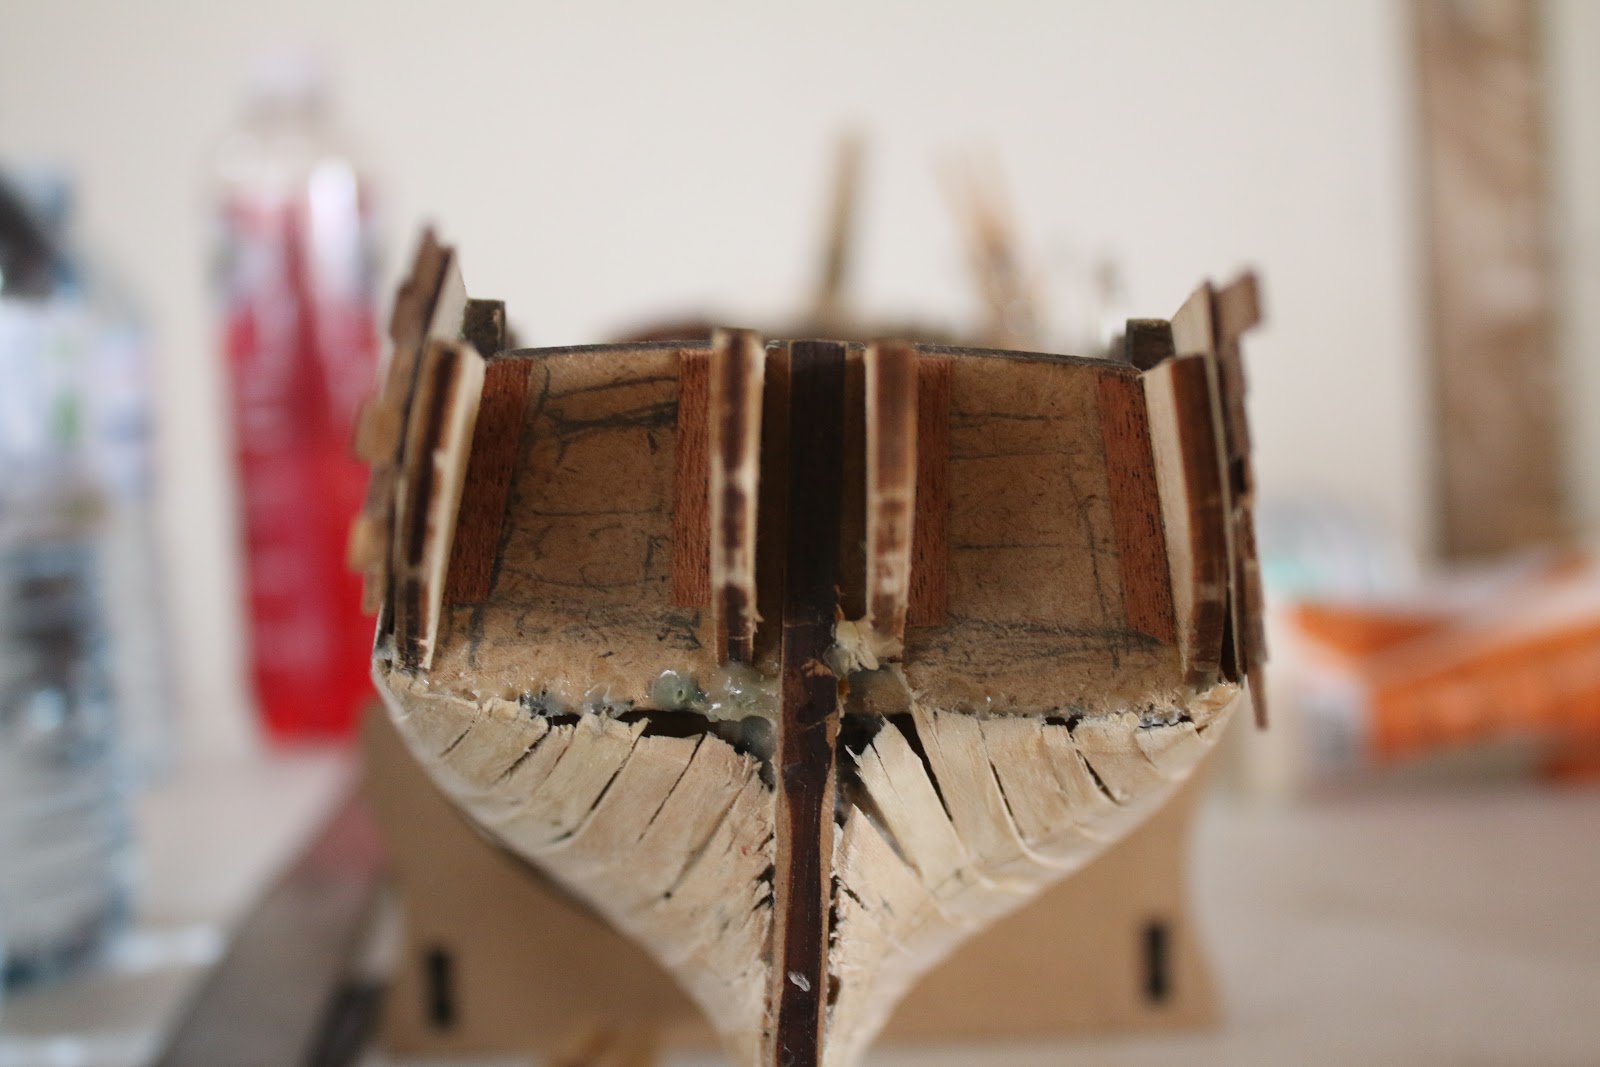
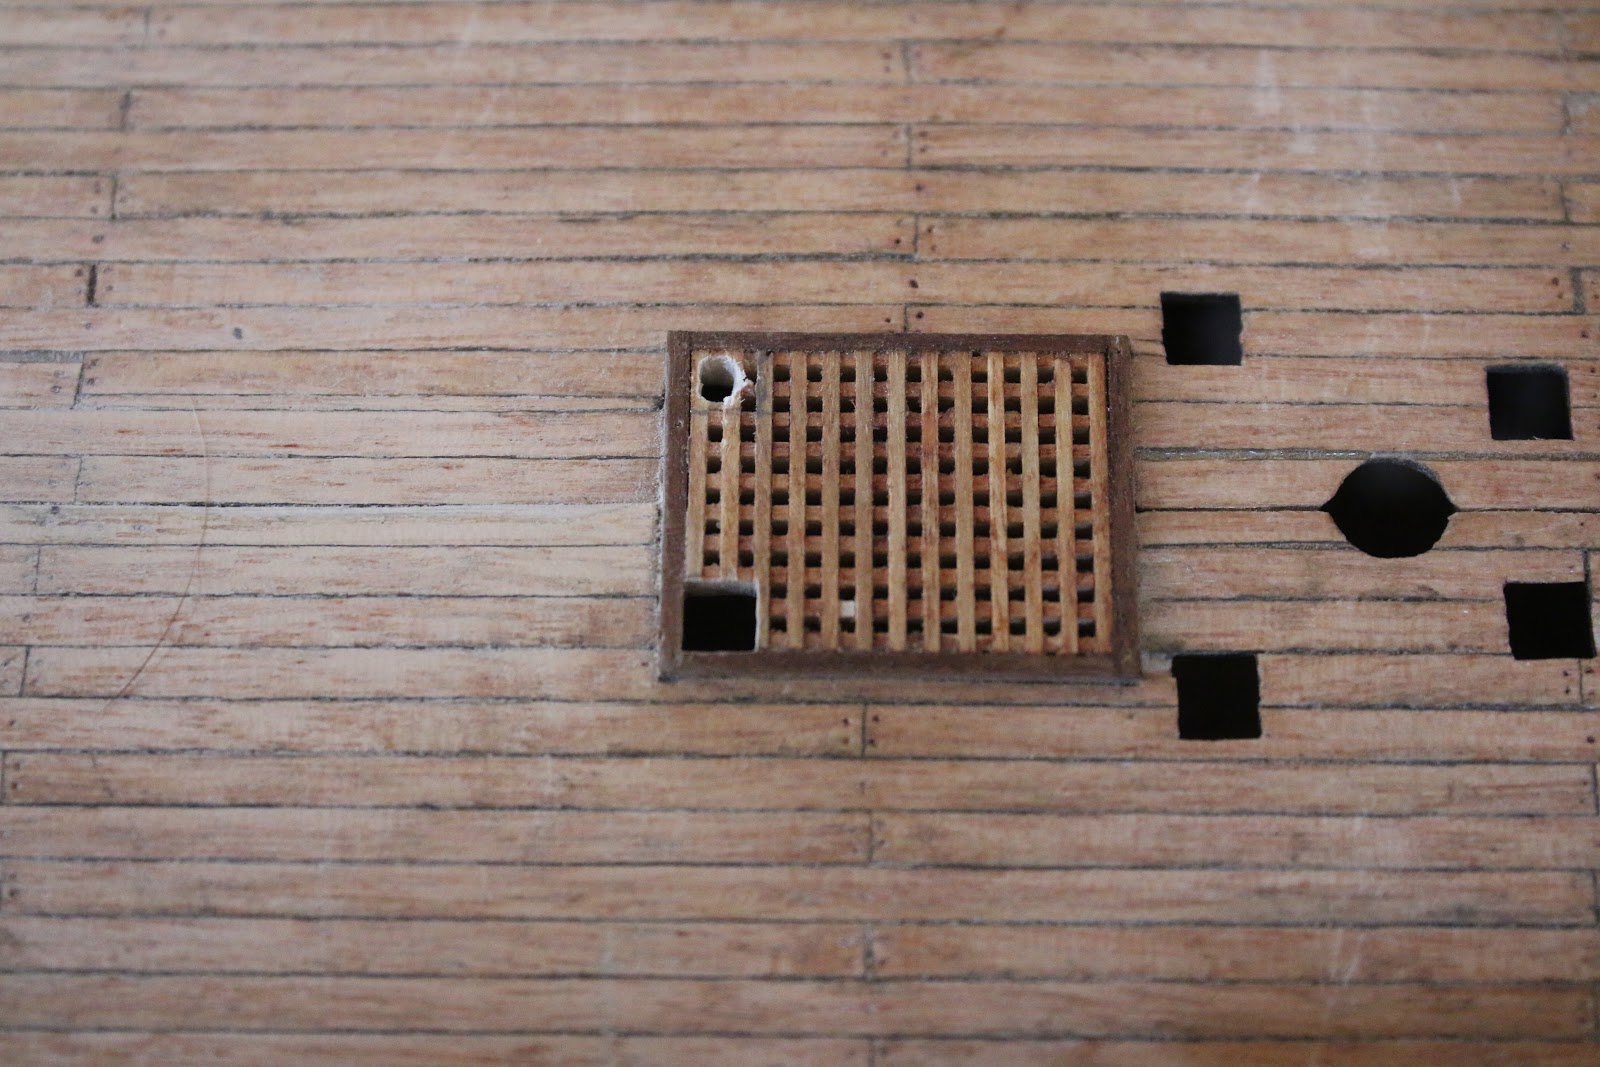
After that, I realized that I had missed a step and forgotten to cut holes in my main hatch for the anchor rope to run into. So with some muttering, I went ahead and fixed this mistake.

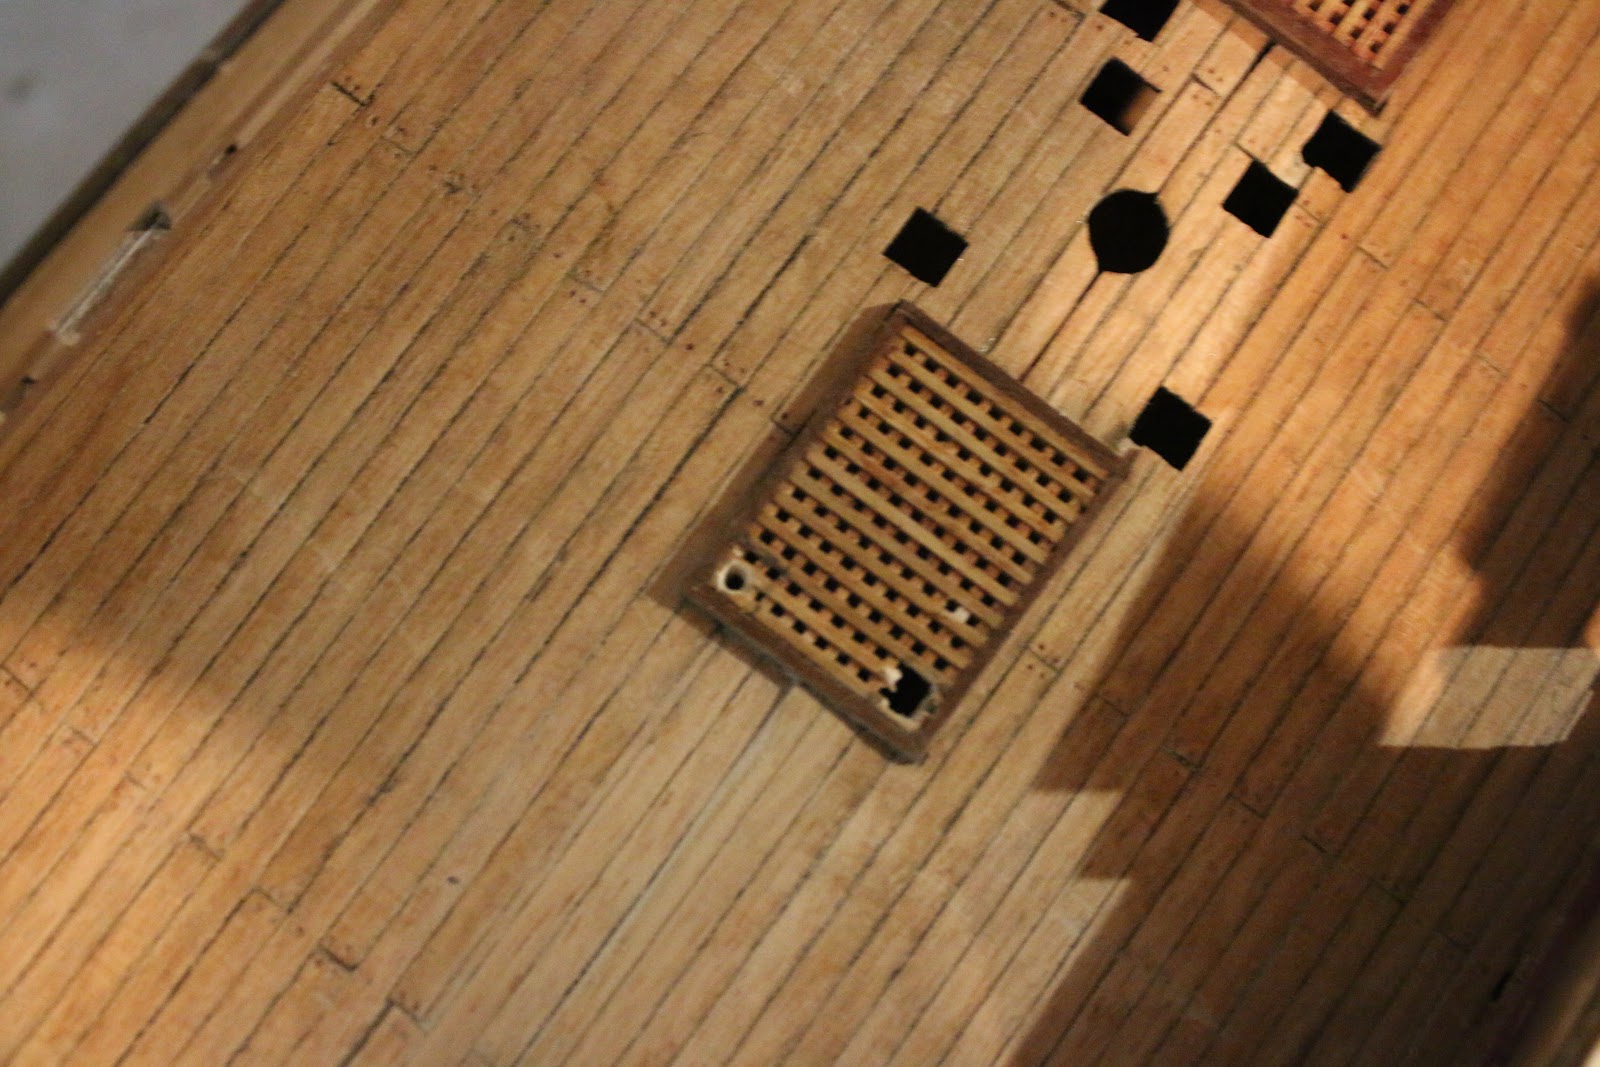
After some much needed time away from home. The guns and their carriages finally came in. though I had to convince the post office to give me the cannons due to a mistake in the address but simply pulling up the email confirmation showed it did indeed belong to me.

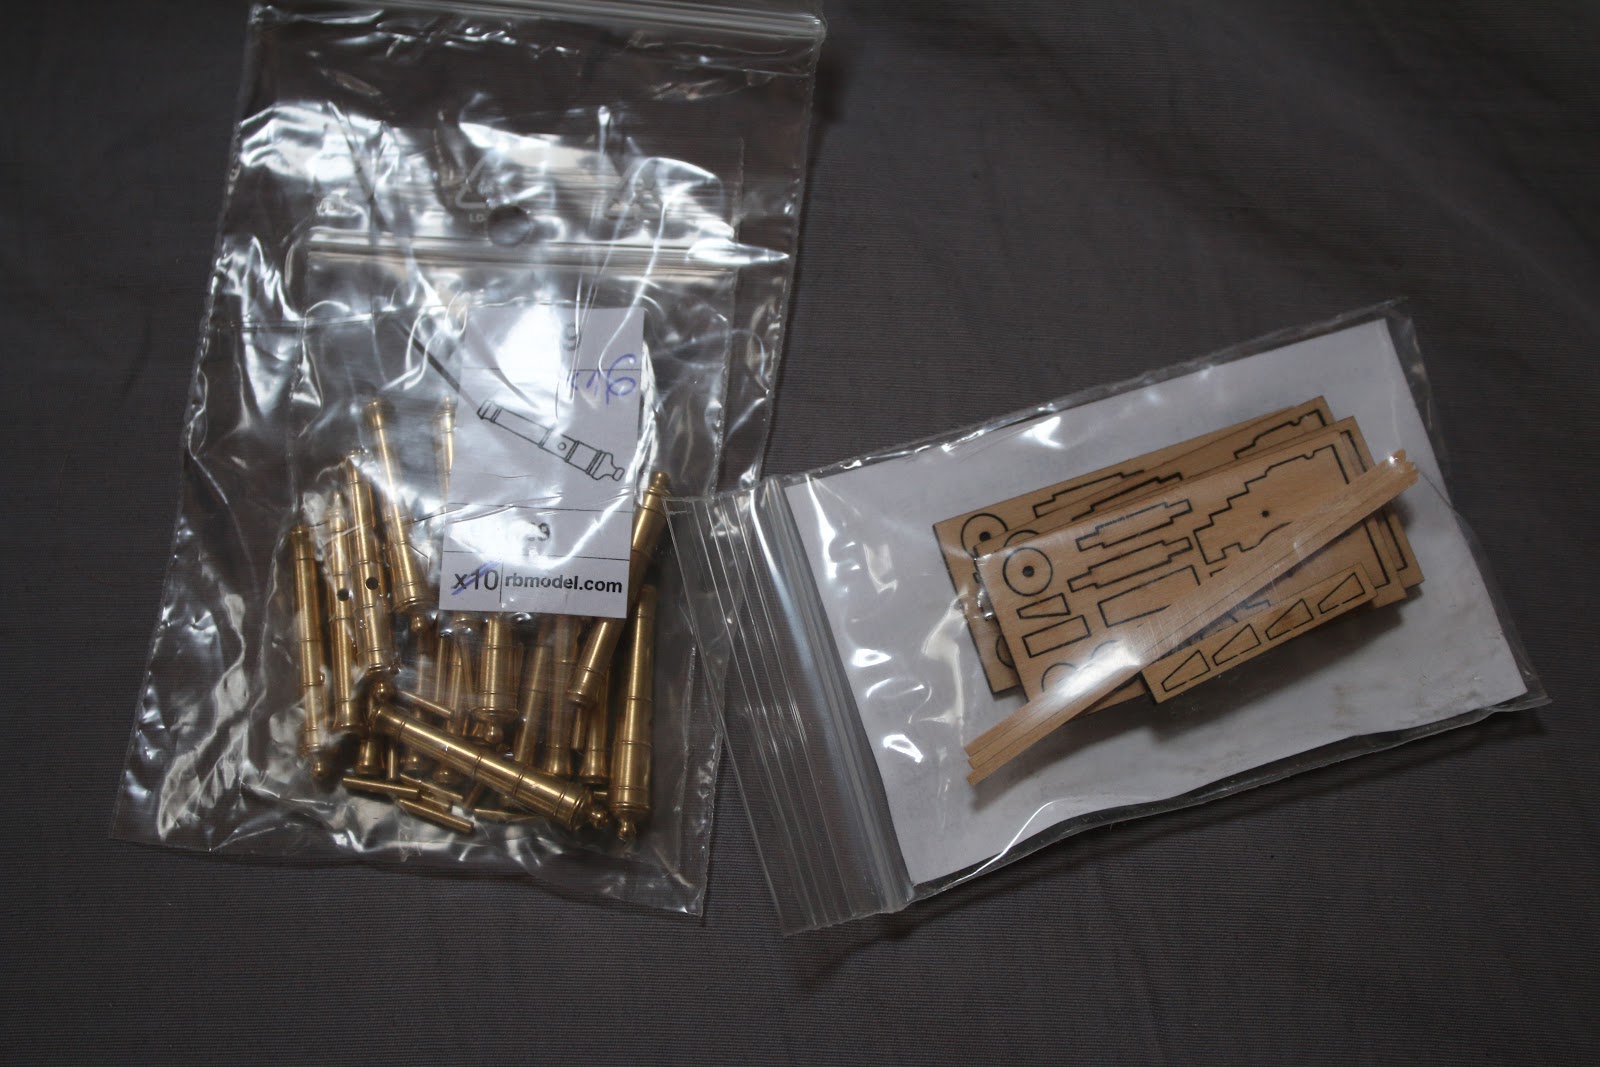
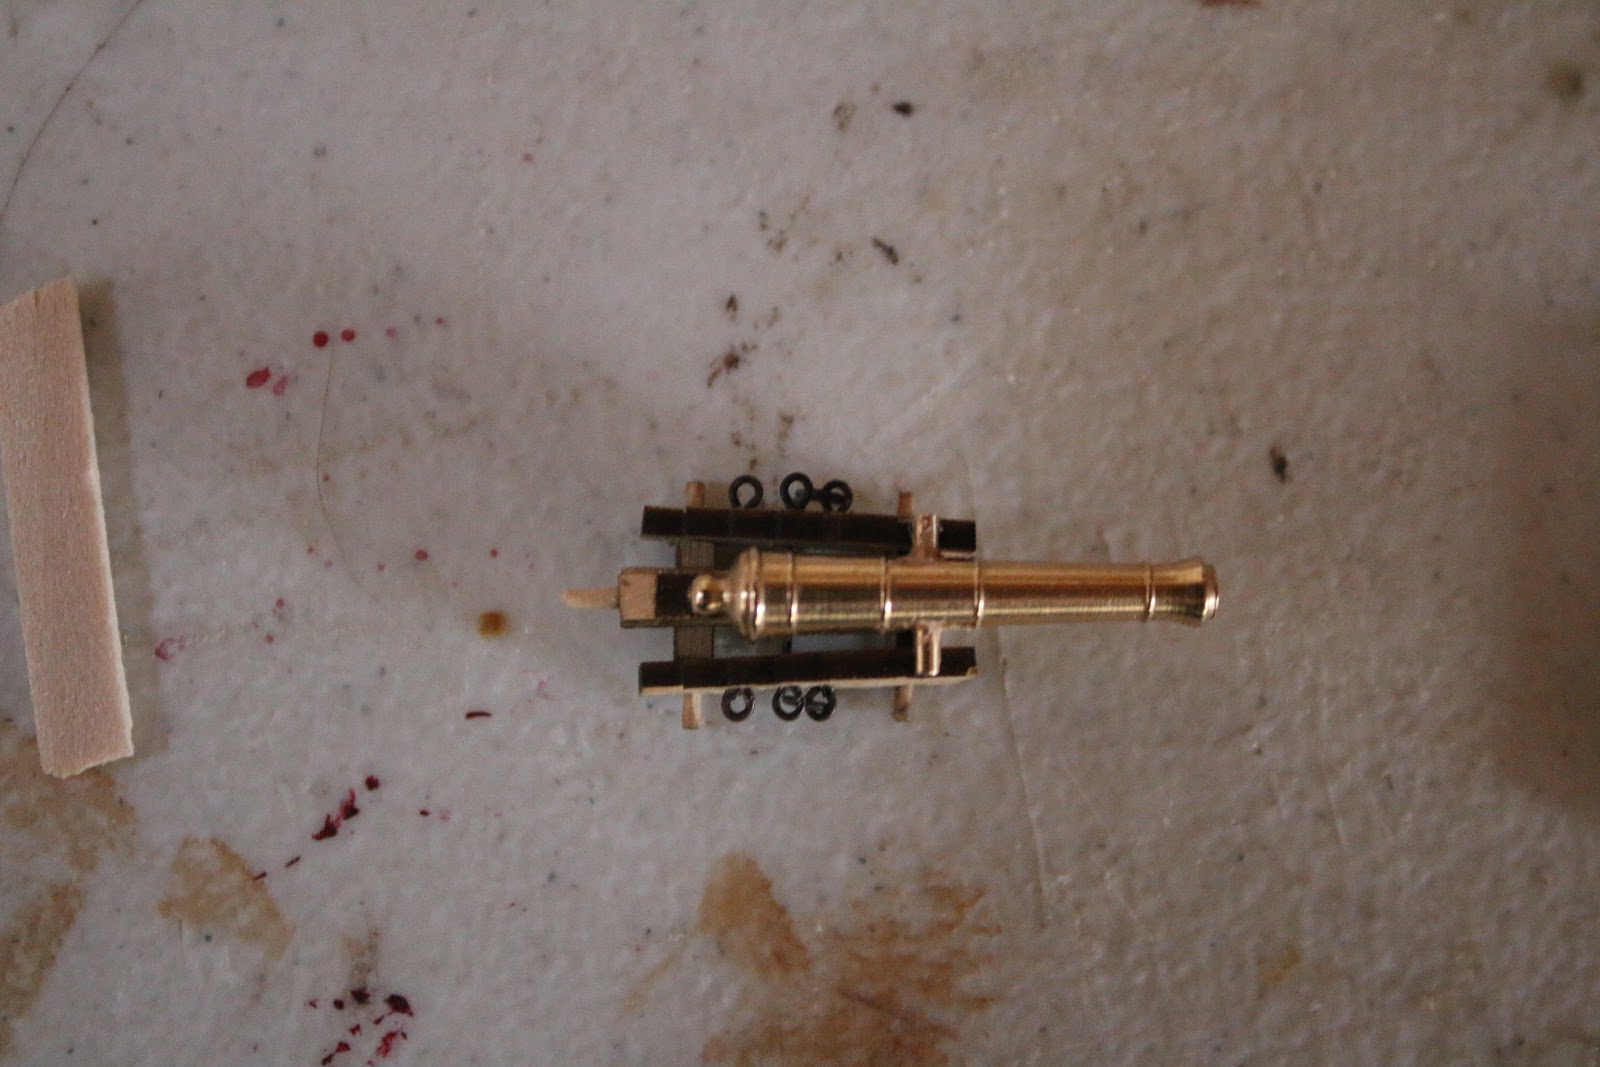
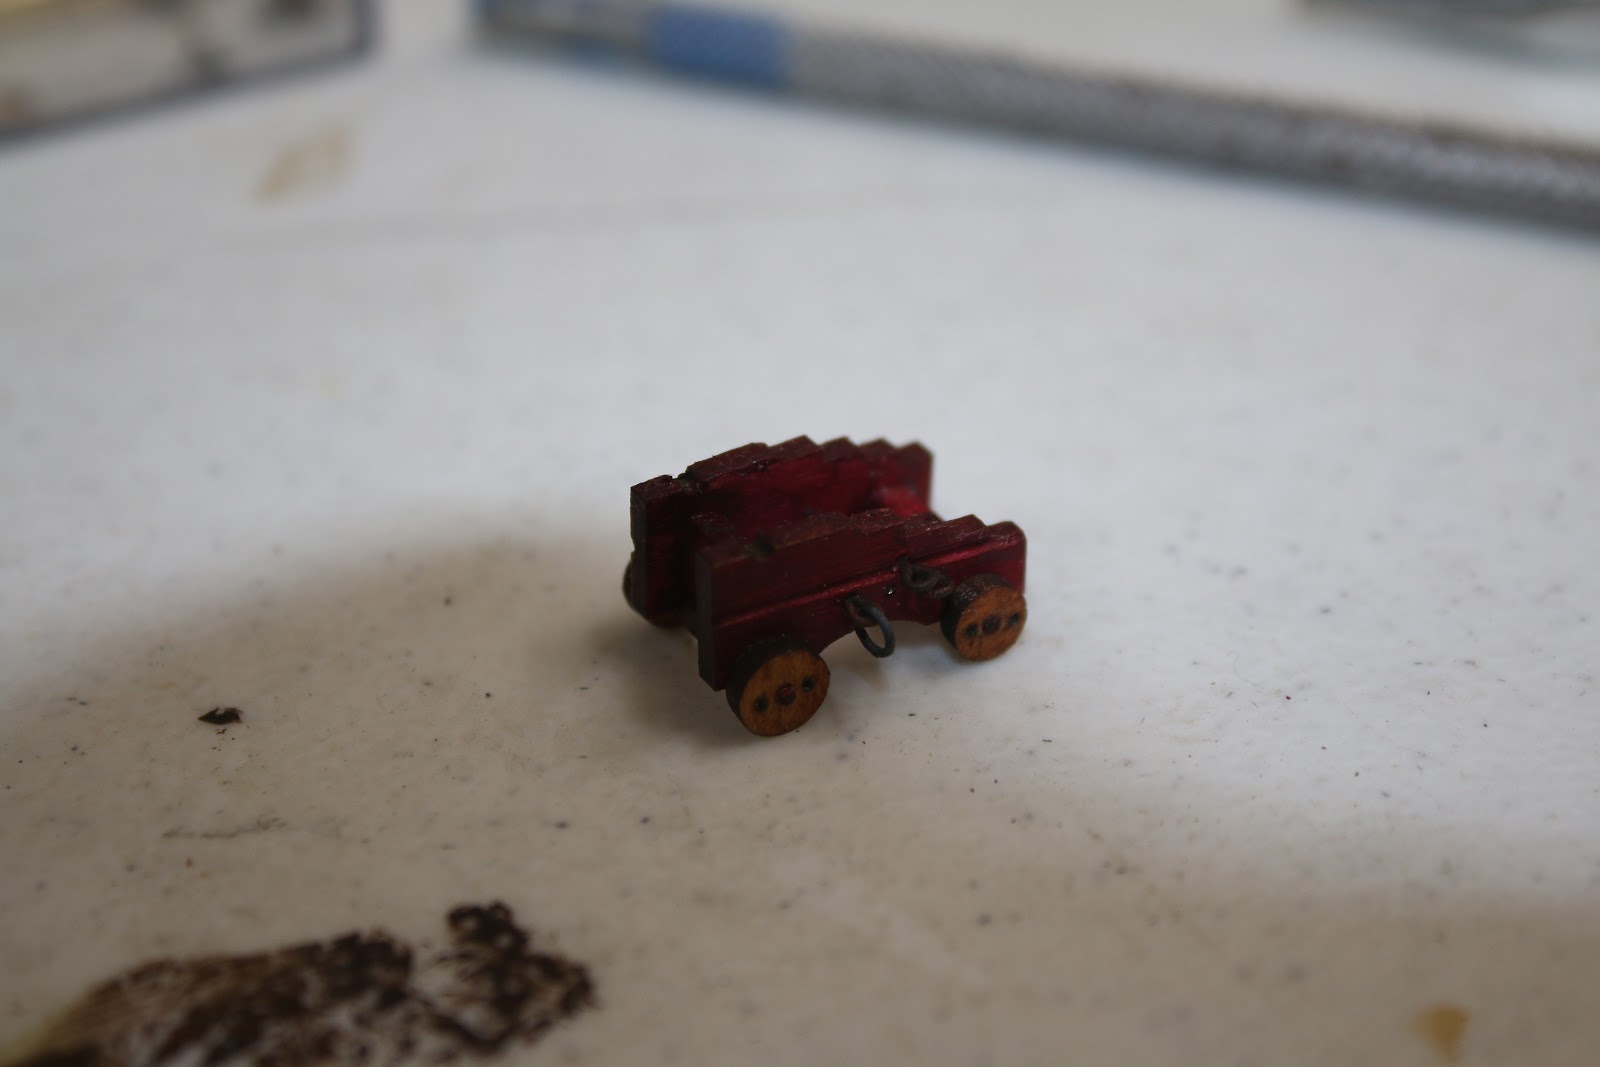
And with that, I went ahead and attempted to build a carriage. And not surcome to the mind-numbing challenge this is.

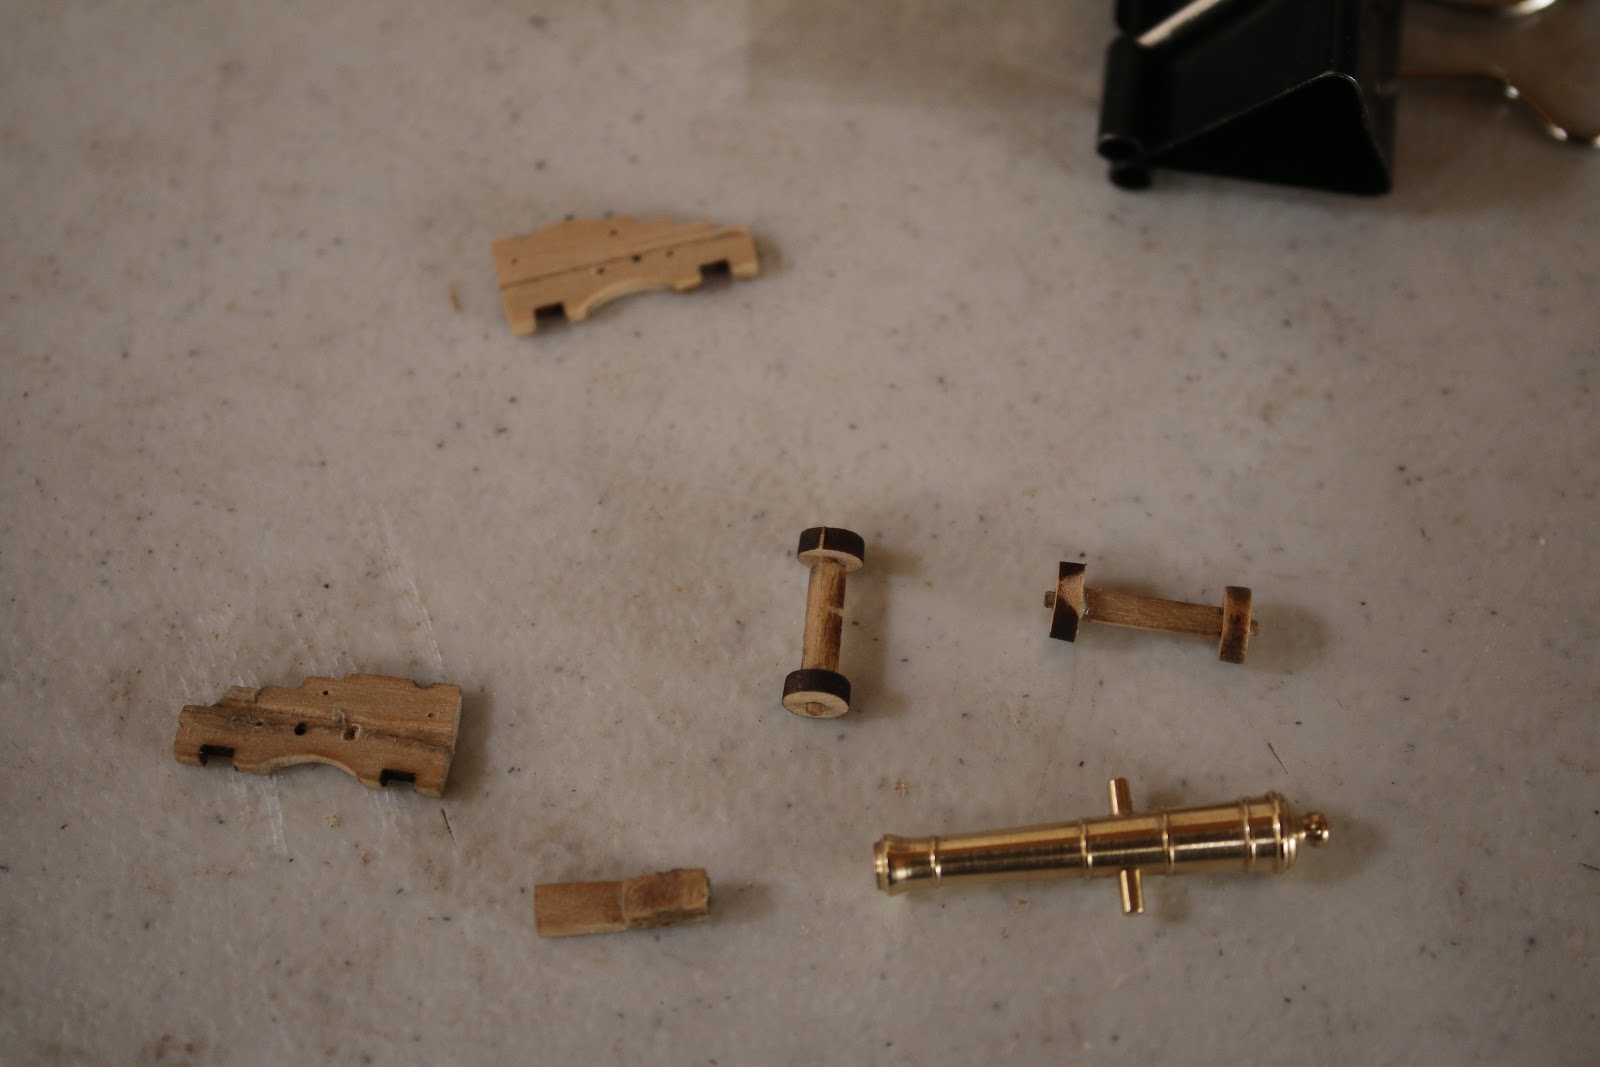
Alas, I did succeed.

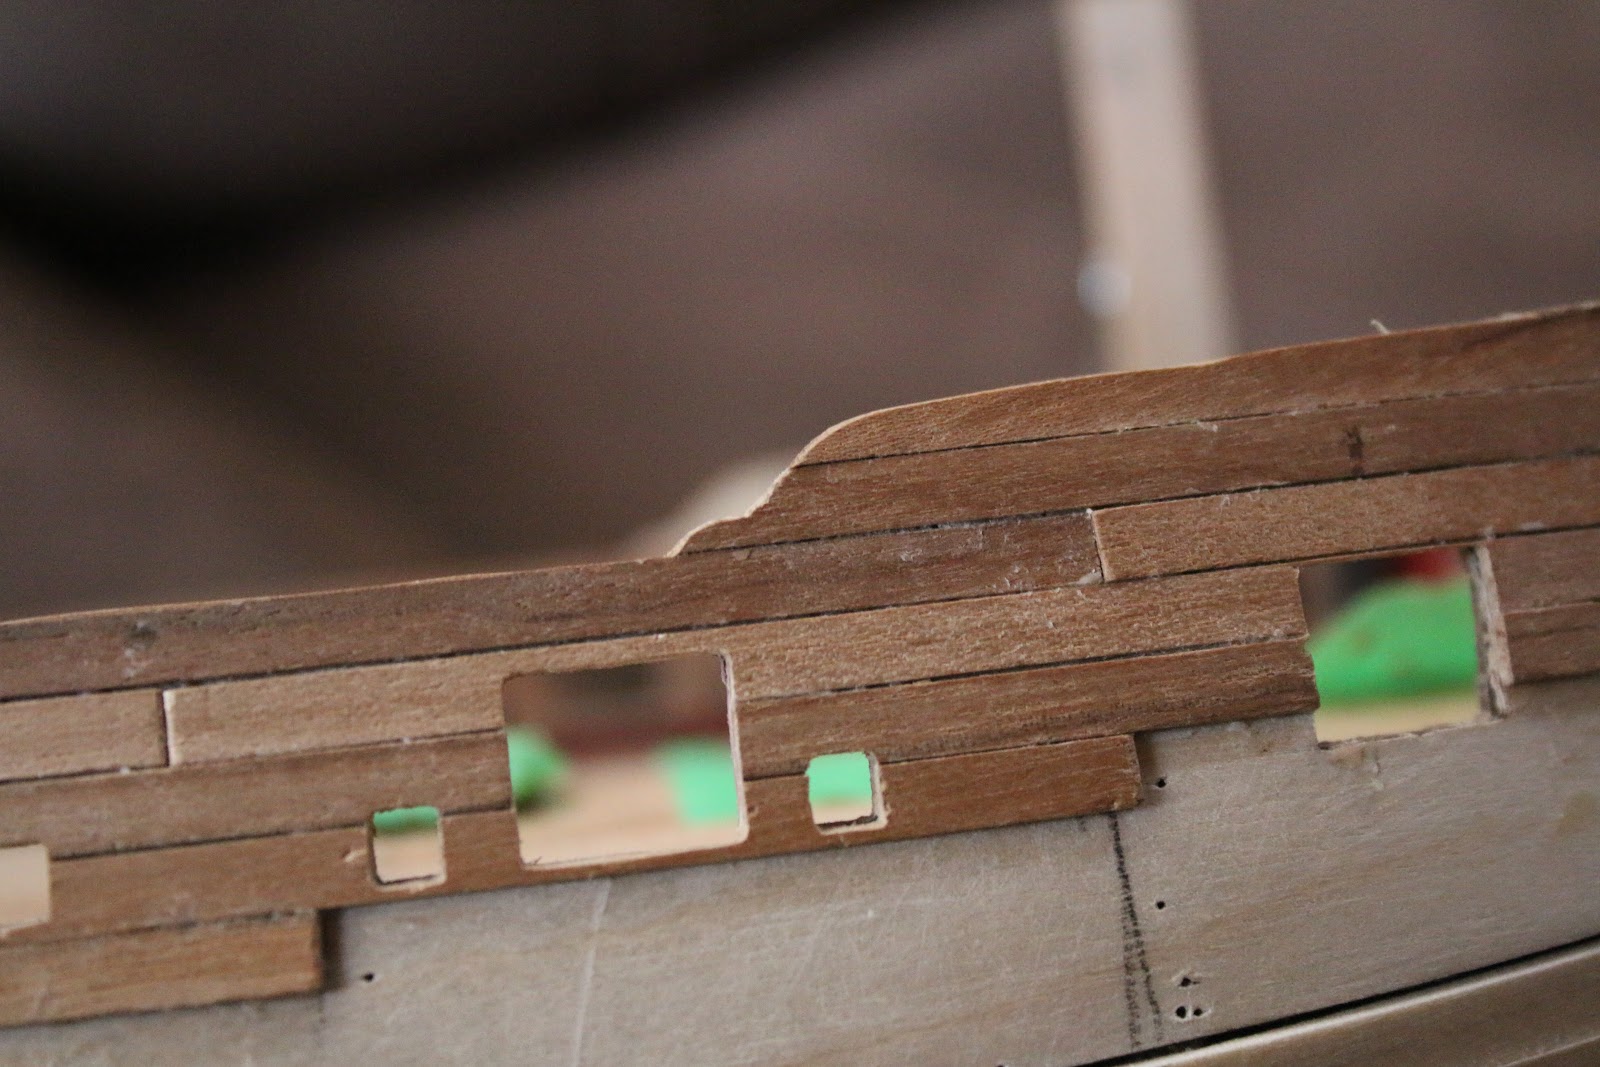
As I'm sure many of you know the Novel virus Covid 19 has reached a pandemic state at this time and due to the rising number of cases in Canada and me being a student I was and still am at home due to classes shutting down. So with nothing else to do, I decided to make a push on with the second planking. Which I’ll admit I had been avoiding. So I started planking away and here's where I left off have been slowly working towards passing the gunports so I can fix and refinish the gun deck.

I also started to work bottom up on the planking. Using the method my grandfather who got me into building ships taught me.

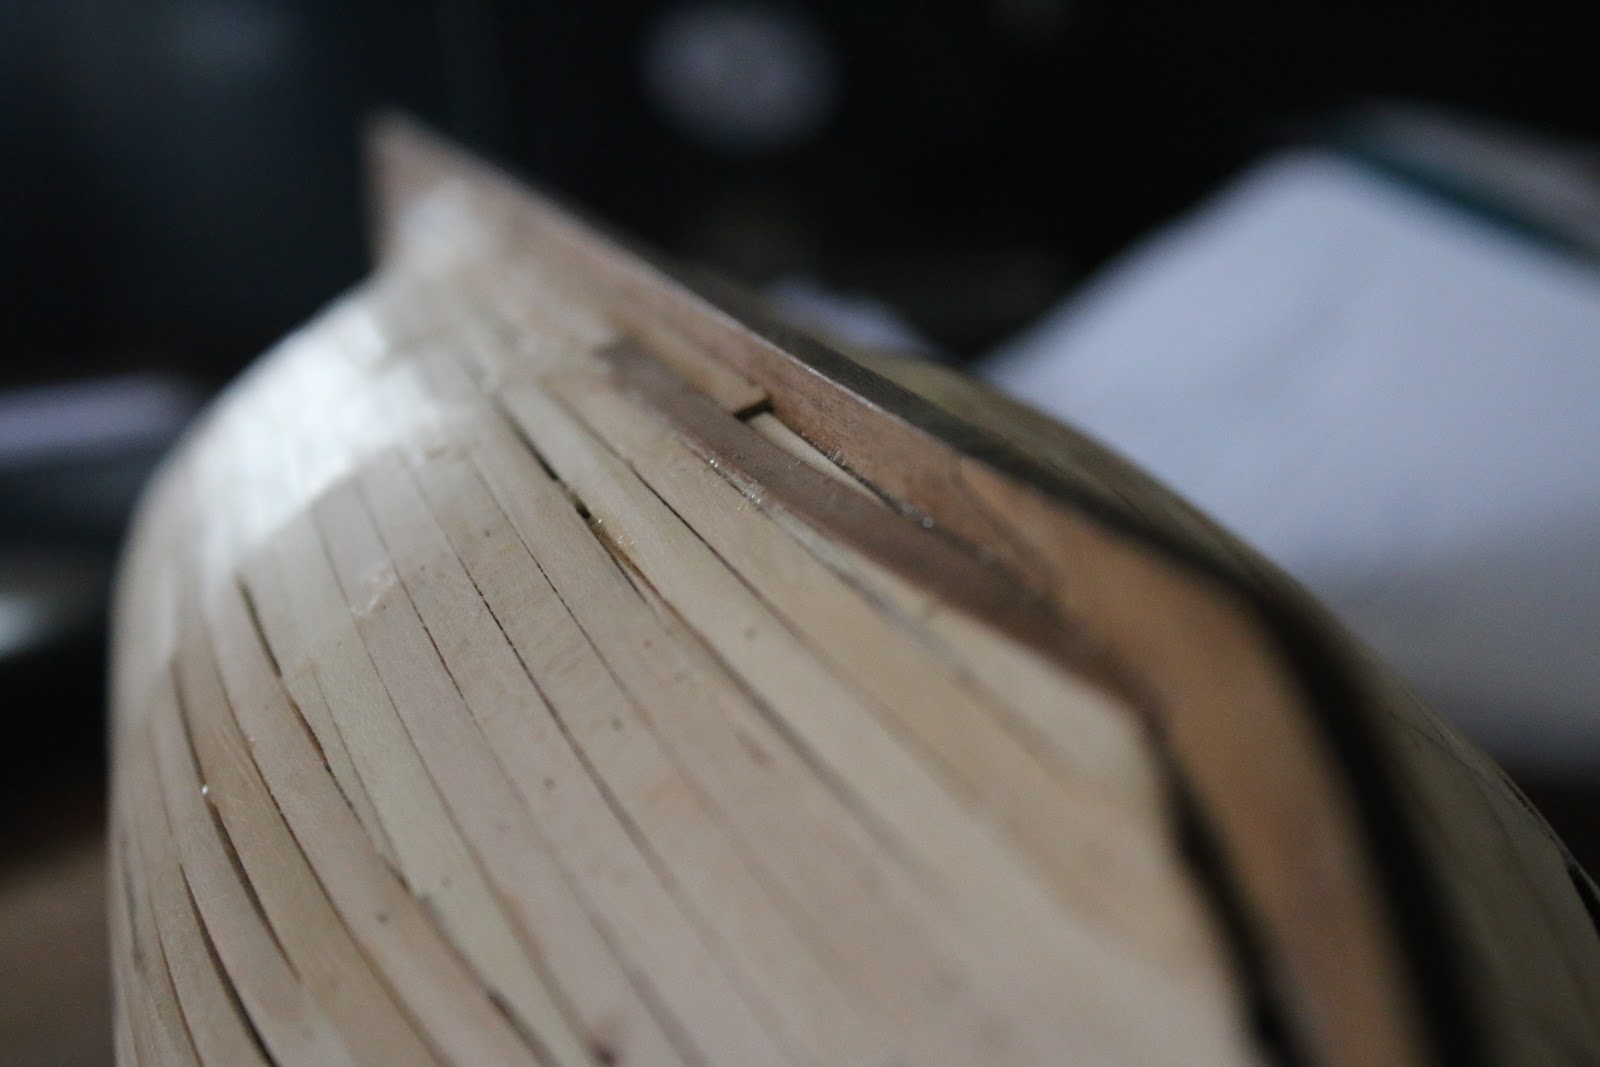
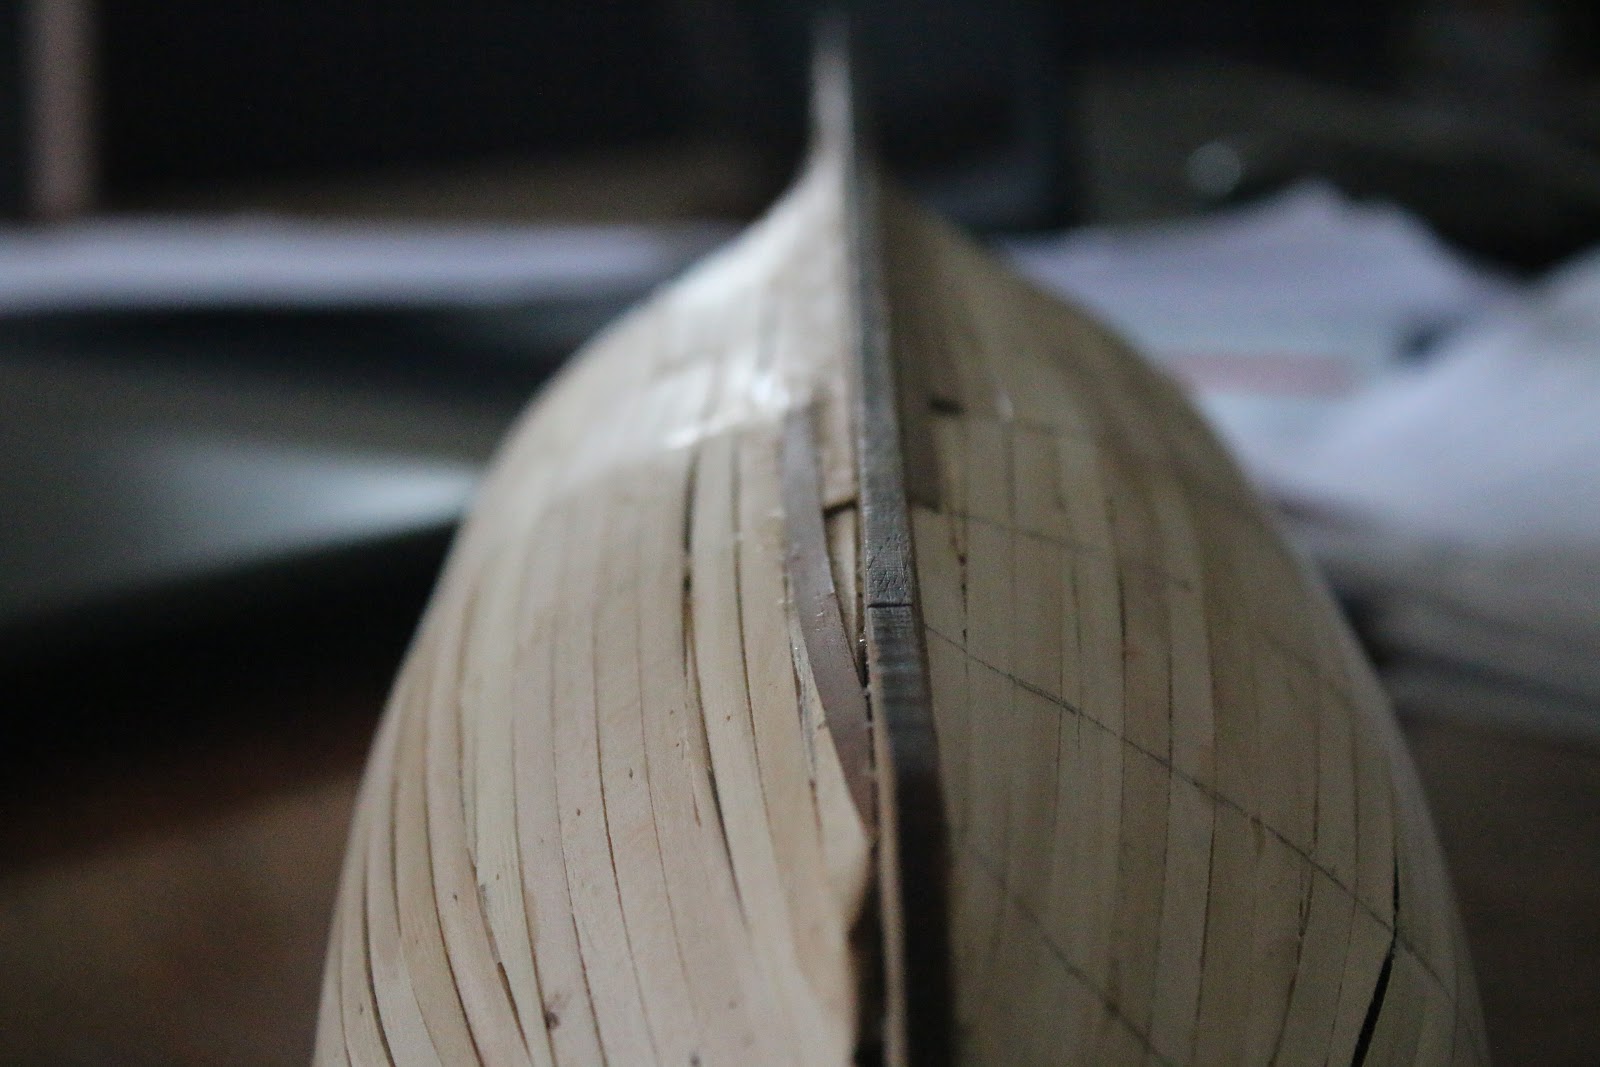
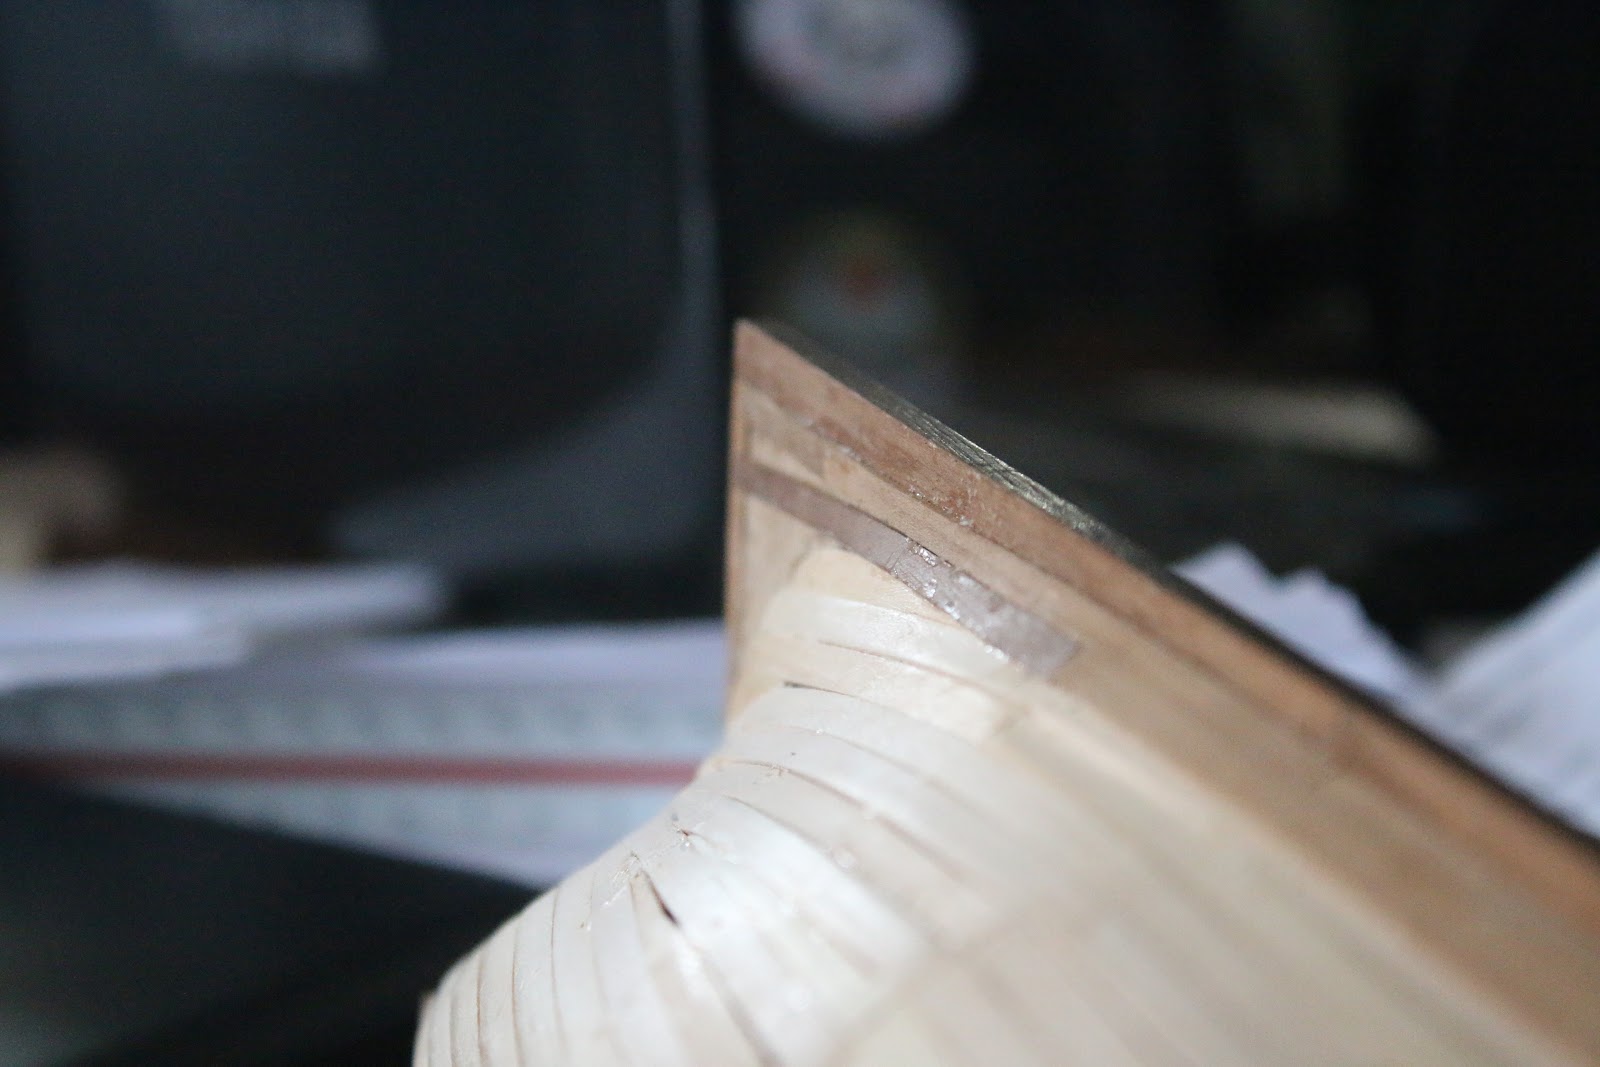
And in the coming days, I worked my way up the hull following the natural curvature.

And a little more planking as well was placed in a wedge plank.

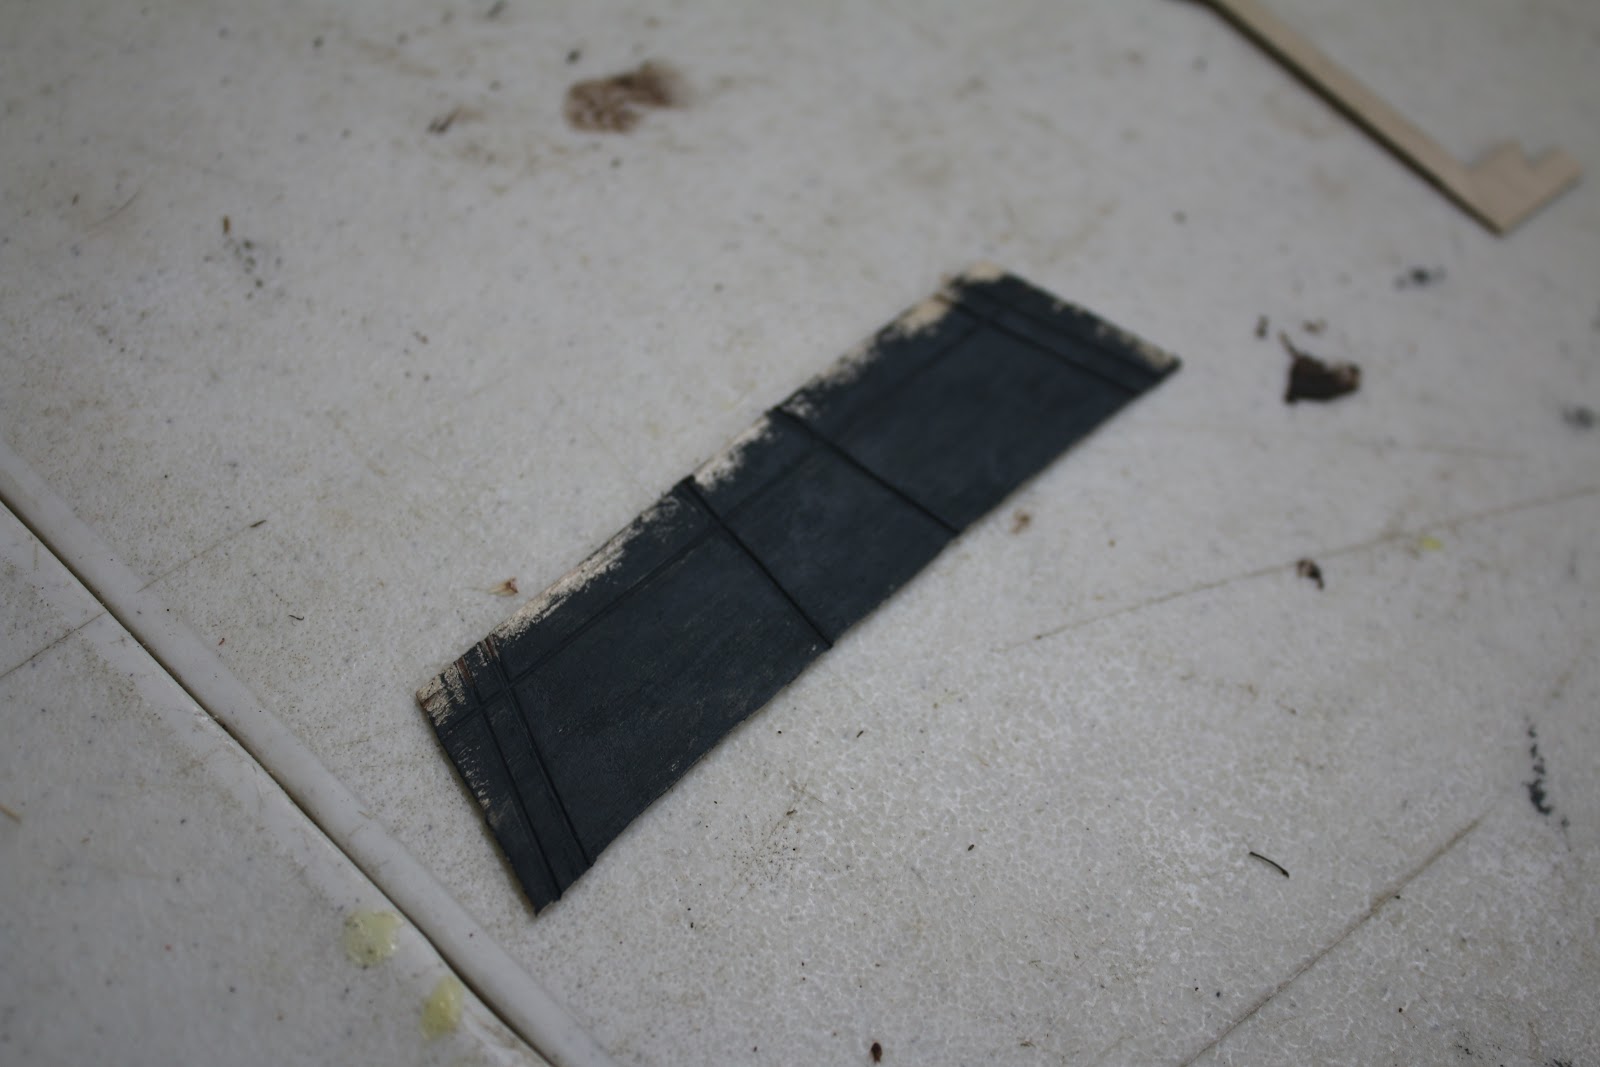
So one of the things that's been bothering me for some time is my lack of knowledge when it comes to blackening my eye bolts and as you can see my last attempt did not turn out.

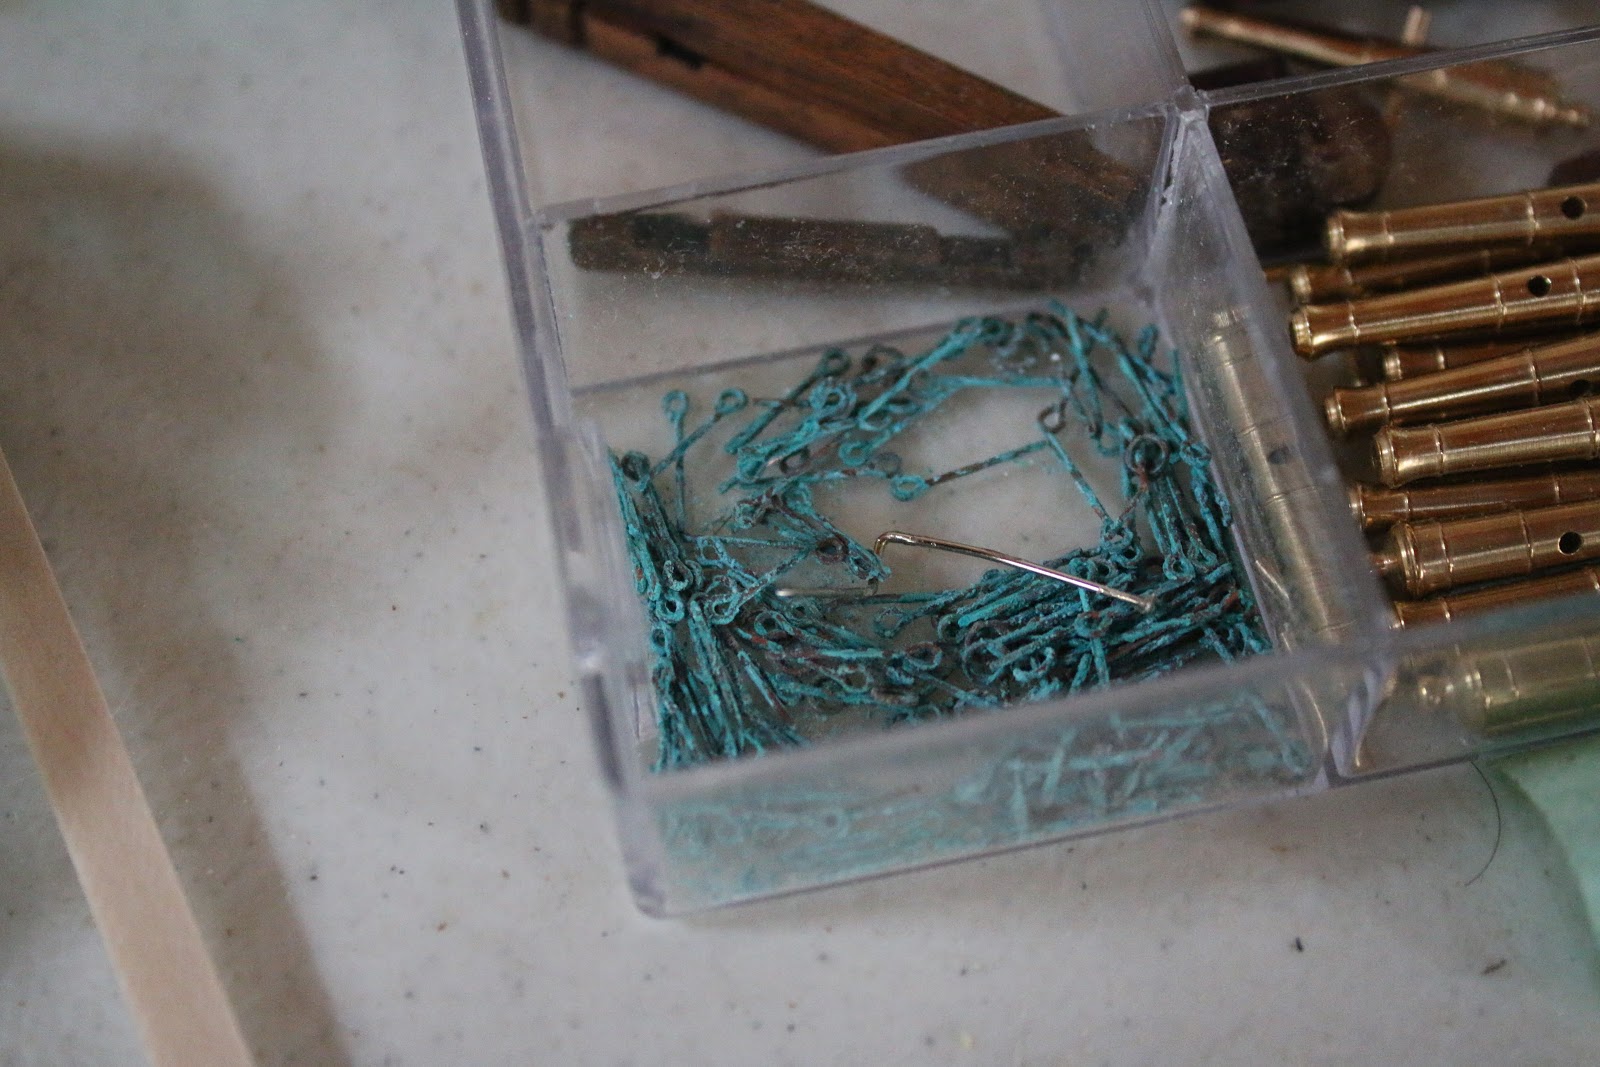
but I did have a breakthrough and discovered setting them on fire both cleans and blackens them and after seeing it in steel pins.

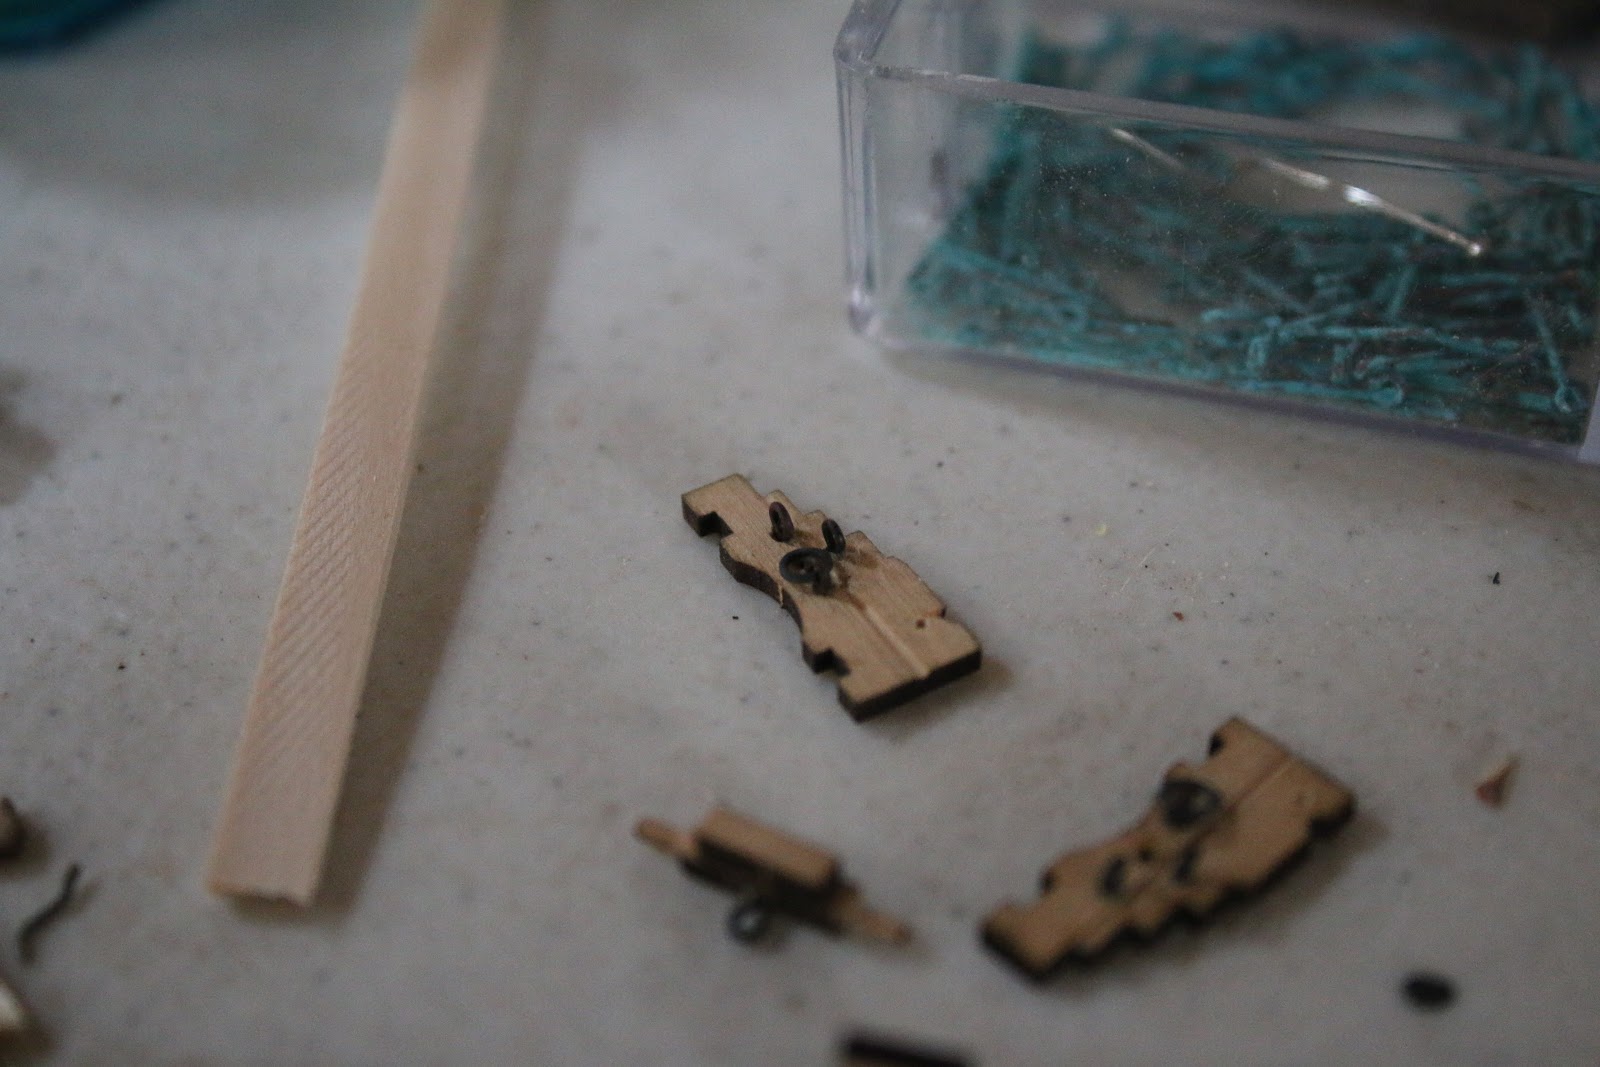
and with that, I'm now a pyro head.

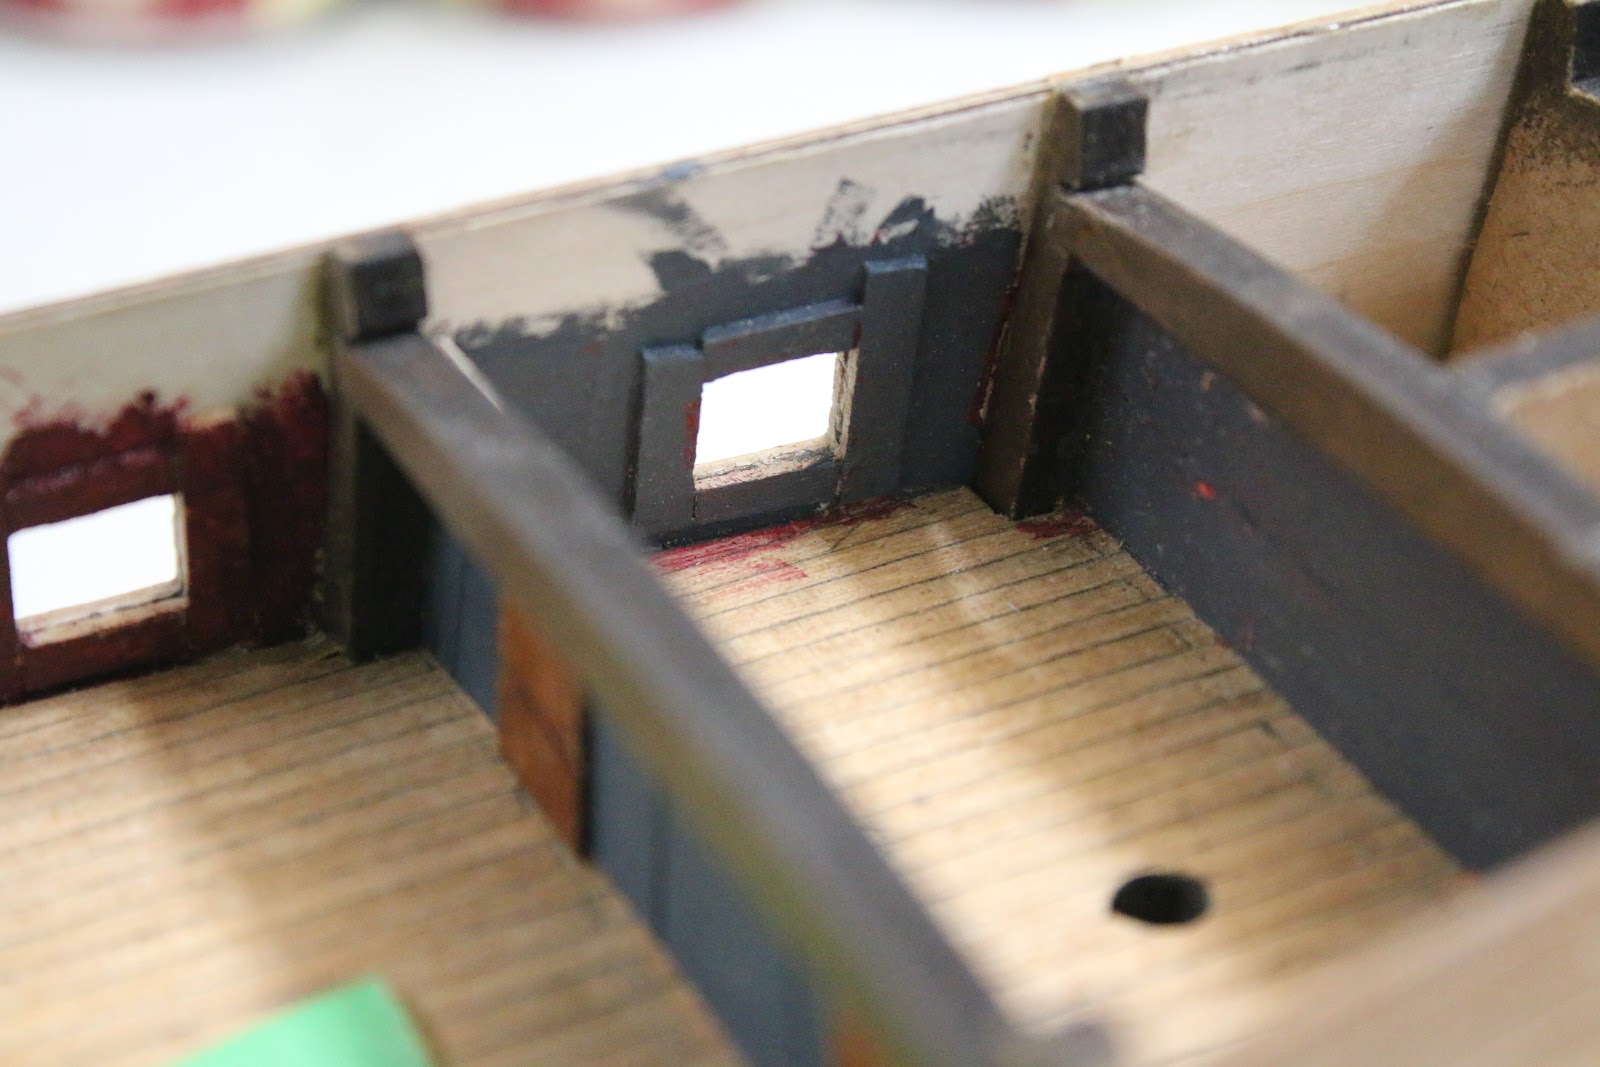
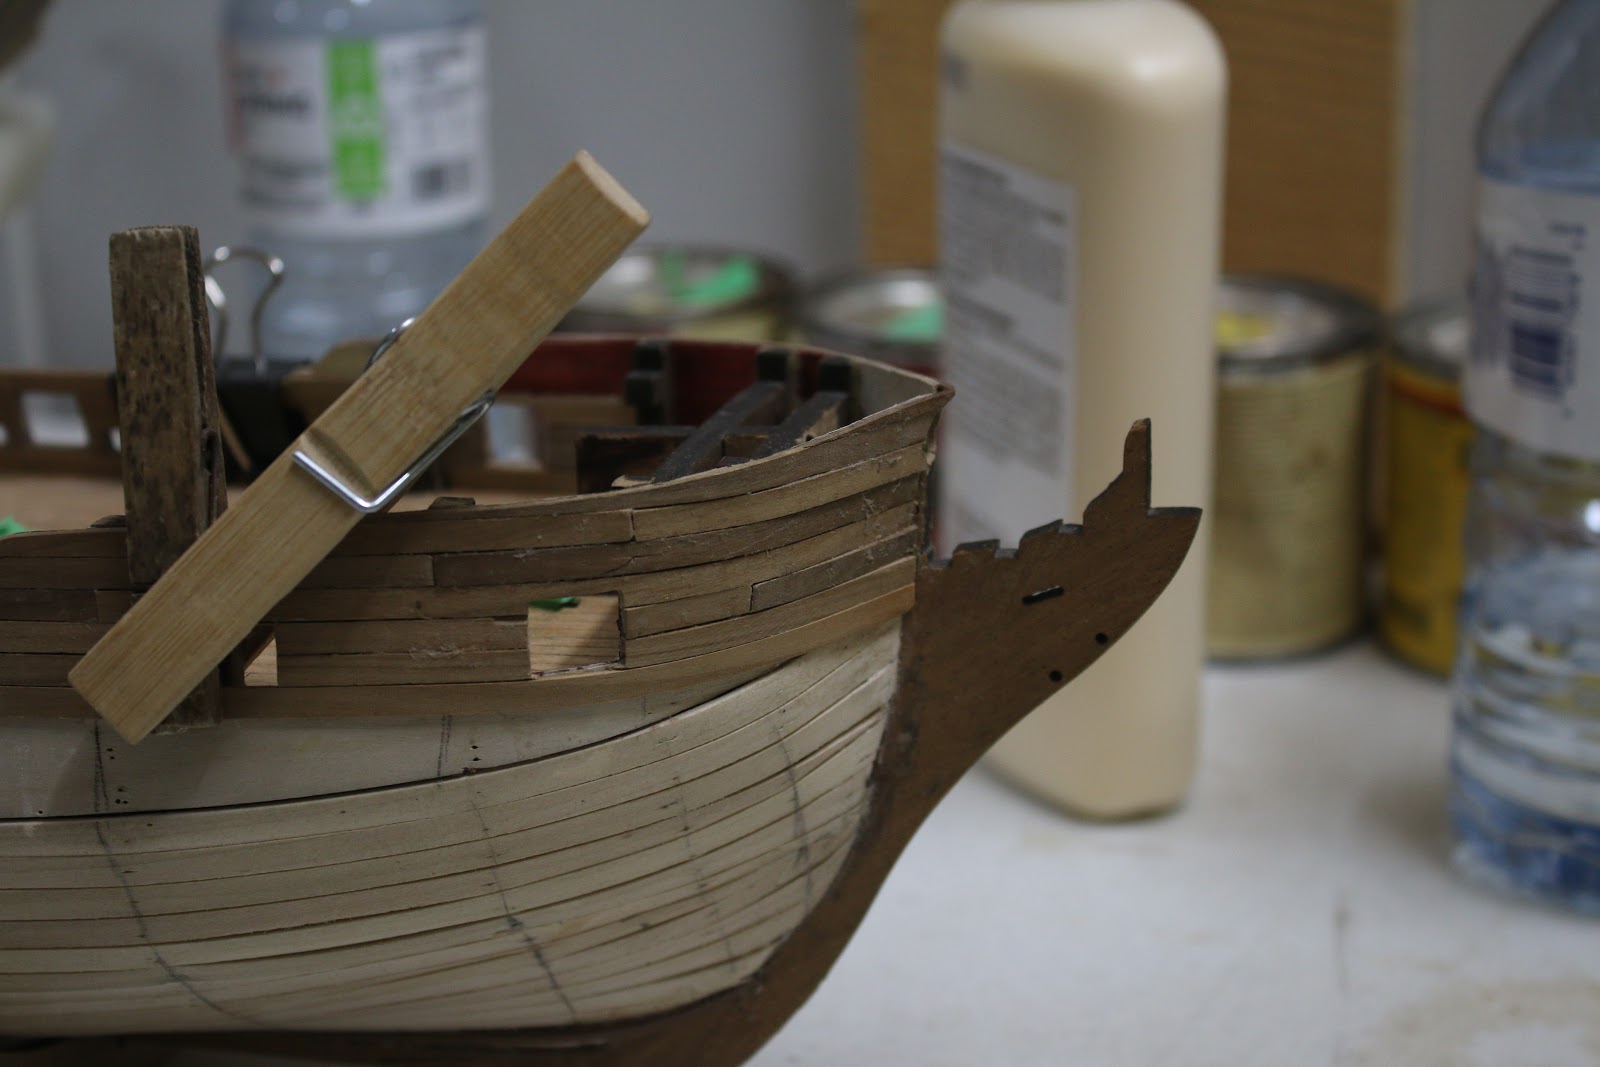
Anyways moving on I finally put in the transom plate on the back of the ship and also decorated the inside a bit.

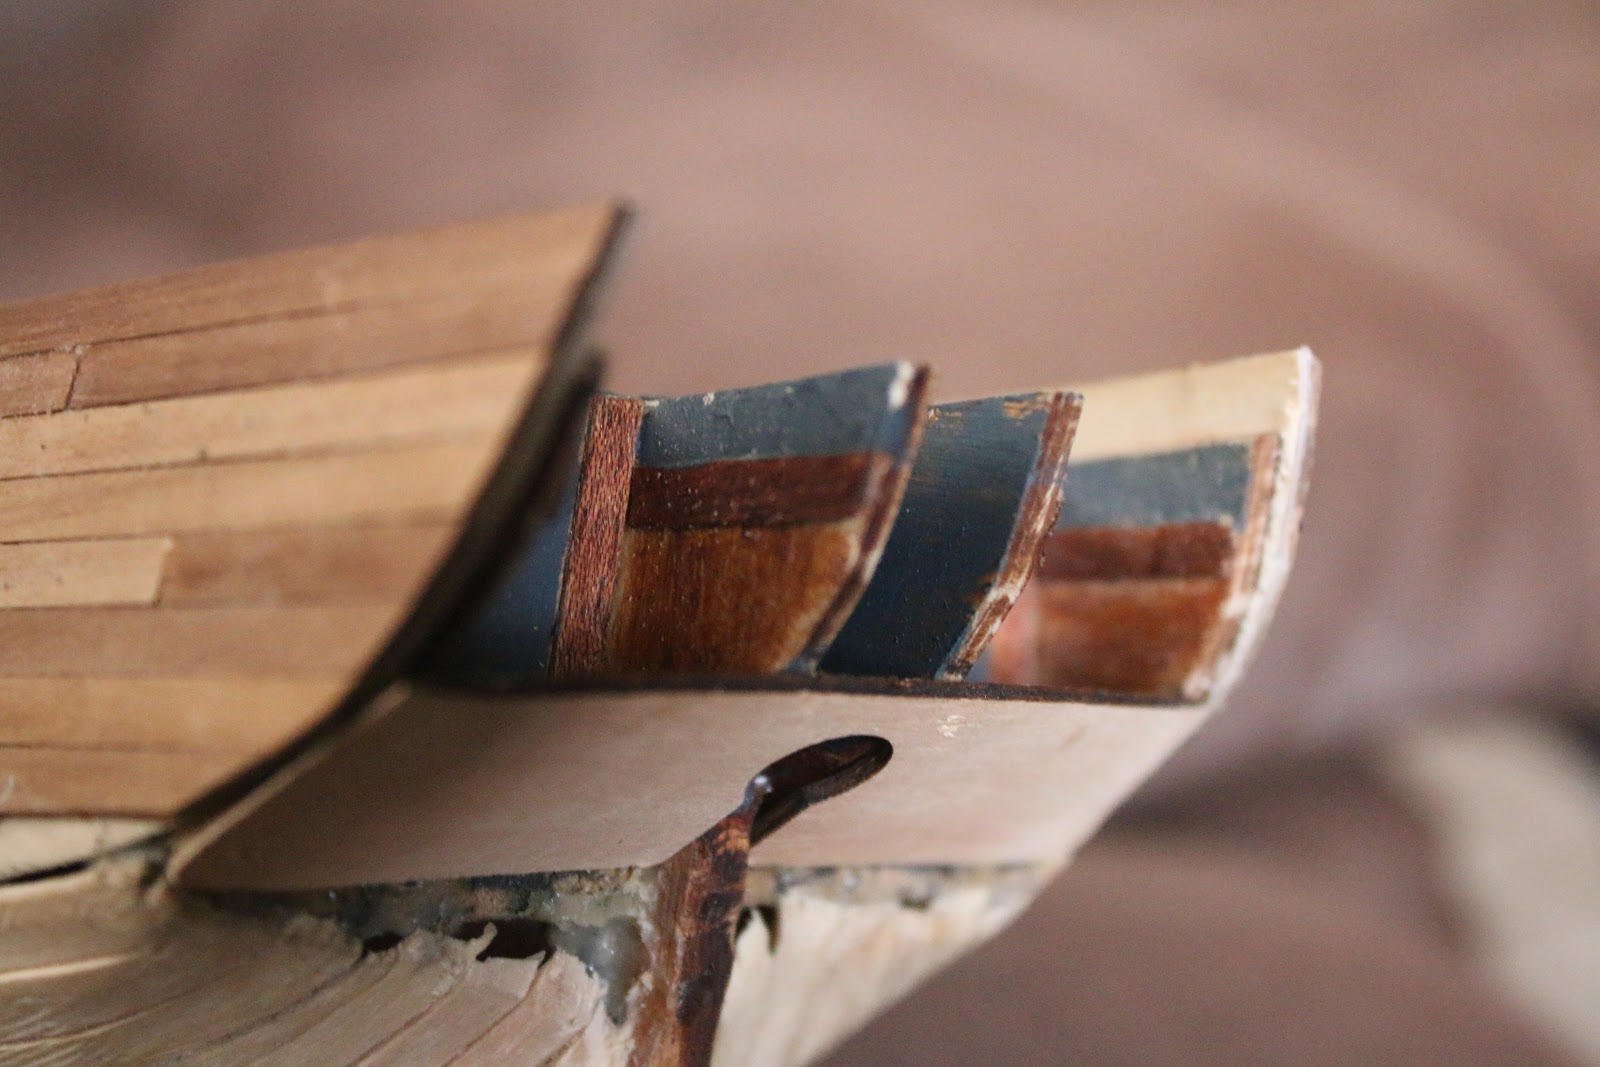
I also repainted my little separation wall that I had put in the back of the boat to match.

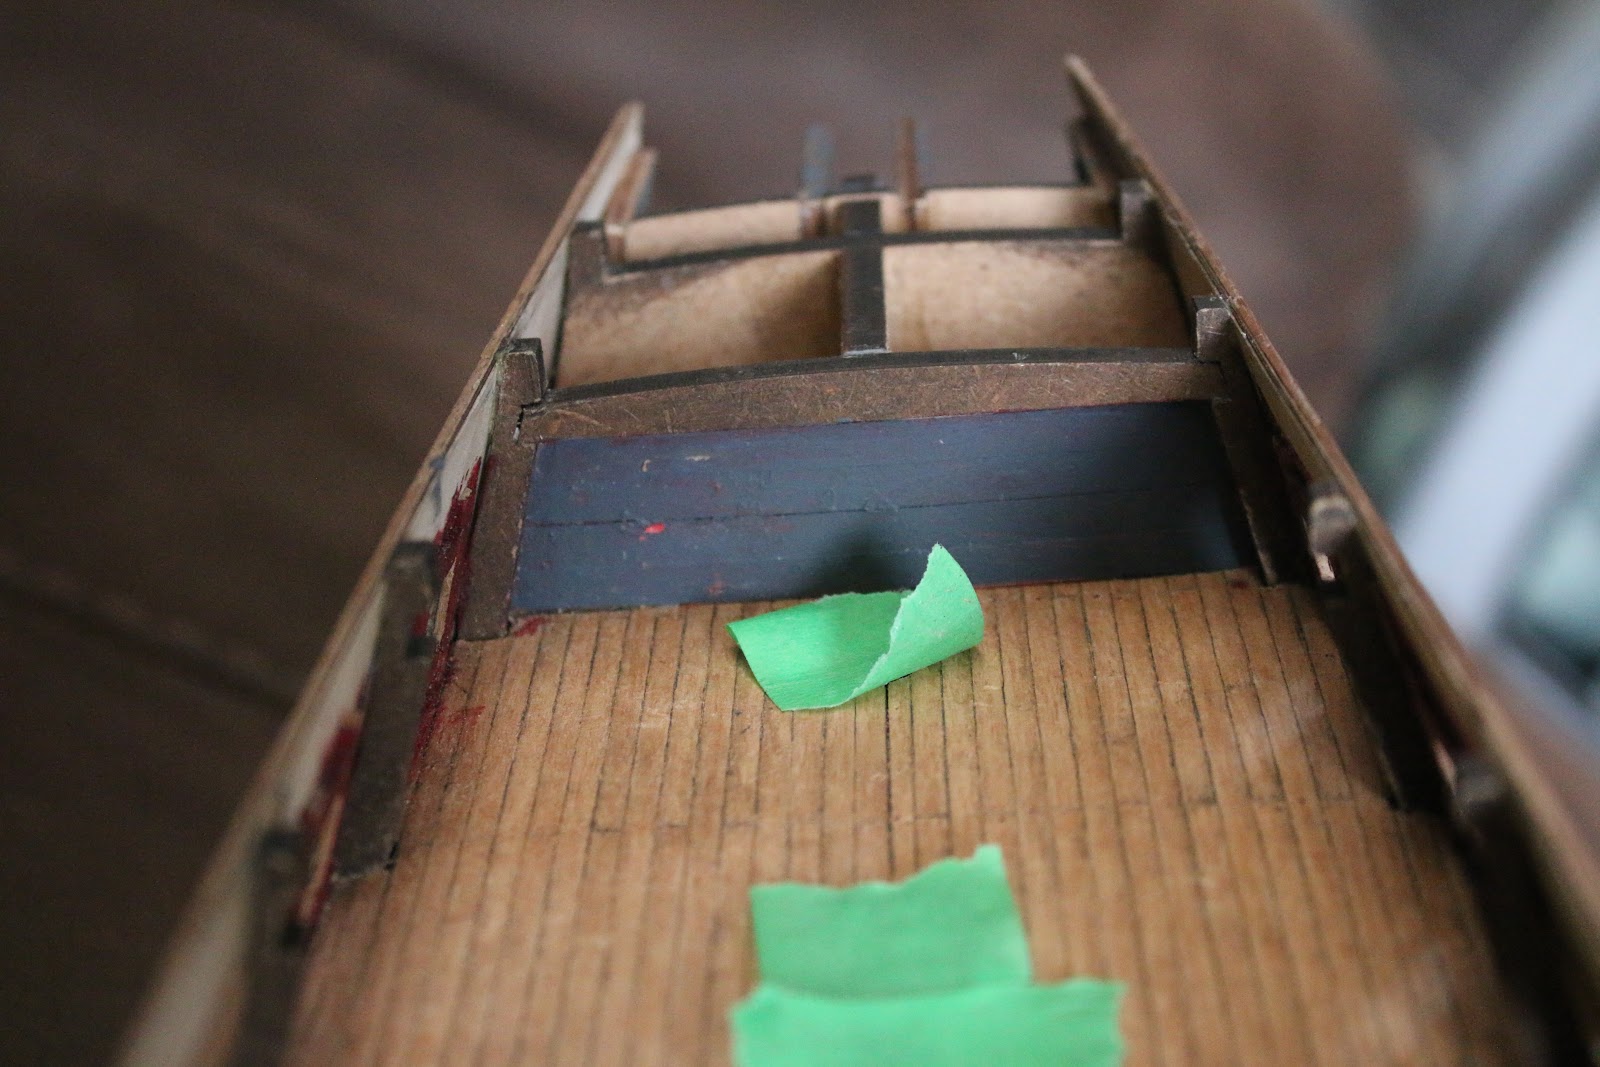
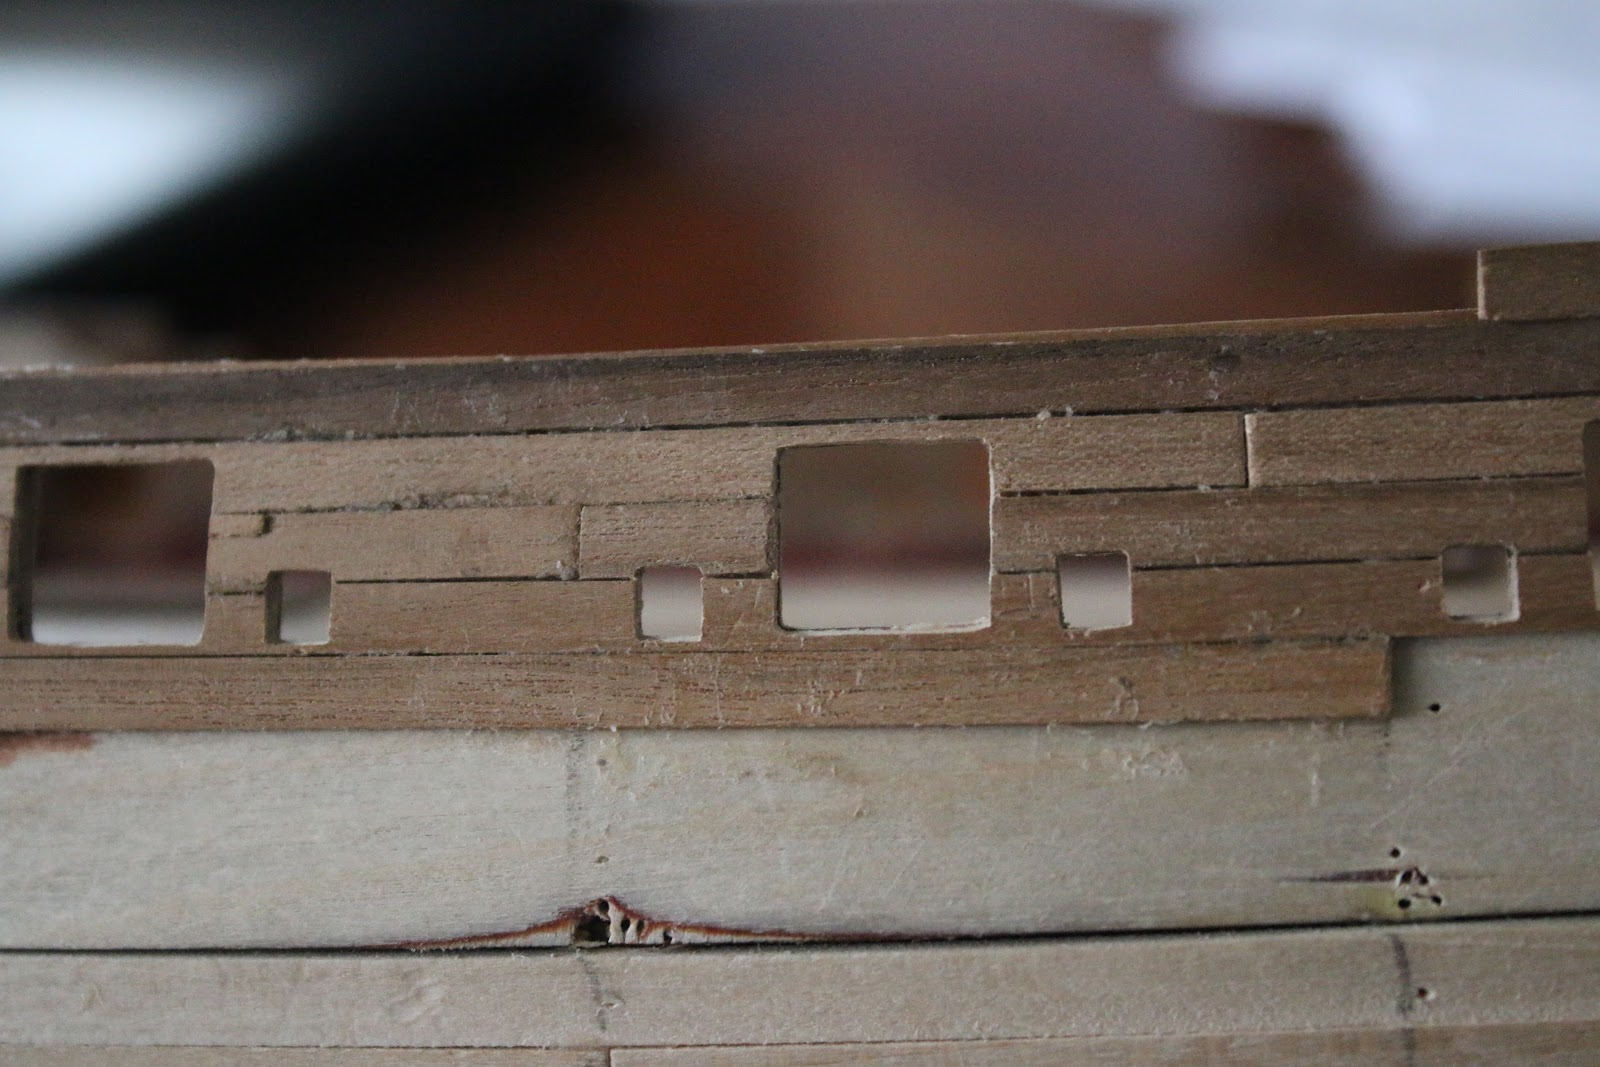
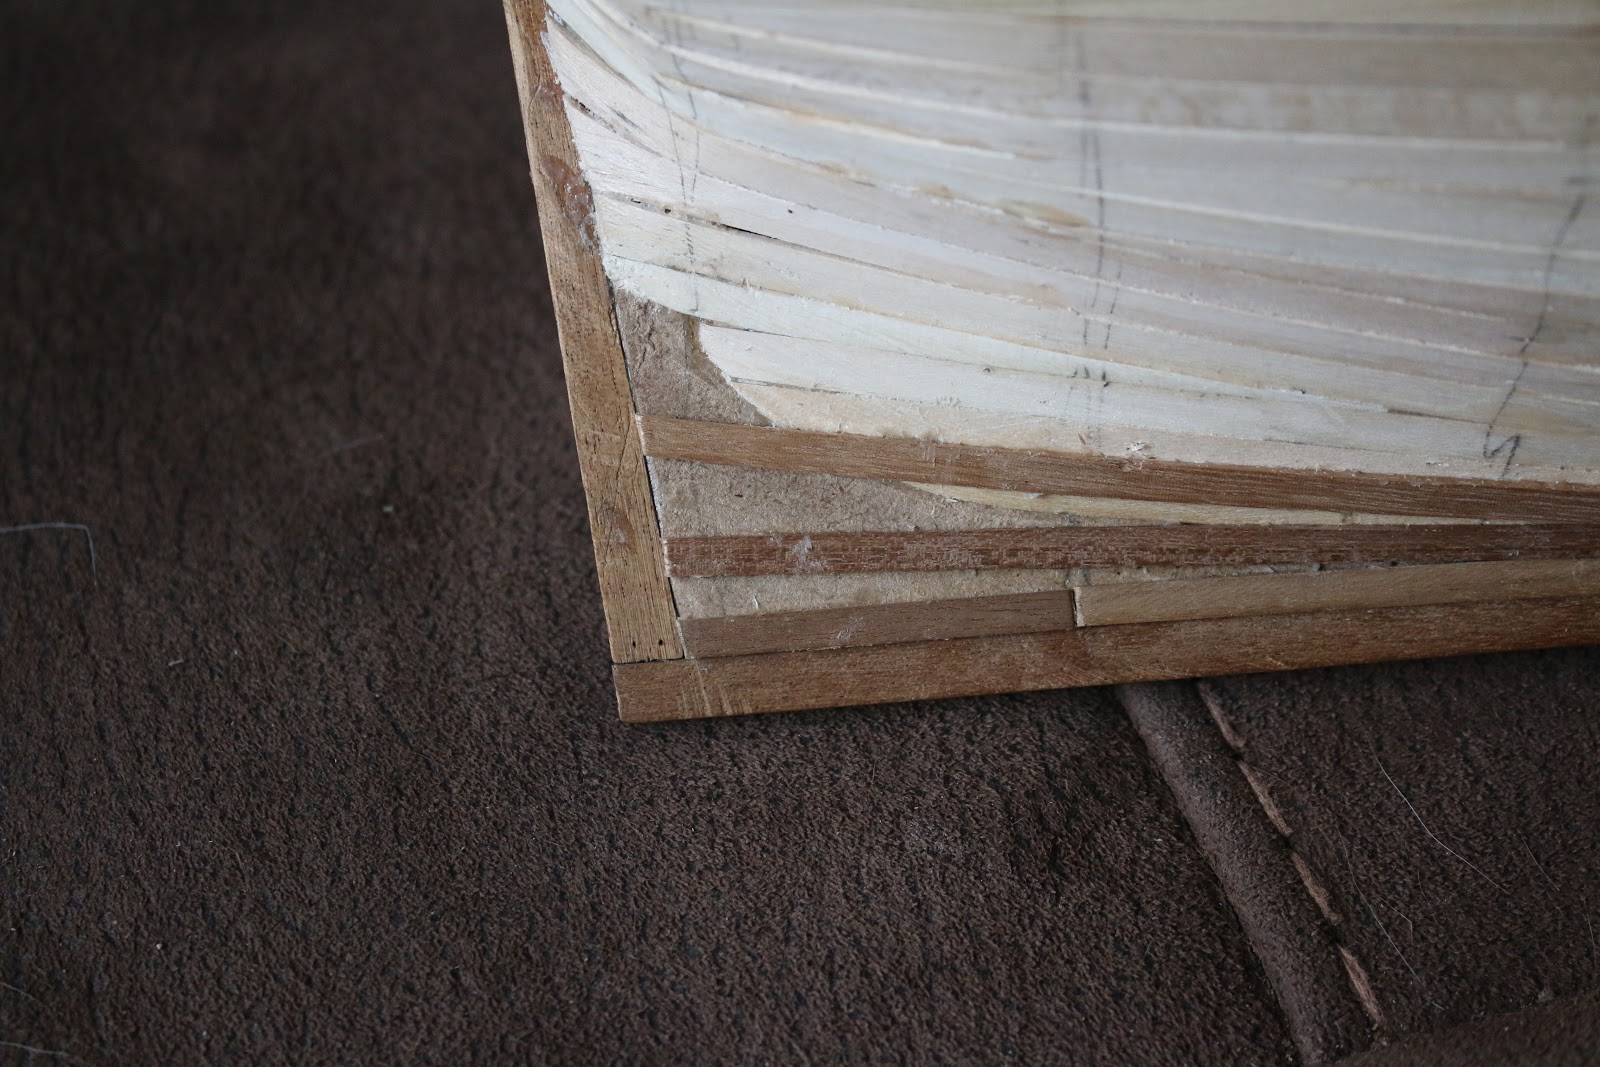
I then finished framing the gunports.

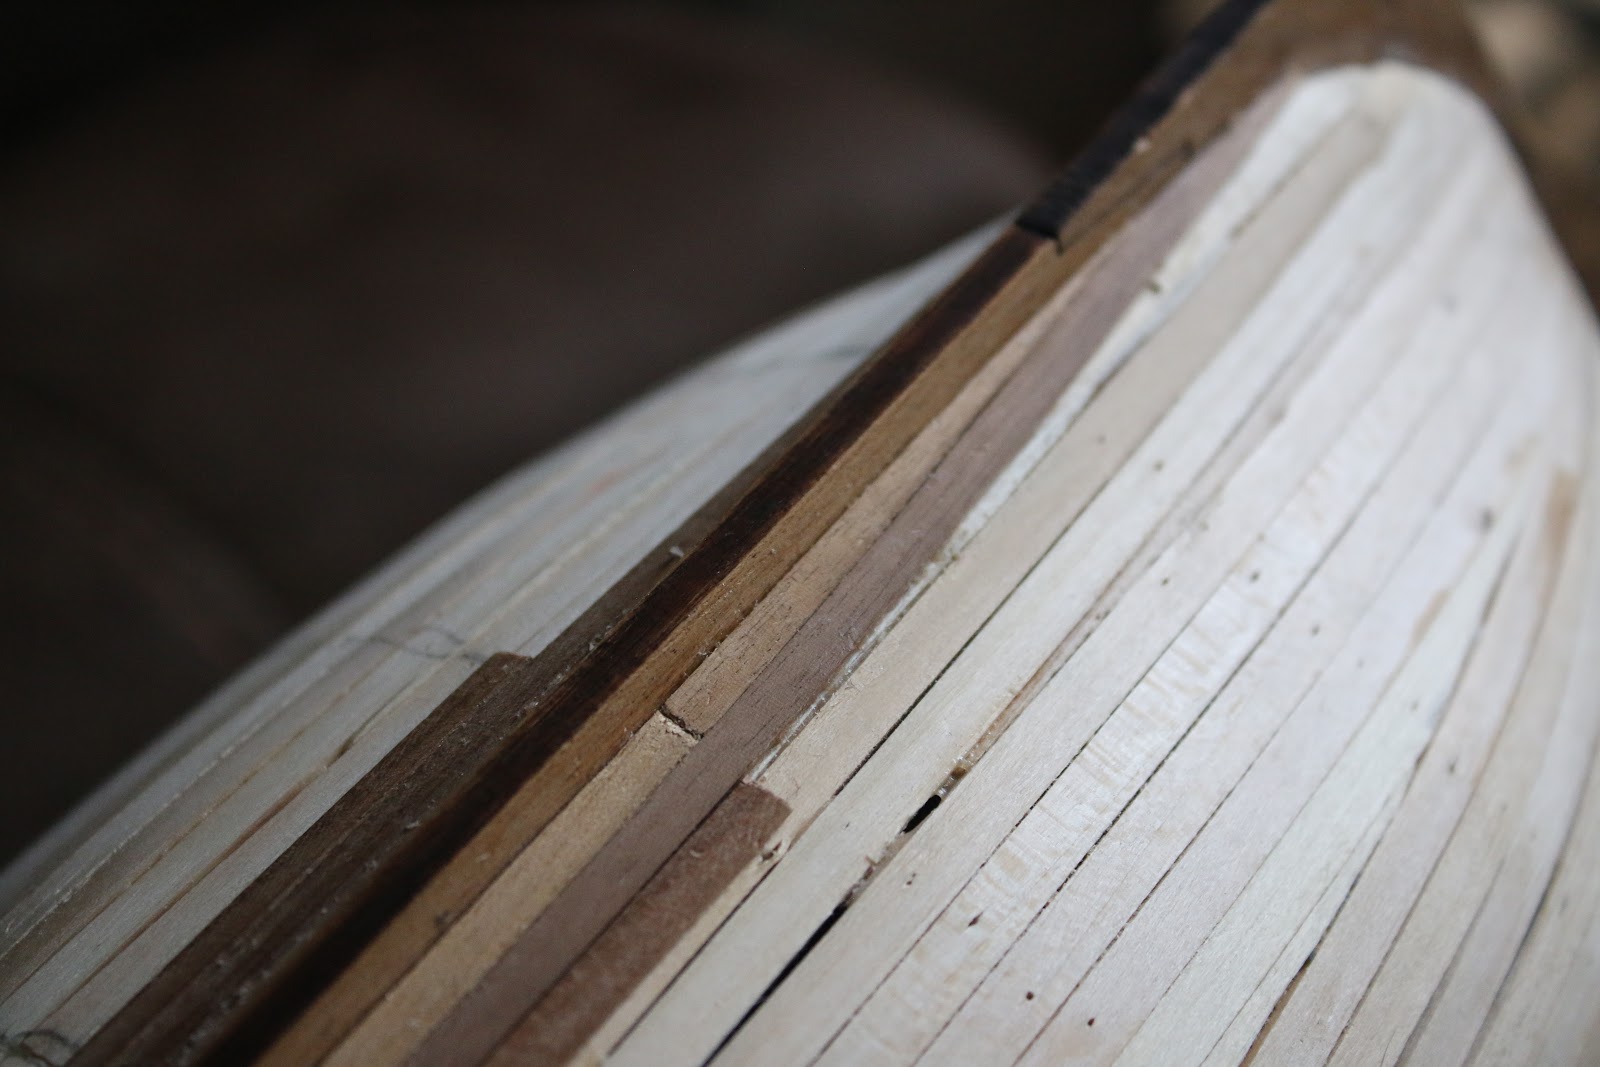
And then I decided to finally shape the top planks with the plywood template.

And I also finished planking the seen interior planking.

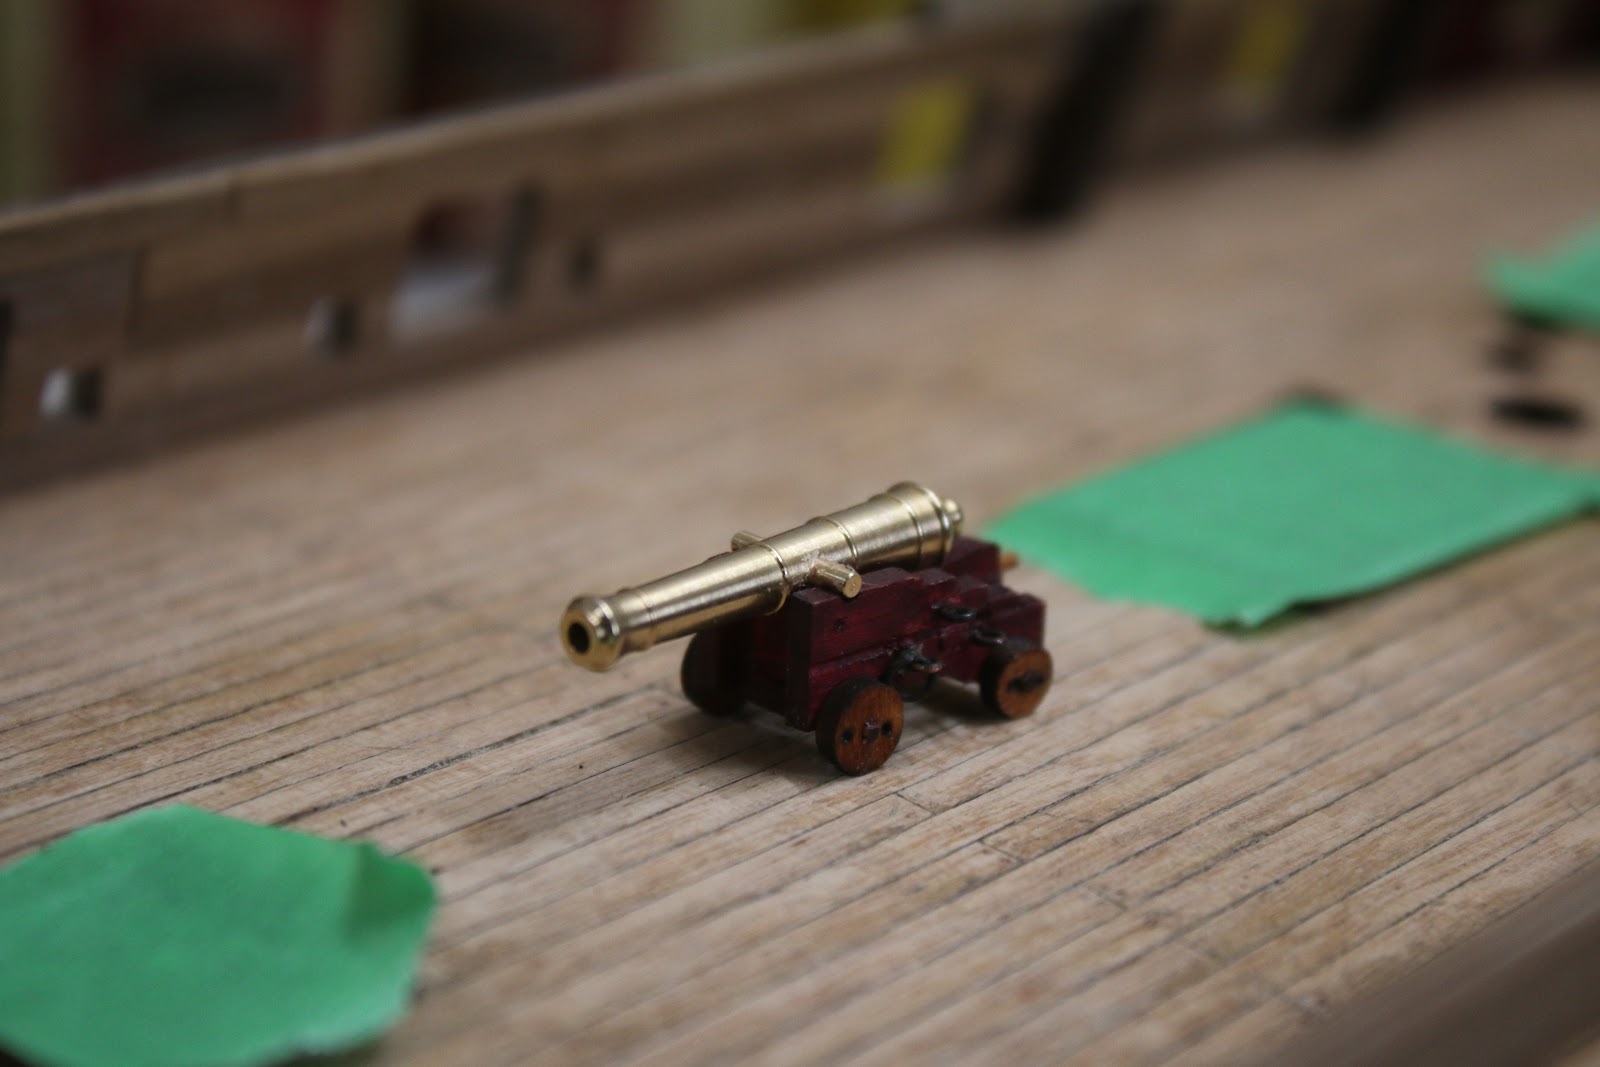
And then while waiting for that to dry I decided to try my hand at a “show” cannon. Which I would say turned out pretty good.

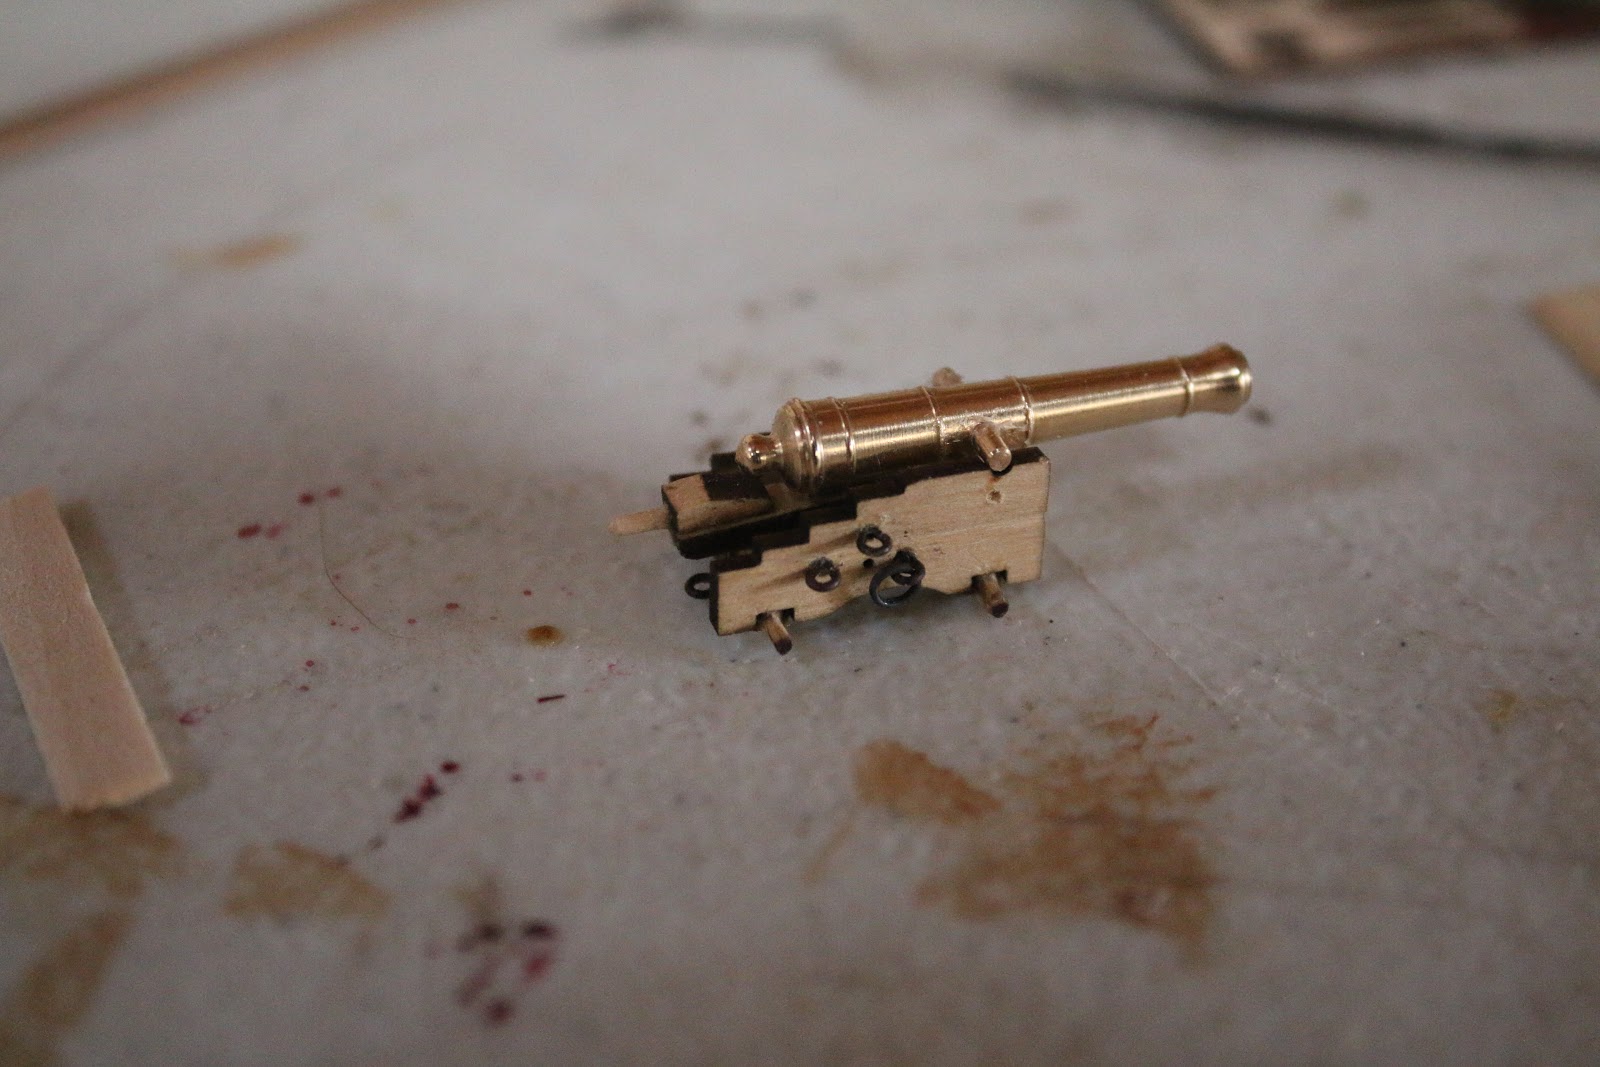
The next day after constructing the cannon I moved the whole model building operation to the shop my family and I have been building for 2 years now.

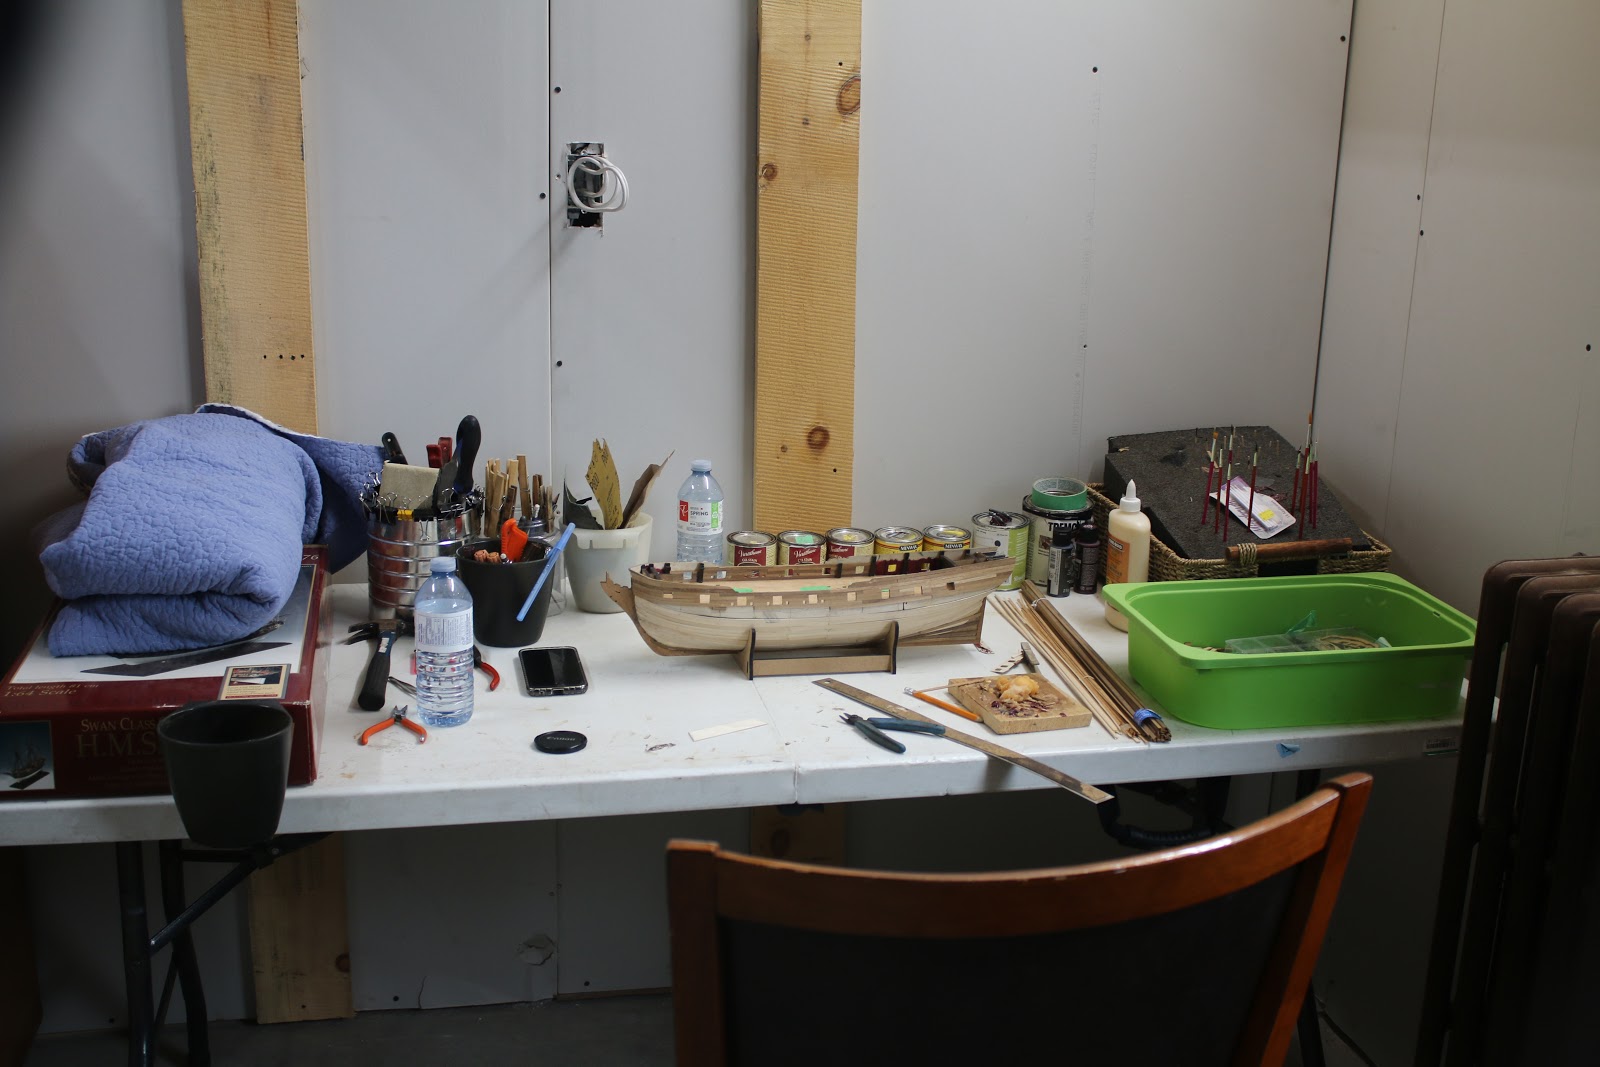
That night I installed some more planking working my way down past the gun deck.

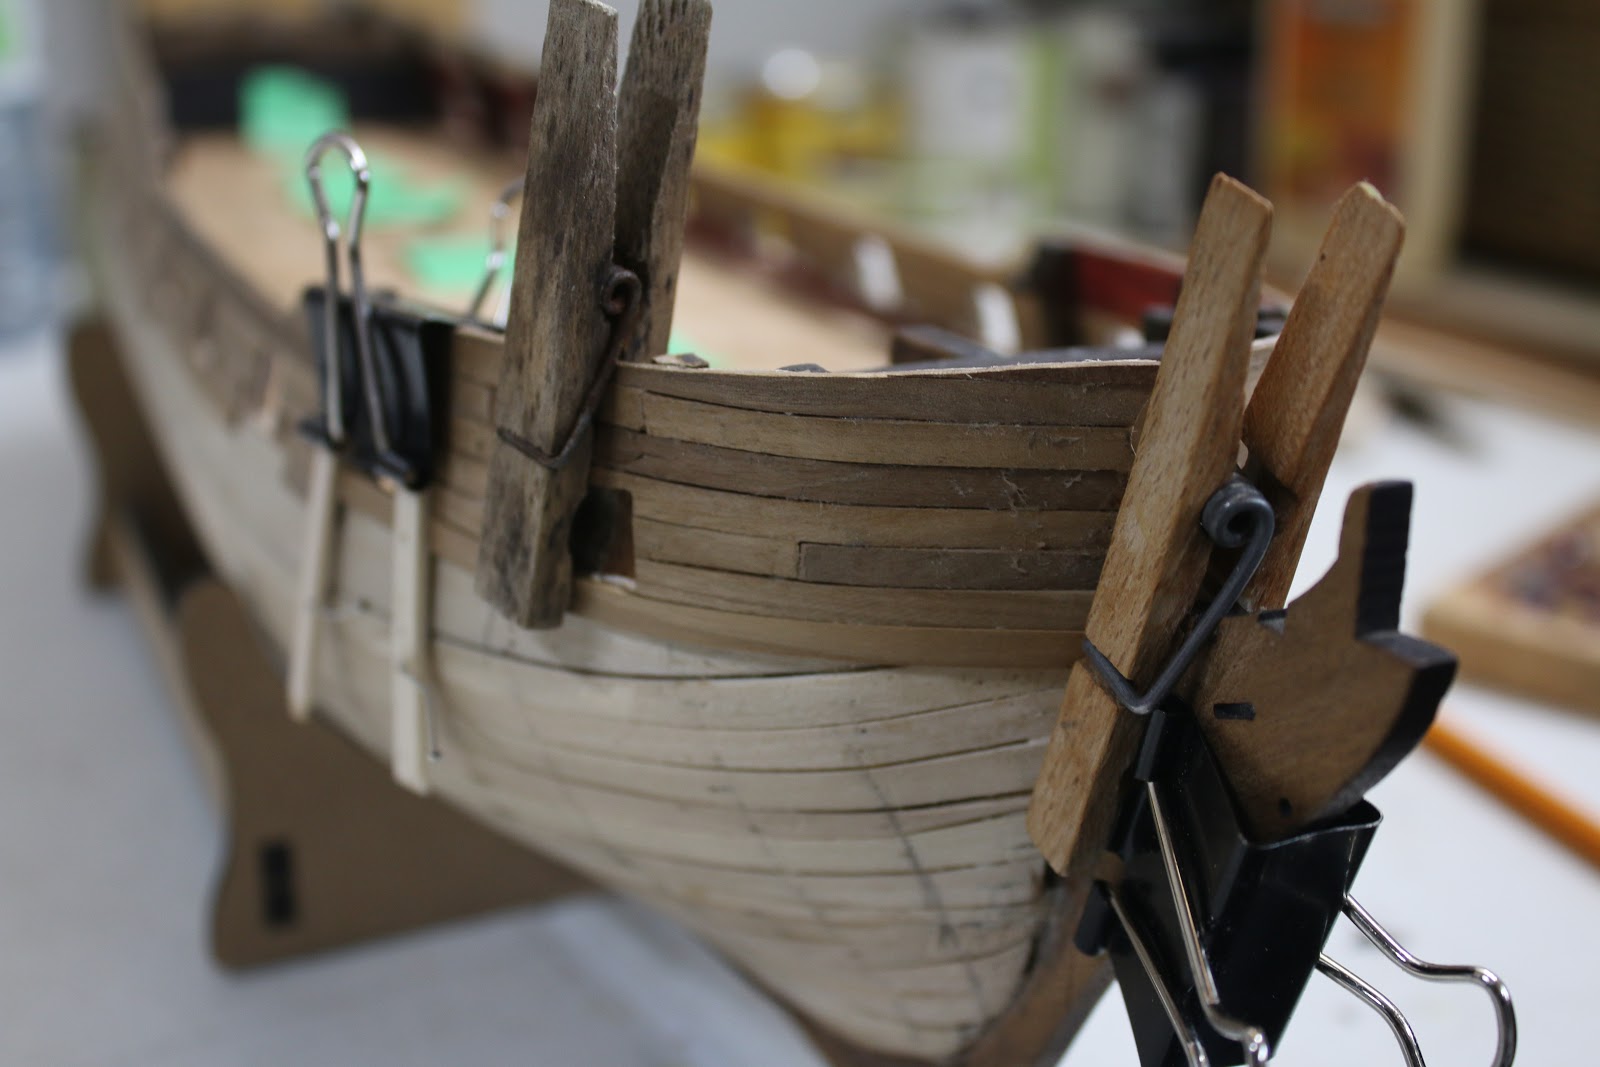
I also “attempted” to construct the wall for the captain's cabin but I'm not quite happy with it and may very well restart it.

I also painted the interior where it won't be seen. I know it's rough but it won't be seen so I'm not entirely worried about it.

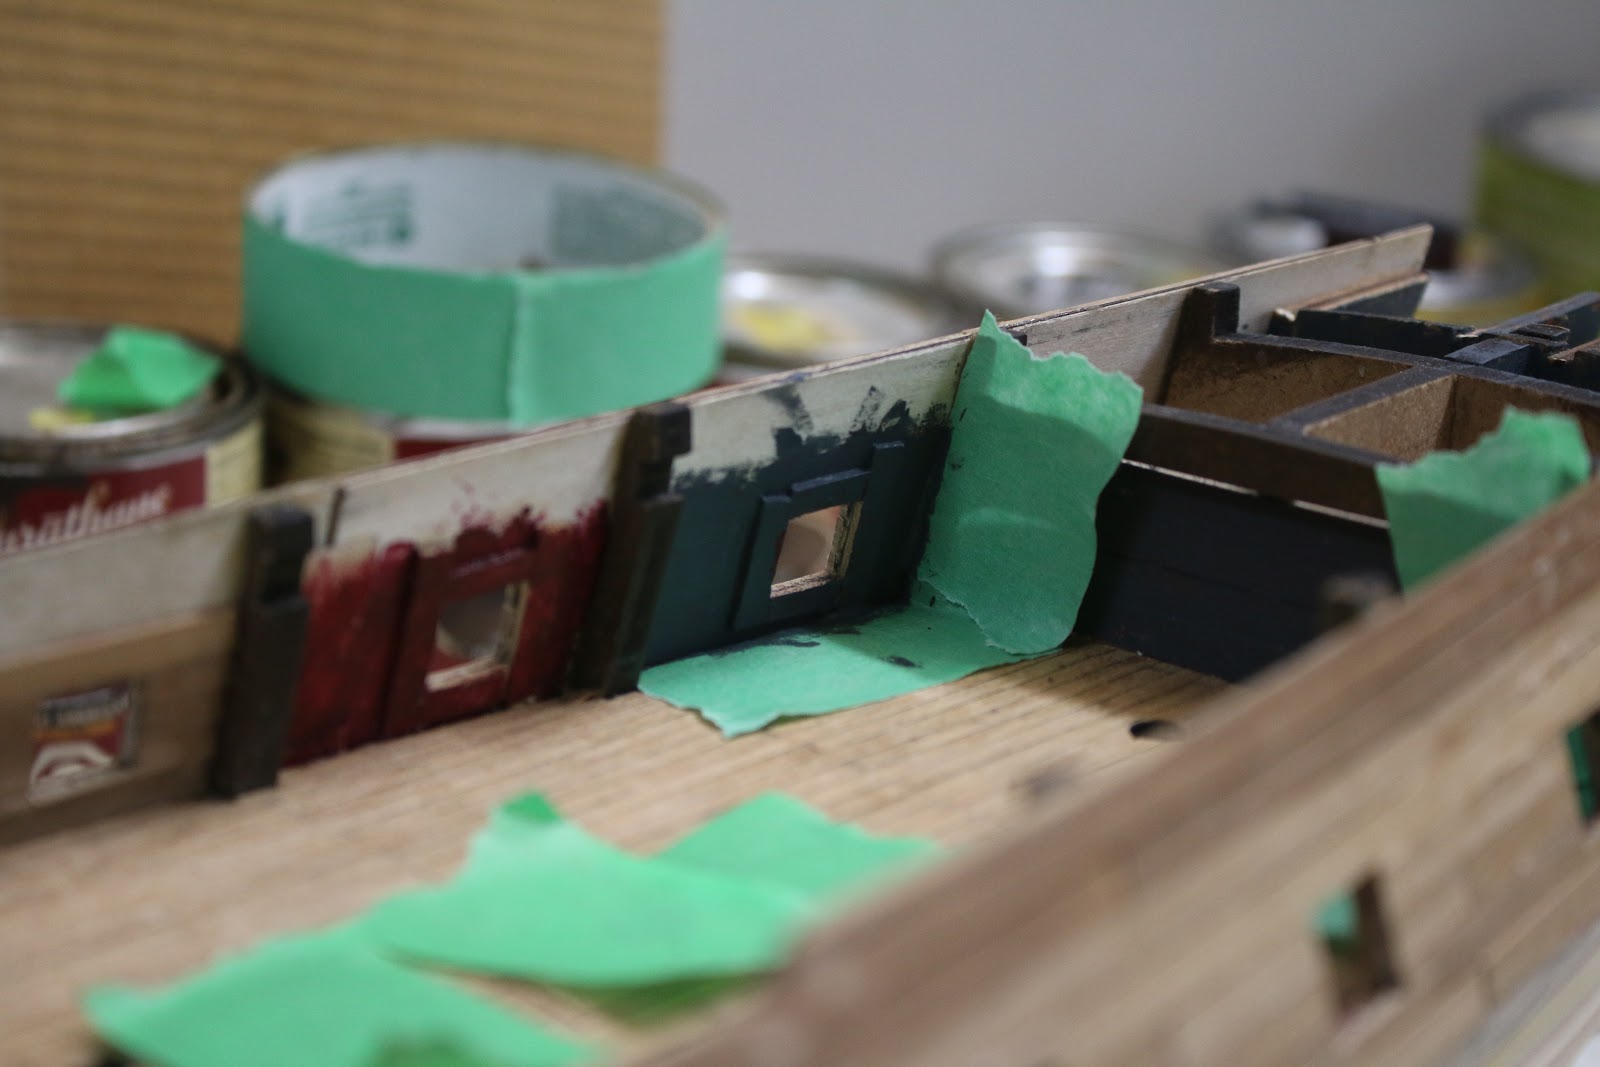
Then moving forwards I went on to installing an extra plank on the bottom of the interior. An idea that I got from Blue Ensign’s HMS Pegasus build

https://modelshipworld.com/topic/15526-hms-pegasus-by-blue-ensign-finished-victory-models-164-scale

I also went ahead and started a second carriage, which while my paint did improve I will not have it in the open part of the deck but rather the first port under the opening in the top decks, due to its misplacement of the upper eyebolts.

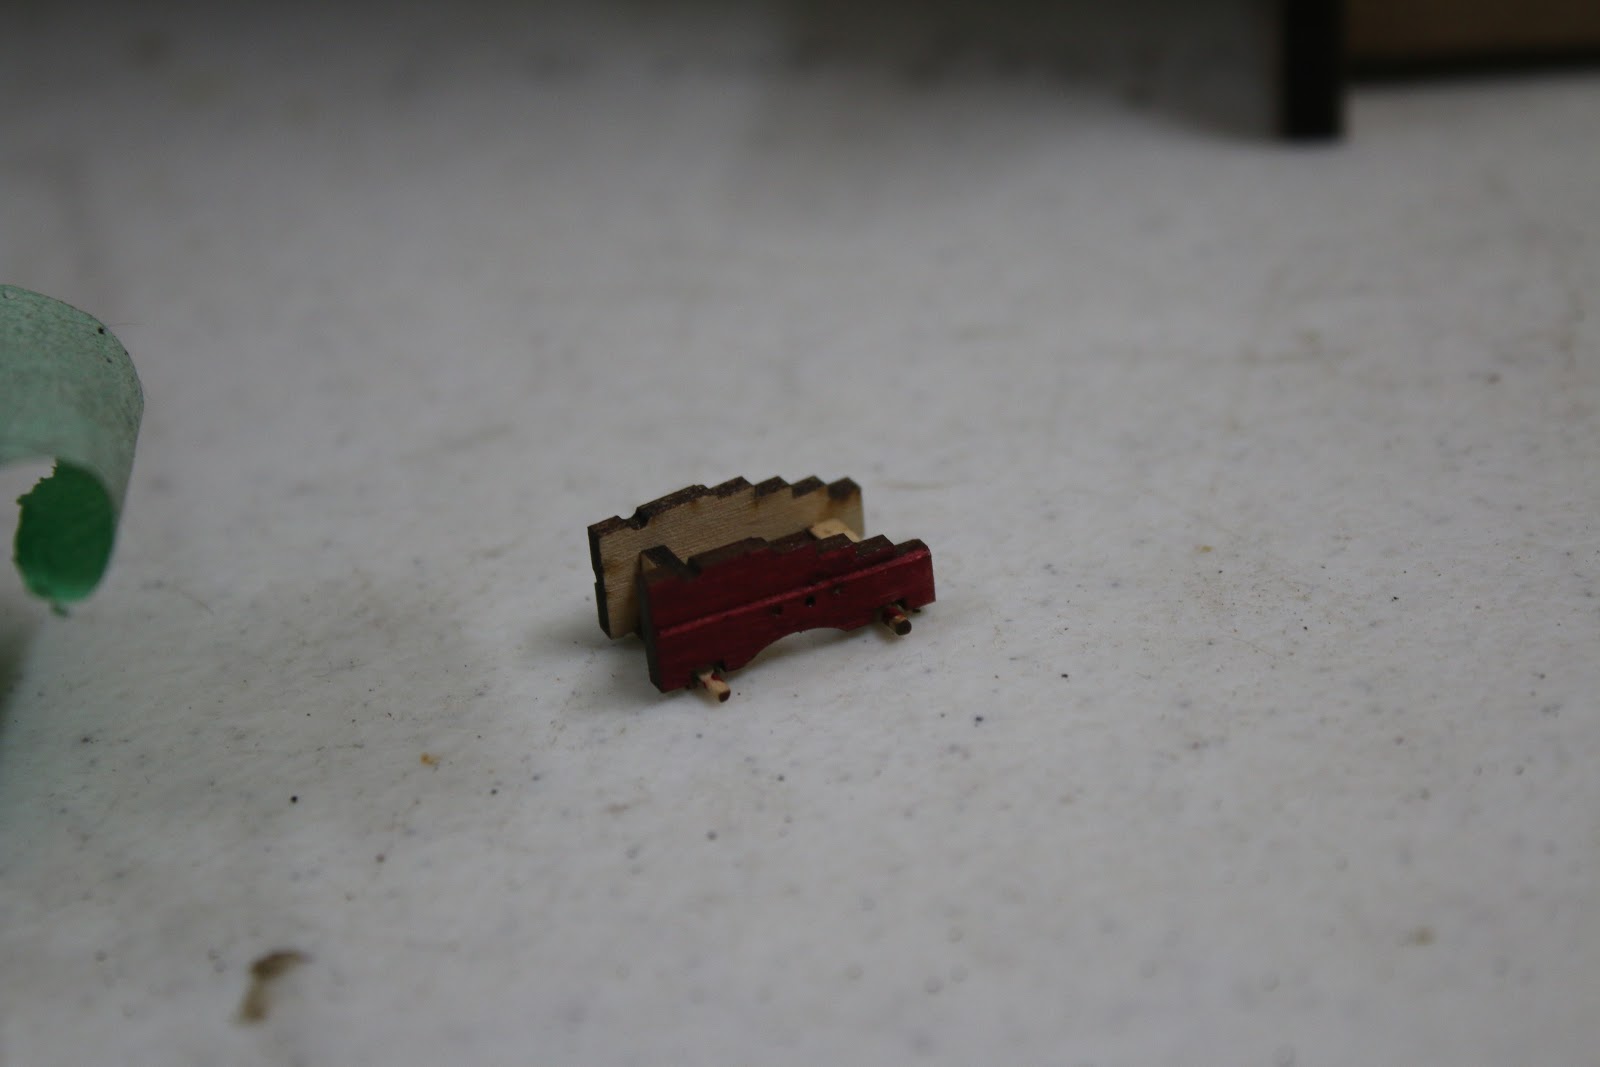
The next day I removed the clamps on the extra interior plank.

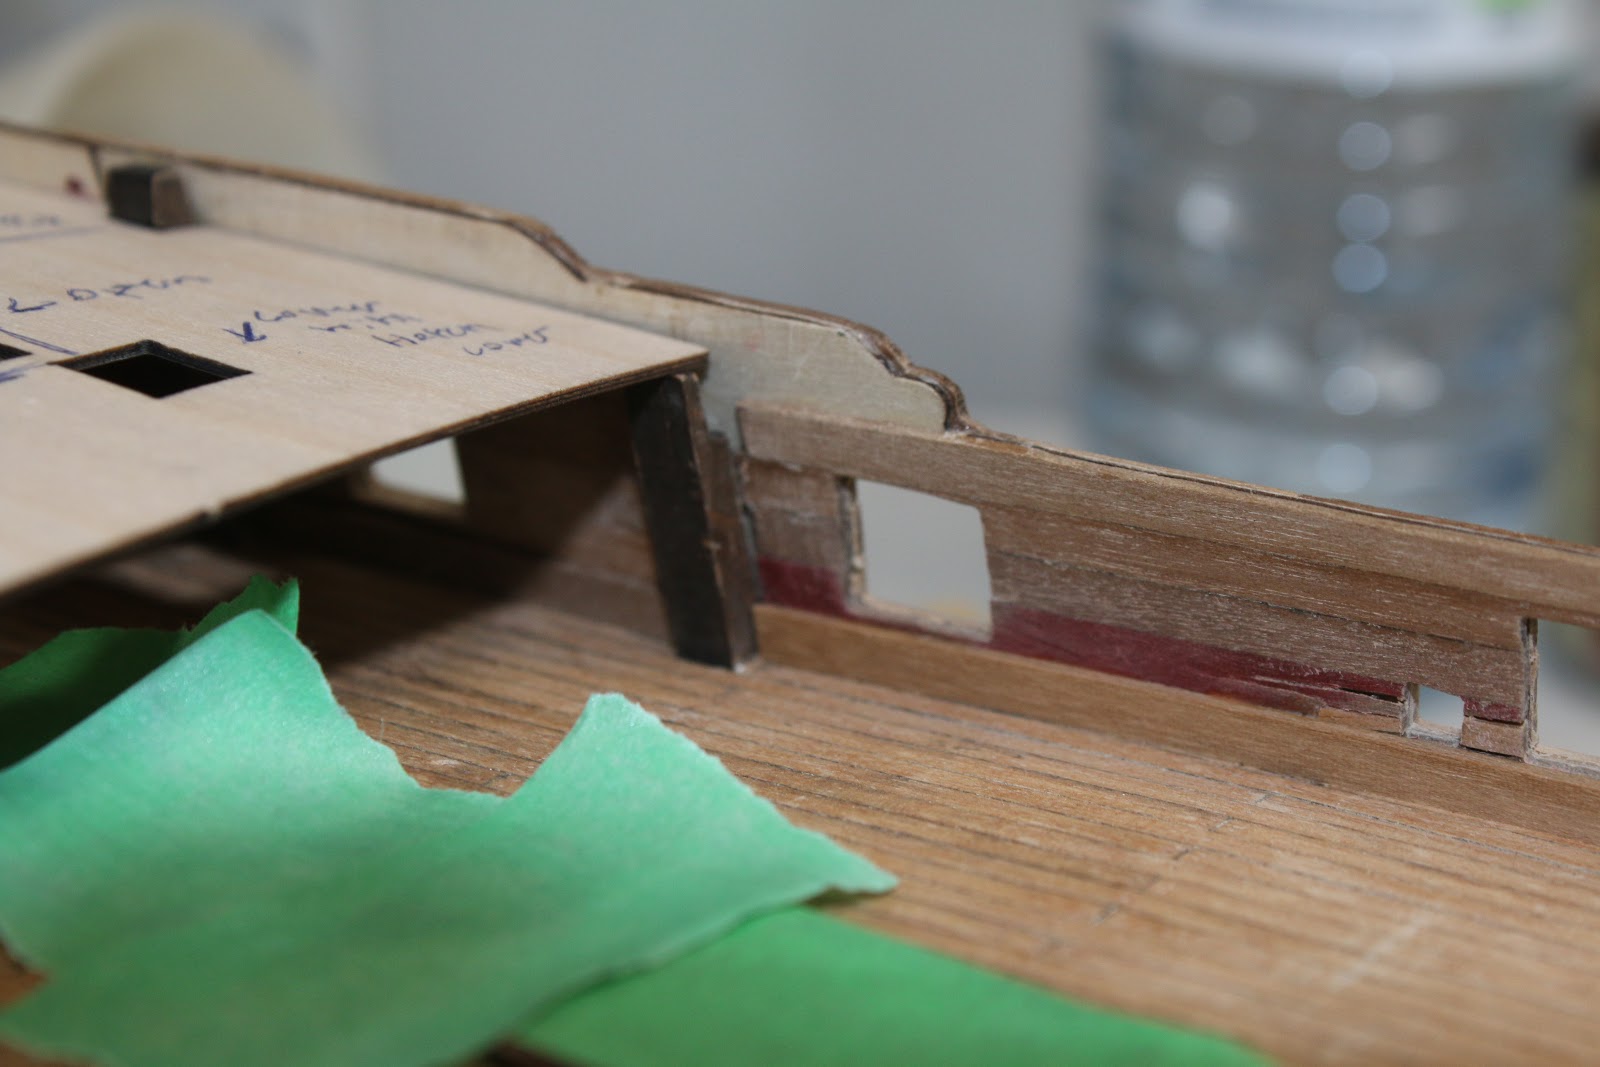
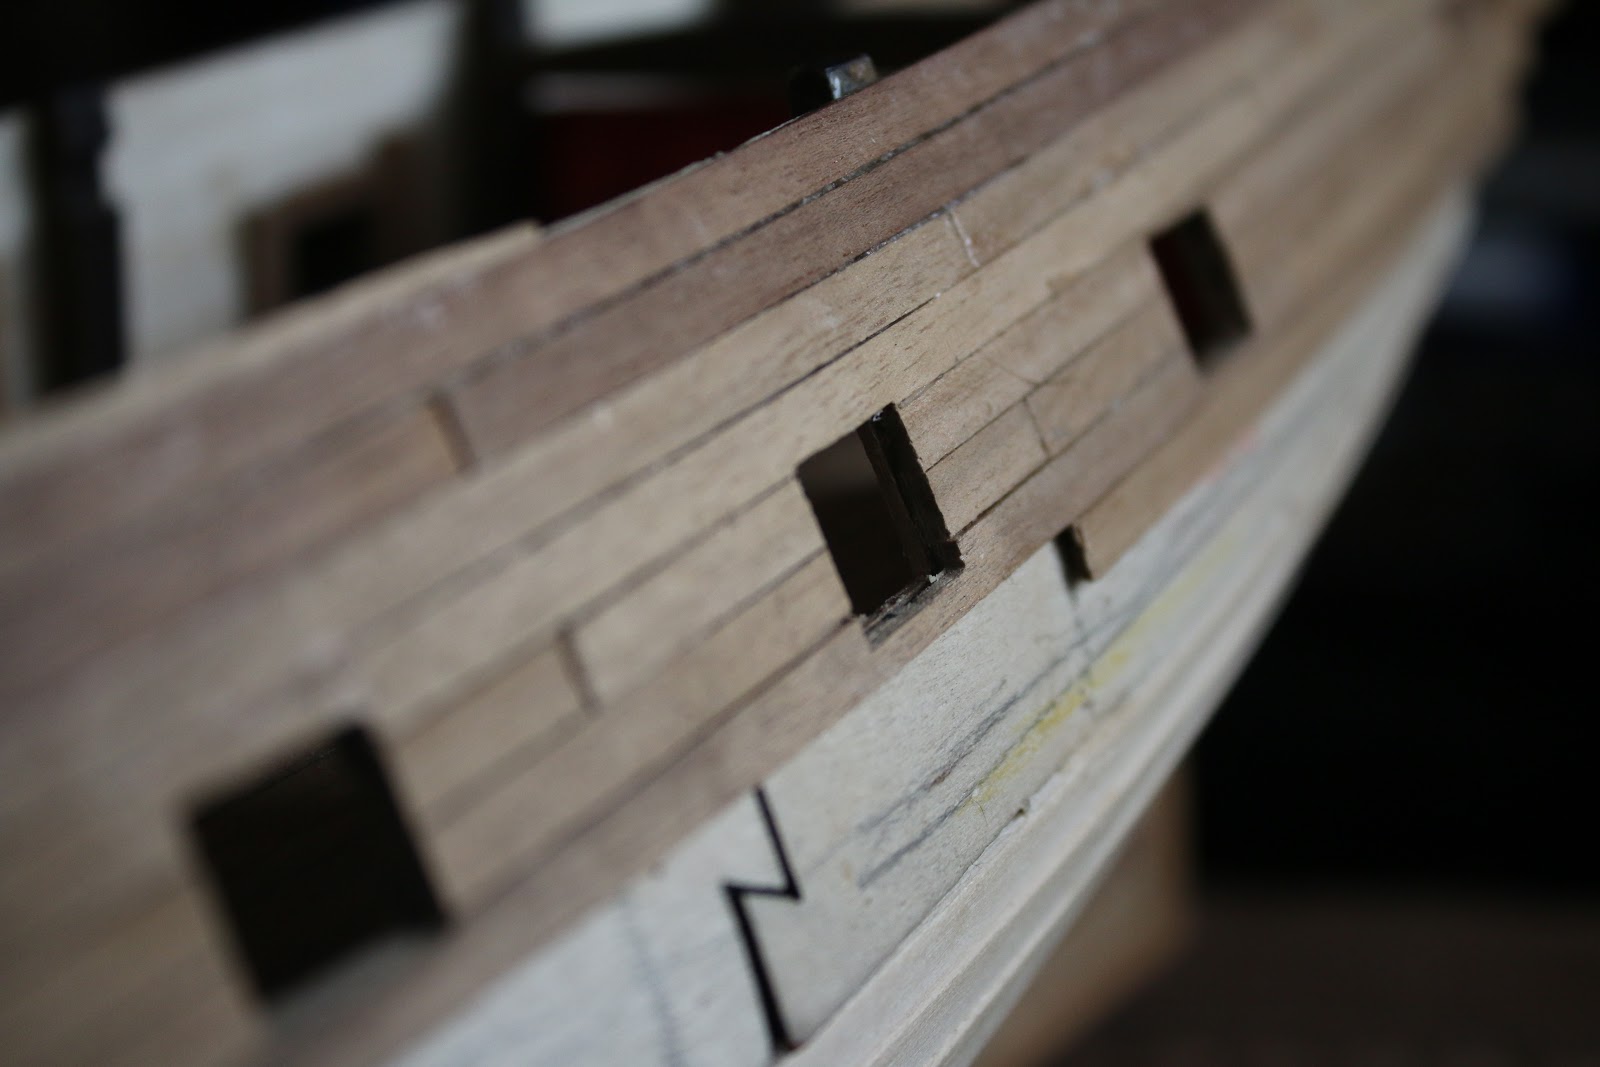
And prepared to file and finalize the gunports.

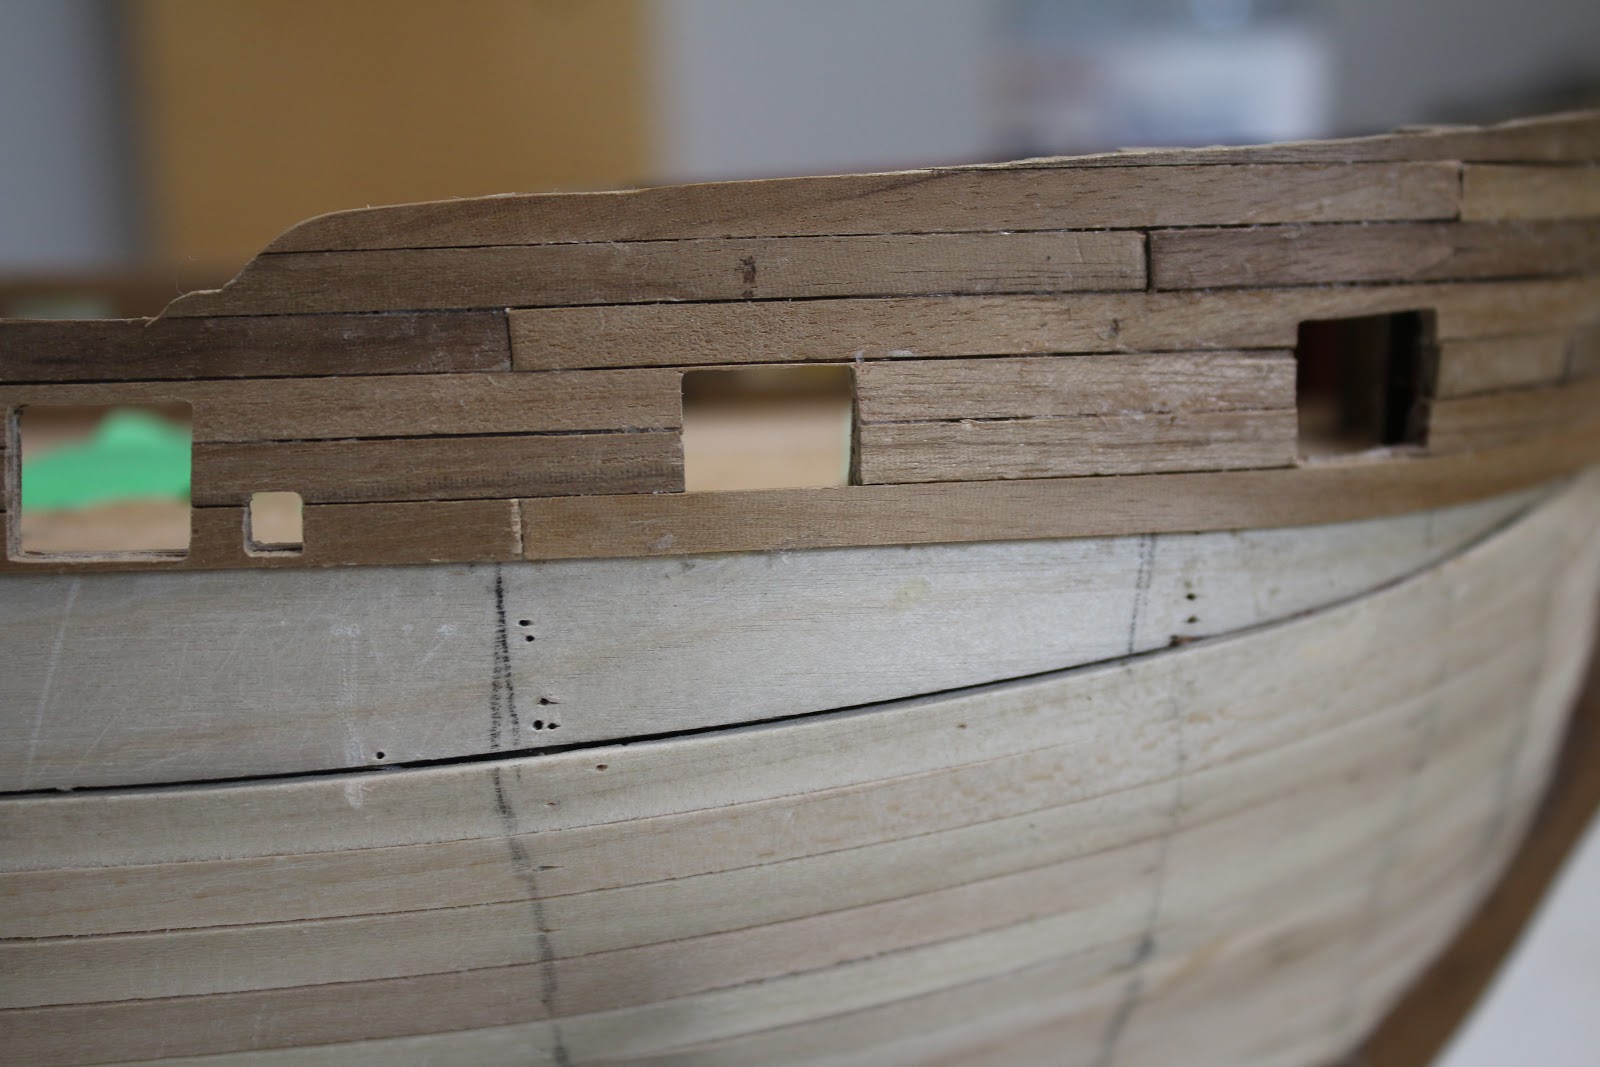
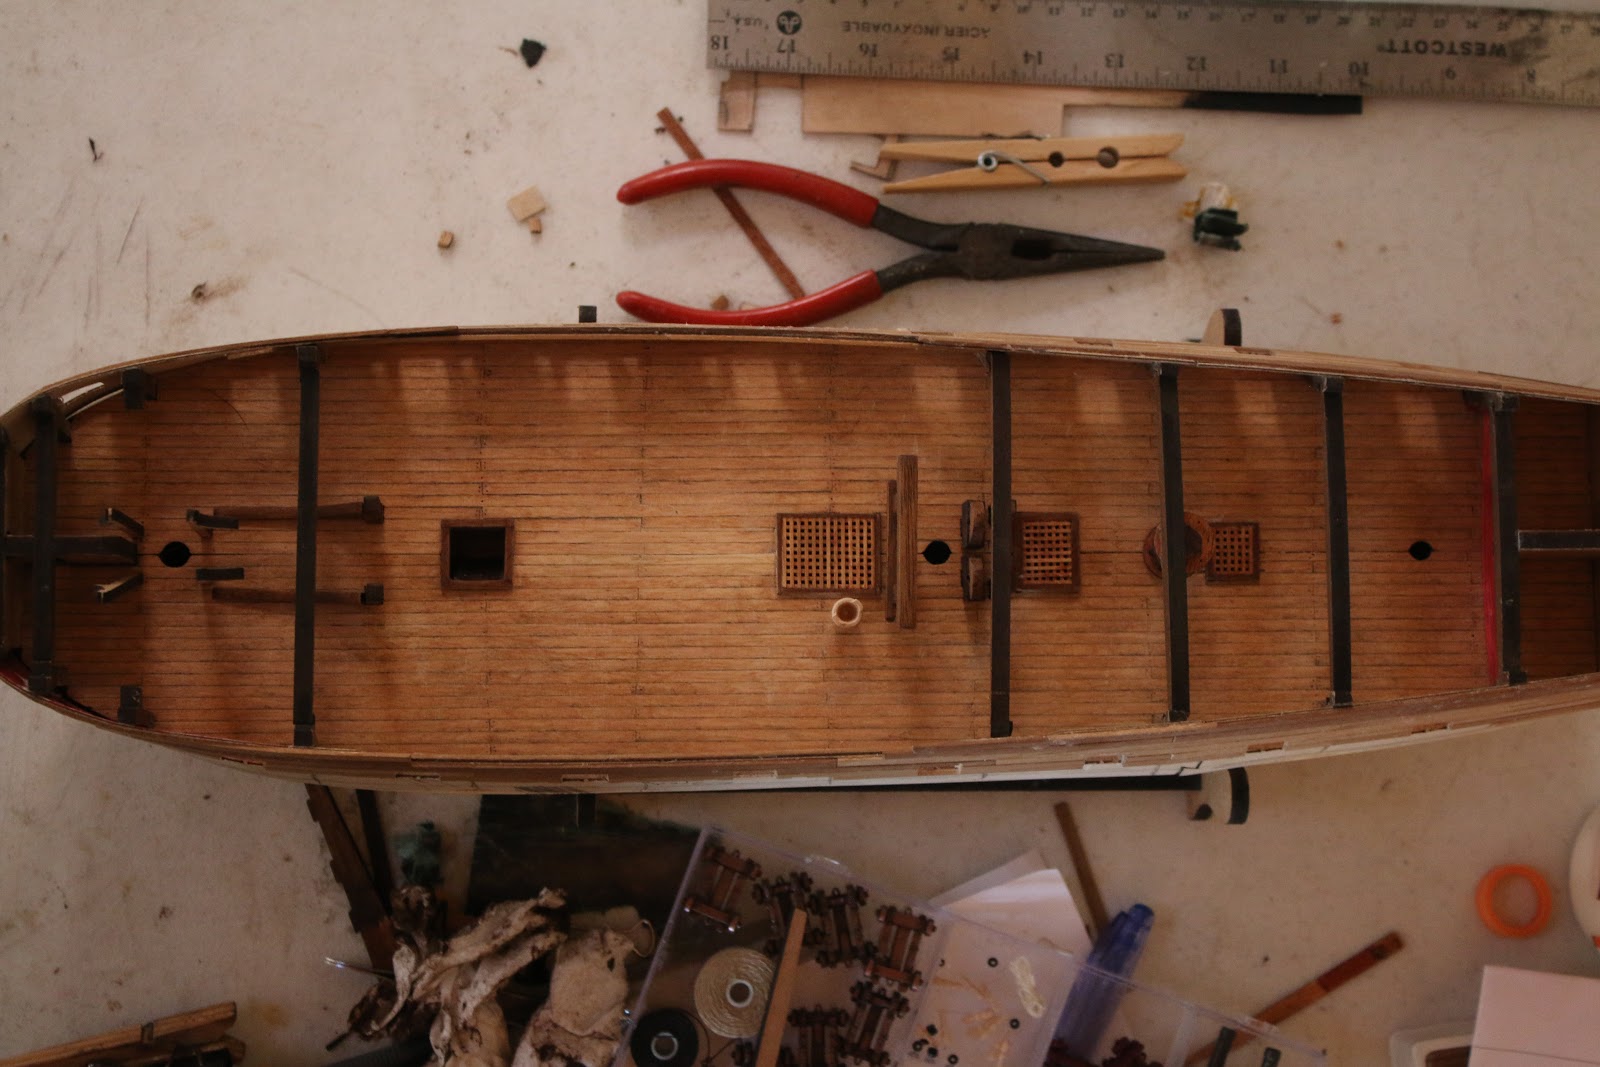
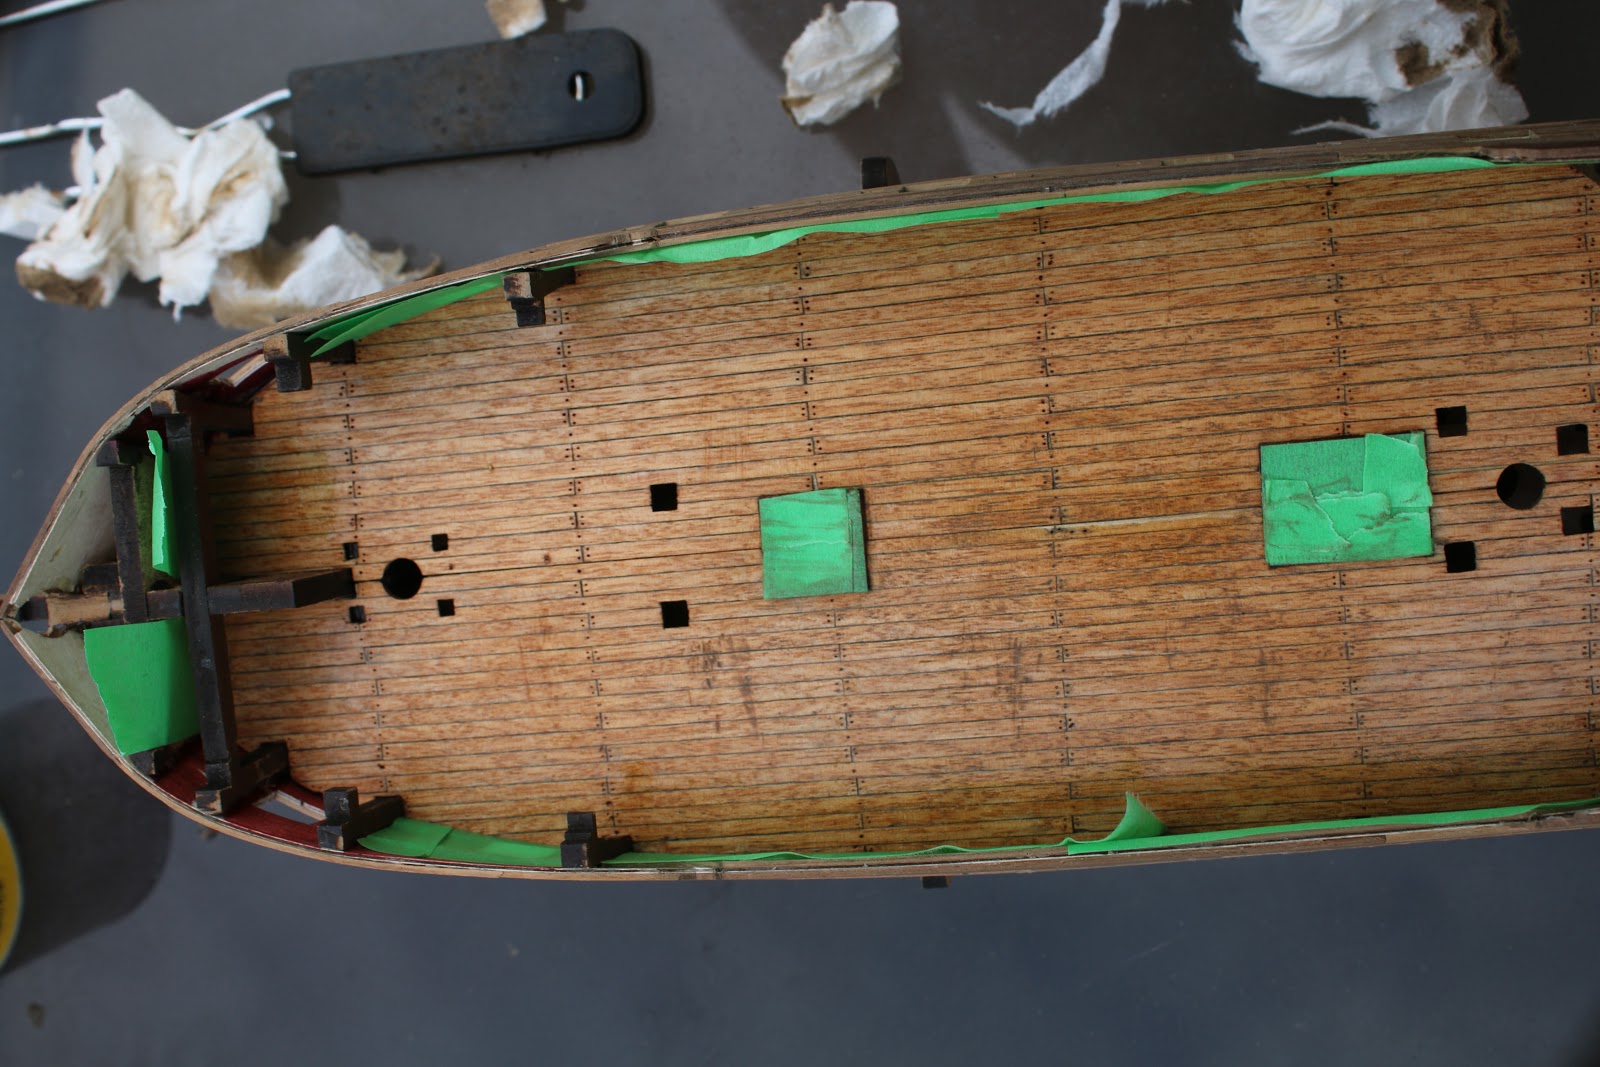
Then finally being past the gunports with the planking I began to prepare the deck for refinishing.

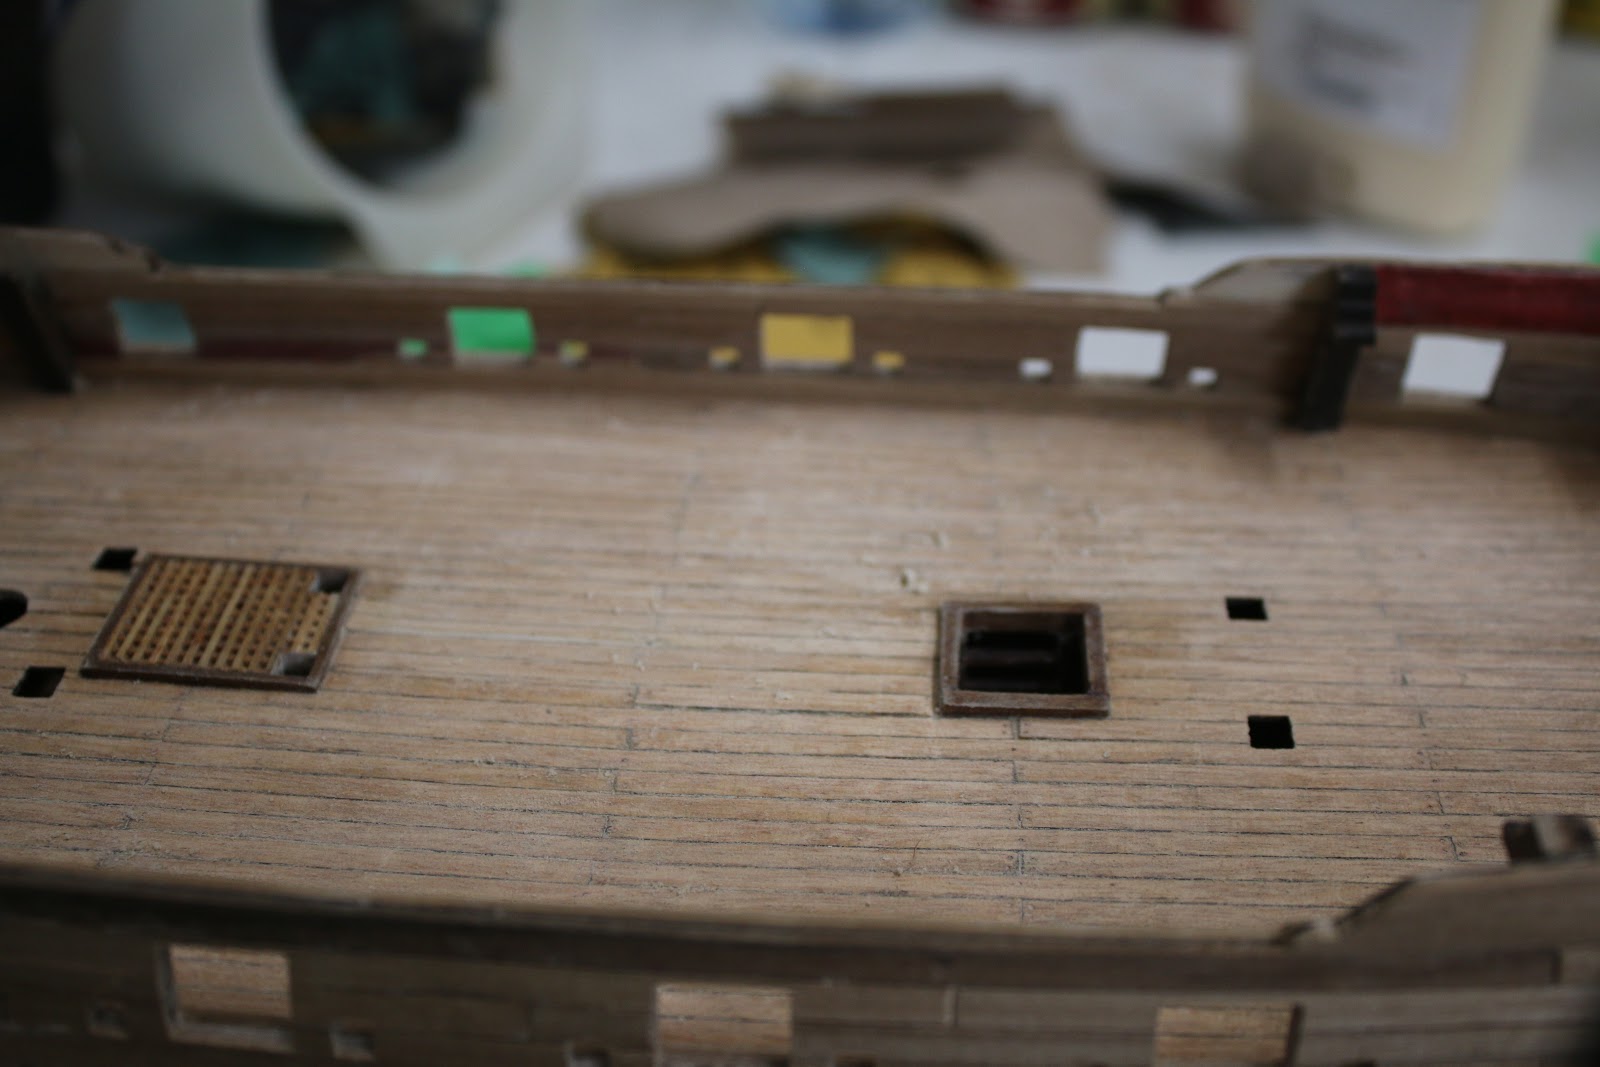
Then using an air hose and compressor, I removed all the dust and dirt from the deck.

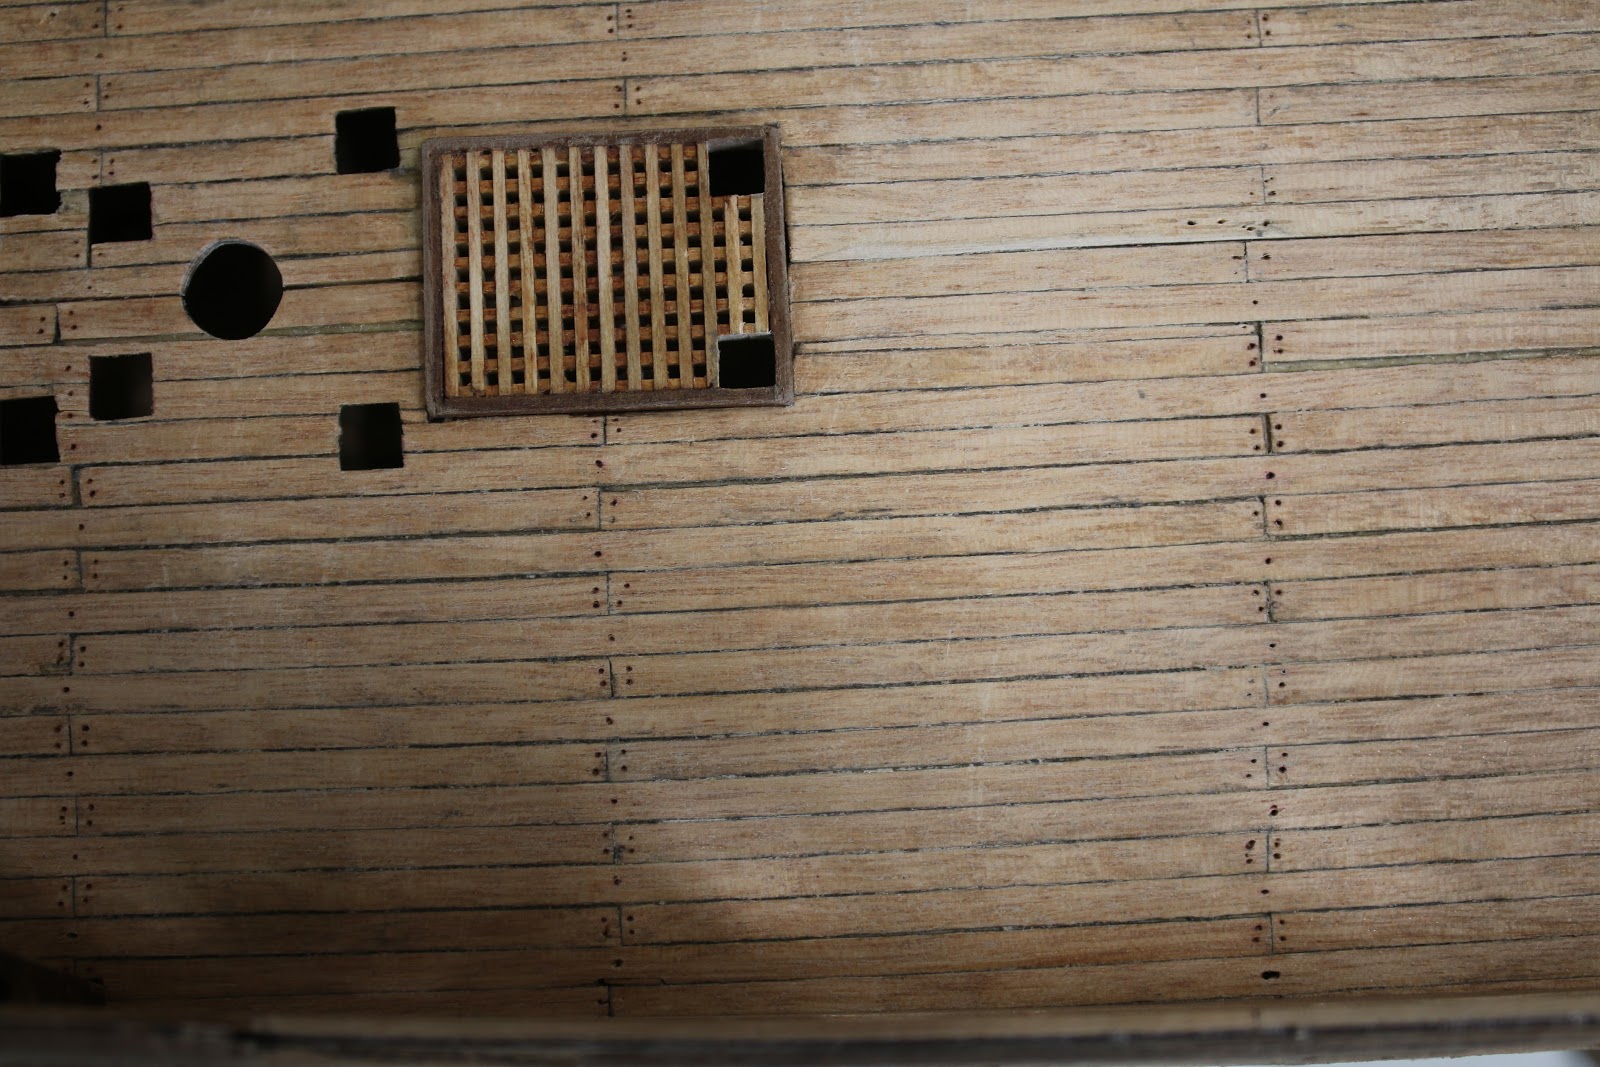
I then framed the hatches in masking tape and refinished them.

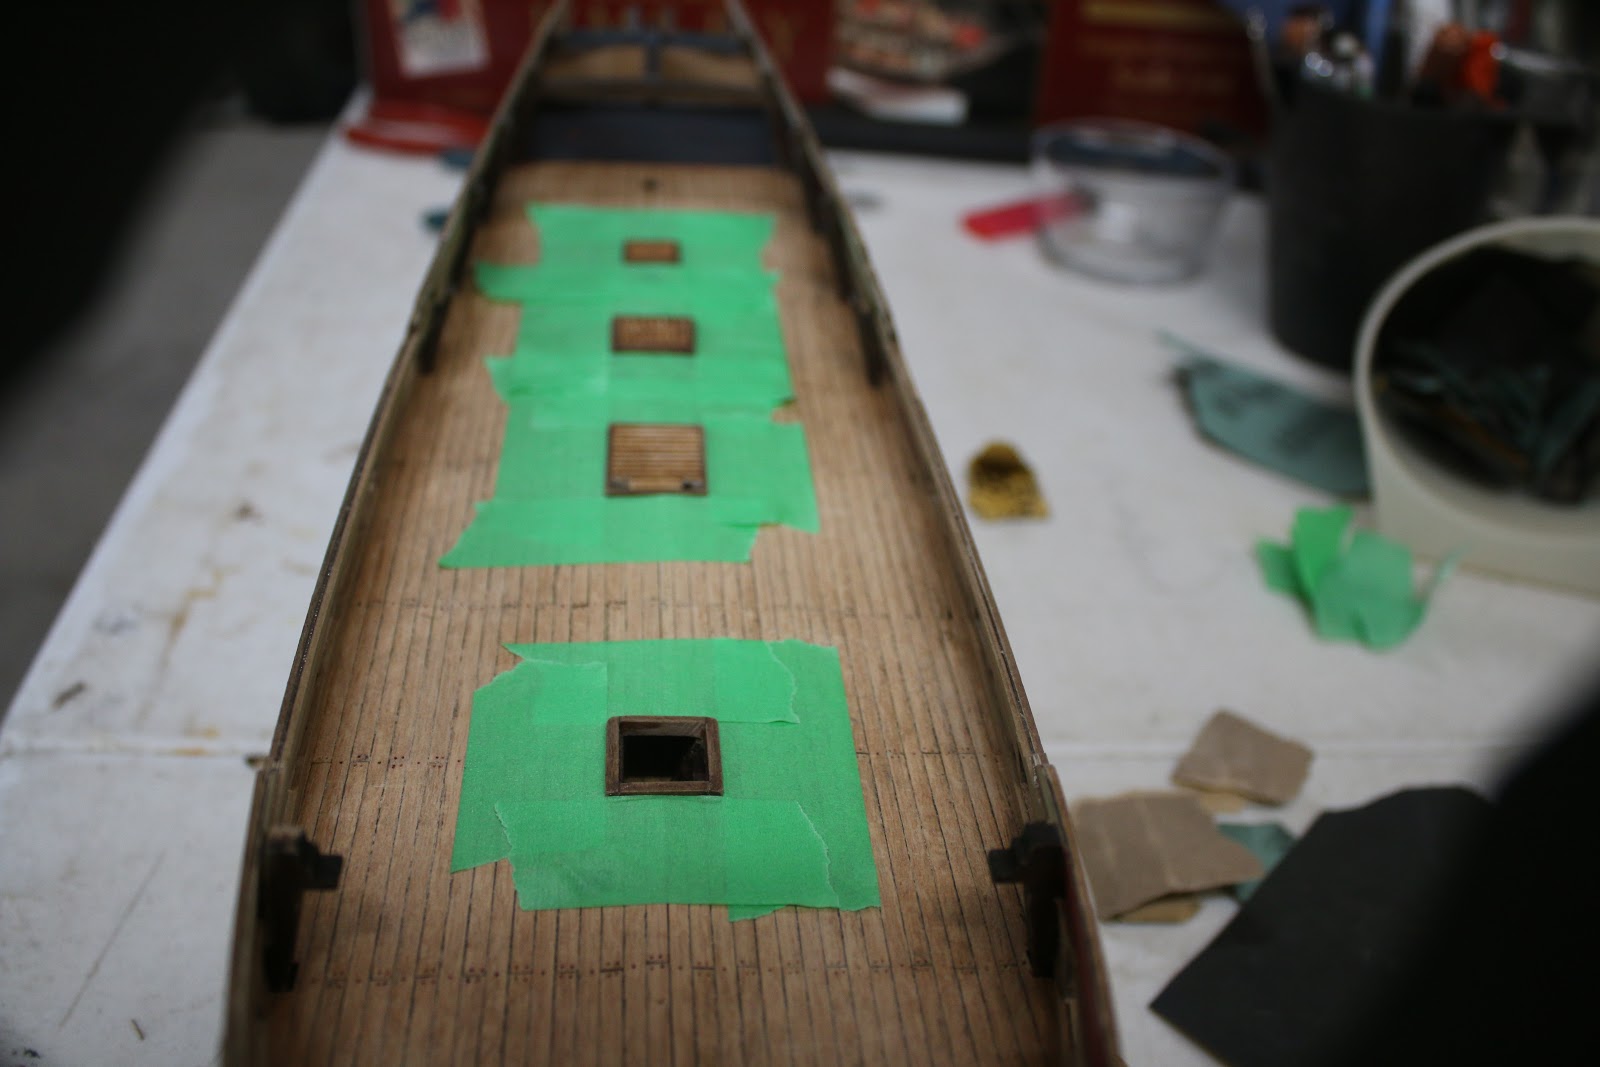
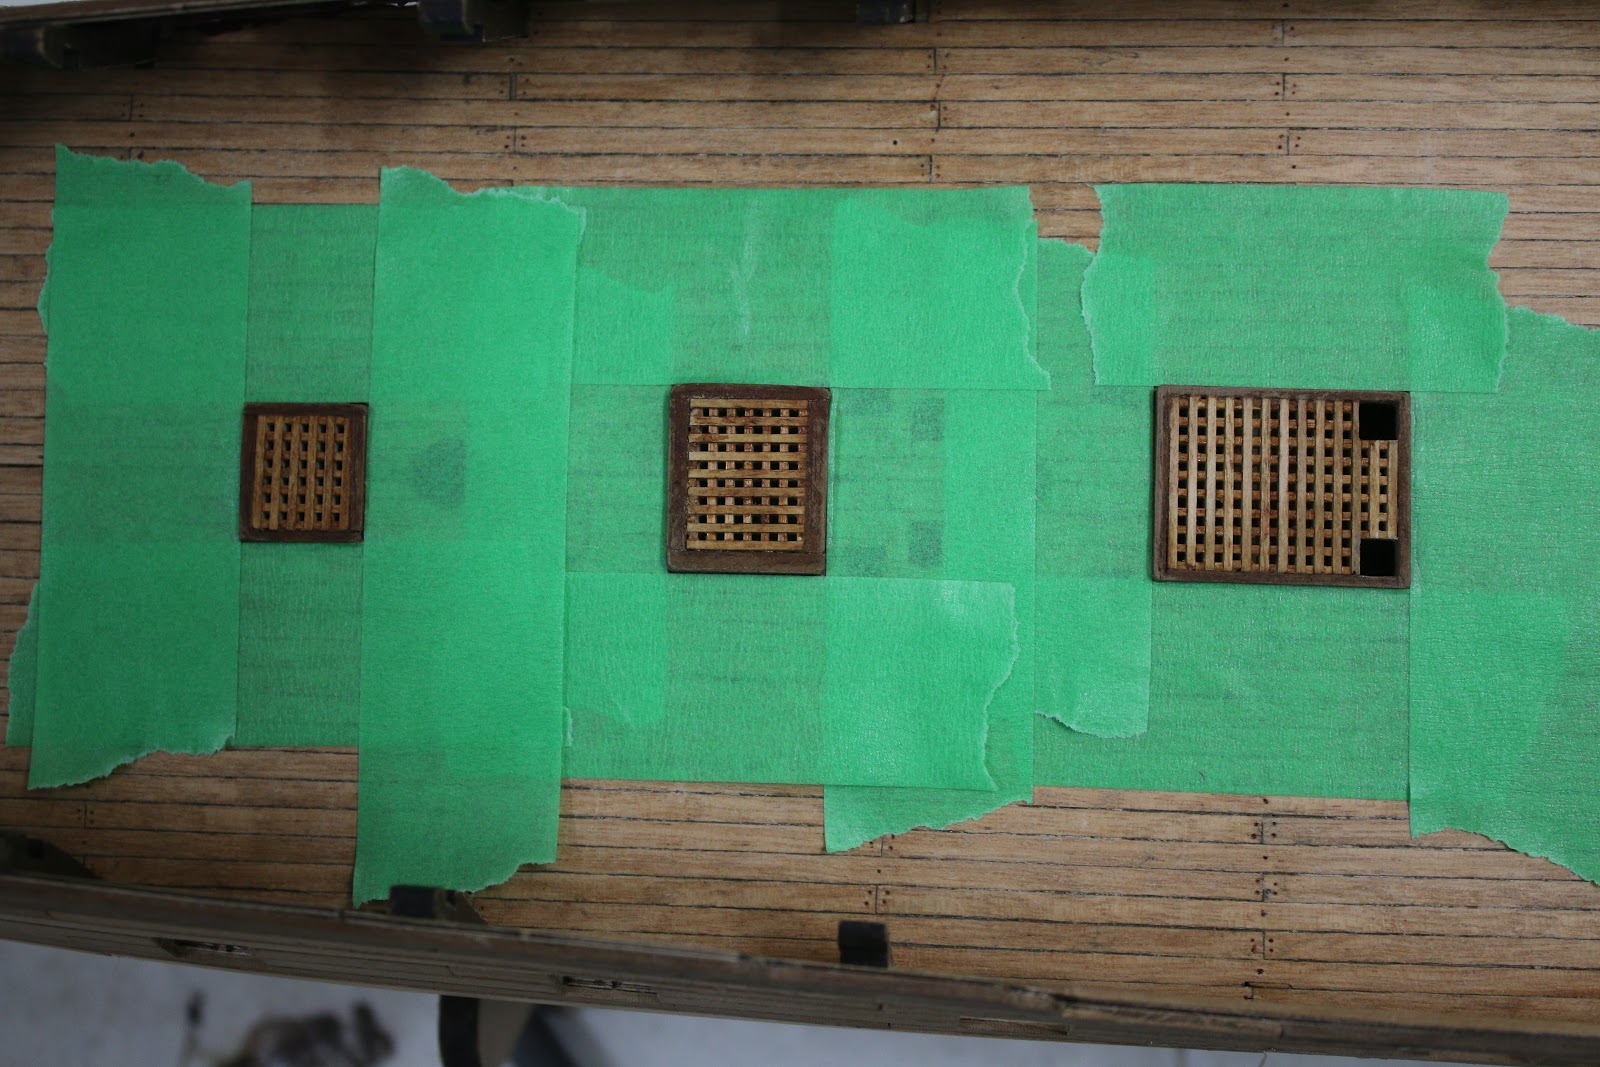
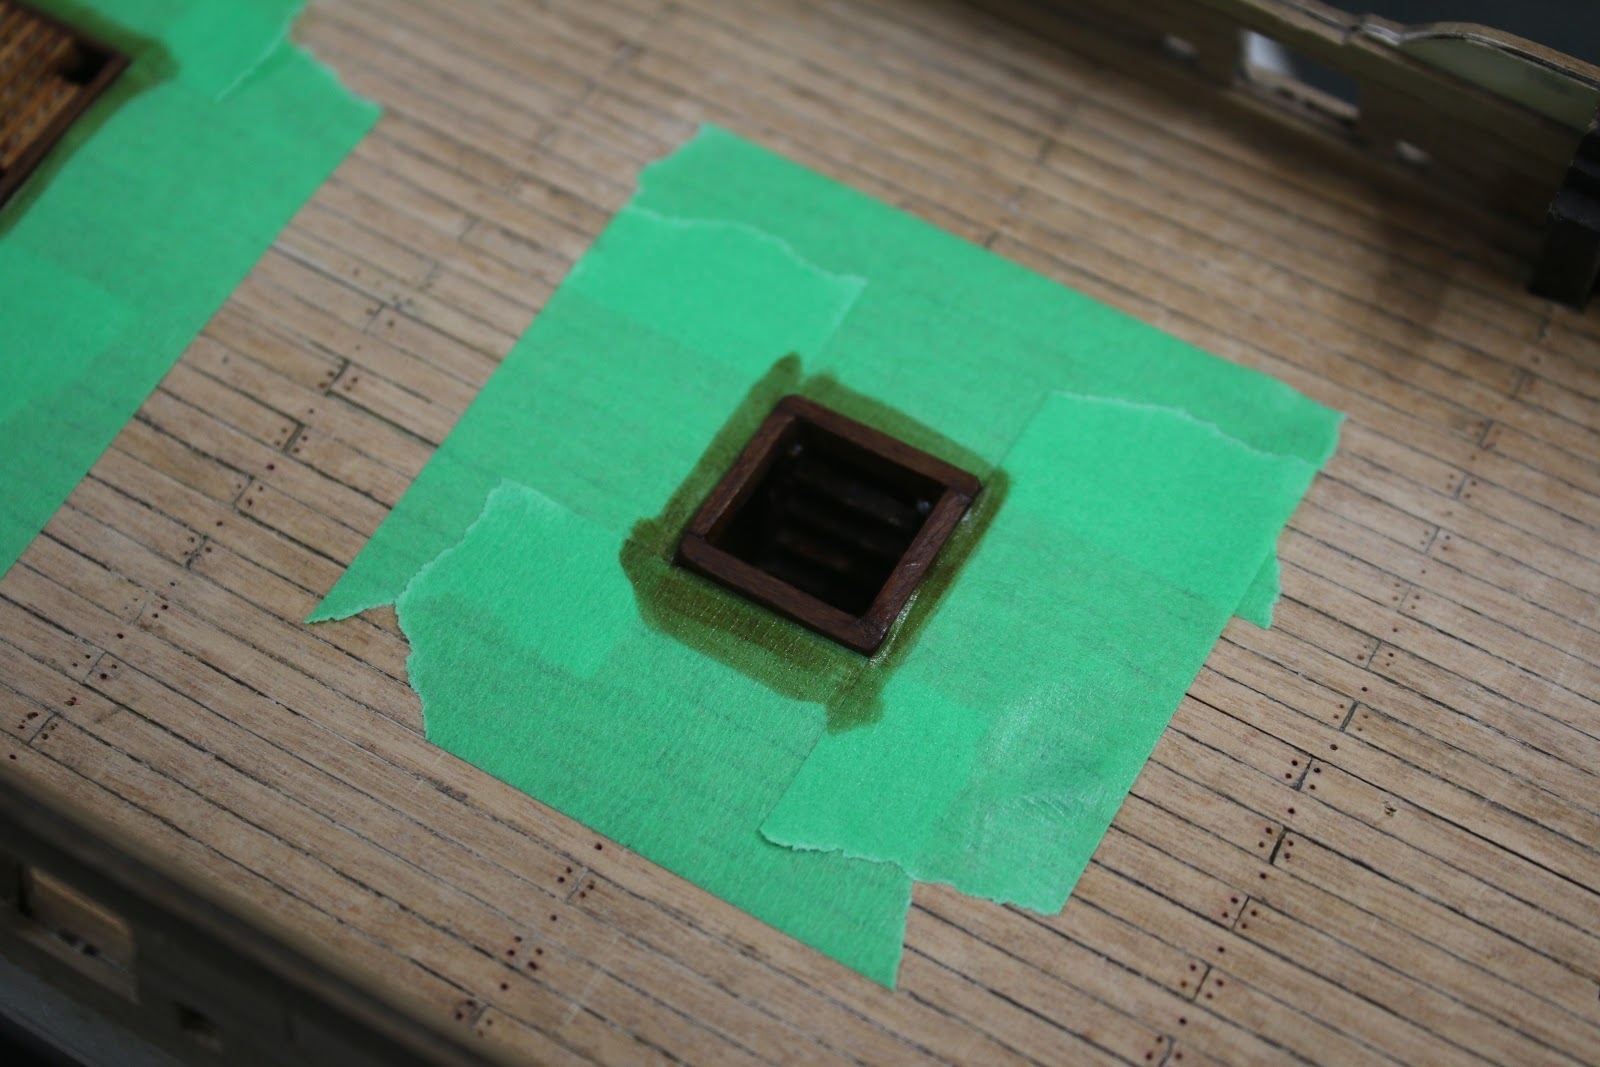
I then taped up the interior planking to prepare for the stain.

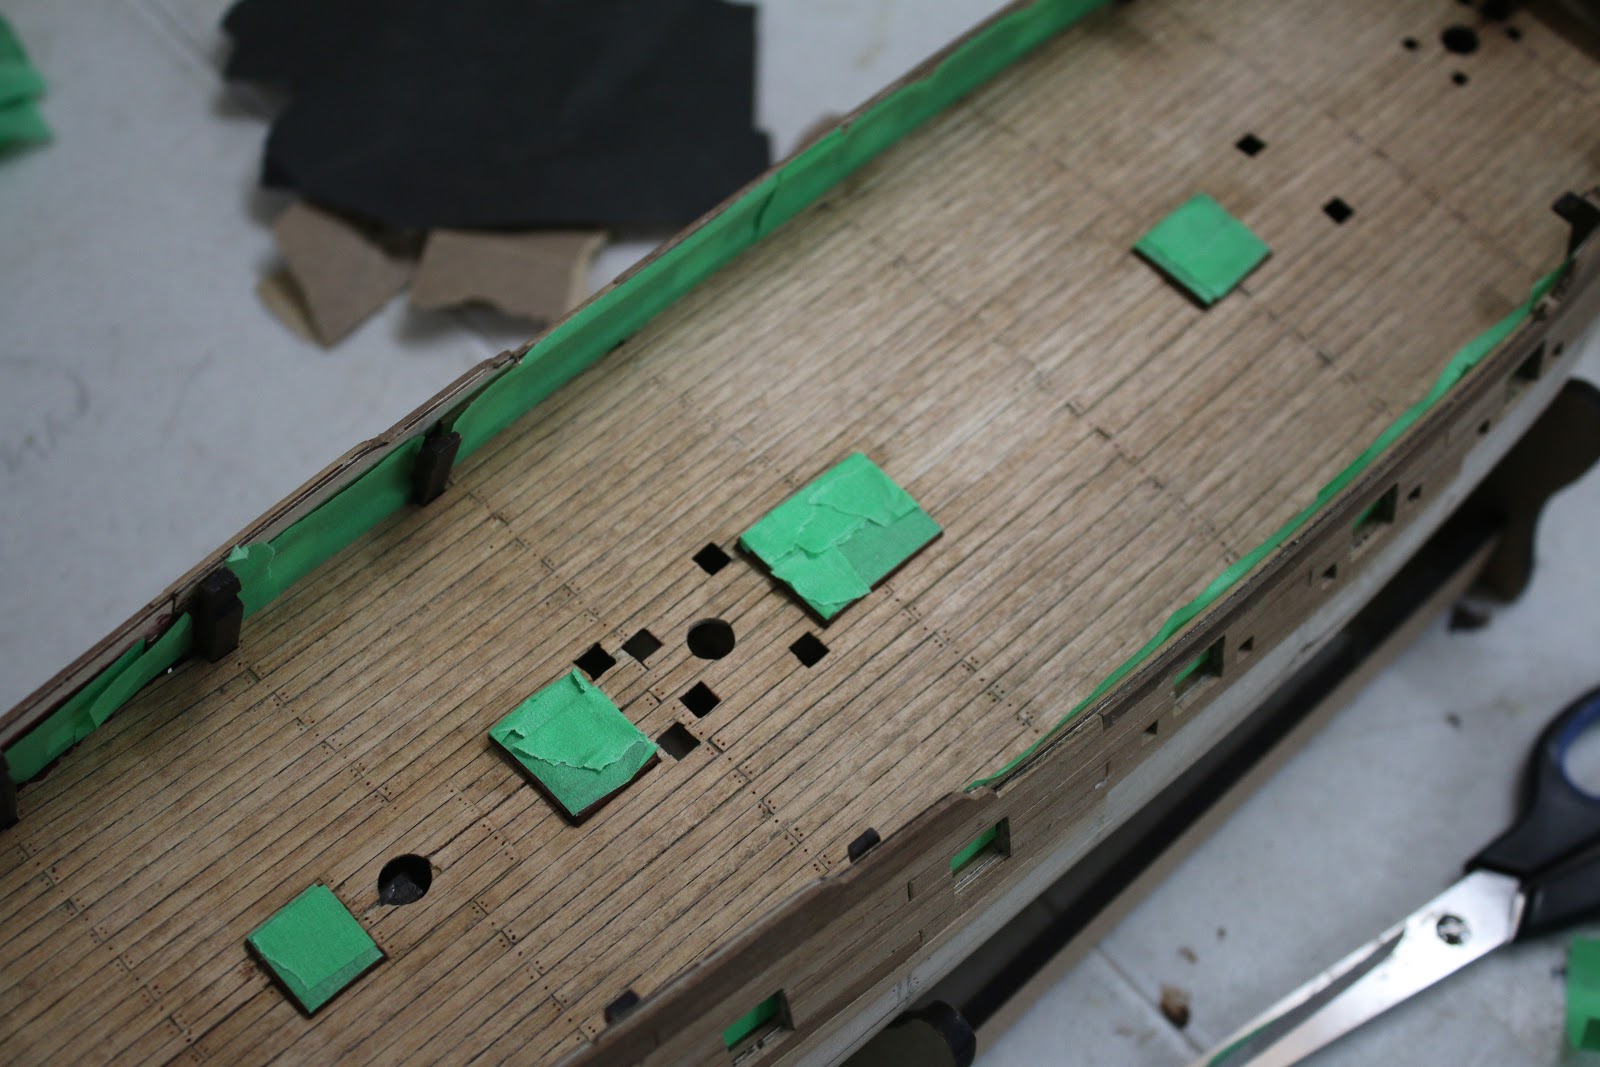
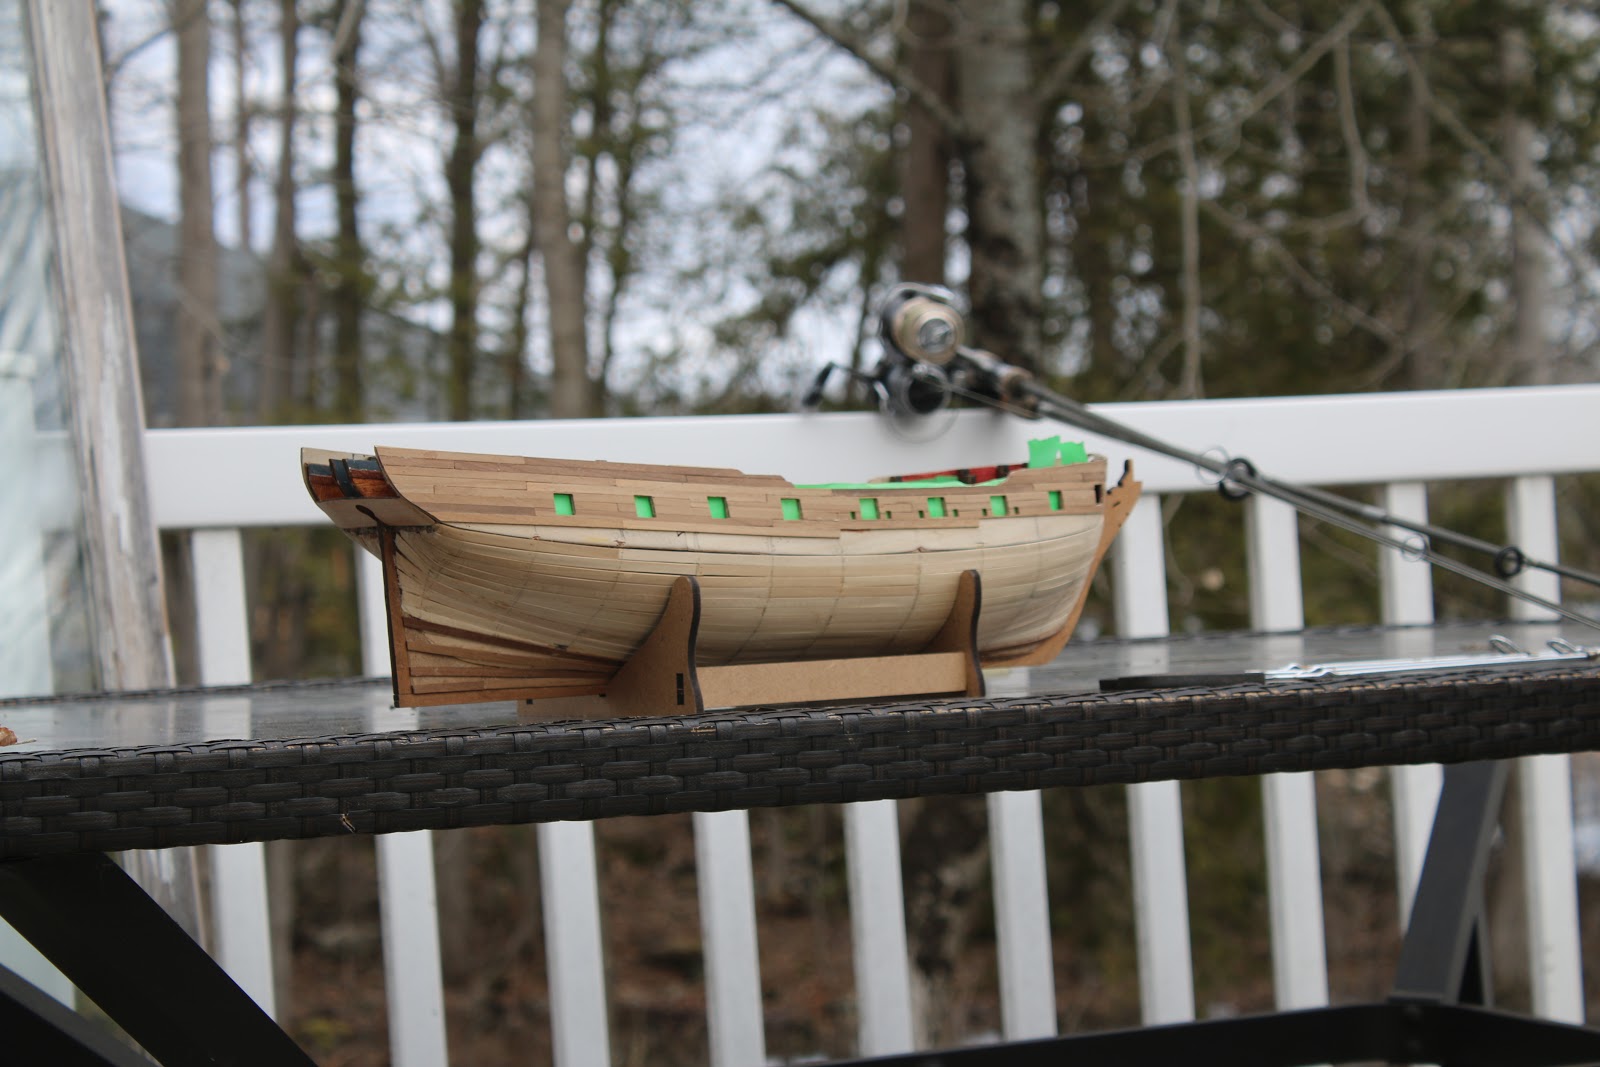
And finally, I refinished the deck and got the exact finish I was aiming for. Some of the scratches do remain but they are mainly where a cannon will be and would be sliding back and forth and at this point, there's nothing that I can do to fix the scratches, so I’ll just have to live with them.

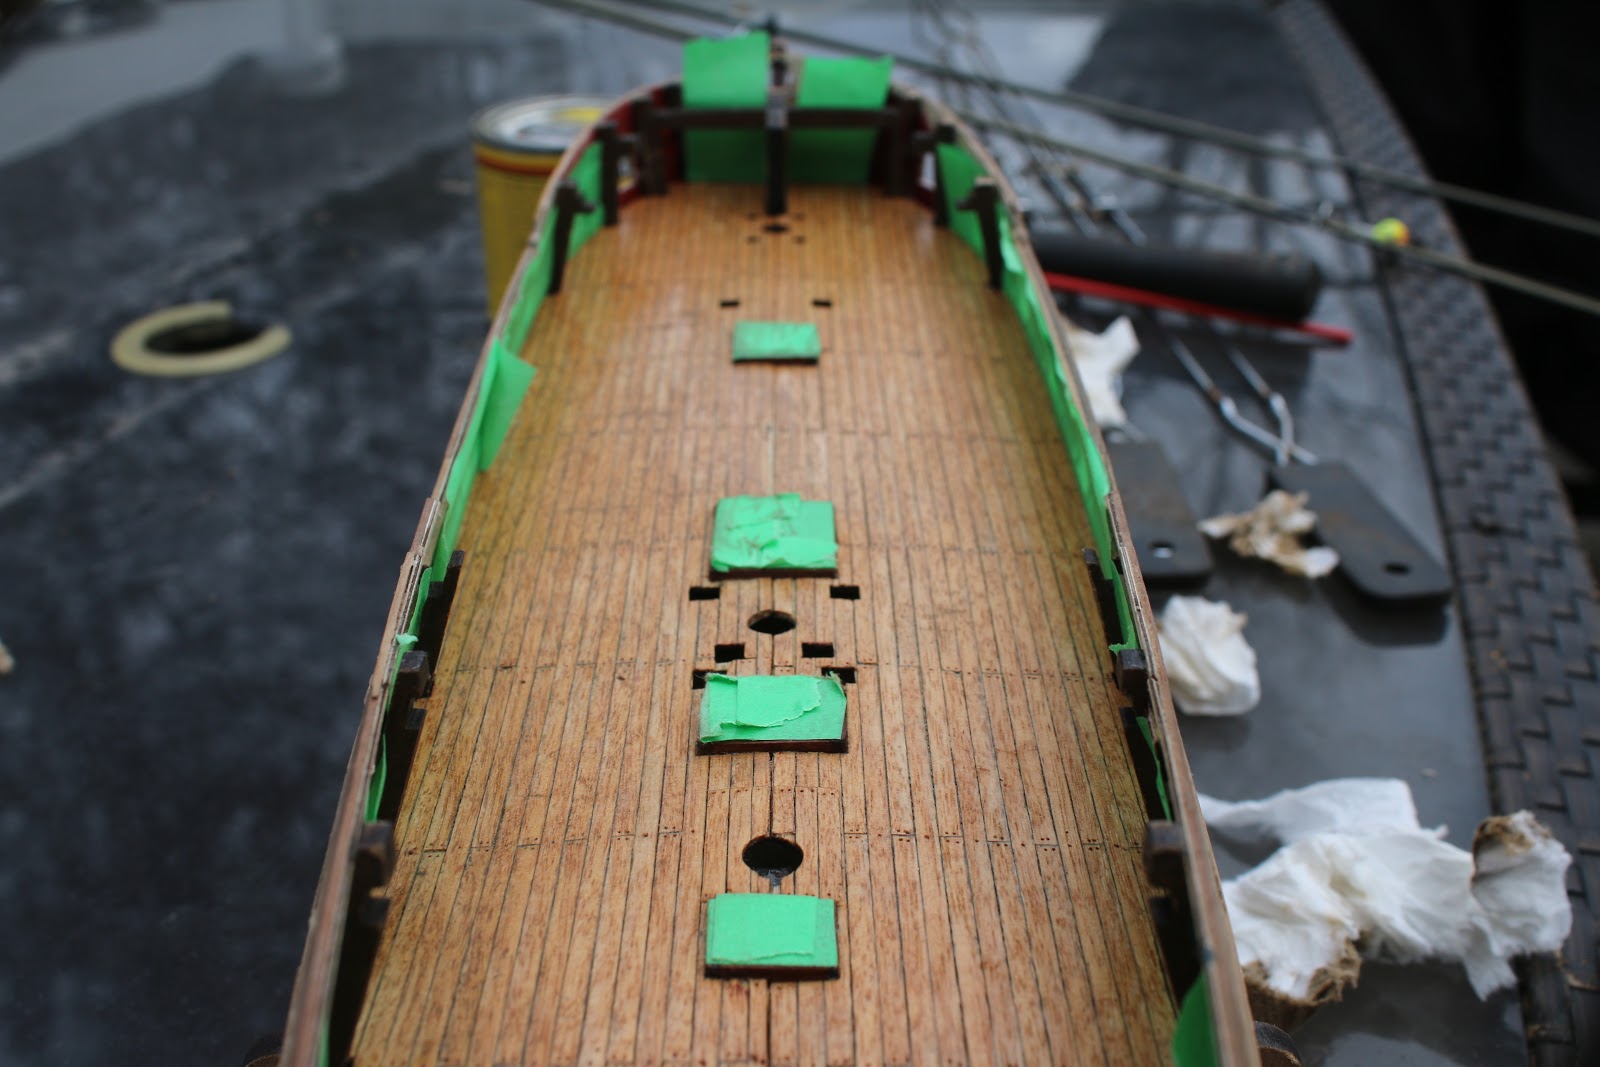
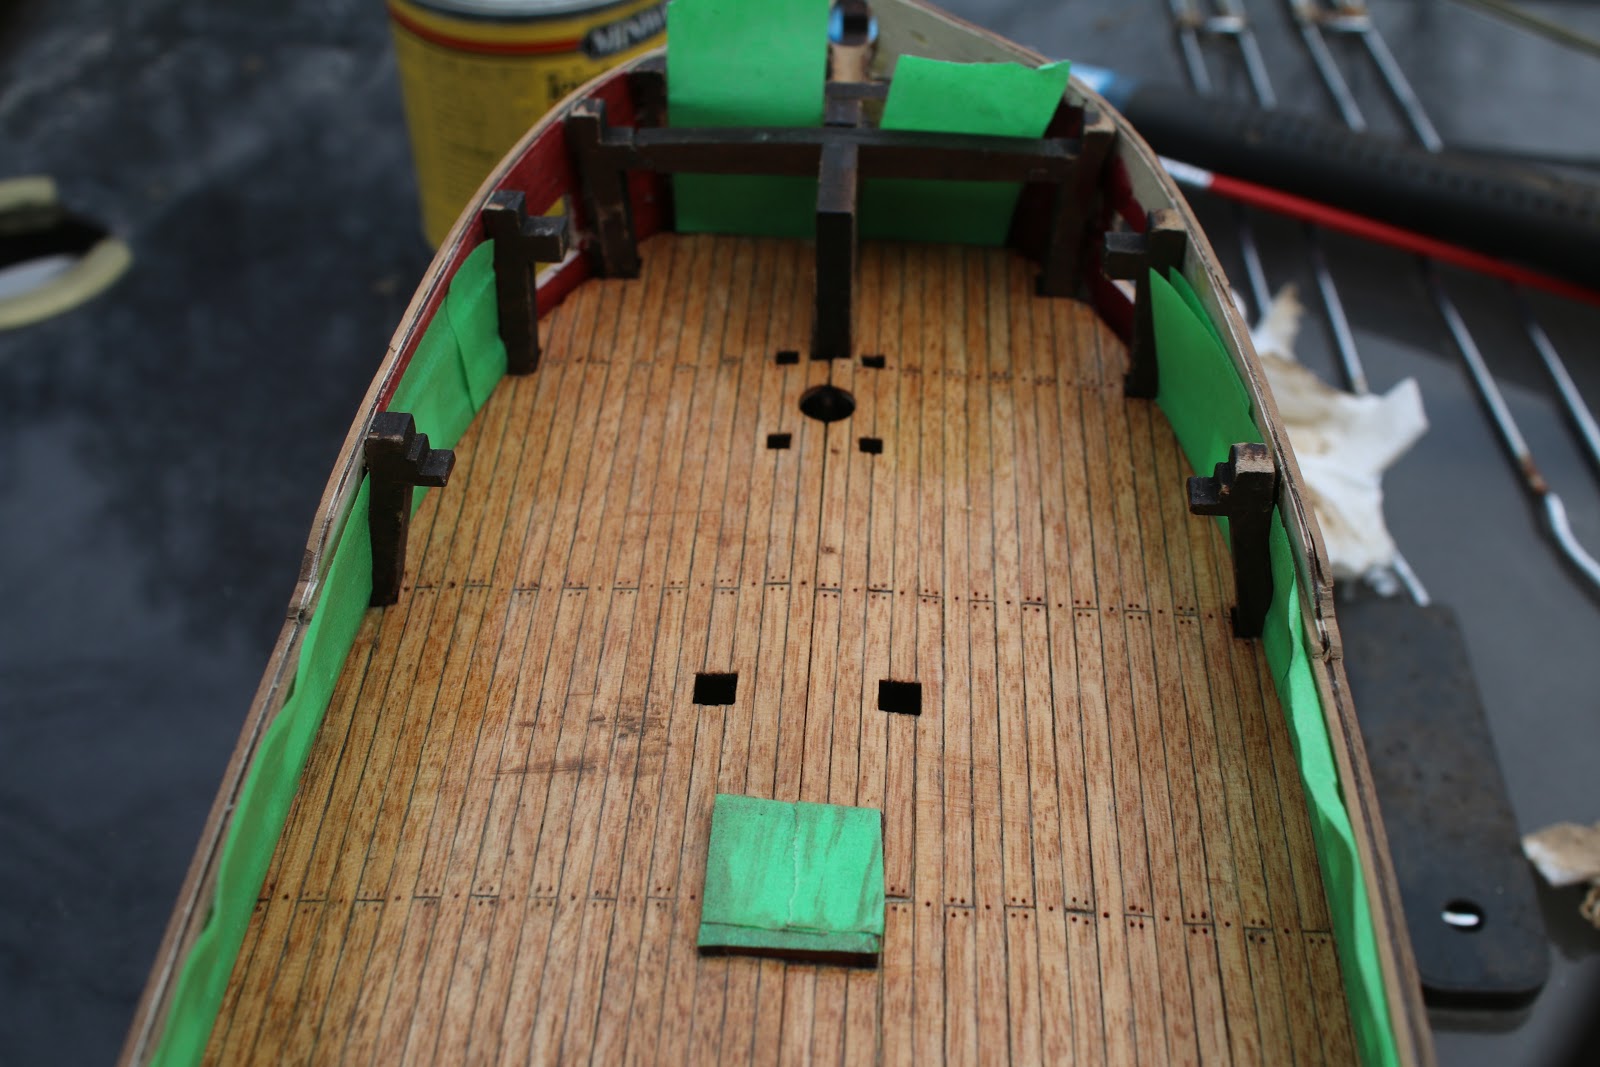
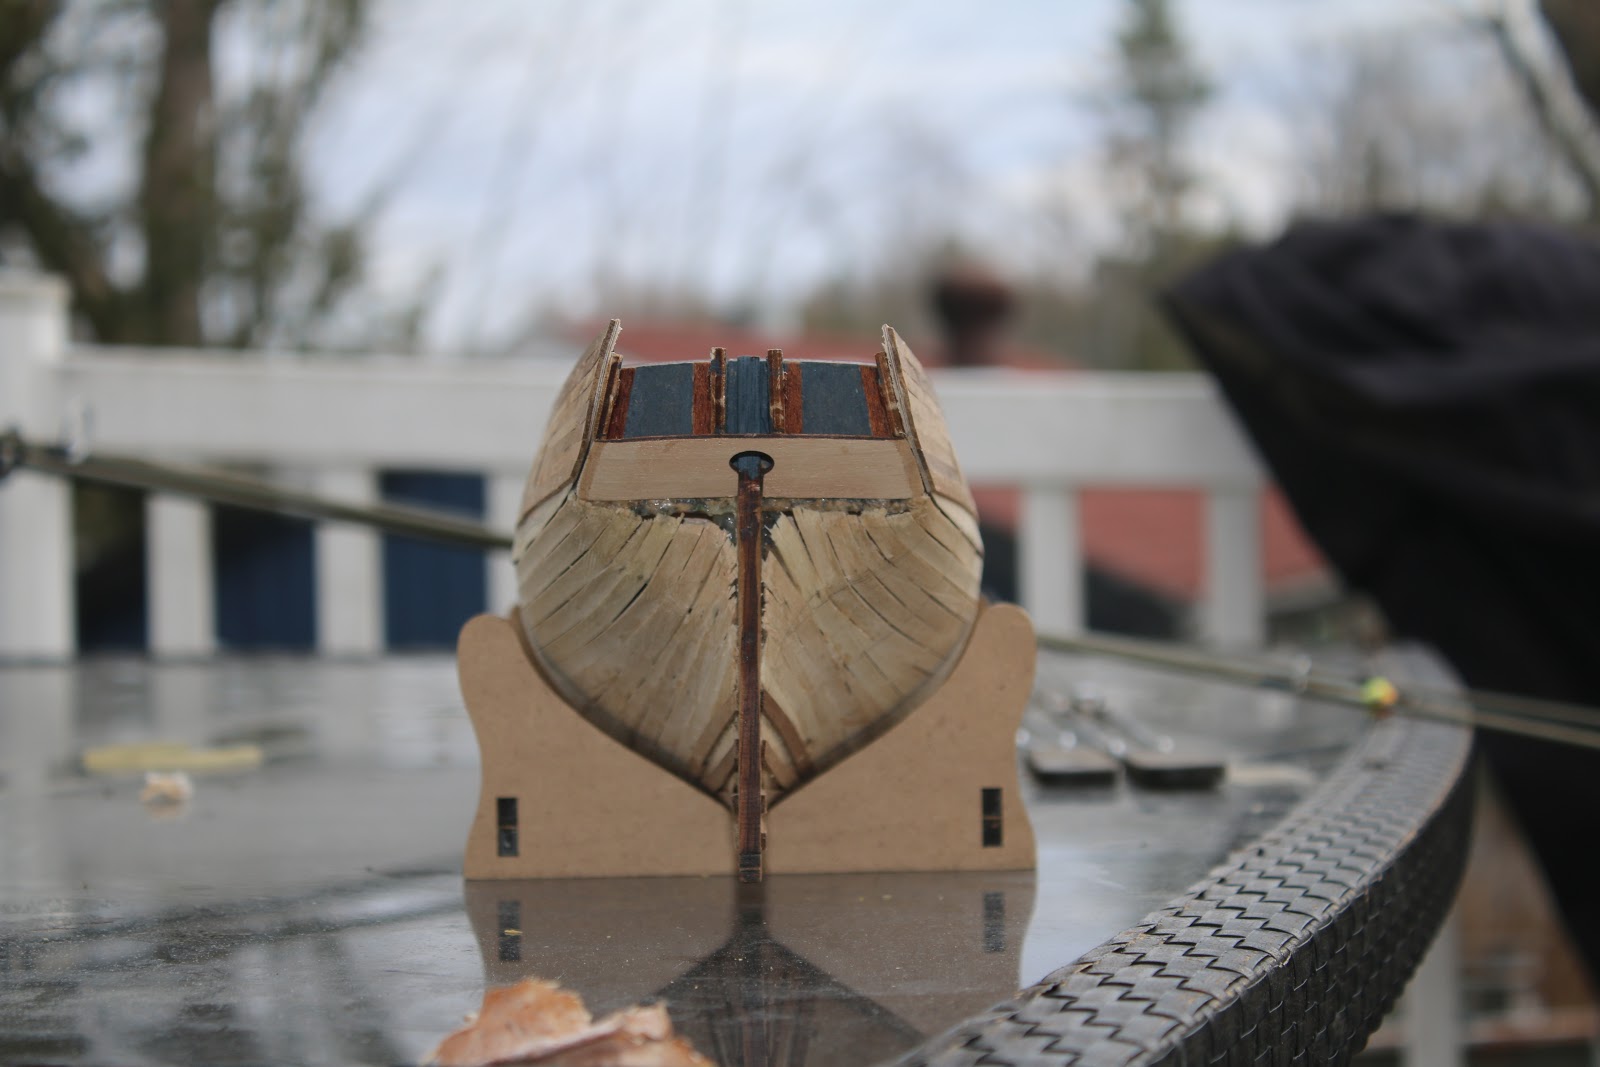
And here's a few pictures of the ship I took while she dried.

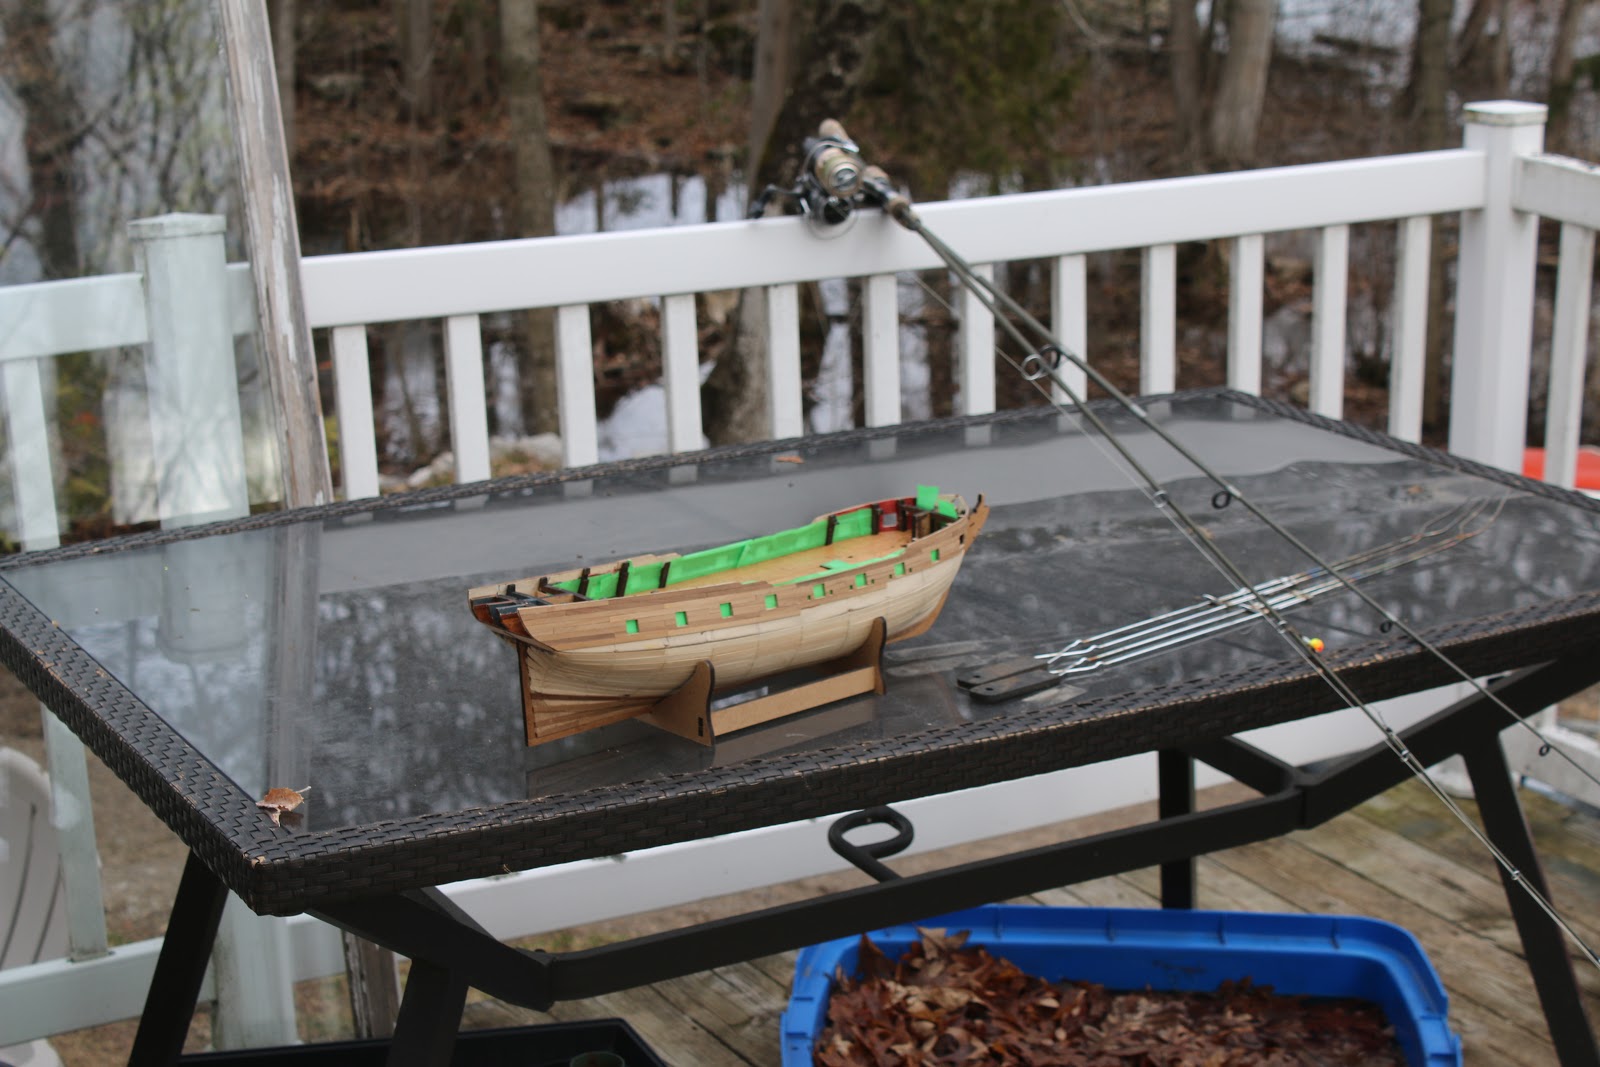
And that's where I left off today. My main focus now will be working on the planking as much as I can and I will also be covering the gundeck up with paper and tape to protect it while I work. As soon as I get a new cherry red stain I will be staining the interior planking and I’m extremely excited to do so. In the meantime between the next post, I wish you all good health in this unusual and trying time and best of wishes. 

-Jamie

Intermediate builder from the lakes of Canada

  • Member since
    January 2015
Posted by TheMongoose on Saturday, April 4, 2020 8:57 PM

This has been a lot of good bonfire side reading. looking forward to more.

In the pattern: Scale Shipyard's 1/48 Balao Class Sub! leaning out the list...NOT! Ha, added to it again - Viper MkVii, 1/32 THUD & F-15J plus a weekend madness build!

  • Member since
    August 2018
Posted by Jamie Dominie on Sunday, April 5, 2020 12:24 AM

Thank you TheMongoose!

Intermediate builder from the lakes of Canada

  • Member since
    August 2018
Posted by Jamie Dominie on Tuesday, April 21, 2020 11:24 AM

So in my last post, I finally refinished the gun deck and I couldn’t be happier with its turnout. The next day, after my last post, the stain had dried and it was time to remove the tape.

The first order of business after removing the tape is to cover the deck back up with paper cutouts to keep dust off it while I continue with planking.

I then proceeded with planking the hull.

After laying those planks and looking over the model I finally built up the guts to address the biggest issue in the first planking. The stern. Realizing that the stern shape is out of shape and won't work with the second planking, I did the risky job of carving the planks down to the right shape with an Exacto knife. It was a success but created some cavities so to finalize it and improve its strength I covered it with wood filler.

I also filled the bow a bit. With those issues addressed I continued planking.

At this point, I had reached the point at the stern where I needed to make some sharper curves. To do this I soaked the planks for a while to make them less brittle.

I then installed the planking above the transom.

while this was drying I decided that I was not happy with the interior wall I had made earlier. So I went ahead and redid the work.

And more planking over the next few days.

At this point, I decided that it was time to install my stealers and fill the gaps in the planks before proceeding with the planking.

I also framed under the open hatch in the upper deck.

At this point, life got a lot easier. I managed to get my hands on some thumbtacks which proved to be a lot better than sewing pins for holding planks.

Without these, I don't think I would have managed to continue the planking.

I also checked the stern gallery base for fit.

And then continued with the planking.

So one of the things I had to decide was whether or not to put treenails in the hull. So I mocked up a few test planks and tried it out.

I also pined up the hull plan at my workstation.

And with that, I decided that I will be doing treenails. I also worked out the stain I will be using on the hull and I settled on a natural finish wood oil.

A few more days later and I have finally layed the last planks.

After that, I prepped for sanding. I started by rough sanding the hull with a rotary sander and then used various sandpapers going from low grit to high before finally going over it with 800 grit to get it super smooth to the touch. Now, this isn’t the final sanding as I now need to make the treenails sand again and install the wales before applying the finish and painting.

And that's where I am now. In the coming days, I will be doing the treenail work and then installing the wale. I'm also thinking about carving the cast decorations from wood but I'm, not a carver and it's not totally decided, alas I will try my hand at it with a few test pieces and show you all how they turned out in the next post. 


-Jamie

Intermediate builder from the lakes of Canada

  • Member since
    October 2019
  • From: New Braunfels, Texas
Posted by Tanker-Builder on Tuesday, April 21, 2020 12:33 PM

Hi Jamie!

     I do like your little sloop! Now ,I will be watching and urging you onward!

  • Member since
    October 2019
  • From: New Braunfels, Texas
Posted by Tanker-Builder on Tuesday, April 21, 2020 12:37 PM

Jamie: Make a guide for the pin.

 Tip; Take a shapes template and drill a hole big enough for your pin along the unused edge. Then do one at the other end and fil in along the way spaced well. Then you will have A guide anytime you need it 

  • Member since
    August 2018
Posted by Jamie Dominie on Tuesday, April 21, 2020 7:16 PM

thank you for the tip tanker builder!

Intermediate builder from the lakes of Canada

  • Member since
    August 2018
Posted by Jamie Dominie on Tuesday, October 6, 2020 10:04 PM

It has been quite a long time and I give my sincere apologies for that. Life got in the way as the pandemic went on but work on the Fly continued, I just forgot to write and post. Yet here I am, back from the dark days of the pandemic with a new post for you all. So after finishing planking in the last post. Which I was very excited about, I then proceeded to treenails. The method I chose was to poke holes and fill them with filler which after staining gives the impressions of treenails.

I then filled the holes which took about 2 weeks

After that, the next step was to sand the hull again and reveal the treenails and as a side effect, I also got a bit of an improved shape in the hull.

After that was done I began the process of installing the wales. The first step for me was to measure out the distance between the bottoms of the gunports and the wales on the plans, I then transferred that to the hull and marked it out. I then layed tape along the upper edge of the top strake to create a profile line that the top strake will follow.

I then went ahead and installed the first half of the top strake.

I then installed the back halve.

I then repeated this on both sides and installed the two strakes below the top strake. The hardest part of this was ensuring both sides were identical because if they weren't it would affect the entire look of the ship in a negative way.

The second hardest part of the wales was the dramatic upwards curve of the bottom two strakes at the stern. It took some trial and error but I eventually ended up soaking the planks and using pins to hold then in. the area the pin was used is then filled with wood filler.

Once the wales were installed I decided to get started on the various trim pieces on the hull. Now I’ll admit the way I did this part is odd and it might have been a better idea to add it after finishing but I was worried about it not going on right so I did it before finishing. I knew immediately that I wanted to have at least the bottom piece a moulding so I went ahead and made a profile scraper with an old ruler and some files.

I then proceeded to scrape the profile of the mouldings into the boards and clamp them to the hull which was considerably easier than the wales. It wasn't until later that I realized I had used the wrong boards for the bottom trim but I really liked how they turned out and how they looked on the boat that I decided to not rip them off the hull.

Notice how I used a board to get an even distance between the trim and the wale down the hull. That also ensured that the trim follows the curve of the wales. After the first side was done I then moved to the other side and repeated the work. After its completion, I went ahead and installed the upper rail.

After installing those mouldings I moved my attention to the stern. Specifically the joint between the stern planking and the transom. Seeing different methods of covering the joint I decided to use a moulding, which I would say turned out well.

After the joint was covered I cut the mouldings where they covered the gun ports and filed them flush with the gunport sides.

I also installed the port stops.

After this was completed I reapplied the missing treenails and gave the hull a final sand before prepping it for stain.

I then went ahead and finally stained the hull.

The sain I used was a Varaphane natural oil stain and it was the exact look I was going for with the planking which made me very happy, but mostly I was just happy to be finished all the hull work that was required before finally staining the hull. More will be coming soon, as of the time im posting this im almost ready to install the guns. This post's last photo was in May. I look forwards to posting more and as always thanks for reading.


-Jamie

Intermediate builder from the lakes of Canada

JOIN OUR COMMUNITY!

Our community is FREE to join. To participate you must either login or register for an account.

SEARCH FORUMS
FREE NEWSLETTER
By signing up you may also receive reader surveys and occasional special offers. We do not sell, rent or trade our email lists. View our Privacy Policy.