SEARCH FINESCALE.COM

Enter keywords or a search phrase below:

Finishing an airplane with metal foil and making rivets

5879 views
11 replies
1 rating 2 rating 3 rating 4 rating 5 rating
  • Member since
    March 2015
  • From: Close to Chicago
Finishing an airplane with metal foil and making rivets
Posted by JohnnyK on Monday, October 24, 2016 12:04 PM

APPLYING FOIL AND MAKING RIVETS

I just finished my third model airplane in metal foil. The plane is an F-104C. I would like to share my tips for applying the foil and making rivets.
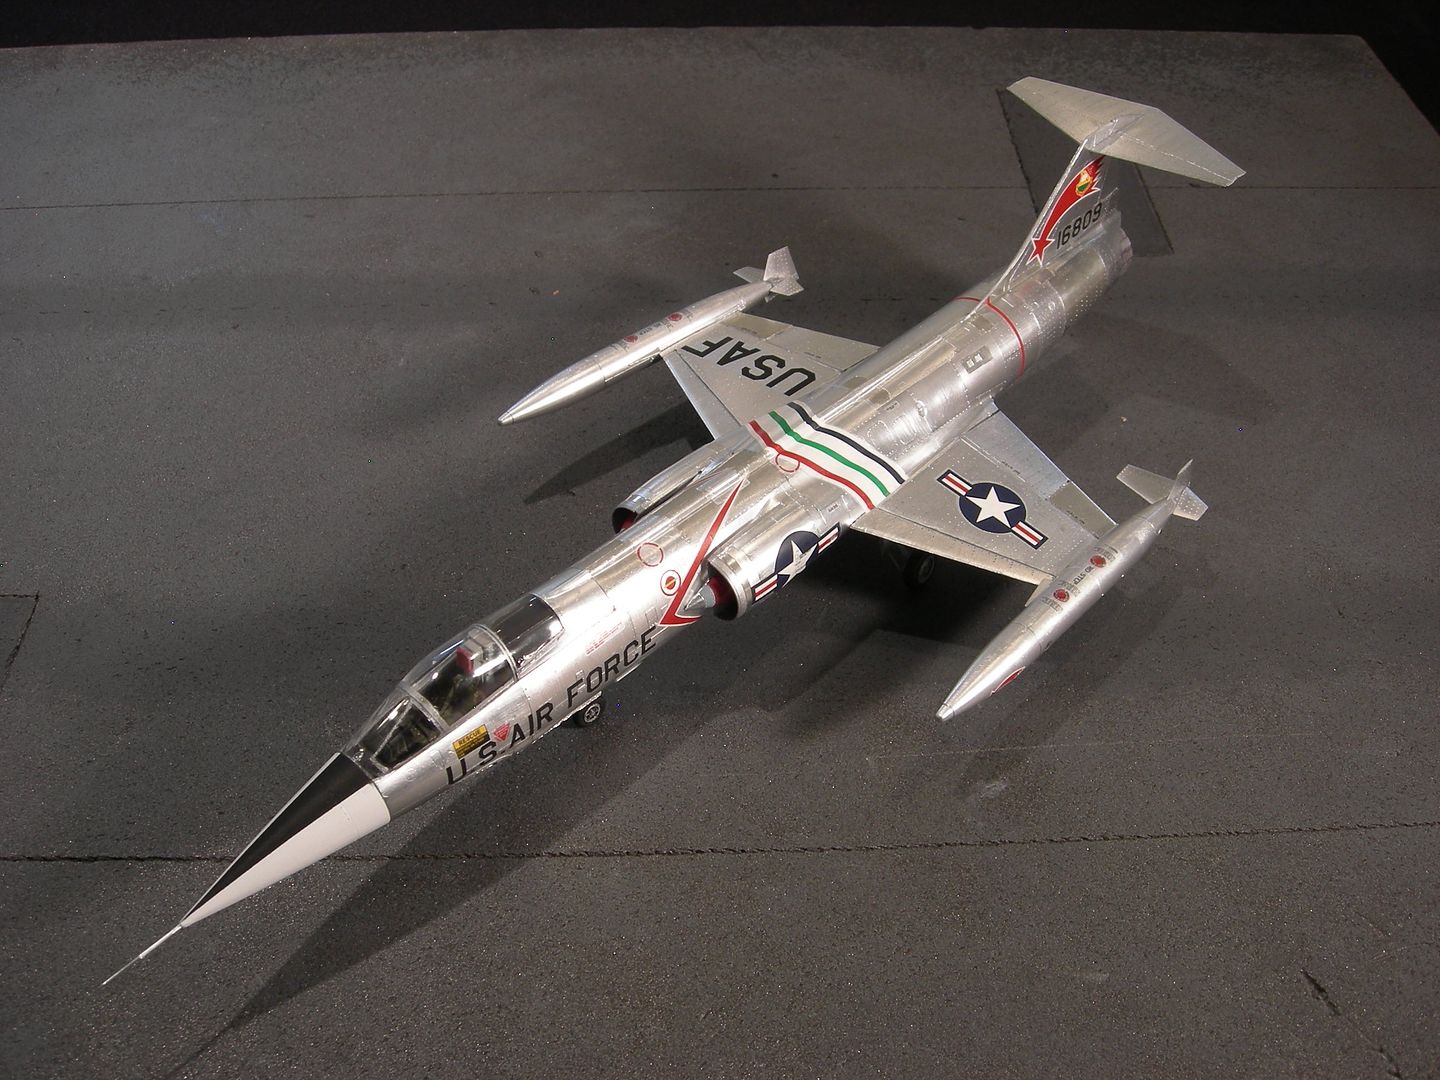
 

I only use a product called Bare Metal FoiI. This product is a bit thinner than kitchen aluminum foil and is comes with a pressure sensitive adhesive on one side. I use three different types of BMF, “Matte Aluminum”, “Chrome” and Ultra Chrome. Matte Aluminum is used on the vast majority of the airplane. Chrome and Ultra-chrome are used on a few panels to add variety to the final appearance. I have tried to use kitchen aluminum foil with an adhesive that is applied to the model, but I was never able to apply the adhesive smooth enough. So, I now only use BMF.


The following tools are useful for applying the foil and are available at craft stores.

·         X-acto knives for cutting the foil. You need to purchase a large number of these because they become dull quickly when cutting the foil. Dull knives cause the foil to tear.

·         A ruler  that is used to measure the foil and provide a straight edge when cutting the foil. My ruler has a cork backing to prevent it from sliding on the foil. I use “post-it-notes”  for measuring curved surfaces.

·         Paper blending sticks and Q-tips are used to smooth the foil after it is applied to the model.

·         0000 steel wool is used to enhance the natural grain of the BMF.
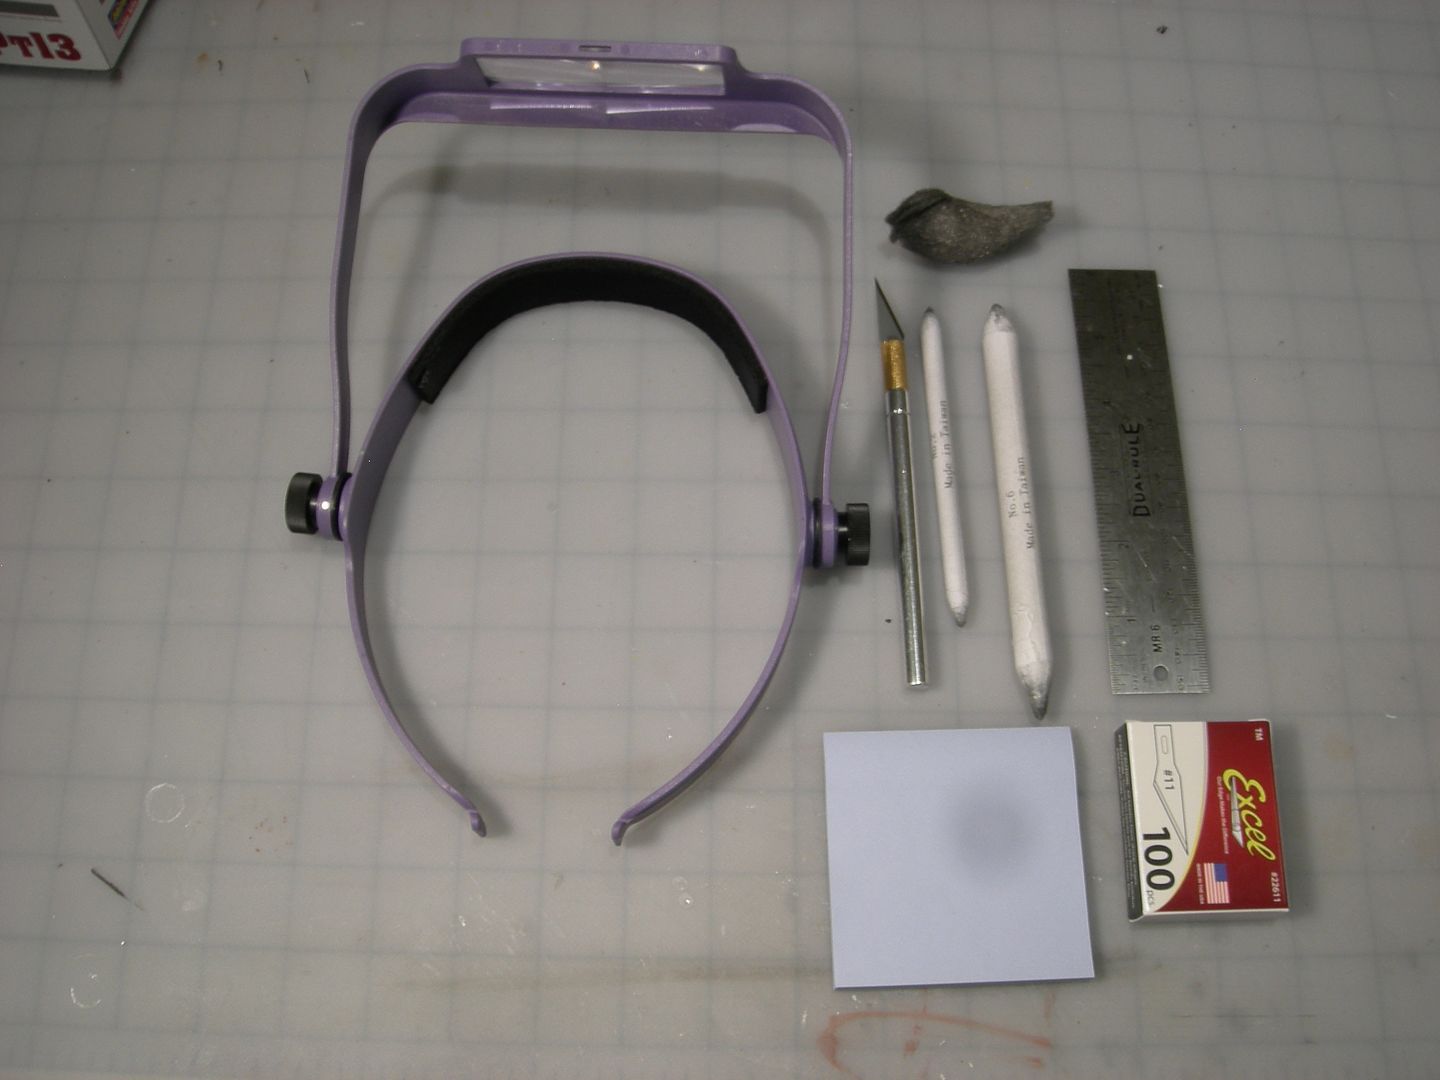
 

I also use a magnifier. I do not think that it is possible to apply foil without a magnifier. It is really important to keep your work surface, tools and model very clean. If you apply foil over the smallest bit of dirt or hair it will be magnified and ruin the appearance of the model. If that happens you will need to remove the foil and reapply it. Also, keep your hands clean. Oil from your hands will show up on the foil. In fact, I use a cotton glove on my left hand with the index finger removed. This aids in keeping the model clean.

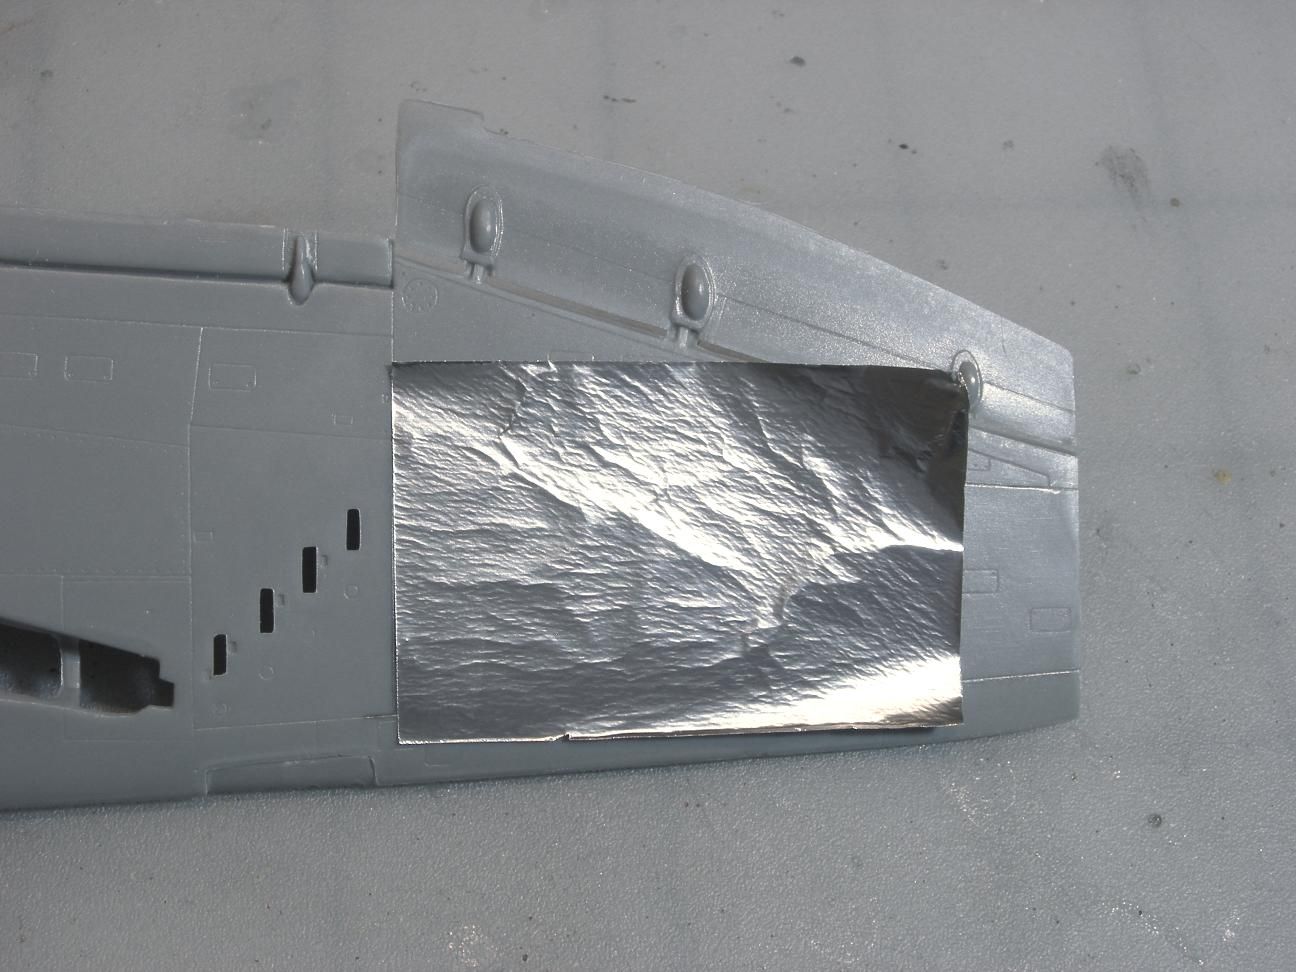
FOIL STEP 1

Note which way the grain runs on the foil. You can change the direction of the grain to vary the appearence of  the panels, just don't make the model look like a checker board. Cut a piece of foil that is slightly larger than the panel that will be covered. Use an xacto knife to aid in peeling the foil from the backing paper. Try to not let the foil curl over on itself. Wipe the model with your finger to remove dust and hair. Next, apply the foil to the panel and use your finger to smooth it down. At this point the foil will look really bad, but don't worry, it will be smoothed out in Step 2.
FOIL STEP 2

Use the paper blending stick to smooth the foil. Rub the foil at one side and work your way over the foil. You can press hard to get a smooth finish. Rub extra hard at the recessed panel joint so that you can see the panel joint. Using an xacto knife, trim the foil along the panel line. You should be able to do this freehand, just work slowly and try not to trim the foil in a single pass. Trim the foil in small cuts. After the foil is trimmed rub the panel lines with the blending stick to push the foil into the panel lines. Note that the grain is running sideways.

.
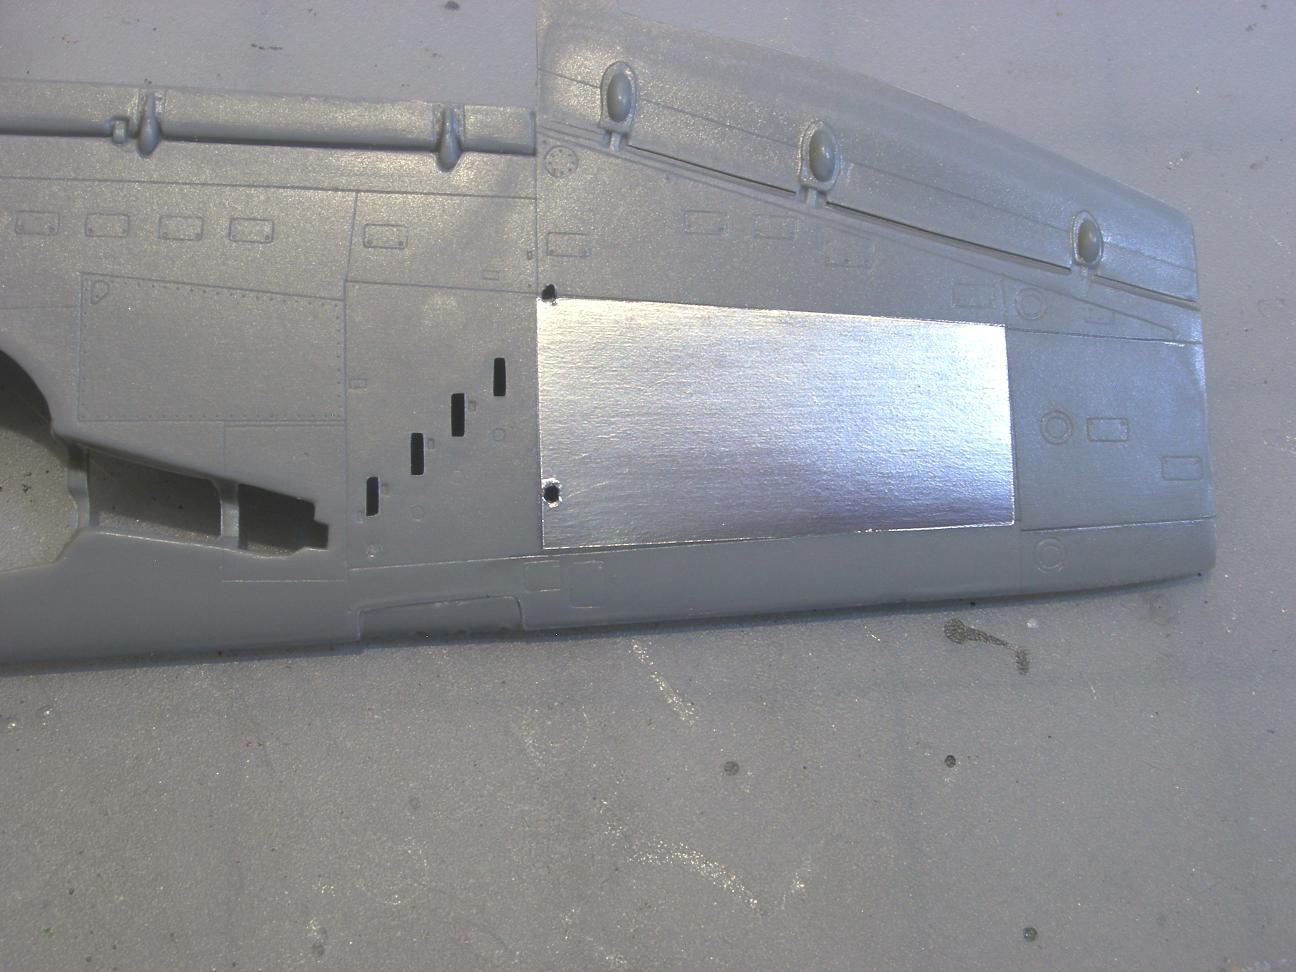
FOIL STEP 3

Rub the foil with 0000 steel wool in the direction of the grain. Only make one pass with the steel wool.
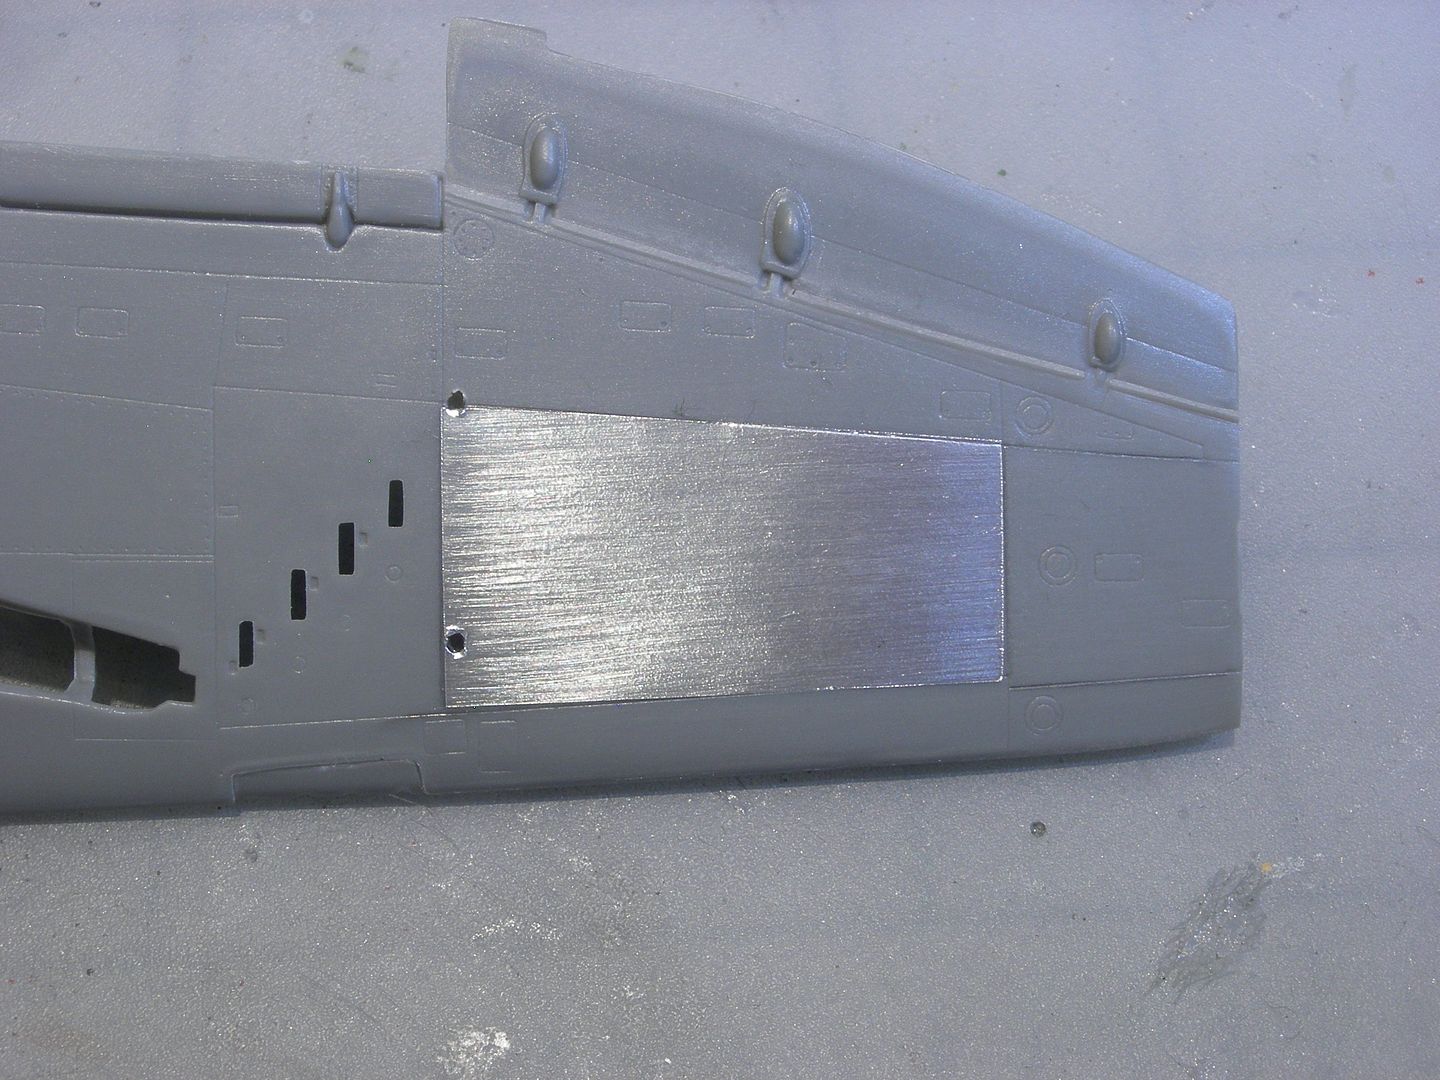
FOIL STEP 4

Apply foil to the next panel using Steps 1 - 3. Note that the grain in the second panel is running the opposite direction of the first panel. Protect the first panel with a "post it note" to protect it when rubbing the second panel with steel wool.
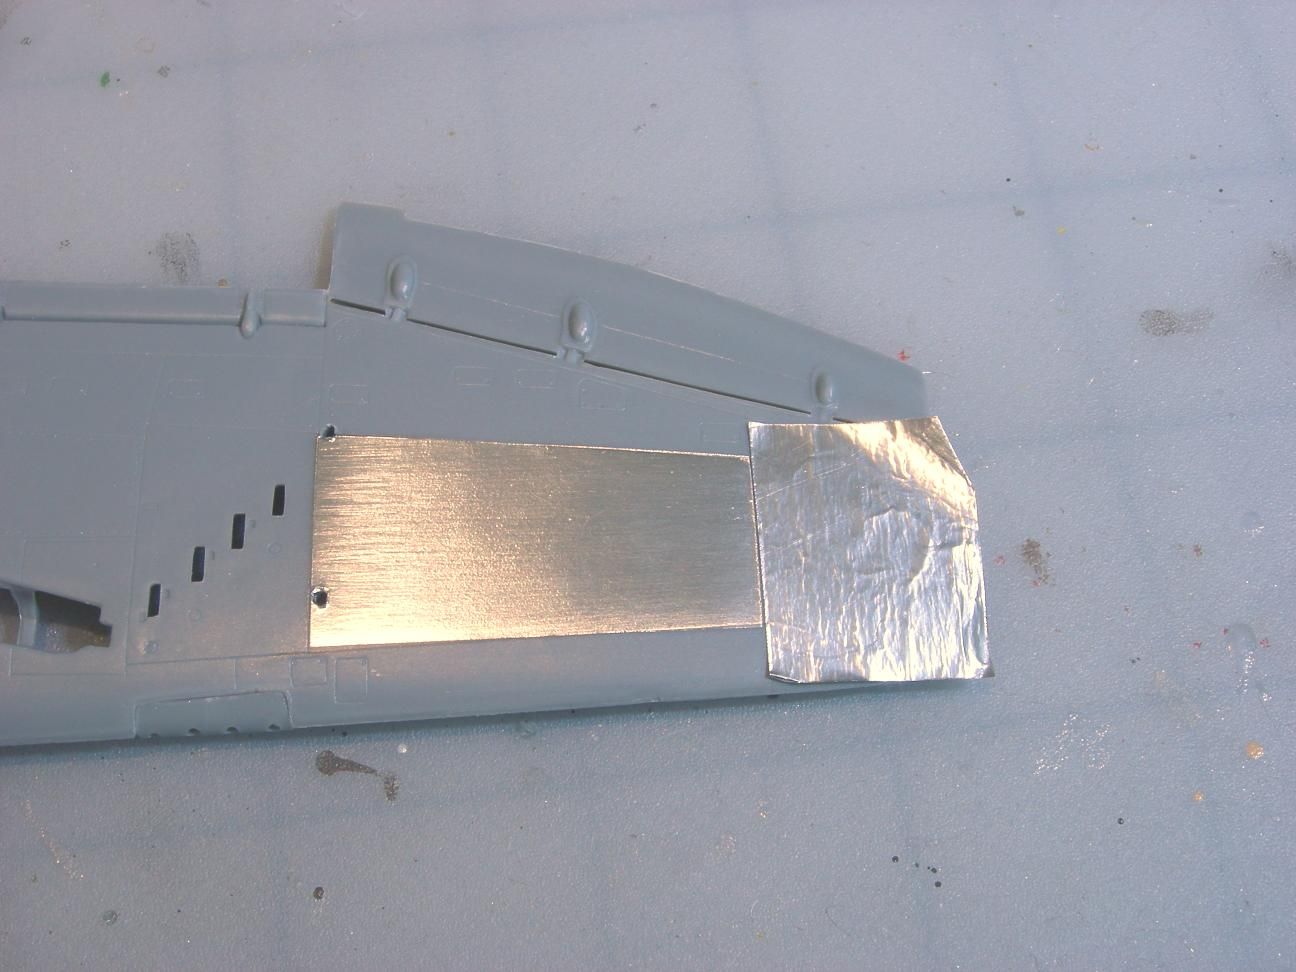
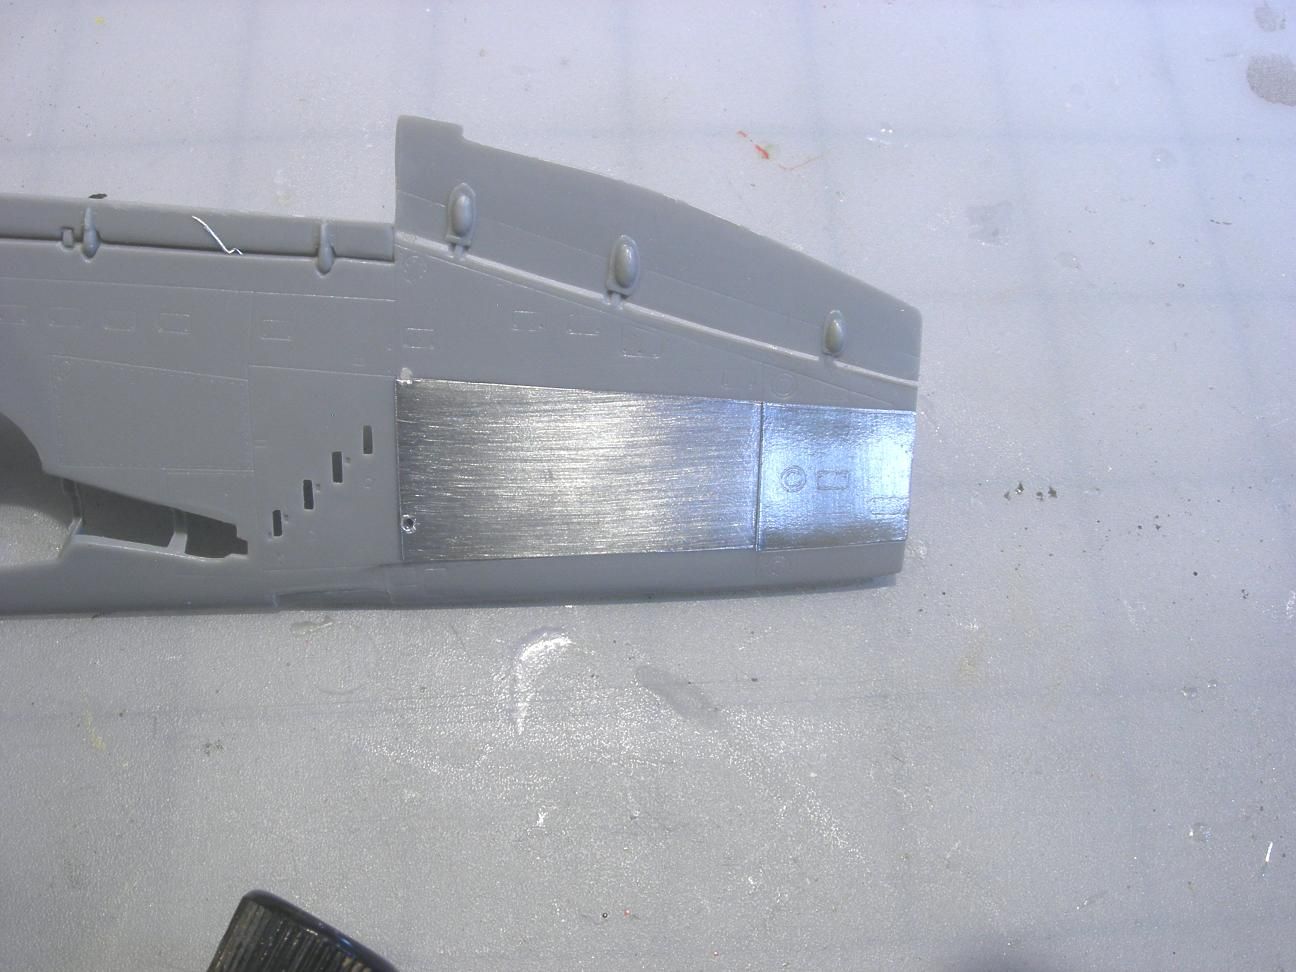
MAKING RIVETS

The Revell P-47 did not have recessed rivets, so I made my own. Following is a P-47 wing that is ready for rivets. 
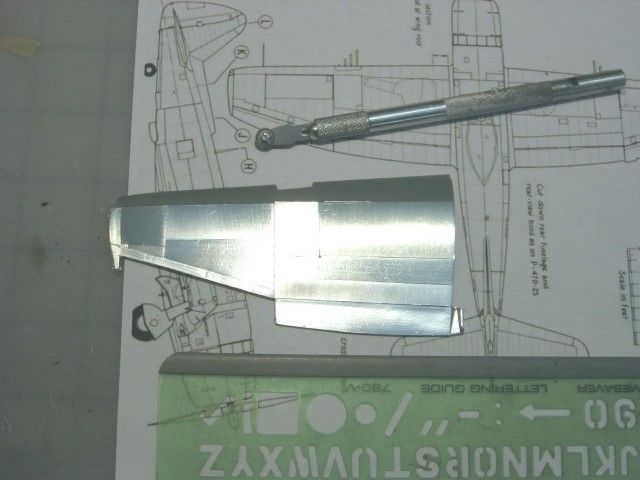
 

RIVETS STEP 1

I use a RB Productions rivet wheel to make the rivets. Basically the tool is a wheel with teeth. The tool came with three wheels with different size teeth. I used an old lettering template as a straightedge when making the rivets. The lettering templete is flexable so I can use it on curved surfaces. I found a drawing on the Internet that showed the rivet pattern of the P-47. It is really important that the rivet patterns a straight and evenly spaced!!! Crooked rivets look really bad. I use "post it notes" to space the rivet lines and a straight edge to make straight rivet lines. Remember, crooked rivets look bad!
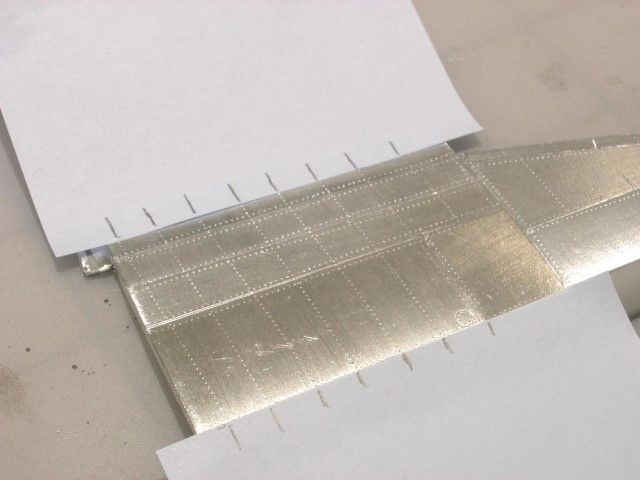
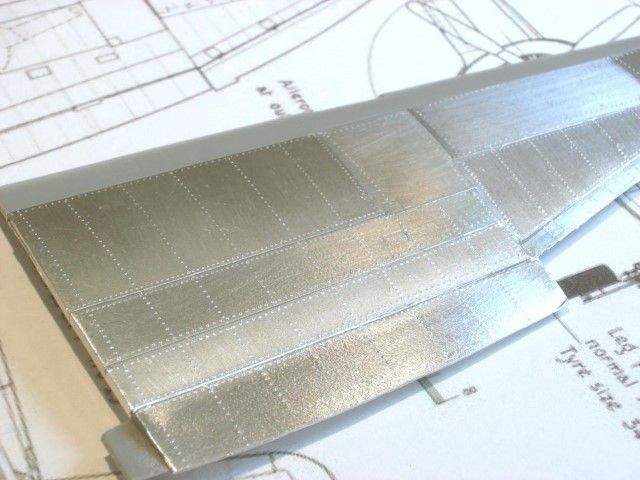
Following is the model with rivets. Note that the grain of the foil runs in different directions.
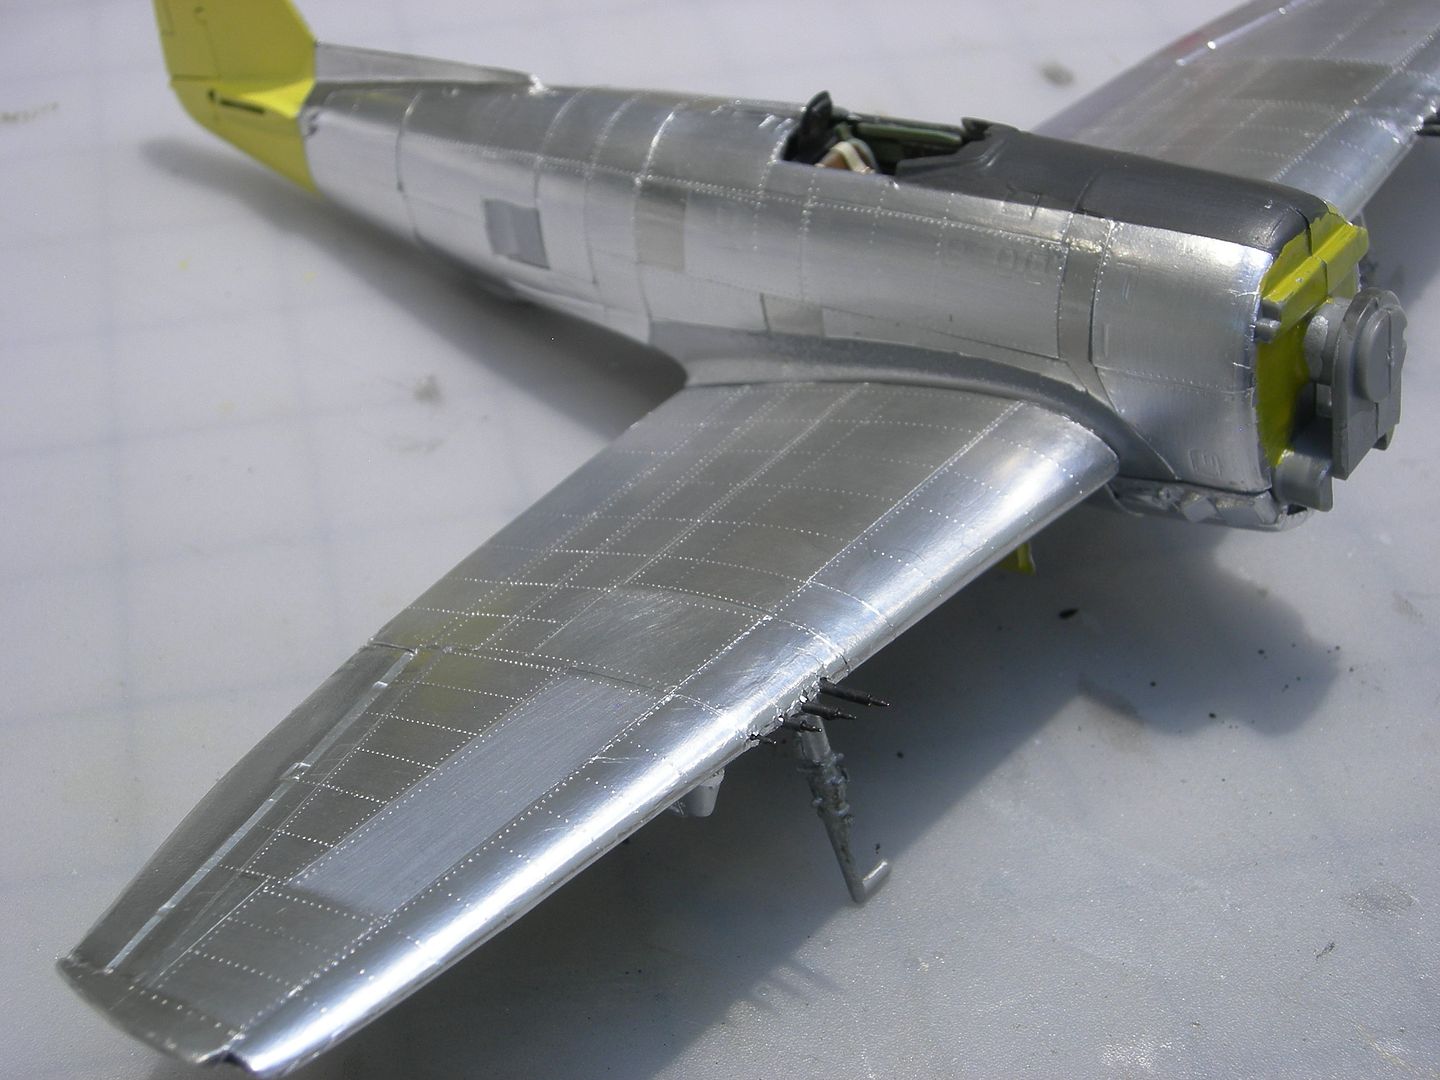
I weathered the foil with Tamaya Smoke. Wet the brush before putting it into the Smoke and apply thin coats. Once the Smoke is on the foil it cannot be removed.
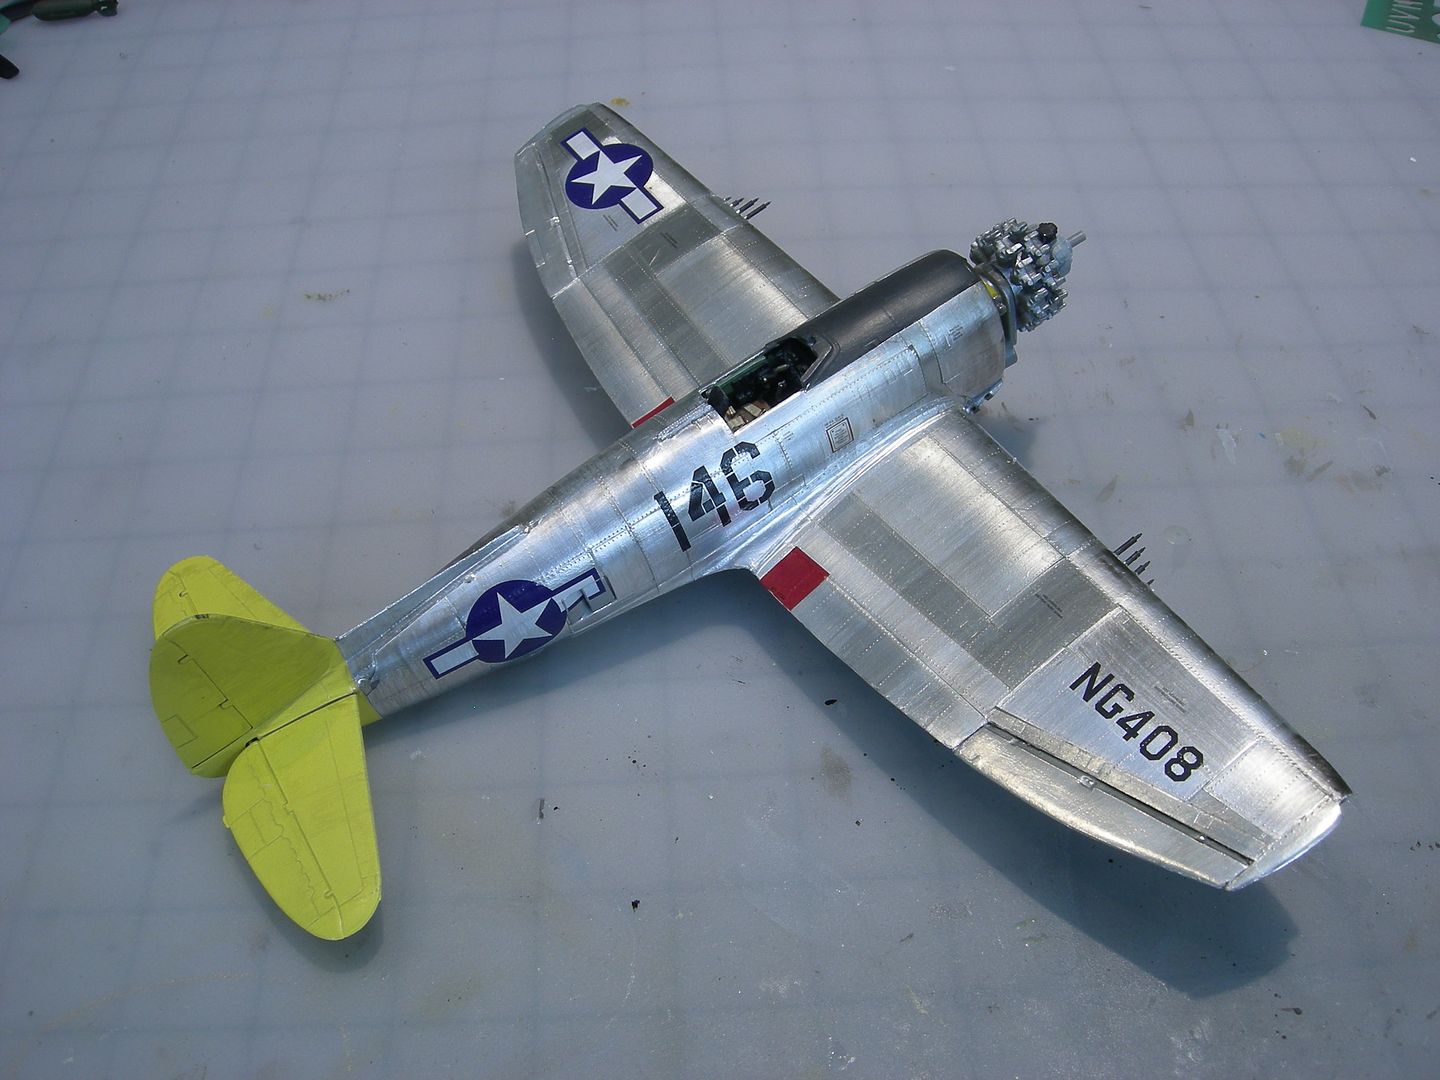
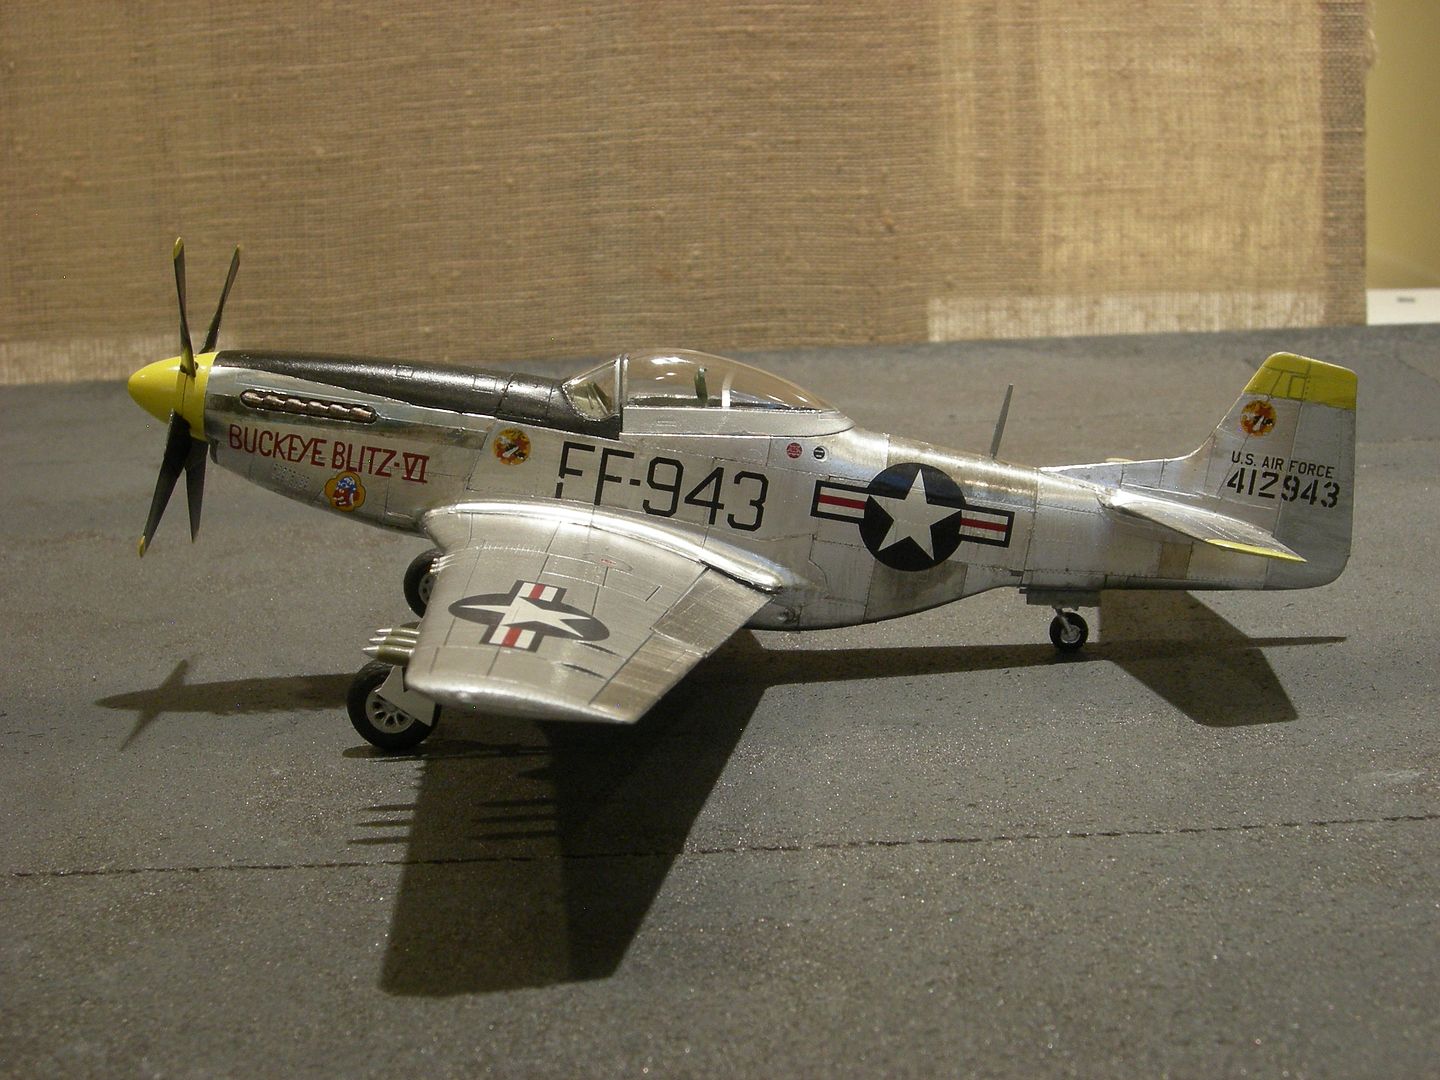
Following is a P-51 with foil. The wings are painted and the fusalage is foiled. The model did not come with rivets, so I needed to make the rivets.
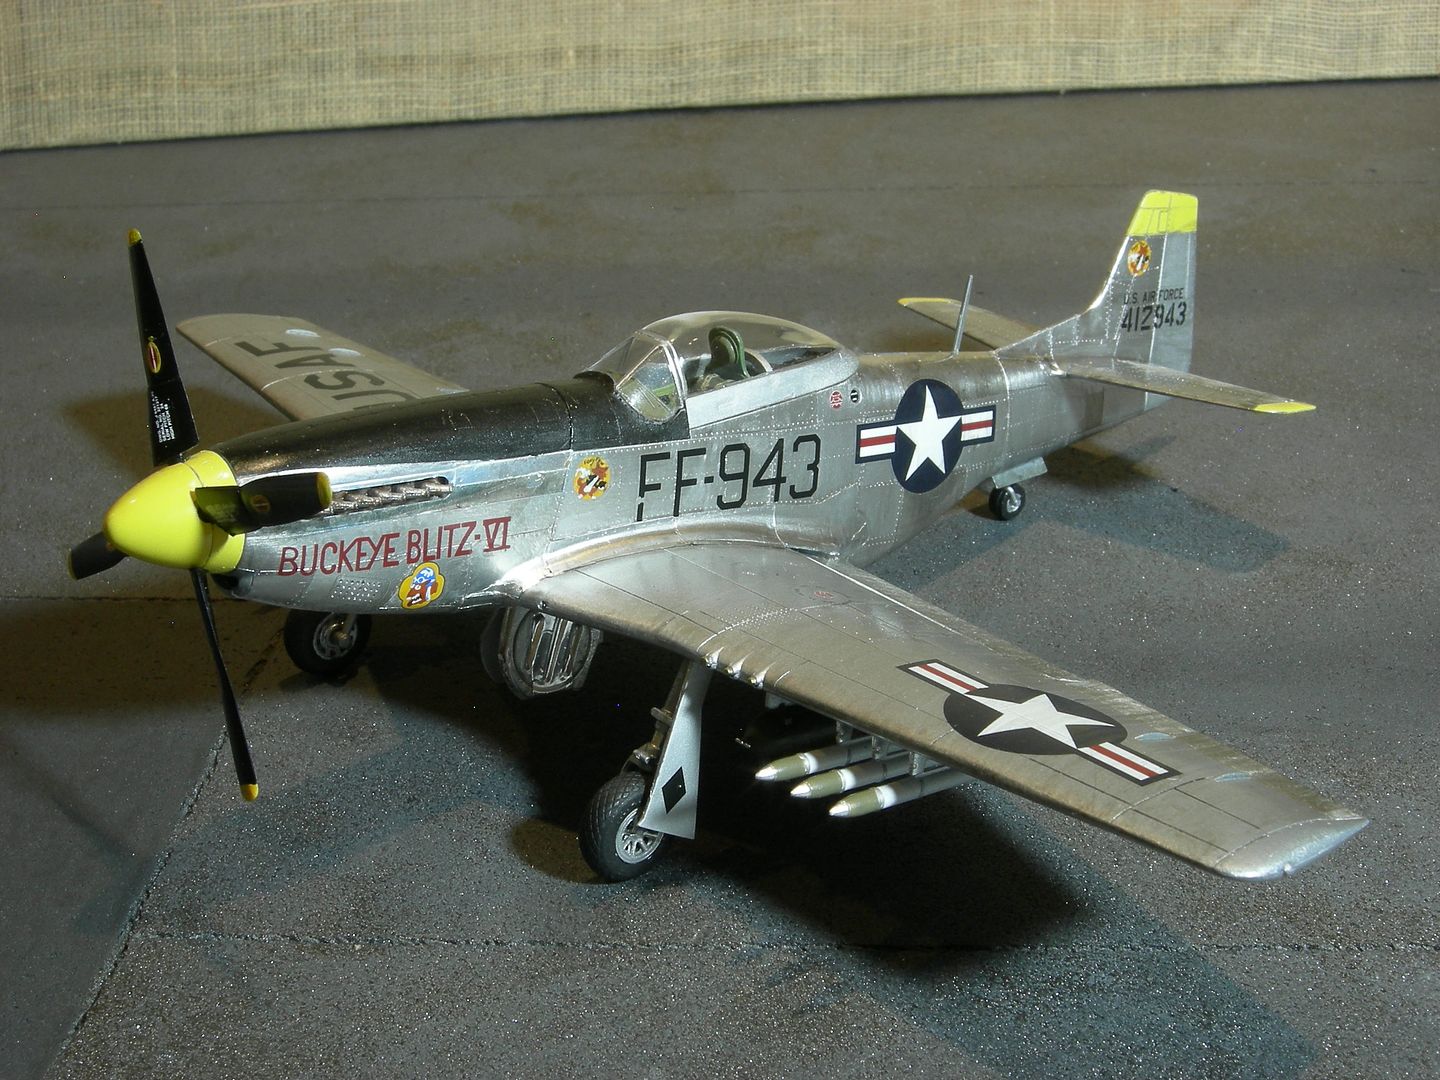
WARNING!! Decal setting solution will tarnish the foil. Note the tarnished color of the foil located above and below the star on the fusalage in the following photo. I like the way it looks because I wanted the plane to look dirty. If you do not like this look then do not use decal setting solution.
 

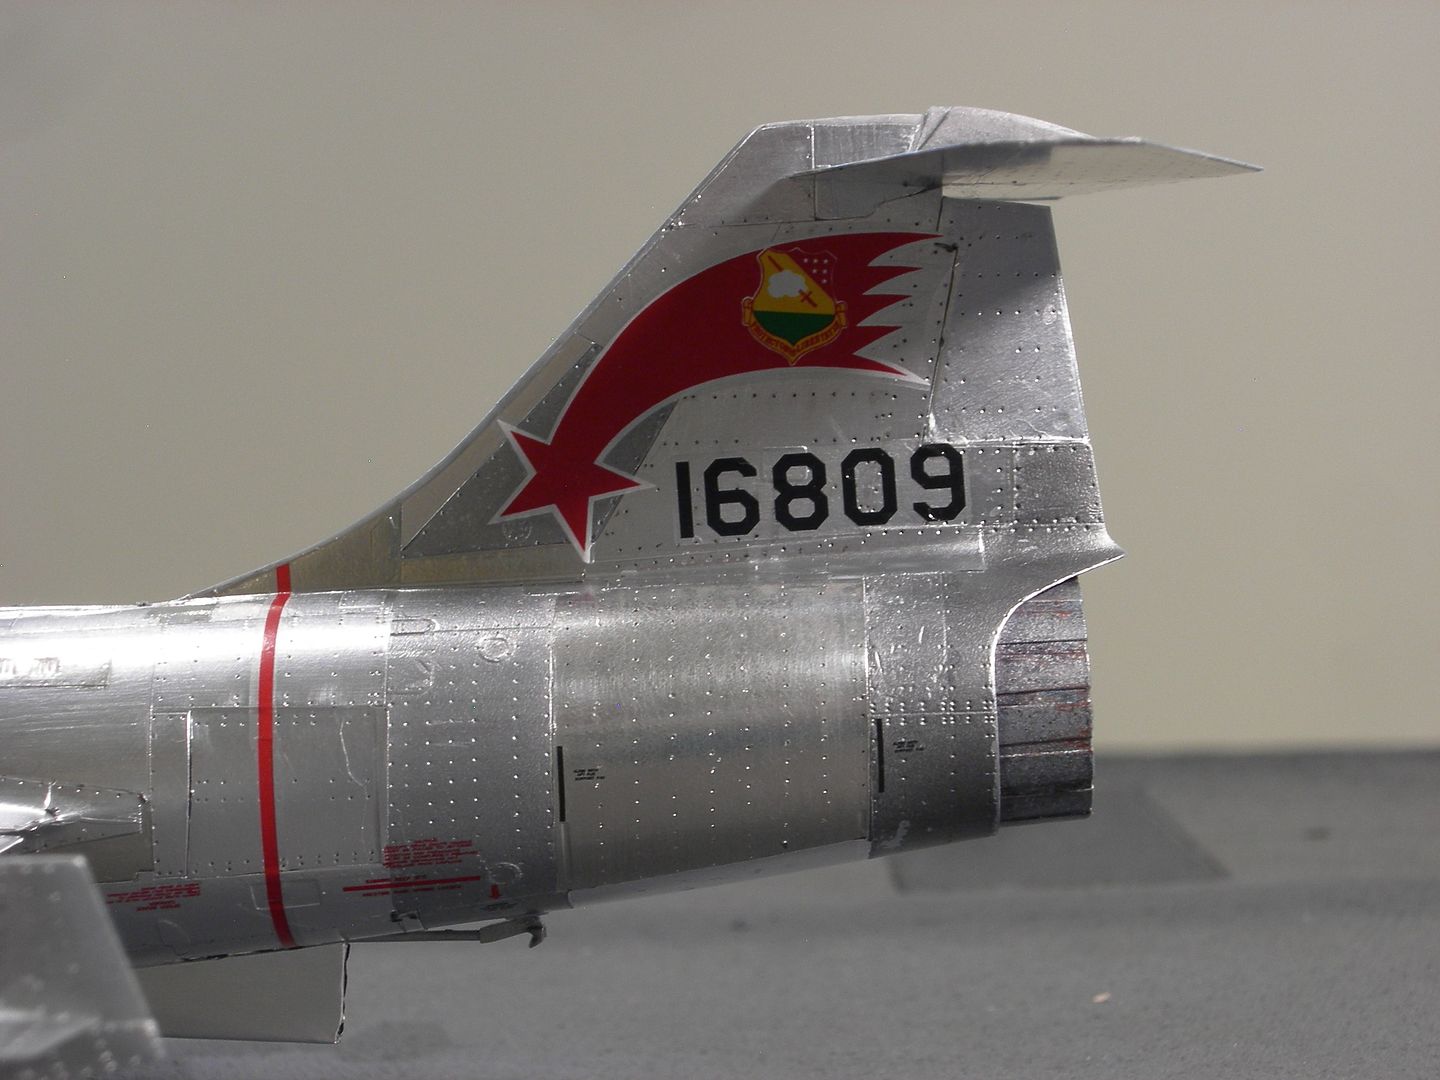
The following F-104C came with recessed rivets. I used a very "fine" magic marker to enhance the rivets. I pressed the marker into each rivet.


Your comments and questions are always welcome.

  • Member since
    January 2013
Posted by BlackSheepTwoOneFour on Monday, October 24, 2016 7:36 PM

Meh... I'm not a big fan of using BMF on aircraft kts. I prefer the Bare Metal Silver paint for realism over the shiny foil stuff. More realistic in my opinion since no aircraft in active service are shiny new -  except course restored WW2 aircrafts.

They look nice otherwise.

  • Member since
    March 2015
  • From: Close to Chicago
Posted by JohnnyK on Monday, October 24, 2016 8:12 PM

Following is a photo of an actual F-104. It is not a restored airplane. it is an "in service" airplane. These planes tended to be kept in a shiny condition. 

I have used Testors Metalizer and other silver paints on a number of airplanes. IMHO, they looked like painted airplanes, not real metal airplanes. Only metal looks like metal. To each his own. What is important is that we like the final results of our work.

Your comments and questions are always welcome.

  • Member since
    April 2013
Posted by KnightTemplar5150 on Monday, October 24, 2016 9:35 PM

Working with BMF requires a unique skill set and a lot of patience. You've got a great technique there, Johnny - well done! Thanks for sharing a look at how you did it!

  • Member since
    June 2014
  • From: New Braunfels , Texas
Posted by Tanker - Builder on Tuesday, October 25, 2016 8:10 AM

Hi;

 I have to say , Them's purty things with wings ! Now on the self made foil . When you did this you made the same mistake everyone else does . You followed directions ! You should it's true , BUT , this time you shouldn't have .

 I started using foil about twenty years ago and what I did was apply Micro foil adhesive to the foil , Not , the model . I know it says to do the opposite .

 I found by accident that when you follow the instructions , it doesn't seem to work as well . I had accidently thinned some of the adhesive to spray on a plane and sprayed the foil instead ! OOOPS! ! !

     Well , when I came back the stuff had dried clear and was sticky as Hayul . I had some old bumper stickers and took them off their backing paper and stuck the stickers on my neighbor's tractor , over some rust spots !

     I then smoothed the foil onto this strange paper .TADA ! ! A safe way to keep it , use it and re-use it . Now I use Bare-Metal Foil only when I have too . My homemade foil is still the foil of preference .

   Oh ! This too , the foil you buy in grocery stores and discount stores will work better IF you buy the house brand . It is thinner and sometimes shinier too . Also , it has sometimes heavier process roller grain and some slightly different shades as well .

 Process roller grain is the lines you see in the duller shiny side and sometimes the very shiny stuff that looks like lines . They come from the big rollers that start with an aluminium billet about a ton in weight and keep thinning it till it is foil .

 Yup , I watch " How it's Made " Too ! Model On - - -T.B.

  • Member since
    November 2009
  • From: Twin Cities of Minnesota
Posted by Don Stauffer on Tuesday, October 25, 2016 9:39 AM

When I was in the AF, I remember squadron commander's aircraft were usually highly polished, compared to the rest of the planes in the squadrons.  This was in the states, with squadrons like training and transport squadrons not in combat areas.


Don Stauffer in Minnesota

  • Member since
    March 2015
  • From: Close to Chicago
Posted by JohnnyK on Tuesday, October 25, 2016 11:01 AM

Tanker - Builder

Hi;

 I have to say , Them's purty things with wings ! Now on the self made foil . When you did this you made the same mistake everyone else does . You followed directions ! You should it's true , BUT , this time you shouldn't have .

 I started using foil about twenty years ago and what I did was apply Micro foil adhesive to the foil , Not , the model . I know it says to do the opposite .

 I found by accident that when you follow the instructions , it doesn't seem to work as well . I had accidently thinned some of the adhesive to spray on a plane and sprayed the foil instead ! OOOPS! ! !

     Well , when I came back the stuff had dried clear and was sticky as Hayul . I had some old bumper stickers and took them off their backing paper and stuck the stickers on my neighbor's tractor , over some rust spots !

     I then smoothed the foil onto this strange paper .TADA ! ! A safe way to keep it , use it and re-use it . Now I use Bare-Metal Foil only when I have too . My homemade foil is still the foil of preference .

   Oh ! This too , the foil you buy in grocery stores and discount stores will work better IF you buy the house brand . It is thinner and sometimes shinier too . Also , it has sometimes heavier process roller grain and some slightly different shades as well .

 Process roller grain is the lines you see in the duller shiny side and sometimes the very shiny stuff that looks like lines . They come from the big rollers that start with an aluminium billet about a ton in weight and keep thinning it till it is foil .

 Yup , I watch " How it's Made " Too ! Model On - - -T.B.


Thanks for the tip. I always put the Mico Foil Adhesive on the plastic. I could never get it smooth enough. What did you thin it with? I agree with you regarding house brand foil. I like the grain and I like the dull color of it. It looks just like weathered aluminum. I will give this a try on my next build. Do you have any photos that you can post?

Your comments and questions are always welcome.

  • Member since
    March 2015
  • From: Close to Chicago
Posted by JohnnyK on Tuesday, October 25, 2016 11:33 AM

KnightTemplar5150

Working with BMF requires a unique skill set and a lot of patience. You've got a great technique there, Johnny - well done! Thanks for sharing a look at how you did it!


I think that there are two types of modelers. One modeler likes to get their models done quickly and move on to the next model. Which is fine. The other type likes to tinker with their model regardless of how long it takes to complete the model. The first type of modeler would be frustrated trying to use metal foil because it takes an extended amount of time to complete that model.


John

Your comments and questions are always welcome.

  • Member since
    July 2004
  • From: Sonora Desert
Posted by stikpusher on Tuesday, October 25, 2016 11:45 AM

Well I have multiple "tinkering" projects that have been going on for years... and no big deal. But I can still see myself getting easily frustrated with this stuff. One day I will have to try foil out though.


F is for FIRE, That burns down the whole town!

U is for URANIUM... BOMBS!

N is for NO SURVIVORS...

       - Plankton

LSM


  • Member since
    July 2004
  • From: Sonora Desert
Posted by stikpusher on Tuesday, October 25, 2016 11:47 AM

Don Stauffer

When I was in the AF, I remember squadron commander's aircraft were usually highly polished, compared to the rest of the planes in the squadrons.  This was in the states, with squadrons like training and transport squadrons not in combat areas.


Right- the look of a NMF aircraft depends a lot upon service area, timespan, etc. And what many folks think are NMF aircraft are often aluminum lacquered finishes.


F is for FIRE, That burns down the whole town!

U is for URANIUM... BOMBS!

N is for NO SURVIVORS...

       - Plankton

LSM


  • Member since
    April 2013
Posted by KnightTemplar5150 on Tuesday, October 25, 2016 2:01 PM

JohnnyK

I think that there are two types of modelers. One modeler likes to get their models done quickly and move on to the next model. Which is fine. The other type likes to tinker with their model regardless of how long it takes to complete the model. The first type of modeler would be frustrated trying to use metal foil because it takes an extended amount of time to complete that model.

John

I suspect that the modelers of the second group you mention would agree that finishing a plane in foil is an intensive labor of love done to challenge both their skills and their sense of artistic vision. Painting a convincing metal finish is always a challenge, but this type of finish requires another degree of craftsmanship altogether. Thanks again for sharing your work - rivet lines on foil, how cool is that?!?!

  • Member since
    March 2015
  • From: Close to Chicago
Posted by JohnnyK on Tuesday, October 25, 2016 3:05 PM

stikpusher


Don Stauffer

When I was in the AF, I remember squadron commander's aircraft were usually highly polished, compared to the rest of the planes in the squadrons.  This was in the states, with squadrons like training and transport squadrons not in combat areas.


Right- the look of a NMF aircraft depends a lot upon service area, timespan, etc. And what many folks think are NMF aircraft are often aluminum lacquered finishes.


As you said, this F-86 has a painted finish.

Photo ID 158318

Your comments and questions are always welcome.

JOIN OUR COMMUNITY!

Our community is FREE to join. To participate you must either login or register for an account.

SEARCH FORUMS
FREE NEWSLETTER
By signing up you may also receive reader surveys and occasional special offers. We do not sell, rent or trade our email lists. View our Privacy Policy.