APPLYING FOIL AND MAKING RIVETS
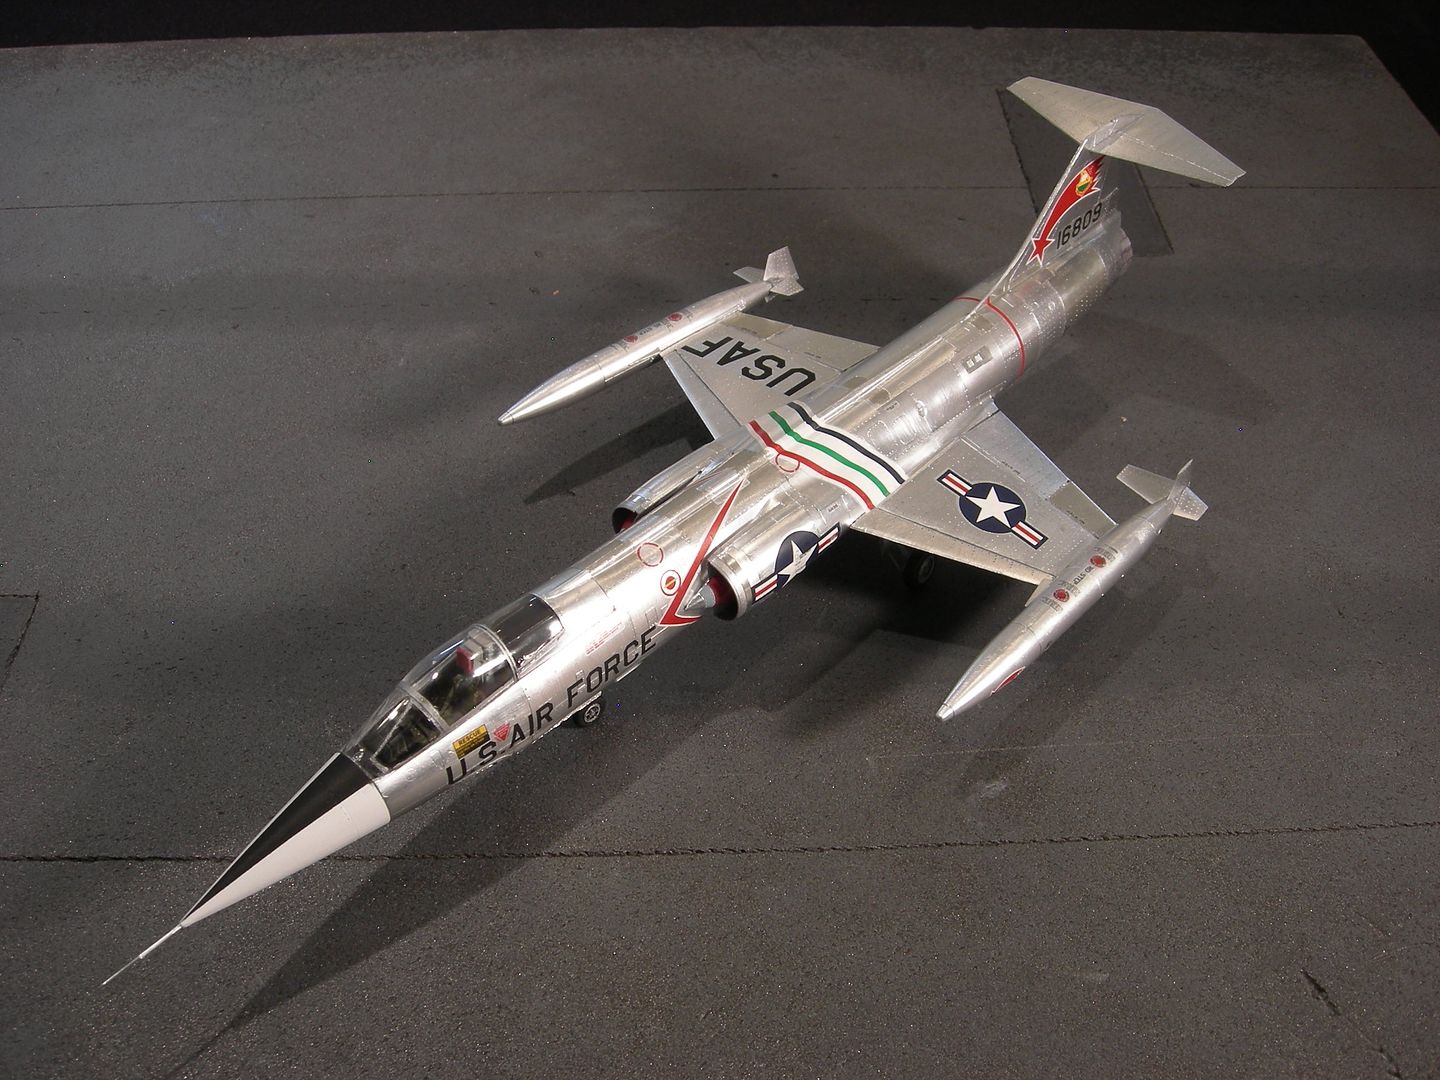
I just finished my third model airplane in metal foil. The plane is an F-104C. I would like to share my tips for applying the foil and making rivets.
I only use a product called Bare Metal FoiI. This product is a bit thinner than kitchen aluminum foil and is comes with a pressure sensitive adhesive on one side. I use three different types of BMF, “Matte Aluminum”, “Chrome” and Ultra Chrome. Matte Aluminum is used on the vast majority of the airplane. Chrome and Ultra-chrome are used on a few panels to add variety to the final appearance. I have tried to use kitchen aluminum foil with an adhesive that is applied to the model, but I was never able to apply the adhesive smooth enough. So, I now only use BMF.
The following tools are useful for applying the foil and are available at craft stores.
· X-acto knives for cutting the foil. You need to purchase a large number of these because they become dull quickly when cutting the foil. Dull knives cause the foil to tear.
· A ruler that is used to measure the foil and provide a straight edge when cutting the foil. My ruler has a cork backing to prevent it from sliding on the foil. I use “post-it-notes” for measuring curved surfaces.
· Paper blending sticks and Q-tips are used to smooth the foil after it is applied to the model.
· 0000 steel wool is used to enhance the natural grain of the BMF.
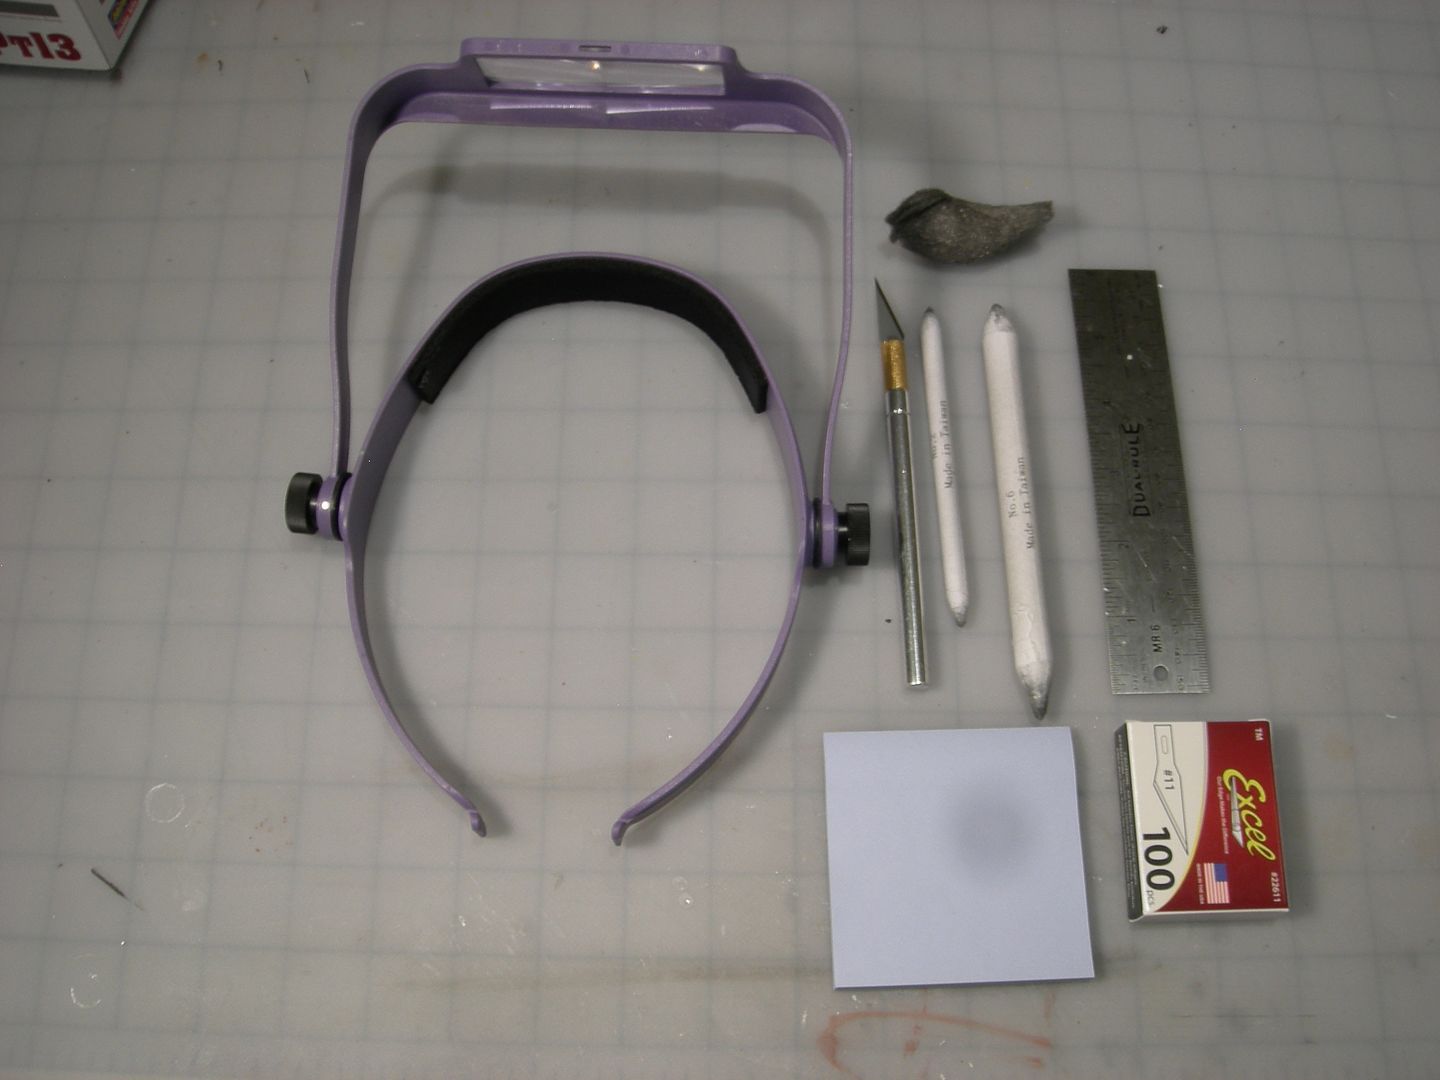
I also use a magnifier. I do not think that it is possible to apply foil without a magnifier. It is really important to keep your work surface, tools and model very clean. If you apply foil over the smallest bit of dirt or hair it will be magnified and ruin the appearance of the model. If that happens you will need to remove the foil and reapply it. Also, keep your hands clean. Oil from your hands will show up on the foil. In fact, I use a cotton glove on my left hand with the index finger removed. This aids in keeping the model clean.
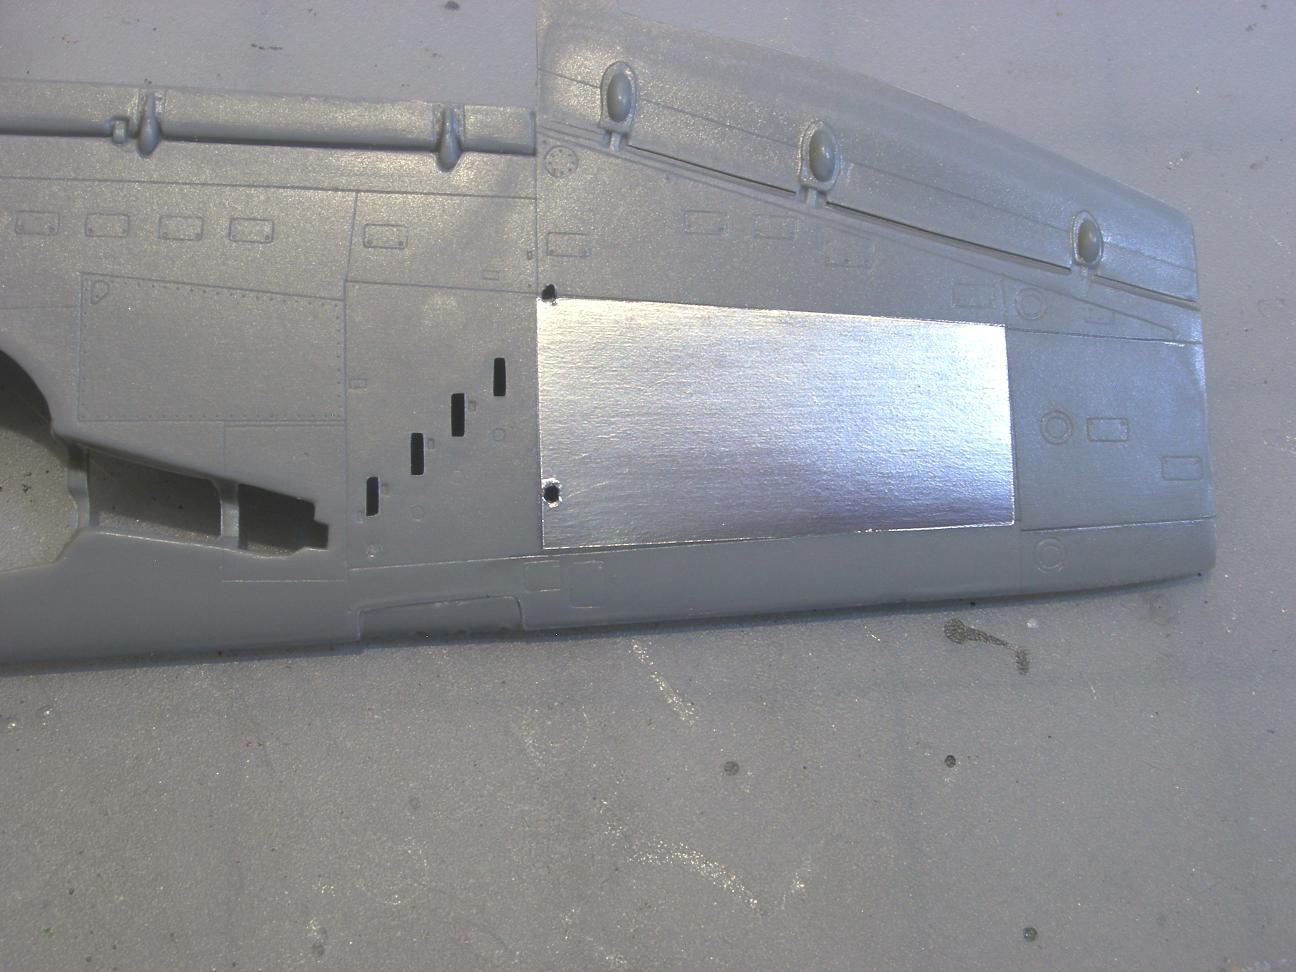
FOIL STEP 1
Note which way the grain runs on the foil. You can change the direction of the grain to vary the appearence of the panels, just don't make the model look like a checker board. Cut a piece of foil that is slightly larger than the panel that will be covered. Use an xacto knife to aid in peeling the foil from the backing paper. Try to not let the foil curl over on itself. Wipe the model with your finger to remove dust and hair. Next, apply the foil to the panel and use your finger to smooth it down. At this point the foil will look really bad, but don't worry, it will be smoothed out in Step 2.
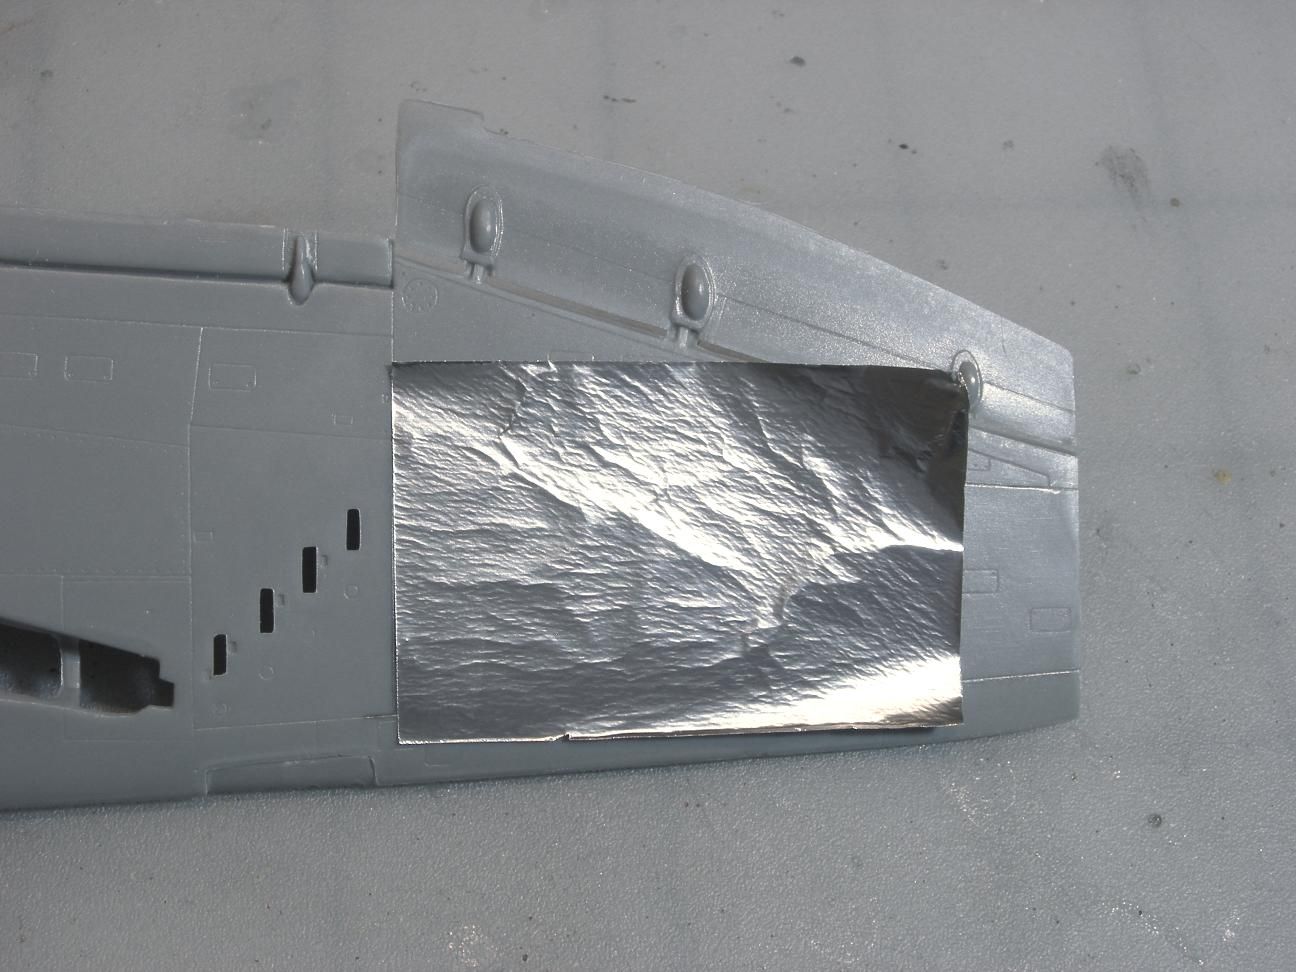
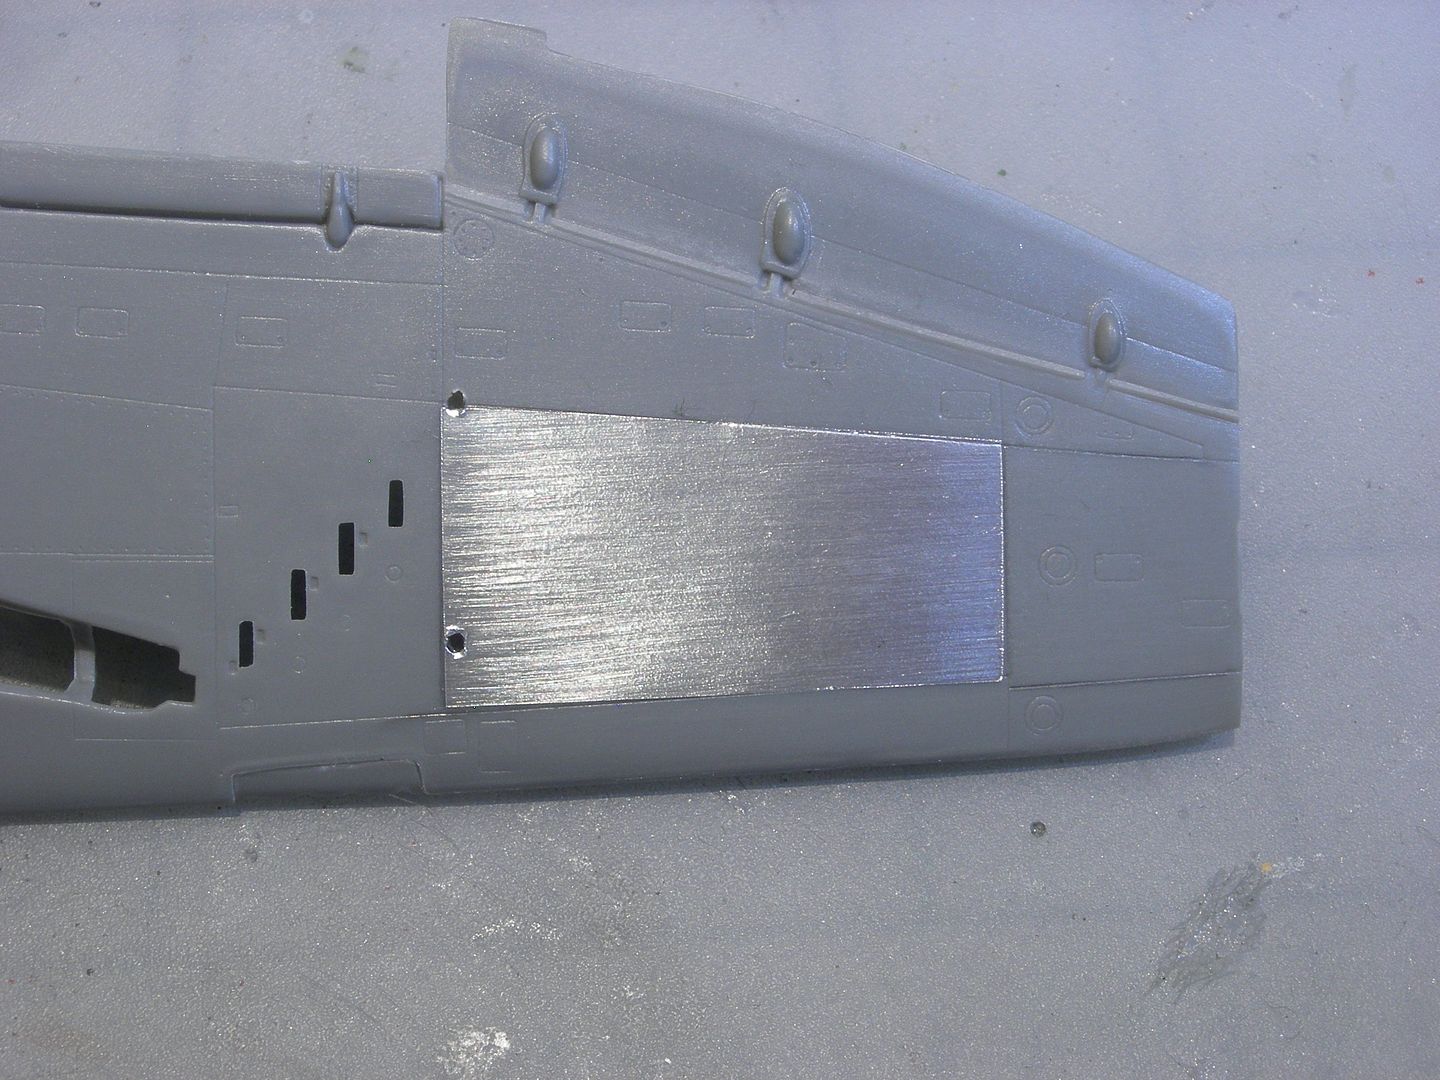
FOIL STEP 2
Use the paper blending stick to smooth the foil. Rub the foil at one side and work your way over the foil. You can press hard to get a smooth finish. Rub extra hard at the recessed panel joint so that you can see the panel joint. Using an xacto knife, trim the foil along the panel line. You should be able to do this freehand, just work slowly and try not to trim the foil in a single pass. Trim the foil in small cuts. After the foil is trimmed rub the panel lines with the blending stick to push the foil into the panel lines. Note that the grain is running sideways.
. 
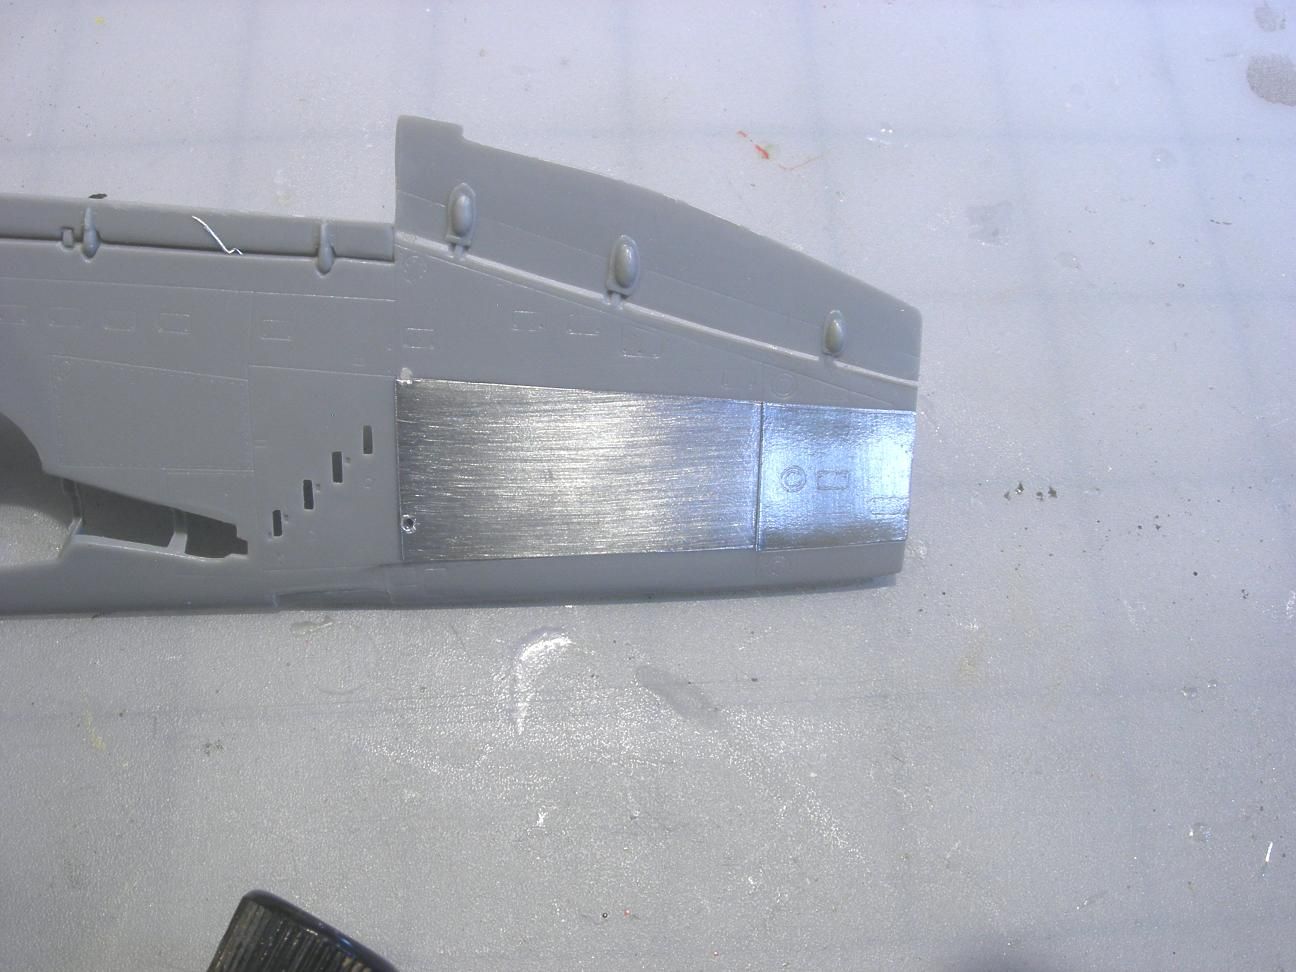
FOIL STEP 3
Rub the foil with 0000 steel wool in the direction of the grain. Only make one pass with the steel wool.
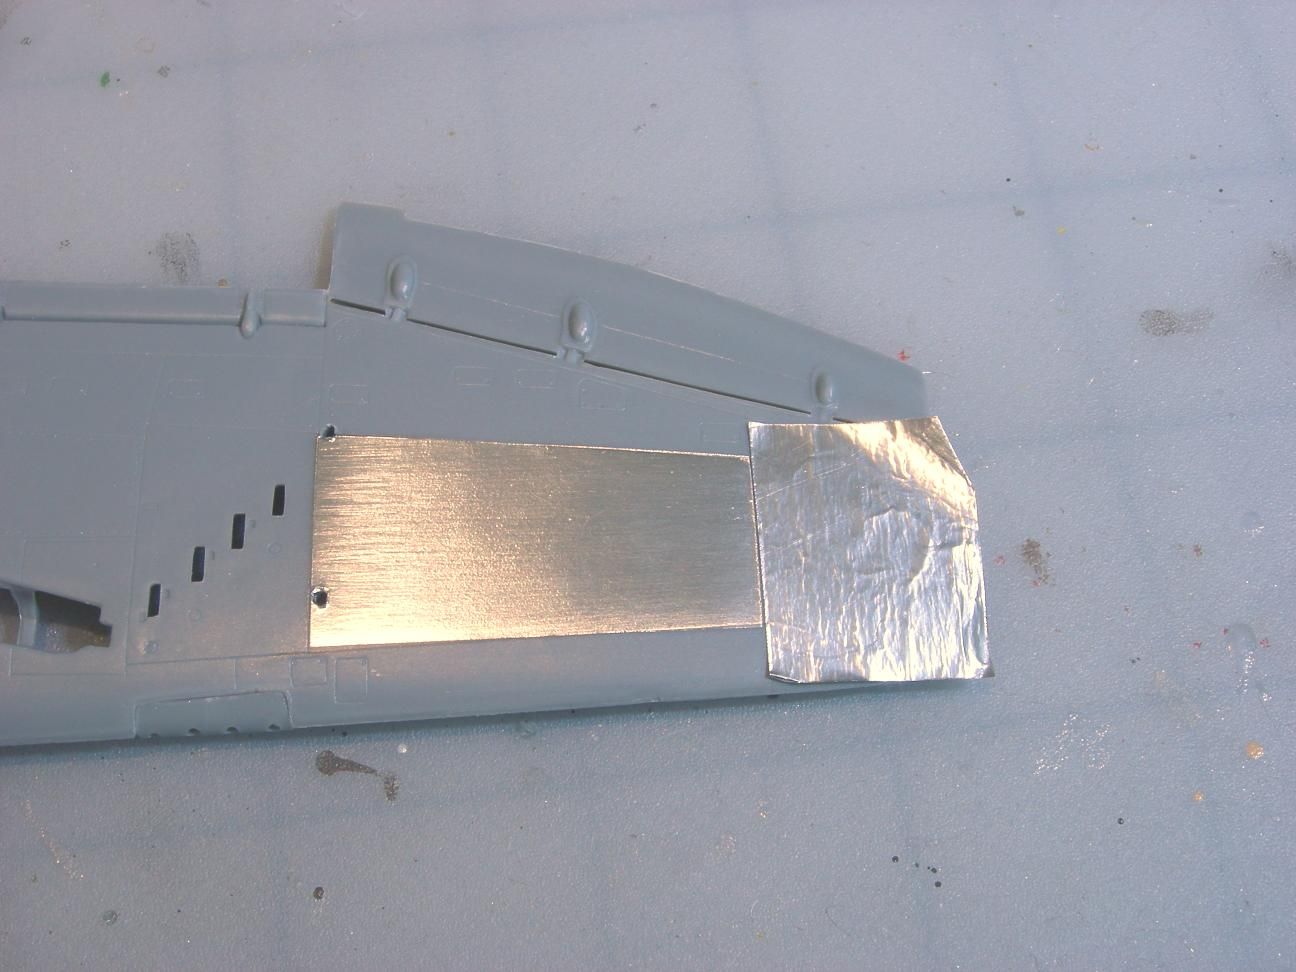
FOIL STEP 4
Apply foil to the next panel using Steps 1 - 3. Note that the grain in the second panel is running the opposite direction of the first panel. Protect the first panel with a "post it note" to protect it when rubbing the second panel with steel wool.
MAKING RIVETS
The Revell P-47 did not have recessed rivets, so I made my own. Following is a P-47 wing that is ready for rivets.
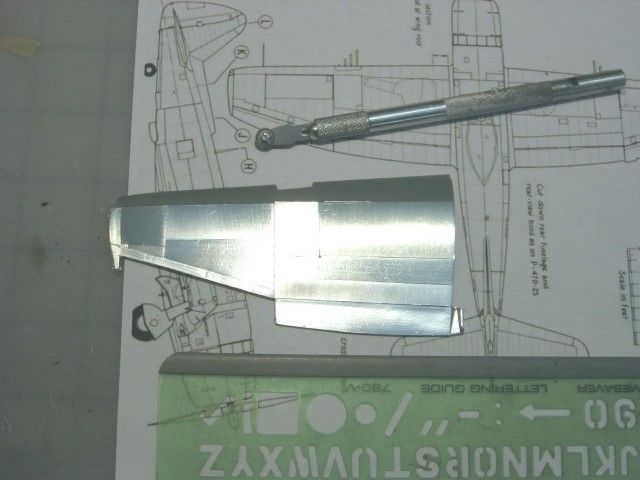
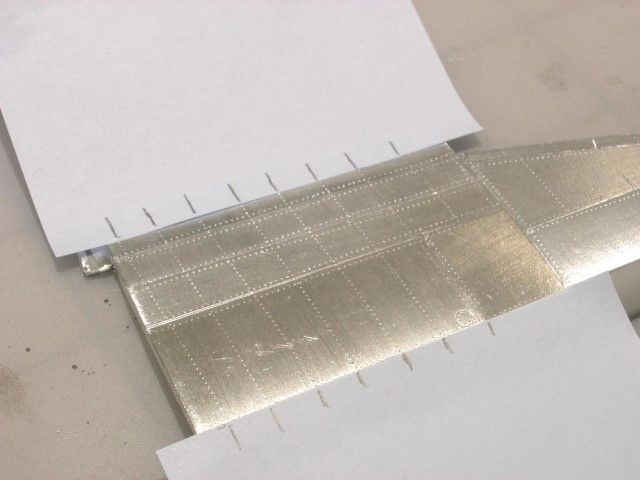
RIVETS STEP 1
I use a RB Productions rivet wheel to make the rivets. Basically the tool is a wheel with teeth. The tool came with three wheels with different size teeth. I used an old lettering template as a straightedge when making the rivets. The lettering templete is flexable so I can use it on curved surfaces. I found a drawing on the Internet that showed the rivet pattern of the P-47. It is really important that the rivet patterns a straight and evenly spaced!!! Crooked rivets look really bad. I use "post it notes" to space the rivet lines and a straight edge to make straight rivet lines. Remember, crooked rivets look bad!
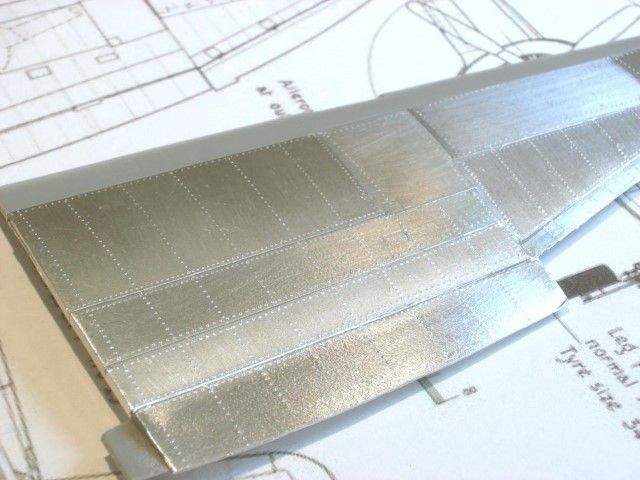
Following is the model with rivets. Note that the grain of the foil runs in different directions.
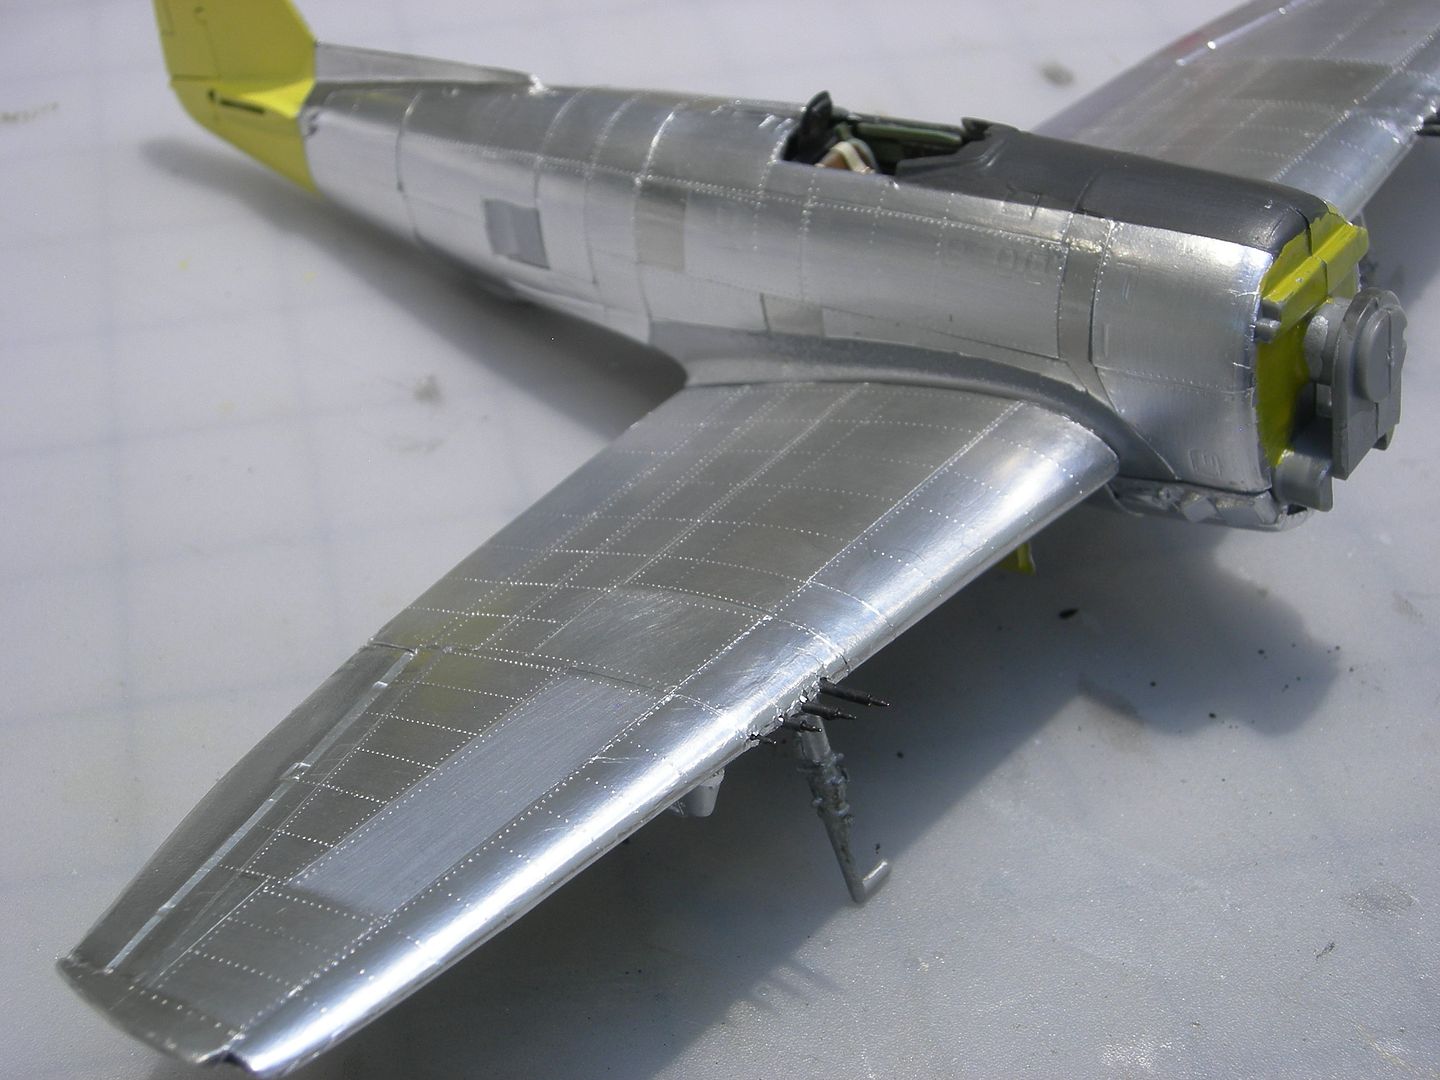
I weathered the foil with Tamaya Smoke. Wet the brush before putting it into the Smoke and apply thin coats. Once the Smoke is on the foil it cannot be removed.

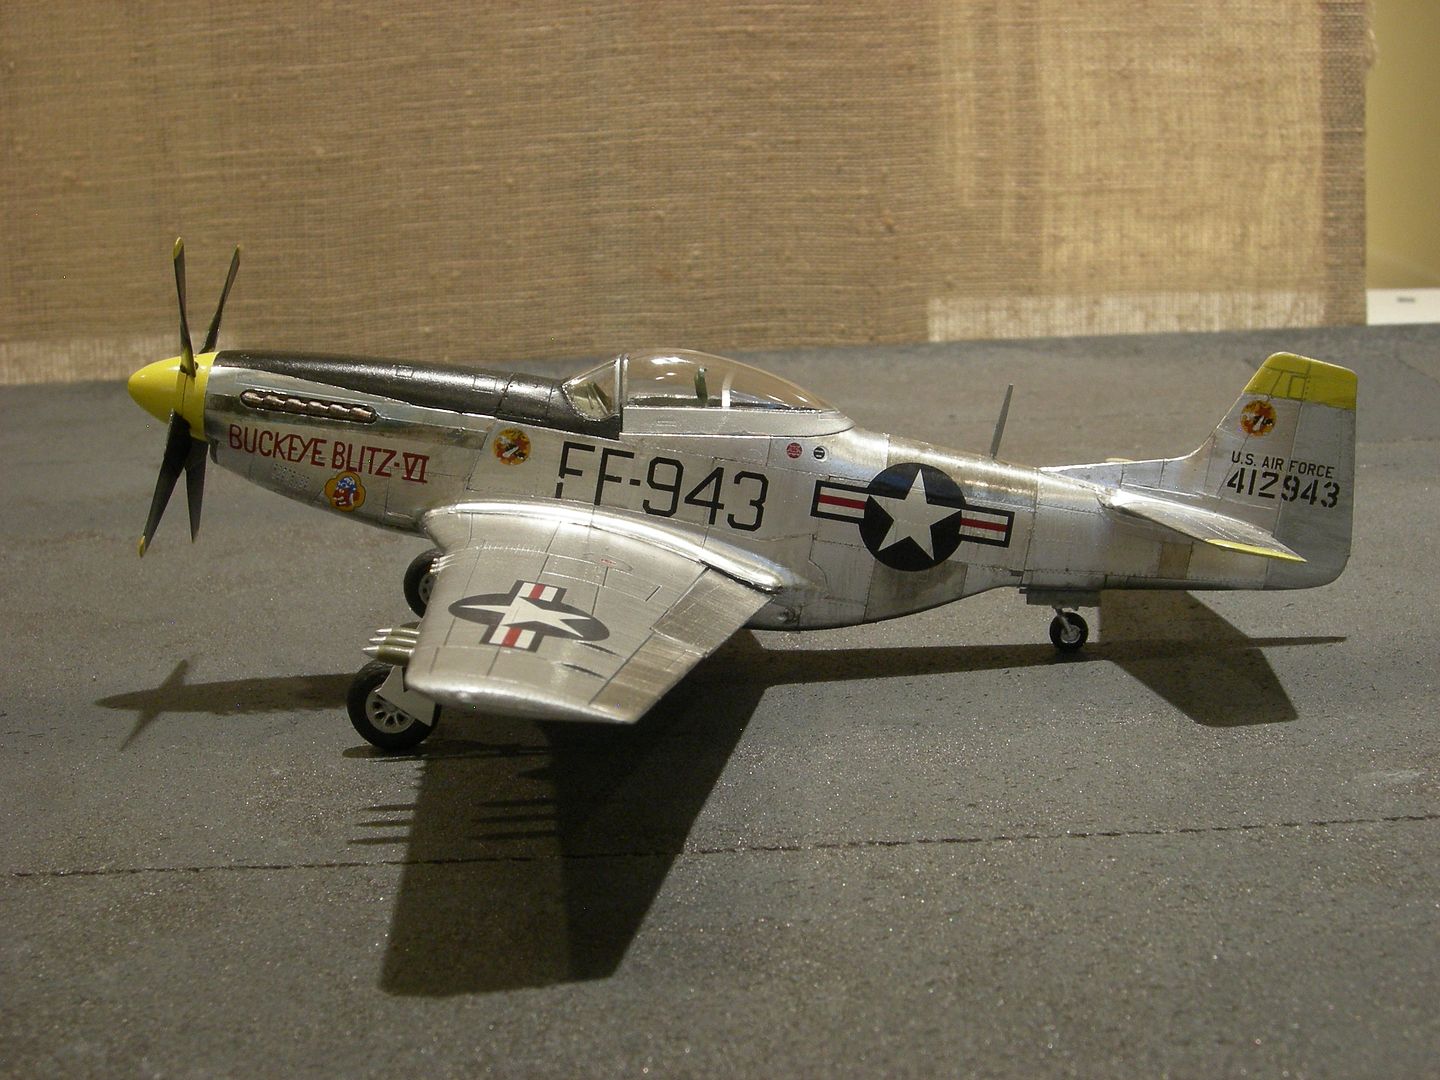
Following is a P-51 with foil. The wings are painted and the fusalage is foiled. The model did not come with rivets, so I needed to make the rivets.
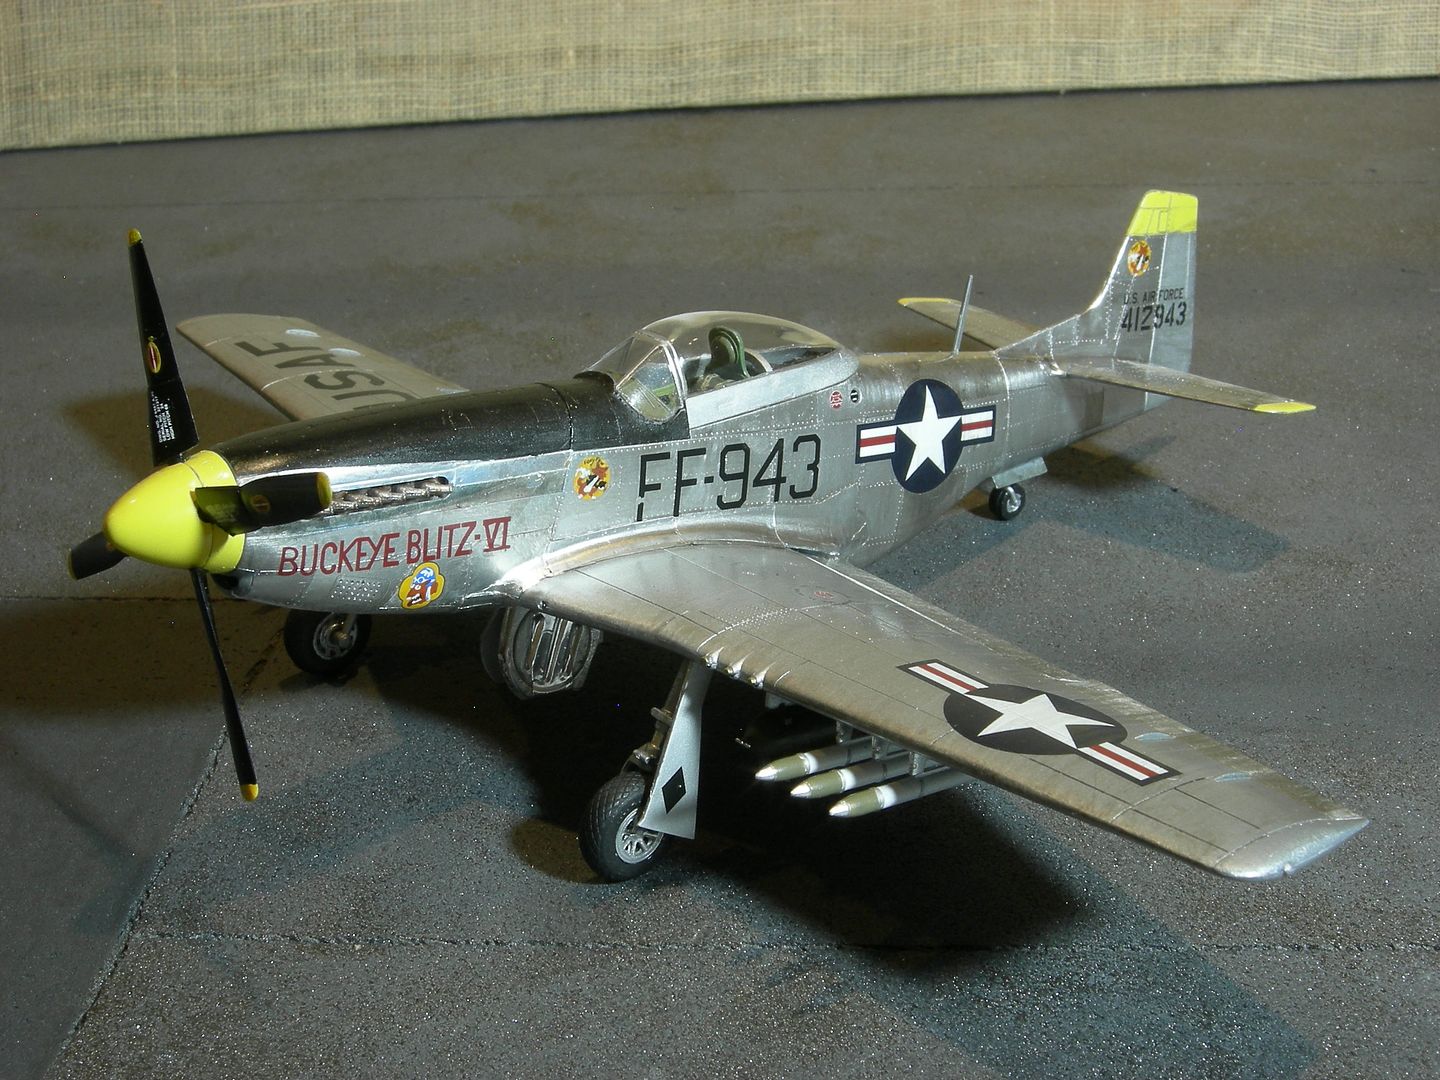
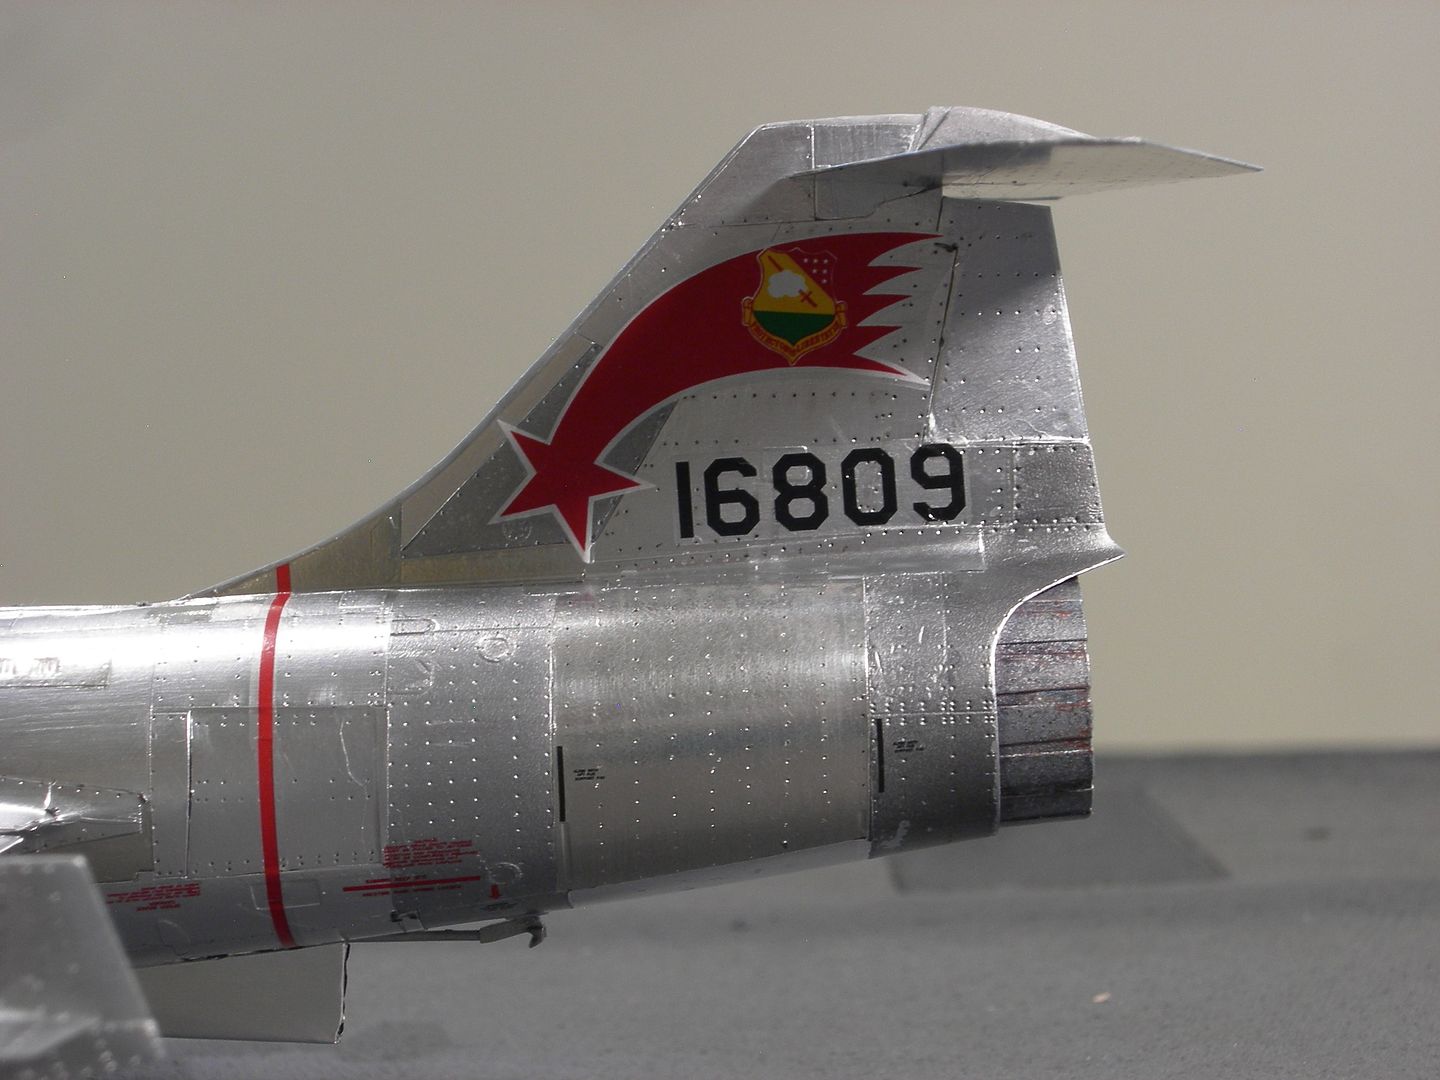
WARNING!! Decal setting solution will tarnish the foil. Note the tarnished color of the foil located above and below the star on the fusalage in the following photo. I like the way it looks because I wanted the plane to look dirty. If you do not like this look then do not use decal setting solution.
The following F-104C came with recessed rivets. I used a very "fine" magic marker to enhance the rivets. I pressed the marker into each rivet.