SEARCH FINESCALE.COM

Enter keywords or a search phrase below:

Is it possible to brush paint

1248 views
7 replies
1 rating 2 rating 3 rating 4 rating 5 rating
  • Member since
    July 2014
  • From: Franklin Wi
Is it possible to brush paint
Posted by Bakster on Sunday, June 12, 2022 10:00 AM

a smooth airbrushed finish? And when I say AB finish... I mean no brush marks, no globules, no uneven coverage, and no variations in color tone.

I have experimented wih all types of paint and thus far, the only thing I have come close to it is with using craft acrylic paints. I find that if you flow it on heavily it will self level and produce an even color tone. However, you do lose some detail with the heavy flow and having a heavy flow does not work well with blocked out areas and/or masked areas. 

Does anyone have a process that works? 

  • Member since
    March 2013
Posted by patrick206 on Sunday, June 12, 2022 3:27 PM

Hi, Steve -

I've had some moderate success with brushing, operative word being SOME. One time I did an entire 1:48 A-6 by brushing Model Master Sea Gray acrylic, thinned only with water. I was on a London flight with three day layover, took the model and a few supplies for something to do. However it happened, the job turned out pleasing well. I feel quite sure it had to do with the thinning ratio.

For the most part I have good results only when doing small areas, like LG doors, etc. Model color is one of the better ones for brushing, Tamiya is very demanding of additives, to avoid brush marks and rapid drying while still spreading paint. And I have enjoyed some really good results with some of the craft acrylics, the one I favor is Craft Smart. For that one I thin only with distilled water, and the thinning ratio is really important, I keep adding water and stirring, trying sample areas until it flows well.

If I have done it correctly it covers with one pass, and it's then thin enough to not lose much, if any, surface detail. I find it useful for rotor blades and prop blades, inside cowl areas, gear doors and such. The key is to lay it on uniformly with a slight overlap for each pass, and avoid continued brushing so you don't let it start to setup on the brush and cause uneven coverage. The self leveling feature allows for the smooth surface we seek, so attempts to make it smoother by continued brushing just leaves you with just the opposite, an uneven surface.

In some cases when the temp is higher, I do add a drop or two of flow improver and that seems to help.

Patrick


  • Member since
    October 2021
Posted by PhoenixG on Sunday, June 12, 2022 8:44 PM

Hi Bakster,

Patrick206 has some great guidance there.

In my experience it is possible to create a very good finish with brushes.

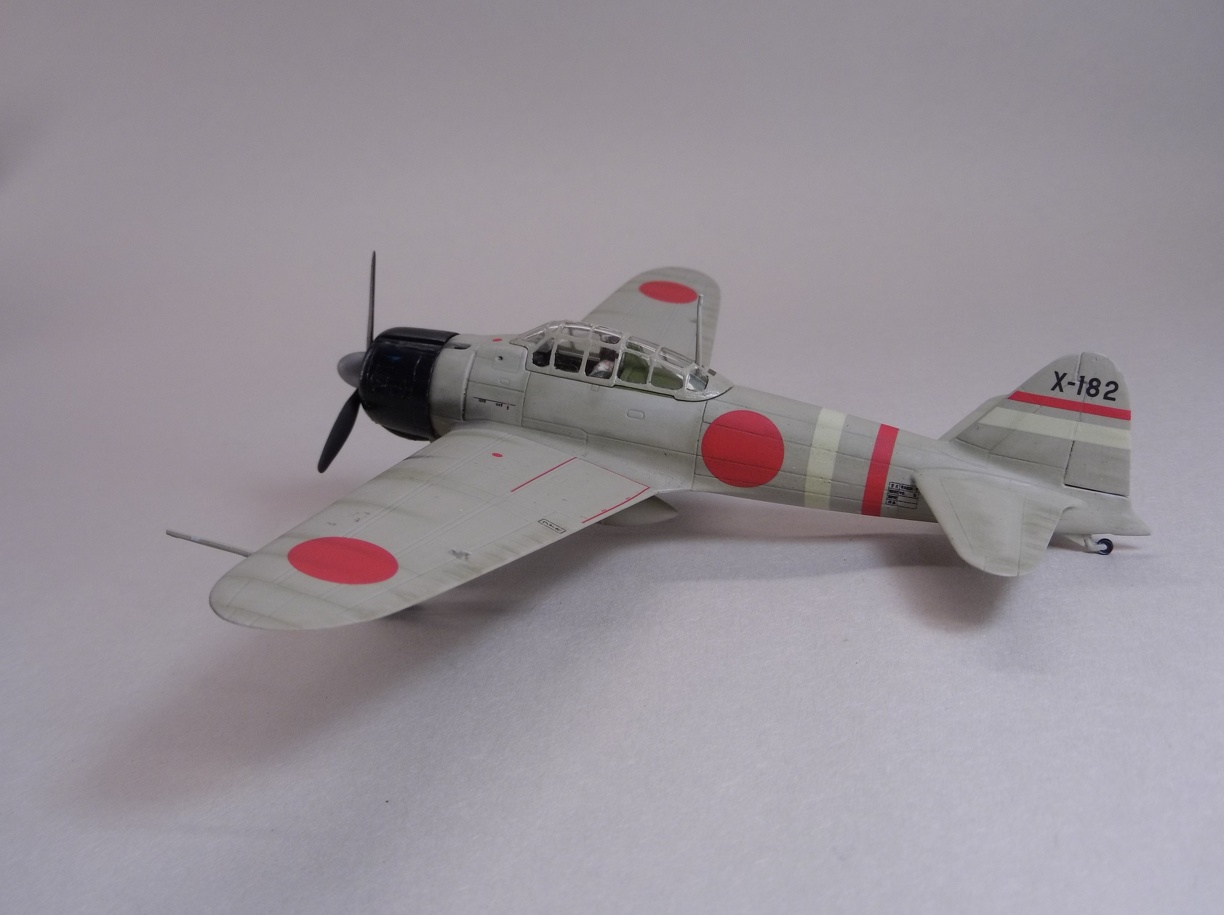
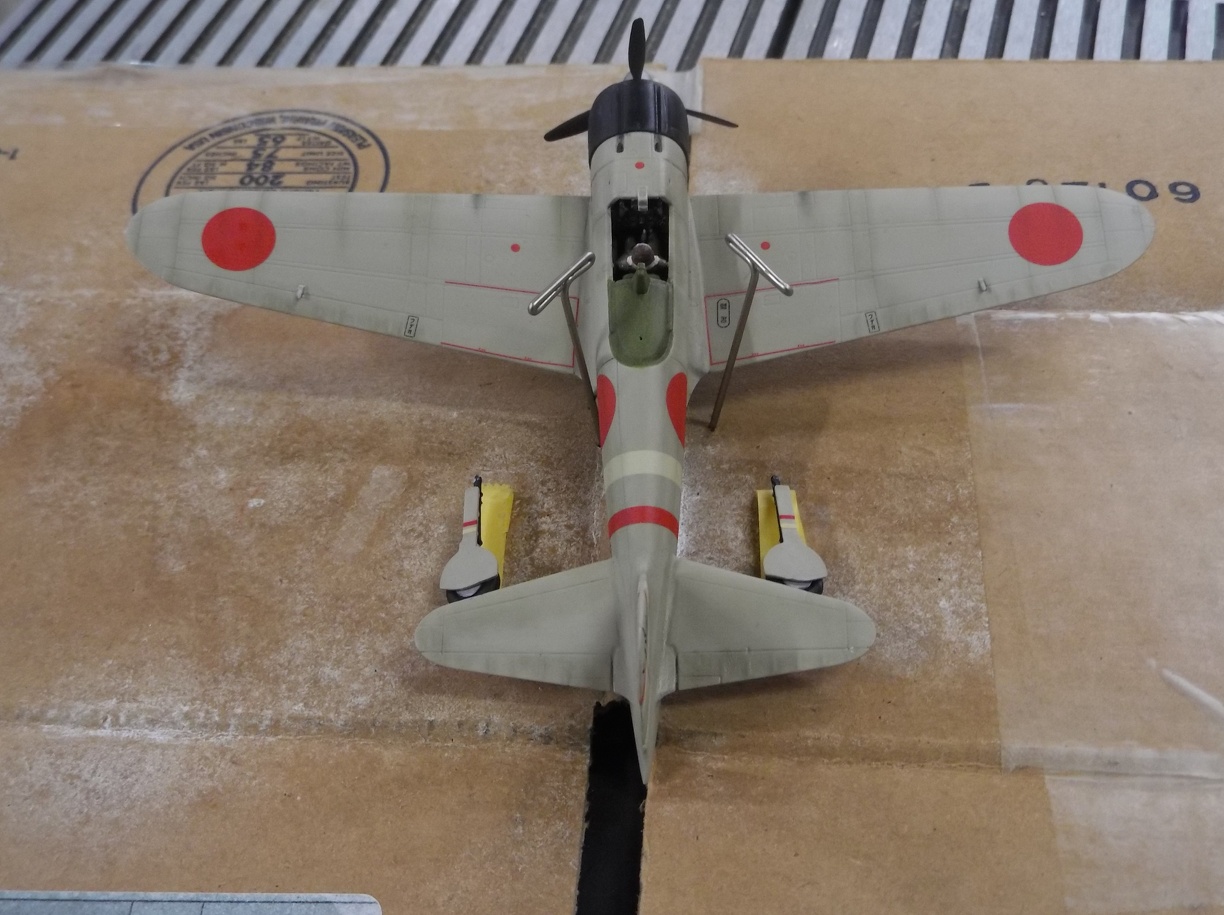
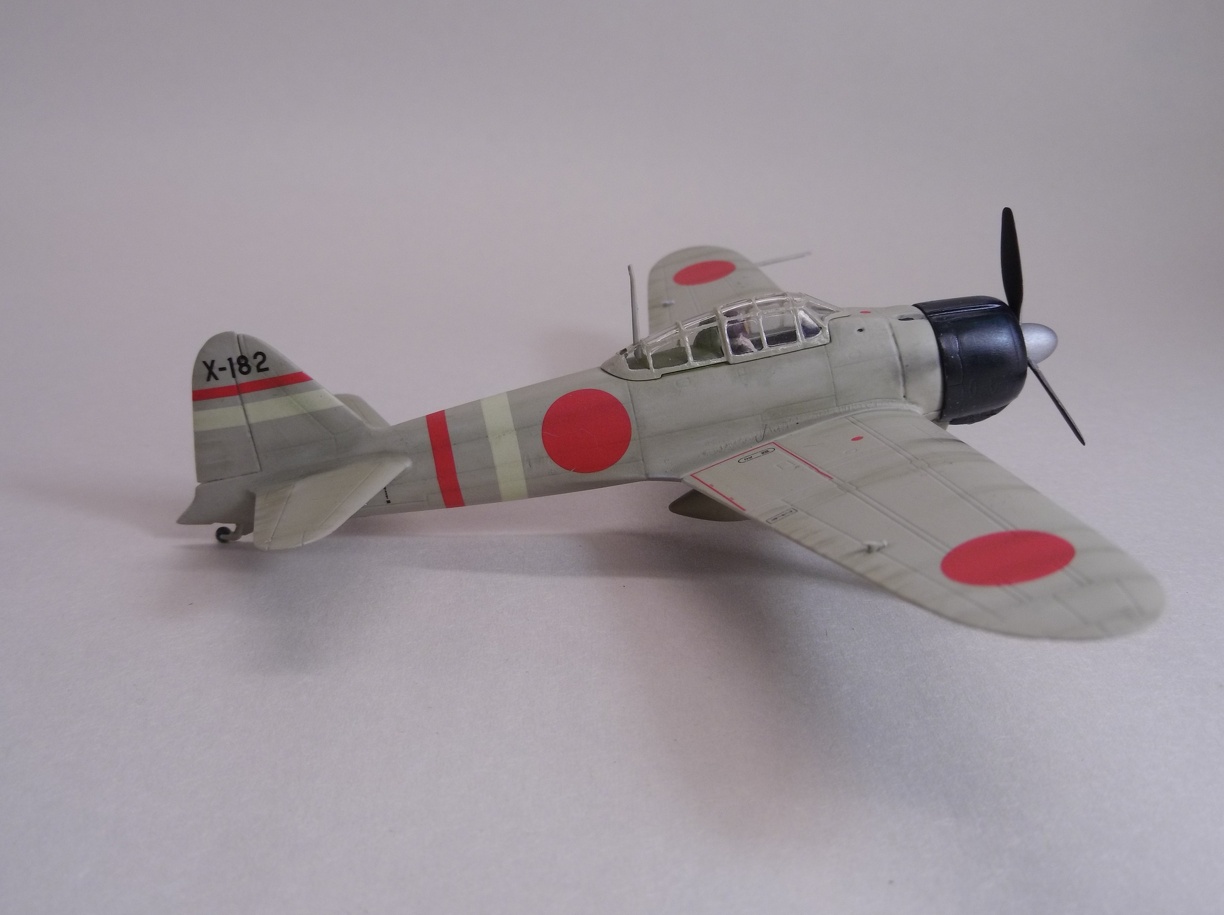
This Airfix 1/72 Zero was done with acrylics and brushes.  The varnish was done with a rattle can of Testors dull coat.  It's also the last thing I fully brush painted after purchasing my first airbrush last year.
zero1

zero2

zerozero

I apologize up front.  Explaining things simply, is a challenge for me, and my inclination is towards painstaking detail.  I blame my background in systems administration.

I use Vallejo Model color almost exclusively. Using it sometimes feels more like alchemy than chemistry. 

There are a few things I have learned when working with acrylics.

  1. Proper thinning is a must
  2. How to thin the paint varies according to not only manufacturer but sometimes the color being used as well!
  3. how the brush is cared for while painting is as important as how the paint applied
  4. Paint once and then move on.

As I've mentioned in other posts, I don't prep MC with airbrush thinner or flow improver.  It tends to lift the earlier layers of paint.  On occasion I will add a very small amount of retarder to the paint on my palette.  This is mostly to slow down the drying out of paint on the palette as I don't yet own a wet palette.  It's rare for me to add retarder as it tends to act as a thickener as well.


1-2) Thinning the Paint:

This describes small batch prep as that is my most often use it but the process scales up well to larger batches.

Regardless how small the piece being painted is, starting with two to three drops of paint works great.  It is less likely to be over thinned, easier to mix, and takes longer to dry out on the palette.  Whenever I start with less, the inevitable result is I have to add at least that much more to correct things.

When thinning MC, I start with a single drop of Vallejo's Thinner Medium.  This is not airbrush thinner but part of the Vallejo line of paint mediums.  It helps reduce the viscosity of the paint while maintaining paint adhesion. You can substitute straight water for the Thinner Medium and that is how I started.  However, I did discover mixing some of this in creates a more easily reproduced experience with the paint.

  If the consistency is still too thick, I'll dip a 2/0 brush in distilled water and without blotting, mix it into the paint.  I'll repeat that process till the desired paint consistency is achieved.  Usually about the point when only a small round of paint will easily form on the tip of a moistened brush.  Word of caution, I did discover that thinning with mostly water requires MC be stirred more frequently to keep it mixed. 

3) Prepping the Brush:

  Wet it with distilled water and then wipe it off on a paper towel till it is essentially dry.  My assumption is this leaves enough water in the bristles to act like a lubricant both for picking up paint as well as applying it. 

If the paint was thinned well, when dipping the brush into the paint, the paint shouldn't climb much higher than the depth the brush was inserted.  If it wicks up much higher, than either the paint is too thin or the brush too wet.  If the brush is to wet, simply rinse it out, blot it dry and try again.  If the paint is to thin, I'll sometimes use a toothpick to slowly add a little more paint. 

Now the brush has paint in it, but before brushing gently wipe one side of the brush onto a paper towel.  This should leave one side with some paint and fairly flat and the other with a bit of rounded paint on it.  Apply the flat side sans paint to the part and start the stroke.

Wiping off that bit of paint does two things.  One, it helps prevent leaving a blob of paint at the start of the brush stroke and two, the remaining blob of paint at the top continuously feeds paint to the brush during the stroke.  I use it as visual indicator for when I need to load up my brush again.  That wipe is done every time the brush is reloaded with paint.

Regularly rinse out the brush and blot it dry as described above.  The thinners and mediums evaporate relatively quickly and leave deposits of pigment in the brush which can create an uneven application of paint as well as depositing unexpected lumps.  The smaller the brush the more frequently it needs to be rinsed.

4) Paint Once and Then Move On:

First coats are rarely even.  Just like Patrick206 said, resist the urge to go back over an area just painted.  It only makes things worst.  My experience is it takes two to three coats of brush painting before an even color is achieved.

Start at one point, work your way across, and only after reaching the end consider starting again from the beginning point.  Restraint is key.  If needs be, set it down and walk away.  Give it the few minutes to dry.  Then, beginning again from the same starting point, work your way across once more.

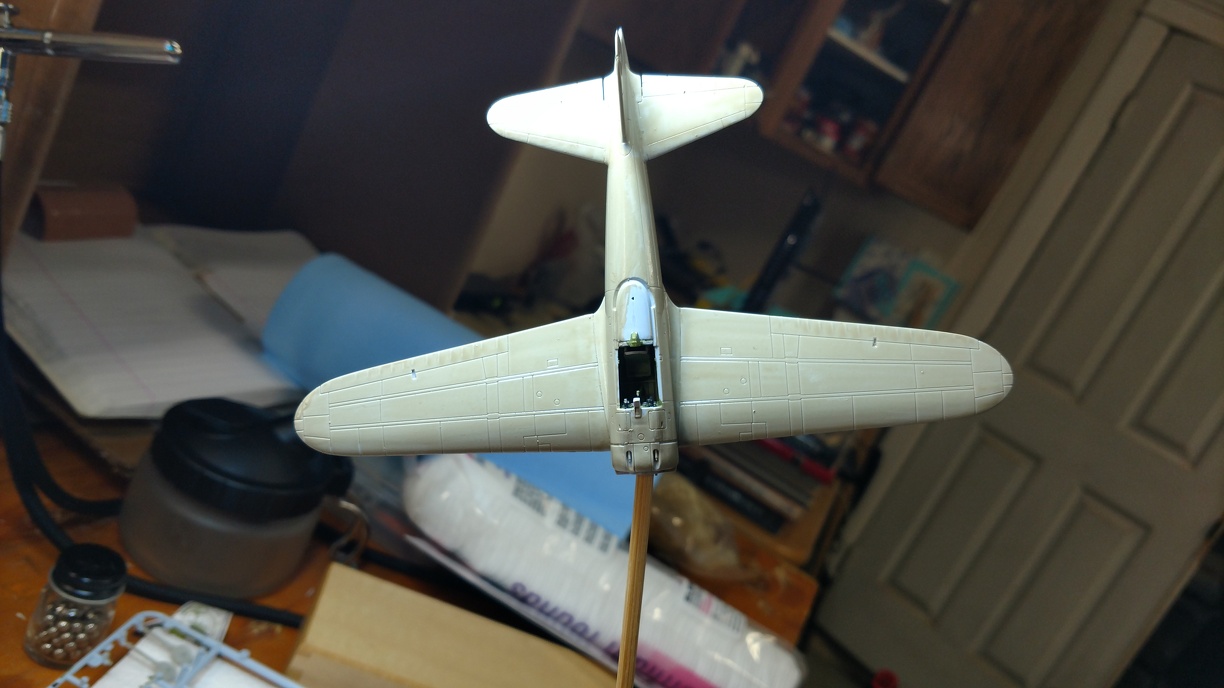
This is the same Zero after it's second coat of paint.  You can still see the plastic color coming through in some of the panel lines.
zero stuff

It took a total of three passes across three days to get the above effect.  And it took three days because I had to walk away.  Otherwise, I would try to put on another coat of paint too soon.  I'd stripped it back to plastic twice because I tried to rush it.

The brown camouflage stripe on this King Tiger was applied freehand with a brush.  Took two passes on each stripe to create a solid enough color.   Everything else was airbrushed.
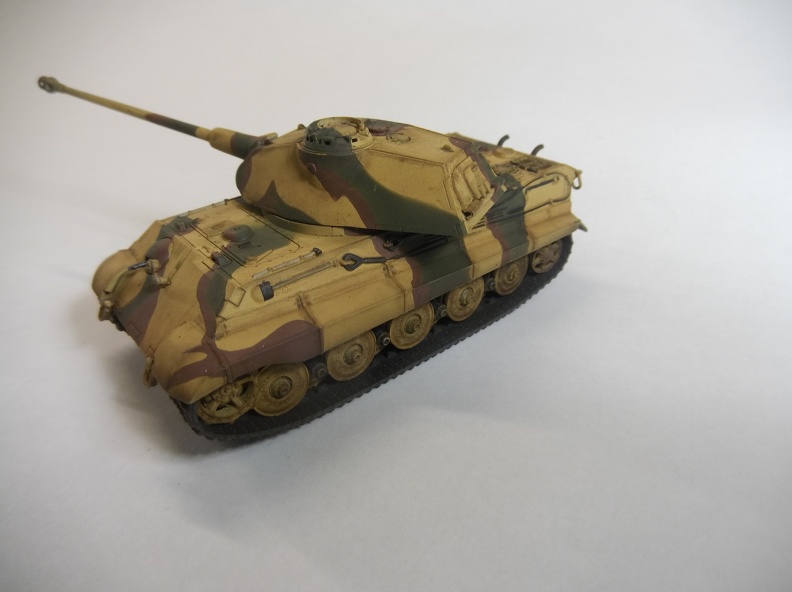
tiger

This is the pilot tub from the Ma.K. I currently working on.  Used the exact method above to paint it.   This is after applying brown/black washes for wear.
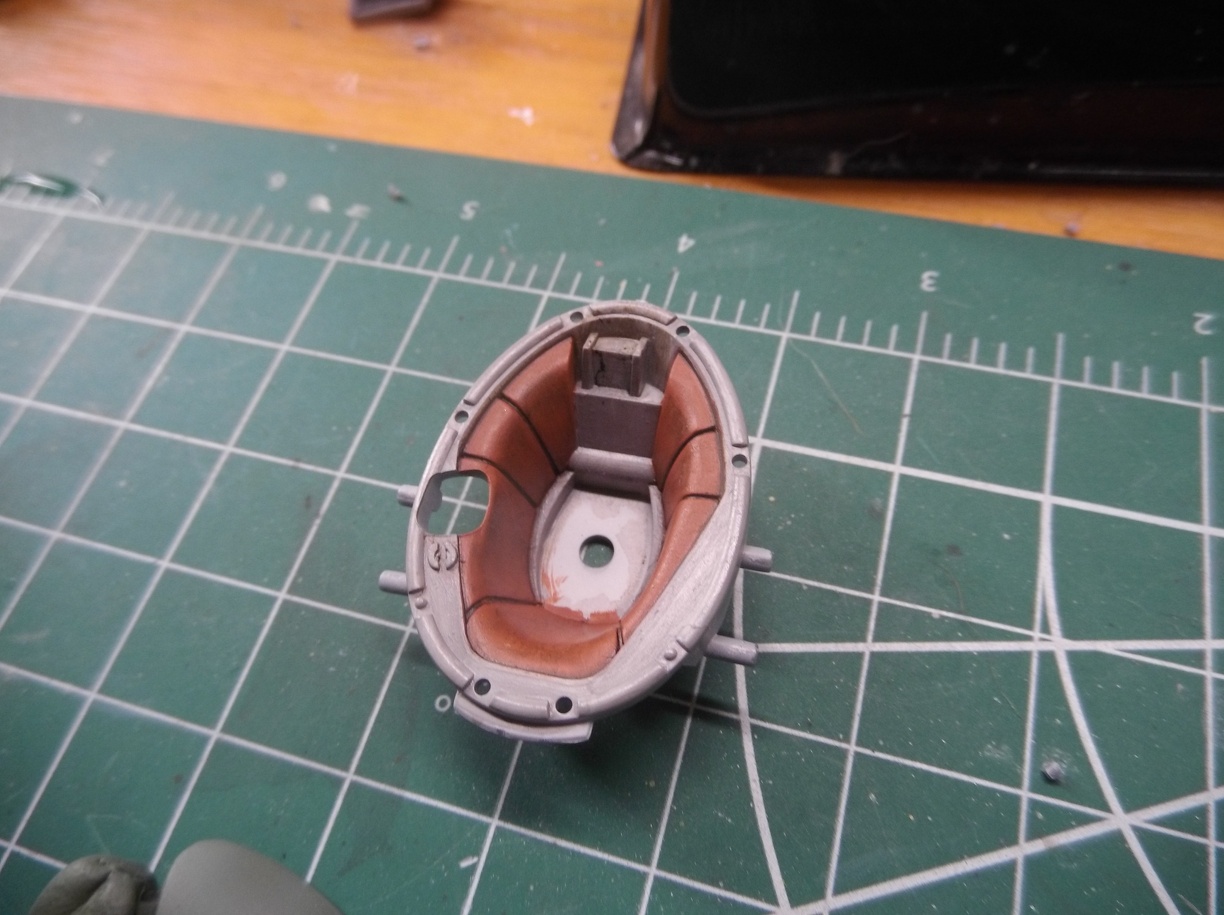
tub

I started by applying a single coat of paint on the panel to the right and worked my way around clockwise till I arrived at the beginning.  It took long enough to finish the single round that the first panel was dry enough to go around a second time.  Letting it completely dry revealed some inconsistencies.  Went around it one final time, achieving the final look above.

Final Thoughts:
My experience has been that whenever I don't follow this process the paint becomes lumpy, captures brush strokes, or worst of all.  Creates what I call a pudding coat.  A pudding coat is where the paint suddenly builds up and starts obliterating all detail fine or otherwise and the only remedy is to strip it back to plastic.  It got the name pudding coat because the first time it happened to me it was with a semi-gloss paint making it look like the model had been dipped in pudding.  It was horrible. Ick!

Apologies again for the really long post.  Hopefully some part of it may prove useful to you or others.

On the Bench:

Bandai 1/72 Defender Destroid

  • Member since
    November 2018
Posted by oldermodelguy on Monday, June 13, 2022 7:54 AM

Vallejo retarder is too thick for thinning acrylic paints for brush or spray. To that end I use Liquitex retarder in most acrylic paints to include Tamiya acrylic for brush painting, to which the suggestion to thin with retarder came from the Tamiya web site for use in their acrylic to make it brushable.. The use of Liquitex though is my own as that's what I stock and use in my acrylic thinner formulas for airbrushing ( Liquitex retarding agent is thin like water). Anyway, That alone in the paint as the thinning agent and a little water on the brush to aid flow off the brush works fine for me. And it gives working time to get around the piece and as mentioned before more palette time. Exact thinning is not an exact ratio but rather a matter of flow and coverage and leveling.

Now with enamels it's more exact, about 40% mineral spirits will usually do it. Again wet the brush or dampen the brush with the spirits for better flow off the brush tip.

In either case you want the paint to kind of float off the brush with little contact or very light contact of the brush to the surface. It's more a matter of moving the paint around with the brush than heavy brush contact.

As the previous poster mentioned with acrylics water will work, my wife did all her ceramics painting with acrylics thinned with water and brush painted, not a brush stroke to be found. Usually in two coats. Then I spray coated them with airbrush two coats of liquitex varnishes according to her will if gloss, satin or matte. She's gone home to be with Lord now, I can't quizz her lol !!

  • Member since
    July 2014
  • From: Franklin Wi
Posted by Bakster on Monday, June 13, 2022 9:25 AM

Hi Patrick, Phoenix, and Dave.

Dang! You guys are bringing some fantastic information to the forefront. It is truly awesome information from all of you! I am bookmarking this for sure; I don't want to lose it. I think I will try printing it too.

Phoenix, an extra special thanks to you for are all the detailed information that you provided. You put a lot of work into that post and no, it was not too much. Also, it was your willingness to help on my Nautilus build that started all of this. What you helped to birth here is a primer that many can learn from. And btw. The paint examples in your model images look really good.

Thanks to all of you. This is excellent information that I will refer to in my own testing. If I can nail down these processes it would go a long way to advancing my modeling skills.

Good stuff, Guys. You are awesome. THANK YOU!

  • Member since
    September 2006
  • From: Bethlehem PA
Posted by the Baron on Monday, June 13, 2022 9:28 AM

Bakster

a smooth airbrushed finish? And when I say AB finish... I mean no brush marks, no globules, no uneven coverage, and no variations in color tone.

I have experimented wih all types of paint and thus far, the only thing I have come close to it is with using craft acrylic paints. I find that if you flow it on heavily it will self level and produce an even color tone. However, you do lose some detail with the heavy flow and having a heavy flow does not work well with blocked out areas and/or masked areas. 

Does anyone have a process that works?  

As the others have noted, yes, and thinning is the key.  I realized this myself, after being around figure painters long enough.  They use various types of paint, with acrylics and oils probably the most popular, but also enamels and lacquers, and others I've forgotten  Any figure painter will confirm, you thin your paint for brushing by hand.  And when you see their results, you see that it absolutely works.

I use mostly water-based acrylics with a wet palette.  That includes Andrea, Vallejo Model Color, and craft store brands: Americana, Apple Barrel, and Folk Art.  A wet palette keeps the paints thinned to a good consistency during my working sessions.  And it lets me keep a batch of colors over several sessions.

I also use Tamiya's acrylics (lacquer-based) and I use Tamiya's proprietary thinner with those.  Nothing else worked for me.  For Tamiya acrylics, I use a little jar of the thinner, dip my brush in the paint or pick it up off the underside of the lid, then dip it in the thinner and apply it to the piece.  Or I'll mix a bit of the color and the thinner in the well of a ceramic palette.  Either way, I get nice thin coats, and depending on the subject, two passes are sufficient.


The bigger the government, the smaller the citizen.


  • Member since
    October 2021
Posted by PhoenixG on Monday, June 13, 2022 2:01 PM

oldermodelguy
In either case you want the paint to kind of float off the brush with little contact or very light contact of the brush to the surface. It's more a matter of moving the paint around with the brush than heavy brush contact.

Yes!  That's a perfect description!  Didn't realize I look for that till I read your post.  There's so much expertise we develop and use without conscious recognition. 

On the Bench:

Bandai 1/72 Defender Destroid

  • Member since
    September 2012
Posted by GMorrison on Monday, June 13, 2022 4:04 PM

Use a flat brush.


Bill

 Modeling is an excuse to buy books.


JOIN OUR COMMUNITY!

Our community is FREE to join. To participate you must either login or register for an account.

SEARCH FORUMS
FREE NEWSLETTER
By signing up you may also receive reader surveys and occasional special offers. We do not sell, rent or trade our email lists. View our Privacy Policy.