Mrchntmarine
Question: Ive asked this before - when ive sanded parts and have scuff marks that can been seen, ive asked, "wont they be visible if i prime and paint if i can see them before priming? " and ive always been told, yes. So, if i scuff the plastic with 600 grit, the marks will be visible after priming and painting??
Yes, you'll have visible scuff marks if you use 600 grit sandpaper. I'm currently building a Revell F-100D, and I'm finding that I'm having no issues with primer and paint sticking to it, even doing test fits of the cockpit into the fuselage using non-detacked Scotch tape. What I did for surface prep on my F-100 fuselage (since its too big to fit in my "bath" containers) was to use my trusty cheap electric toohbrush and a paste I made with Comet and water. When you use Comet paste like this, its important to use that same cheap electric toothbrush during the rinsing process, to make sure you scrub all of the Comet residue off. A regular toothbrush is OK too, but an electric one puts far less mechanical stress on any small details you might otherwise break off with the broad motions of a regular toothbrush...the electric one is fast, but the movements are small and gentle. Once that completely dries, I use decanted Tamiya Grey Surface Primer which I thin with MEK (MEK mixes extremely well with the primer and serves as a really aggressive plastic etchant, but as long as you're airbrushing it and not laying it on in a thick, wet layer, it won't hurt even the finest details). I have found that the primer is ready to accept paint after a minimum of 2 hours. I learned the minimum time and techniques above by LOTS of meticulously structured experimentation on spare F-14 fuselage pieces, and finally settled on what I'm posting here as my go-to technique which hasn't failed me yet, and leaves no visible scuff marks, even under the bright light and magnification I always use when building. For masking, in case I haven't already mentioned it, I no longer use tape of any kind because it always leaves bands of slightly different sheen paint where it touches (again under bright light and magnification...you don't see it otherwise). I use Tamiya masking sticker sheets, which require no "de-tacking" and they're so thin and strong that they lay down extremly well, even when going over 90 degree bends. You have to cut them to the size and shape you want, but its not as hard as it sounds. Using the above techniques and the Tamiya masking sticker sheets (which are essentially the same material as Tamiya and Eduard canopy masks), I have had no issues at all with lifting, and no slightly different sheen to the paint they were touching.
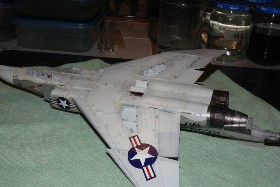
The sharply-defined scalloping between the upper and lower colors on this F-4B, as well as the fairly-complex shape of the bare metal areas, were masked with Tamiya masking sticker sheet material that was cut to the shape of the scalloping. Also did the masking for the corrogard areas on the leading edges of the wings with this material. No bleed-under and absolutely no peeling of any kind when the mask was removed. Surface prep and priming were all done per the above paragraph.
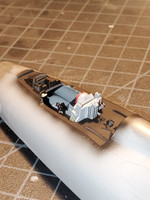
Also used the above surface prep method on the F-100D fuselage. Its a work in progress, but you can see toward the front that none of the primer was peeled off the plastic by the Scotch tape I'm using for test fits (I had it wrapped tightly around the area forward of the black cockpit area), and Tamiya primer feathers really nicely as well, so blemishes due to schmutz are easy to fix.