SEARCH FINESCALE.COM

Enter keywords or a search phrase below:

Building my Painting Booth...New Pics 1/1 and 1/2/08!!!

4096 views
24 replies
1 rating 2 rating 3 rating 4 rating 5 rating
  • Member since
    September 2012
Posted by namrednef on Saturday, January 5, 2008 11:24 AM

Hey J-Mart! Thanks for the view!

I know not everyone has access to sheetmetal and a shop....just hoping some modelers might 'know' a guy....or be able to go to a sheetmetal shop and not get ripped off.

Your input is very helpful....don't discount that!

....as I have said, the booth is still raw and can be adapted for many changes!

More progress pics coming tonight 

  • Member since
    March 2007
  • From: NJ
Posted by JMart on Saturday, January 5, 2008 9:08 AM

Sorry I missed this post before, some ideas even though it may be too late, from my experience with the Pace booth:

1. Paper the interior vs paint - I ditto that, very easy to change the paper. I actually lined up the inside of the booth with that Testors "hobby mat" (clear plastic) and covered that with newspaper (several pages thick). When I have a spill or just overuse, rip the newspaper, booth still pristine.

2. The most useful gadget of the pace booth as mentioned by Bgrigg is having an electrical switch on front of the booth controlling outlets. you can turn on/off your compressor without bending down or moving from the booth.

3. Another ditto... get something to cover the booth opening when not in use to keep dust out. I have a cheap outdoor BBQ cover, correct size and price!

4. I put the booth on top of a an old wooden small dresser from the kids room,. Hard to explain, but the point is I have drawers in which to save/store stuff for the hood vs cluttering the workbench.

5. You can never NEVER have enough good light! I changed the bulbs on my booth to incan "green" bulbs. Can only go to 75w, or the sheet metal gets TOO hot, bad Pace Booth engineering, the light casing is touiching the top sheet metal, overheats it! Avoid fluorecence and/or get glare free. The light has to light up INSIDE the hood.

Great to see the reinforcements you made... the Pace booth is too flimsy and can/will bend when moved around.

Anyways, great job with your "build" and dont forget you still need to use that respirator! :)

Cheers, Jim


  • Member since
    September 2003
  • From: South Central Wisconsin
Posted by Daywalker on Wednesday, January 2, 2008 10:09 PM
Nice work so far Nam!  It's so much more satisfying doing it yourself rather than buying something pre-fabbed, isn't it?

Frank 


  • Member since
    September 2012
Posted by namrednef on Wednesday, January 2, 2008 6:11 PM

Hi All!

Banged together the paint booth after work tonight.....however I forgot to bring home a couple things we call 'slips' and will stiffen up the sidewalls perfectly.....I'll do that tomorrow.

Here's an update:

 Began by punching some holes in the shelf (I only made one of!Dead [xx(]) to accept pop-rivets

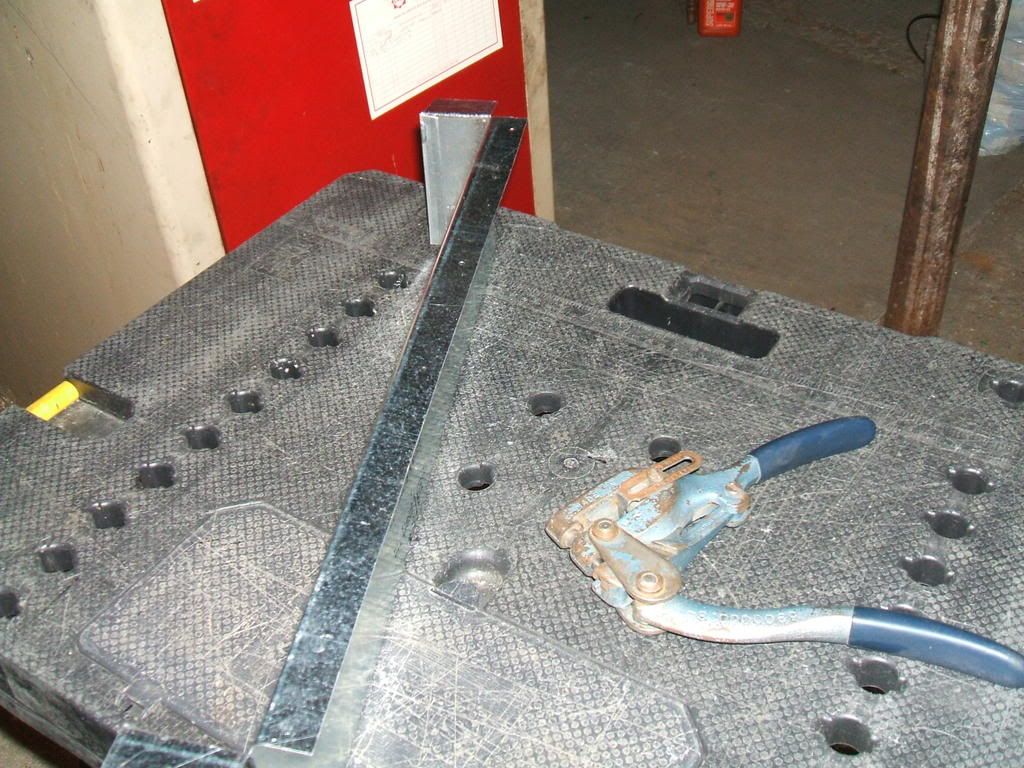
Then did a quick "field mod" on an errant bend with my trusty hammer....you can make out 4 holes I popped along the top ....though it is the bottom of the shelf....also a hole in each 'wing' on the ends 

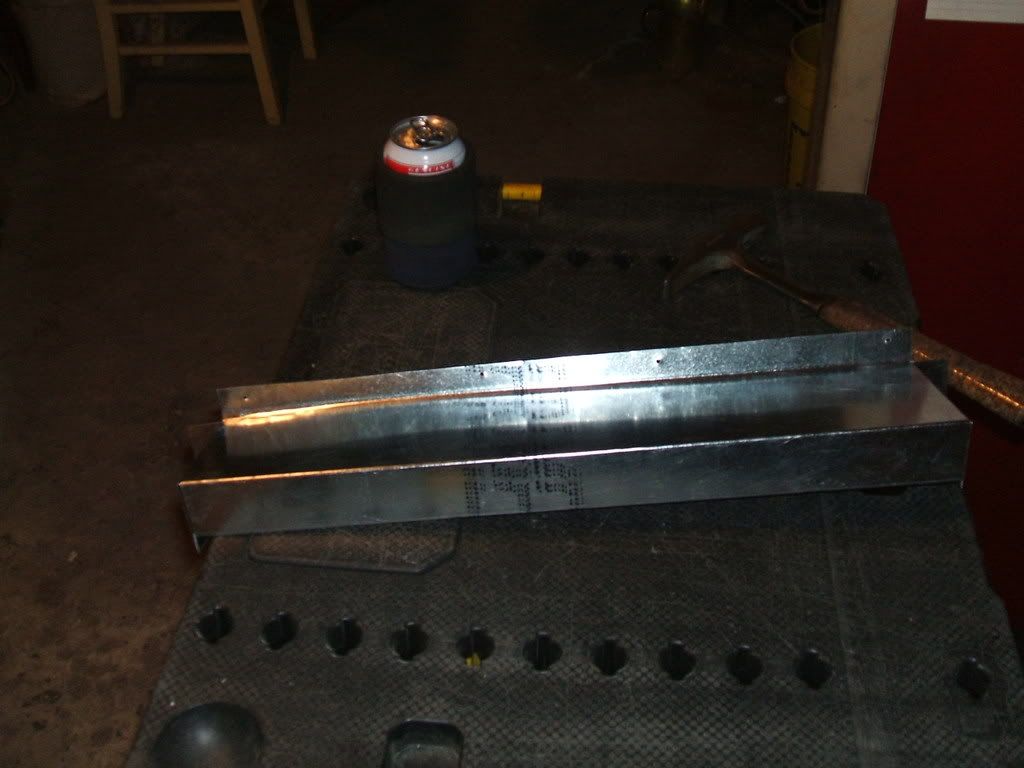
 Used the punched holes as a pattern.....drilled corresponding holes in the right side wall and pop-riveted shelf to wall. (easier to do this before attaching wall to booth) 

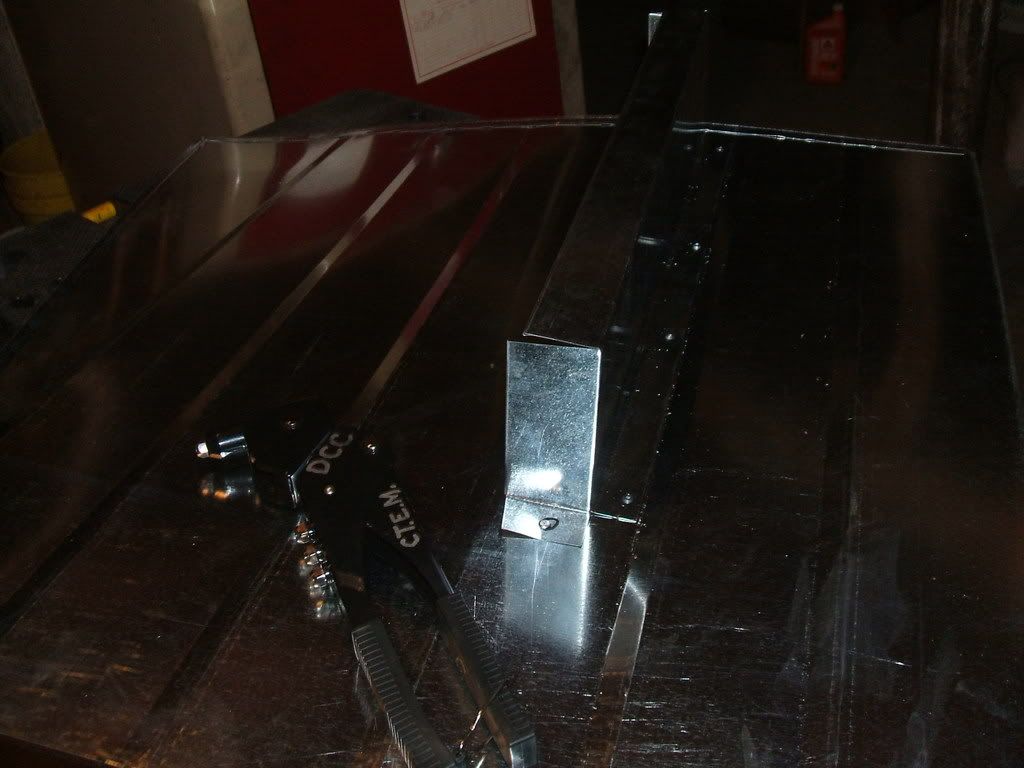
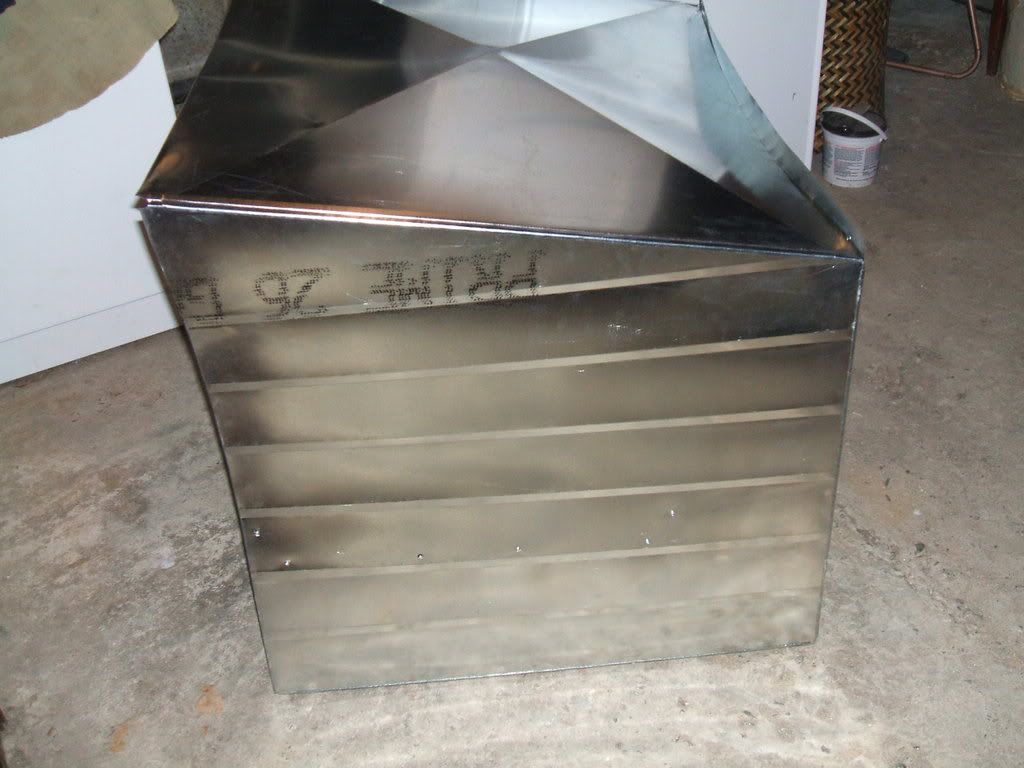
 Right side wall and shelf attached to bottom/and rear of booth....the edges of the cabinet facing the painter are folded and flattened over to get rid of sharp edges (ouch!). 

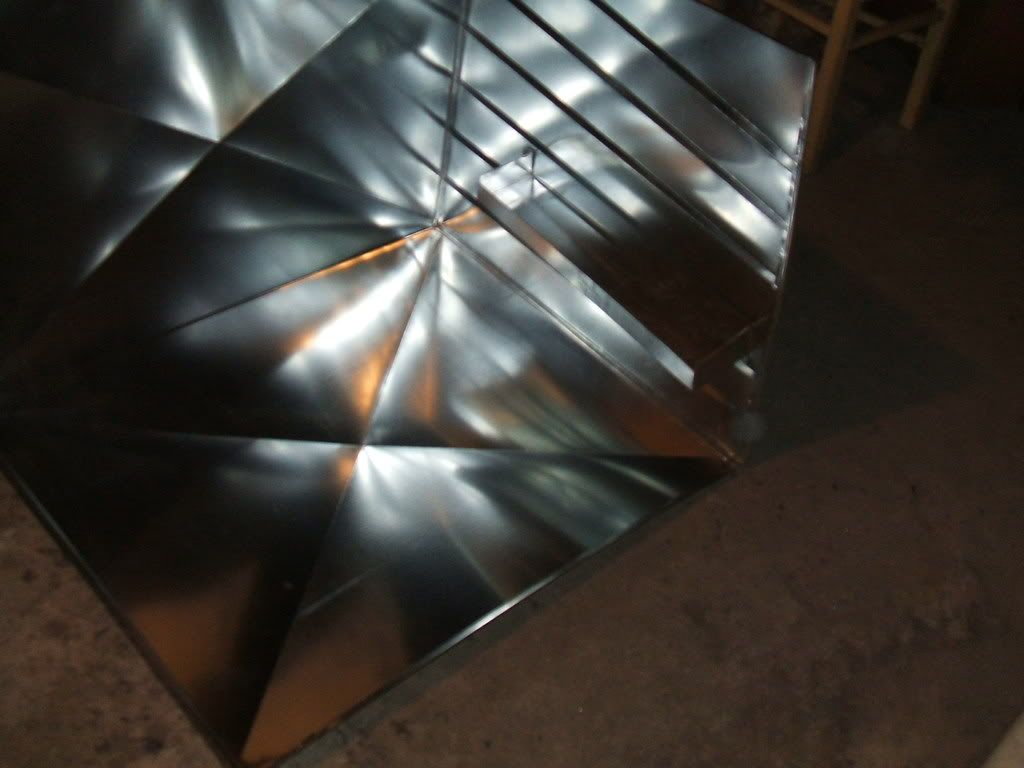
....from the outside.... 

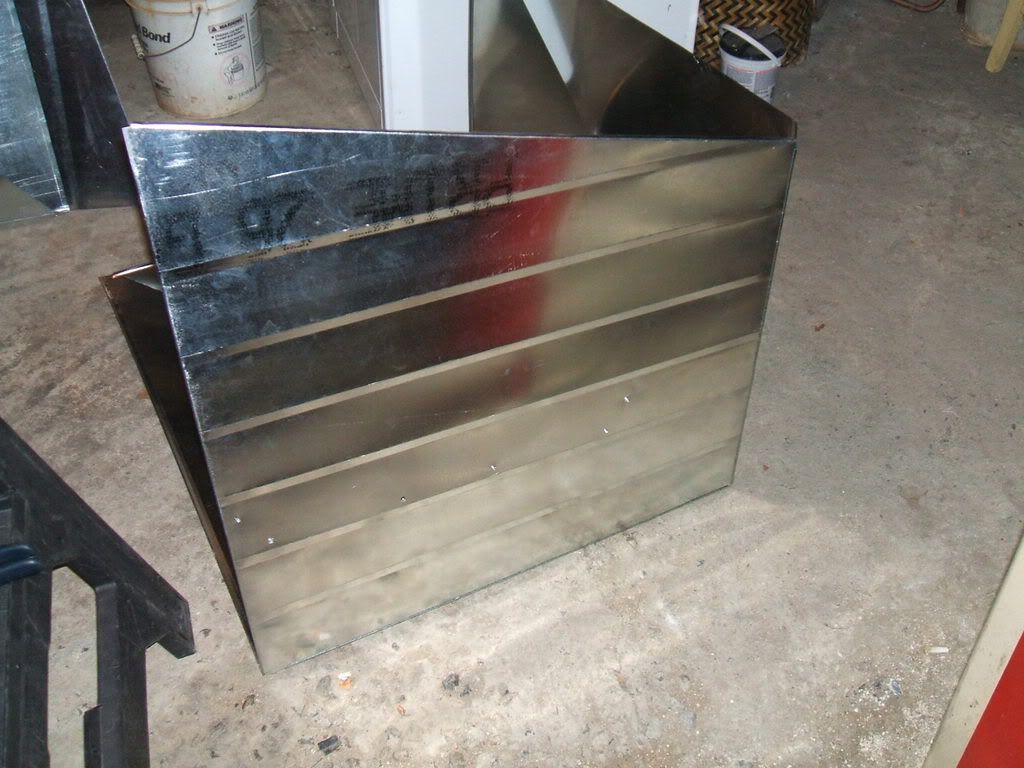
....both sides on.....you see the need for stiffeners....the bends....'cross braking' running front to back will make the booth stronger overall....Didn't bend them in an 'X' as attaching the shelf wouldn't have been pretty.... 

....with the top of booth attached....the extra inch you see protruding at top of back wall will get folded down onto the 'top' and get a half dozen screws to tighten things up. Remember, I had make bottom, back and top in 2 pcs....as it was just too long to manipulate alone. 
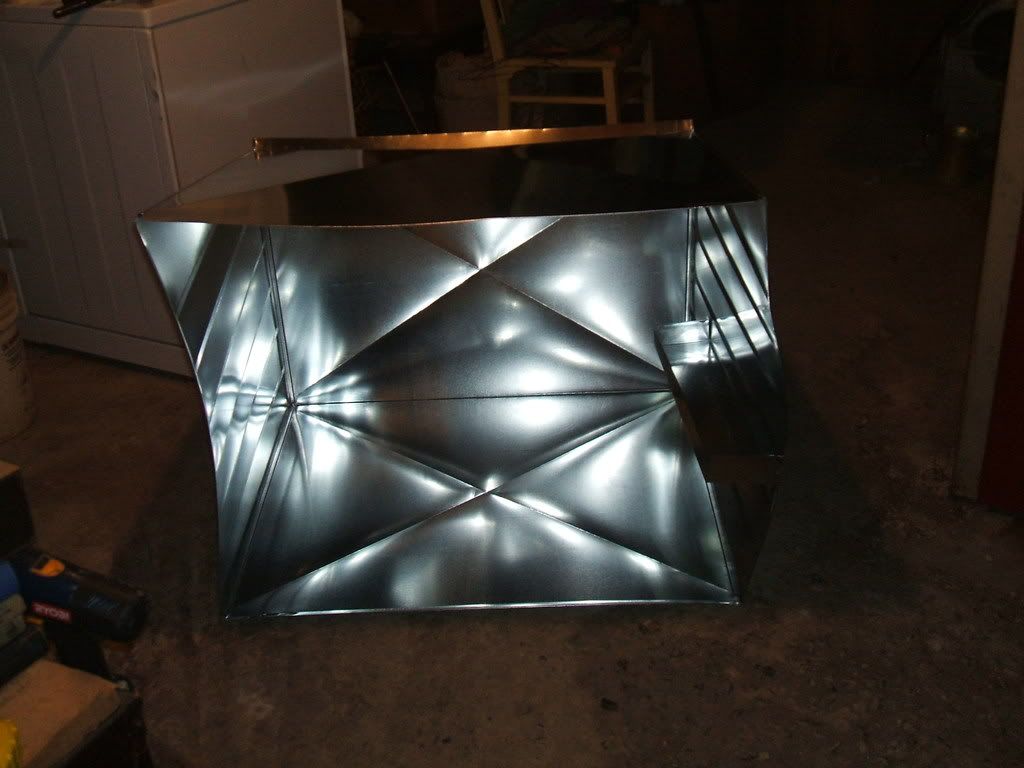
Outside, side view 

After adding the stiffeners up the edges of each side wall, I will add short angled braces in the 4 front and 4 rear corners.

 Picking up the exhaust fan and ducting for it this weekend (downdraft) and when I've altered the tabletop the booth sits upon....I'll screw the bottom of the booth down.

 I'll build another shelf for the outside (because I'm clumsy and can spill paint just by looking at it).....add the valance an armrest.....mount the compressor regulator on the booth (Thanks to a tip received here!) and customize the thing based on other suggestions you folks have helped with.....(parts hangers, doors etc)

 Thanks for checking it out!

 Nam 

  • Member since
    September 2012
Posted by namrednef on Tuesday, January 1, 2008 8:21 PM
Thanks Bgrigg.....glad you looked in!
  • Member since
    September 2012
Posted by namrednef on Tuesday, January 1, 2008 7:56 PM

Yep Frank....except for not tracing out the second shelf....everything went by the numbers. I realize these pics don't really tell the story too well.....but when I bang it together tomorrow....the new pics will make it evident.

 Tomorrow, I'll put it together.....mount the shelf, rest and valance with pop-rivets....add a couple stiffening braces I made and we will have a nice big box that we will proceed to viscerate  for lighting, fan etc.

 But from hence.....the photos will be more ably handled in a step-by-step manner.

Nam 

  • Member since
    May 2005
  • From: Left forever
Posted by Bgrigg on Tuesday, January 1, 2008 7:49 PM
Wow, nice work!

So long folks!

  • Member since
    September 2003
  • From: South Central Wisconsin
Posted by Daywalker on Tuesday, January 1, 2008 6:48 PM
Nice work Nam!  I look forward to seeing pics of your completed project!

Frank 


  • Member since
    September 2012
Posted by namrednef on Tuesday, January 1, 2008 4:32 PM

 Here are my first pics in a post here at FSM!

This first pic is of me in our little shop just after lighting our little gas heater.....about 12:30 pm EST.....raining and blowing and COLD outside! I am there in the gloom.....didn't realize I was out of flash range.


Sorry I couldn't make 'in action' photos....these are the 2 sides of the booth 


This is some ductwork we built last week that had to be moved in order to get to.... 

....this machine 


This is the front/bottom armrest 

....the top front valance which will help 'stiffen' the structure and provide shade from the light that will be behind it 

....two shots of the inside shelf.....I made one....meant to make two, but talking to the boss.....I forgot to trace my first pattern....one shelf on inside right wall.....another on outside left wall


I'll be banging this together tomorrow and will have better pics for you (some pics today featuring the top and back did not turn out, but you can visualize it, I think)


These last three are of the roof of the booth....as flat freshly cut metal....then in the brake.....then on the table after cross-braking (to stiffen it)....had to build bottom, back and top as two pieces because as one it was over 7 feet long....too big for me run through the lockformer machine on my own. 

Sorry it wasn't completed today.....but more tomorrow!

 Nam 


  • Member since
    September 2012
Posted by namrednef on Tuesday, January 1, 2008 3:47 PM

 Ditto that Bgrigg!

Hello again Ladies and Gentlemen!


Got home from the shop about an hour ago....my boss and very good friend of 40 years came out to watch me build the metal for the booth......so it took me a couple more hours than it should have. Shooting the breeze....about metal, paint....models....you get the idea.

I'm uploading the pics of what I built on Photobucket as I write.....I did have a pal coming along to photo stuff as I went.....but he backed out with the nasty weather....so I had to shoot the pics myself....so at this point you will see just the actual components and parts of the booth.

 I'm going to knock the whole thing together here at home.....I realized a bit late that it would not fit in the car after assembly! Besides.....I intend to show the lighting and downdraft vent system installation....wiring etc.....so it all works out. 

 Now I am going back to P'Bucket and use some great advice from Frankie Daywalker and attempt a post with actual pics!


Nam 

  • Member since
    May 2005
  • From: Left forever
Posted by Bgrigg on Monday, December 31, 2007 8:18 AM
Pics of the girlfriend are OK, just as long as you don't post one of your wife! Mischief [:-,]Big Smile [:D]

So long folks!

  • Member since
    September 2003
  • From: South Central Wisconsin
Posted by Daywalker on Monday, December 31, 2007 12:01 AM

Allright...

You asked for it...

Here's my girlfriend wearing it...

Big Smile [:D]

Frank 


  • Member since
    September 2012
Posted by namrednef on Sunday, December 30, 2007 11:57 PM

Frank! Dammit!

 I've been trying to reply to your post for ten minutes! Just laffing too hard.

 That darn photo!........I wondered weeks ago about the blue tape (in another thread)....but you just can't focus on anything but those infernal goggles!

 Do not! Repeat....DO NOT....post the pic of your wife in those things in this thread! My heart just won't take it!

(I have a visor like that.....and I'll get you back!) 

 Nam 

  • Member since
    September 2003
  • From: South Central Wisconsin
Posted by Daywalker on Sunday, December 30, 2007 9:21 PM

Not a huge tip I know, but to hold parts to dry on mine I simply put pieces of blue tape onto the side of the booth where I could stick the toothpicks into with the parts attached to them.  Pretty low-tech I know, bit works for me!  You can see it in the background of this photo:(Please pardon my goggles here!)

Frank 


  • Member since
    September 2012
Posted by namrednef on Sunday, December 30, 2007 11:27 AM

Hahhaha!..........Nice!

I decided to go with a downdraft based upon an earlier post....so I had to *ahem* alter the workbench.

Love how the pipe and elbow got in the pic.....and I figure that's just where you keep the shopvacCool [8D].....

 But the hanger holes and the door idea are a great help!

 Thank you!

Nam 

  • Member since
    January 2005
  • From: PA
Posted by daveinthehat on Sunday, December 30, 2007 10:43 AM

I made my own spray booth. I designed it so I can use a standard size filter. I made it a down draft booth. One reason was because of the weight of the fan, the other reason is that I like to paint some things upside down so that any dust will fall on the inside surface.

A couple things that I found helpful...I put a strip across the top with holes in it so I can hang parts. Having a lights to light up the inside of the booth is a must. I might add lights along the bottom. My booth vents out the back and I have a frame from a sliding screen that I adapted to  hold the vent in the window. I made a cover for the front that slides in from the top so I can leave wet stuff in the booth until it's dry

I used aluminum that has a baked white finish on it. I coat it with car wax and don't buff it off. When it comes time to clean out my booth all I have to do is wipe down with a little alcohol and it cleans up easy no matter what type of paint I've used.


  • Member since
    May 2005
  • From: Left forever
Posted by Bgrigg on Friday, December 21, 2007 10:37 PM

Simple electrical work is pretty easy, but if you screw up the consequences can be deadly. In essence, it's making a circuit, and as long as you keep black to black, white to white etc. it's pretty easy. You can get step by step guides at the hardware store (and probably online!) and yes, you can buy anything you need at the local hardware store.

I did the wiring for my booth, and I'm not an electrician. I just remember what they taught me in high school shop classes! 

So long folks!

  • Member since
    December 2002
  • From: Steeler Country
Posted by Kumy on Friday, December 21, 2007 10:08 PM

Is it very hard to do the wiring of say a fan and lights for a downdraft booth?  I'm pretty handy but I've never done anything electrical so far.  And can I pick up the electrical stuff at my local Lowes or Home Depot?  Can a novice safely wire a booth up?

I've got the itch and I'm hoping to get back to finishing up some models.  But having a good place to work and a nice paint booth are must haves at this point.  I work on CAD so I can design up somethin nice.  Its just the intangibles I'm gonna have to figure out like if I need a drawer built in, airbrush holders, switches/outlets, lights and filters.

  • Member since
    September 2012
Posted by namrednef on Tuesday, December 18, 2007 4:14 PM

Thank you Fred....all fine points indeed!

 That is what this post was for....and it is paying off greatly. By the end of the week I should have the finer details you folks are helping with all bundled nicely into a final plan.

 Thank you much for the lighting advice. 

 I went looking around at the pre-fab booths last night. I understand why they are pricey....mainly labor costs, I think.

 Fortunately, I should be able to build mine from one 4' x 8' sheet of 26 ga. sheet metal which I can get from our stock at work for about $18. My labor is my own and I figure 2-3 hours to build the booth proper which may seem like a lot of time, but such a booth will need to be 'bent' and 'cross-broken' in such a way as to ensure rigidity.

 These techniques will make themselves evident in the building photos I will submit.

 Any alterations I need to make after I get the booth home, I can do with my own sheetmetal tools....installing lighting, fan, door etc. 

 Thanks again for the help.

 Nam 

  • Member since
    January 2007
Posted by Gigatron on Tuesday, December 18, 2007 2:13 PM

Nam,

I say build as big of a box as you're comfortable with and find a fan that will vent it properly.  Thing is, it's hard to have too big of a box, but way too easy to have too small of a box.

Consider using incandescent daylight bulbs, in the 54000k range.  They simulate daylight and give you the best ability to see the true color you're painting.  Flourescents tend to have a green hue and incandescents have an yellow/orange tint.  I use compact trumpet daylight flourescents for photography, but they can be a bit pricey for spray booth usage.  Daylight incandescents work in regular incandescent sockets, so those a re a more affordable approach.

Don't go fancy on an airbrush holder.  Just drill two holes in the side of the box and use an unbent coathanger.  Shape it to hold the brush and then work the tail end through the two holes to secure it.

Put a shelf to hold small things, like a couple bottles of paint, toothpicks, tweezers and brushes - things that are good to have at hand when painting.

Instead of primer or cardstock, line the sides and bottom with newspaper.  You can do test sprays, spill paint or whatever.  The sunday paper is almost a lifetime supply.

As for a door, consider finding a way to hang it rather than hinge it.  Sometimes, it just easier to pick it up and get it out of the way then it is to swing it up.  But i may be biased because i just happened across an old glass cabinet door that had the exact dimensions of my booth opening.

These are all things I figured out when designing my spraybooth.  Unfortunately, when I priced out the sheet metal and the fans, it was cheaper to buy a pre-fab box on ebay.  I'm still looking for decent lighting.  Right now, I only use those stick-on LED lamps and they leave a lot to be desired.

-Fred


  • Member since
    September 2012
Posted by namrednef on Monday, December 17, 2007 8:50 PM

Then a plexi door it is.....have tons of foam tape, too.

Yeah.....my bench to hold the booth has none so I think I will by a couple of those 3, 4 or 6 drawer poly units many of the folks here use for paint jar storage....to store paint and the accessories.

 I built my first booth about 25 years ago from plywood.....but it was 2' x 18" x 18"....which was nice until I got on a 1/48th B-17 kick!

 Another consideration is that I'm permanently settled.....have a large basement and plan to model until the bitter end.....so a little overkill shouldn't hurt meWhistling [:-^]

Thanks again 

  • Member since
    May 2005
  • From: Left forever
Posted by Bgrigg on Monday, December 17, 2007 8:37 PM

You're welcome Nam, been there, thought of all these ideas right after building my booth! Big Smile [:D]

The plexidoors you would think would attract dust, but in reality it doesn't seem to be an issue. They don't seem to build up any static. I put mine on hinges, and then used sticky back foam weather stripping to help seal the edges.

I built my booth out of left over plywood, and am in the early stages of converting it to a downdraft booth. Early stages = thinking about it. I've now been in the early stage for about a year!

One thing I will be adding is some sort of drawer unit to keep my other airbrushes and spare parts. 

So long folks!

  • Member since
    September 2012
Posted by namrednef on Monday, December 17, 2007 8:24 PM

Thanks for the reply Bgrigg!

 You make great points.

 The regulator idea is beautiful...wouldn't have thought of it until it was too late and have to retrofit! The 'door' or covering idea too is a keeper! Would or does plexiglas attract or generate dust? I know some things are supposed to. I could put a piano hinge across the top and make a drop-down cover very easily.

 I actually can reasonably buy a quiet, explosion-proof fan that can move the air I need moved....but that was good of you to comment. I will be doing the wiring etc. and you have given me more food for planning.

 My idea of primering the inside was that should I make an annoying blotch of overspray, I could just spray over it....but like all you wrote, I will take it under consideration.

 Very fine post....thank you much!

Nam 

  • Member since
    May 2005
  • From: Left forever
Posted by Bgrigg on Monday, December 17, 2007 7:53 PM

A shelf is a must, so is a holder for the airbrush(es). I put the regulator on the inside of my booth, so I can change pressure without moving. 

If you can do simple electrical work put an on/off switch for the compressor on the front of the booth, and perhaps some plugs for additional lights.

Rather than paint the interior, consider putting up sheets of white or grey cardstock. That way the overspray sticks to the paper, which can be easily changed. 

Are you planning to put doors on? Even a sheet of poly helps keep out the dust while things are drying. I've put fluorescent lights in my booth, and then added one incandescent to help speed up the drying times.

You might want to cut down the size a bit. 18.75 cu. ft. is going to require a pretty impressive fan! 

So long folks!

  • Member since
    September 2012
Building my Painting Booth...New Pics 1/1 and 1/2/08!!!
Posted by namrednef on Monday, December 17, 2007 5:07 PM

....can help me make it the best it can be.

 As some know...just getting back into modelling after long lay-off....I was going to just dive right in....but have decided to get all the ducks in a row first.....and start building first week of January.

 I do HVAC work and am an experienced sheet metal person.

 My basic plan is for a benchtop booth 3 feet wide, 30 inches high....30 inches deep....with a nice 'counter' 3-4 inches high across the bottom front to rest a forearm on if needed. 

 My main question from my friends here.....(and I know many of you have built your own boothes).....is:

 What features have you found helpful.....or that you wish you had bought or built in?

 I see the obvious need for a handy shelf or two....perhaps one on the outside....and one on the inside on the right (I'm left handed). Also a handy hanger or rest for the brush itself....maybe some rubberized padding on the armrest I mentioned.

 My original lighting idea is for a 30 inch long flourescent....up inside the top front....should I make provisions for adding some side lighting? I will be coating the inside with a grey primer to cut the glare from the metal.

 Does anyone have any thoughts or comments that they think might help? I'd be happy to hear them!

 I'm buying the fan system this week and plan to build the basic booth next Saturday.....there will be play-by-play photos of the manufacturing process (My first pics ever here). I am working on something I offered to help with over in scratchbuilding....so these two things will keep me busy until I am ready, fully stocked.....and ready to seriously model!

 (As things keep arriving by mail.....and the bank account dwindles!Sign - With Stupid [#wstupid]

 Thanks everyone

Nam 

JOIN OUR COMMUNITY!

Our community is FREE to join. To participate you must either login or register for an account.

SEARCH FORUMS
FREE NEWSLETTER
By signing up you may also receive reader surveys and occasional special offers. We do not sell, rent or trade our email lists. View our Privacy Policy.