SEARCH FINESCALE.COM

Enter keywords or a search phrase below:

WIP: Spray booth and cart in 48hrs, and less than $235

7516 views
34 replies
1 rating 2 rating 3 rating 4 rating 5 rating
  • Member since
    January 2009
  • From: London
Posted by Bobs Buckles on Sunday, January 4, 2009 1:28 PM

Well, Well! That's an eye opener and no mistake.

Superb idea and execution.

Cheers,

Von Buckle Smile,Wink, & Grin [swg]

every man dies, but not every man truly lives... Bobs Buckles Website
  • Member since
    September 2012
Posted by namrednef on Monday, December 22, 2008 3:27 PM


NP about the airflow Alex! I knew of your background. I've learned much here about my OWN trade!Laugh [(-D]

My suggestion would be a handy shelf....one inside and maybe one outside the booth......not sure of your countertop, but shelves are handy!

My eyesight sucks so badly.....aiming the lights upward and reflecting onto a cardboard surface works out very fine.

Nice work!Thumbs Up [tup]

  • Member since
    June 2004
  • From: Tucson
Posted by cardshark_14 on Monday, December 22, 2008 3:15 PM
Bgrigg, a roll of paper, eh?  I was thinking of trying to get a piece of light blue flannel fabric to cover the grate, and using fresh butcher paper, or white flannel as a backdrop.  I swiped a piece of thin white flannel and hung it over the fluorescent lights. It seems to work well enough as a diffuser. I took a couple of pictures playing around with it so far, and liked having the horizon in the image, but if that's a no-no in photography, things can change. I'll post the test pics up as soon as my camera battery is charged.  

Nam, thanks for the kind words, and the offer to help with my data...I think I've got it now...Fortunately, (or unfortunately, depending on how you look at it)  I've had 2 years of fluids and thermo engineering classes in recent history, so I already know how to find my theoretical airflow, with and without head loss.  You actually like the bright lights in your spray booth reflecting on the metal??  I tried it, and it was way too bright.  So, butcher paper it is, at least for me! Thumbs Up [tup]

Gip, thanks for getting back to me.  I've got plenty of formulas, I was just wondering if there was some sort of field test I could do to get a rough estimate of flow rate. I've sprayed some non-hazardous, but smelly things into the booth, like Windex, Vinegar, dyed water, and I never smelled them at all, and all of them got sucked in quickly.  I'm thinking I may need to put a rheostat on the fans so I can control their speed. Otherwise, the fans may pull the paint away before it ever reaches the model. Shock [:O]

Hi Jim, thanks for the link...I already knew that stuff, but a refresher is always nice. Smile [:)]

I think the next thing I need to do is to hang a small Purple-K (A/B extinguisher) near the spray booth, and mount the plexiglass lid. Then I'll look into making a drying booth function as well. Once all that gets completed, I'll tackle the circuitry side of things.  I'd like to end up with a control panel that has a rheostat for the fans (that's gonna take some doing, as I think they are binary...), and individual switches for the fluorescent light, a temperature controlled incandescent light for heat, a compressor switch, and possibly an emergency kill-button. Mischief [:-,]

I like to design and build things...did I mention that?  Almost like I should've been an ME or something...Whistling [:-^]

Anyone have any suggestions or see anything I've missed?  Thanks for looking!  I'm going to start a new thread in Tools, as I think the original challenge is complete.  Now I'm just tinkering...

Cheers,
Alex

Never trust anyone who refuses to drink domestic beer, laugh at the Three Stooges, or crank Back In Black.
  • Member since
    February 2007
  • From: S.E. Michigan
Posted by 2/20 Bluemax on Sunday, December 21, 2008 9:22 PM

 Alex-Here is a link to a an article on the design of spray booths. Included in the article are tables to calculate static pressures and elbow to straight duct eqiuvalents. This link originally appeared in the Tools Forum on 10-03-2004 during a discussion on spray booth design. The article may help you calculate theoretical air flows. http://modelpaint.tripod.com/booth2.htm

Jim

  • Member since
    May 2003
  • From: The flat lands of the Southeast
Posted by styrene on Sunday, December 21, 2008 7:16 PM

Alex,

Sorry about getting back to you so late.  I was searching through some of the literature, and I don't know any way of doing an actual measurement without some sort of equipment--either an anemometer or a pitot tube (We use magnehelics as continuous monitoring devices that measure in inches of water.)  As you suggest, you could do a theoretical calculation based on either velocity pressure loss or static pressure.  For purposes of performance, I would rather concentrate on the inlet side.  Although measurement is still not possible without some sort of equipment (or a really good knowledge of the fan specs and all the associated formulae), a simple smoke test would be the "quickest and dirtiest" method to assure adequate airflow and capture.

If you still need me to send any formulae your way, let me know.

Merry Christmas,

Gip

1882: "God is dead"--F. Nietzsche

1900: "Nietzsche is dead"--God

  • Member since
    September 2012
Posted by namrednef on Sunday, December 21, 2008 3:08 PM


Inspired idea about the photo booth, Alex!....nice input from BGrigg too!

My homemade booth is of 26 ga. galvanized steel. I like reflectivity of the lights on the metal....I aim the lights up at the roof and it gets BRIGHT with little glare. To stop the overspray build-up, I keep delivery pizza boxes and paint inside of them.

  • Member since
    May 2005
  • From: Left forever
Posted by Bgrigg on Sunday, December 21, 2008 7:44 AM

Alex,

Good thinking on the butcher paper, and on the idea of using it as a photo booth. My suggestion would be to have a longer piece of paper and let it curve along the bottom. That way you don't get a line in the background.

So long folks!

  • Member since
    June 2004
  • From: Tucson
Posted by cardshark_14 on Saturday, December 20, 2008 11:40 PM
It occurs to me that I could get a piece of blue or black or white fabric and use magnets to hang it on the inside of the booth...voila!  Instant photo booth!  Now...to search the forums for info on drying booths...

Cheers,
Alex
Never trust anyone who refuses to drink domestic beer, laugh at the Three Stooges, or crank Back In Black.
  • Member since
    June 2004
  • From: Tucson
Posted by cardshark_14 on Saturday, December 20, 2008 9:04 PM
Ha!  It turns out that there's a nice bonus to making a spray booth out of metal.  I covered the interior with butcher paper in less than 5 minutes...the best part?  Its held up with little magnets! I need to let the caulk dry, and than I'll be ready to start messing with this thing.  I'll post pics after I play with it a bit.  Wink [;)]  Can you tell I'm excited?

Cheers,
Alex
Never trust anyone who refuses to drink domestic beer, laugh at the Three Stooges, or crank Back In Black.
  • Member since
    June 2004
  • From: Tucson
Posted by cardshark_14 on Tuesday, December 16, 2008 10:25 PM
Gip, no problem...Thanks for any help you can send my way. Thumbs Up [tup]

Cheers,
Alex
Never trust anyone who refuses to drink domestic beer, laugh at the Three Stooges, or crank Back In Black.
  • Member since
    May 2003
  • From: The flat lands of the Southeast
Posted by styrene on Tuesday, December 16, 2008 10:00 PM

 cardshark_14 wrote:
Gip, is there a way for me to measure airflow at the exhaust vent, without buying, borrowing, or stealing an anemometer or rigging a pitot probe?  I can do fluids calculations for a theoretical airflow after head loss, but I'd like to know what real world performance I have at the outlet.  If I was back at school, I'd just check out one from the ME stock room...

Cheers,
Alex


Alex,

I just saw your post.  I really need to throw this one around the office tomorrow, because sitting here at almost 11 p.m. trying to maintain some minimal level of comprehension is almost an impossibility (I just got back tonight from a 3-hour Messiah rehearsal after playing 5 other Christmas concerts the past few days).  I'll try to address your question in the a.m. tomorrow.  Thanks for your patience.

Gip

1882: "God is dead"--F. Nietzsche

1900: "Nietzsche is dead"--God

  • Member since
    October 2007
  • From: Inland Northwest
Posted by Summit on Tuesday, December 16, 2008 8:16 PM
Alex - I really like your booth. I just cant believe you did such a Fantastic job with out the Modern Sheet~metal brake or shear.  Just goes to show us Primitive methods and determination can get the job done.  I just wish you would of done this project last Spring when I was in the market for a Spray~booth.  Kudos to you and looking forward to seeing your first project painted using it Thumbs Up [tup] Thumbs Up [tup]
Sean "I've reached nearly fifty years of age with my system." Weekend GB 2008
  • Member since
    September 2012
Posted by namrednef on Tuesday, December 16, 2008 4:39 PM

Alex.........send me all your data......should be able to help.


Also, outside venting info.

  • Member since
    June 2004
  • From: Tucson
Posted by cardshark_14 on Tuesday, December 16, 2008 4:14 PM
Gip, is there a way for me to measure airflow at the exhaust vent, without buying, borrowing, or stealing an anemometer or rigging a pitot probe?  I can do fluids calculations for a theoretical airflow after head loss, but I'd like to know what real world performance I have at the outlet.  If I was back at school, I'd just check out one from the ME stock room...

Cheers,
Alex
Never trust anyone who refuses to drink domestic beer, laugh at the Three Stooges, or crank Back In Black.
  • Member since
    June 2004
  • From: Tucson
Posted by cardshark_14 on Monday, December 15, 2008 11:30 PM
Gip, Bgrigg, thanks for the kind words.  I really appreciate them, especially coming from you two. I read a lot of posts by both of you as I was researching my dream spray booth.  Bgrigg, I don't know if you noticed, but after a lot of testing, I went with one cool bulb and one warm bulb, just like you recommended to someone a long time ago.  Gip, reading all your comments about spray booths are like a list of what to do and what not to do.  Really, all I did was just do what you and a lot of other people who know more than I do recommended.  I'm glad to get your seal of approval. Wink [;)]

Cheers,
Alex 
Never trust anyone who refuses to drink domestic beer, laugh at the Three Stooges, or crank Back In Black.
  • Member since
    May 2005
  • From: Left forever
Posted by Bgrigg on Monday, December 15, 2008 10:26 PM
Wow, Alex. Just Wow. You did yourself proud with that booth. And you get praise from Gip. I don't know if I've ever seen that before! Bow [bow]

So long folks!

  • Member since
    May 2003
  • From: The flat lands of the Southeast
Posted by styrene on Monday, December 15, 2008 10:14 PM

Alex,

Your booth is probably one of the nicest down draft setups I've seen.  Good design, and obviously well thought-out.  I've never been one to recommend the use of computer fans, but what you have done is commendable.  550cfm seems a bit of an overkill for a downdraft booth; however, airflow won't be a problem for you.  I also like your plenum and reducer ductwork; you should get a lot of good, even airflow without any restrictions on the push side.  Job well done.

Merry Christmas

Gip Winecoff

P.S.  I'm really curious as to its performance once you get it all hooked up and running.  Could you do an update here, or shoot me an email?  Thanks.

1882: "God is dead"--F. Nietzsche

1900: "Nietzsche is dead"--God

  • Member since
    June 2008
  • From: Piscataway,NJ
Posted by jtrace214 on Monday, December 15, 2008 9:28 PM

As someone who does alot of sheetmetal work it came out very good. I like it. Can't even tell you didn't use a brake good bends and improvising another thing that can be done is some c-clamps and 2 peices of angle iron for an improvised brake I do tha for bends over 4' thats the largest my present brake can handle. I have  an attachment like that for my drill don't use it much since I bought an air nibbler and a beverly shear.


John

the pic to the left is my weekend condo lol

  • Member since
    June 2004
  • From: Tucson
Posted by cardshark_14 on Monday, December 15, 2008 6:27 PM

LOL Aaron!  Thanks for the kind words.  They are computer fans, but they're special...they move a lot of air, 110.31 CFM each, 5 mounted in parallel, after headloss, means they move about 510 CFM total. Mischief [:-,] I got them while they were on sale, now they are $9.95 each.

http://www.frozencpu.com/products/6488/fan-383/Scythe_Slip_Stream_120mm_x_25mm_Fan_-_1900_RPM_SY1225SL12SH.html?tl=g36c15s60

They are also sealed, and spark proof.

HTH!

Never trust anyone who refuses to drink domestic beer, laugh at the Three Stooges, or crank Back In Black.
  • Member since
    October 2004
  • From: League City, Texas
Posted by sfcmac on Monday, December 15, 2008 6:15 PM

 Awesome looking Alex! Did Nam ever show you his? He powered his with a WP 2100 HP radial engine though. Sucked the poor Puppy right thru the vent hence the one bent ear. Laugh [(-D] Also seems to send his models into a parallel dimension which ok cuz he works miricles with those old kits! Make a Toast [#toast]

 Seiously are those computer fans? Ran by a computer Powersupply? Cool! Never thought of that. Good idea!

  • Member since
    June 2004
  • From: Tucson
Posted by cardshark_14 on Monday, December 15, 2008 5:54 PM
Thanks for the kind words, Nam! Blush [:I] Cross brake!  Is that what that is called?  
Never trust anyone who refuses to drink domestic beer, laugh at the Three Stooges, or crank Back In Black.
  • Member since
    September 2012
Posted by namrednef on Monday, December 15, 2008 5:31 PM


Alex! Absolutely AWESOME garage metalworking! Well planned and improvised with great skill!

I do this crap for a living and you've given me 'field mod' ideas!

Your cross-brake (for rigidity) idea was inspired. And for all your hammering.....it looks damned well!

Thumbs Up [tup]

  • Member since
    June 2004
  • From: Tucson
Posted by cardshark_14 on Monday, December 15, 2008 2:16 PM
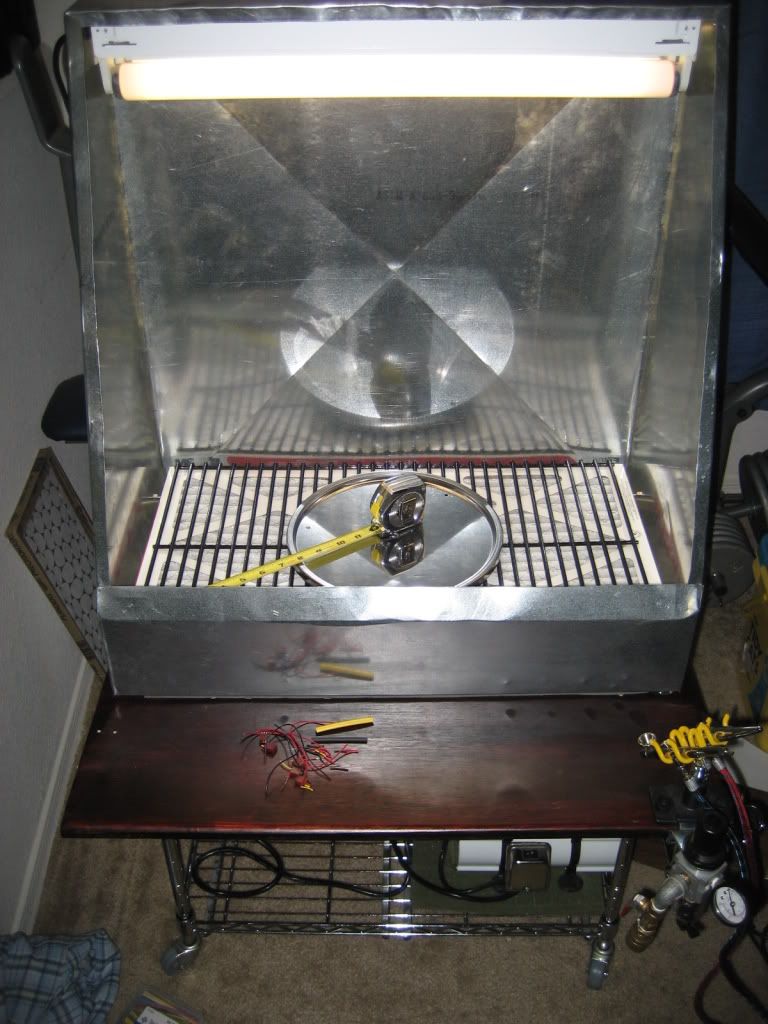
I put in another 6 1/2 hours on Sunday, and the whole thing's almost done, I need to caulk the joints and attach the plexiglass lid and hinges, but that can be done at any time.  I can start using it really soon!  Hooray!Propeller [8-]

Total Elapsed Time: 30 1/2 hours 

I apologize in advance for dropping into technical writing/ME report mode.Dead [xx(]

From the start...

I started with a piece of 28 gauge sheet metal, and marked out the spray booth unfolded on it using a Sharpie.  

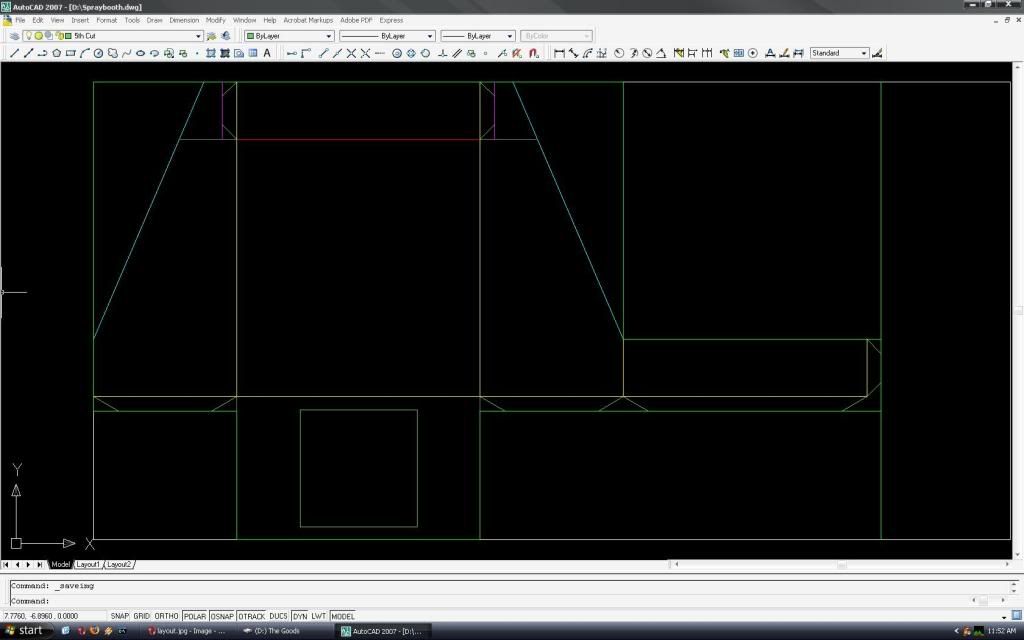
Next, the flattened shape was cut out using this attachment:

The shank of the attachment goes into any drill, and the internal gearbox converts rotary motion into a vertical snipping motion.  I was a bit leery of using something like this as it seemed a bit hokey, but it goes through 28 gauge like a hot knife through butter.

A 3/8" drill bit was used to open up a hole to insert the shears to cut out the square in the bottom of the spray booth where the fan and reducer assembly would eventually go.  

Lacking a brake, I had to get creative.  I wanted stress bends on the back, as it was a large, flimsy expanse of metal with no real rigidity.  My friend's garage has a cement floor with expansion joints about 1/4" wide.  I laid the sheet metal over the expansion joint, and held a 4x4 with just the corner touching and smacked it with a hammer to imprint a stress bend in the metal.  I rotated the sheet metal 180 degrees and repeated the work.  This formed the familiar X shape ribs found on large ductwork, similar to what is shown below.

Using clamps and steel rulers to spread the force evenly, the tabs and sides of the spray booth were folded.  Sharp 90 degree folds were made by holding a scrap piece of 4x4 on the inside of the fold, and hitting the outside of the fold with a hammer.  After everything was folded, clamps were used to hold parts together, while 1/8" holes were drilled.  The tabs were then riveted in place.  

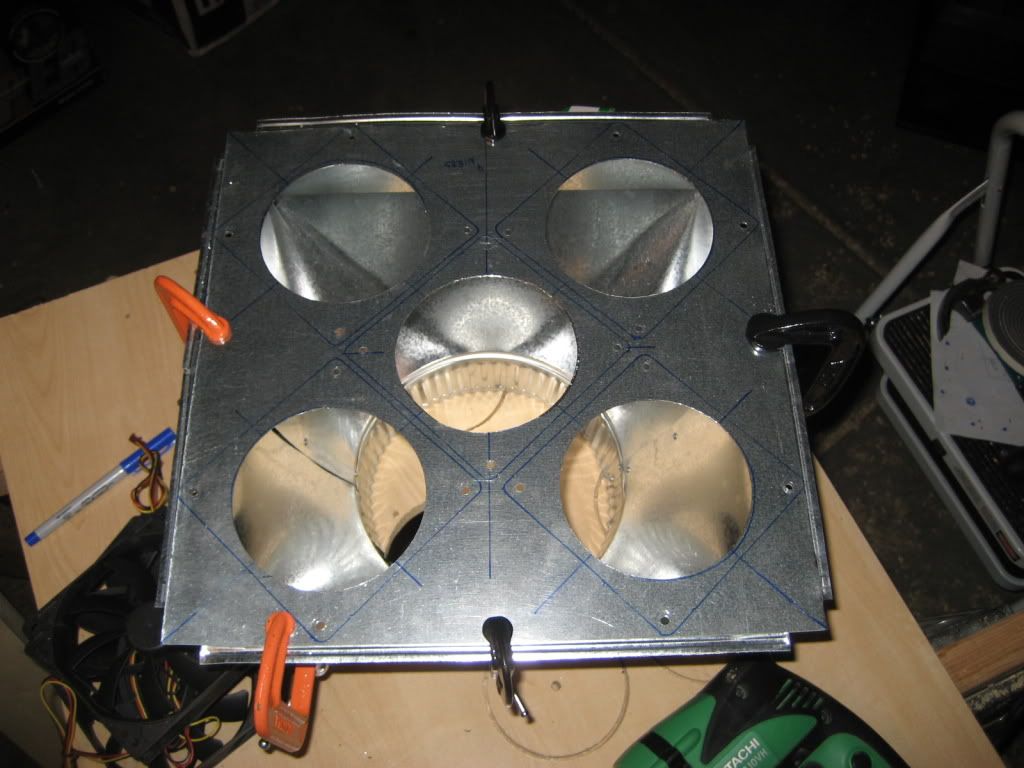
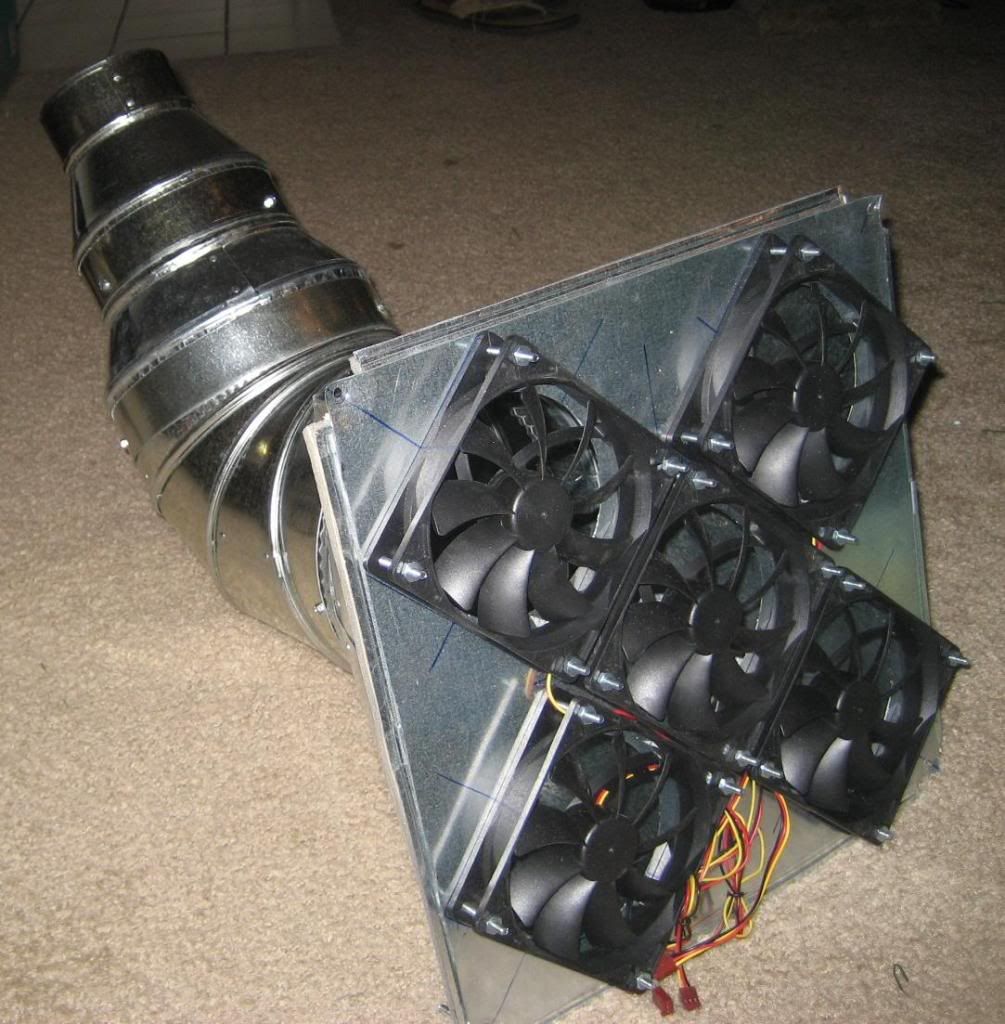
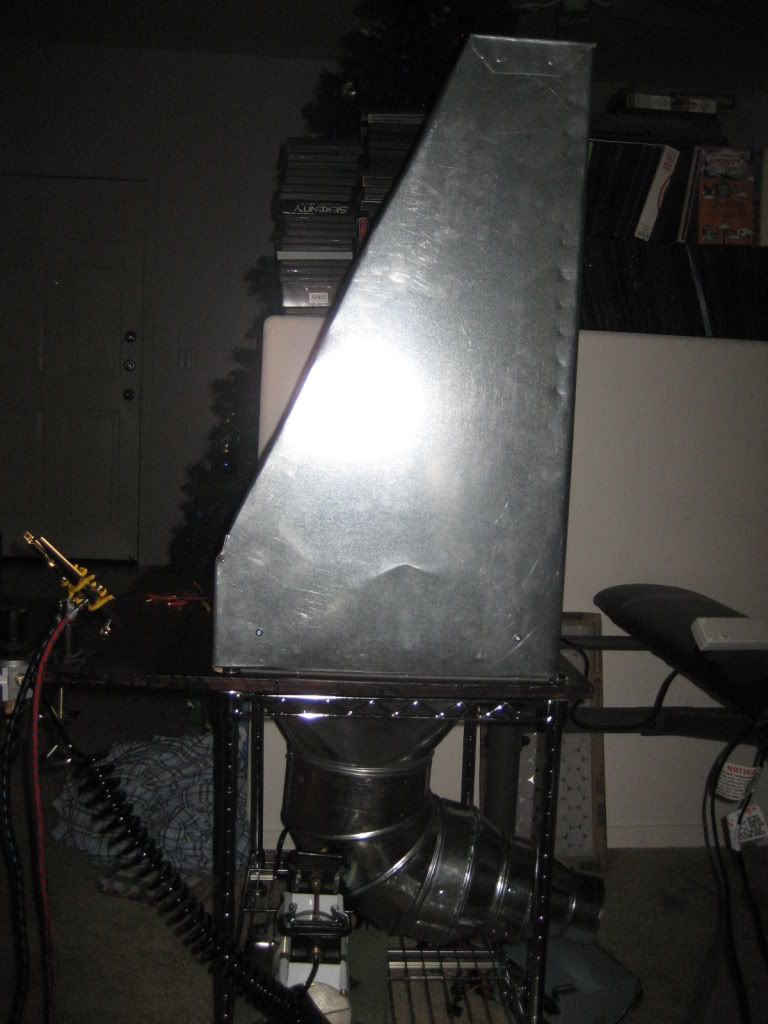
Next, the fan and reducer assembly was built.  First, a leftover piece of sheet metal 12 3/4" on a side was cut out.  Five 4 1/8" holes were marked out, and drilled out using a hole saw.  The fans were then clamped in place and their mounting holes were drilled out as well.  The fans were then mounted to the metal using machine screws in all holes except those along the outer edge.  The square reducer's mounting flanges were pulled off, and slits were cut so that new mounting tabs that would sit flush could be bent out.  The fan assembly was then clamped to the reducer flanges, and the outer fan mount holes were chased out through the reducer.

Next, the other reducers were were attached using self-tapping sheet metal screws. the joints were then wrapped in foil tape.  Finally, weatherstripping was applied to the bottom of the reducer flange, the assembly was held in place, holes were drilled in the corners, and machine screws were used to mount the whole thing. The sheet metal work was now complete.

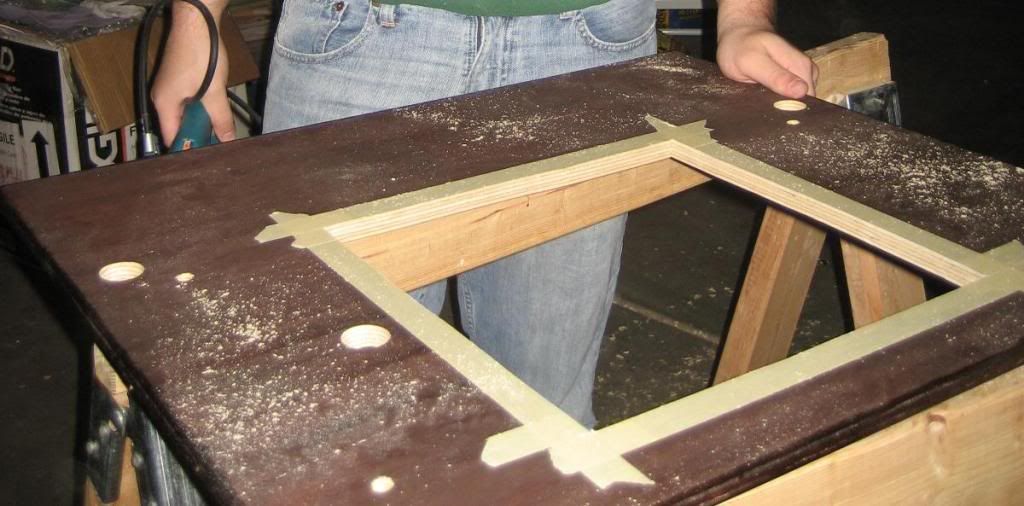
Next, the tabletop was cut to size, routed, and stained.  Locations for the connecting bolts and the cart posts were then covered in masking tape to prevent splintering, marked out on the bottom, and drilled. A 3/8" drill bit was once again used to provide a starting hole for a jigsaw to cut out the square shapewhere the fan and reducer assembly would eventually go.  A line of weatherstripping was laid out to form a tight seal between the bottom of the spray booth, the rivets, and the table top.  

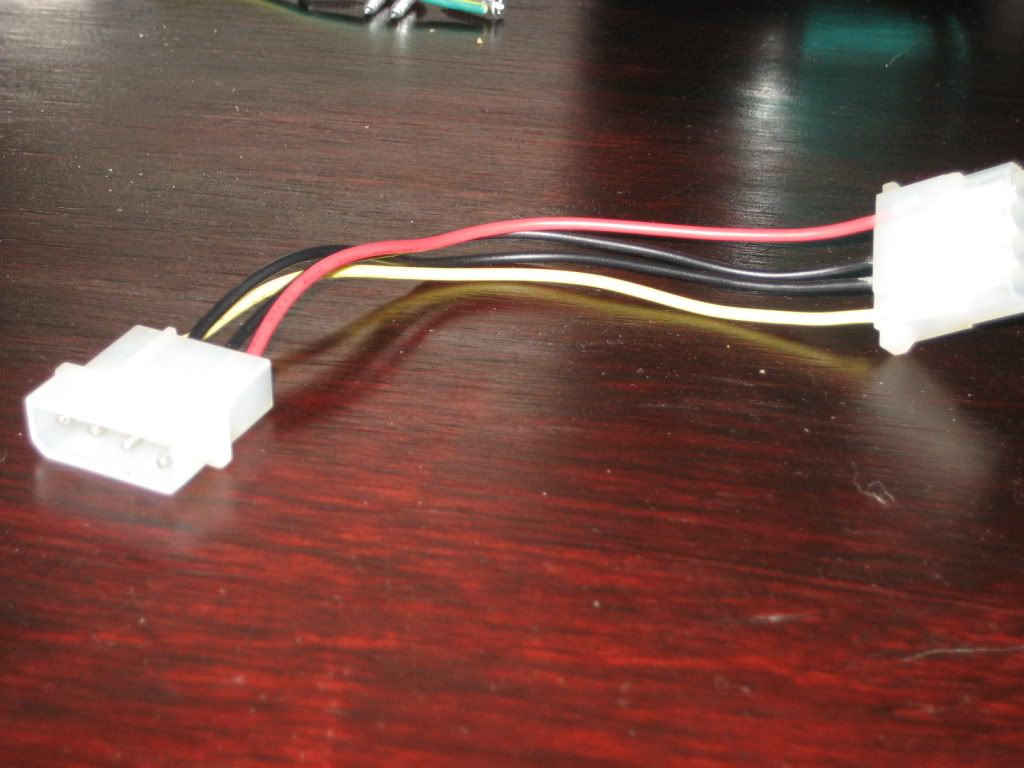
Major assembly was now done, and we started on odds and ends.  With the tabletop complete, we clamped the spray booth in place, and chased out holes in the bottom of it for the connecting bolts, which were then bolted down, and the fan power wire. A grommet was inserted into the fan power wire hole.  Holes were also drilled in the top of the spray booth to mount the fluorescent light, and it was then mounted.  A hole was drilled in the side of the spray booth for the light power wire, and the light was then wired up.  The aluminum spacers proved to be disappointing, so we used long machine screws as studs to rest the filter and grate on. The fan wires were attached in parallel, heat shrink-wrappped, sealed, and fed through the power wire hole.  Next, they were wired into a quick disconnect, with the other side of the disconnect feeding into the power supply.  

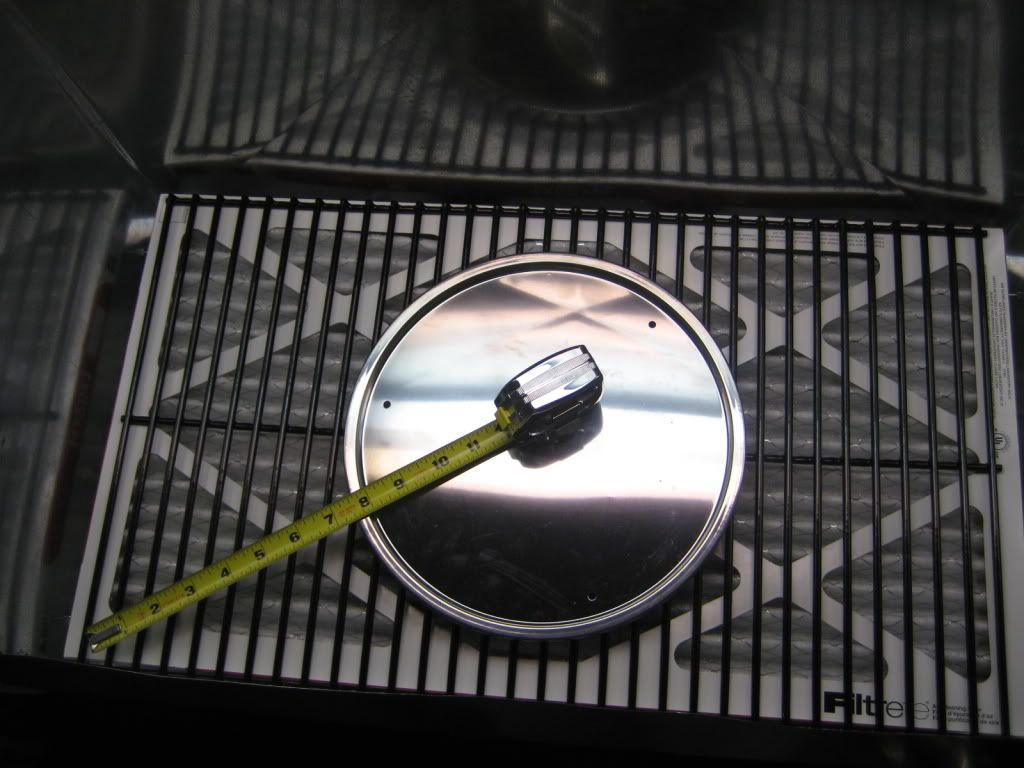
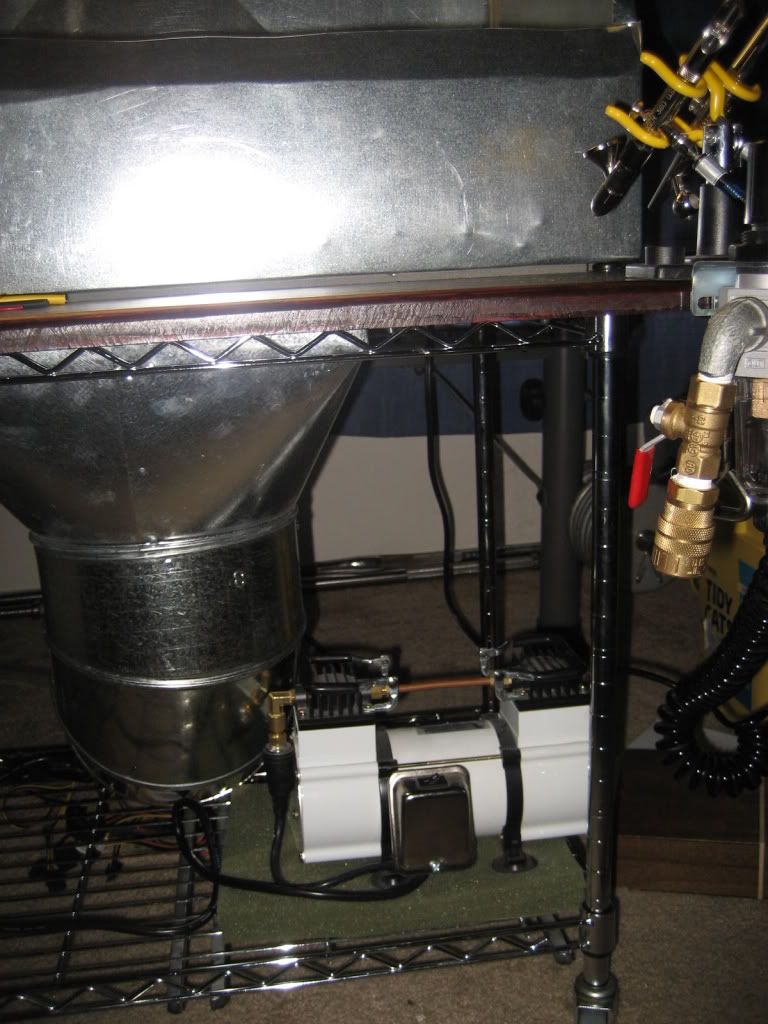
The whole assembly was then slid onto the cart poles, and large washers were used as spacers.  Metal straps were screwed into the bottom of the tabletop, and thread through the cart sides to hold the assembly in place.  My airbrush regulator, holder, and quick-disconnect were added to the front of the tabletop, while the compressor and power supply were mounted to the bottom of the cart.  A power strip was mounted to the bottom of the tabletop, and the power supply, compressor, and lights were plugged in.  The filter and grate were placed on their improved supports, and we called it a night!


Feel free to ask any questions you can think of...I'd love to hear your comments and friendly criticism too!  

Cheers,
Alex
Never trust anyone who refuses to drink domestic beer, laugh at the Three Stooges, or crank Back In Black.
  • Member since
    June 2004
  • From: Tucson
Posted by cardshark_14 on Sunday, December 14, 2008 5:01 PM
I've just gotten the all clear to go finish this thing at my friend's house. Hopefully it'll be done later tonight. Stay tuned!

Cheers,
Alex
Never trust anyone who refuses to drink domestic beer, laugh at the Three Stooges, or crank Back In Black.
  • Member since
    June 2004
  • From: Tucson
Posted by cardshark_14 on Thursday, December 11, 2008 12:52 AM
John, no problem. If you can get a hold of Modelnerd, he knows how to get a copy decently cheap.  Otherwise, its ridiculously expensive.

Cheers,
Alex
Never trust anyone who refuses to drink domestic beer, laugh at the Three Stooges, or crank Back In Black.
  • Member since
    June 2008
  • From: Piscataway,NJ
Posted by jtrace214 on Thursday, December 11, 2008 12:38 AM

Alex,thanks for the info on Solid Works I think I could use it alot of what I do is repetative bends and stuff on rub rails (side bumbers) and front and rear bumbers, and most body parts are identical to manufacturer. I know what you mean about neighbors they built a new house near my garage and the new couple have a baby so they ask me to nock off at 9:00 which I understand but......None of my others ever complained I even do side work for the welding and car repairs.


John

the pic to the left is my weekend condo lol

  • Member since
    June 2004
  • From: Tucson
Posted by cardshark_14 on Thursday, December 11, 2008 12:21 AM

Parts list and price breakdown for spray booth cart:

Materials and Specialty Tools:
Rolling file cart $25.00 (Already had)
Airbrush/regulator holder $17.00 (Already had)
Power strip $1.50
4 x 7/8" ID washer $1.50
4 x 5/16" x 1 1/2" bolts $0.50
4 x 5/16" nuts $0.25
leftover piece of plywood FREE
1 1/8" Hole Saw $6.00 (Already had)
TOTAL: $51.75 (actually spent $3.75)
Big Smile [:D]

Tools:
tape measure
speed square
drill
1/2" wrench
1/2" socket
ratchet
basic drill bit set
pencil
large T-square
punch
hacksaw
jig saw

Cheers,
Alex

Never trust anyone who refuses to drink domestic beer, laugh at the Three Stooges, or crank Back In Black.
  • Member since
    June 2004
  • From: Tucson
Posted by cardshark_14 on Wednesday, December 10, 2008 11:26 PM

Hey Aaron, 

Yep, unless something unforseeable happens, I've gotten everything that I need to, so I'm actually a bit under budget!  Plus, my spray booth has some nice extras that aren't included with even an artograph booth, like a plexiglass lid, all the ductwork, and even new tools! Party [party]  The best thing is that while its large enough to hold 1/72 heavies and flying boats, like a Ju 390 or an Me 323 or a Bv 222, it also will collapse quite nicely for when we move back to the midwest.  I can't wait to get this thing finished and move on to some modeling...my V-1 is calling my name, and I've got a bunch to finish for Roy's NME GB.

Cheers,
Alex

Never trust anyone who refuses to drink domestic beer, laugh at the Three Stooges, or crank Back In Black.
  • Member since
    October 2004
  • From: League City, Texas
Posted by sfcmac on Wednesday, December 10, 2008 11:08 PM
 It almost looks like a dust catcher that I have seen in some wood shops. Very cool idea. Your able to pull it off at cost? That will be pretty cool. Much more advanced than my window fan. Tongue [:P]
JOIN OUR COMMUNITY!

Our community is FREE to join. To participate you must either login or register for an account.

SEARCH FORUMS
FREE NEWSLETTER
By signing up you may also receive reader surveys and occasional special offers. We do not sell, rent or trade our email lists. View our Privacy Policy.