 DrewH wrote: DrewH wrote: |
| ....WOW! you two are good. |
|
Flattery will get you everywhere!
| DrewH wrote: |
| Very crude (compared to yours) as I need a degassing chamber to improve the finished quality of the castings. |
|
The molds that I describe below do use a vaccum chamber to remove air and increase the density of the resulting molds. I've tried cheap vac pumps but it really does take a good one. E-bay often has them for .25 on the 1.00 if your inclined to do it that way. ALL of my casting equipment was purchased used
| DrewH wrote: |
| multipart molds are used daily, but have never figured out how to do them. Any help there would be HUGELY appreciated. |
|
Let's try to remove the mystery of that. Following are TWO DIFFERENT APPROACHES TO A SIMILAR PROBLEM
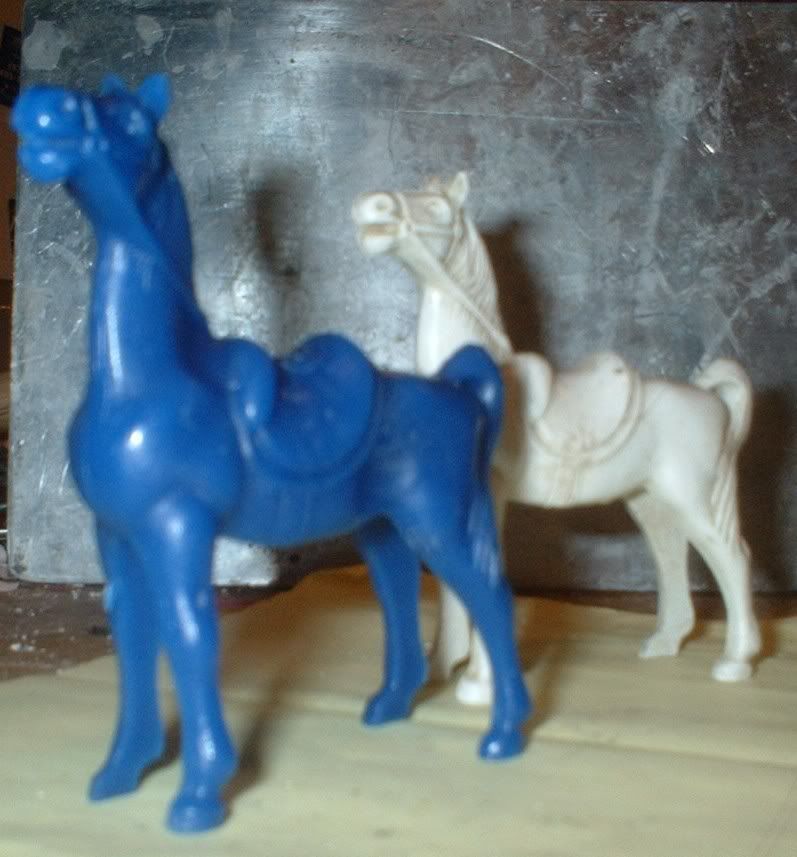
FIRST APPROACH NEXT THREE PICTURES -- The RTV used in this mold is Castaldo Liqua-Cast 2 part 10 to 1 mix. I really like it a lot and the cost is very inexpensive compared to others I've used. It allows for better carving that the normal RTV two part blue. The first picture is of the Master (White) and the end result of the mold, a wax to be used in Lost Wax Casting (Blue). I'm sure that many of you have run into the problem illustrated, there is no single parting line that will suffice to get the part out once the material has been poured in, regardless if it's resin, or wax, or Low Melt Alloy
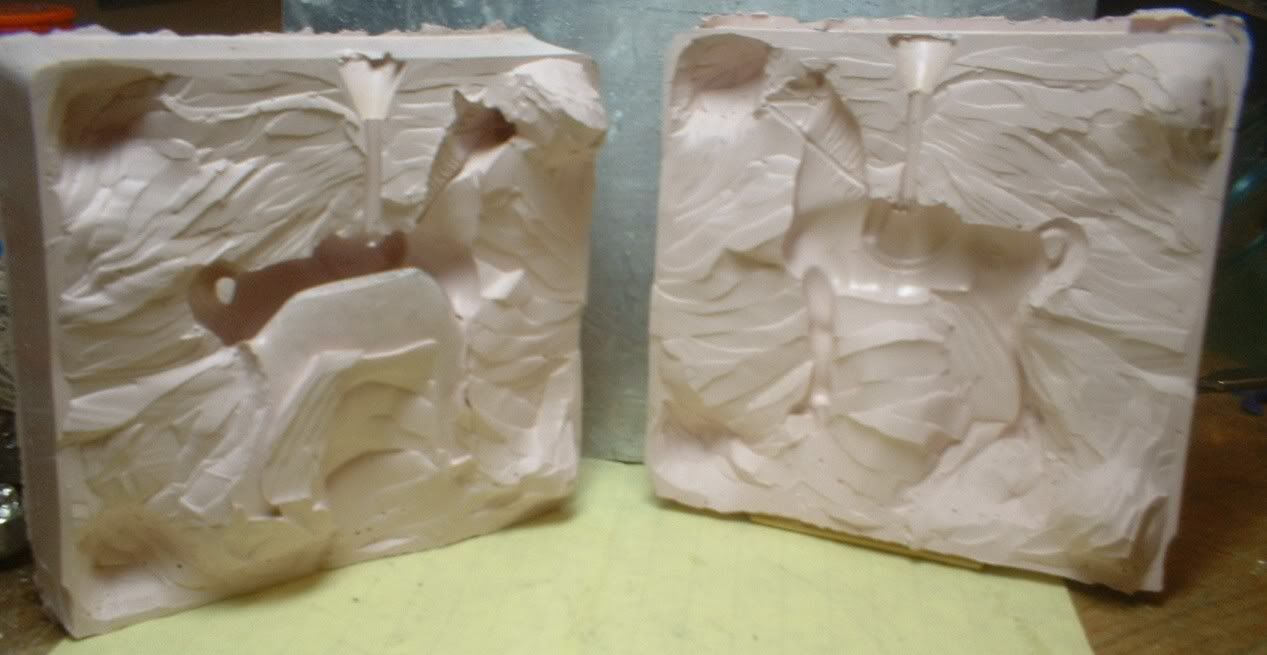
This next picture shows the first cut of the mold. BTW I do both carved molds as well as multi-part pours as in the second example. The objective is to be able to separate along a parting line that will cleanly separate some portion of the master while leaving the balance embedded in the other part. In this case the initial first cut exposed one half of the body and two of the four legs. The remaining legs are embedded in the other half (Left)
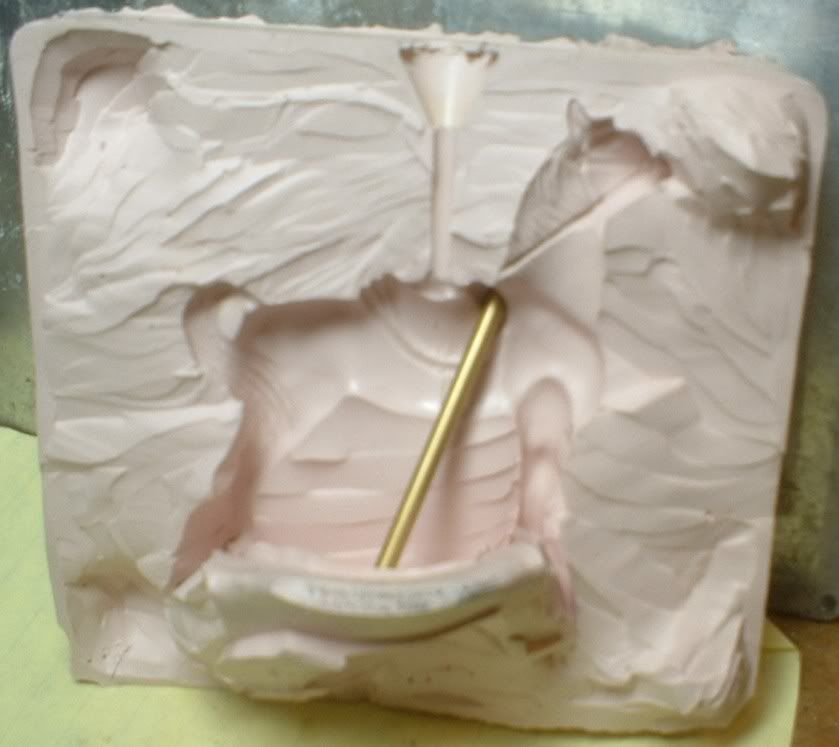
The third photo shows the cut that will allow the part to be removed. I had to prop it open with a sprue rod (1/8 inch brass). The trick is think where the cuts will have to be in 3d. The other trick is to orient the mold and know where the object is inside. I usually put a yellow sticky on the inside of the mold prior to pouring in the RTV with a drawing on the sticky facing out. Then I know where I can safely cut to get to the model. I have even taken pictures of objects sitting in the mold prior to the pour. As you do these cuts, you need to be aware of how it will fit together when you are ready to pour or in my case inject. You don't want to have square or straight cuts that can slip. You need to leave enough mass to act as the hinge.
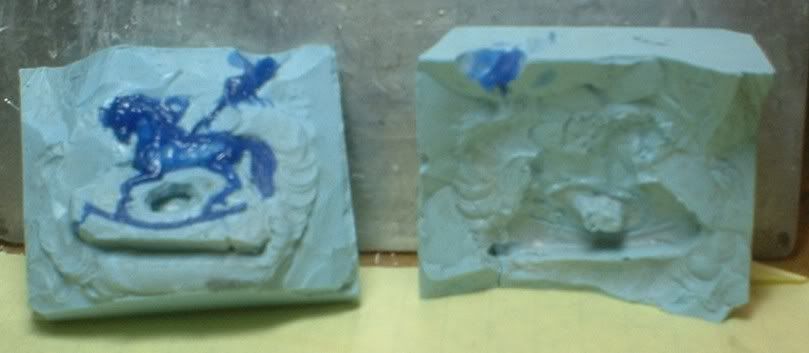
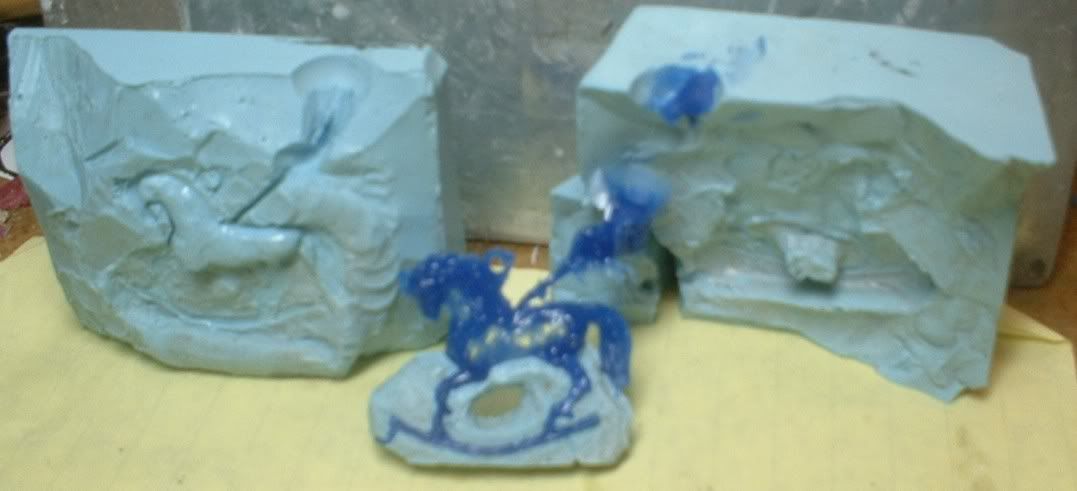
SECOND APPROACH NEXT TWO PICTURES -- The RTV used in this mold is a no-name 2 part equal parts mix. I like it for different reasons, it is easier to work with when creating molds by a barrier separation method and is easier to work with when there are undercuts because it is soft and flex. The cost is more expensive. It doe not allow for carving since it is too soft and it will tend to break when bent compared to the pink.
The parting line determination method is the same as previous, you simply have to see in 3d and visualize how you want to achieve separation. In the construction of this mold:
- I took the master, a sterling silver pendant and put tape around the rocker portion thus creating the insert part.
- I mixed and vaccumed the RTV
- Poured it into the pony sitting upside down, thus creating the mold that would be the space between the rockers.
- I then vaccum again with the pony in the chamber upside down
- Set aside to cure.
- Next I carved out the locating shape in the center of the rockers thus insuring that I could get solid and consistent position of the removable part.
- I then embedded the pony, with the insert in place, up to the desired parting line. The left picture would represent the clay and the right picture will be the second pour.
- After embedding in the clay, paint your parting agent on the inside of the box edges, on the clay, and very important on the first pour of the RTV. This is so the second pour which you about to do will not adhere to the part between the rockers.
- Mix, vaccum, pour, vaccum and set aside to cure. When step 9 is complete you will have mold part number 2 with a post that now fits into the hole previously carved.
- Remove all clay and put it back into the mold box with the two parts assembled and in a fashion that will allow you to pour the third and final part
- Paint your parting agent on the inside of the box edges, and very important on the first two pours of the RTV. This is so the third pour which you about to do will not adhere to the assembled first two parts
I'm not sure how good this explaination is but I'd be more than happy to answer any questions.
Regards Caster (RLW)