Hi guys!
Well, go easy on me! I almost tore my hair out finishing up this very diffficult kit! Man, I got new respect for you car builders! If anyone has tried to build this, you know that it's a bear of a kit. Well, I originally started this as just a basic experiment to build and A/B the paint type against the other car on my desk right now. I painted this with acrylics; the Super Bee still in progress is being done with enamels.
But, dang it; you know me--couldn't let it go as just an OOB; besides, the Charger is my absolute favorite muscle car!!! ![Tongue [:P]](/emoticons/icon_smile_tongue.gif) So I rolled up my sleeves and...
So I rolled up my sleeves and...
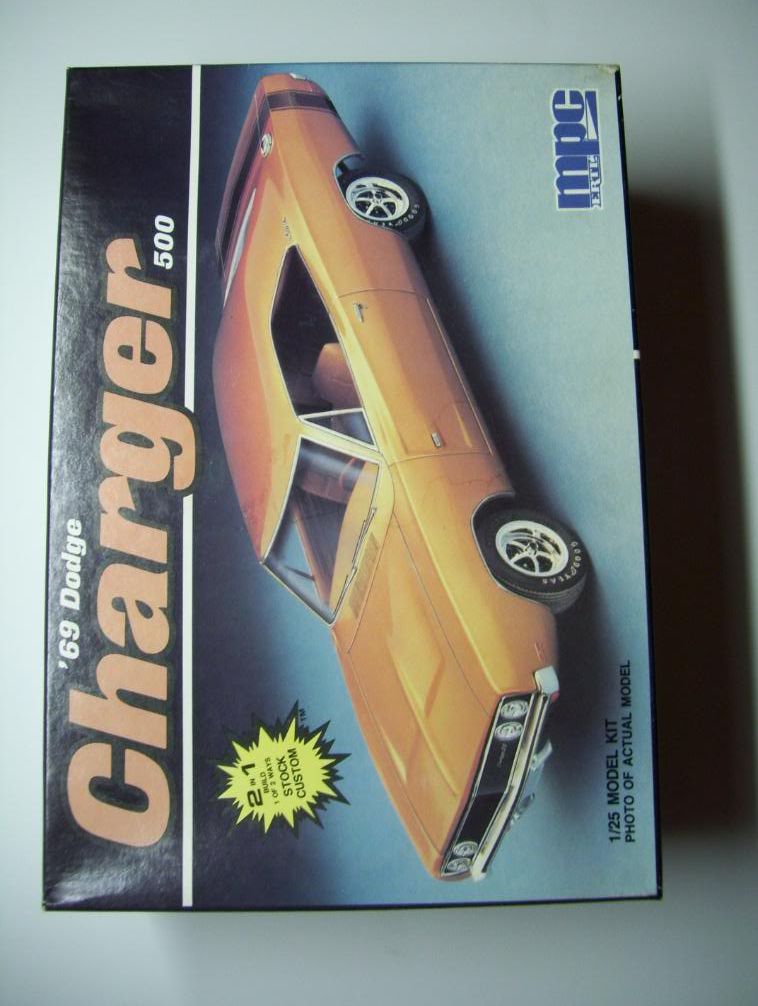
Here's the kit box: the old MPC 1/25 Charger 500.
LOL! Here's how the first kit arrived from ebay! (The seller sent me a second one!)
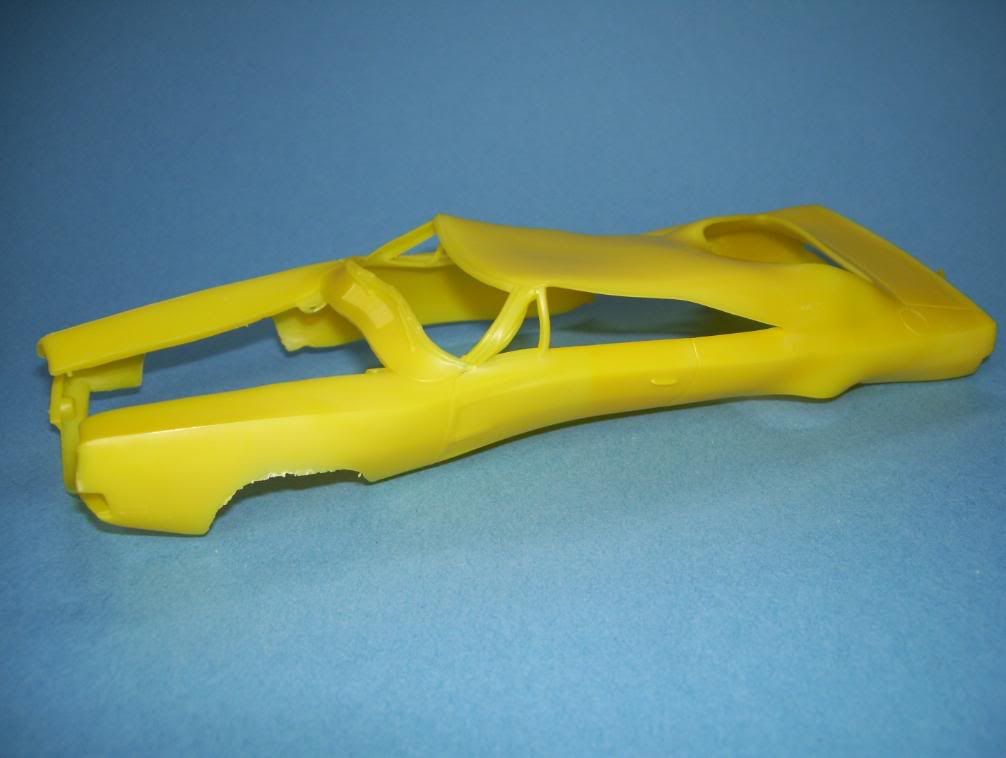
The kit was built up, and painting was started with first a coat of Tamiya white primer, then a coat of flat Model Master Dark Green, and then MM Dark Green Pearl--about 5-6 coats in all, with MUCH sanding and polishing. UGH! WHile that was drying, I worked on the interior.
I scratched some door handles and arm rests, added head rests, flocked the carpeting and then added fine black sandpaper matts; also painted in acrylics. The white coat is just the Tamiya primer, with a gray oil wash added for depth.
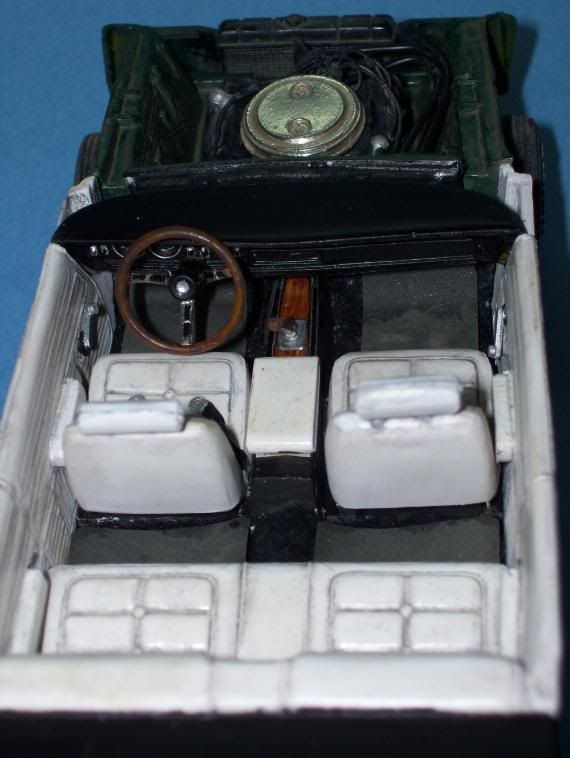
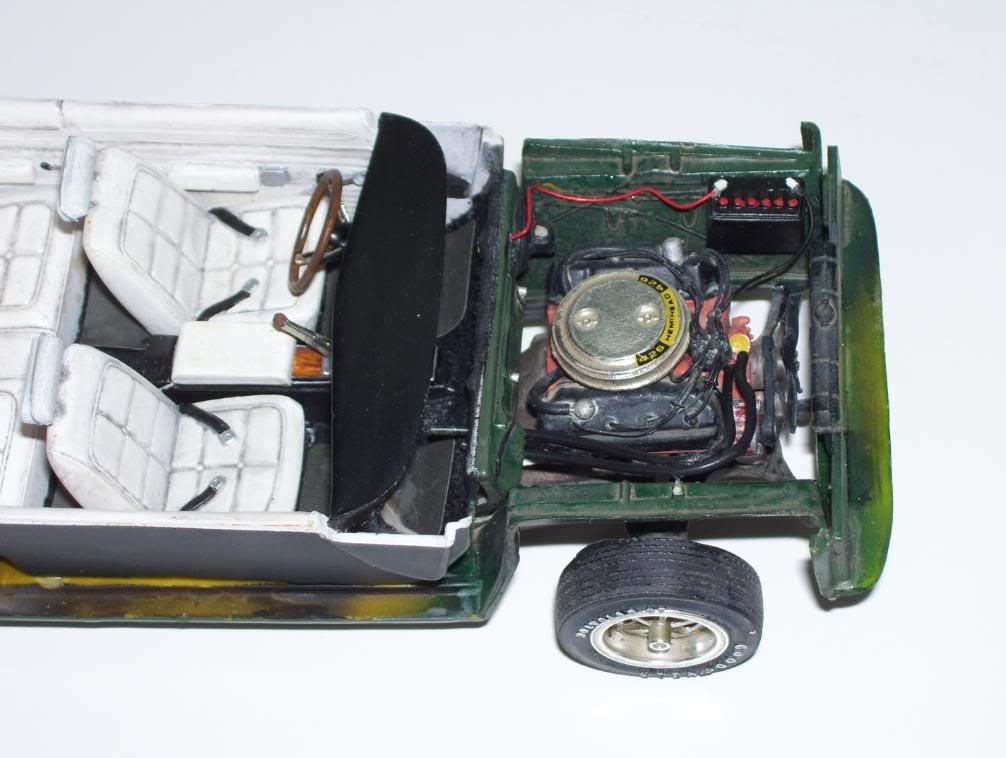
On the engine so far in ths photo, I have added Detail Master hoses, wiring, added foil to the air cleaner and an AM decal to the Hemi, and I scratched those silver ducts n the Hemi covers; don't ask me what they are or what they do! ![Whistling [:-^]](/emoticons/icon_smile_whistling.gif)
I then finished up the painting, foiled all the chrome parts, and applied the rear stripe decal--this was NOT fun! Before applying the decal, I noticed that the position of the molded-on rear side markers was such that they would never have lined up in the middle of the stripe decal--they were too far back. SO I cut them off and sanded the part smooth, carefully and patiently repainting a patch of the area...days tick by..I had an excellent AM decal that I'd got off ebay, which looked MUCH more realistic than the kit decals, but I ruined it by overzealous waxing--it was so thin it chipped!. The first kit decal went on and looked like crap; it was so old and thin that the color showed through! So I got the second decal from the first melted kit, and put the second decal on over the first as well, as the AM decals I had had are now OOP. It doesn't look anywhere as near as good as the AM did, but it looks much better than just the one semi-transparent one!
![Headphones [{(-_-)}]](/emoticons/icon_smile_headphones.gif) One of these things is not like the other...notice the darned valance on the rear of the kit compared to a real one?--NO UPPER TRIM! How could I paint the black interior of the rear panel without the trim? THAT would look stupid!? Sigh....what to do? It's already been painted!
One of these things is not like the other...notice the darned valance on the rear of the kit compared to a real one?--NO UPPER TRIM! How could I paint the black interior of the rear panel without the trim? THAT would look stupid!? Sigh....what to do? It's already been painted! ![Sigh [sigh]](/emoticons/icon_smile_sigh.gif)
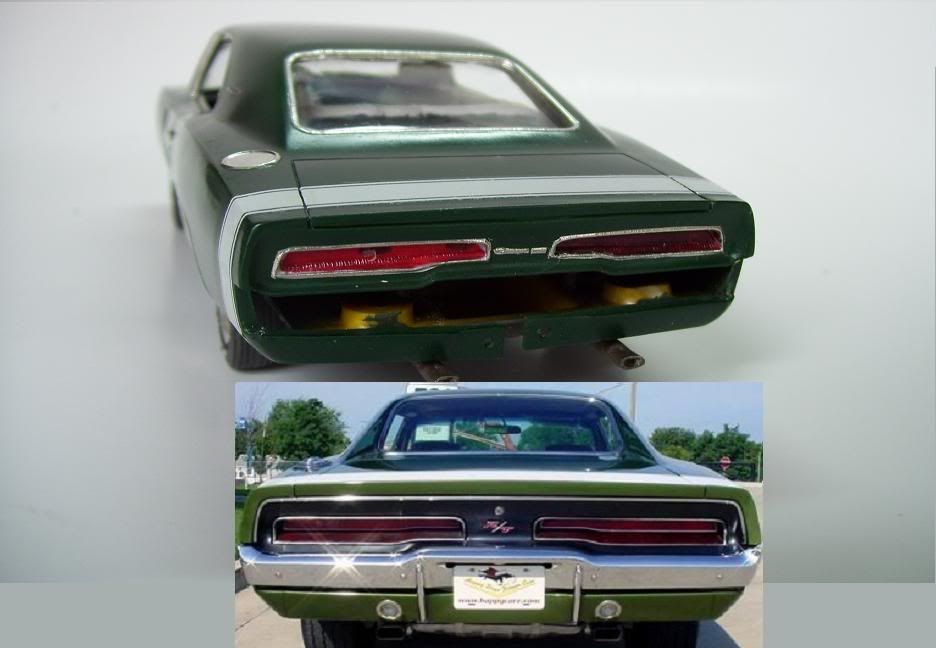
Oh well....get out the Exacto blade, and with the ol' Optivisor, scrape, scrape, scrape...then I took some .015 rod, and added it using Tenax R7 model glue. Here it is in-progress..
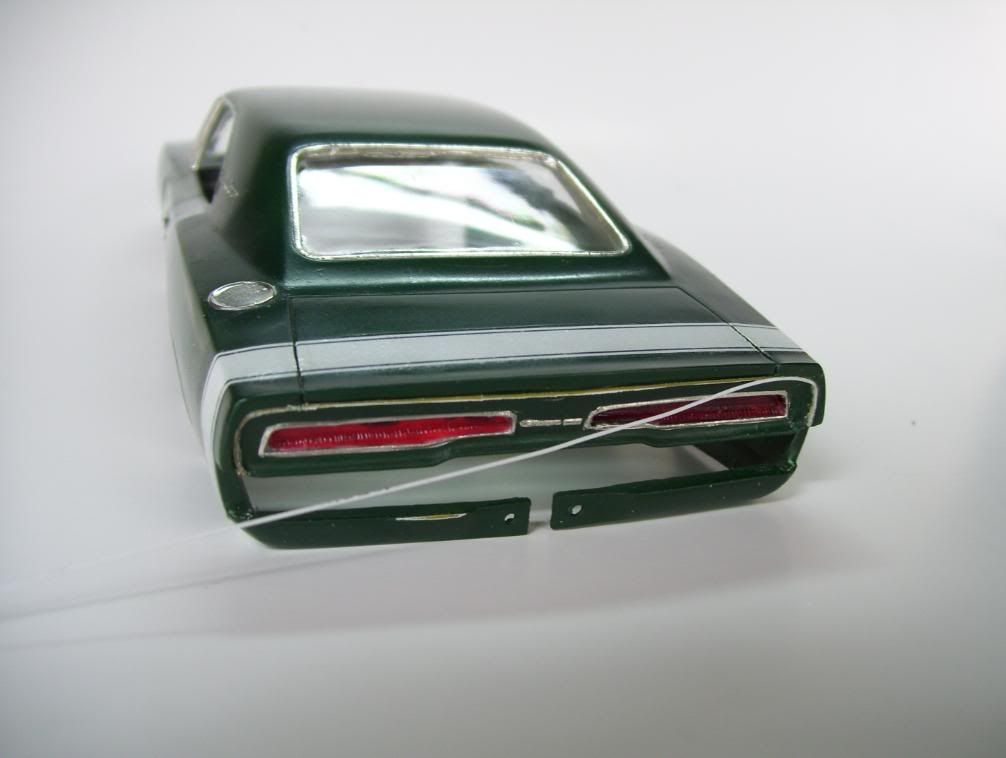
..and finito; again, note the missing side markers. The windows were added with 5-minute epoxy. (A special "THANKS!" goes out to a fellow modeler here who wishes to remain anonymous who helped me out with a spare after I ruined the first one with epoxy, and found that the melted kit's one was too warped to fit!)
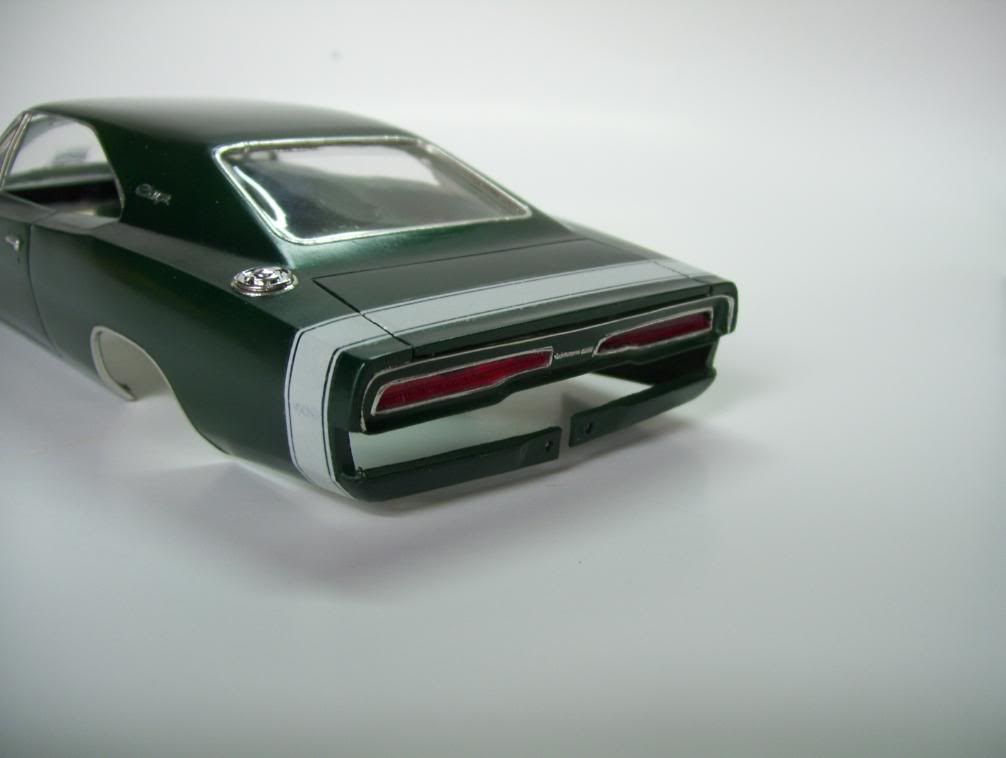
To add the side markers, I very carefully cut the ones off the warped kit with a razor blade and glued them onto a scrap sheet of very thin plastic; I then painted them, cut them out of the sheet with a razor blade, and superglued them in place.

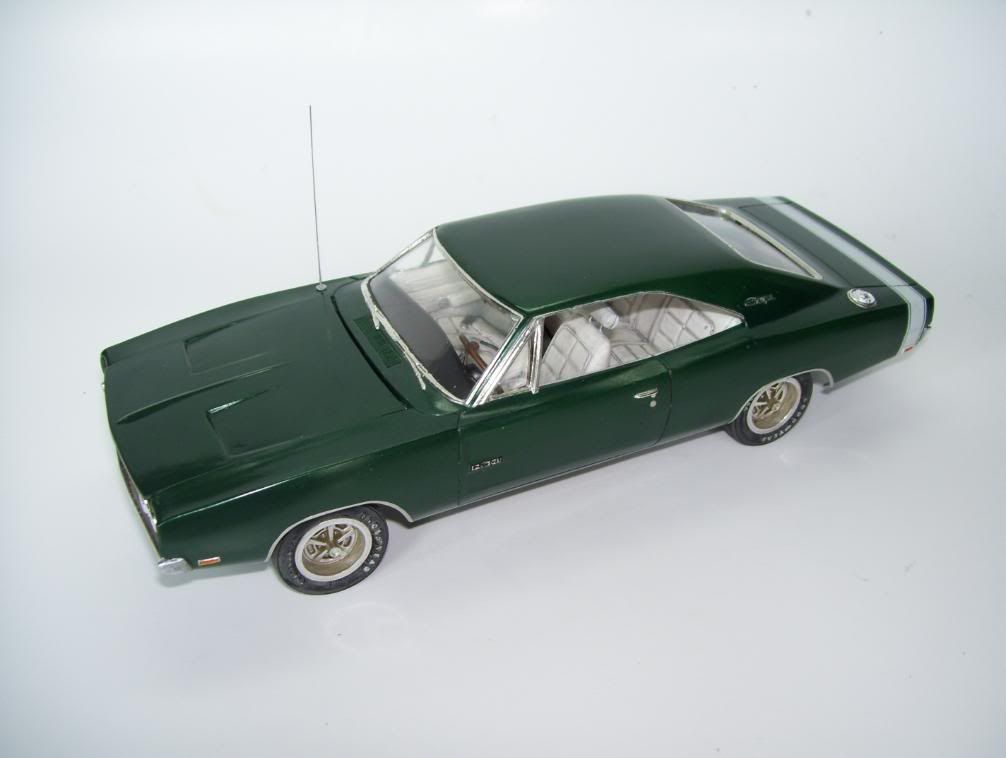
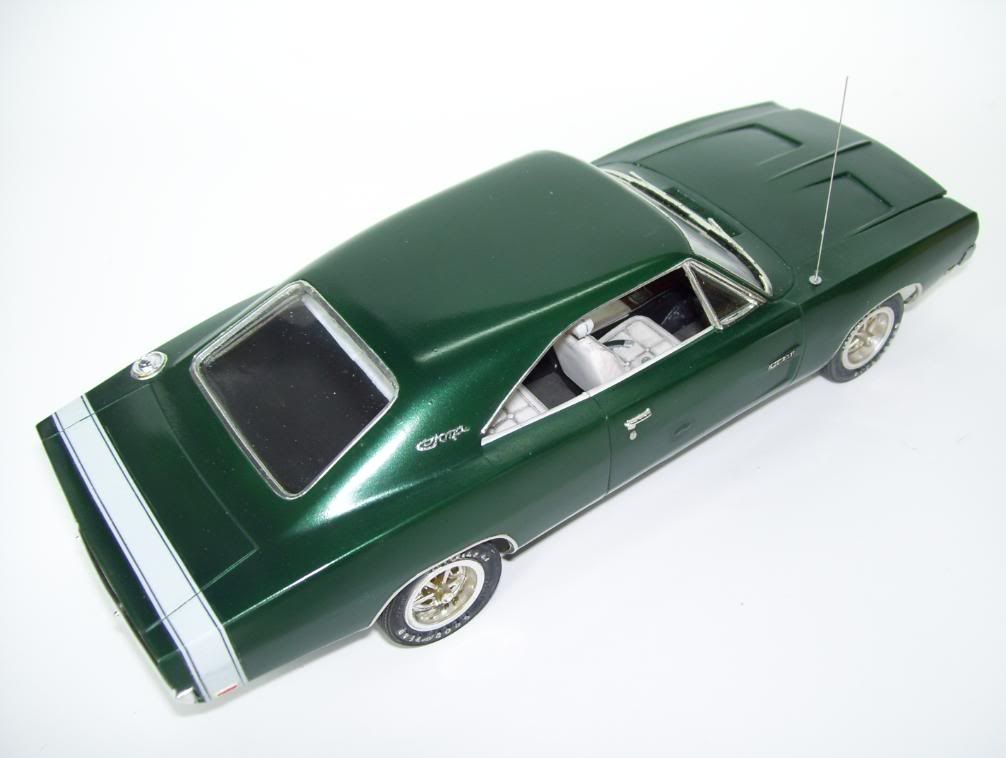
And here's the finished shots...my first "shiny" car model in over 10 years! The antenna was made from a guitar string...
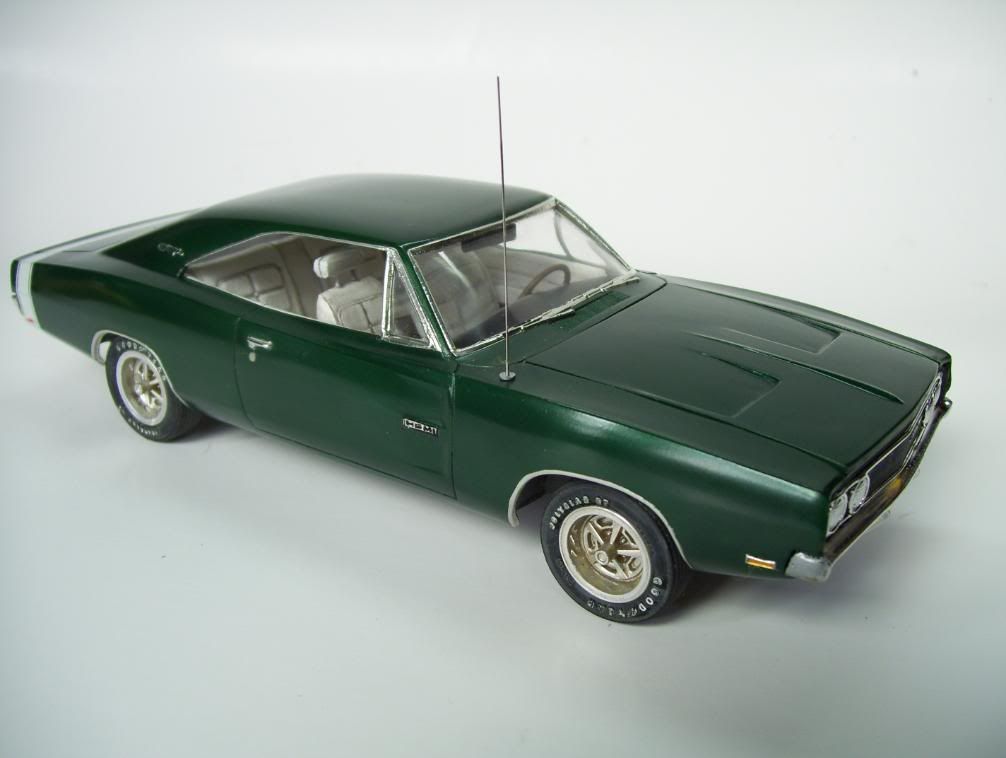
I also had added a scratched rear view mirror...

The engine turned out much better than I had planned, LOL! ![Laugh [(-D]](/emoticons/icon_smile_newlaugh.gif) I added some more stiff after mating the body/chassis...I scratched a cleaner fluid reservoir, added a radiator overflow hose, that little coil thingy on the front of the Hemi, a longer, more accurate hose to the radiator with foil clamps..I weathered the engine bay with a dirty oil wash. Hey, I gotta put some "Armor personality" into it!?
I added some more stiff after mating the body/chassis...I scratched a cleaner fluid reservoir, added a radiator overflow hose, that little coil thingy on the front of the Hemi, a longer, more accurate hose to the radiator with foil clamps..I weathered the engine bay with a dirty oil wash. Hey, I gotta put some "Armor personality" into it!? ![Whistling [:-^]](/emoticons/icon_smile_whistling.gif)
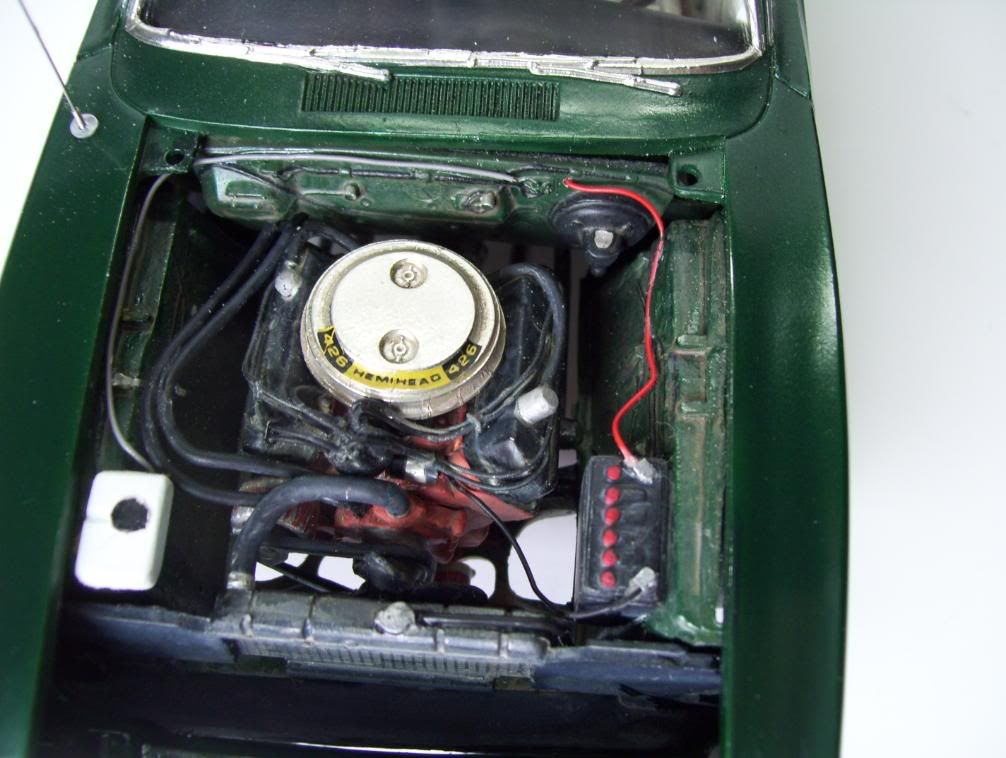
I'm willing to say that I'm not sure if all the plumbing goes where it's supposed to. "Hey man, I just build the things, I don't now how to make 'em run!"

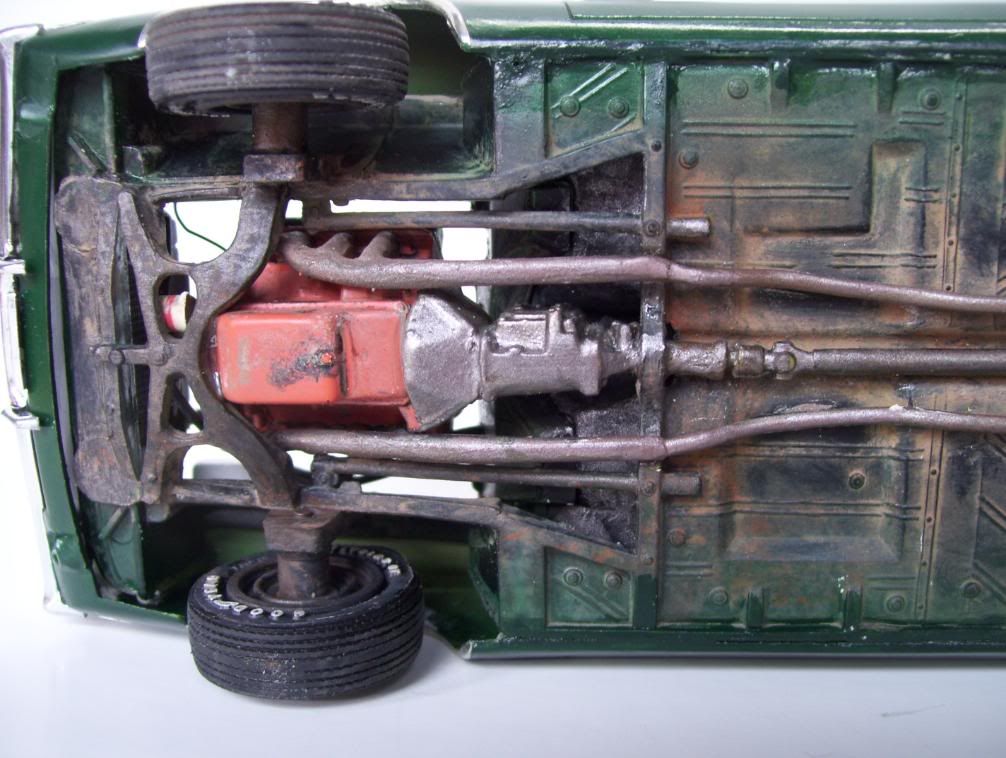
The underside, weathered with pastel powders. The pipes were an absolute b**ch to get to meet--I actually had to add a .060 spacer! The engine is painted in my own Tamiya mix.
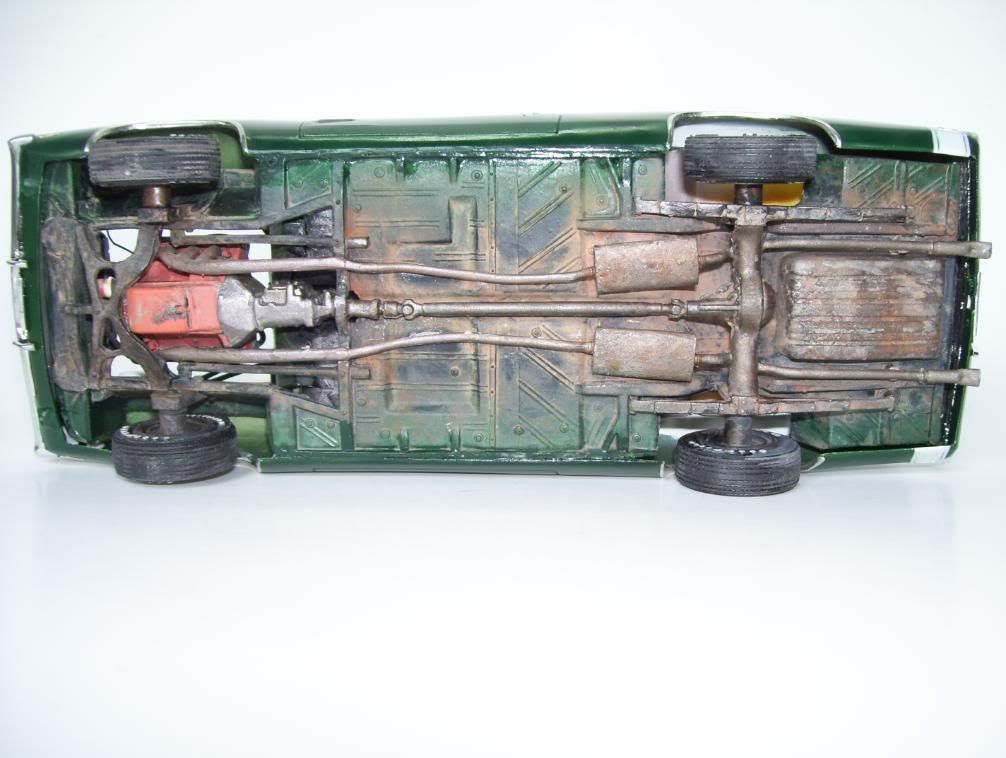
Stilll gotta weather the sides where I joined/glued the body on..
And a last look--does the "sit" look correct? I may have lowered the rear a bit too much--It was a super PITA to get it to sit together correctly, so I had to lower the tub by a few millimeters. I may take it apart again and raise the rear a bit more...what do you think?

Well, be gentle on me guys! This was the hardest build Ive done in a while! I have to say that I now realize how spoiled we Armor guys are, with all the "slide molding", precise-fittting models; man, this one almost kicked my a**! I STILL hate gloss paints! ![Yuck [yuck]](/emoticons/icon_smile_yuck.gif) LOL!
LOL!
Any comments, hints, suggestions or criticisms would be welcomed and appreciated!