SEARCH FINESCALE.COM

Enter keywords or a search phrase below:

1/48 B-17 Group Build...ALL INVITED TO JOIN!

681322 views
1413 replies
1 rating 2 rating 3 rating 4 rating 5 rating
  • Member since
    September 2009
  • From: Frisco, TX
Posted by B17Pilot on Friday, March 9, 2012 8:58 AM

AlaskanWW2

Curious how could i get a set of these decals??   Im goning to build "Sentimental Journey"

You have to make the Sentimental Journey decals yourself.


  • Member since
    June 2011
  • From: Birds boro PA
Posted by Ghostriderp-47 on Friday, March 9, 2012 6:05 AM

Vary nice work I love forts that like this. They have so much more meaning when u have a relitvie that served on one. Would love to see some more pictures.

  • Member since
    February 2012
  • From: Olmsted Township, Ohio
Posted by lawdog114 on Thursday, March 8, 2012 10:00 PM

Hello, Since this is the never ending B-17 group build, I thought I would submit my B-17 build from about 3 years ago.  My grandfather flew 11 missions as the ball turret gunner on this plane "Cash and Carrie" serial number 425915 of the 390th Bomber Group/ 570th Bomber Squadron).  He was shot down on the Munster Raid of October 10th 1943 and was POW'ed at that time. 

This is the product of about 5 years of research.  Carrie was a Lockeed Vega B-17 F with a somewhat unusual nose configuration (at least from what I could tell).  I took the 1/48 Mongram B-17G and removed the chin turret then reworked both cheek areas.  I fashioned a new nose and gun station since Carrie had a single 50 caliber protruding here.   I was able to find nose art for Carrie through the 390th BG website for which my graphic designer friend made for me.  Unfortunately I have since found out the stars and bars should have had the red border.  Here she is:

 "Can you fly this plane and land it?...Surely you can't be serious....I am serious, and don't call me Shirley"


  • Member since
    January 2012
Posted by AlaskanWW2 on Tuesday, March 6, 2012 11:02 PM

Curious how could i get a set of these decals??   Im goning to build "Sentimental Journey"

  • Member since
    March 2008
  • From: Ohio
Posted by B-17 Guy on Friday, March 2, 2012 3:21 PM

Nice!

  • Member since
    June 2011
  • From: Birds boro PA
Posted by Ghostriderp-47 on Thursday, March 1, 2012 9:45 PM

I LOVE night fighters and thought it would be cool to see what a b-17 would have looked like if it would have ever flown night missions. 

Photobucket

Photobucket

  • Member since
    June 2011
  • From: Birds boro PA
Posted by Ghostriderp-47 on Thursday, March 1, 2012 9:38 PM

So this is the vary first B-17 i ever made as a madder of fact this was the second model i every made. As you can see it was fare from anything thing nice. I got tired of looking at it all broken up so im fixing it up with a little twist 

Photobucket

Photobucket

  • Member since
    March 2008
  • From: Ohio
Posted by B-17 Guy on Tuesday, February 28, 2012 8:26 PM

redraider56

Loos like you have much better luck with yellow than I do

Are you spraying it or brushing it?

  • Member since
    March 2008
  • From: Ohio
Posted by B-17 Guy on Tuesday, February 28, 2012 8:25 PM

I would also say no, but it depends on what your spraying, a 1/2 oz bottle is not enough for a 48th scale B-17.

  • Member since
    March 2008
  • From: Ohio
Posted by B-17 Guy on Tuesday, February 28, 2012 8:23 PM

Ghostriderp-47

I love the paint what brand of paint is that

It's this, good stuff but it does require work. I sprayed it with the snj paint, then buffed it with aluminum powder, the really shiny parts were done with a dremel.

http://www.hawkeyeshobbies.com/snj-spray-metal-paints.htm

  • Member since
    June 2011
  • From: Birds boro PA
Posted by Ghostriderp-47 on Tuesday, February 28, 2012 8:11 PM

I would say no because its always better to have extra. You never know what tip of problems your going to run into. When you are air brushing or useing a spy can.

  • Member since
    February 2012
  • From: Illinois
Posted by TicTac on Tuesday, February 28, 2012 7:40 PM

About how much paint is required to paint the fuselage? I have a 1/2 oz of Olive Drab but I feel as if it isn't enough.

  • Member since
    April 2010
  • From: Green Bay, WI
Posted by redraider56 on Tuesday, February 28, 2012 3:43 PM

Loos like you have much better luck with yellow than I do

-Matt

On The Bench: 1/48 HK B-17G "Man-O-War II"

On Deck: 1/48 Tamiya P-38H, 1/48 Revell PV-1


  • Member since
    June 2011
  • From: Birds boro PA
Posted by Ghostriderp-47 on Tuesday, February 28, 2012 9:15 AM

I love the paint what brand of paint is that

  • Member since
    September 2009
  • From: Frisco, TX
Posted by B17Pilot on Tuesday, February 28, 2012 9:01 AM

YesYes


  • Member since
    March 2008
  • From: Ohio
Posted by B-17 Guy on Monday, February 27, 2012 10:47 PM

  • Member since
    January 2003
  • From: Merton, Wisconsin
Posted by bigfoot01 on Monday, February 13, 2012 5:55 PM

B17Pilot

 bigfoot01:

I guess I missed something. what happened to the "D"?


OK, I'll recap. I got it off of ebay a few years ago broken in two.
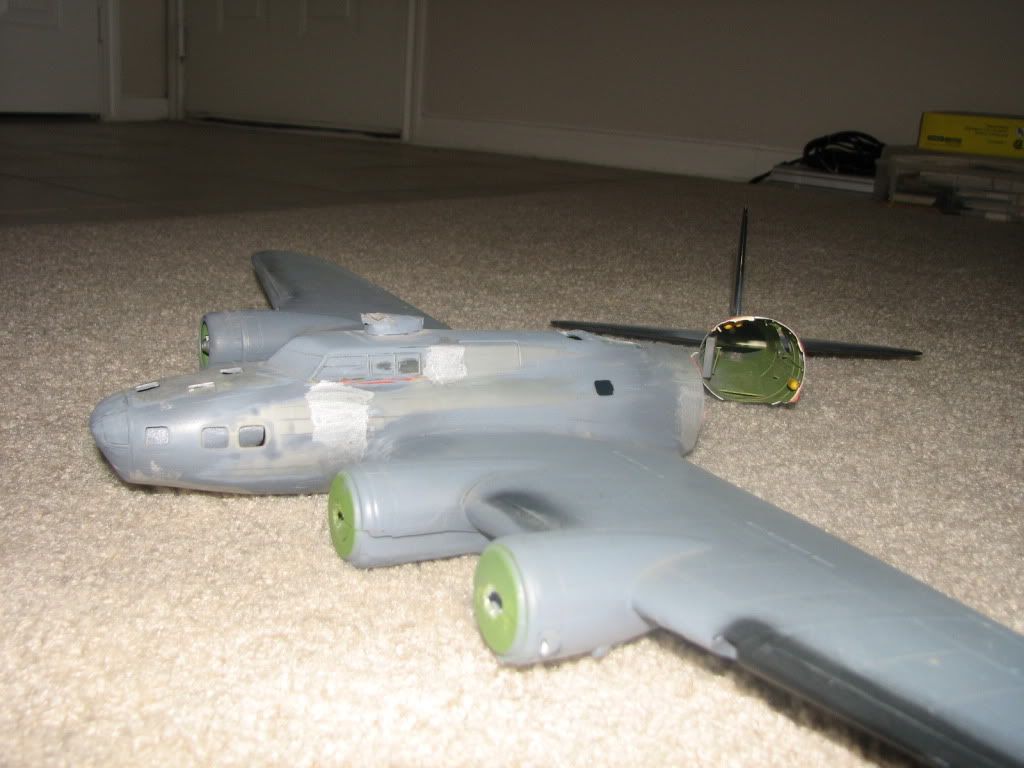
http://i993.photobucket.com/albums/af53/raiderpilot/B17s/IMG_3161.jpg

 I glued the two fuselodge pieces back together and discovered it was missing its bath tub gun turret and it developed these holes:

http://i993.photobucket.com/albums/af53/raiderpilot/B17s/IMG_7034.jpg

 So I started at the nose and am working my way back to the tail fixing everything that needs to be fixed.  I've added additional seats that are in the shark tail versions of the -17, but not in the E-G models (see previous pages).  I am now on the waist gun section making it look like it should.

Thanks for bringing me up to speed!

John 


  • Member since
    September 2009
  • From: Frisco, TX
Posted by B17Pilot on Monday, February 13, 2012 1:04 PM

bigfoot01

I guess I missed something. what happened to the "D"?


OK, I'll recap. I got it off of ebay a few years ago broken in two.

 I glued the two fuselodge pieces back together and discovered it was missing its bath tub gun turret and it developed these holes:

 So I started at the nose and am working my way back to the tail fixing everything that needs to be fixed.  I've added additional seats that are in the shark tail versions of the -17, but not in the E-G models (see previous pages).  I am now on the waist gun section making it look like it should.


  • Member since
    January 2003
  • From: Merton, Wisconsin
Posted by bigfoot01 on Monday, February 13, 2012 12:18 AM

Thanks Sparrow, it looks like thats the route I am going to take.

John 


  • Member since
    August 2009
  • From: Toledo Area OH
Posted by Sparrowhyperion on Sunday, February 12, 2012 1:45 PM

I have a simple way to fix it.  First glue the tail end of it together, but the back area only.  Don't put any glue on the front half.   Then let that dry overnight and the next morning do the front at use some extra strong elastic bands and/or clamps to hold it down while the front dries overnight as well.  This should force the fuselage half to conform to the proper edges and shape.  I did this with a couple of kits with misaligned  fuselage halves and it's always worked for me.


bigfoot01

Well, my project just got ugly. My plan was to build a "visible B-17" in the markings of Liberty Belle. I am at the point of getting ready to close up the fuselage. To avoid doing anything to smear up the transparent half, i have been using the extra opaque part for dry fitting. Well I decided to test fit the transparent part, and found it is terribly warped! I can get the nose end to line up perfectly OR the tail end, but not both! I am afraid of messing up the clear half or the already painted other half by gluing and clamping as I go, so I need to un-warp it before I close it up. Any ideas that won't wreck the transparency? Here you can see the warped clear half versus the nice and flat half it is suppossed to join with:

http://img.photobucket.com/albums/v485/BigFoot01/Aircraft%20Collection/Models%20in%20Progress/DSCF3584.jpg

http://img.photobucket.com/albums/v485/BigFoot01/Aircraft%20Collection/Models%20in%20Progress/DSCF3583.jpg


HELP!

In the Hangar: 1/48 Hobby Boss F/A-18D RAAF Hornet,

On the Tarmac:  F4U-1D RNZAF Corsair 1/48 Scale.

  • Member since
    January 2003
  • From: Merton, Wisconsin
Posted by bigfoot01 on Sunday, February 12, 2012 1:09 PM

Well, my project just got ugly. My plan was to build a "visible B-17" in the markings of Liberty Belle. I am at the point of getting ready to close up the fuselage. To avoid doing anything to smear up the transparent half, i have been using the extra opaque part for dry fitting. Well I decided to test fit the transparent part, and found it is terribly warped! I can get the nose end to line up perfectly OR the tail end, but not both! I am afraid of messing up the clear half or the already painted other half by gluing and clamping as I go, so I need to un-warp it before I close it up. Any ideas that won't wreck the transparency? Here you can see the warped clear half versus the nice and flat half it is suppossed to join with:


HELP!

John 


  • Member since
    January 2003
  • From: Merton, Wisconsin
Posted by bigfoot01 on Sunday, February 12, 2012 12:53 PM

B17Pilot

Well the weather's been playing havoc with my other projects, so more time on the B-17D.

The holes have been filled, need a couple of more swipes with the sanding stick, but that's no big deal.

http://i993.photobucket.com/albums/af53/raiderpilot/B17s/IMG_7044.jpg

http://i993.photobucket.com/albums/af53/raiderpilot/B17s/IMG_7043.jpg

I guess I missed something. what happened to the "D"?


John 


  • Member since
    March 2008
  • From: Ohio
Posted by B-17 Guy on Sunday, February 12, 2012 1:28 AM

Damn fine job your doing bringing that D model back to life pilot!

  • Member since
    September 2009
  • From: Frisco, TX
Posted by B17Pilot on Saturday, February 11, 2012 3:44 PM

Well the weather's been playing havoc with my other projects, so more time on the B-17D.

The holes have been filled, need a couple of more swipes with the sanding stick, but that's no big deal.

Tags: B-17


  • Member since
    December 2011
  • From: AZ
Posted by Luft Modeler on Saturday, February 11, 2012 2:04 PM

B-17 Guy

Bigfoot, I'd wait to do any final finishing on the fuselage till you have it glued together. This kit doesnt go together like a tamiya kit. I promise you will have to do seam work on this kit. Always better to paint the fuselage after its assembled, windscreen installed etc. The windscreen alone is a pain in the azz. Trust me.


I learned that on the first B-17... Lucky me I was able to fix it but live and learn..

  • Member since
    January 2003
  • From: Merton, Wisconsin
Posted by bigfoot01 on Saturday, February 11, 2012 12:52 PM

Thanks for the advice B-17 Guy. I did a dry fit with the opaque fuselage half and it fit perfectly, I did a dry fit with the transparent half and it definitely has some alignment issues. It was challenging trying to modify the tail with the Cheyenne tail gun. I used the opaque half to experiment, then used it as a template to cut the transparent piece. It is a challenge not to mess up the transparent half.

John 


  • Member since
    March 2008
  • From: Ohio
Posted by B-17 Guy on Saturday, February 11, 2012 12:40 PM

Bigfoot, I'd wait to do any final finishing on the fuselage till you have it glued together. This kit doesnt go together like a tamiya kit. I promise you will have to do seam work on this kit. Always better to paint the fuselage after its assembled, windscreen installed etc. The windscreen alone is a pain in the azz. Trust me.

  • Member since
    August 2009
  • From: Toledo Area OH
Posted by Sparrowhyperion on Saturday, February 11, 2012 9:57 AM

I'd go with a gloss or semi gloss.  Metalics look better that way.  And they are more realistic when shiny.  I usually use Chrome Silver Model Masters enamel spray, over a black primer.  Speaking of which, does anyone have an online source that has black primer?  I ran out and can't find any except acrylic primer.


Rich


bigfoot01


 pzl66:


Very nice bigfoot! What paint did you use on the fuselage?


Thank you! I used Testors Gloss Metalic Silver in a rattle can. It gives a similar appearance to the finish of the restored Liberty Belle (rest in piece). Now i just need to decide glosscote or dullcote for the final finish,

In the Hangar: 1/48 Hobby Boss F/A-18D RAAF Hornet,

On the Tarmac:  F4U-1D RNZAF Corsair 1/48 Scale.

  • Member since
    January 2003
  • From: Merton, Wisconsin
Posted by bigfoot01 on Saturday, February 11, 2012 9:46 AM

pzl66

Very nice bigfoot! What paint did you use on the fuselage?

Thank you! I used Testors Gloss Metalic Silver in a rattle can. It gives a similar appearance to the finish of the restored Liberty Belle (rest in piece). Now i just need to decide glosscote or dullcote for the final finish,

John 


  • Member since
    December 2011
  • From: AZ
Posted by Luft Modeler on Friday, February 10, 2012 12:36 AM

Very nice bigfoot! What paint did you use on the fuselage?

JOIN OUR COMMUNITY!

Our community is FREE to join. To participate you must either login or register for an account.

SEARCH FORUMS
FREE NEWSLETTER
By signing up you may also receive reader surveys and occasional special offers. We do not sell, rent or trade our email lists. View our Privacy Policy.