SEARCH FINESCALE.COM

Enter keywords or a search phrase below:

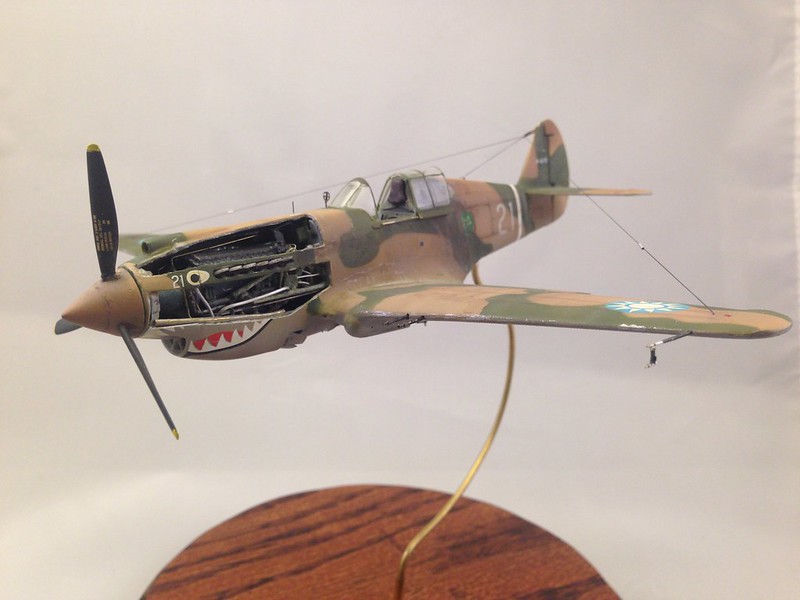
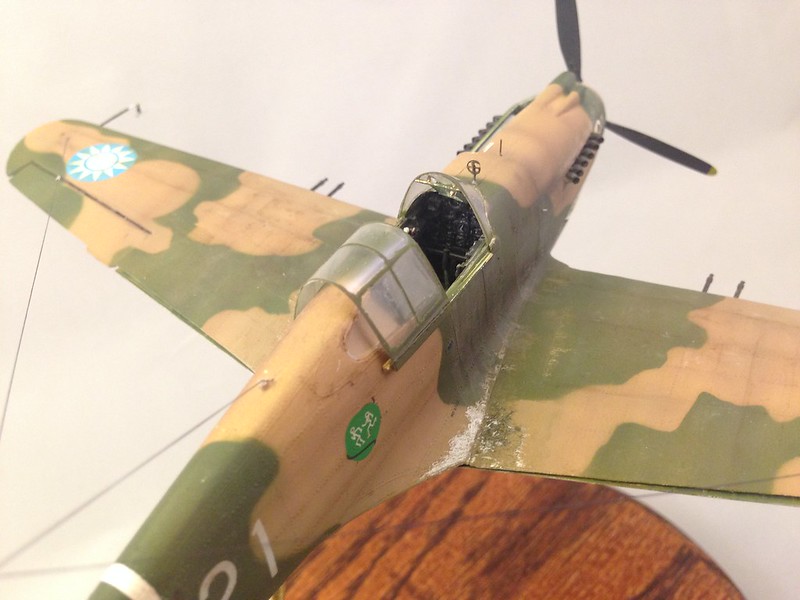
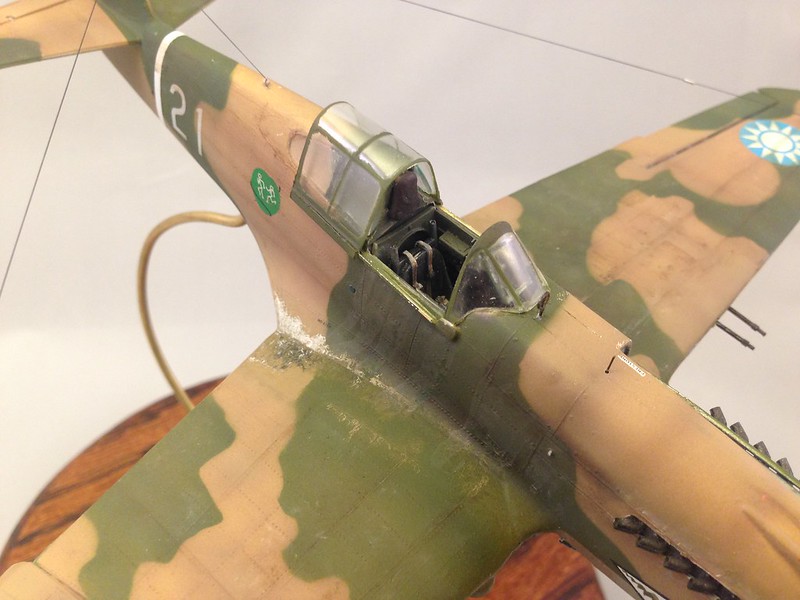
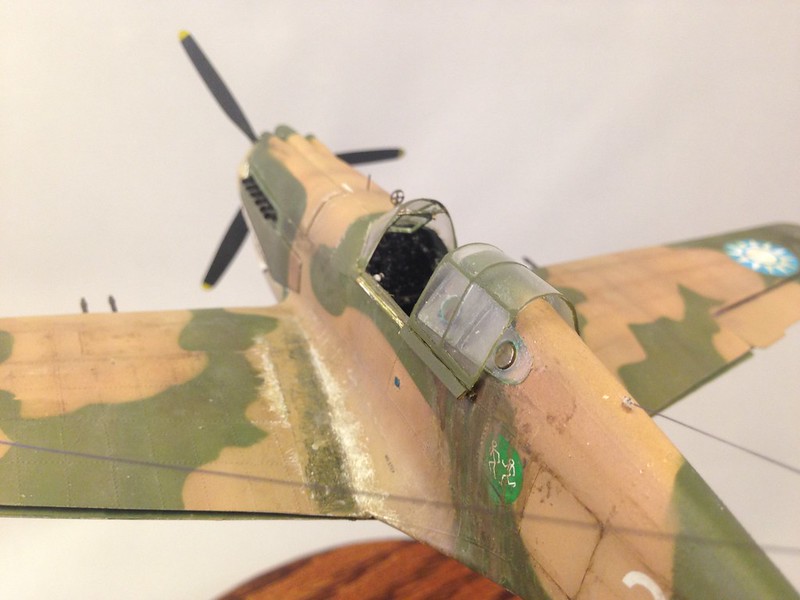
Revell/Monogram 1:48 P-40B Flying Tiger AVG (Complete)

40618 views
123 replies
1 rating 2 rating 3 rating 4 rating 5 rating
  • Member since
    March 2010
  • From: MN
Posted by Nathan T on Thursday, February 20, 2014 8:35 AM

Very nice start. Excellent scratch building on this old girl. That True Details cockpit looks really nice all painted up. I've looked into Engines and Things from time to time, as I see they make some obscure products and are quite affordable compared to Aires and Quickboost. What do you think of the detail on yours? How are you adding the rivets?


  • Member since
    February 2013
Posted by Chanter on Thursday, February 20, 2014 8:49 AM

Wow, that is impressive!  I love watching what you guys are able to do with those older kits.  Really looking forward to watching it come together.

My son (10) and I just built that kit a few months back as his "intro to modelling", making it the 403 Sqn Tomahawk.  I remember thinking just how ill-fitting this thing was as we were building it, but in the end it looks like a Tomahawk and sits proudly on a shelf in his room so mission accomplished I guess. Smile

Allen

ButcherbirdBadgesmall_zps1d50c6bb1944 GB

  • Member since
    June 2013
Posted by bvallot on Thursday, February 20, 2014 1:08 PM

Thanks Nate.  The detail on the Allison engine is amazing.  I'm so glad I got one!   I'm looking to open up two of the panels and place some magnets somehow to be able to put it on and take it off in order to see all this.  The rivets are being made with a riveting tool.  I actually only just got one.  I had previously been doing it with a blunt needle tool. =P  Takes a LONG time.  This riveter is much nicer and more consistent.

Chanter, that's nice to hear.  I'll be getting married in September...so no kids for me just yet...but I certainly hope to have the chance one day down the road to do the same.  My dad did taxidermy when he was younger and painted duck scenes mostly, and I can remember looking over his shoulder when I was 3 and wondering if I'd ever be good enough to do something similar.

On the bench:  

Tamiya F4U-1  Kenneth Walsh


  • Member since
    February 2012
  • From: Olmsted Township, Ohio
Posted by lawdog114 on Thursday, February 20, 2014 8:57 PM

Looks great so far bvallot.  That TD pit looks fantanstic, as does the Allison. Since my AVG build, I've learned that most, if not all AVG P-40s were originally England bound for the lend lease program, so they were done in Dupont equilvalent British colors.  Apparently the interior is supposed to be in grey green, like the Spitfire (Tamiya XF-71 is a good match).  It was too little to late for me since I already did mine in Bronze Green, which is apparently correct for American planes.  I guess your mileage may vary here but I figured I would put it out there for you.  This is gonna be a beauty and I'll be following your progress.  Did you find decals for Pappy's plane yet?  Eagle Cal made a sheet with his 1st pursuit markings I believe. If not, shouldn't be too hard to piece together.

Thats great Allen.  My 6 year old girl seems to be taking more interest in modeling.  I've already started showing her how the airbrush works.  She only lets me fill it up with pink though....lol.  Ironically, my AVG plane was built because she wanted me to build the plane with the "shark mouth".   She's very artistic for her age and she loves to draw and color, so who knows, maybe someday she will take up the hobby.

Joe    

 "Can you fly this plane and land it?...Surely you can't be serious....I am serious, and don't call me Shirley"


  • Member since
    June 2013
Posted by bvallot on Thursday, February 20, 2014 9:35 PM

Thanks Joe.  Yeah, looking over it now that XF-71 does seem to be a good match to it.  I think I got it pretty close by mixing it the way I did.  These photos come out a bit dark.  The sides of the cockpit near the floor will seem a tad darker (that was sort of the goal), but the floor will definitely look right once it's all installed.  I'll have to double check but I may even have the bottle in my collection already! =P  I have seen your AVG P-40 thread before...it may have even been one of the first ones I'd seen you do come to think of it.

And I did pick up that EagleCals sheet you told me about before.  It's really nice in fact.


Sheet_1 by brittvallot, on Flickr

They give you two options for the number as it seems unclear to some whether or not they were originally white.  I'm excited about them.  =]

On the bench:  

Tamiya F4U-1  Kenneth Walsh


  • Member since
    March 2008
  • From: Ohio
Posted by B-17 Guy on Friday, February 21, 2014 10:16 PM

Bow Down

  • Member since
    June 2013
Posted by bvallot on Wednesday, March 12, 2014 1:09 AM

Thanks B-17 Guy!! Sorry, I'm just seeing this.  I've got to pick your brain later about a conversion I'm doing to an E.  I've put it aside for now till I hone certain scratchbuilding skills.  =]

Nothing too new for at the moment.  I've been dreadfully careful about releasing the two engine cowls on the left side of the fuselage.  I want them to fit snugly without a large gap when they are closed.


image by brittvallot, on Flickr

So far I have one piece fitted to the kit part that comes separate.  It will require a little more attention, but I feel good about it so far.  I've also thinned down the panels to better approximate the scale here.


image by brittvallot, on Flickr

I've also started working on the firewall and locating mounting points for the engine.   Even with all this modification, it seems this kit is holding up well and so far it's not giving me too much trouble.  After I separate a piece, I double check my work to ensure nothing is getting away from me.  Luckily, I've also found that the flexibility of the the kit parts on the wings and fuselage allow me to manipulate everything without any fuss.  Hopefully this proves to remain an advantage.  


image by brittvallot, on Flickr

Still working on it...

I certainly welcome any advice from others who have been here and done this before.  This will be the first time I've attempted opening up the cowls and modeling the engine this way.

=]

On the bench:  

Tamiya F4U-1  Kenneth Walsh


  • Member since
    February 2012
  • From: Olmsted Township, Ohio
Posted by lawdog114 on Wednesday, March 12, 2014 2:59 AM

You are a braver man than I Bvallot.  Thats unchartered territory for me since I build my stuff closed up.  It certainly looks like your on the right track.  Didn't the resin set come with instructions?  They usually do..

Joe

 "Can you fly this plane and land it?...Surely you can't be serious....I am serious, and don't call me Shirley"


  • Member since
    June 2013
Posted by bvallot on Wednesday, March 12, 2014 3:47 AM

Ha! Brave some times goes hand in hand with foolish.  =D  We'll see which one wins.  The resin piece didn't have much to go with it.  I've actually been looking up builds done of the 1:32 scale from Trumpeter and various other sites with collections of P-40 photos.  It's hard to find any B variants but I just recently found a few that are sketches from back in the day that are quite good.  Maybe I'll post them here to help out any future modelers.

Once I got my firewall piece sanded to fit, I made a couple of marks to scale from a diagram that shows front, side, and top views of the engine mount.  Some of the angles on the horizontal struts may not line up 100.00%, but from an "engineering" stand point of close enough for practical purposes...no one will really tell the difference. =P

So long as I can get the big stuff to line up and fit right on the fuselage, I think it will work out okay.  I'm just worried about navigating around the nose piece which is separate from the rest of the kit fuselage.  That part has to line up snug with the front of the prop reduction box.  Sooo...fingers crossed!

On the bench:  

Tamiya F4U-1  Kenneth Walsh


  • Member since
    December 2003
  • From: Charleston, SC
Posted by sanderson_91 on Wednesday, March 12, 2014 6:52 PM

Bvallot,  looking really good!  I'm working on the same kit.  I scratched the cockpit and wheel wells.  I also chopped the nose machine gun farings off the nose piece and molded them with milliput.  I'm gonna post some photos over in the P-40 GB.  

Steve


  • Member since
    January 2011
  • From: Commonwealth of Virginia
Posted by Tal Afar Dave on Wednesday, March 12, 2014 9:10 PM

Great work on such an old classic kit!  I've got at least 3 in my stash and will definitely be following your build!  Thanks for all the great pictures!!

2022 New Year's Resolution:  Enter 1 group build and COMPLETE a build this year!!  Why Photobucket did you rob me of my one Group Build Badge???  Must be part of the strong anti-Monogram cartel!!!

 ]

  • Member since
    June 2013
Posted by bvallot on Saturday, March 15, 2014 12:54 AM

Thanks guys.  Sanderson, I'd really like to hear about how that milliput stuff works.  I've seen others mention it before, but I've personally never seen the process of it being used.  Seems like there'd be a few times when it might be nice to use.

After a little more consideration and searching in vain for photos of how this hawk is put together has convinced me to share what I have found.  That way anybody here on the forum who's looking for something has another outlet to peruse in case their search turns up as sparse as mine has.

So here goes:

Starting with the cutaway.  Not a very detailed view, but a good look see to envision how everything comes together.


P40_Av_4008_cutaway_W by brittvallot, on Flickr

The rest sort of speak for themselves


P40_Av_4209_sk_engine-mount_p156_W by brittvallot, on Flickr


P40_Av_4209_sk_firewall_p156_W by brittvallot, on Flickr


Engine_mount_top_side by brittvallot, on Flickr

Here's a look at one being restored


1283257M by brittvallot, on Flickr

One thing I was discussing with lawdog114 was about the size of the old British roundels that would've been on the planes before they became repurposed for The Flying Tigers.  Evidence of the roundel can be seen on the camo scheme where it was omitted:


Screen Shot 2014-01-13 at 5.14.37 PM by brittvallot, on Flickr

I actually took another look at the decals for the Monogram/Revell kit as I had originally put them aside.  I did happen to find a couple versions of the British roundels used at the time.  I cut out a small mask I made of one to see how it would match up on the wings.  I also noted that the Chinese roundels from the kit were about the same size.


image by brittvallot, on Flickr


image by brittvallot, on Flickr

The decals from Eaglecals are much better and offer a lot.  Not to bash the kit's decals.  I'd actually give them a little more credit than some Tamiya decals I've seen before.  But the size difference is clear and would impact your build...figured it was worth mentioning.  =]


On the bench:  

Tamiya F4U-1  Kenneth Walsh


  • Member since
    February 2012
  • From: Olmsted Township, Ohio
Posted by lawdog114 on Saturday, March 15, 2014 7:17 PM

Cool reference pics Bvallot.  Those will definitely benefit the scratchbuilders. I'm glad you found a solution to the Roundel issue.  

Joe  

 "Can you fly this plane and land it?...Surely you can't be serious....I am serious, and don't call me Shirley"


  • Member since
    May 2006
  • From: Chapin, South Carolina
Posted by Shipwreck on Saturday, March 15, 2014 7:28 PM

Bvallot, that is an ambitious project you have there on a really neat kit. With that TrueDetails cockpit, you must be tempted to leave the cockpit open. As a heads-up, I have noticed that several open cockpit Revell P-40's do not have the bottom of the canopy frame back with the canopy. The canopy seal is molded to the fuselage in a closed position!. Sure looks good so far.

On the Bench:

Revell 1/96 USS Constitution - rigging

Revell 1/48 B-1B Lancer Prep and research

Trumpeter 1/350 USS Hornet CV-8 Prep and research


  • Member since
    November 2003
  • From: State of Mississippi. State motto: Virtute et armis (By valor and arms)
Posted by mississippivol on Saturday, March 15, 2014 7:44 PM

Great progress, Bvallot! Thanks for sharing, especially the reference material.

  • Member since
    June 2013
Posted by bvallot on Saturday, March 15, 2014 9:12 PM

Shipwreck, could you maybe elaborate just a bit more...I think I follow you but I'm not totally clear on what you're referring to. I was actually just thinking a while ago about opening up that cockpit as well. So I wouldn't mind some pointers in navigating some possible snafu.

Joe, I couldn't believe it when I opened the box to peek at those Revell decals and I saw those British colors. I thought to myself,"well son of b!$@h."  I wasted no time sizing it up. =]. I was also thinking I'd repost this in the GB since it'd be of more immediate use there.  

On the bench:  

Tamiya F4U-1  Kenneth Walsh


  • Member since
    May 2006
  • From: Chapin, South Carolina
Posted by Shipwreck on Sunday, March 16, 2014 4:59 PM

bvallot

Shipwreck, could you maybe elaborate just a bit more...I think I follow you but I'm not totally clear on what you're referring to. I actually just thinking a while ago about opening up that cockpit as well. So I wouldn't mind some pointers in navigating some possible snafu.

Bvallot, sorry it took me so long to get back to you. Look at the side of the fuselage in the cockpit area. You will notice that just aft the bulkhead/headrest there is a thin line of plastic molded onto the side of the fuselage. That is the rail that the canopy slides back and forth on! Now look at the area before the bulkhead/headrest forward to the aft of the windshield. You will notice a much thicker strip of plastic, about .75" long. This is actually the bottom seal of the canopy when it is glued on top of it. The rail runs throuh it on the kit in the closed position. In order to move the canopy back in an open position; you need to scrap off the thick section, replace it with a rail section. Then scrape off the rail section and fabricate new seals (thicker portions) for the bottoms of the canopy. You also have to make sure the new seals are attached at the same height as the molded on ones or the canopy will not sit right on top of the fuselage.

Study the cockpit photos on this link and I think that you will see what I mean.

http://www.aviation-history.com/curtiss/p40.html

http://warrior481.blogspot.com/2012/07/greatest-show-on-turf-2012.html

On the Bench:

Revell 1/96 USS Constitution - rigging

Revell 1/48 B-1B Lancer Prep and research

Trumpeter 1/350 USS Hornet CV-8 Prep and research


  • Member since
    June 2013
Posted by bvallot on Sunday, March 16, 2014 11:58 PM

I actually have a squadron canopy I was thinking about using. I can see what you're speaking about now. I will likely be putting this one in flight. I haven't entirely decided yet.  If I do, I thought about placing it in a dive. You think that would be at all conducive to allow it to open? It might make it more of a pain in the ass?!  You may have just convinced me. =]

On the bench:  

Tamiya F4U-1  Kenneth Walsh


  • Member since
    May 2006
  • From: Chapin, South Carolina
Posted by Shipwreck on Monday, March 17, 2014 6:45 PM

I have found a link to Charles Older's build of an open cockpit and how that canopy seal and frame rail should be. www.percongrp.com/.../p40b3_ms.htm

If you put your P-40 in flight, you will need a pilot to fly it and then you will loose sight of all that good detail you put into it. I just spent many hours on a P-51 cockpit; put a pilot in it and could not see a bit of the cockpit detail!

On the Bench:

Revell 1/96 USS Constitution - rigging

Revell 1/48 B-1B Lancer Prep and research

Trumpeter 1/350 USS Hornet CV-8 Prep and research


  • Member since
    June 2013
Posted by bvallot on Tuesday, March 18, 2014 1:36 AM

This has helped a bunch!   'Preciate 'cha!!    =]

On the bench:  

Tamiya F4U-1  Kenneth Walsh


  • Member since
    June 2013
Posted by bvallot on Wednesday, March 19, 2014 10:55 PM

Does anybody out there happen to know what color the interior cowl area of the these AVG P-40s were?

On the bench:  

Tamiya F4U-1  Kenneth Walsh


  • Member since
    June 2013
Posted by bvallot on Tuesday, March 25, 2014 3:34 PM

Here's a quick update.  Nothing really special here, but I thought I would show how I've mated the cowling panel to the separate kit piece.  I've also got the gun fairing attached to both parts as well.

You'll note the cut away part for the .50 cal gun barrel to fit through.  I've dug through everything I could to find a photo of this and came up with nothing.  This is the solution I came up with mostly out of functionality and little to do with anything I referenced.  But it seems to make the most sense also.

The fairing has been sealed up with CA and sanded smooth to fit flush over the two kit parts.  Same with the cowling.

It's a little difficult to see in the photo since this is just taped to test fit, but so far all the parts are matching up without any unsightly gaps.  *fingers crossed.  =]

On the bench:  

Tamiya F4U-1  Kenneth Walsh


  • Member since
    December 2003
  • From: Charleston, SC
Posted by sanderson_91 on Tuesday, March 25, 2014 9:03 PM

Great work Bv!  Looks really nice!

Steve


  • Member since
    June 2013
Posted by bvallot on Friday, April 18, 2014 5:28 PM

Here's a quick reposting from the P-40 GB. =D

Just made some major progress on this V-1710-33 Allison.  It hasn't received a clear or flat coat yet.  I've got a few more things to add still before I can finish weathering everything here.  One thing I had to settle on was attaching the rod for the motor mount onto the engine first.  It was just too touchy trying to match it to the engine while a part of the rest of the mounting support arms.  There's also some touch up painting to do still, but I really needed to get to this part so that I could move on with it.

 image by brittvallot, on Flickr

 image by brittvallot, on Flickr

You can see here where a few of the ignition cables have fallen off while handling.  They'll get put back on later.

 image by brittvallot, on Flickr

 image by brittvallot, on Flickr

 image by brittvallot, on Flickr

 image by brittvallot, on Flickr

Here the radiator is loosely attached to test fit.  Quite pleased with it so far. =]

 image by brittvallot, on Flickr

 image by brittvallot, on Flickr

 image by brittvallot, on Flickr

The blue is a Tamiya's Medium Blue.  I made a quick coat with the AB and followed up with some Med Blue lightened up with Flat White with a fine brush to fix up weathering the paint in places.  I mixed and thinned the color to lay down somewhat what randomly.

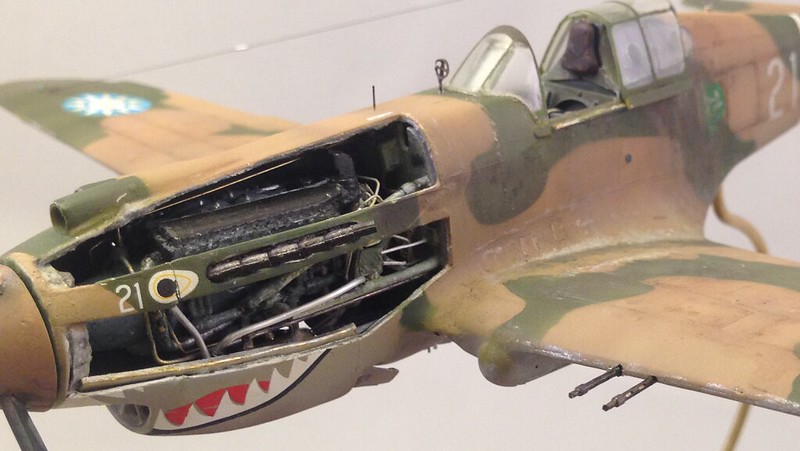
The top over the crankcase is painted in Alclad's Jet Exhaust.  It puts down a nice dark color that isn't quite black but has enough character to look to reflect some of what is going on with the rest of the engine being hot.  The oil and coolant piping is made of brass rod and primed and painted in Tamiya's Flat Black and then Flat Aluminum.  The radiator is painted in Alclad's Pale Burnt Metal first and then touched up with Exhaust Manifold.  All of the green parts are just painted in Tamiya's Olive Green for now so that I have something up there.  I will later paint these with a color that will go down on the rest of the cowl parts of the engine area.

This is a really fantastic resin engine from Engine & Things and with just a little bit of love and some scratchbuilding, you can make something quite special to add some life to your build. =]  I'm glad I got one!

On the bench:  

Tamiya F4U-1  Kenneth Walsh


  • Member since
    June 2013
Posted by bvallot on Saturday, April 26, 2014 12:15 AM

Finally decided to install the cockpit. Here it is now.

I had to fix up the bulk head here to make the TD cockpit fit:

 image by brittvallot, on Flickr

IP installed:

 image by brittvallot, on Flickr

 image by brittvallot, on Flickr

 image by brittvallot, on Flickr

Bulkhead behind the seat:

 image by brittvallot, on Flickr

 image by brittvallot, on Flickr

Everything in place:

 image by brittvallot, on Flickr

 image by brittvallot, on Flickr

 image by brittvallot, on Flickr

I did have to mess with the fit a bit more.  Usually the case when you actually go to put it in.  So, keep your eyes open Ray.  The floor needed a bit of narrowing to get it to seat better.  Nothing a sanding tool can't take care of...And you might want to consider doing something similar behind the seat as well.  Just double check your fit before you glue anything in.

I asked about it on the GB, but I wanted to expand it to the Aircraft section as well...any thoughts on wiring the IP here?  I'd like to for the practice, but I'm starting to think none of this is remotely visible.

On the bench:  

Tamiya F4U-1  Kenneth Walsh


  • Member since
    January 2011
  • From: Commonwealth of Virginia
Posted by Tal Afar Dave on Saturday, April 26, 2014 7:53 AM

Great work on giving this classic kit a new life, BV!!   Keep up the awesome work; I've been following for awhile and will use your posts as an additional resource for my builds.  (Although I don't think I'll be able to go as "crazy" with all that close, detailed work!

2022 New Year's Resolution:  Enter 1 group build and COMPLETE a build this year!!  Why Photobucket did you rob me of my one Group Build Badge???  Must be part of the strong anti-Monogram cartel!!!

 ]

  • Member since
    June 2013
Posted by bvallot on Tuesday, April 29, 2014 12:38 PM

Thanks Dave!  That's refreshing to hear.  For the better part of two years, I dug through pages of forums looking for examples and tips on how to produce these scale aircraft nicely.  So, I'm happy to pay it forward as well as continue to gather advice.  =]

So here's what I have scratched out so far with the .50 cal set up and the bulkhead behind the motor mounts.

On account of the time left for this build, I decided not to engineer another bulkhead where the .50 barrels rest.  Instead, I just fashioned a shelf that also reinforces the fuselage.  It's basically just an L bracket.

 image by brittvallot, on Flickr

Next, I've built up the coolant expansion tank with the straps to hold it down and some other goodies...primed it for paint.

 image by brittvallot, on Flickr

 image by brittvallot, on Flickr

So far...everything seems to still be right on the money.  No ill-fitting parts yet.  I had to be careful with that strut for the .50s.  It was a tight fit and I didn't want it to spread the fuselage to the point where my engine mount would be loose.

Critiques and comments are always welcome.  =]

Tags: P-40 GB 2014

On the bench:  

Tamiya F4U-1  Kenneth Walsh


  • Member since
    February 2012
  • From: Olmsted Township, Ohio
Posted by lawdog114 on Wednesday, April 30, 2014 7:49 PM

Coming along nicely.  The detail work on that TD pit looks great.  You cited issues with the fit.  Isn't it designed for this kit?

Joe

 "Can you fly this plane and land it?...Surely you can't be serious....I am serious, and don't call me Shirley"


  • Member since
    June 2013
Posted by bvallot on Wednesday, April 30, 2014 10:18 PM

It's actually for the Academy/Hobby Boss kit.  So it did take a bit of tweaking.  More so on the later end of fitting it somehow...  ;)  But I never doubted!  I was going to see that thing fit in there one way or another!!  The only part that really needs modifying is the floor.  I have just learned as of last night that the IP will need a little "more" help in securing to the fuselage side walls.  Soooo... I'll be back with more from that.

Keep your eyes open Ray. =]

On the bench:  

Tamiya F4U-1  Kenneth Walsh


  • Member since
    September 2006
  • From: Bethlehem PA
Posted by the Baron on Thursday, May 1, 2014 11:52 AM

Wow, what a great build!  I love the engine and the detailing you're adding under the hood, Britt!  You've got great skills for scratchbuilding.  This kit is one of my all-time favorites, and the additions you're making make it a real jewel.

You mentioned about using Milliput.  I recommend it, especially if you haven't worked with 2-part putties.  It is relatively simple to work with, and is good for filling seams or for sculpting.  It comes in two logs, one of putty and the other of the catalyst, and you just mix equal parts by kneading, then use it for whatever application.  It can be smoothed with water while you work it--water applied with your fingertip, or with a brush-and when it sets, it takes sanding very well.  A box will also keep for a long time, though over time, the logs can start to dry out, forming a skin.  I've had a batch for over 20 years, and I can still use it, but I have to shave away the outer skin, to get to the good part.  I have that batch so long, because I moved to epoxy putties, settling on Aves Apoxie Sculp.

There are also different grades of Milliput, based on the fineness of the grain.  Anyway, you should get yourself some and see what you think.  From the rest of the work in this build, I suspect you'll pick up working with putty and become a master in no time.

Best regards,

Brad

The bigger the government, the smaller the citizen.


  • Member since
    September 2006
  • From: Bethlehem PA
Posted by the Baron on Thursday, May 1, 2014 11:55 AM

Oh, I remembered one more thing about this kit, but I don't think it will be an issue for you, because you're adding the engine.  I noticed that the front edge of the fuselage is sometimes a little pinched, compared to the back side of the nose piece.  It can cause a visible step where the three kit pieces meet.  I've made spacers to push the sides of the fuselage out enough, to try to correct it, or at least, make it as invisible as I can.

The bigger the government, the smaller the citizen.


  • Member since
    June 2013
Posted by bvallot on Monday, May 5, 2014 12:11 PM

Brad, thank you so much for everything packed into that post!  I long for helpful tips and methods of treating some of the trickier parts of scale model making.  I may stay in the dark about dealing with some particular snafu for quite a while until I stop being lazy and look for a better way to tackle it.  So it's posts like these that I'm only too happy to see.

I checked out the milliput site and was very happy about what I saw. This is exactly what I've been looking for.  Too many times I've thought how I wasn't happy with the shape something made and my only solution was to sand it down since I couldn't build it up proper.  So this will come in quite handy in the future.  I just needed to know where to look.  =]

And thanks again for the encouragement.  I'm afraid I might have bit off more than I can chew this time.  That ticking clock might get me! =P

They'll be more to come soon.

On the bench:  

Tamiya F4U-1  Kenneth Walsh


  • Member since
    September 2006
  • From: Bethlehem PA
Posted by the Baron on Tuesday, May 6, 2014 12:07 PM

You're very welcome!  If anything I can add is helpful, I'm glad.  I'm looking forward to your next installment.

The bigger the government, the smaller the citizen.


  • Member since
    June 2013
Posted by bvallot on Thursday, May 8, 2014 12:05 AM

Last quick update here for a little while.  Honest! ;)

Started looking more at the wheel bay just so I don't have any surprises later on when I'm ready to get the wings together.  I realize the wheels will cover mostly everything, but since I'm going the distance already I figured I'd do a little something for all visible areas.  Didn't want to over do it and find issues with the fit so i settled for this:

 image by brittvallot, on Flickr

 image by brittvallot, on Flickr

 image by brittvallot, on Flickr

 image by brittvallot, on Flickr

Still going to fix up the landing gear here.  This is a stopping point for now.  Anybody else out there who's tackled the Warhawk have any input...hit me.  

Tags: P-40B , P40 GB 2014

On the bench:  

Tamiya F4U-1  Kenneth Walsh


  • Member since
    June 2013
Posted by bvallot on Thursday, July 3, 2014 10:52 PM

Okay. I'm back with a quick update before the weekend starts.  Made a little progress towards getting the engine wired, hosed, and probed so she can be installed onto the engine mounts ASAP.   Hope to get her finished by Tuesday.  I am very wary of where I will locate the magnets in order to pop the panel on and off for viewing.  If anybody out there has had experience with this sort of thing...I'm all ears. =]

 image by brittvallot, on Flickr

 image by brittvallot, on Flickr

 image by brittvallot, on Flickr

Happy 4th everyone.  =]

On the bench:  

Tamiya F4U-1  Kenneth Walsh


  • Member since
    August 2013
Posted by Jay Jay on Friday, July 4, 2014 11:13 AM

Wow, that looks fantasic.  

Now I hafta learn how an aircraft engine works to become a better modeler....LOL


 I'm finally retired. Now time I got, money I don't.

  • Member since
    June 2013
Posted by bvallot on Sunday, July 6, 2014 11:50 AM

Thanks Jay Jay.  I'd also recommend grabbing some extra patience at the store and perhaps some kind of means of holding/securing what you're working on so that once you complete a job and move on...you don't break five other things off while working on something next to it.  =[

I exercised every four letter word I know and made up some new ones too.  I've had to redo everything you see above.  The tricky part after this is all completed will be to get it installed without breaking anything else.

On the bench:  

Tamiya F4U-1  Kenneth Walsh


  • Member since
    August 2013
Posted by Jay Jay on Monday, July 7, 2014 8:59 AM

I usually seem to avoid breaking off the fiddly parts.  My biggest downfall is having glue blobs appear at the joining of the parts which ruins the whole look.   I haven't been able to resolve that problem yet,  any advice ?


 I'm finally retired. Now time I got, money I don't.

  • Member since
    June 2013
Posted by bvallot on Monday, July 7, 2014 9:39 AM

Of course! What you need to get to fix that is one of those extender tips that stretches out real long.  There's a couple of different styles of tips.  Most come around one to three inches long.  You can cut them to whatever size you prefer but the trick is that the opening is maybe only 1mm wide.  That will allow you much greater control over how much CA glue you deliver at one time.  =]

I used to have similar issues when I first picked up modeling scale aircraft in college.  Actually, I was 8 when my dad did most of the work on a 1:72 F-15C.  I always thought to myself..."one day..."  and then it was one day at the end of a long semester I had plenty of time off to try one.  It would be three more years before I walked into an actual hobby shop that was stocked with all the goodies one would need to go to work.  I was amazed on what I had been missing out on.  =D  So if you haven't yet...I would recommend you taking a stroll through your local hobby shop and peek at what they've got.  You'll no doubt find a few more goodies to make life easier for you.

On the bench:  

Tamiya F4U-1  Kenneth Walsh


  • Member since
    September 2006
  • From: Bethlehem PA
Posted by the Baron on Monday, July 7, 2014 11:51 AM

Great progress!

As far as applicators go, I use toothpicks or straight pins, toothpicks definitely for styrene glue, and either one for CA or epoxy.

The bigger the government, the smaller the citizen.


  • Member since
    June 2013
Posted by bvallot on Monday, July 7, 2014 8:44 PM

Baron, now I remember.  It was you that mentioned the Milliput.  Cannot thank you enough for mentioning that stuff.  Tried it out just recently on the spinners for that Academy P-38 and it worked like a charm.  Can't wait to use it here to smooth out and reshape the carb intake and gun ports along the cowl.

....whenever that part gets here... =[  lol

But definitely Baron.  Much love.

On the bench:  

Tamiya F4U-1  Kenneth Walsh


  • Member since
    August 2013
Posted by Jay Jay on Tuesday, July 8, 2014 10:46 AM

Ty for the advice on glue-ing

I have tried the extender tips for CA and found they work well for about 3 drops then clog up.  I keep a jar of acetone handy and drop the tips in it when they clog. the next day, I then retrieve the 6 or so tips from the jar and begin again.  So, it's glue a part or two, remove the tip, drop it into the acetone, replace the tip...etc..  All the while wasting the CA that's left in the clogged tip,and the CA that drips out when removing it, which considering the length of the tip, is 10 times more glue than I actually use.  There must be a better,less messy way.

I like the idea of using a small puddle on a post it note and diping the needle/toothpick in.   I think more practice is in order for me to deposit the right amount of glue where I want it.   That must be all pretty basic to you pros but I'm determined to get past this hurdle and with your excellent advice, I will. Thanks again.


 I'm finally retired. Now time I got, money I don't.

  • Member since
    June 2013
Posted by bvallot on Tuesday, July 8, 2014 11:13 AM

Jay, I'd say that's a fairly common issue with the extender tips.  Even when you handle it properly and return it to it's upright position...=] ...it'll probably still happen.  When that occurs I just give it a little nip with my handy clips for removing kit parts of the sprues/PE parts.  That ought to work more often that not.  That other method is certainly handy as well and it may just depend on what you're working with and how fast you're glueing things.

But definitely don't fool with trying to remove the tip until it's totally used up or when it's just time to change it out.  You probably will go and waste more glue that way.

On the bench:  

Tamiya F4U-1  Kenneth Walsh


  • Member since
    September 2013
Posted by blackdog62 on Tuesday, July 8, 2014 6:08 PM

I was just talking to mlh owner about not getting glue to through my extended fine tips mine at home didn't work.

so k purchased some new ones. It took some extra pressure to get it through the tip I thought the hole tip would blow off. Made some tiny dots. Took the tip off cleared the end and left stood up to see if would back drain. When I get home ill check if it worked.

I also use miput and love it its great for wing root seems.

  • Member since
    September 2013
Posted by blackdog62 on Tuesday, July 8, 2014 6:54 PM

just checked its off the glue over night it dryd at the tip abd was wet in the it worked by trimming the tip back.

  • Member since
    August 2013
Posted by Jay Jay on Wednesday, July 9, 2014 8:12 AM

good idea Bvallot,  TY


 I'm finally retired. Now time I got, money I don't.

  • Member since
    June 2013
Posted by bvallot on Wednesday, July 9, 2014 1:01 PM

Always worked for me.  =]  Glad to help.

On the bench:  

Tamiya F4U-1  Kenneth Walsh


  • Member since
    February 2012
  • From: Olmsted Township, Ohio
Posted by lawdog114 on Wednesday, July 9, 2014 6:10 PM

That Allison is looking fantastic Bvallot.  That landing gear detail looks great too...

Joe

 "Can you fly this plane and land it?...Surely you can't be serious....I am serious, and don't call me Shirley"


  • Member since
    June 2013
Posted by bvallot on Thursday, July 10, 2014 12:02 AM

Thanks for the motivation everyone.  I think I've got this Allison back on course. I have had to be very patient for things to set up before moving on.  Everything is so tiny at this scale. But.. I'm back on DEFCON 5...so crisis averted.  =P

I had hoped to be a little further than this so I can move this along and get her off my bench before the deadline of the P-40 GB. Here's where I'm at now:

I've put all this back together and finally made a few more additions.  Also, I was able to marry the Allison to the mounting brackets.

 image by brittvallot, on Flickr

 image by brittvallot, on Flickr

 image by brittvallot, on Flickr

Just a few more odds and ends and I'll have the .50 cals back reinstalled, then I can finally put this part to rest and move on to the fun part...painting!  =D

 image by brittvallot, on Flickr

On the bench:  

Tamiya F4U-1  Kenneth Walsh


  • Member since
    June 2013
Posted by bvallot on Monday, July 14, 2014 12:04 AM

Good Lord.  After lots of cleaning and wedding preparation, I still feel as though I didn't get anything done today.  I tried my best to get this engine mounted, but someone kept finding more and more things that needed my attention. Bang Head 

I did manage this today:

I got the .50 MGs matched up to the gun ports.  It's very hard to see here (I am sorry about that but there's not much to see.)  I ended up making a shim for the shelf they sit on.  I misaligned the shelf by about 3mm which put the barrels off.  So now they are back on.  The one thing I did accomplish here.  The nickel tube you see I have left long to keep the barrel true while it was setting up from the CA and epoxy. (not screwing around here on this part. =] )  I'll cut this tube to the appropriate size for the the .50 barrels.  The left side I believe I will leave removable.

 image by brittvallot, on Flickr

Here are some brass sheets I cut to make the riveting frame for the panels.  Unfortunately, I haven't been able to match them up and glue them in yet.  

 image by brittvallot, on Flickr

This last part I thought I measured right, but somehow I managed to lengthen it by twisting it tight to bend at the front of the scoop.  So all this came back off.  But I figured I'd show it anyhow.  This is more or less what I'll end up with.

 image by brittvallot, on Flickr image by brittvallot, on Flickr 

I swear if I don't wrap this part of the build up soon...this thing might actually start flying....

On the bench:  

Tamiya F4U-1  Kenneth Walsh


  • Member since
    June 2014
Posted by BrandonK on Monday, July 14, 2014 10:09 AM

Wow, just wow !!

On the bench:

A lot !! And I mean A LOT!!

2024 Kits on deck / in process / completed   

                         14 / 5 / 2  

                              Tongue Tied

  • Member since
    September 2006
  • From: Bethlehem PA
Posted by the Baron on Monday, July 14, 2014 11:52 AM

Incredible detailing on the engine and its compartment!  This is an excellent upgrade to a classic kit.

The bigger the government, the smaller the citizen.


  • Member since
    June 2013
Posted by bvallot on Monday, July 14, 2014 12:16 PM

Thanks Brandon.  I'm certainly doing my best.

Baron, I don't know if you saw it earlier, but I wanted to tell you how I appreciate your suggestion to try out the Milliput putty.  It's definitely going to come in handy here for this build.  

And thanks...though it's still got a ways to go.  =]

On the bench:  

Tamiya F4U-1  Kenneth Walsh


  • Member since
    June 2013
Posted by bvallot on Wednesday, July 16, 2014 9:49 AM

Alright!! =] Finally made some headway. I've been a bit anxious about rushing any one part of getting this engine installed before I finished certain necessary steps, but now I think I'm finally rolling with this.  Of course I had to dress this Allison up a little nicer.  I couldn't help myself.  I knew I'd never get every single hose and tube in place at such a tiny scale (especially my first time attempting this) but after I found a beautifully pictured walkaround book on the P-40B/C...I just had to follow through.  And I took a play out of lawdog's playbook and pulled my light box out to film with so these pictures come out better.  But first I wanted share one trick I come up with for working this tiny.  Obviously, some of the detail will be unseen...like origin and insertion points. So here's a photo of what I did when two or more lines were going to the same general location.  The origin gets doubled over which helps to make a tab to anchor it down and allows you to accomplish more with less mess.

 image by brittvallot, on Flickr

The other trick I used which I can't find a picture of now...was when two lines were next to each other running virtually parallel, I would make a similar tab as outlined above, but here I would hook it onto the the part already in place.  Kind of like threading a needle but instead you're just dropping it onto (the "eye" is just a hook). This helps all this fiddly stuff to be a bit more sturdy.  Hope some finds that useful.

Here's the Allison V-1710-33:

 image by brittvallot, on Flickr

 image by brittvallot, on Flickr

Here's a view of the coolant expansion tank/line and the linkage for the carb.

 image by brittvallot, on Flickr

 image by brittvallot, on Flickr

I touched up the paint here and there as needed.  Weathered a bit more...and painted in some placards.  I'm pretty happy with it.  =]

When they say measure twice, cut once...holy sh!t my father would be so happy. =]  Talk about a tight fit!!  Had to be very careful placing this old girl in there as I have some of the fuselage already glued together.  There is absolutely no play left in this engine area.  Which I suppose is actually a good thing...everything should be snug and in it's place which makes me glad I triple checked the fitting every time I added a new major component to this Allison.  So here it is:

 image by brittvallot, on Flickr

url=https://flic.kr/p/om1Eiu] [/url]image by brittvallot, on Flickr

 image by brittvallot, on Flickr

 image by brittvallot, on Flickr

So that's that for now.  I have the Dzus railing to put on next, the intake scoops, misc trimmings, and then solve the magnet problem, and then I can move on to fitting the wings to the fuselage.  =]

Comments and suggests are always welcome.  =]

On the bench:  

Tamiya F4U-1  Kenneth Walsh


  • Member since
    December 2006
  • From: Phoenix, AZ
Posted by Fly-n-hi on Wednesday, July 16, 2014 11:04 AM

Fantastic work on the engine!  It looks very busy and realistic!

  • Member since
    June 2013
Posted by bvallot on Wednesday, July 16, 2014 7:10 PM

Thanks Fly-n.  =]  It does feel pretty busy to me, but there are a couple more pieces to install before it's completely done.  I just needed to get it into the fuselage and set before moving on.  It was a little maddening trying to keep all this together, but the next time I think it will be easier as I've got over a bit of that learning curve for some of these fiddly bits.

When are you planning on tackling one of these guys?  =]

On the bench:  

Tamiya F4U-1  Kenneth Walsh


  • Member since
    April 2014
Posted by r13b20 on Wednesday, July 16, 2014 7:28 PM

Not in that scale or that detailed. Amazing. Bob

  • Member since
    June 2014
Posted by BrandonK on Wednesday, July 16, 2014 8:01 PM

Well............... I was gonna start my Revell P-40. I think now I'll just push it to the back for awhile cuz this build is gonna make me feel like I'm building with scotch tape and painting with crayons. keep up the good work.

On the bench:

A lot !! And I mean A LOT!!

2024 Kits on deck / in process / completed   

                         14 / 5 / 2  

                              Tongue Tied

  • Member since
    June 2013
Posted by bvallot on Saturday, July 19, 2014 12:55 AM

Well, I appreciate that Brandon.  If' it's any consolation, none of this just fell together.  I did fight it a lot at  first.  There was a bit of a learning curve for me for some of this detailing.  Adding some extra detail here and there has never been such an issue, but having so much in such a tight space has proved a little difficult.  I did have to learn some new tricks on the fly to cope with it.  I do my best to outline what I've done so that others can make use of it or improve on some aspect of it.

I hope you find it helpful. And thanks again! =]

On the bench:  

Tamiya F4U-1  Kenneth Walsh


  • Member since
    September 2011
Posted by fightnjoe on Saturday, July 19, 2014 9:28 AM

it is very impressive.  stunning work all the way through.  

joe

Veterans,

Thank You For Your Sacrifices,

Never To Be Forgotten

Where you can find me:

Workbench on FaceBook  Google Plus  YouTube

  • Member since
    June 2013
Posted by bvallot on Tuesday, July 22, 2014 1:01 AM

Here's a quick update.

All this is beginning to come together.  Just a few more additions and I'll be able to move much quicker through the rest of this.  At least I'm hoping... =]   So far I haven't run into any real issues with the fit of this kit aside from how I'm editing and detailing parts.

Here is a view of the scoops fitted to the front of the engine cowl that the kit offers.

 image by brittvallot, on Flickr

This is what I settled for in order to maintain the shapes I was looking for on the scoops as well as to keep them matching up with the radiators.

 image by brittvallot, on Flickr

Here it is with all the bell and whistles.

 image by brittvallot, on Flickr

Here's something I'll have to patch up once this epoxy finishes setting.  This gap is do to the radiator assembly being just a bit to big for kit piece.  Everything is pretty much right on the money to scale but somehow it happened anyhow. Since I've cut the panels out to reveal the engine, I have to leave this gap here in order to preserve the shape of the panels that I've cut.  It was a very snug fit before, but after the addition of the scoops they just stopped fitting.  =/ 

 image by brittvallot, on Flickr

One of the last things I'll do is to place the shroud over the exhausts on here to help support this piece.  It's broken once on the back end of it.  The shroud ought to help stiffen it.  Since I'm adding this, I'll leave off the upper and lower Dzus rails right here and just place the very upper and lower to tie everything together.

 image by brittvallot, on Flickr

Any comments at all right here would be certainly appreciated.  I have a fair sense of where I'm going with this here, but I'm definitely in uncharted territory.  =]

Thanks.

On the bench:  

Tamiya F4U-1  Kenneth Walsh


  • Member since
    June 2013
Posted by bvallot on Friday, July 25, 2014 12:39 AM

FINALLY!

Salvation.  I've finally moved on to this thing called "building the rest of the aircraft."  I first fixed up the gap underneath, sanded and smoothed that shape back.  I played with trying to insert the rear venting duct that fits behind the radiator but there's just not enough room to safely place it in there.  And since I'm trying to reveal the interior, I guess I don't mind leaving that part out.  I admit I would have liked to have included it.

Here's where I'm at.  Fixed the gap/seam.

 image by brittvallot, on Flickr

Backing up a bit, before I fixed the wings to the fuselage I tried fitting everything put together so far and found a tiny space between the undersurface of the flaps.  I came up with this as a solution.  I made a paper mask to make my cuts and applied them to the brass sheet.

 image by brittvallot, on Flickr

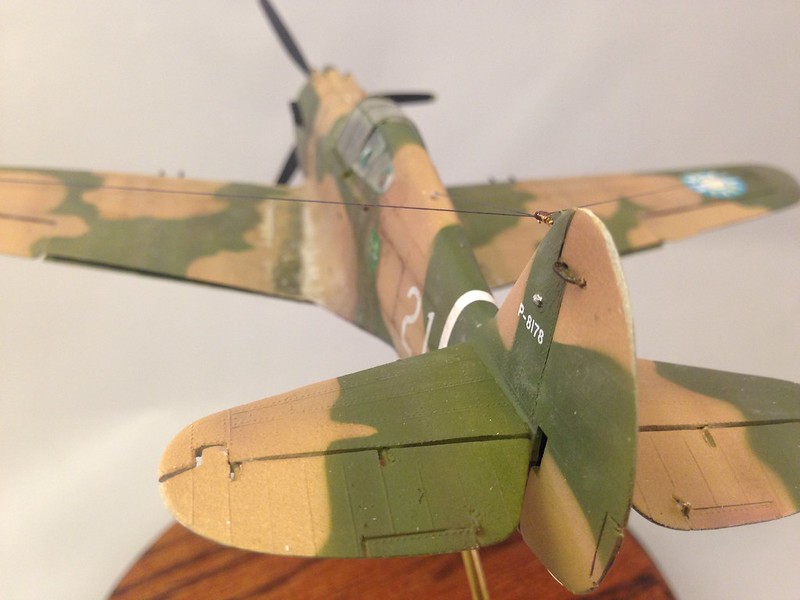
Next, before I closed up the rest of the fuselage and tail, I had decided (a while back) that I would fix the tab that would hold the radio aerial line.  I sanded a small strip of plasticard thin and cut it to shape and placed a very small hole for the spring to fit.  I gave it some space so that it would not become weak near the edge and break.  For the spring, I took the smallest piece of brass wire I have and coiled it around the second smallest brass rod and kept it tight so that I could have a tougher spring than the pulled sprue I came up with for the Corsair.  I think this is going to work out a lot better.  It's a lot stronger too. =]

 image by brittvallot, on Flickr

Here's the wings placed up.

 image by brittvallot, on Flickr

 image by brittvallot, on Flickr

 image by brittvallot, on Flickr

This is where I'm at for now.  It'll have to wait until Monday before I can do anything more. Then it'll be a mad dash for the finish line!! =D

On the bench:  

Tamiya F4U-1  Kenneth Walsh


  • Member since
    June 2014
Posted by BrandonK on Friday, July 25, 2014 9:56 AM

I love watching these big builds. They give me so many great ideas and the bravery needed to explore techniques that are more advanced. Thanks for the motivation.

On the bench:

A lot !! And I mean A LOT!!

2024 Kits on deck / in process / completed   

                         14 / 5 / 2  

                              Tongue Tied

  • Member since
    March 2008
  • From: Ohio
Posted by B-17 Guy on Saturday, July 26, 2014 2:35 PM

Where's the exhaust manifolds?

  • Member since
    June 2013
Posted by bvallot on Monday, July 28, 2014 10:09 AM

Brandon, thanks!  I feel like I'm in the same shoes with all the impressive builds I see on here.  Each one makes me want to try more.  

B-17Guy, I'm sorry I should've mention it before.  I'm replacing the kit exhausts with a pair of Ultracast resin exhausts.  But either way, since I'm placing it onto the engine I needed to shim the exhausts so that they stick out the exhaust opening properly.  It seems that somewhere along the way either the engine block or the distance between the insides of the cowling of the fuselage is a little off 1:48. More likely the engine.  But still, it's no biggie.  I've included the shroud around the exhausts on the left side to help support the kit parts in between the panels.  So to save a little bit of fussing later, I've left exhausts off for now so I'm not having to mask them later.  Once the painting is complete, I'll pop those bad boys on there. =]

On the bench:  

Tamiya F4U-1  Kenneth Walsh


  • Member since
    October 2013
Posted by Big Blue on Monday, July 28, 2014 11:06 AM

Looking great BV.  As I mentioned elsewhere, I am very appreciative of the effort it takes to maintain an informative build thread.  Kudos to you.

  • Member since
    June 2013
Posted by bvallot on Wednesday, July 30, 2014 7:44 PM

Thanks Blue.  You're right about that.  Some times it does take a bit to keep up with.

I've put some more work in.  Everything is virtually together save for the ailerons.  I am having a bit of trouble with some seams.  I wouldn't say it's really any fault of the kit.  Everything test fitted just fine.  This is more to do with all the modifications I've been making.  I am trying not to ruin any existing surface detail, but that may be inevitable.

Here's where I'm at:

Went to town with the Milliput.  Reshaped the gun ports to even them out and to keep a truer profile.  Reshaped the intake on top since there was a bit of step from the kit part.  Made that to be a more accurate shape.  I sanded and smoothed all this down and I have to say how pleased I am to be able to fix things like this now.  I used to think from only a "continue to cut and sand" vs. "adding something more" to the surface.  Not anymore!! =]  Anyone out there that doesn't already know...you should really check this stuff out.  It was just what I needed to sculpt the top part of the cowl on fuselage.

 image by brittvallot, on Flickr

 image by brittvallot, on Flickr

Here's that seam that is mostly cooperating:

 image by brittvallot, on Flickr

For the landing gear, I notice by further reviewing the walkaround book (I got on P-40Bs from my LHS) that the nubs that are included on the kit parts are crudely representing the joint here.  I meant to snap a quick picture before I cut the other one, but here is a picture of what it is and the hole I drilled out to better capture this.  There will be a small pin with an eyelet for lack of a better term for this piece of engineering. 

 image by brittvallot, on Flickr

Here's a shot with a coat of primer to identify any troubleshooting...there is some.  So I'll be back with that. =]

 image by brittvallot, on Flickr

More to come.

On the bench:  

Tamiya F4U-1  Kenneth Walsh


  • Member since
    September 2005
  • From: North Pole, Alaska
Posted by richs26 on Wednesday, July 30, 2014 8:39 PM

BV, I have a question about the pitot tube in this kit.  Does it come it with just the British Tomahawk  "cranked" style or with the US AC/AAF P-40B/C "straight arrow" style?  

WIP:  Monogram 1/72 B-26 (Snaptite) as 73rd BS B-26, 40-1408, torpedo bomber attempt on Ryujo

Monogram 1/72 B-26 (Snaptite) as 22nd BG B-26, 7-Mile Drome, New Guinea

Minicraft 1/72 B-24D as LB-30, AL-613, "Tough Boy", 28th Composite Group

  • Member since
    June 2013
Posted by bvallot on Wednesday, July 30, 2014 9:16 PM

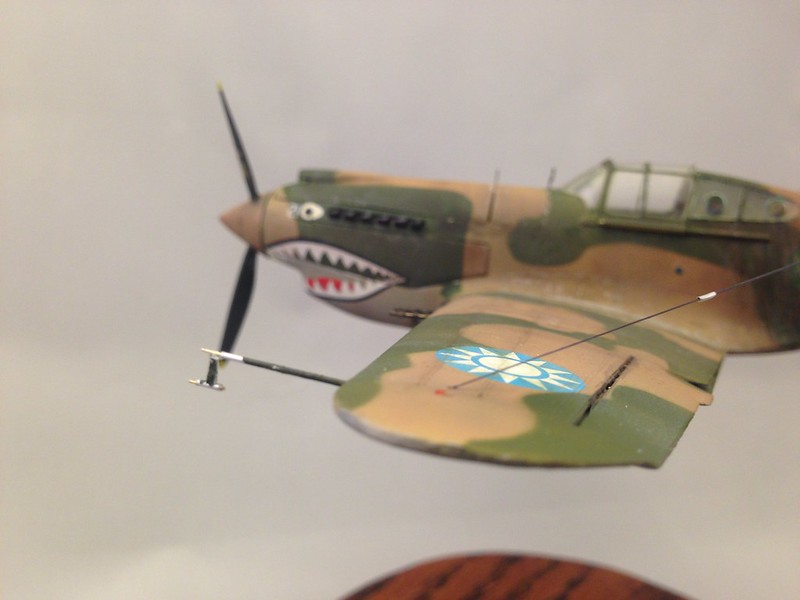
richs, they definitely have the British pitot style tube here.  The only thing is...this is one of the parts that makes this kit show it's age.  It is a little "fat" and crudely fashioned.  And flimsy!  I'm not even using it in fact.  I'm going to show it later on how I'm making one out of some Albion tube and brass rod.  =]

On the bench:  

Tamiya F4U-1  Kenneth Walsh


  • Member since
    June 2014
Posted by BrandonK on Wednesday, July 30, 2014 11:37 PM

Man, you're getting me stoked to start my P-40. It's funny that you primed your P-40 to look for flaws and I  primed my P-51 today for the same reason. But, you have way more work in yours than I have in mine. Can't wait to see this thing all done. It's gonna be awesome!!  Cool

On the bench:

A lot !! And I mean A LOT!!

2024 Kits on deck / in process / completed   

                         14 / 5 / 2  

                              Tongue Tied

  • Member since
    February 2012
  • From: Olmsted Township, Ohio
Posted by lawdog114 on Sunday, August 3, 2014 4:39 AM

Stunning my friend.  Looks like your almost ready for paint.

Joe

 "Can you fly this plane and land it?...Surely you can't be serious....I am serious, and don't call me Shirley"


  • Member since
    December 2013
  • From: Greenville, TX.
Posted by Raymond G on Sunday, August 3, 2014 8:47 PM

Looking good.  I guess it'll be a race to the finish line.  I'll start shading tomorrow most likely.  Yours look much more impressive, however.  Raymond

On the Bench:

U.S.S. Arizona (Revell)

P-51D Tribute (Revell)

57 Chevy Bel Air


  • Member since
    August 2009
  • From: Borlando Fla home of the rat
Posted by TREYZX10R on Sunday, August 3, 2014 9:56 PM

Just spent the last 1/2 hour catching up on this incredible build and must say its the best 1/2 hour I've spent on this site in a long time! Stunning work going on here, looking forward to the next update!

  • Member since
    June 2013
Posted by bvallot on Monday, August 4, 2014 4:19 PM

Wow.  Trey that actually comes as a huge comfort to hear as I've practically wasted the first part of the day screwing around with the little SOB magnets.  They are the absolute GD bane of my existence right now.  They are perfect for what I what in way of ease to remove the panels, but firmly keeping them on otherwise.  But these little bastards are so close together in the most forward part of the prop reduction box that they keep coming off.  They are so strongly attracted to each other that I can't keep them on there.  It is really beginning to keep me from doing anything else with this build.  And it's REALLY killing my calm.

So now I'm breaking a heavy duty two-part epoxy.  One way or the other...

Anyhow for now I'll drop this picture of the preshading to show where I'm going with this thing.

 image by brittvallot, on Flickr

This is a concept I'm been trying to improve over the last two builds (excluding the NMF) where I'm varying the wear over the surface of the wing and fuselage.  I've seen Flyinhigh do this to some extent as well dflu78.  I really like the outcome and hope to have some luck with it myself.  Instead of marking every panel line uniformly, I'm allowing for some variety in the darker spaces along joints as well as filling in spaces in between to help with weathering down the road.  Fingers crossed.  I definitely don't need anymore headaches with this one.

On the bench:  

Tamiya F4U-1  Kenneth Walsh


  • Member since
    June 2013
Posted by bvallot on Tuesday, August 5, 2014 3:49 PM

Okay! Here's a quick update with more to come later tonight hopefully.

I'm finally able to get these wheels turning over and get moving.  =]  I started painting this Hawk and now it's starting to come to life.  I'll try to be brief here.  Began painting the skidwalk on the wings.  There seems to be some talk as to whether or not these were present, but in many of the photos I referenced these skidwalks were painted over in the camo scheme of Earth and Green colors and worn away somewhat with use and became visible.  So I've included them here with the intent of painting over them and using MiG's product Absolute Chipping to subtly reveal them.

 image by brittvallot, on Flickr

Normally I would wear these a bit more to show the aluminum surface underneath, but that doesn't seem to be the case with them painted over in DuPont colors.

 image by brittvallot, on Flickr

For the undersurfaces, I'm trying something different.  It seems that due to a lack of communication between US manufacturers and British reps at the time, the color Sky has a shady history.  There are two colors describing a light blueish-grey, but it seems this color may have changed with more colors coming into the palette for the British which required a wider degree of separation.  I have my sources that I've been referencing for this build, but I would certainly love to hear from anybody on the forum that knows a bit of the history behind this story, but for now I'll just get to the point.

Since there is no true FS match for DuPont 71-021, I have come up with a mix of my own.  There are several P-40s showing undersurfaces painted with the -021 and later retouched with a Neutral Grey.  So with the help of MiG's Absolute Chipping I'll be painting the bluer color down first and following up with a slightly warmer grey.  =]  With the help of a phone app (thanks to dflu78) I've put together a mix that approximates FS 36463 which is a bluer mix of -021. I use Tamiya acrylics for everything that isn't metal. =]  For this color I chose Sky Grey [XF-19] and RLM Grey [XF-22] in a 2:1 ratio respectively.  Now...what I actually ended up doing since I'm too impatient to wait 24 hours and get more paint at the LHS...I instead mixed Sky Grey [XF-19], Dark Grey [XF-24], and Flat White [XF-2] in a 2:1:1 ratio respectively.  The actual color came out a little greyer than I wanted, but I think it would've been fine.  I did end up adding Light Blue [XF-23] at about 50% of what the mix was to give it a bluer color.  Even though I haven't personally put together the first mix, I do believe it would be an easier way to get this color. This is where I'm at now:

 image by brittvallot, on Flickr

I'll cover this with the Chipping solution and allow to dry and come back over it with the next color which I'll outline later as I need to stop now seeing as I got a little long winded.  =]


On the bench:  

Tamiya F4U-1  Kenneth Walsh


  • Member since
    June 2013
Posted by bvallot on Wednesday, August 6, 2014 8:03 AM

Here's another quickie.

So the MiG Chipping hasn't quite worked out like I thought it would.  I went back through a few tutorials to see if it was something in my application that I did wrong and found that wasn't the case.  Then, I searched around to see how well it works with Tamiya paints.  I didn't turn up much, but it does seem that there are others out there with the same problems.  I never got results as easy as they make it look in the video.  The Tamiya paint seems too tough to want to give and break from itself.  Now granted, there wasn't a lot of separation in color or value from the light blue to the light grey so it was difficult to even see what I was expecting.  The effect came out looking more like a wash than the chipping I was hoping for.  In any case, I went back over some of the preshading I intended to keep with a very thinned darker light grey (added a bit of Nato Black and Hull Red), and hit it again with the light blue color and kept it thin.  Followed back up with the light grey paint I mixed and very lightly dry brushed the light blue I was looking for in places to show the wear.  I varied the blue by mixing Light Blue and Flat White in two dabs and pulled what I needed.  I do this with a lot of my brush painting as it helps to keep things from being too uniform.  There will be some done to the undersurface here later on, but for now I'll be moving onto the upper surfaces.

 image by brittvallot, on Flickr

This picture doesn't quite do it justice.  I'll have better ones later.  I have gotten back to the color I was looking for originally.  Of course it had to be the hard way...this Hawk hasn't been making anything easy lately.

If anybody has had some experience with the Absolute Chipping, I would more than love to hear about it.

=]

On the bench:  

Tamiya F4U-1  Kenneth Walsh


  • Member since
    February 2012
  • From: Olmsted Township, Ohio
Posted by lawdog114 on Thursday, August 7, 2014 2:48 AM

Very nice.  I guess I'll pass on the MIG chipping fluids.  

Joe

 "Can you fly this plane and land it?...Surely you can't be serious....I am serious, and don't call me Shirley"


  • Member since
    June 2013
Posted by bvallot on Friday, August 8, 2014 8:56 PM

I'm gonna try to get the upper surface painted tonight.  Earlier, I did take a moment to test out the Chipping solution again to see if a greater degree of contrast in the colors might allow me to see what's happening a little better.  With a brush, I dropped some NATO Black over a section of Alclad Aluminum (such as I already have on the wing root of my Hawk).  This is a test piece from a Phantom that I scraped to do tests such as this.  Came back over the black with some Hull Red and let that dry before applying the Chipping solution.  When I started working the surface I did notice the solution working as I had expected however, it did begin to remove the black underneath as well.  So, I'm wondering if because the paint was a little thicker (due to the brush) that it allowed the paint to grab better to the solution.  I think I might try testing a Flat coat over the black to protect it so I don't lose any of it.  That's that for now.

I did manage to get the lights on before I painted this time! =] Hoping to minimize all the mess I seem to create late in the game.

 image by brittvallot, on Flickr

I took a match to a small clipping of clear sprue and stretched it.  Selected the diameter I wanted for the nav lights on the fuselage, CAed them in, and sanded them down some to clean it up.  Cut and shaped the lights for the tail and dropped those on.  Easy.  So happy I recognized that beforehand this time around. =D

More to come later tonight.  (fingers crossed)

On the bench:  

Tamiya F4U-1  Kenneth Walsh


  • Member since
    June 2013
Posted by bvallot on Saturday, August 9, 2014 1:18 AM

Last update for the night.  I managed to get the upper surface painted. =D (que Rocky Theme) =]  

So I'll start off with the color. In an effort to tackle the color scheme, I'd been digging deep to find something true and accurate to what was used for the AVG.  

Curtiss Brown - DuPont 71-009:  The closest FS equivalent is said to be FS 30219, and sometimes called Sandy Earth, but from what I've found...Curtiss actually used two colors in their RAF P-40s: DuPont 71-009 for Temperate Land Scheme and 71-065 for Desert Scheme. DuPont 71-009 is known to fade quickly, becoming a lighter color and chalky when weathered. DuPont 71-065 is close to FS 30118 and apparently had more stable pigments and was closer to the RAF color. The 71-065 was used only on later P-40Es, and it's been mentioned that this paint could be a second attempt by DuPont to match RAF Dark Earth more accurately. 

Here is also a great chance to show everyone what I mentioned in an earlier post. The phone app I've used to premix these colors is called "iModelKit."  I first learned of it from dfllu78.  It has loads of color samples from any and everything you'll ever happen to need. Plenty of features that also allows you to mix a color to match what you need from a certain collection of paints.  Normally I don't really require the aid of something like this, but for this project it's probably saved me some money by not having to throw out mixed paint that won't suit my needs. =] 

I've started with a slightly yellower version of FS 30219.  That's gone down first.  I may use something simliar to the 3 color practice that I've seen lawdog outline before.  I meant to make use of some filters but seeing as I haven't made time to purchase them, I'll just being doing it all with paint.

[/url]image by brittvallot, on Flickr

 image by brittvallot, on Flickr

 image by brittvallot, on Flickr

Here is a screen shot of the app I used.  It also shows the colors I used and the ratio they're mixed to.

 image by brittvallot, on Flickr

=]

On the bench:  

Tamiya F4U-1  Kenneth Walsh


  • Member since
    February 2012
  • From: Olmsted Township, Ohio
Posted by lawdog114 on Saturday, August 9, 2014 9:07 PM

Very cool.  Where did you get that telly app? Does Droid offer it?

Joe

 "Can you fly this plane and land it?...Surely you can't be serious....I am serious, and don't call me Shirley"


  • Member since
    June 2013
Posted by bvallot on Sunday, August 10, 2014 1:22 AM

Joe, I just looked it up on my phone's app service.  It seems this particular company is only iPhone friendly for now.  I'm sure you could find it's equivalent out there though.  It was just a couple of dollars, but it's money well spent.  Basically costs one jar of Tamiya paint. =]  I'll continue to post my mixing ratios for anyone out there who happens to wants to try or modify what I've done here.

But put out a search.  I'm sure there's something out there. =]

On the bench:  

Tamiya F4U-1  Kenneth Walsh


GAF
  • Member since
    June 2012
  • From: Anniston, AL
Posted by GAF on Sunday, August 10, 2014 1:36 AM

The color certainly looks good!

  • Member since
    June 2013
Posted by bvallot on Tuesday, August 12, 2014 5:19 PM

Thanks GAF.  It's taken a lot to get to this part.  =]

Well, I've finally gotten to put some green down on this Hawk.  I'm less than a month out from my wedding so getting to the bench to put some time in has been difficult to say the least.  So without delay... 

I went to work on masking off the upper surfaces to paint the Curtiss Green.  Boyington's Hawk was said to have a slightly different camo scheme along the left cockpit area of the fuselage and along the left vertical stabilizer.  I found some sources online showing this as well as the decal instructions from EagleCals supported this also.  I drew out the masks by hand onto regular printer paper and cut them out with a number 11 exacto blade.  I left tabs for the wings so that I could better attach them.  It seemed to work out pretty well.

 image by brittvallot, on Flickr

 image by brittvallot, on Flickr

Some of this felt a little too sharp. So I rounded off some of the edges where I thought appropriate from other photos of the Flying Tigers.  After it was all said and done...this is what I ended up with:

 image by brittvallot, on Flickr

 image by brittvallot, on Flickr

As for Curtiss Green (DuPont 71-013): it's generally agreed that FS 34092 is a good match.  FS 34079 is close as well for this medium green color.  With the fading that occurred from weathering and fuel spilt on the planes, it seems that this color ashed up on the AVG Hawks too.  I've elected to start with this mix for Curtiss Green:

 image by brittvallot, on Flickr

I will come back over this with some darker green and weather over that with a layer diluted with some Flat White and Buff.

 image by brittvallot, on Flickr

 image by brittvallot, on Flickr

 image by brittvallot, on Flickr

 image by brittvallot, on Flickr

Next up, I'll put a couple layers of weathering down by painting with something similar to three layer paint method.  Then, she'll get a coat of Alclad's Klear to get her ready for some decals and more weathering.  =]

Thoughts and comments are always welcomed.  =]

On the bench:  

Tamiya F4U-1  Kenneth Walsh


  • Member since
    December 2003
  • From: Charleston, SC
Posted by sanderson_91 on Tuesday, August 12, 2014 7:35 PM

Sweet Bv!! Love where you're going with this!!

Steve


  • Member since
    June 2013
Posted by bvallot on Thursday, August 14, 2014 12:23 AM

Thanks Steve.  I'm beginning to feel more and more like I'm back in my own territory. =]  

I got a little more time in tonight and managed to take care of some weathering with the airbrush.  I started with mixing a little NATO Brown and NATO Black together.  This was made to be very diluted.  It didn't quite have what I was looking for so I added about the same amount of Hull Red to it.  I put this down first from front to back over the wings the same as you'd paint condensation marks.  I took this one out of Lawdog's playbook.  I really like how it turned out.  I didn't add too much here just yet.  I was very pleased with the darker tinge that this color was putting down so I took advantage of trying it out over the Curtiss Green to put more character into it.  It was giving me just what I was looking to end up with down the road a ways so I took advantage of applying it now while I had it up and ready.  I lightly touched up some of the more typically weathered surfaces with this color.

Once I was done with this, I pulled out some Buff and diluted it quite a bit too.  I very lightly added some condensation lines over the wing surfaces and also hit a couple of areas that were highly weathered in photos as well.  This color helps add the chalky, ashy look that the early DuPont paints were known to do.  It was working out pretty well, so again I opted to take care of it some now so that I don't overdo something later.

 image by brittvallot, on Flickr

 image by brittvallot, on Flickr

The next thing I moved on to was weathering the walkway along the wings.  I tried out MiG's Chipping solution again with some improvement.  This time I put a coat of Alclad's Flat over the NATO Black painted skid walks in an effort to seal it.  This did help some it seems.  After working it some, I did manage to lift some of the paint but these Tamiya paints just don't look like they want to play with the solution MiG's come up with.  On the left side, I did end up having to put a couple of light washes of Tamiya's Flat Aluminum (where I tore up the Alclad underneath some) and a little NATO Black to suggest the skid walk where I wanted it to show and some more Curtiss Brown back to cover what I didn't want to show.  In the future, I'll likely continue to find a better way to do this but so far I'm pleased with the outcome.

 image by brittvallot, on Flickr

 image by brittvallot, on Flickr

Here you can see the formation light painted in and the fuel/oil caps painted as well.  For the caps, I didn't want anything too brand new.  I never like painting a warplane with pretty, clean colors so I used Flat Red with Hull Red to dirty this color up a bit.  The other cap has been shown pretty exclusively to be yellow, but in actual photos of the Flying Tigers it seems to be worn completely off to a metallic color.  So I opted for a Dark Grey to start with, Metallic Grey to add a bit of shine, a little Yellow-Green on top of this, and finally a little more Dark Grey to knock it back down to something I liked.  This is all down with a fine brush, very thinned out and these colors are allowed to blend on the cap somewhat.

 image by brittvallot, on Flickr

And here's one more of the walkways together. =]

 image by brittvallot, on Flickr

That's it for tonight.  Thursday or Friday I'll be able to put a clear coat on it and start with some decals.

On the bench:  

Tamiya F4U-1  Kenneth Walsh


  • Member since
    February 2007
  • From: Brunswick, Ohio
Posted by Buckeye on Thursday, August 14, 2014 11:37 AM

Nice!

Mike

  • Member since
    February 2012
  • From: Olmsted Township, Ohio
Posted by lawdog114 on Friday, August 15, 2014 9:50 PM

Very well done BV.  Good idea with the masks.  Thats some of the best wing root chipping I've seen.  Whats that paint app on your telly called?

Joe

 "Can you fly this plane and land it?...Surely you can't be serious....I am serious, and don't call me Shirley"


  • Member since
    June 2013
Posted by bvallot on Tuesday, August 19, 2014 12:42 AM

Thanks Joe. =]  It's still a working progress.  I doubt I'll ever stop trying to improve something like that. The app is called iModelKit.  I got the full version.  I think it cost about $3.  Totally worth it though.  It does a lot and it's loaded with color swabs from damn near anything you could want to reference.

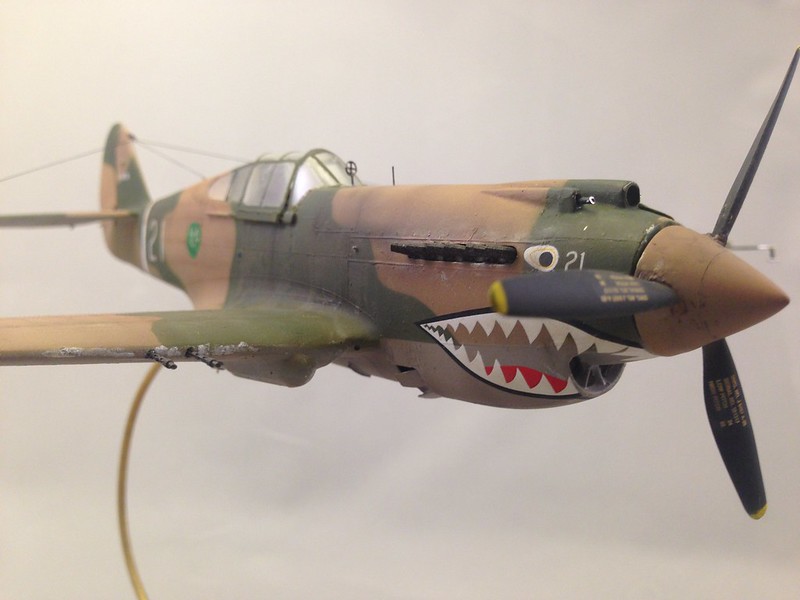
This plane's starting to come to life for me.  I'll be skipping ahead past some of the boring parts that don't amount to much visually.   I've got a clear coat down.  Alclad's Aqua Gloss goes down real well.  I doubt I'll ever use anything else.  And it doesn't change my colors much at all after a coat or two.  I used EagleCals AVG Flying Tigers decal set that included Greg Boyington.  I did his Corsair about a year ago and I'm in the process of repainting some of the insignia currently.  So I had considered getting to his P-40 one day when I decided to do one...and this is it. =]  The decal set is great.  Plenty of options, crisp in-register decals, and the film is tight around the print.  They took a little bit of playing with to get them to set over the raised detail of the Revell kit's rivets and raised panel lines, but after a nice bath of SolvaSet and they settled down real nice. 

Here's a few close ups of how that went:

 image by brittvallot, on Flickr

I love this smile. 

 image by brittvallot, on Flickr

With the clear coat down, I wanted to tackle the panel lines next.  Now in the past I've often gotten carried away with picking out the panel lines.  There's the never ending debate of how much is too much and so on...so here...I wanted to show more discretion and only very lightly define these lines where they were shown to be from photos of the AVG in the Pacific.  I picked them out with some Burnt Sienna oil paint I have and thinned it down considerably.  When I was happy with the results, I broke out my Alclad Klear Flat to put a coat to seal all this.

 image by brittvallot, on Flickr

 image by brittvallot, on Flickr

 image by brittvallot, on Flickr

Here's a better top view:

 image by brittvallot, on Flickr

Here's the undersurface.  I very lightly picked out some lines with Tamiya's Dark Grey actually.  Never did it like this before.  I was too impatient to wait to drop by Hobby Lobby and pick up a little extra variety of oil paint to use for something just like this and opted for an acrylic wash.  It actually worked just fine.  I will say, be careful not to rub through your clear coat with an alcohol thinner like I started to do.  If you put enough of it on there, it will start to eat through your finish.

 image by brittvallot, on Flickr

One thing I thought was nice was that EagleCals included the "Prestone" decal that went over the coolant expansion tank on the top of the cowling of the fuselage.  I was just about to start painting in on when I reviewed the decal sheet once more and caught it! =]  It's the little things, right!? =]

 image by brittvallot, on Flickr

Next up, I'll have a few more quick layers of paint to bring out a more weathered and beaten up look that so many of these Hawks had.  I'll seal that and move on to dotting the i's and crossing the t's.  =]

On the bench:  

Tamiya F4U-1  Kenneth Walsh


  • Member since
    December 2013
  • From: Greenville, TX.
Posted by Raymond G on Tuesday, August 19, 2014 1:33 PM

Wow Britt!  She's really coming to life.  I don't know... I may have to revisit this in a year or so, once I feel a little more confident and gained a little more experience :)

On the Bench:

U.S.S. Arizona (Revell)

P-51D Tribute (Revell)

57 Chevy Bel Air


  • Member since
    June 2013
Posted by bvallot on Tuesday, August 19, 2014 8:46 PM

Thanks Ray! She is finally coming around. Certainly was stubborn about it.  I still need to fix the prop...if anybody noticed one of the damned blades popped off as I was applying the mask to paint it.  Sure didn't take much either.  I'll definitely revisit this kit again too.  I'd like to build it as a Pearl Harbor P-40 and maybe even an XP-40 in NMF as an early pre-war plane.  Aside from all the extra stuff I've made more complicated in pursuing, it is a relatively quick build.

Have you decided on a type of base for yours?  It looked like you were making a little diorama for it.

On the bench:  

Tamiya F4U-1  Kenneth Walsh


  • Member since
    May 2006
  • From: Chapin, South Carolina
Posted by Shipwreck on Wednesday, August 20, 2014 7:41 AM

Bvallot, the plastic on those old birds is a bit fragile. It might be easier just to purchase another kit or two in order to replace that prop. I had two when I started my George Welsh version. After I dry fitted the nose piece, it popped off and I could not find it. Then I noticed my dog was munching on something really good! It took me two kits to build it, but it only costs about $8 each.

On the Bench:

Revell 1/96 USS Constitution - rigging

Revell 1/48 B-1B Lancer Prep and research

Trumpeter 1/350 USS Hornet CV-8 Prep and research


  • Member since
    June 2013
Posted by bvallot on Wednesday, August 20, 2014 2:10 PM

Shipwreck, that's not a bad idea.  I was going to try to salvage it.  I planned on carving out a little hole for a small brass rod to insert and glueing the rod/prop back onto the spinner.  I'm not even sure how it's going to workout, but at least I don't feel worried about it. =]  That's a good thing, no? lol  Confidence outta get me somewhere.

On the bench:  

Tamiya F4U-1  Kenneth Walsh


GAF
  • Member since
    June 2012
  • From: Anniston, AL
Posted by GAF on Wednesday, August 20, 2014 4:00 PM

An extra kit for the prop is not a bad idea.  You not only get the prop, but an extra set of decals too!  And if you go to Hobby Lobby with a 40 percent off coupon, it's cheaper than buying a decal set. Guess that's one good thing about the Revell kits.  I needed decals for one of my P-47 builds and the cheapest way to get them was to buy another kit!

She's a fine looking P-40!

Gary

cb1
  • Member since
    December 2009
  • From: D/FW Texas
Posted by cb1 on Thursday, August 21, 2014 4:31 AM

holy cow! that is awesome dude!

  • Member since
    June 2013
Posted by bvallot on Sunday, August 24, 2014 11:44 PM

Thanks CB1.  It's been a bit of a love-hate relationship with this Hawk.  

A quick update.  I've addressed a few things that I put on hold for a while and continued to work on the weathering.  I had previously assembled the covers to the landing gear since in my test fit it appeared that I would be able to sneak them in underneath.  Well,  of course that wouldn't be the case at all.  I suppose I should've known better.  So, I cut the covers off (carefully) and set them aside.  I have weathered the tires a bit more to show more mud and dried dirt that it would've have sat in at some point briefly.

Here's that:

 image by brittvallot, on Flickr

You can see in the photo above I had to cut a very small slice off the length of the rod that accepts the tire. After adding the strips of plasitcard, it's now raised the tire a smidge higher.  This allowed the cover to set down a little neater where it belongs. The photo below shows the better fit.

 image by brittvallot, on Flickr

Tires:

 image by brittvallot, on Flickr

Here are the landing gear now assembled.

 image by brittvallot, on Flickr

If you look closely here, you can see where I've set the eyelet pin piece (help with that term?) that seems to hold the tire in place.  It's a very tiny brass rod that I've bent into a circle.  Worked fairly well.  =]

 image by brittvallot, on Flickr

Here's a quick top view of what's generally going on here with the weathering.

 image by brittvallot, on Flickr

The chalky markings on the paint surface are Tamiya Weathering compounds A.  They work rather well, but it did take a little learning of how I wanted to go about it.  I didn't have the kind of luck I wanted with adding some fuel stains.  I started with MiG Rain Streaks.  It went down a little poorly.  I wasn't patient enough with allowing it to set up, so it became overdone.  Then as I tried to fix it, naturally it got away from me a little more.  After some more effort I finally got it to come back to where I wanted.  This terribly overworked area is a combination of the Tamiya Compounds, light washes of the Tamiya acrylic paints to bring colors back to where I wanted them, and following up again with the weathering compounds.  I made this more work for myself than was needed, but it's coming together.  It's not entirely what I was looking for.  I don't feel I had the kind of control I normally have when it comes to painting and weathering.  However, I don't think it turned out too bad.  I'd like to tone this down some next time.  =/

 image by brittvallot, on Flickr

 image by brittvallot, on Flickr

Here's a view again showing some of the Rain Effects applied.  I'd recommend it.  Just take your time with it.

 image by brittvallot, on Flickr

That's where I'm at for now. =]

On the bench:  

Tamiya F4U-1  Kenneth Walsh


  • Member since
    December 2013
  • From: Greenville, TX.
Posted by Raymond G on Monday, August 25, 2014 3:17 PM

Dang it Britt, I'm sorry I just saw this!  Check your messages about the prop!  I've got an extra!!!  Raymond

On the Bench:

U.S.S. Arizona (Revell)

P-51D Tribute (Revell)

57 Chevy Bel Air


  • Member since
    June 2013
Posted by bvallot on Monday, August 25, 2014 3:35 PM

Ha! That's nice of you. =]  I forgot to mention it during the post as it was late when I got to it.  I actually managed to fix it.  Since it was a simple clean break, there was a slight tooth to a small part on the most forward aspect of the blade and it happened to fit very neat into the depression it left on the spinner.  So I left that alone and with my No. 11 exacto blade I carefully drilled a tiny hole into the widest part of the blade.  I matched that up to the corresponding place on the spinner except on the spinner I drilled all the way through.  I fit a small brass rod thru it and bent it to about 80 degrees or so in order to lock it down on the inside wall of the spinner....something for the CA to bite on.  =]  Glued the blade back onto the spinner while noting the pitch and voila!  Back to new!!

So no worries. =]  Crisis averted.  I did however notice that a small triangular, bracket from the engine popped off and that'll need to be replaced.  Always something with this damn Hawk.  =]  But thanks for thinking of me.

On the bench:  

Tamiya F4U-1  Kenneth Walsh


  • Member since
    November 2003
  • From: State of Mississippi. State motto: Virtute et armis (By valor and arms)
Posted by mississippivol on Monday, August 25, 2014 10:08 PM

It must be right, cuz it needs a serious run through a car wash!

  • Member since
    June 2013
Posted by bvallot on Wednesday, September 17, 2014 3:19 PM

Aaaaaaaand I'm back.  =]  Last update.  The next post I make will be at the finish line.  Just some odds and ends to address.  

Completed the cowl flaps and added the rods and gearing to make them "work."

 image by brittvallot, on Flickr

 image by brittvallot, on Flickr

One thing I noticed happening with the landing gear is that the struts still appear in the loaded position.  It didn't occur to me at first as I was more concerned with making them fit.  I suppose it's a small concession to make.

Master Model .30 gun barrels in place. Ultracast exhausts, and a Squadron wind screen/canopy in the works (not glued down yet).  And I finally got one of my magnets back in place for the bottom panel.

 image by brittvallot, on Flickr

 image by brittvallot, on Flickr

A closer look reveals something going awry here with my cowl panel.  It seems that this damn thing is bending itself straighter as the fit is somehow different now.  Hopefully when I add the magnet at the other end this will resolve itself.  My prop is acting funny now too.  I think it's more an issue of the makeshift shaft I have inside the engine.  It seems to have shifted while handling.

 image by brittvallot, on Flickr

Other exhaust stack

 image by brittvallot, on Flickr

And here with the Squadron Canopy something else weird is happening.  This is the second one I put together.  The first one came out great.  Fit was perfect.  Paint was perfect.  Then I tried to dirty the windows up a bit and I started melting through the damn plastic.  Made the one you see now and I managed to screw with the fit of the canopy butting up against the windscreen.  Everything else about the fit of the slide rails grooving with the canopy is fine.  Hopefully, I can beat this into submission before the end of the week.  There's a IMPS event nearby where I live and I was considering throwing this one in it.  I've never been to one before and don't really know what to expect, but I do want to make sure I clean up all these little issues before then.

 image by brittvallot, on Flickr

Anyone out there who's dealt with similar issues with the squadron canopy and has a grip on fixing it, by all means please throw me a bone.  =]  This is the first one I wholeheartedly attempted.  That's a wrap on that.

If you've got any input, I'd love to hear from ya.  =] 

On the bench:  

Tamiya F4U-1  Kenneth Walsh


  • Member since
    February 2012
  • From: Olmsted Township, Ohio
Posted by lawdog114 on Wednesday, September 17, 2014 8:08 PM

Hey Britt, I just picked up the latest incarnation of this kit at a local drug store as a "sacrificial lamb" for my next project.  Last night, for Censored and giggles, I taped together the main airfame (and nosepiece)  to see how it would go together.  Oh my....absolutely horrendous!  This mold has certainly run its course.  With that, I had to give you a shout out.  Congratulations on turning this pig into a beautiful work of art, and making it look easy at that.

Joe   

 "Can you fly this plane and land it?...Surely you can't be serious....I am serious, and don't call me Shirley"


  • Member since
    June 2013
Posted by bvallot on Sunday, September 28, 2014 10:09 PM

Okay guys here it is! I've finally washed my hands of this one. This Hawk kept finding new ways to challenge me along the way, but now it's complete. =D

So here we go: (Lot's of pics. Sorry. =] )
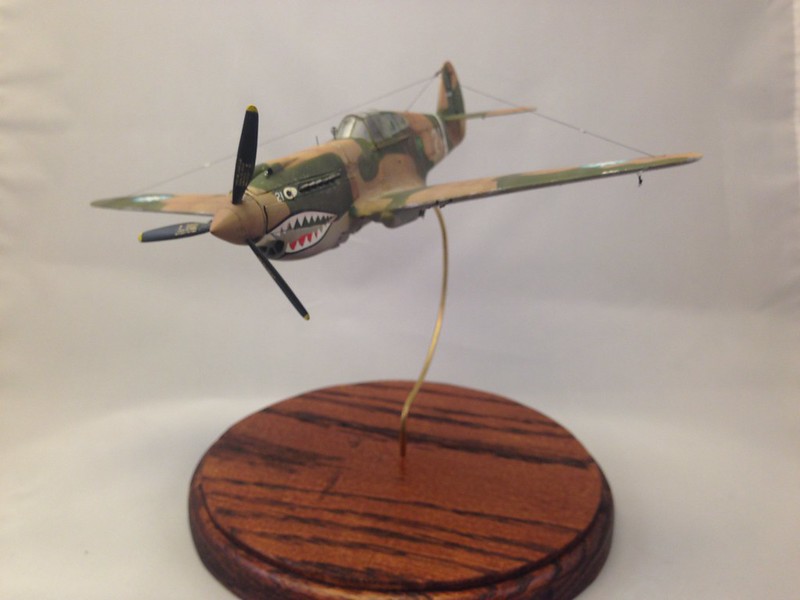
 image by brittvallot, on Flickr

 image by brittvallot, on Flickr
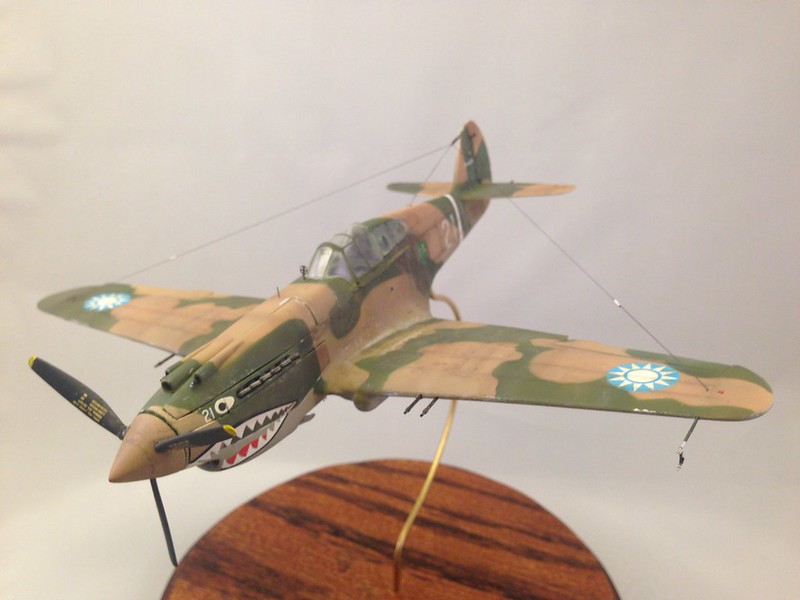
 image by brittvallot, on Flickr

Close up of rudder horn and aerial hook up.

 image by brittvallot, on Flickr

 image by brittvallot, on Flickr

For the cross hairs...I literally spent about two and a half hours trying to do something that would've been really nice.   But they were just too tiny for me to grip and put together.  Ugh! But still I took the kit part to see what I could do with it and ended up filing it down as thin as I could and used a sharp No. 11 blade to trim up the insides.  I'm mostly content with it.  

Detail of the exhaust and what's either a static pitot tube or some exhaust vent that protrudes from the cowl.

 image by brittvallot, on Flickr

 image by brittvallot, on Flickr

 image by brittvallot, on Flickr

Detail of the engine.  I've included the fuel drain here and that really tiny hole on the landing gear housing is what they used to grease the gear parts for turning the landing gear. (This is also seemingly the only picture I have where the crosshairs look less than nice. =[ ) 

 image by brittvallot, on Flickr

 image by brittvallot, on Flickr

 image by brittvallot, on Flickr

 image by brittvallot, on Flickr
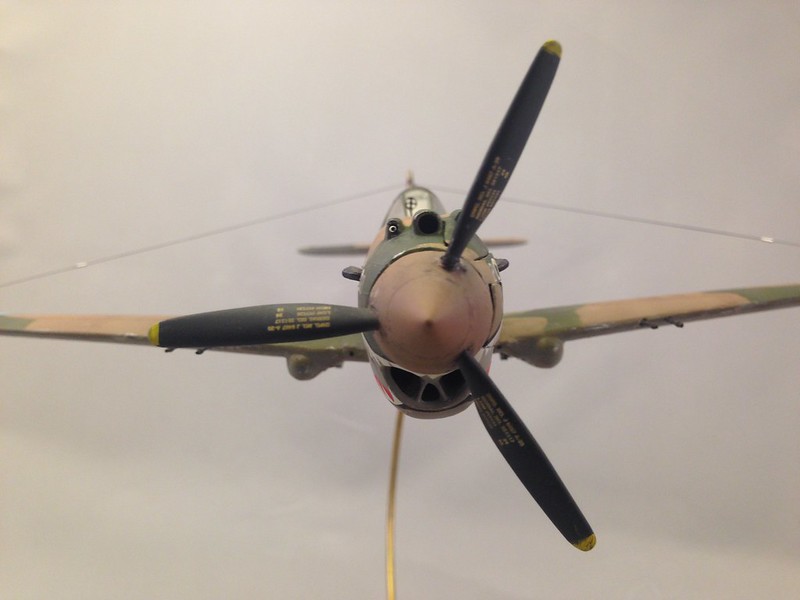
Detail of scratch built British pitot tube.

 image by brittvallot, on Flickr

 image by brittvallot, on Flickr
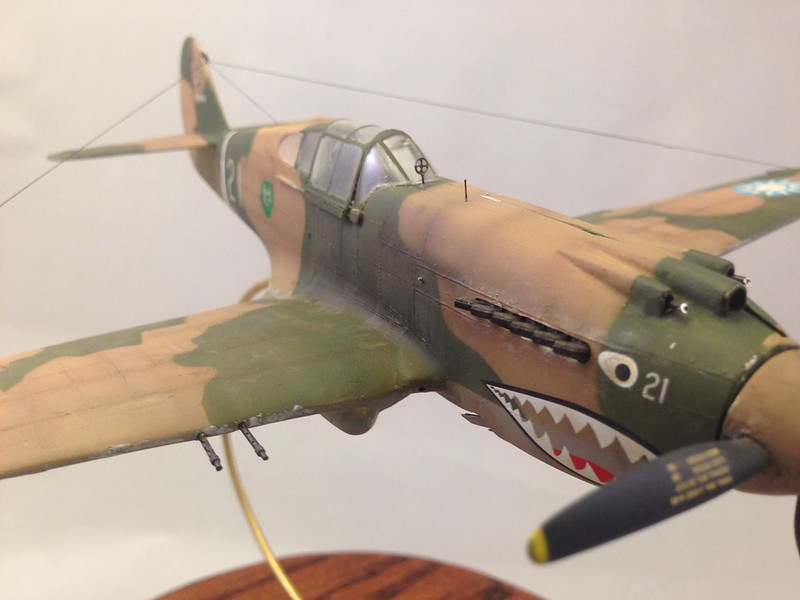
 image by brittvallot, on Flickr
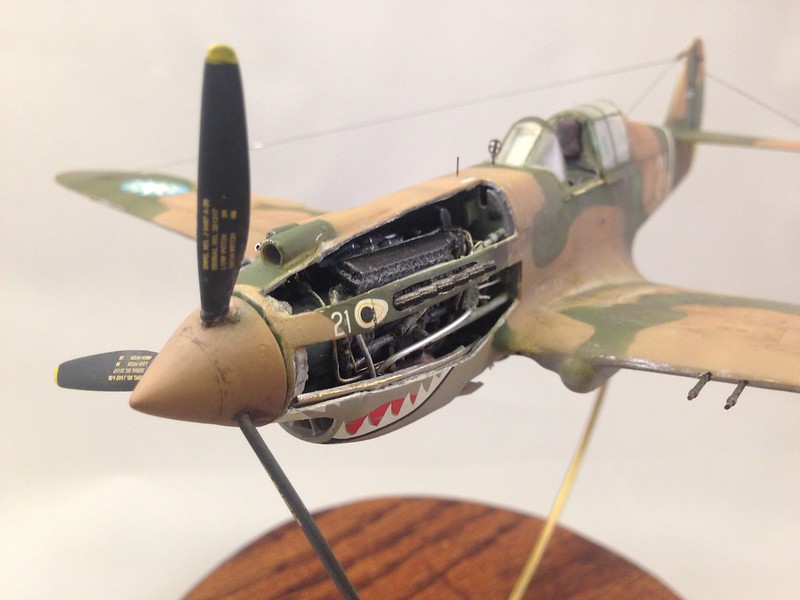
 image by brittvallot, on Flickr
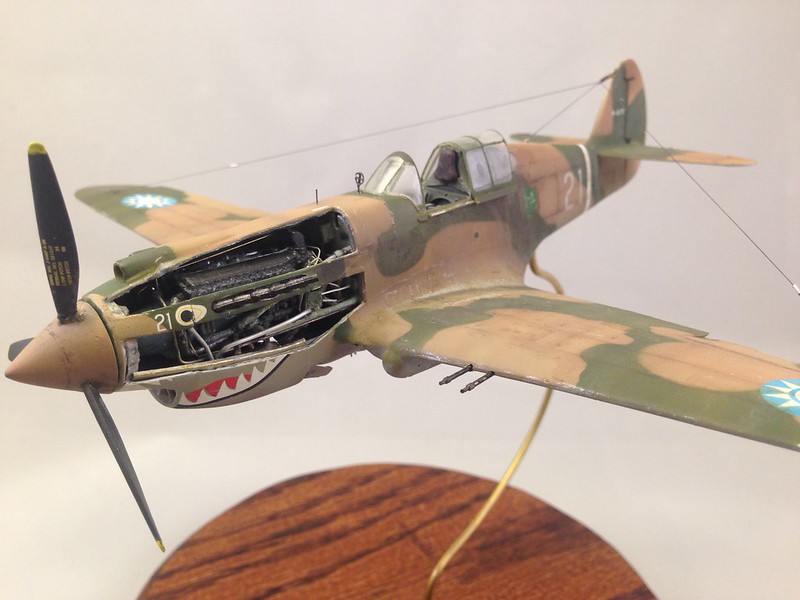
 image by brittvallot, on Flickr
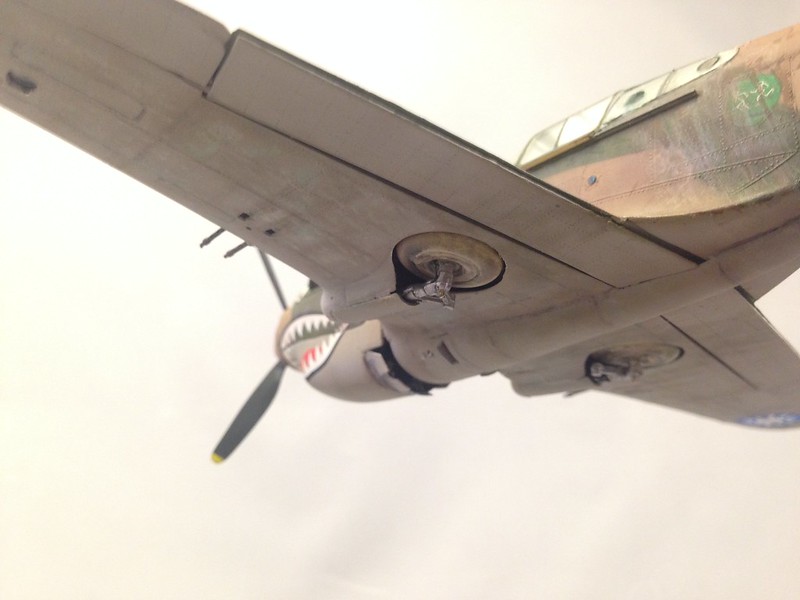
 image by brittvallot, on Flickr
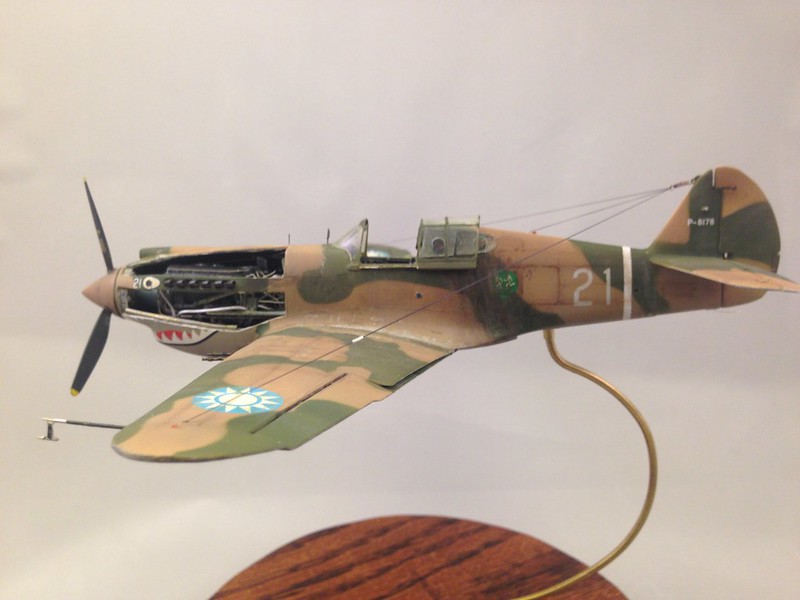
 image by brittvallot, on Flickr
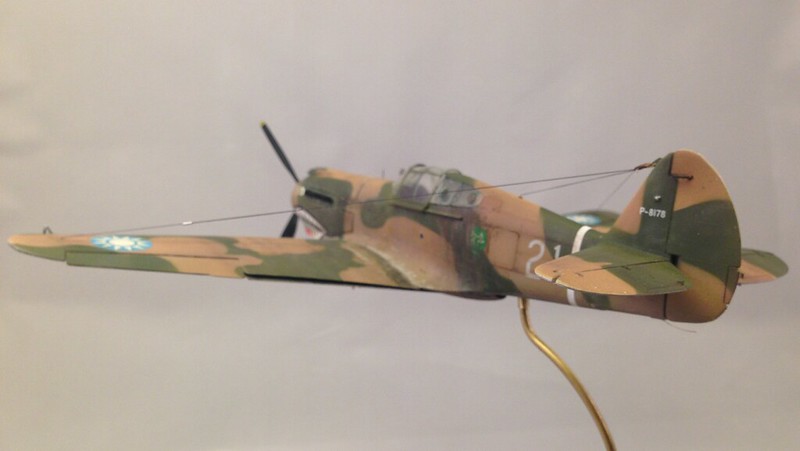
 image by brittvallot, on Flickr
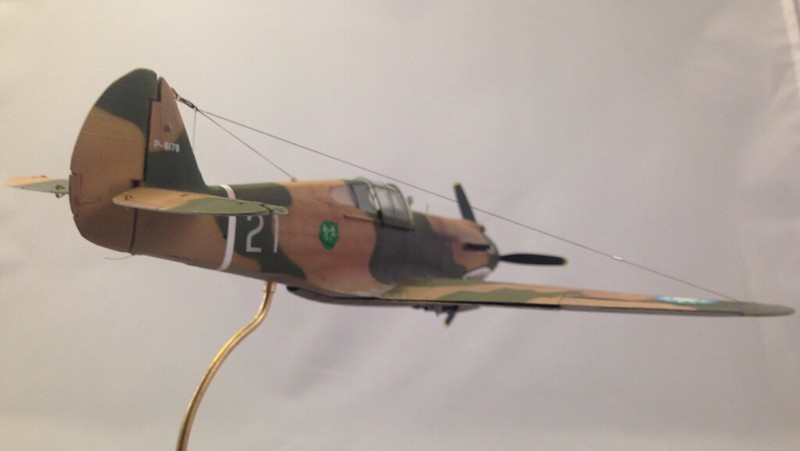
 image by brittvallot, on Flickr

Deflector made from plastic strips and a thin sheet of acetate. Hangs from a brass rod scratched out.

 image by brittvallot, on Flickr

That's a wrap.  Of course I don't mind hearing what the jury out there has to say.  This Hawk is far from perfect.  There's a couple of spots I've had to live with considering the add ons I did. But she's still purty to me. =]  There's a Saints game on now and I think my boys need me.  Gotta run!!

On the bench:  

Tamiya F4U-1  Kenneth Walsh


  • Member since
    December 2013
  • From: Greenville, TX.
Posted by Raymond G on Sunday, September 28, 2014 11:36 PM

Absolutely beautiful Britt!  You went way above and beyond the call on this one, especially knowing what you had to work with!  I've got this kit on my want to do again list, but not for a while ;-)  Congrats, mate...  She's a beaut for sure, Raymond

On the Bench:

U.S.S. Arizona (Revell)

P-51D Tribute (Revell)

57 Chevy Bel Air


  • Member since
    February 2012
  • From: Olmsted Township, Ohio
Posted by lawdog114 on Monday, September 29, 2014 1:46 AM

Gorgeous Britt.  I hope my Frankenstein P-40 turns out half this well.  Nice job on the rigging too.  I must say I'm a fan of your in-flight displays.  

Joe

 "Can you fly this plane and land it?...Surely you can't be serious....I am serious, and don't call me Shirley"


  • Member since
    February 2003
  • From: Cameron, Texas
Posted by Texgunner on Monday, September 29, 2014 8:46 AM

That's some mighty fine work Britt!   She looks cool "in-flight" too.  Great job on a difficult project!Bow Down

Gary


"All you mugs need to get busy building, and post pics!"

  • Member since
    June 2014
Posted by BrandonK on Monday, September 29, 2014 9:03 AM

That really is a super nice build. What an amazing amount of work you did in modifying that kit in to something it was never meant to be. Success!!! I love it.

On the bench:

A lot !! And I mean A LOT!!

2024 Kits on deck / in process / completed   

                         14 / 5 / 2  

                              Tongue Tied

  • Member since
    June 2013
Posted by bvallot on Monday, September 29, 2014 9:07 AM

Thanks guys!

Ray: I will say that for the most part I didn't find the kit to be too awful...maybe I got a lucky one.  It did have some nasty spots to correct which I was adequately prepared for (this time).  I did just pick up another one for the P-40B in OD Green scheme.  I saw a lot of nice photos that showed some subtle variation in the color of the OD due to weathering and such.  And all the kit's quirks are still fresh in my mind so I might work it a little on the side as I do my next one that I've been putting off for a while.  Should be a quicker build without all the extras.  And of the Curtiss P-40s, the -B is my favorite shape. =]

Joe: I'm such a fan of that EZ Line!  I don't dread rigging up the aerials anymore.  What used to take 2 or 3 hours of fooling with is now wrapped up in about 20 minutes.  I think it comes out so much nicer too.  Much more straight forward for me especially.  And thanks.  I'll still do some in-flight planes, but I'm getting eager to have some on the ground.  There's a part of me that cringes when it comes to the moment where I have to drill a hole for that rod that it gets mounted too.  There will come a point where I'll want to display certain features of the aircraft that will dictate it stays on the ground.  And now that our house is in order and the busyness of post-wedding on-goings is over, I'll have my attention on that special item for you.  The nature of it being flat has been tricky for making a mold that won't get destroyed when opening. It's comin' though.  I promise!!

On the bench:  

Tamiya F4U-1  Kenneth Walsh


  • Member since
    February 2007
  • From: Brunswick, Ohio
Posted by Buckeye on Monday, September 29, 2014 11:26 AM

Beautiful build!  Love the weathering you did on the tires.Drinks

Mike

  • Member since
    December 2013
  • From: Greenville, TX.
Posted by Raymond G on Tuesday, September 30, 2014 6:22 AM

I hear you Britt... My chief complaint with the kit is the awful gaps, the horrid cockpit set up, and the intentional misses on the landing gear doors.  Not a huge fan of the wheels either, though yours ended up looking awesome.  Honestly, I'm not sure you can't look at this kit from two angles: First, being that it's a great beginner level kit, and it is what it is.  Second, that it's an experienced builders dream because there's so many modifications that can be done to improve a fifty year old mold.  Like I said, I'll probably do it again, once I've got a little more experience under my belt.  I'm actually seriously considering doing a diorama of Boyington's bird being repaired on top of the mountain top Chinese cemetery he crash landed on.... Complete with him getting his butt chewed on by a peeved crew chief ;-)  But, you got to admit... going from a modern Tamiya mold to this is enough to strip anyone's gears :-)   Raymond

On the Bench:

U.S.S. Arizona (Revell)

P-51D Tribute (Revell)

57 Chevy Bel Air


  • Member since
    May 2006
  • From: Chapin, South Carolina
Posted by Shipwreck on Tuesday, September 30, 2014 9:11 AM

Bvallot, you certainly raised the bar on us. That is a plus fine P-40B. I noticed that you attached the canopy so that it could be moved back - nice touch! Have you ever used pilots? I bet you could get one to drop right in there. They help fly the plane!

On the Bench:

Revell 1/96 USS Constitution - rigging

Revell 1/48 B-1B Lancer Prep and research

Trumpeter 1/350 USS Hornet CV-8 Prep and research


  • Member since
    June 2013
Posted by bvallot on Tuesday, September 30, 2014 9:37 AM

No doubt about the gaps Ray! =D I'll tell you like anybody else about this kit...if I had one thing that got me through this it was--well, two things--a positive mental attitude and my secret weapon: Milliput.

One thing that kept me up was that I didn't have any expectations from this kit and I wasn't worried about ruining some part. I just did what I was going to do and I was going to make it work.  As for the Milliput, that stuff made this kit happen! Can't say enough about it.  I used it for the leading edge of the wings, the fairing in front of the landing gear, the gun barrel fairings on the cowl, and a few spots along the wing root.  That stuff absolutely helped me keep the shape right without having to make a mess.  CA just wasn't an option for me in some of those tight spaces.  I just couldn't sand it all properly.  That Milliput went on like silk too and it was fairly forgiving.

I think you should go for it on the diorama! Beat that plane up too. =] So long as you're taking care of the important things, i.e. seams etc., I think it would be more fun not worrying about making it perfect. Do you have a picture of that event at all?  All I can picture is a steep hilltop cluttered with tombstones without the first notion of being able to land much less take off again.  And looking forward to seeing that Spit when you get around to it. ;)

Shipwreck: Thanks for the assist with the canopy rails heads up. =] That little addition was all cause of you right there.  I may make this a thing I do with certain builds from now on.  It's a little big to scale, but...it's functional.  And it works like a charm!!  If I can find one smaller, I might try that out too, but for now I'll make this work.

I still may try dropping a pilot in there.  The seatbelts may get in the way.  I'll give it a try.  I've developed this "ghost pilot" means of display for these WW2 birds so as to allow the cockpit to be viewed.  For more modern jets I do plan to include a pilot.

And I appreciate the kind words from all of you.

On the bench:  

Tamiya F4U-1  Kenneth Walsh


  • Member since
    December 2013
  • From: Greenville, TX.
Posted by Raymond G on Tuesday, September 30, 2014 12:43 PM

No, I got that event out of his book...  Wouldn't surprise me if it happened though.  That was around the start of the end of the love affair between him and Chennault.  He described it as being at the top of a mountain, and being very rocky...  The graves, if I remember correctly, were piled up rocks.  I'm sure I could do a google search and get an idea of similar cemeteries, and extrapolate the rest.  I'm thinking about having the plane sitting on makeshift supports while a mechanic works on the Landing Gear and another mechanic beating the heck out of a bent prop blade, while the other chews on Boyington.  I know they flew in to the spot.  I'll have to go back and check and see what in.  If I can, I may see if I can build that bird to go with it.  

I'll have to check into some of that milliput.  I used putty and did a lot of sanding.  It did fairly well, but there are areas I'm still not 100% happy with.  You're right though, attitude as a big part of the kit.  At least we have something that's fairly accurate.  I'm still flattened that there's just not a better kit for such an important plane...  Raymond

On the Bench:

U.S.S. Arizona (Revell)

P-51D Tribute (Revell)

57 Chevy Bel Air


  • Member since
    June 2013
Posted by bvallot on Tuesday, September 30, 2014 7:09 PM

Definitely get some and practice with it beforehand.  A little goes a long way.  A couple of tools to help push and carve with will be of some use as well.  Use your imagination! =]

In my rush to get those pictures posted and done with, I forgot to show that prop blur! =[  I put in all that work to make it fit nice and pretty so as make it spin and I plum didn't even film it.  So here's a few fun ones and i noticed I left out a detail of the insignia.  I thought they were pretty damn good and with a little help I think they worked out nicely. So here's that as well.

A little extra weathering on top goes a long way for a convincing decal.  This was done with a very light wash of the green I used and Tamiya Weathering Compounds.

 image by brittvallot, on Flickr

 image by brittvallot, on Flickr
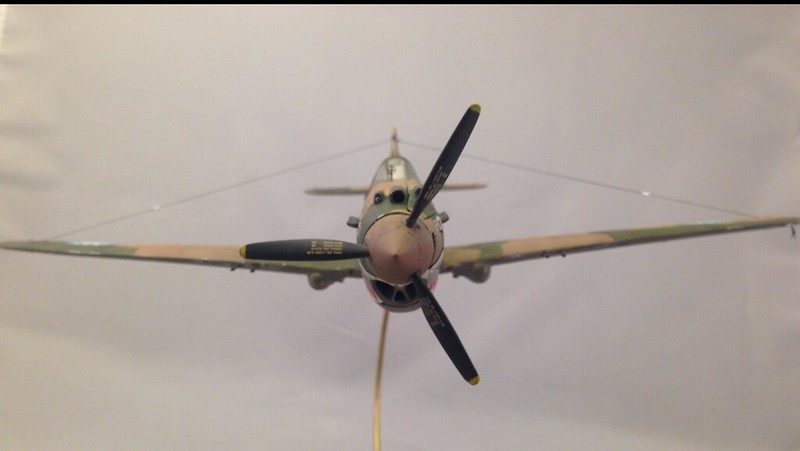
Fuel drain and cowl flaps

 image by brittvallot, on Flickr

 image by brittvallot, on Flickr
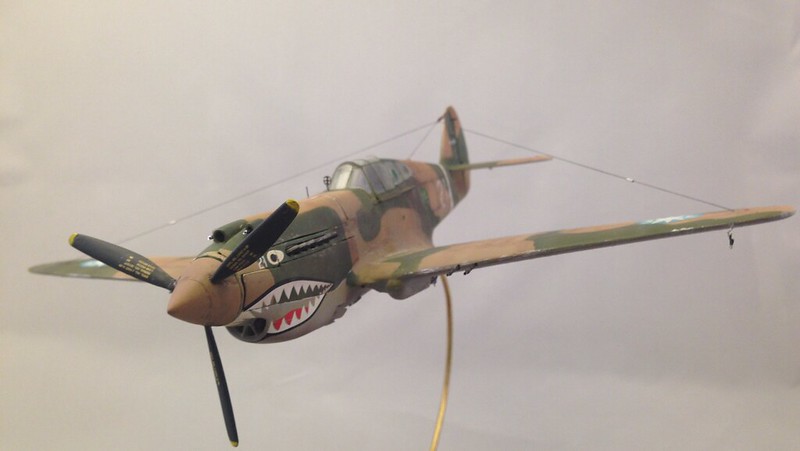
I just really love the shape the -B makes.  =]  I could stare at this for hours.

 image by brittvallot, on Flickr

 image by brittvallot, on Flickr
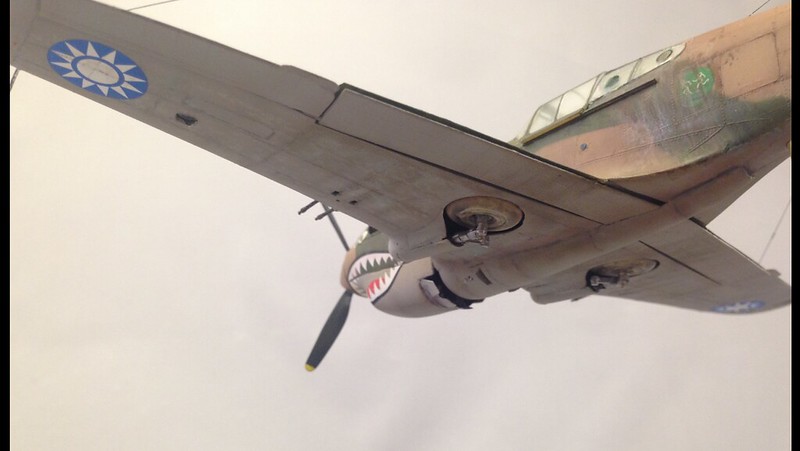
That's that.  =]

On the bench:  

Tamiya F4U-1  Kenneth Walsh


  • Member since
    November 2009
  • From: SW Virginia
Posted by Gamera on Tuesday, September 30, 2014 10:33 PM

Wow, somehow I missed this, beautiful work and I love the prop blur!

"I dream in fire but work in clay." -Arthur Machen


  • Member since
    December 2013
  • From: Greenville, TX.
Posted by Raymond G on Wednesday, October 1, 2014 4:03 AM

Hey Britt... Just for... grins and giggles, why don't you convert the second from last to black and white...  I bet it looks pretty !@#$ spot on...  Raymond

On the Bench:

U.S.S. Arizona (Revell)

P-51D Tribute (Revell)

57 Chevy Bel Air


  • Member since
    October 2013
Posted by Big Blue on Wednesday, October 1, 2014 9:15 AM

I just caught up.. nice job BV, that's one sweet looking P-40!  I'd love to build one myself, but don't think I'd have the same appetite for wrestling with a kit.  Way to go!

  • Member since
    February 2012
  • From: Olmsted Township, Ohio
Posted by lawdog114 on Wednesday, October 1, 2014 9:08 PM

bvallot


 I'll have my attention on that special item for you.  The nature of it being flat has been tricky for making a mold that won't get destroyed when opening. It's comin' though.  I promise!!

Thanks Britt!  Theres no hurry believe me.  I'm eyeing that Accurate Minitures P-39 in my stash right now.  Its one that I've always wanted to do...

Joe

 "Can you fly this plane and land it?...Surely you can't be serious....I am serious, and don't call me Shirley"


  • Member since
    December 2013
  • From: Greenville, TX.
Posted by Raymond G on Thursday, October 2, 2014 12:50 PM

Hey Britt...  I hope you don't mind, but I did the honors...  Wow, you did a good job!  Even my wife is impressed.

On the Bench:

U.S.S. Arizona (Revell)

P-51D Tribute (Revell)

57 Chevy Bel Air


  • Member since
    June 2013
Posted by bvallot on Thursday, October 2, 2014 1:59 PM

=D Ha!! That's nice.  You even photoshopped the brass out.  That's pretty sweet.  I've been wanting to do that very same thing with all the pics I've ever dressed up...just never got around to it.  I did start one.  I'll try to get it up here tonight some time.

Nicely done.  =]

On the bench:  

Tamiya F4U-1  Kenneth Walsh


  • Member since
    February 2003
  • From: Cameron, Texas
Posted by Texgunner on Thursday, October 2, 2014 2:07 PM

Raymond G

Hey Britt...  I hope you don't mind, but I did the honors...  Wow, you did a good job!  Even my wife is impressed.

Raymond, well done man!   That's a great job!  Very cool too.

Gary


"All you mugs need to get busy building, and post pics!"

  • Member since
    June 2013
Posted by bvallot on Thursday, October 2, 2014 3:06 PM

Here ya go.

 2014-10-01 09.06.02 by brittvallot, on Flickr

On the bench:  

Tamiya F4U-1  Kenneth Walsh


  • Member since
    May 2006
  • From: Chapin, South Carolina
Posted by Shipwreck on Thursday, October 2, 2014 5:44 PM

Bvallot, that is the best prop blur that I have ever seen, next to the real thing. Can you tell us how you achieved it?

On the Bench:

Revell 1/96 USS Constitution - rigging

Revell 1/48 B-1B Lancer Prep and research

Trumpeter 1/350 USS Hornet CV-8 Prep and research


  • Member since
    June 2013
Posted by bvallot on Thursday, October 2, 2014 6:40 PM

Shipwreck

Bvallot, that is the best prop blur that I have ever seen, next to the real thing. Can you tell us how you achieved it?

Well, I'd hate to ruin anything magical about it.  It's nothing too fancy really.  I'm just borrowing the same principles that nature already offers by filming it while it spins.  For this particular build though, I did fit the copper tube coming off the prop reduction box to a piece of aluminum tube that would accept it snugly.  Found the perfect fit...put the tiniest drop of mineral oil on it (meant to lubricate my shears for trimming my beard) to keep the spin smooth and Voila!  Now you have one smooth running propeller! =]  I'm pretty lo-fi at the moment for filming it.  I have my airbrush running to move the prop blades.  Like I said...nothing too fancy...but it works. =]

On the bench:  

Tamiya F4U-1  Kenneth Walsh


  • Member since
    May 2006
  • From: Chapin, South Carolina
Posted by Shipwreck on Friday, October 3, 2014 8:19 AM

The prop looks great. Thanks for sharing your magic.

On the Bench:

Revell 1/96 USS Constitution - rigging

Revell 1/48 B-1B Lancer Prep and research

Trumpeter 1/350 USS Hornet CV-8 Prep and research


JOIN OUR COMMUNITY!

Our community is FREE to join. To participate you must either login or register for an account.

SEARCH FORUMS
FREE NEWSLETTER
By signing up you may also receive reader surveys and occasional special offers. We do not sell, rent or trade our email lists. View our Privacy Policy.