SEARCH FINESCALE.COM

Enter keywords or a search phrase below:

Revell 1/32 Tornado ECR WIP

24420 views
93 replies
1 rating 2 rating 3 rating 4 rating 5 rating
Dre
  • Member since
    June 2007
  • From: here, not over there
Posted by Dre on Thursday, April 17, 2014 8:31 AM

I hope I don't break that HUD just by looking at it!   That looks soooo much better than the kit part- good job!

  • Member since
    September 2013
Posted by Dean30 on Wednesday, April 16, 2014 5:00 PM

Thanks Dre, well I have done more, Revell gave me this as a HUD frame,

Sorry for the blur its bad lighting, I decided I could do better,

I will be adding the instruments either side of the HUD and therefore wont be adding the part yet, but will do soon. 

Dre
  • Member since
    June 2007
  • From: here, not over there
Posted by Dre on Wednesday, April 16, 2014 2:41 PM

I think that looks great so far, Dean.   I dig the scratchbuilt items that you're adding to these models.

  • Member since
    October 2012
Posted by bimski on Wednesday, April 16, 2014 12:19 PM

wiring looks great.......you can also cover the ECR with a simulated cloth like on F-14

  • Member since
    September 2013
Posted by Dean30 on Tuesday, April 15, 2014 2:52 PM

Thanks Fly but I can't get shot gun stuff but the milliput on its own seems to have done the trick. Ok well I decided that perhaps I should take advantage of the cockpit being so sparse and add a bit of detail. Being that there are so many versions of the Tornado and being made in 3 countries there were many variations of the same colours and wiring in the cockpits so I took what I could from Google and tried my best with wire and mesh, and the best part to me is in the back seat there's a round screen which has a rounded screen, the kit part was completely flat and despite my efforts I couldn't get any lens type of build up but then I remembered the spares box! Trumpeters missile lenses were a perfect match! Have a look, I am not finished, probably about half way, I think I will revamp the seats and add o2 hoses etc.

Real ECR cockpit, and my interpretation, I am a million miles away but I feel it's looking not bad.

I managed to get the round glass screen quite well I think.

I know I have a long way to go with regards skills and I have to neaten it up a bit, in real life being that the images are much larger the cockpit looks better in 1/32 scale rather than this, I think it's one of my best efforts, if I can get a better result than my Mig 29UB I'll be happy. As always all input is welcome. 

  • Member since
    December 2006
  • From: Phoenix, AZ
Posted by Fly-n-hi on Monday, April 14, 2014 12:04 PM

Here's a tip, if you're interested.  I use Aves Apoxie Sculpt (similar to Milliput) and mix in some steel bird shot from a shotgun round.  Mix it up so that it looks like chocolate chip cookie dough and jam it into the nose cone, or where ever it fits.  It weighs more and takes up a bit less space.

  • Member since
    September 2013
Posted by Dean30 on Monday, April 14, 2014 11:23 AM

Yeah and no, having such an amount of detail which means you don't have to add is great, but having so much that goes unseen is a shame.

Dre
  • Member since
    June 2007
  • From: here, not over there
Posted by Dre on Monday, April 14, 2014 8:32 AM

You don't like Trumpeter's hidden gems?

  • Member since
    September 2013
Posted by Dean30 on Saturday, April 12, 2014 2:15 PM

There's a whole RADAR to build but I'm not going to install it, I have yet to make one for a kit, I just don't like to spoil the shape of the aircraft, There seems to be logic in this model, something Revell seem to be doing unlike Trumpeter, they're putting decent detail where it can be seen, and almost none where it cannot, it's probably why it's such a cheap kit.

  • Member since
    September 2013
Posted by Dean30 on Saturday, April 12, 2014 2:12 PM

It's you, the nose came in two versions, the GR1/IDS/ECR and the F3/ADV/F2 versions, F version had a longer nose the former had the shorter nose but Revell got it bang on. It's an odd shape the nose is a very smooth curved shape, I used to have trouble drawing it as it's such an awkward shape. As for the kit there's plenty left in the box! Lot's. I never used Milliput before but it has a substantial weight to it.

Dre
  • Member since
    June 2007
  • From: here, not over there
Posted by Dre on Saturday, April 12, 2014 1:05 PM

Not too many bits and pieces to this kit, hmm.   I wouldn't have thought of using Milliput as a weight, but it makes sense.

is it me, or does the nose cone look a little squashed/too short?   It just seems off somehow.

  • Member since
    September 2013
Posted by Dean30 on Saturday, April 12, 2014 11:45 AM

I have a few more photo's I have the nose attached, you will notice there is a gap on the forward fuselage where the Radome is attached, this is my fault as I sanded a bit too much after I had removed the parts. Also there appears to be a mistake in the instructions, the doors on the inside of the intakes are pictured upside down and on the opposite side, at first I thought it was me, I dry fitted them s few times but they didn't look right, so I decided to try the opposing side and it looked perfect and the fit was perfect so I can assume I was right in this instance.

Here's what became of the milliput, it's a brilliant nose weight as it's quite heavy and as I squashed it into the nose which is actually something I did by accident just to actually use it but I think I will do this again.

Here's the nose attached.

Here's the intake assembly the way I think it should be, Revell will tell you to put the top half the other way around so the ejector pin mark is on the outside.

The intakes will need a bit of work but they fit together pretty well, I just have to possibly fill the seams and sand the rough edges away.

Here's the separate assemblies so far, I have gone back and forth in the instructions in order to get as much made as possible, the fits so far are pretty good, the only area that needs filling is due to my error.

Also that Black shape is whet I am going to test against the inside and if it fits I will use it to completely seal the inside of the fuselage and black it out.

Dre
  • Member since
    June 2007
  • From: here, not over there
Posted by Dre on Saturday, April 12, 2014 9:18 AM

Just trying to help make your model life a little more interesting!

  • Member since
    September 2013
Posted by Dean30 on Friday, April 11, 2014 7:14 PM

No way lol looks awful, the Tornadoes have big green canvas ones anyway, I'm just going to accept it's a cheap kit and I will make do with what's there and build and finish it to the best of my abilities, plus the Tornado has pretty small intakes by comparison to most aircraft I mean the Mig 23 has no intake trunking thinking about it and it's never going to be known so no big deal I don't think.

Dre
  • Member since
    June 2007
  • From: here, not over there
Posted by Dre on Friday, April 11, 2014 6:12 PM

Eh, try heating and bending plastic stock to shape your intakes (like that one Su-34 conversion)...  might be even more 'fun'.

Hell, I'd probably just make some intake plugs (the big red ones) and go that route.

  • Member since
    September 2013
Posted by Dean30 on Friday, April 11, 2014 4:44 PM

Milliput as intake trunking? Never going to happen lol, though I think Dre foresaw that, anyway waste not want not, I squashed it all up and used it as nose weight. There's more chance of me getting on a unicycle and mastering it right away than me making what I proposed, on the flip side I will be getting the build on a bit faster again, I just am going over seams again and again to make sure they're in good condition, I'm not going to post any more until I have something decent to actually show as they can get a bit boring to read with out build photos I'm sure.

  • Member since
    September 2013
Posted by Dean30 on Friday, April 11, 2014 2:53 PM

It's gonna be s**t isn't it Dre lol?

Dre
  • Member since
    June 2007
  • From: here, not over there
Posted by Dre on Friday, April 11, 2014 2:15 PM

Sculpting your own intake trunks ought to be a 'fun' experience- I look forward to seeing this.

  • Member since
    September 2013
Posted by Dean30 on Friday, April 11, 2014 1:16 PM

Nah I'd prefer to scribe, plus I am not great so it will be a good way to improve skills. I think the OOB idea is dead, I couldn't resist adding detail, however it has been prompted by the kits manufacturing as the missing panel lines are one thing but the inside will need fixed, I have seen that if you look down the inside of where the intakes will be you can see that the engine faces will be visible so I have glued a strip of plasticard down the centre between the two, then I have cut another piece to make a roof of sorts . The reason is, when you open the wings it will let a lot of light in and it will become apparent that there's a huge hole elsewhere so I need to seal it in completely then I will add another strip to the opposite side of the faces to make it so that light will not pass between the fuselage when the wings are open. I think this is why Revell kits are cheaper but I don't mind it adds to the building experience, I will be using Milliput for the first time to make engine trunking, I have looked at the options and I think the best way will be to sculpt half and half top and bottom it won't be easy for sure, but should be worth it.

Dre
  • Member since
    June 2007
  • From: here, not over there
Posted by Dre on Friday, April 11, 2014 11:44 AM

You could always pencil on the missing panel lines instead of scribing them.

I haven't poked around too much in this website, but you might some good reference pics in here...

http://sgkoksijde.be/pictures/index.htm

  • Member since
    September 2013
Posted by Dean30 on Friday, April 11, 2014 10:24 AM

I know Dre lol. @ap me this is the re-tool so it will be a better kit then what you had, I hear the old kit was pretty bad.

  • Member since
    November 2005
Posted by Anonymous on Thursday, April 10, 2014 7:31 PM

I had one of these about 35 years ago.  I didn't like the way it came out, but I did like the way that a pound of black powder made it go away.

Dre
  • Member since
    June 2007
  • From: here, not over there
Posted by Dre on Thursday, April 10, 2014 7:18 PM

You're getting past OOB....  just sayin'.

  • Member since
    September 2013
Posted by Dean30 on Thursday, April 10, 2014 3:59 PM

The glue has dried on the ends of the brass, so far it would appear that when I pushed the pylon against the holes the resistance should mean when I push them in they're not coming back out so I will find out after the entire model has been completed, I actually am glad that I used the brass rod as the painting will not be so much hassle now, personally I would always put the swing wing together, I know some modellers prefer to cut the wings and attach them later but I guess I like the novelty of freely moving wings. So far so good! I have noticed that there is not one drop of detail on the fuselage sides and none on the underside of the forward fuselage, I (should) be able to engrave them.

Dre
  • Member since
    June 2007
  • From: here, not over there
Posted by Dre on Thursday, April 10, 2014 3:43 PM

Using that brass rod looks like a good solution to the issue, but I can't really think of a way to get them to stay.    

You're moving right along on this one.

  • Member since
    September 2013
Posted by Dean30 on Thursday, April 10, 2014 2:54 PM

Well I have had to actually make some modifications, I so wanted to not add any parts but this is probably for the best. The Revell parts broke after I had attached them it was not great but I half expected it. I decided to drill the pylons and stabilisers and use brass rod as it is much much stronger. The build should be able to pick up pace now that this has been dealt with.

First thing I had to find a way to make the brass rod stay in the wing as a pivot, I remembered that the Tamiya F-16 used pins and a rubber slot to hold the weapons on. I could not for the life of me find any rubber tubing I could use for this purpose so I had an idea, I decided to cut a hole just smaller than the rod and see how it fit, the fit was pretty good and was strong enough to hold the pylon and allow movement.

I just made holes all over the plasticard and managed to get good fits, it took a few tries but worked pretty quickly.

The brass tube snapped into the hole.

I then cut each piece of card and glued to the inside of the wing.

I used some tape so the super glue would set the part in place.

I decided not to take any chances with the horizontal stabs and cut the plastic attachment and replaced it with rod. I did have to bend the rod in order to obtain the anhedral however this created a split on the top half of the wing but I think it wont really be an issue, just to be sure I added a lot of glue on the split as this glue is incredibly strong. I also added glue to the tops of the brass on the pylons and stabiliser attachment so I could widen the ends and when dry it will fit pretty tightly and hopefully hold well. 

If anyone has tips regards to what I have been doing, or if anyone can see how I can improve this please let me know. 

  • Member since
    September 2013
Posted by Dean30 on Monday, April 7, 2014 5:06 PM

Okay well a couple of things here completed, I have been letting the huge horizontal stabilisers dry for a few days and I had a correction to make, I don't know why but many model companies seem to think that Tornado's have curved edges on the stabilisers, this is not true, the edges should be flat. Also I had thought of adding trunking to the kit but as I said I wasn't going to add any detail and build from the box that's what I'm going to stick with, possibly adding detail to the cockpit but it will be afterwards if I do, but probably not. Also I have the pylons attached, I wanted to have them moveable but wasn't convinced of the strength of the parts until I actually fitted them and I can say they fit pretty well and seem surprisingly strong, the same for the horizontal stabs the connection point was something I was going to replace but the parts seem really strong so again it saves money, rather than unnecessarily spend on extras I think I can stick OOB all the way.

Okay, here's the correction that had to be made, it's still OOB by the way lol, I'm just correcting not adding any detail.
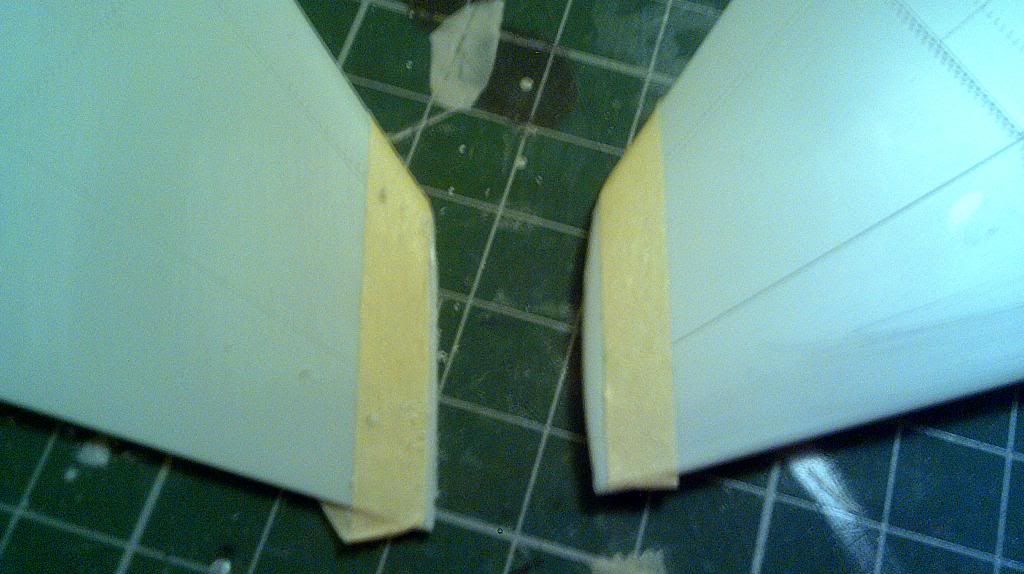
A few mins with a razor saw and tape as a guide and here you go! Very easy fix!
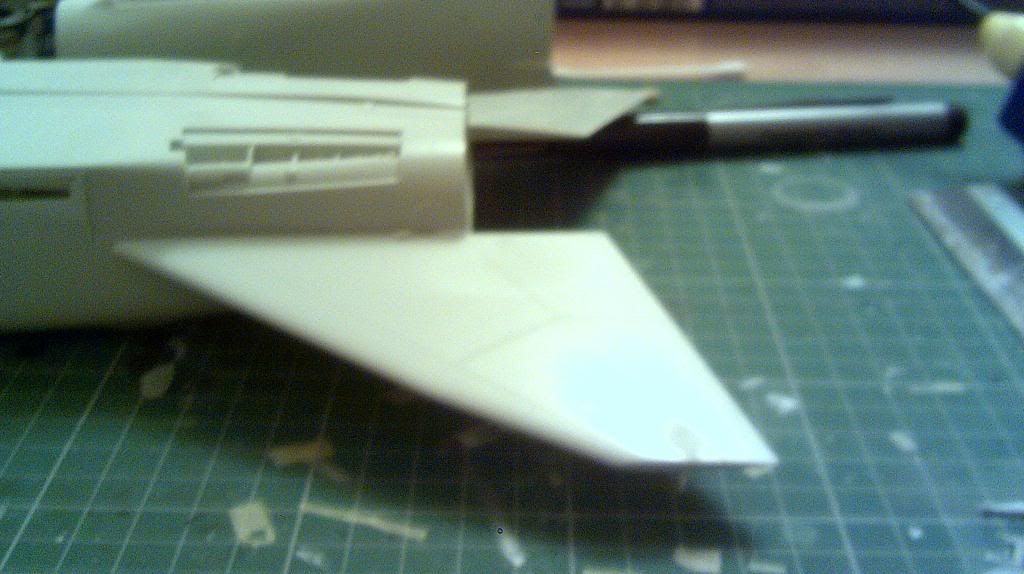
Here we can see that the edge now has the correct flat appearance, and those of you not familiar with my builds will also note my bad photography skills, it's how you know it's actually me and not an imposter.
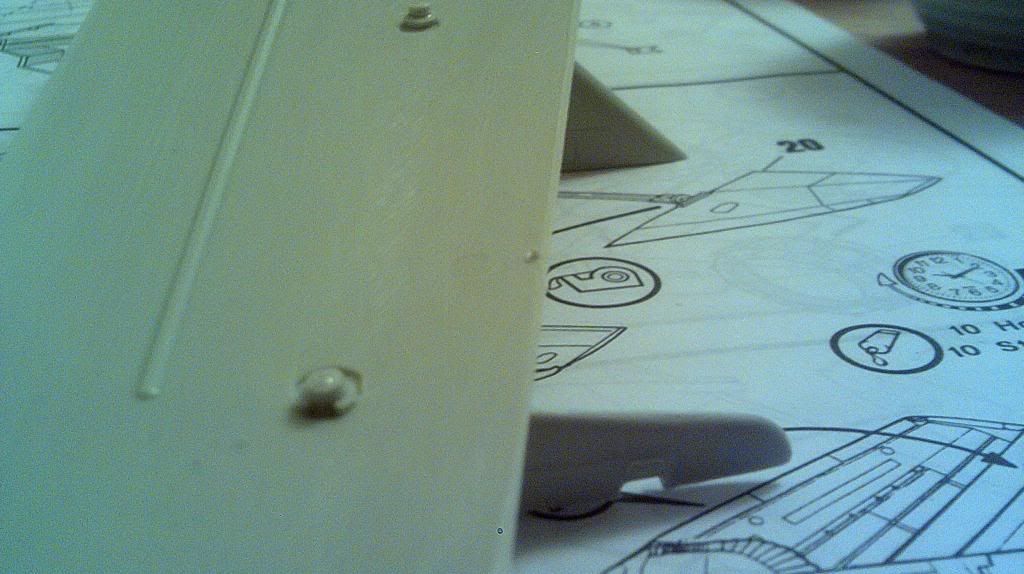
The pylons will move and I want them to so I can move the wings, though I will probably never ever actually move them forward once completed, all I'm actually doing here is making the painting process harder for myself, good that why make it easy?
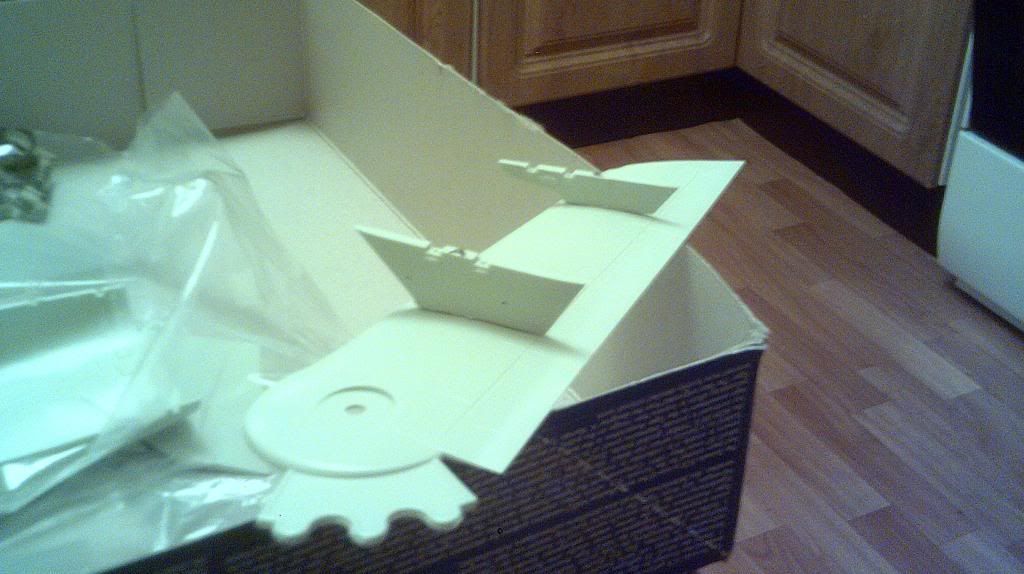
Here the wing underside is completed, I have never seen a Luftwaffe Tornado with dropped flaps and slats when at rest, RAF Tornadoes almost always do, but German never seem to be so no messing around. I just know life is going to take a running kick between my legs when painting this! More to follow soon, the kit is starting to come together quicker than I had thought. 

  • Member since
    September 2013
Posted by Dean30 on Friday, April 4, 2014 3:58 PM

It does but I threw the box in the bin lol, I have used food packaging a few times on builds as food is usually kept in really clear plastic containers which are sturdy to prevent damage which makes them ideal for modelling. I have been tidying up a few seams with this and the fit is pretty good I have to say, if all goes well I'll not need any filler.

Dre
  • Member since
    June 2007
  • From: here, not over there
Posted by Dre on Friday, April 4, 2014 2:34 PM

Sounds like a good product to keep on hand.   Does it take paint well?   You could always paint the backside before gluing it on.

  • Member since
    September 2013
Posted by Dean30 on Friday, April 4, 2014 2:32 PM

It's just clear plastic, but its really really clear and sticks with clearfix, it's really easy to cut, I guess I have the right ingredients for this one lol!

JOIN OUR COMMUNITY!

Our community is FREE to join. To participate you must either login or register for an account.

SEARCH FORUMS
FREE NEWSLETTER
By signing up you may also receive reader surveys and occasional special offers. We do not sell, rent or trade our email lists. View our Privacy Policy.