11/18/2014
Hi Everybody!
You are right CN Spots, both the strength and resolution (.i.e., level of detail) depend heavily on the printer, as well as the material used, since some printers can print various materials. You are also right that the ones that do lower resolution (i.e., more detail) are very expensive. I don’t know what machine C2D uses, but parts of similar quality that Admiralty Modelworks printed for me were printed on a ProJet 3500HD Max Multi Jet Printing (MJP) that cost around $100,000.
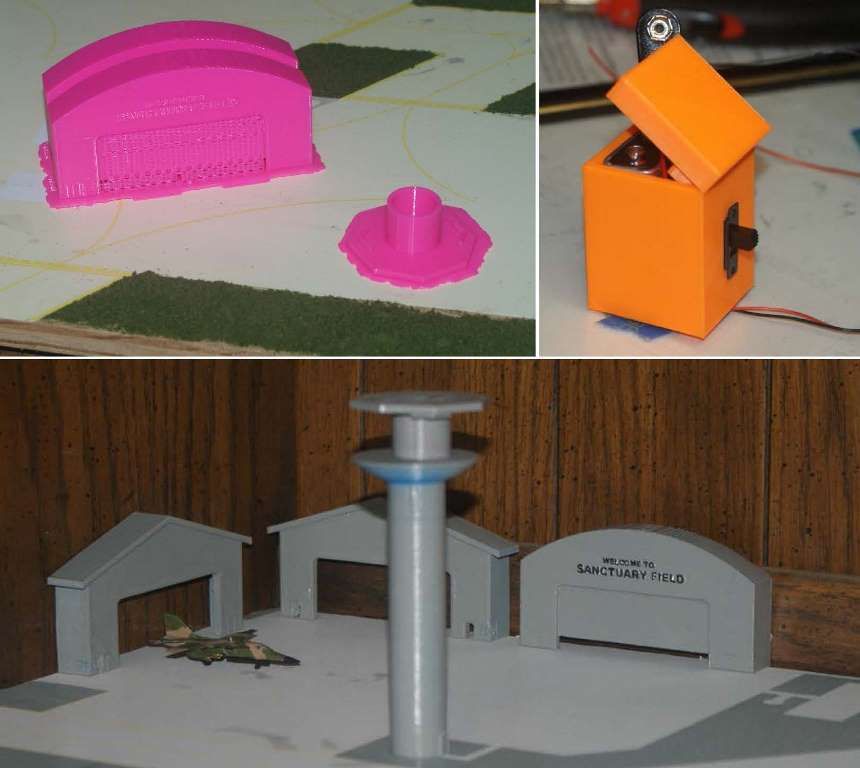
The printers OU has, that I used to print the hangars, tower and battery holder for my diorama, are considerably cheaper, and although they printed these items well. They could not print the airplanes. The video below shows the hangars and tower being printed. The machine melts a thin strand of plastic that is fed from a spool, and lays it down layer by layer. It took about 3-1/2 hours to print.
http://vid1352.photobucket.com/albums/q659/rdutnell/A-4%20Skyhawk/Video-Extrusion_zpscp8bmweu.mp4
On the first try I got marginal results because they ran out of plastic part way through and they guy that reset it didn’t really know what he was doing, so I made another appointment and redid the parts that didn’t do well. The upper left image below shows the parts printed the 2nd time, without the support material removed. The image at upper right shows the battery box. Note the different colors. If you have a preference you can schedule your printing for when .they are printing that color, but since I’m going to paint them anyway, I didn’t care what color they were. The lower image shows them with a coat of gray paint/primer on them. Note that the detailing is good enough that the raised letters I included printed, which made them easier to paint.

The video below shows the SLA printing the Greenling. I didn’t actually get to see it. My friend sent me the video. In the video, the machine first lays down and smooths out a very thin layer of UV curable plastic, then hits it with a UV laser that solidifies the plastic wherever the machine encounters a part. Again it does this layer by layer.
http://vid1352.photobucket.com/albums/q659/rdutnell/A-4%20Skyhawk/Video-SLA_zpsr5gluzc3.mp4
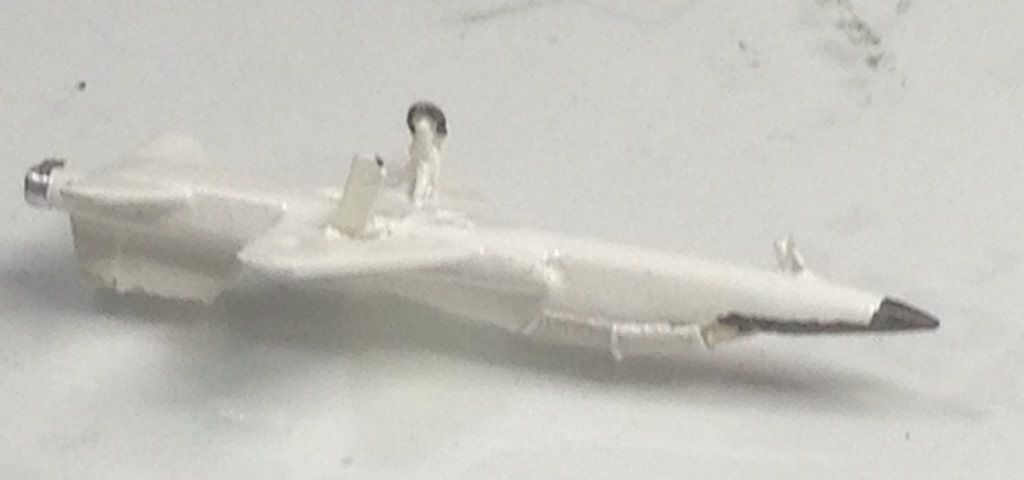
The image below shows the printed model.

As for strength, I have found them to be strong enough for the most part, as long as I don’t make parts too thin. Of course, a fall to a hard floor wouldn’t do them any good. Neither does knocking a coffee cup over on them.

As for the parts being printed on”1st gen” 3D printers, Groot, that’s not really true. My friend, who printed the 1/144 scale USS Greenling, says they have been using their SLA (Stereolithography) printer for over 15 years. The 3DSystems web site says they were the first to commercialize SLA 3D printers in 1989, and Selective Laser Sintering (SLS) printing in 1992. MJP printing followed in 1996, approaching 20 years ago. It’s just that it has only recently grabbed the attention of the press as various uses for the technology are being discovered.
I’m glad you are enjoying the colorful pictures Groot, and I can’t wait to see them either.