SEARCH FINESCALE.COM

Enter keywords or a search phrase below:

1/48 Revell Messerschmitt Bf-109G-10 (Completed)

19850 views
134 replies
1 rating 2 rating 3 rating 4 rating 5 rating
  • Member since
    January 2015
  • From: Tumwater, WA.
Posted by M. Brindos on Monday, June 1, 2015 11:39 AM

Thank you for the compliments guys!!

I do have a small update for you. I found the Achilles heel of this kit; the canopy glass. Its something I wish I had the money to replace.

The gap is 1mm wide in 1:48, wich is about 2.48 inches in 1:1. I'm not sure how I'm going to fix this yet. I've been thinking it over and fortunately I have some black Sheet styrene but it is on the thick side. The canopy frames are not pronounced and if Revell were to update this kit it wouldn't take much besides re-working the canopy in this kit.

I'm glad I'm not displaying this one with the canopy closed, but I could fix it easier if it did it that way. Hiding the new sheet parts when the canopy is not a uniform thickness is going to be tricky enough.  :/

I am indeed an experience brush painter and for the last 5 months now I've been using an air brush and loving it. But yes I think I'm going to put down the main colors with the AB and then brush the camo onto the sides. I've done it before so I know what to expect.

I did this 1/72 109 from Testors last year and had loads of trouble with the decals and had to paint half of them on there after a masking tape problem lifted them off. You can see the mottling on the sides. The entire model was painted by brush and turned out okay.

You can clearly see that the swastika on the tail was far too big for this kit. They all were. So I made this one up as a game piece and it sits on the shelf looking pretty.

So yeah. That canopy is going to take me some time to figure out.

Thanks for your interest. I'll get more pictures up after some more progress has been made.

- Mike Brindos "Lost Boy"

  • Member since
    March 2012
  • From: Corpus Christi, Tx
Posted by mustang1989 on Monday, June 1, 2015 3:44 AM

 Got any updates for us there Mike? Big Smile


 Forum | Modelers Social Club Forum (proboards.com) 

  • Member since
    August 2009
  • From: MOAB, UTAH
Posted by JOE RIX on Sunday, May 31, 2015 7:18 PM

Super work on the 109, Mike. Some great scratchbuilding skills you've got there. Impressive work indeed. I'm certainly looking forward to the finished product.

"Not only do I not know what's going on, I wouldn't know what to do about it if I did". George Carlin

  • Member since
    March 2010
  • From: MN
Posted by Nathan T on Sunday, May 31, 2015 7:07 PM

Great work here! I'm really digging the look of those seat belts. So you're a brush painter huh? Tough to do Luftwaffe stuffs that way. Looking forward to your results.


  • Member since
    January 2015
  • From: Tumwater, WA.
Posted by M. Brindos on Saturday, May 30, 2015 4:58 PM

Thank you very much Brandon.  :) I'll be watching your 190 thread as well.

- Mike Brindos "Lost Boy"

  • Member since
    January 2015
Posted by BrandonD on Saturday, May 30, 2015 3:03 PM

You, sir, are doing a fantastic job on that one. I'm looking forward to following it!

-BD-

  • Member since
    January 2015
  • From: Tumwater, WA.
Posted by M. Brindos on Saturday, May 30, 2015 11:44 AM

Ah, yeah. The liquid cement trick is not for everybody and I can't recommend it. You can totally ruin decals with this trick. It takes vast patience and you have to be 100% sure you never want that decal to move ever again. If you are still interested send me a PM and I'll fill you in on it. But it's a scary thing to watch and if you are not confident in your brush painting skills then you risk ruining your model.

Thank you Toshi! I totally recommend this kit to you my friend. It has just enough detail to make it fun to add stuff. Scratch building 101 is all I've done here. Nothing advanced except for the spinner I suppose, and that only because of the trick I used to get the decal stuck on there. You will really like this kit. The decals are thick as card stock and the paint schemes are a bit tricky, but the kit itself goes together really well and that is a bonus.  :)

Thank you Martin! Not too much further to go before I can start painting the "clothes" lol. The schemes are tricky though and I'm thinking of using some oddball tricks to get the Fuselage patterns right. I've chosen the second scheme which was based in Sweden in 1945. The camo is more intricate on the alt scheme, but the primary box art scheme confuses me. I like the yellow on the primary scheme, but those dark grey patches just don't make sense to my artsy side. They don't belong on one side of the plane only and my OCD triggers just light up when I think of it lol.

Thank you guys for your comments. :)

- Mike Brindos "Lost Boy"

  • Member since
    April 2015
  • From: New Hampshire, USA
Posted by UKguyInUSA on Saturday, May 30, 2015 8:06 AM

Great detail work within that cockpit, it looks awesome! Looking forward to seeing her clothes go on, now!

Cheers,

Martin : )

  • Member since
    March 2015
  • From: Streetsboro, Ohio
Posted by Toshi on Saturday, May 30, 2015 8:02 AM

To M. Brindos,

The detail and discipline needed to to your level is nothing short of amazing!

Toshi

On The Bench: Revell 1/48 B-25 Mitchell


Married to the most caring, loving, understanding, and beautiful wife in the world.  Mrs. Toshi


  • Member since
    June 2013
Posted by RobGroot4 on Saturday, May 30, 2015 4:38 AM

Mike,

 Looking really good thus far, particularly the IP and spinner.  I've never heard of using liquid cement on decals, could you elaborate?

Groot

"Firing flares while dumping fuel may ruin your day" SH-60B NATOPS

  • Member since
    March 2012
  • From: Corpus Christi, Tx
Posted by mustang1989 on Saturday, May 30, 2015 3:09 AM

I didn't know it was that recent of a kit. PM sent.


 Forum | Modelers Social Club Forum (proboards.com) 

  • Member since
    January 2015
  • From: Tumwater, WA.
Posted by M. Brindos on Saturday, May 30, 2015 1:10 AM

Thank you very much Lawdog. :D

- Mike Brindos "Lost Boy"

  • Member since
    February 2012
  • From: Olmsted Township, Ohio
Posted by lawdog114 on Saturday, May 30, 2015 1:08 AM

I echo Mustangs sentiments.  Looking great Mike...

 "Can you fly this plane and land it?...Surely you can't be serious....I am serious, and don't call me Shirley"


  • Member since
    January 2015
  • From: Tumwater, WA.
Posted by M. Brindos on Friday, May 29, 2015 9:43 PM

Thank you very much Mustang! I did not expect a reply so quickly lol.

This is coming together really well for me. It was this or their Dauntless kit with it's all raised details and this one won hands down, but mostly because this is one of my absolute favorite birds.

For a kit released in 1979 it still fits together really well. The decals are rather thick but I know how to make them conform to my will lol.

Thank you again for your compliment! :D

- Mike Brindos "Lost Boy"

  • Member since
    March 2012
  • From: Corpus Christi, Tx
Posted by mustang1989 on Friday, May 29, 2015 9:34 PM

It takes somebody with a load of patience and good skills to bring one of these puppies to life. Looks like you've got both Mike.Yes


 Forum | Modelers Social Club Forum (proboards.com) 

  • Member since
    January 2015
  • From: Tumwater, WA.
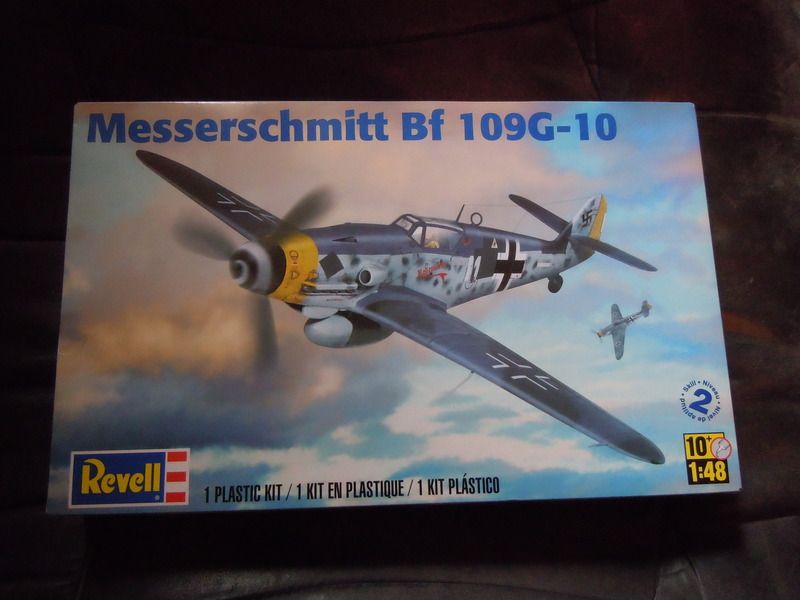
1/48 Revell Messerschmitt Bf-109G-10 (Completed)
Posted by M. Brindos on Friday, May 29, 2015 9:31 PM

Just a side distraction to keep the *** flowing.
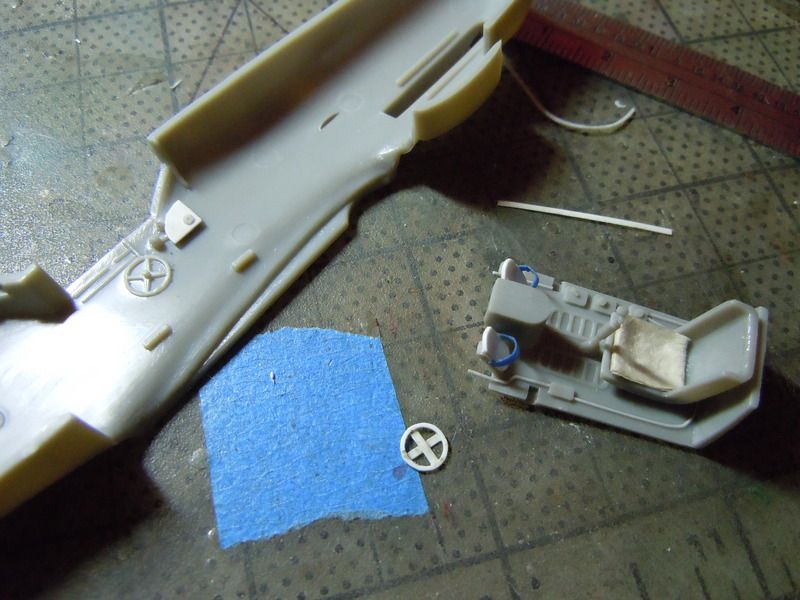
I started by scratch building some details, either missing, or just because I wanted to.
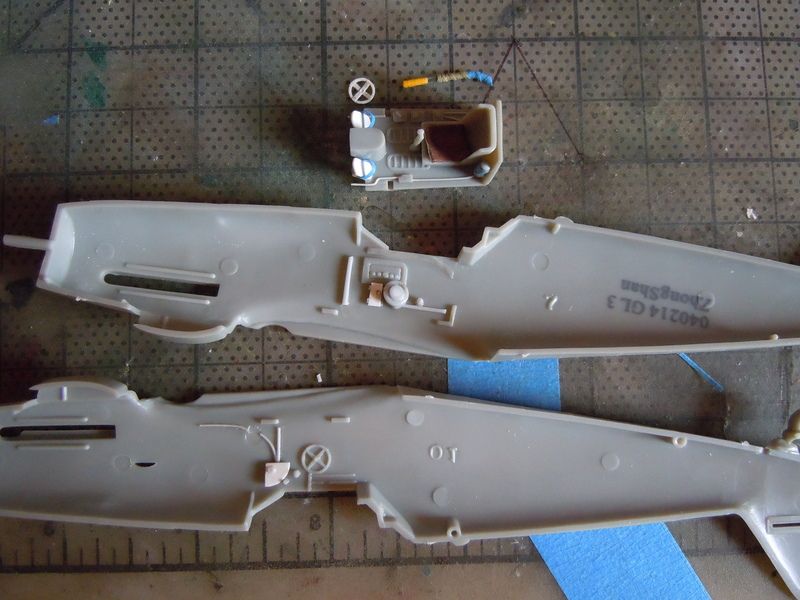
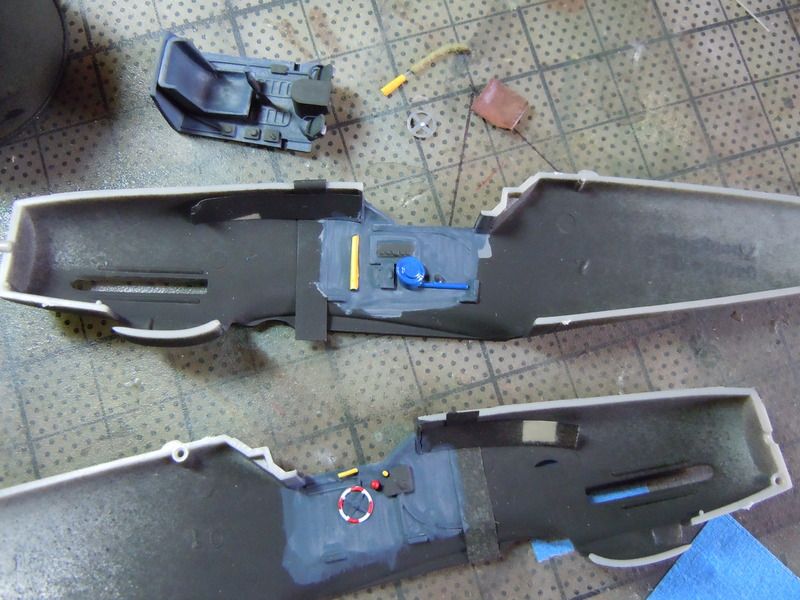
Those trim wheels are way to far up and back but I'm leaving as much of the original kit as possible just because I feel like it. So they stay where they are.
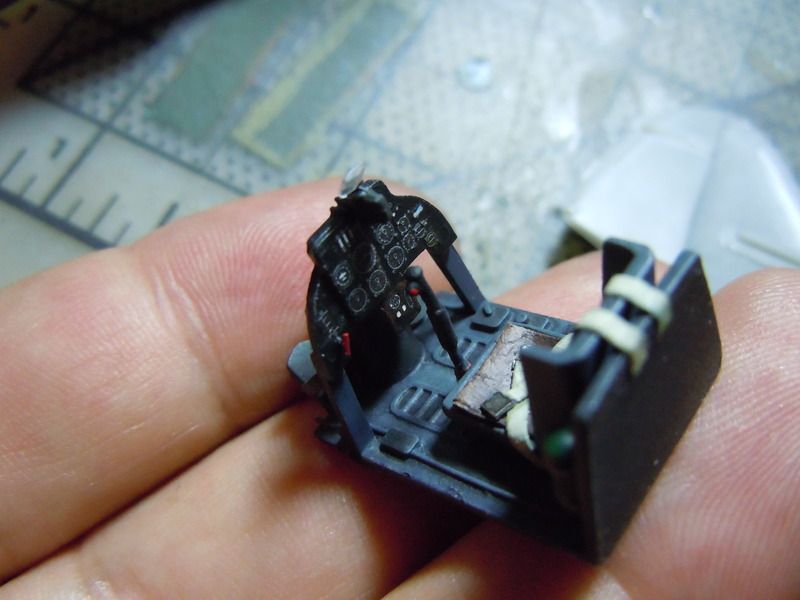
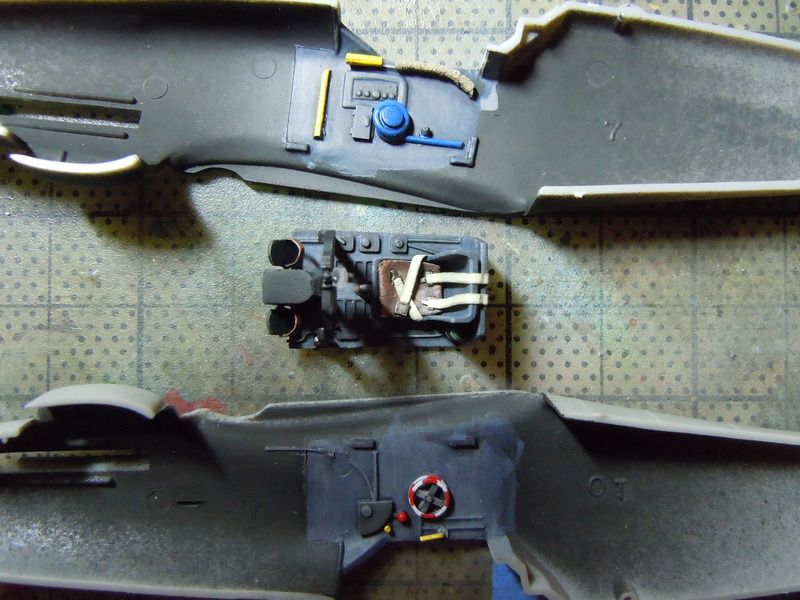
The kit supplied instrument decal took a few swipes of liquid cement before they laid down. They don't fit the panel so be careful in your planning when you get to this point. You'll need to cut them up and place them in four parts.
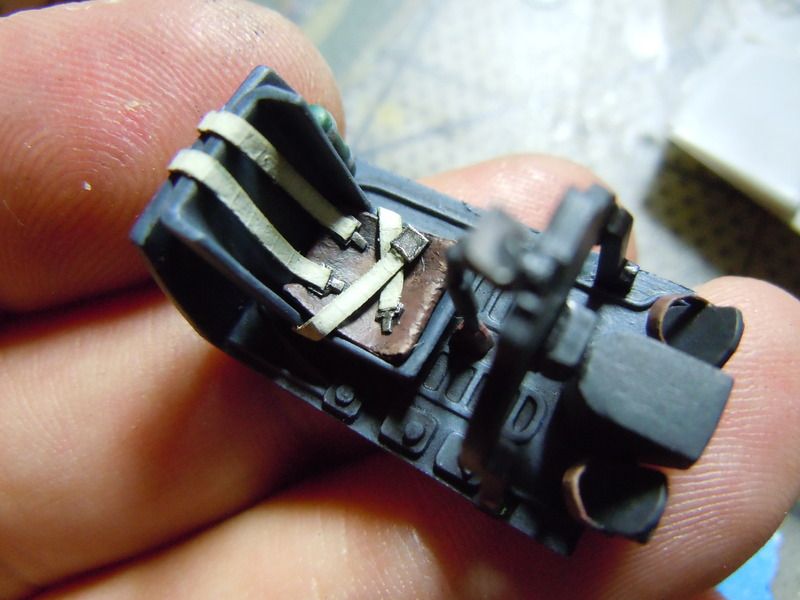
The belts are made out of painter's tape and bits of styrene for the buckles.
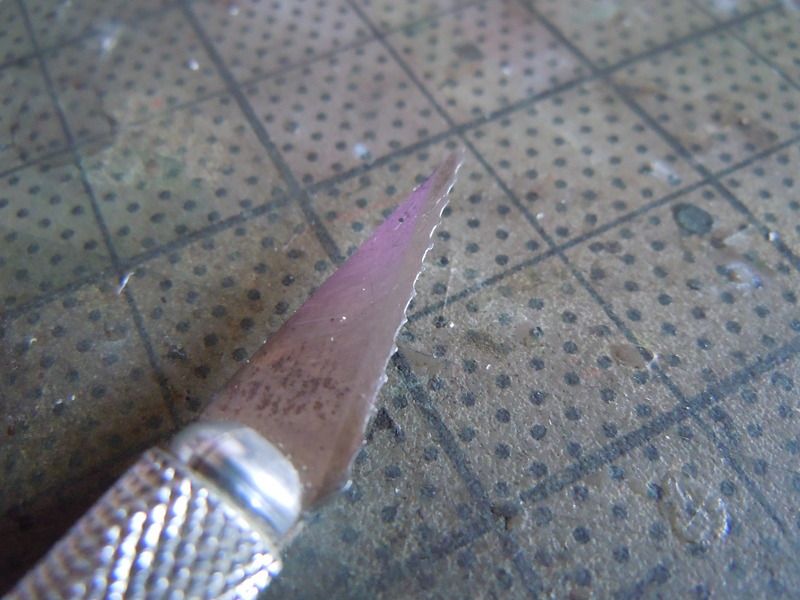
I made myself a scribing tool. I sacrificed a dull No.11 blade and then sharpened it back up with a stone.

It works perfectly :)
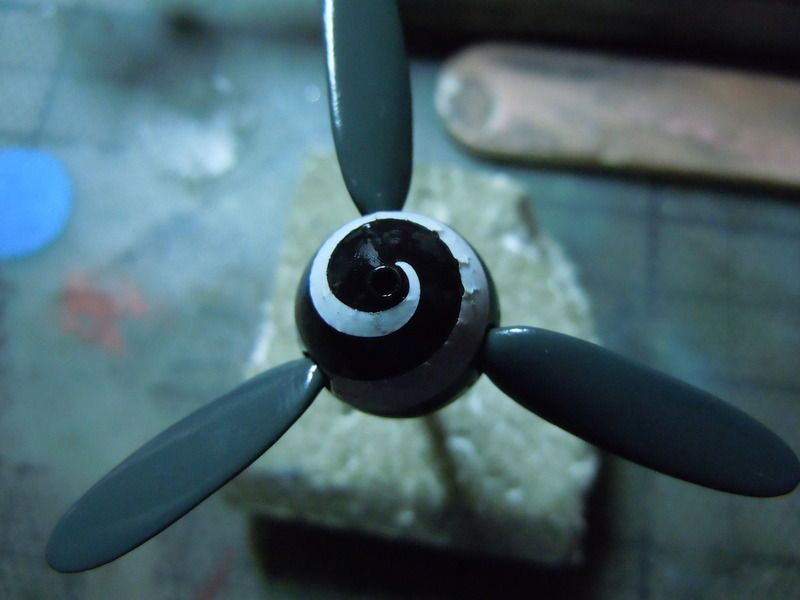
The spinner decal took some serious working-over with 7 applications of liquid cement to get them to settle down. I left it over night and still had to do a bit of sanding to get rid of the stuff that wouldn't settle.
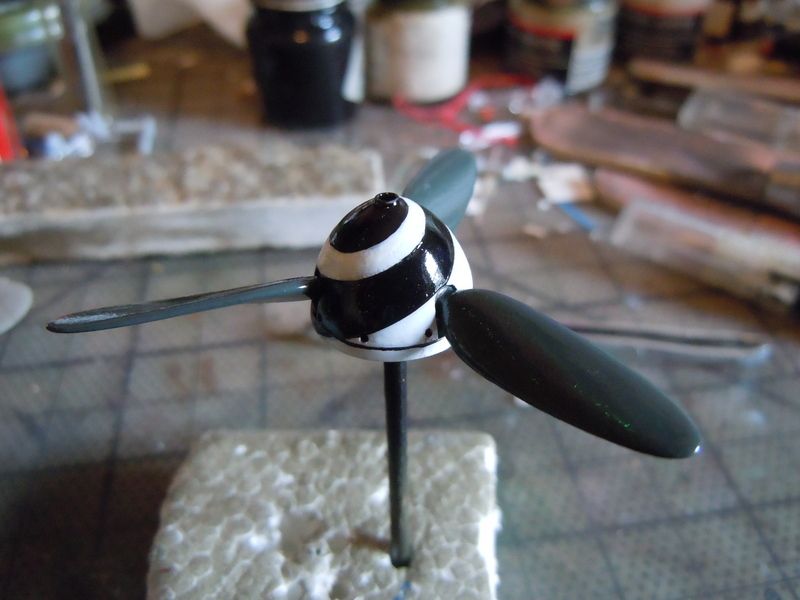
After some painting and a gloss cote it worked out fine.
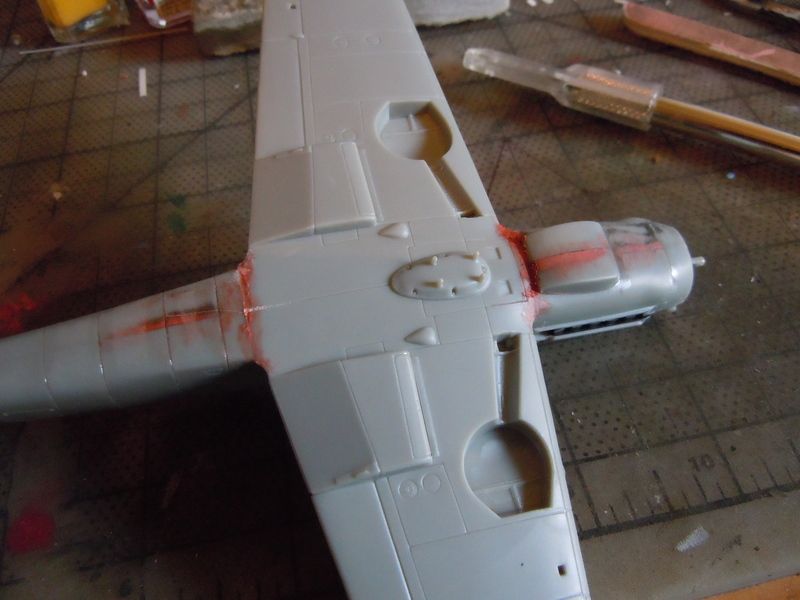
The parts still fit together really well. I've only had to use some putty just to blend things together.
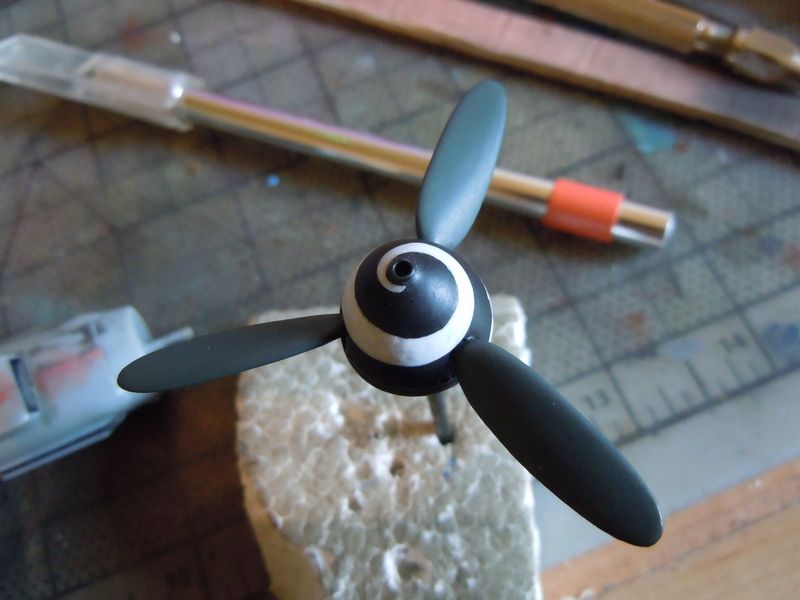
A cote of dull and the spinner is finished until weathering.
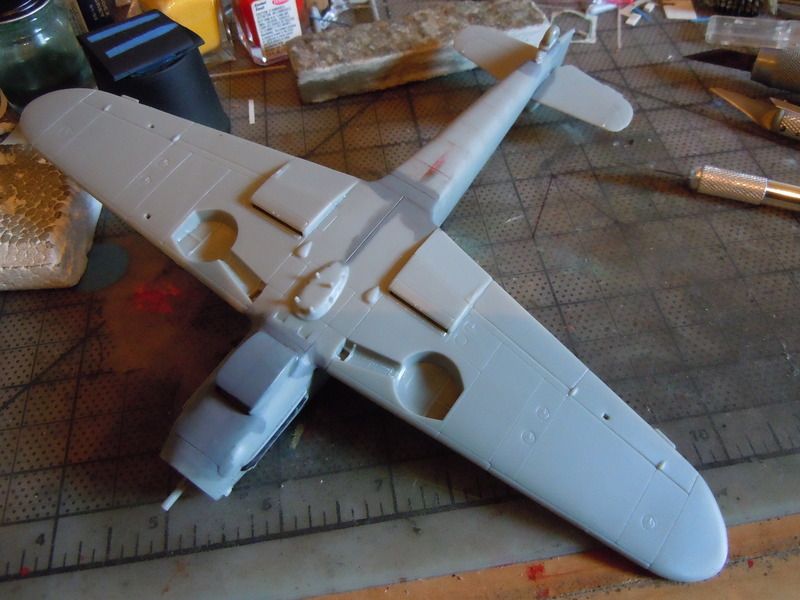
Seams are in good order.
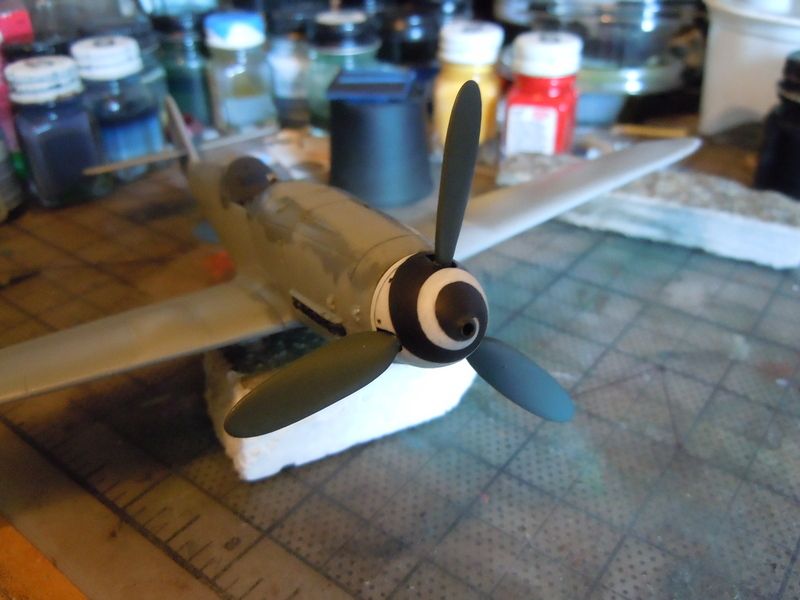
Spinner looks good on her.
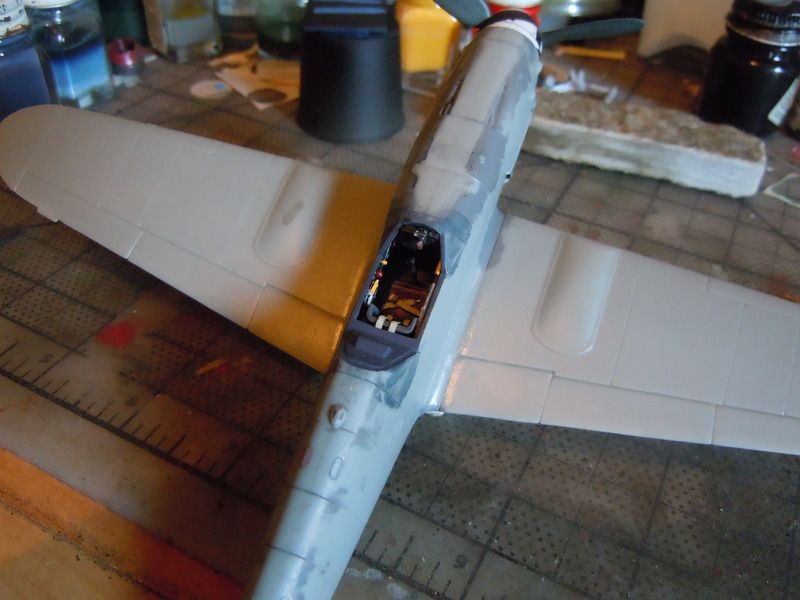
And this is where I'm at with this one.

Thanks for peeking at it. :)


Toshi! If you can find this kit, you will love it. It goes together really well. :)

- Mike Brindos "Lost Boy"

JOIN OUR COMMUNITY!

Our community is FREE to join. To participate you must either login or register for an account.

SEARCH FORUMS
FREE NEWSLETTER
By signing up you may also receive reader surveys and occasional special offers. We do not sell, rent or trade our email lists. View our Privacy Policy.