SEARCH FINESCALE.COM

Enter keywords or a search phrase below:

J J 's B-26 W.I.P.

10208 views
111 replies
1 rating 2 rating 3 rating 4 rating 5 rating
  • Member since
    August 2013
Posted by Jay Jay on Tuesday, July 28, 2015 1:19 PM

Thanks Joe, I've cast a lot of fishing lures in my time so that was like a natural thing to do for me.


 I'm finally retired. Now time I got, money I don't.

  • Member since
    August 2009
  • From: MOAB, UTAH
Posted by JOE RIX on Tuesday, July 28, 2015 12:23 PM

Jay Jay
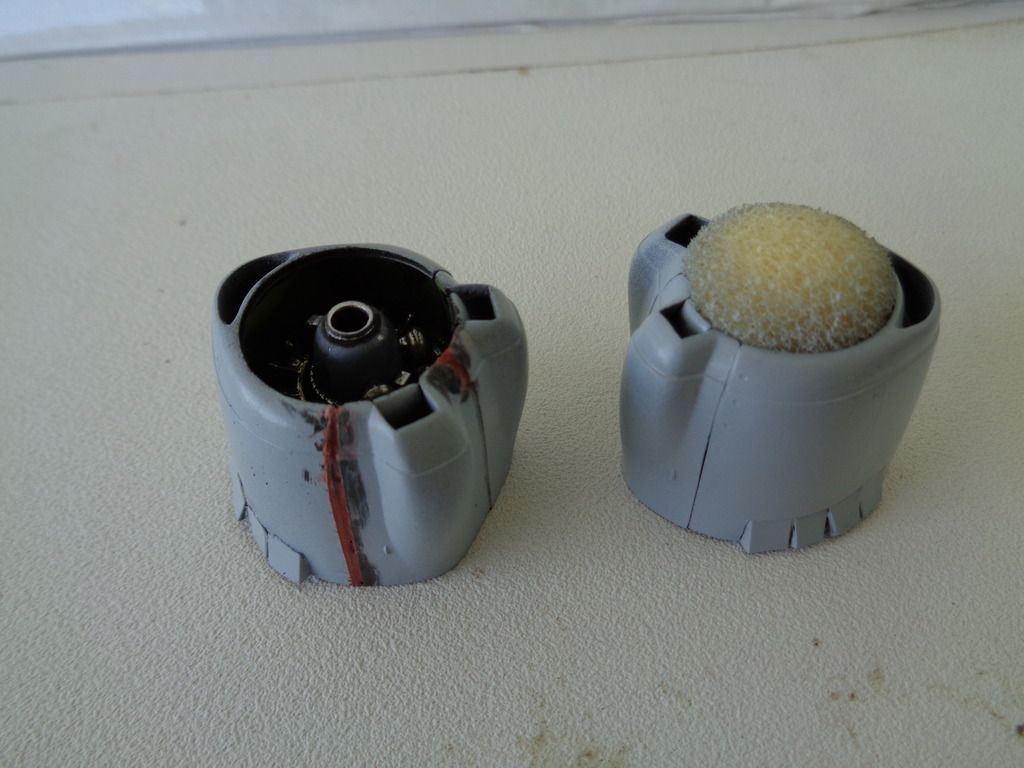
I forgot to add in my WIP that the disks you see inside the nacells are custom cast lead.  I simply made  a mold by drilling an appropriate sized hole in a piece of wood, then poured lead  into it.  I used my wife,s little food scale to pour 1oz lead disks and epoxied them into the nacells so the thing will not tail sit.

Well, I'll be danged. That's downright brilliant Jay Jay. I tip my hat to you.

"Not only do I not know what's going on, I wouldn't know what to do about it if I did". George Carlin

  • Member since
    August 2013
Posted by Jay Jay on Tuesday, July 28, 2015 8:14 AM

To Lawdog;    I have to thank you again for all your tips on here. I couldn't have done it without them. "incredable " ?  you,ve made my day Sir.

To Joe Rix;   Thanks again  and I sure hope so.  I've been building this one with the adage constantly in mind..." I'd better fix this now or be sorry later "  

I forgot to add in my WIP that the disks you see inside the nacells are custom cast lead.  I simply made  a mold by drilling an appropriate sized hole in a piece of wood, then poured lead  into it.  I used my wife,s little food scale to pour 1oz lead disks and epoxied them into the nacells so the thing will not tail sit.


 I'm finally retired. Now time I got, money I don't.

  • Member since
    August 2009
  • From: MOAB, UTAH
Posted by JOE RIX on Monday, July 27, 2015 9:20 PM

You've 'er looking good so far Jay Jay. The tedious work that you're putting into it now is going to pay off huge in the end.

"Not only do I not know what's going on, I wouldn't know what to do about it if I did". George Carlin

  • Member since
    February 2012
  • From: Olmsted Township, Ohio
Posted by lawdog114 on Monday, July 27, 2015 6:23 PM

Your work is incredible, especially on this old kit.  I'm sorry I missed this one until now.  

Joe

 "Can you fly this plane and land it?...Surely you can't be serious....I am serious, and don't call me Shirley"


  • Member since
    August 2013
Posted by Jay Jay on Monday, July 27, 2015 2:09 PM

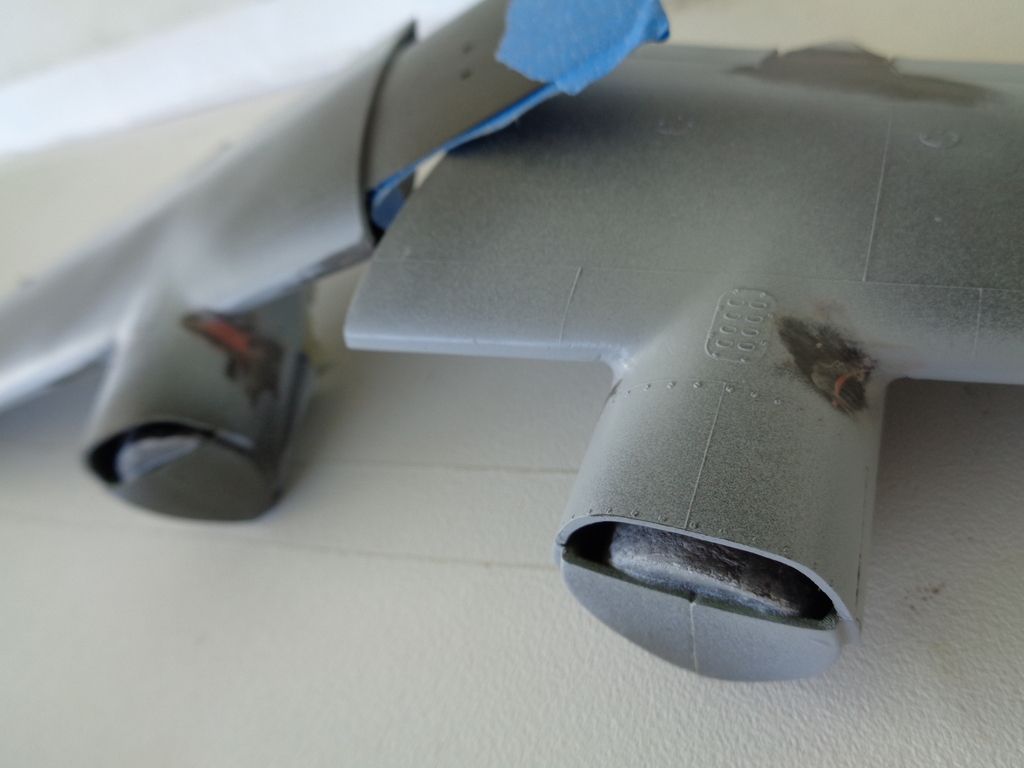
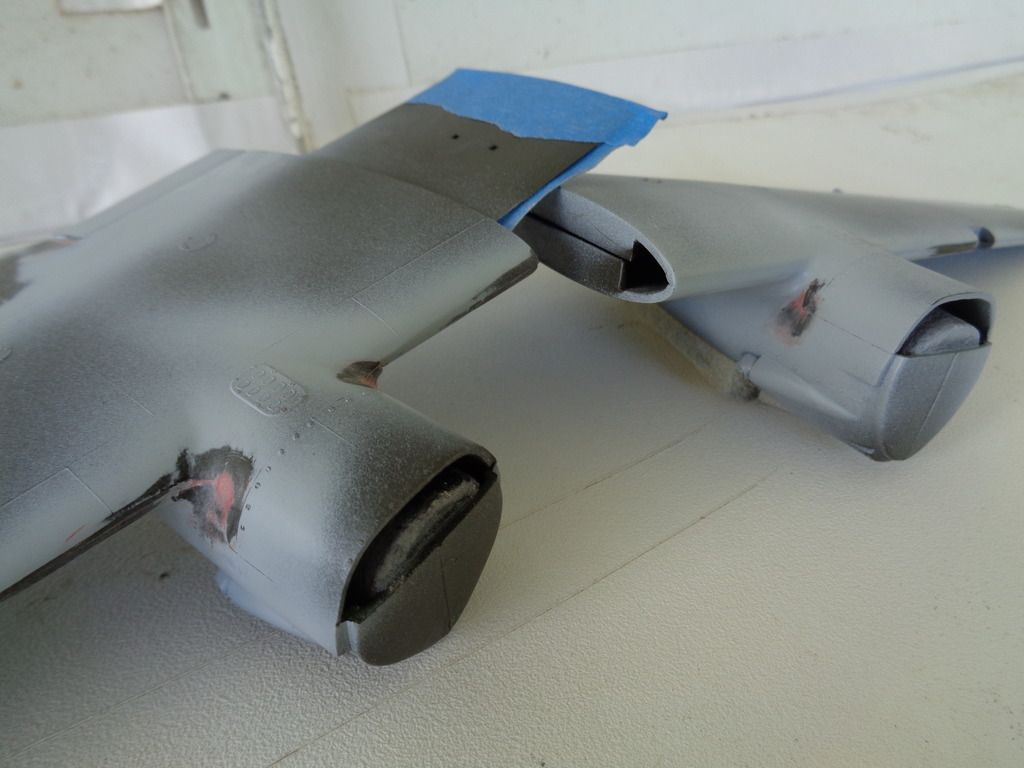
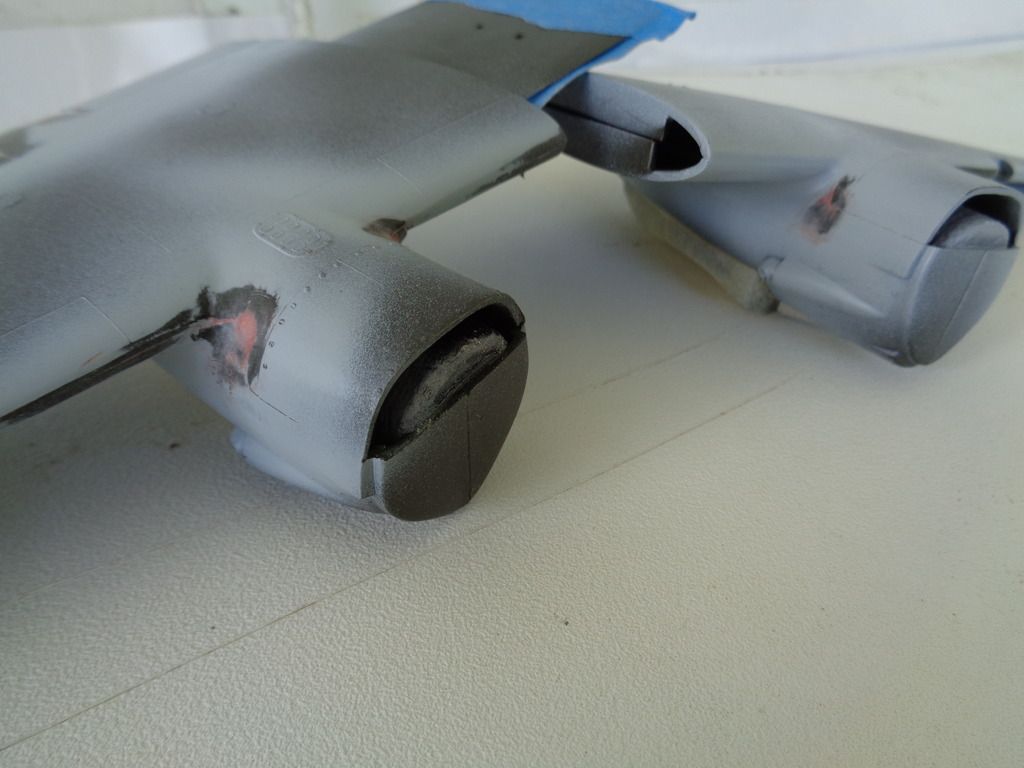
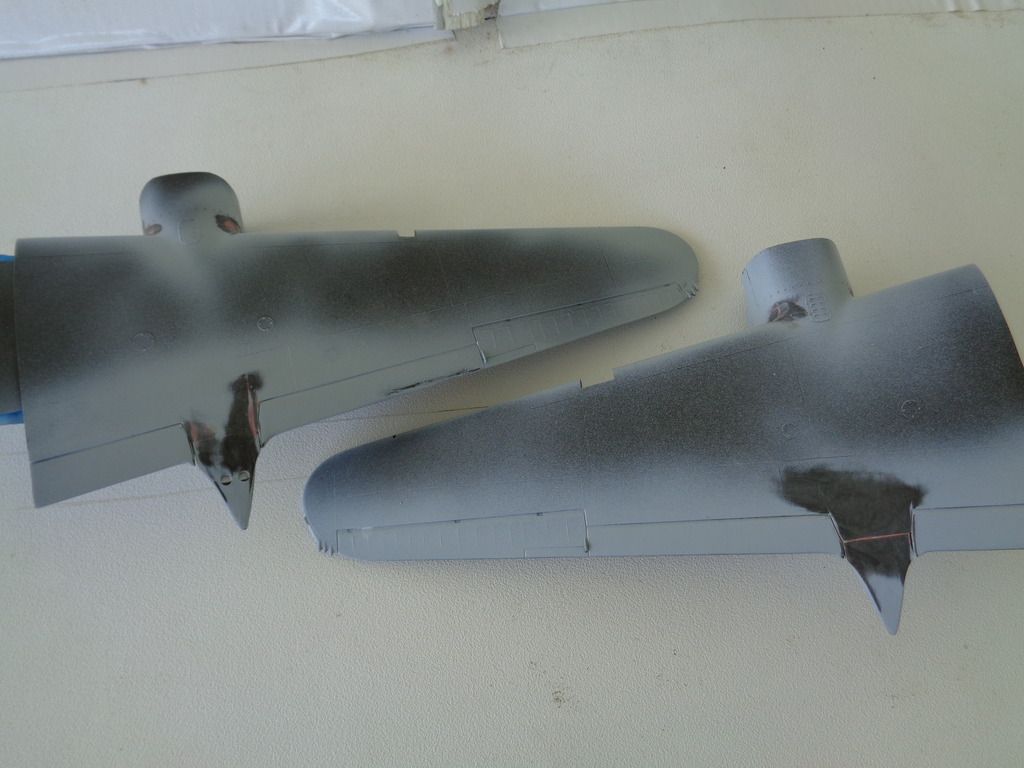
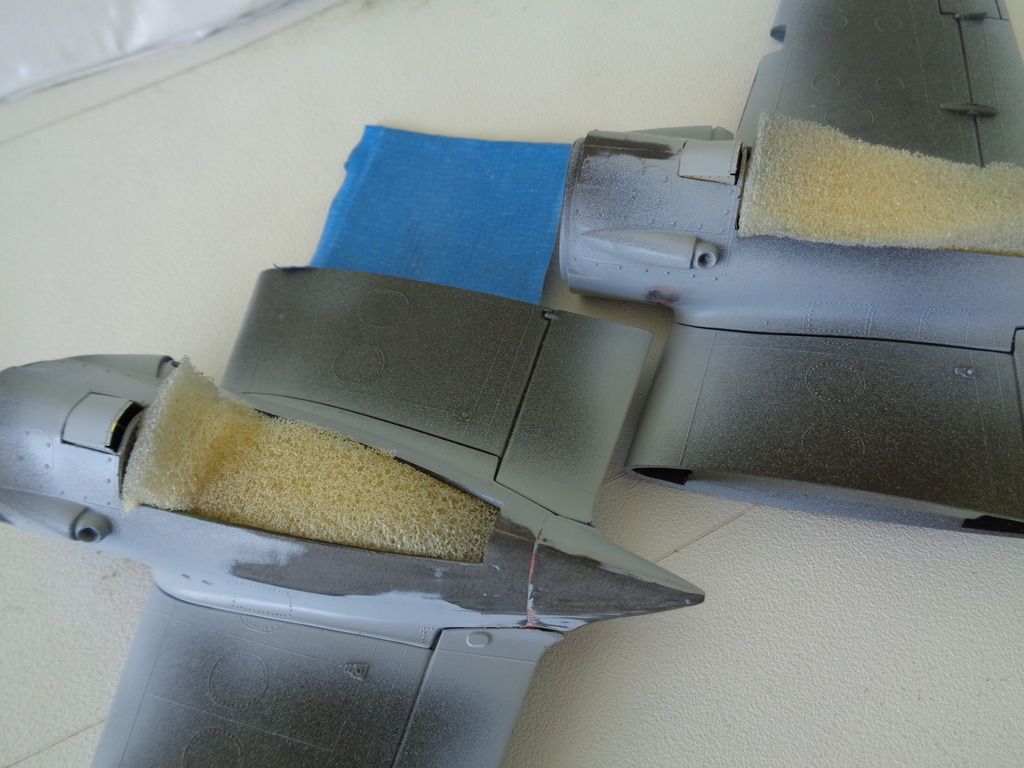
The pink colored filler you see are the actual holes where the parts didn't fit right, filled with the bondo


 I'm finally retired. Now time I got, money I don't.

  • Member since
    August 2013
Posted by Jay Jay on Monday, July 27, 2015 2:05 PM

       Hi Gang,

Finally , after much trials and tribulation, here's my update to the B-26.

The wings where assembled , sanded and primerd with Alclad Primer and micro scratch filler.  This is the 1st. time I used this stuff and I am impressed.  No polishing of the plastic was required prior to priming, but I did clean everything  with 91% alcohol like Lawdog says.   The fit of the engine / wheel nacells left much to be desired especially in the hardest to sand areas where they fit up with the wings... that figures.  

The 1st 4 pics are of these areas after fixing.

1 step Bondo was used smoothing it out some with a Q-Tip dipped in acetone...( that's a cotton bud for you Brits. lol ) then CAREFULLY  filed and sanded to avoid removing the raised details. Man that took some time to accomplish.

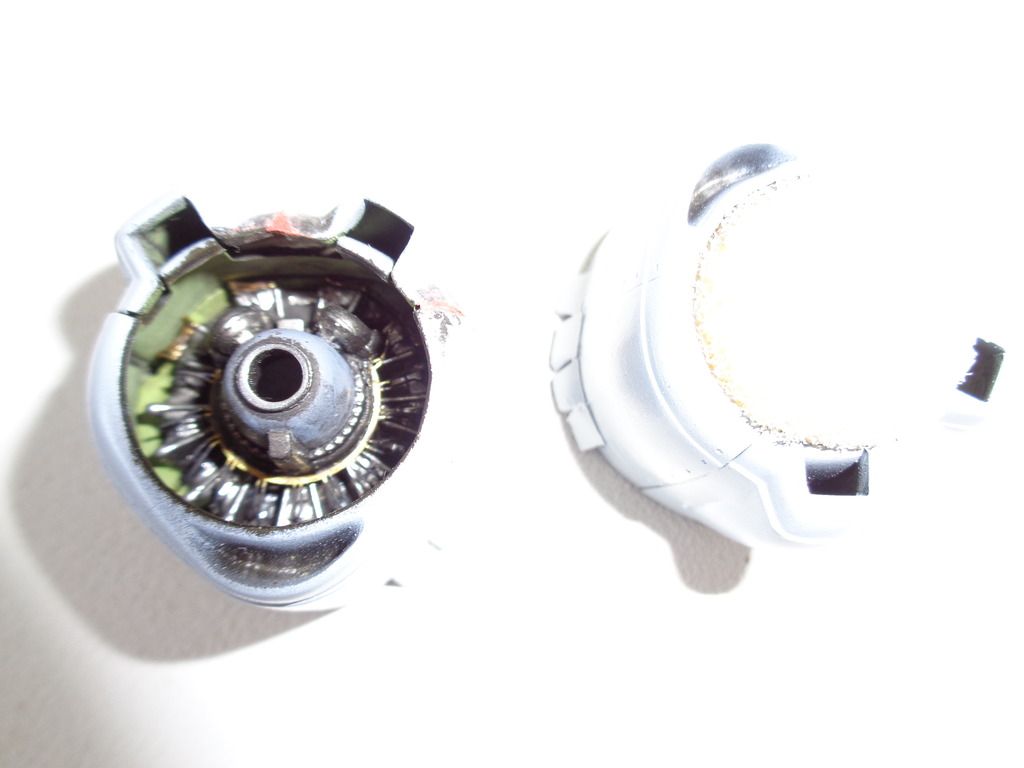
The last 2 pics are of the fixed, filed and sanded engine cowlings(  Arrrgh !) with the PE exhaust flaps installed. That was fun and I really mean it Herbie.  

I now can begin to understand why big bucks are spent on model kits. The expensive ones just hafta fit better than this $25 one.  More time was spent on this kit fixing the ill fitting parts than anynthing else combined. Waaaa.  and I'm only half done with the ass'y.  But because of all you good fellows' advice on here, I'm up to the challenge.

Next up is the ass'y of the fuselage halves and completing the Bomb Bay PE stuff.

I'm going to also pose the canopy in the open position with the gull wings and side glass open.  I have a vacuu-formed canopy on the way to facilitate this operation.


 I'm finally retired. Now time I got, money I don't.

  • Member since
    March 2015
  • From: Streetsboro, Ohio
Posted by Toshi on Thursday, July 16, 2015 12:09 PM

Your engine is amazing, I wish I could do that.  Fantastic job, and the flaps look absolutely fine to me.

Toshi

On The Bench: Revell 1/48 B-25 Mitchell


Married to the most caring, loving, understanding, and beautiful wife in the world.  Mrs. Toshi


  • Member since
    August 2013
Posted by Jay Jay on Thursday, July 16, 2015 10:15 AM

P.S.  an oil wash was used on the engines as it seemed appropriate  lol


 I'm finally retired. Now time I got, money I don't.

  • Member since
    August 2013
Posted by Jay Jay on Thursday, July 16, 2015 10:12 AM

   I hit a formidable wall guys.  

Installing the PE exhaust flaps on the engine nacells is a real bear and I'm having a hard time figuring out how to best do it.  You hafta cut out the molded in flaps , which was done with a razor saw, then bend 4 tiny flaps and CA them into the space on the naccells.  Maybe I can CA the flaps together on a piece of tape  then install them on the naccells IDK .  The 1st. try is not so pretty good.

Any advice would be greatly appreciated.

The next pic is of the finished engines, all painted, washed and wired.  Wow the PE wiring is so small you can't hardly see it.

Last pic of the Bomb bay doors bent with the PE hinges installed and finished on the inside.

Ty for the read and reply.


 I'm finally retired. Now time I got, money I don't.

  • Member since
    September 2005
  • From: North Pole, Alaska
Posted by richs26 on Wednesday, July 8, 2015 2:59 PM

Olive Drab #41 is the official OD designation for USAAF aircraft until it was revised in 1943 for ANA 613 is which is the same as the paint that Army Ground Forces equipment used.  Hueys used a totally different green color from OD #41 and ANA 613.

WIP:  Monogram 1/72 B-26 (Snaptite) as 73rd BS B-26, 40-1408, torpedo bomber attempt on Ryujo

Monogram 1/72 B-26 (Snaptite) as 22nd BG B-26, 7-Mile Drome, New Guinea

Minicraft 1/72 B-24D as LB-30, AL-613, "Tough Boy", 28th Composite Group

  • Member since
    August 2013
Posted by Jay Jay on Wednesday, July 8, 2015 11:29 AM

To Richs26

I viewed pics during my research that show the B-26 with a dark OD paint and I like the look so I'm going with that.  Weather it's an OD #41 or not IDK, not familiar with the # paint designation .

I did a Huey with the MM OD and was not crazy about the color, so I'm mixing my own OD with Tamiya OD and a little Tamiya brown.


 I'm finally retired. Now time I got, money I don't.

  • Member since
    January 2003
  • From: Poland
Posted by Aleksander on Tuesday, July 7, 2015 5:39 PM

I'm rather rare visitor here and I see I've missed a lot - great looking job so far!

  • Member since
    September 2005
  • From: North Pole, Alaska
Posted by richs26 on Monday, July 6, 2015 9:58 PM
Ty Rich for your learned advice on the colors but I think it's too late for me to change it now. I just don't wanna re-do the whole interior for fear of messing it up. Jay Jay, your Zinc Chromate Green is more like an Interior Green color and looks perfect. Keep going for a strong finish. Are you going to do an OD 41 outside finish, NMF finish, or a Continental-based RAF green finish?

WIP:  Monogram 1/72 B-26 (Snaptite) as 73rd BS B-26, 40-1408, torpedo bomber attempt on Ryujo

Monogram 1/72 B-26 (Snaptite) as 22nd BG B-26, 7-Mile Drome, New Guinea

Minicraft 1/72 B-24D as LB-30, AL-613, "Tough Boy", 28th Composite Group

  • Member since
    August 2013
Posted by Jay Jay on Monday, July 6, 2015 7:29 PM

Woot !   thanks a ton Huey !  I'm so glad you think so.


 I'm finally retired. Now time I got, money I don't.

  • Member since
    July 2015
Posted by Huey54 on Monday, July 6, 2015 12:35 PM

Incredible work!

  • Member since
    August 2013
Posted by Jay Jay on Monday, July 6, 2015 9:30 AM

Thank you so much Brindos . Your comments mean a lot to me.


 I'm finally retired. Now time I got, money I don't.

  • Member since
    August 2013
Posted by Jay Jay on Monday, July 6, 2015 9:29 AM

"Just saw this. =] Really nice so far.  Are you in the Boeing GB?"

No BV, I'm not in the GB.  I build far too slow for that, but many thanks for the compliment my friend.

Besides, I think the B-26 was built by Martin not Boeing.


 I'm finally retired. Now time I got, money I don't.

  • Member since
    August 2013
Posted by Jay Jay on Monday, July 6, 2015 9:16 AM

TY Fightinjoe,

The props ,as well as the wheels and engines, are a base coat of decanted Krylon Fusion Gloss black , masked and oversprayed with Alclad II Aircraft Aluminum ,very lightly sprayed at at about 10 psi.

The Bomb bay is Alclad II  Polished Aluminum which is , strangely enough , less shiny than the Aircraft Alum . shade.

I'm going to wire the engines and the dirty them up a bit, along with the props, so the Alclad is just for a highlight effect when done.


 I'm finally retired. Now time I got, money I don't.

  • Member since
    September 2011
Posted by fightnjoe on Monday, July 6, 2015 8:46 AM

Beautiful work.  Gotta tell me though, what did you use for the interior of the props.  It looks awesome.

Joe

Veterans,

Thank You For Your Sacrifices,

Never To Be Forgotten

Where you can find me:

Workbench on FaceBook  Google Plus  YouTube

  • Member since
    February 2011
Posted by knox on Monday, July 6, 2015 8:14 AM

  You are doing such a great job on this kit.  I'm enjoying the updates as they come.                            knox

  • Member since
    December 2002
  • From: Northern California
Posted by jeaton01 on Monday, July 6, 2015 1:24 AM

Very nice modeling!

John

To see build logs for my models:  http://goldeneramodel.com/mymodels/mymodels.html


  • Member since
    August 2009
  • From: MOAB, UTAH
Posted by JOE RIX on Sunday, July 5, 2015 11:38 PM

Jay Jay
That's certailnly high praise from a pro such as yourself.

Whoa Nellie! Although I am flattered by your kind comment, I am a long ways from being any semblance of a pro. Heck, I've only managed to complete 7 models since I got back into the hobby 6 yrs. ago. Not quite enough to thoroughly hone my skills.

"Not only do I not know what's going on, I wouldn't know what to do about it if I did". George Carlin

  • Member since
    June 2013
Posted by bvallot on Sunday, July 5, 2015 10:34 PM

Just saw this. =] Really nice so far.  Are you in the Boeing GB?

On the bench:  

Tamiya F4U-1  Kenneth Walsh


  • Member since
    August 2013
Posted by Jay Jay on Sunday, July 5, 2015 12:39 PM

Ty Joe, I'm really glad you took your turn to hit me   LOL

That's certailnly high praise from a pro such as yourself.


 I'm finally retired. Now time I got, money I don't.

  • Member since
    August 2009
  • From: MOAB, UTAH
Posted by JOE RIX on Sunday, July 5, 2015 11:39 AM

All right JJ, It's my turn to hit you with a load of kudos. All of the interior work you have done looks stellar. The painting, detailing and PE work all look sweet. You have done some really fine work so far that's for sure. I'm impressed with your seat cushions. They look the part. The work you've done on the props, wheels and bombs is sharp and clean. Tamiya tape for the bombs? Hmm, I need to remember that little trick as it looks great. Keep that good stuff coming. I'm likin' it.

"Not only do I not know what's going on, I wouldn't know what to do about it if I did". George Carlin

  • Member since
    August 2013
Posted by Jay Jay on Sunday, July 5, 2015 8:10 AM

Your very kind BrandonK , Silent Bob and Toshi and I thank you so much for your encouraging coments.

Ty Rich for your learned advice on the colors but I think it's too late for me to change it now. I just don't wanna re-do the whole interior for fear of messing it up.

To SilentBob;  Heed Rich's advice on here and don't paint everything Zinc Chromate green when you build yours

To Toshi;  On the bomb stripes ;   I simply cut thin strips of Tamiya tape, painted them yellow and stuck them on the bombs.


 I'm finally retired. Now time I got, money I don't.

  • Member since
    September 2005
  • From: North Pole, Alaska
Posted by richs26 on Saturday, July 4, 2015 11:36 PM
Jay Jay

I guess you're saying the Chromate green is not right Rich ?   What color were the earlier models since that is what I am leaning towards building ?

Jay Jay, what you are building is the long wing Block B-10+ (Baltimore built were B's, Omaha built were C's). They had green interiors compared to the original B-26's and A models which were NMF. A lot of museum "restorations" which uses the term very loosely are not accurate depictions of the real thing. The NASM Block B-25 "Flak Bait" is the only completely original Marauder in the world. Kermit Weeks' original first model B-26 is close with the interior have been painted a light gray instead of NMF. So I would use photos of "Flak Bait" as a guide in your build as it is certifiably original from when it was dismantled in 1945 to now.

WIP:  Monogram 1/72 B-26 (Snaptite) as 73rd BS B-26, 40-1408, torpedo bomber attempt on Ryujo

Monogram 1/72 B-26 (Snaptite) as 22nd BG B-26, 7-Mile Drome, New Guinea

Minicraft 1/72 B-24D as LB-30, AL-613, "Tough Boy", 28th Composite Group

  • Member since
    June 2014
Posted by BrandonK on Saturday, July 4, 2015 10:15 PM

That thing is looking great.

On the bench:

A lot !! And I mean A LOT!!

2024 Kits on deck / in process / completed   

                         14 / 5 / 2  

                              Tongue Tied

  • Member since
    February 2014
  • From: Michigan
Posted by silentbob33 on Saturday, July 4, 2015 9:50 PM

Looks really good to me JJ!  I have this kit in the stash so I'll be following along closely.

On my bench: Academy 1/35 UH-60L Black Hawk

JOIN OUR COMMUNITY!

Our community is FREE to join. To participate you must either login or register for an account.

SEARCH FORUMS
FREE NEWSLETTER
By signing up you may also receive reader surveys and occasional special offers. We do not sell, rent or trade our email lists. View our Privacy Policy.