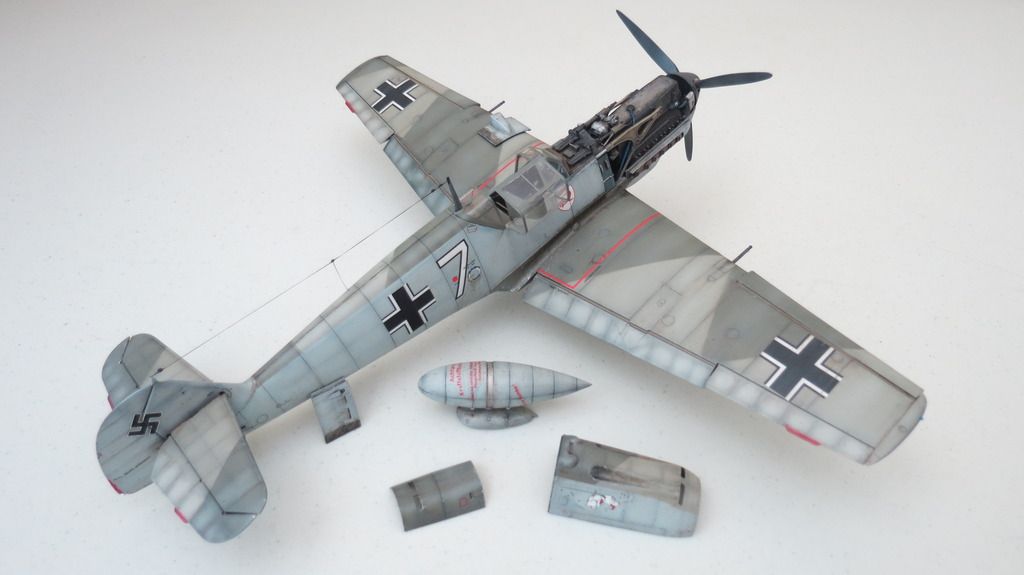
If you've followed my build updates for this kit, you'll be aware of the fit issues that were present when trying to assemble the engine, bulkhead and firewall into the space provided, having to file around 2.0mm away on the width and length of the engine assembly and fuselage internal walls combined, along with filing down the length of the internal assembly and its location points within the fuselage to get it to fit. I also had to jack up the engine with spacers to ensure the exhausts stacks lined up with the apertures that they go through, as well as file the exhaust aperture to make them wider and longer due to the exhausts being larger and not going through.
Regarding whether I think this is a VFM kit - "Value For Money" kit, the answer would be an unequivocal and resounding "No"!
I base this on the cost of the kit compared to the newly tooled Revell Germany 1/32 BF109G-10 that I modelled. Although the Revell kit doesn't come with a Daimler-Benz DB601A engine, it does have nice cockpit and external details and goes together extremely well without the need for filler. The Eduard kit is 50% more expensive than the Revell Germany kit and one has to ask oneself..."Do I want to pay 50% more just to include an engine that is problematic to fit?". Also, if you chose not to display the engine with the Eduard kit, then I would say that you'd be wasting your money paying the extra for a kit that includes an engine, for it not to be used...you definitely should choose the Revell kit if you take that option and save yourself $12.00.
The Revell Germany 1/32 BF109G-10 was $23.95 and the Eduard 1/32 BF109E-3 was $35.95.
Regarding providing my scores for the overall quality of engineering, quality of molded product, quality of details included, quality of the instruction manual and the decals and packaging, I score as follows:
Quality of Engineering Fits: 4/10 based on how badly engineered the internal assemblies were when fitting inside the fuselage halves. Filler was required in a few places. The worst gap was at the underside front end of the two fuselage halves. The gap was around 2.0mm, which led me to file down the front exhaust stacks and the inside faces of the fuselage halves where they mated. Without destroying the exhaust stacks, there was still a gap of around 0.75mm that I filled. There were also gaps all around the rear area of the wing assembly where it joins the fuselage on the belly of the plane. I had to fill these areas, too.
Quality of molded product: 9/10- the product is very nicely molded, parts are crisp and clean with just a few spots of flash. No warp was present on any of the parts and ejector pin witness marks were away from visual area. I didn't have any sink marks to contend with and the canopy parts were nice and clear with minimal distortion when looking through. There are finely recessed panel lines and rivet details, although some of the rivet details are too fine for them to show when the plane is given a dirt wash during the finishing stage. A good rivet forming tool would cure that, should you have one and want to attempt improving them.
Quality of details included: 8/10- The included engine, bulkhead and firewall have nice details that look good at the end of the build, but they require a lot of patience to get them to fit. The undercarriage is nicely detailed too and includes brake lines and treaded tyres. The cockpit is very nicely detailed and would e enhanced more with after-market seatbelts and foot pedals, but as always, I build "Out of Box" to establish a fair assessment of what you're getting for you money compared to similar kits.
Quality of the instruction manual: 9/10- I thought it was very easy to follow, but, it would be nice if the painting instructions were in color. They are if you chose to buy the "Profi-Pak" version instead of this "Weekend Edition" version.
Quality of Decals: 8/10- There is only one option for color and markings. The main decals are very good and go down well onto a gloss clear coat in combination with a good decal setting solution, adhering to recesses and surfaces features. However, some of the smaller stencils had a tendency to "Silver" which I hid with weathering and painting ove the silver areas.
Quality of packaging: 9/10- the box is a two part base and lid construction with the base being very sturdy cardboard. I prefer the base and lid style rather than the open end version provided by Revell. Sprues are packaged in clear polythene bags.
Further notes: I wouldn't recommend this kit to a beginner because of the fit issues, it's definitely a kit for the more experienced modeler who has patience to overcome the fit issues.
Did I enjoy the build?- I did up until the fit issues arose, then it was a "Debbie downer" until those were overcome. Then after that, the rest of the build was smooth sailing.
Would I buy this kit again? NO! I'd hope that Revell Germany would Introduce the engine details into their kits for an extra $5.00 which I'd pay willingly, as long as there were no issues. Or, I'd recommend the Trumpeter 1/32 BF109E models that come complete with engine details, a fret of PE and rubber tyres.
If you'd like to see my "Final Reveal" video for this update, here is the link to that:
https://youtu.be/ej54LH-n8iY
Thanks for following along and for your comments, much appreciated! 

Happy modeling and have fun!
Cheers 

Martin