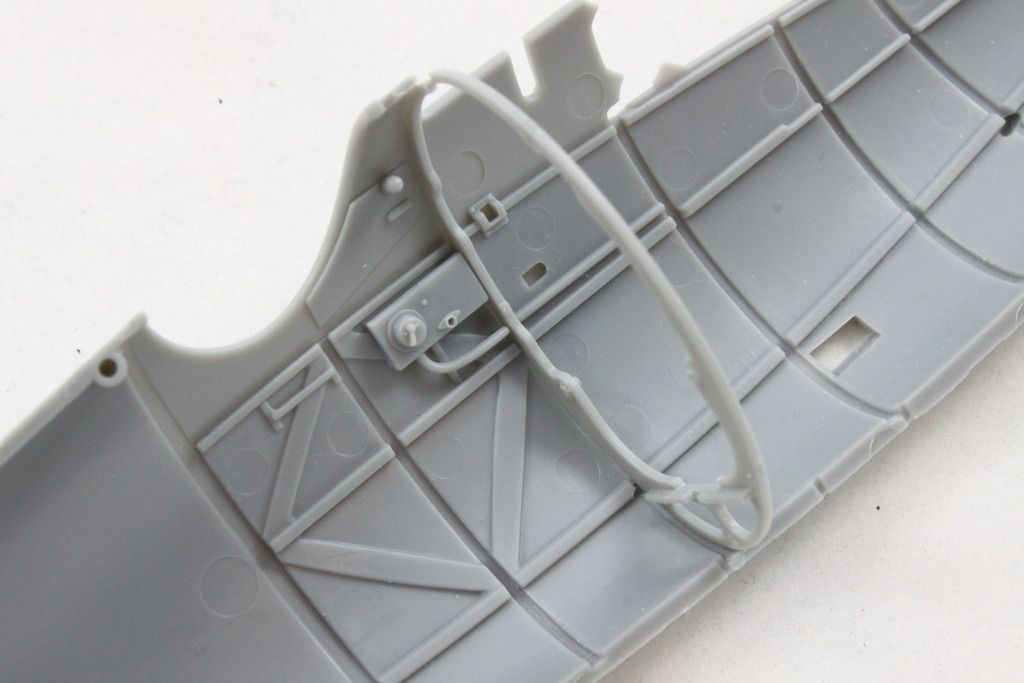
Good evening everyone. It’s been awhile since my last update, but I have managed to get a little bit done. Now that the engine is pretty much wrapped up until I install it, I’ve switched focus to the interior. I was poking around some shots of TVAL’s Albie, and I noticed that what I assume is the throttle cable on the left hand wall is not “copper” as the instructions would have you paint it. I also realized that the cable runs from the wooden plate on the left sidewall to the magneto, but it doesn’t run thru the wooden former like the model has it. I’ll need to cut that off and replace it with solder or some wire, and have it run around the former, not thru it.

Having built one of these kits in the past, I learned that a bit of prevention is worth a pound of scraping. I’ve used some thin masking tape to run in the slots for the formers. This saves a lot of work, and keeps the fit nice and tight – the molding tolerance on early WNW kits can be affected by something as small as layers of paint.
To begin painting the wood interior, I coated the inside with Tamiya Buff, a good base wood color.
For wood graining, I use some Windsor-Newton Burnt Umber oil paint thinned with Turpenoid thinner into a wash. I paint that on using a cheap nylon brush, leaving it a bit streaky – kinda like wood grain. Next, I let it dry about an hour and then I use a wide, stiff brush to streak the paint and leave “grain” marks. The oil paint is very forgiving, and you can play with the grain a while until you’re satisfied.
I made it a bit thicker than usual this time – I think I liked how the grain started to be apparent even before I “streaked” it.
A bit of streaking and swirling, and you have something that looks a lot like wood grain. Remember to vary the direction of the grain on different pieces of wood.
I sealed the wood with a clear coat, and then masked it in preparation for applying the interior green. Some light washes, and the fuselage sides will be ready to go.
While I was spraying the Buff for the wood, I shot the rear bulkhead and flor board as well. I’ve never used HGW wood or Aviatic lozenge decals before. They’re a bit odd – both are very translucent. This means the undercoated color will have a large role to play in the appearance. I cut slightly oversize pieces and applied them. Both worked fine, and were less touchy to apply than I feared.
A sharp scalpel and a couple of drops of setting solution were all that was required to finish them off.
That’s all for a while. Aaron has me busy with the new Airfix Beaufighter and the HK Models Do-335. I’ll have to move the Albatros to the back of the hangar for a bit. Back before too long, I hope. Take care all!