SEARCH FINESCALE.COM

Enter keywords or a search phrase below:

Tamiya 1/48 Fairey Swordfish Mk.II

6895 views
68 replies
1 rating 2 rating 3 rating 4 rating 5 rating
  • Member since
    July 2014
Posted by modelcrazy on Sunday, June 5, 2016 7:40 PM

Looking very good Mike, and thank you for the fit warning. 

Steve

Building a kit from your stash is like cutting a head off a Hydra, two more take it's place.


http://www.spamodeler.com/forum/

  • Member since
    December 2010
  • From: Salem, Oregon
Posted by 1943Mike on Sunday, June 5, 2016 1:24 PM

Another incremental, boring, painting update. Actually I did glue the rudder, elevator/horizontal stabilizer to the fuselage. The painting is taking longer than I'd anticipated for several reasons - mostly my having to repaint where I screwed up or my finger nails scratched a surface, etc., etc.

I must warn people who attempt to build this kit that the fit on most parts, although pretty good as far as I can tell, is very tight! As I mentioned above the enclosing of the pit in the fuse was, for me, a real challenge - very, very tiight. I had to do some sanding on the horizontal stab/elevators to get them to slide into the tail. That may have had something to do with my painting the parts first - it's a TIGHT FIT!

Next up some decaling and then on to more gluing in parts. I have a bad feeling about the section forward of the windscreen that holds the cabane struts. Without paint it was very, very tight. After having painted the struts it wouldn't go in at all. I've sanded/filed some styrene on the attachment points but it'll be scary for me when I have to attach that assembly in the near future.


Mike

"Le temps est un grand maître, mais malheureusement, il tue tous ses élèves."

Hector Berlioz

  • Member since
    July 2014
Posted by modelcrazy on Wednesday, June 1, 2016 11:13 PM

Oooh Mike I like that quote. I going to use that on my signature line!

Steve

Building a kit from your stash is like cutting a head off a Hydra, two more take it's place.


http://www.spamodeler.com/forum/

  • Member since
    December 2010
  • From: Salem, Oregon
Posted by 1943Mike on Wednesday, June 1, 2016 8:49 PM

Greg, thanks.

At my age it's better to attempt something knowing that failure on the first attempt is very much a possibility. So what? As long as I don't bankrupt myself buying too many kits that are destined for the trash heap, failing is, as far as I'm concerned, a real path to success. As long as one is persistent.

I really screwed up my first biplane (Accurate Miniatures 1/48 Grumman F3F-1) but I considered it a test bed so, in a way, I was happy even though I screwed up some important elements. 

Greg, what I'm saying is, if you want to build a biplane, build one. I bought two kits at the time I did the F3F - an F3F-1 which I built and an F3F-2 which is in my stash and I will probably build at some point in time. If you can afford it, buy two kits of the same plane. I've done that with other plastic kits - just to have extra parts or in case I screw up badly. The F3F-1 I built is considered one of the easiest biplanes to put together. It wasn't for me. But I learned a little.

Remember good old Teddy Roosevelt: "Far better is it to dare mighty things, to win glorious triumphs, even though checkered by failure... than to rank with those poor spirits who neither enjoy nor suffer much, because they live in a gray twilight that knows not victory nor defeat."

That's a little much when talking about plastic model kits but you get the idea.

Mike

Mike

"Le temps est un grand maître, mais malheureusement, il tue tous ses élèves."

Hector Berlioz

  • Member since
    May 2013
  • From: Indiana, USA
Posted by Greg on Wednesday, June 1, 2016 8:09 PM

Bossman

So just one question . . .   remind me again what you you said was gonna be "rough" about these posts ?

My thoughts too.

This is looking very good, please do keep the WIP coming (or going, depending on one's perspective).

I'm intimidated by biplanes and have never tried one. Doesn't look like you're scared at all.

  • Member since
    December 2010
  • From: Salem, Oregon
Posted by 1943Mike on Wednesday, June 1, 2016 7:07 PM

Modelcrazy,

You said: "there are few forums equally as encouraging and helpful as FSM." I couldn't agree more!

BD and Chris,

Thanks for the kind words.

Mike

"Le temps est un grand maître, mais malheureusement, il tue tous ses élèves."

Hector Berlioz

  • Member since
    December 2002
Posted by Bossman on Wednesday, June 1, 2016 5:13 PM

Mike,

That engine is a gem.  I've seen this Tamiya kit built up very nicely before - It has a ton of detail that really shows - and its just an interesting aircraft.  Looks like youre headed for the same place with this one.

Chris

  • Member since
    January 2015
Posted by BrandonD on Wednesday, June 1, 2016 4:16 PM

That's looking great! I don't see any rough edges, just an inspiration to build mine someday soon!

-BD-

  • Member since
    July 2014
Posted by modelcrazy on Wednesday, June 1, 2016 10:28 AM

Mike,

Don't ever be aprehinsive about posting a WIP on this forum, there are few forums equally as encouraging and helpful as FSM.

Steve

Building a kit from your stash is like cutting a head off a Hydra, two more take it's place.


http://www.spamodeler.com/forum/

  • Member since
    December 2010
  • From: Salem, Oregon
Posted by 1943Mike on Wednesday, June 1, 2016 10:24 AM

Jay Jay and Toshi,

Thanks to both of you. I'm always nervous about showing my work on this site. I've seen such masterful builds of both aircraft and ships on FineScale that I sometimes feel very much out of my depth when posting here. I am, however, gaining a bit of confidence as I move along and I am very, very grateful to all the members who comment on my work for being so encouraging. You're all such good company in the world of building plastic kits!

Mike

Mike

"Le temps est un grand maître, mais malheureusement, il tue tous ses élèves."

Hector Berlioz

  • Member since
    March 2015
  • From: Streetsboro, Ohio
Posted by Toshi on Wednesday, June 1, 2016 9:54 AM

That is some of the best detailing I've seen in a cockpit.  You're doing a fantastic job thus far!

Toshi

On The Bench: Revell 1/48 B-25 Mitchell


Married to the most caring, loving, understanding, and beautiful wife in the world.  Mrs. Toshi


  • Member since
    August 2013
Posted by Jay Jay on Wednesday, June 1, 2016 7:30 AM

Beautiful job on the engine and camo painting on the wings Mate. The camera didn't catch any mistakes that I can see.


 I'm finally retired. Now time I got, money I don't.

  • Member since
    March 2009
  • From: Yorkville, IL
Posted by wolfhammer1 on Tuesday, May 31, 2016 9:36 PM

Mike, First, I am not seeing any rough spots at all, all I am seeing is spot on.  The engine in particular looks amazing.  Good job, and good luck with getting the fuselage together.  You are doing it the right way, dry fit until it works, then glue.  (I've done it the other way too often, and it really doesn't work)  Keep going, and I look forward to seeing more of your Swordfish.

John

  • Member since
    December 2010
  • From: Salem, Oregon
Posted by 1943Mike on Tuesday, May 31, 2016 6:36 PM

BK, Goldhammer, and Steve,

Thanks for the encouragement. And, I AM having fun working on this aircraft. It's meeting or attempting to meet the challenges that arise in building a kit that is most gratifying. I guess my style of writing a WIP includes the glitches and foibles that I come across and that I create as well as whatever information I might deem useful to those who would attempt this puppy in the future.

Mike

Mike

"Le temps est un grand maître, mais malheureusement, il tue tous ses élèves."

Hector Berlioz

  • Member since
    June 2014
Posted by BrandonK on Tuesday, May 31, 2016 4:38 PM

This build is really looking top notch. Regardless of what you feel are issues, they are not coming out in your work.

BK

On the bench:

A lot !! And I mean A LOT!!

2024 Kits on deck / in process / completed   

                         14 / 5 / 2  

                              Tongue Tied

  • Member since
    July 2014
Posted by modelcrazy on Tuesday, May 31, 2016 4:30 PM

Looking great Mike Yes. I have the MK1 version so I'll be intrested to see how it goes together.

Steve

Steve

Building a kit from your stash is like cutting a head off a Hydra, two more take it's place.


http://www.spamodeler.com/forum/

  • Member since
    August 2014
  • From: Willamette Valley, Oregon
Posted by goldhammer on Tuesday, May 31, 2016 4:21 PM

Looks great.  Quit shortchanging yourself, the work you are showing is on par with what everyone else puts up on here.  As long as you are enjoying it and are happy with it, no one else matters, but it looks just dandy.  Just hope my Gato's and Enterprise come out as nice.

  • Member since
    December 2010
  • From: Salem, Oregon
Posted by 1943Mike on Tuesday, May 31, 2016 2:53 PM

Sorry for the delay in updates. I've been doing other things when the weather permits.

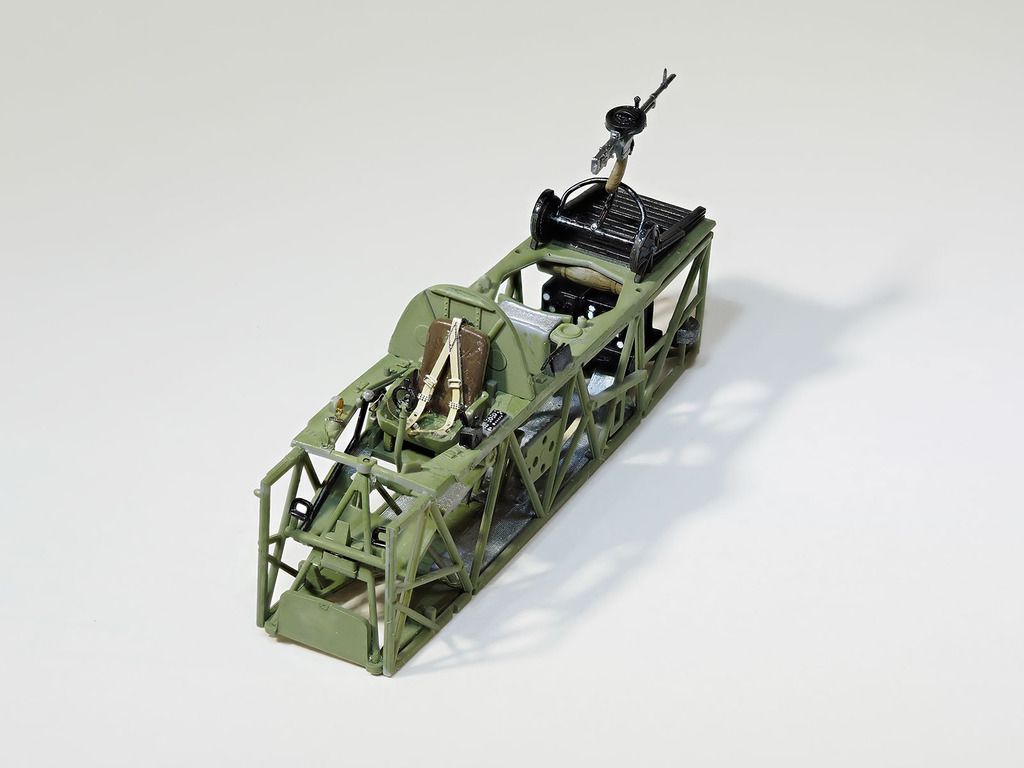
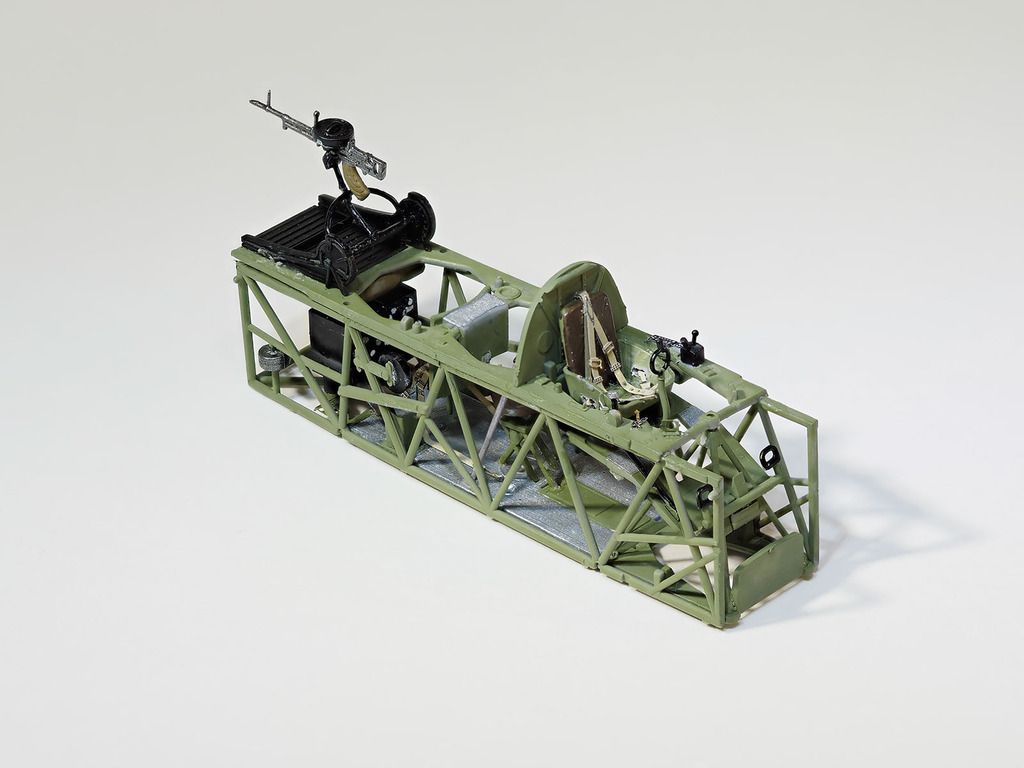
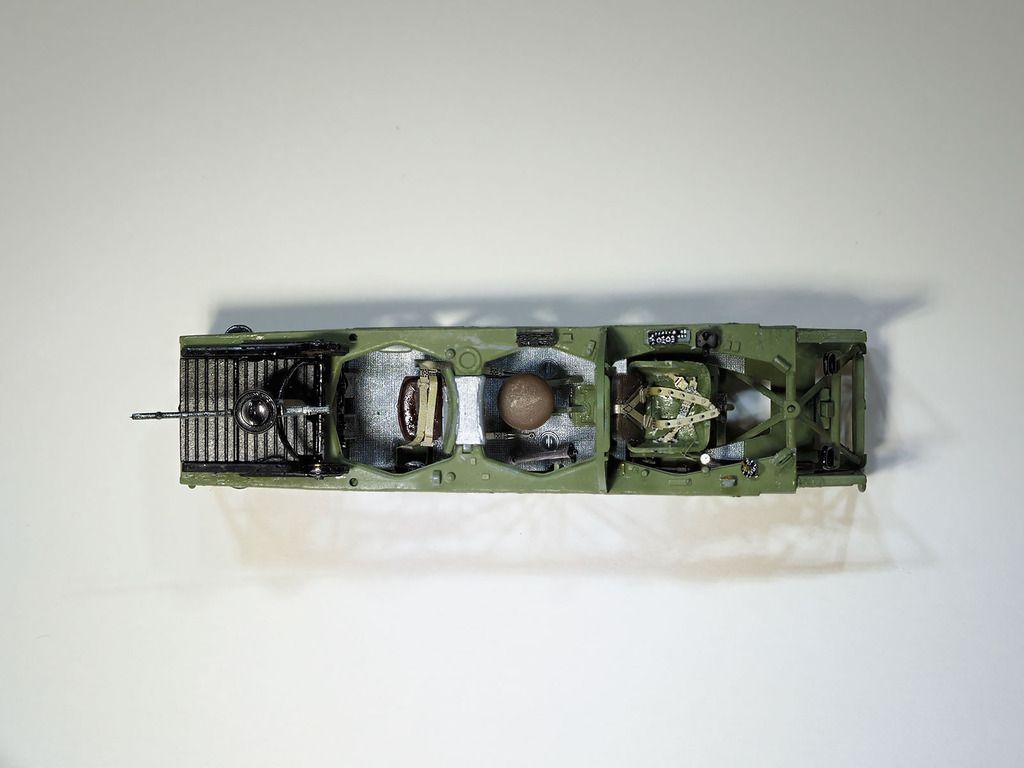
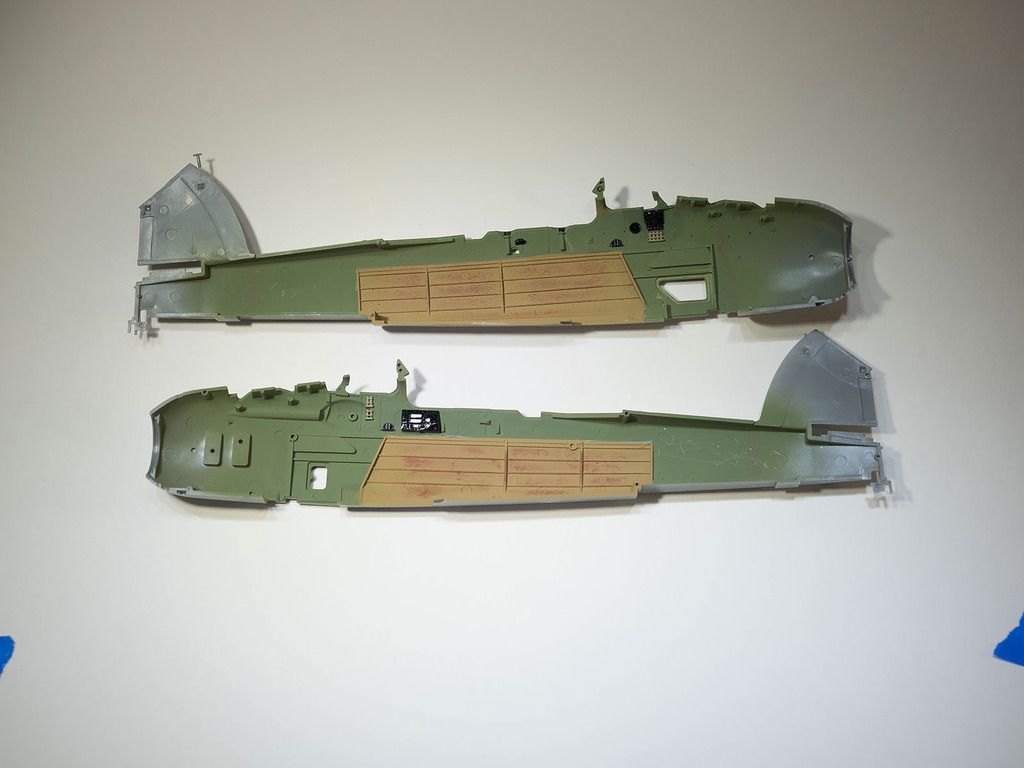
I do have a very small update. I've gotten the engine done (AFAIK) and have started working on painting the fuse, wings, elevators, etc. It's taking me a loooong time! I'm on my third session of having masked, A/B'd, stripped, masked, A/B'd .... you get the idea. I'm at a point where, even though my little hand painted touch-ups are showing differently than the air brushed portion of the paint job, I'm probably going to give up and move on to the next steps.

I used Future on the fuselage to get ready for a little wash on the panel lines and to prepare for some decals but I over zealously put future on the bottom wing sections as well Embarrassed. C'est la vie. I don't think it'll matter once I've sprayed flat clear on all my paint work. I just finished air brushing the gray on the top wings this morning so I haven't sprayed them with Future yet.

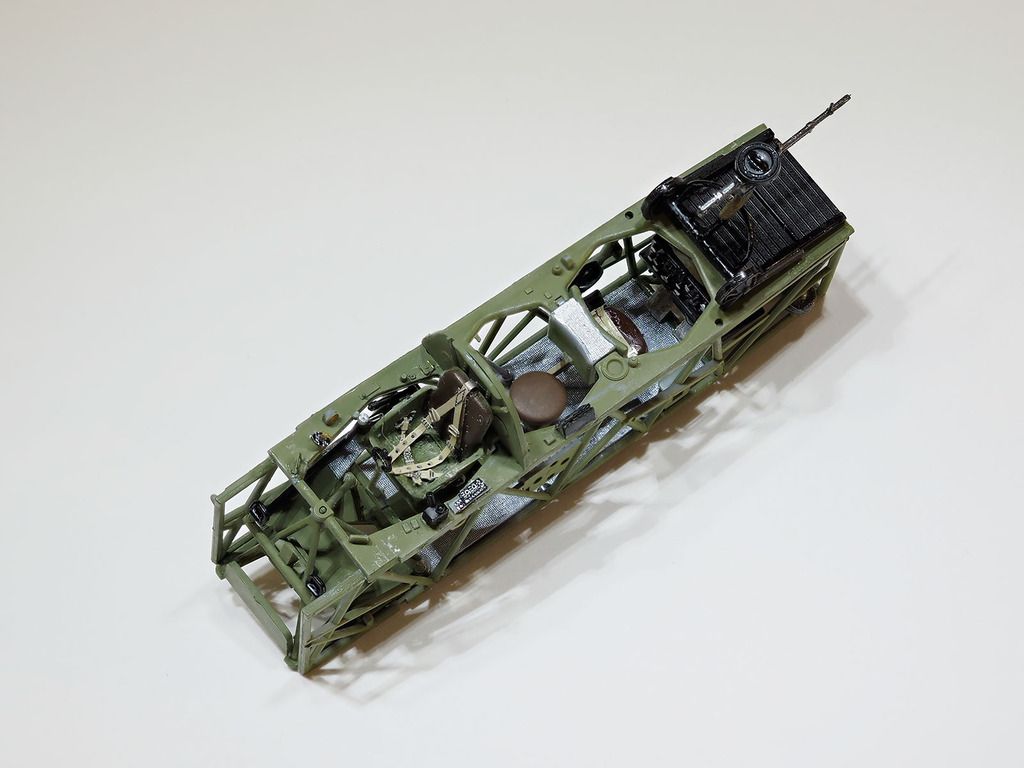
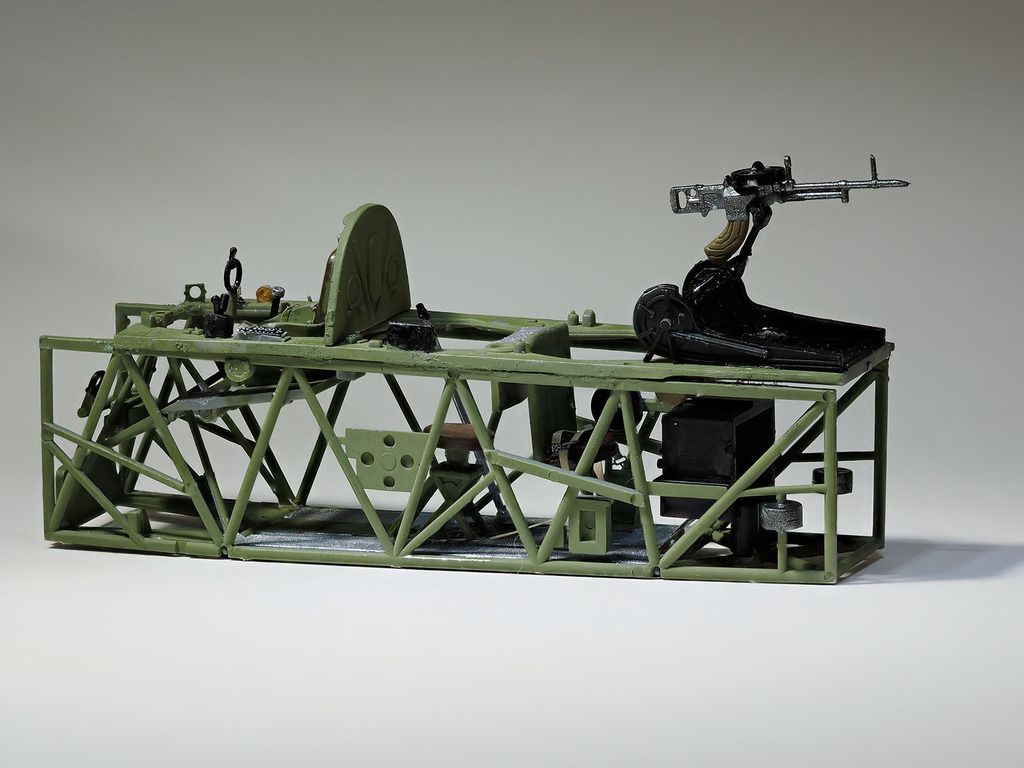
With regard to my last post where I was having difficulty fitting the cockpit into the fuselage, as you can see I managed to do it - but with a lot of clamping, holding sections together with every available means I could find and it is finally together. I'm certain it must have been my fault for somehow not putting the pit together correctly. Oh well, it's done.

Just two pictures today.

Mike


Mike

"Le temps est un grand maître, mais malheureusement, il tue tous ses élèves."

Hector Berlioz

  • Member since
    March 2015
  • From: Streetsboro, Ohio
Posted by Toshi on Sunday, May 15, 2016 5:23 PM

You're heading in the absolute right direction.  Everything looks great, as for some parts not aligning, sometimes things need to be cut, sanded, or scribed.  That's just the nature of the beast.  

I'm looking forward to this build!

Toshi

On The Bench: Revell 1/48 B-25 Mitchell


Married to the most caring, loving, understanding, and beautiful wife in the world.  Mrs. Toshi


  • Member since
    December 2010
  • From: Salem, Oregon
Posted by 1943Mike on Sunday, May 15, 2016 2:36 PM

OK, I have to walk away from this build for a few days. I've just tried to dry fit the fuselage halves over the cockpit assembly and, at first, I couldn't even get it close. I filed off some plastic from what looks like a radio (I really have no idea what it is) on the starboard side of the fuselage and it got a little closer but no cigar. Then I filed away some of the tubing of the pit where I thought there might be a problem. My next try was a very, very tight dry fit. When I get back to this build I'll have to put my hobby clamps to work to hold the assembly when I go for the glue.

Mike

Mike

"Le temps est un grand maître, mais malheureusement, il tue tous ses élèves."

Hector Berlioz

  • Member since
    December 2010
  • From: Salem, Oregon
Posted by 1943Mike on Sunday, May 15, 2016 10:25 AM

Lawdog and Jay Jay,

Thank you both.

My challenge now is trying to figure out what painting and decaling comes at what point in the build.

Mike

Mike

"Le temps est un grand maître, mais malheureusement, il tue tous ses élèves."

Hector Berlioz

  • Member since
    August 2013
Posted by Jay Jay on Sunday, May 15, 2016 9:37 AM

Nice detail on the office for sure.  You're more fastidious than you let on.


 I'm finally retired. Now time I got, money I don't.

  • Member since
    February 2012
  • From: Olmsted Township, Ohio
Posted by lawdog114 on Sunday, May 15, 2016 12:46 AM
Looking great so far Mike. Your British interior green looks fine to me. I'm digging the model closet too. Looks like Tamiya did a nice job on the fish's cockpit detail-wise.

 "Can you fly this plane and land it?...Surely you can't be serious....I am serious, and don't call me Shirley"


  • Member since
    December 2010
  • From: Salem, Oregon
Posted by 1943Mike on Saturday, May 14, 2016 11:28 PM

Thank you Chris!

I know where the "rough" areas are and try not to show too many of them in the pictures. All in all I'm happy enough with my progress - mistakes, omissions, et al. So far the build has been lots of fun. I'm a little worried about some of the upcoming steps but I'll deal with each slowly and as methodically as I can.

I very much appreciate the encouragement.

Mike

Mike

"Le temps est un grand maître, mais malheureusement, il tue tous ses élèves."

Hector Berlioz

  • Member since
    December 2002
Posted by Bossman on Saturday, May 14, 2016 10:40 PM

Hi Mike,

The Swordfish is looking great !  Really nice details, your color mixing of interior green looks right on, the cockpit looks like I could climb right into it, and the photography is gorgeous.  

So just one question . . .   remind me again what you you said was gonna be "rough" about these posts ?

This is some really nice work.

Chris

  • Member since
    December 2010
  • From: Salem, Oregon
Posted by 1943Mike on Saturday, May 14, 2016 2:25 PM

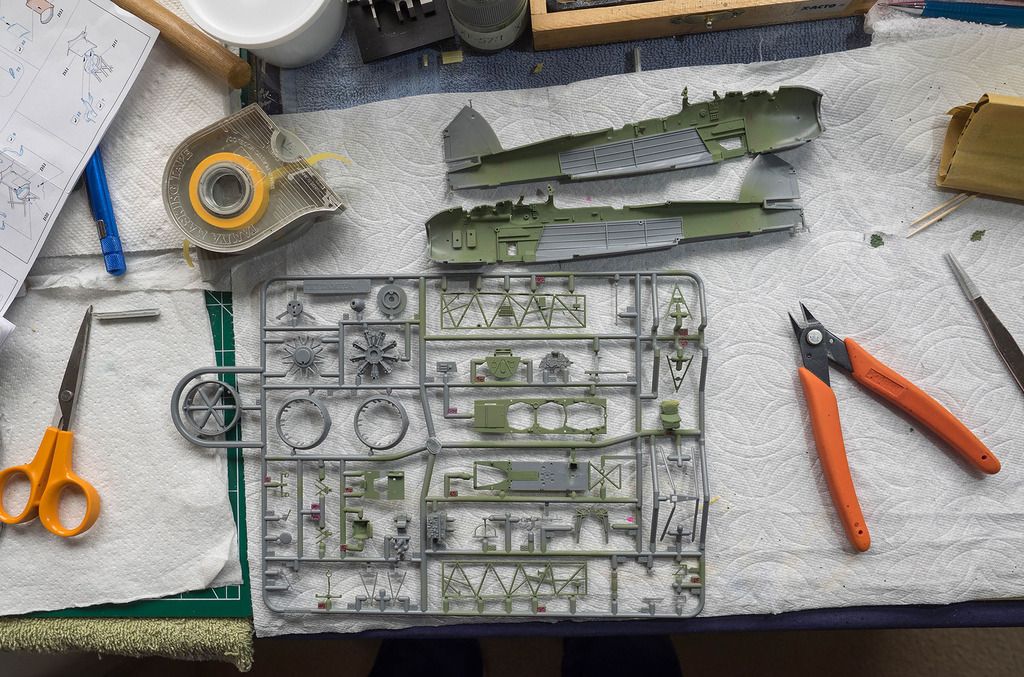
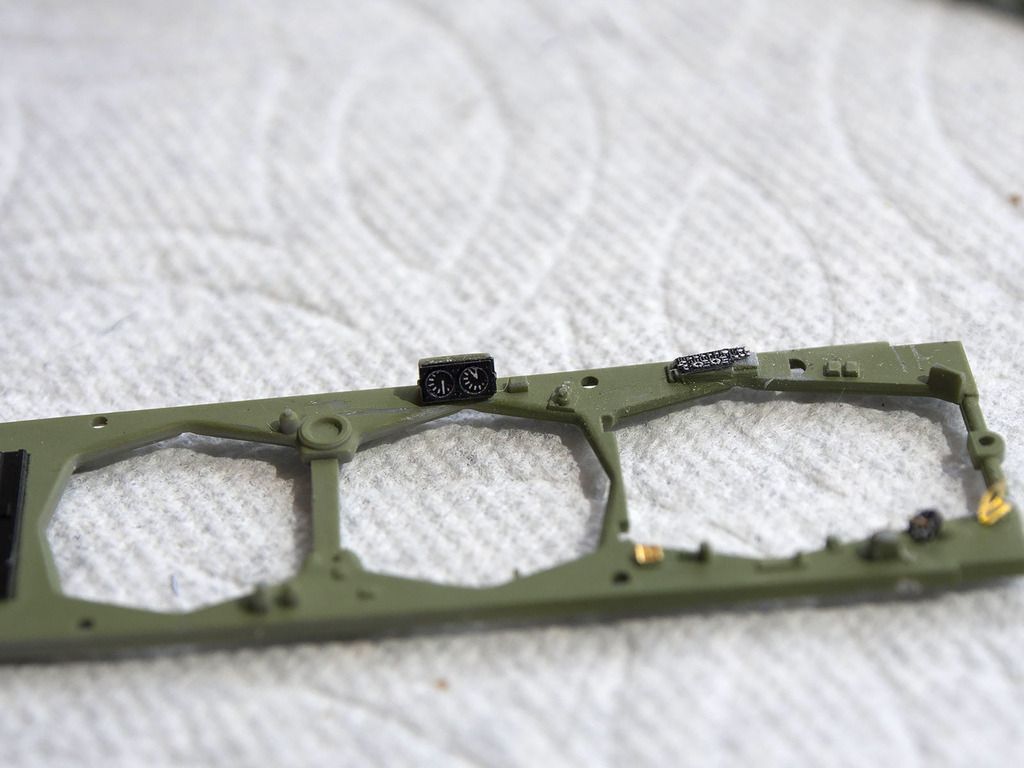
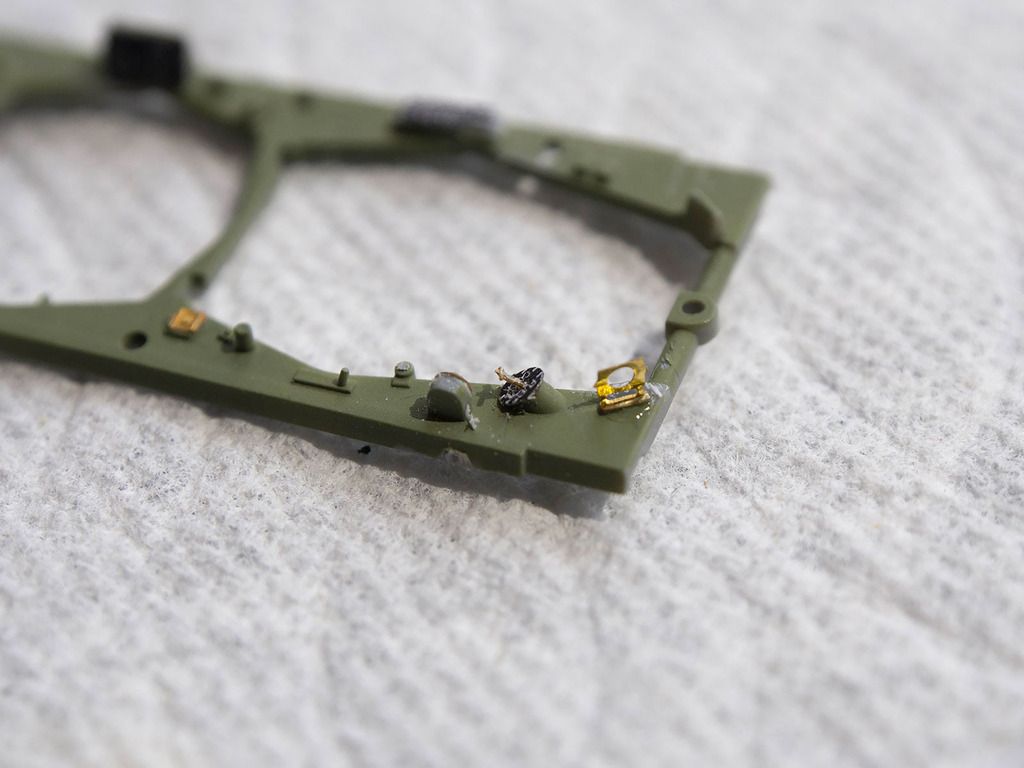
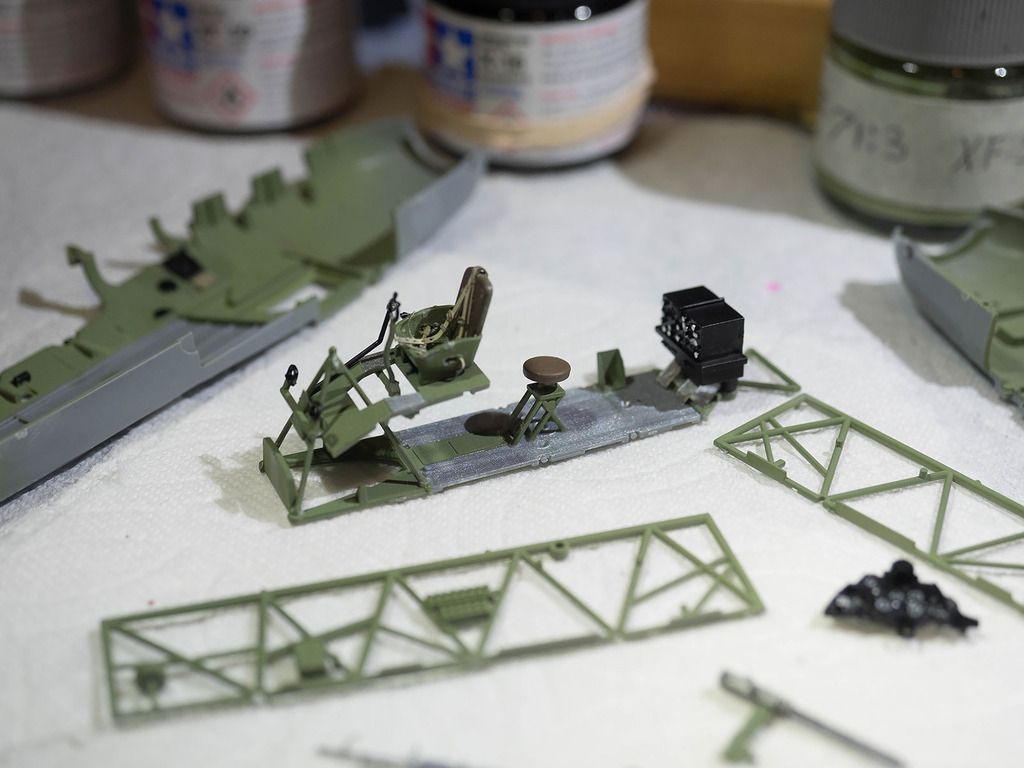
OK, I've done a little work on the cockpit but I've also, in my zeal to take a few pictures of my progress, broken off the machine gun from its bracket. I've glued the gun back on but I've taken the liberty of adding some CA/acrylic powder to the join that will no longer conform to reality. Too bad but on we march!

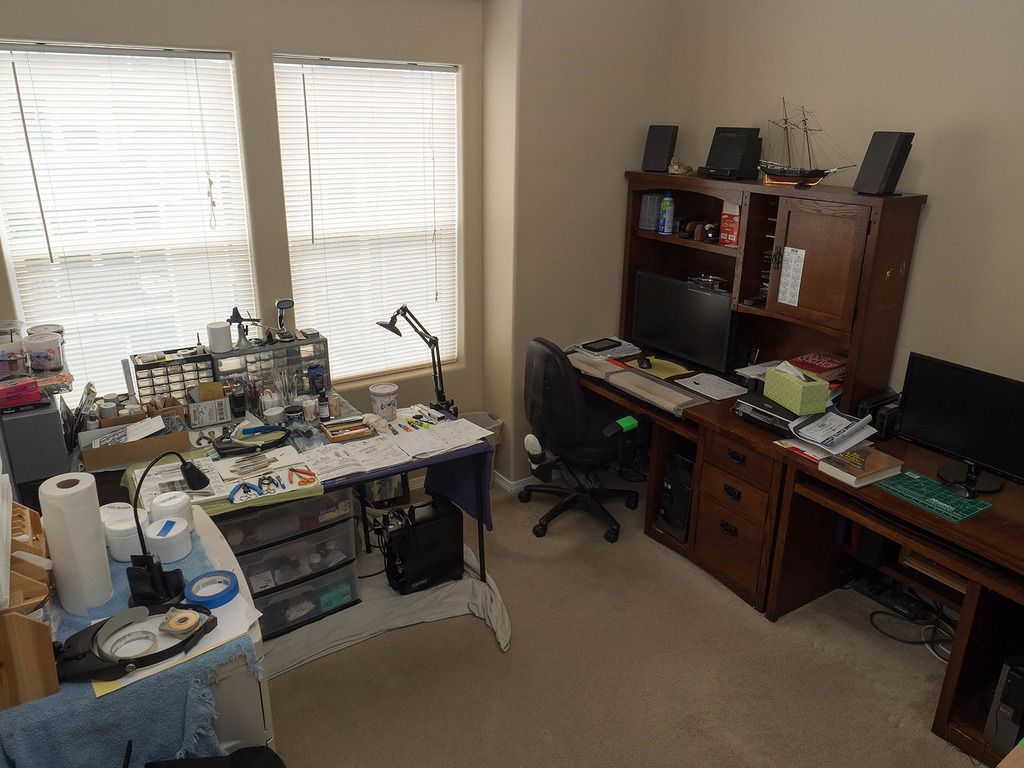
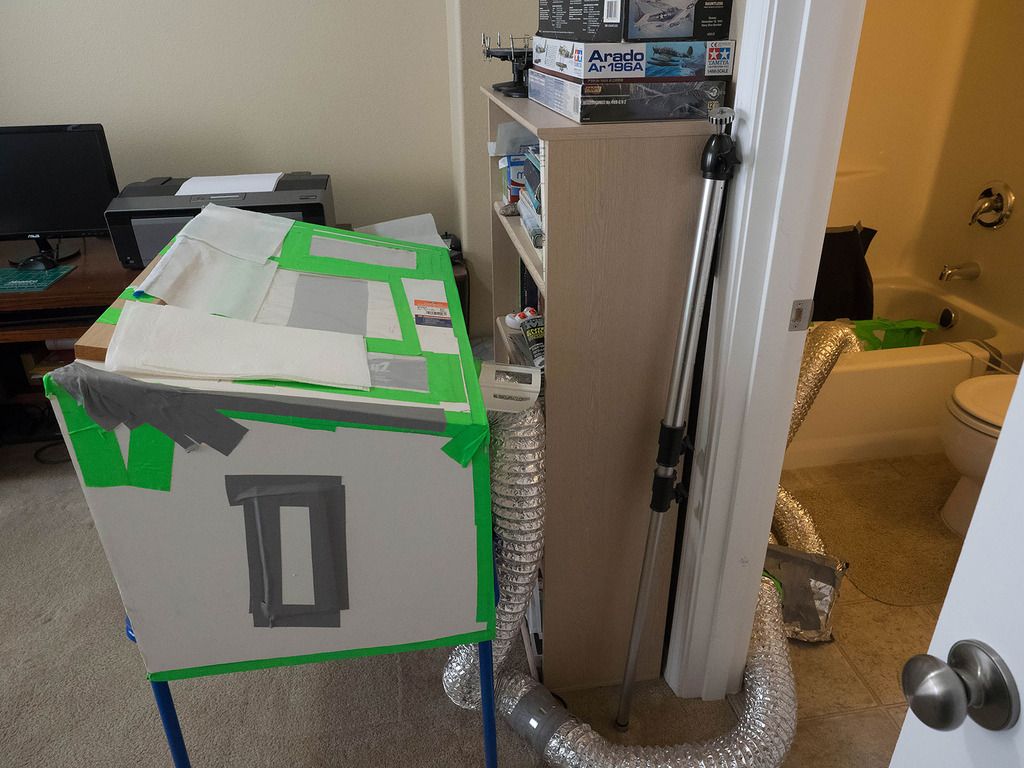
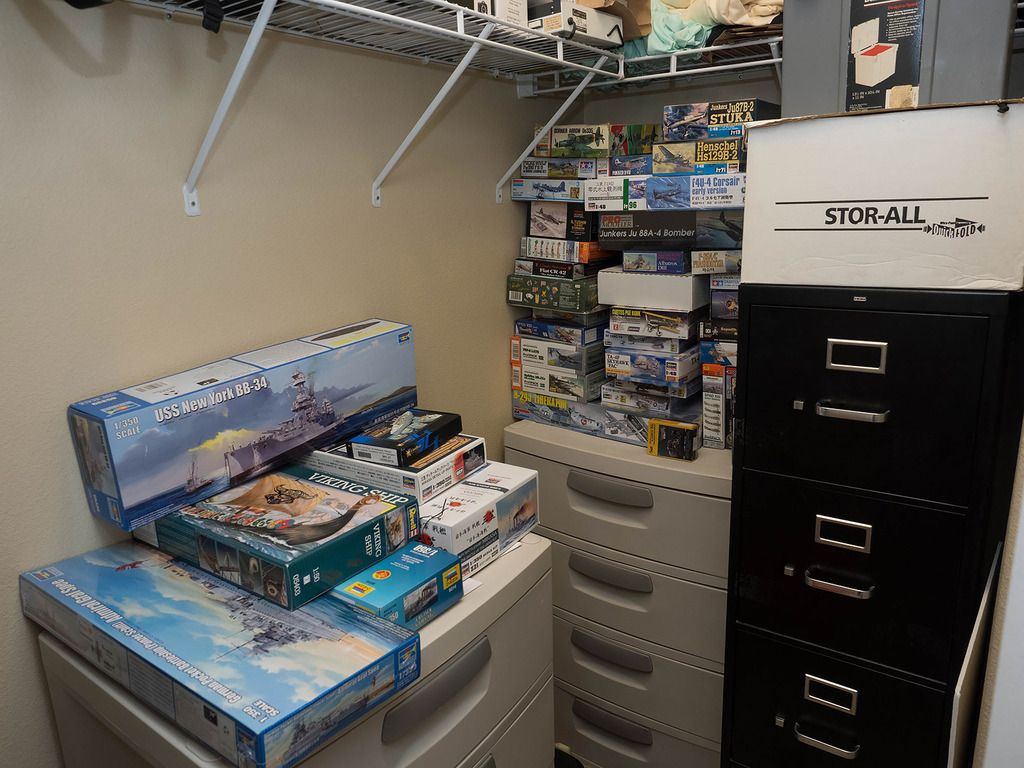
First, some pictures of my work area. It's the small, second bedroom in my condo that I've converted to my hobby room.

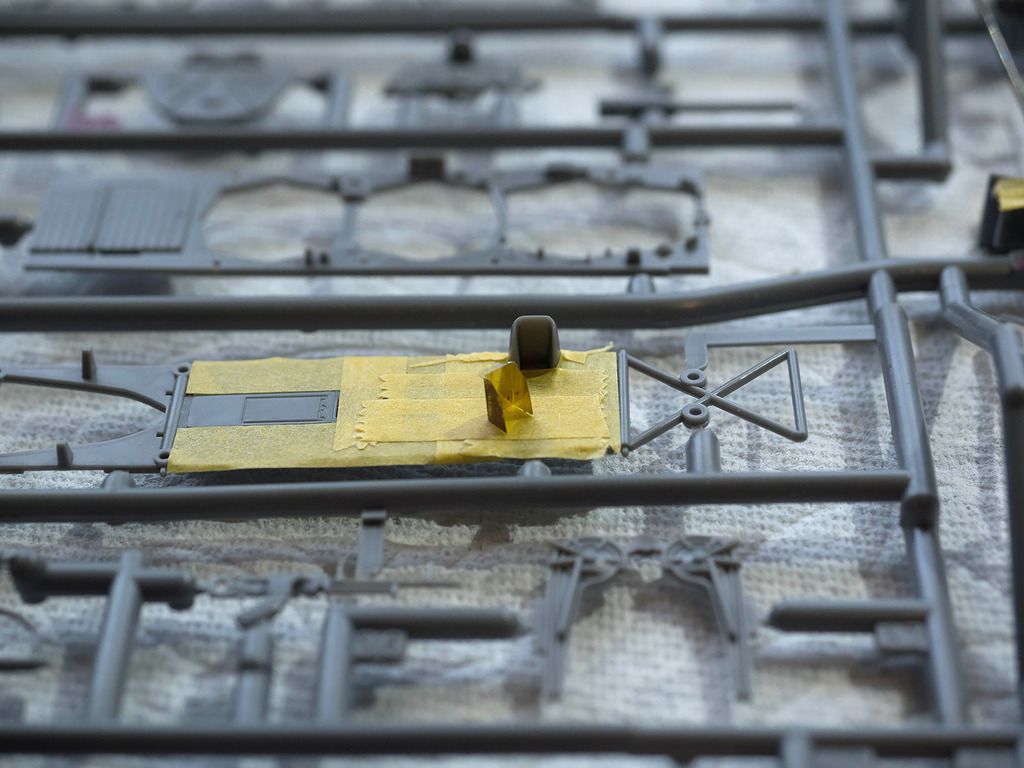
Then follow several pictures in order of my progress. I've used a few parts from the Eduard PE set - mainly got it for the seatbelts (that's another story Big Smile - coming up).

I mixed up Tamiya paints to get something that might be passable as the interior green in the Swordfish cockpit area. I used XF-71:3, XF-57:1, and XF-58:1 if anyone's interested.

Back to the seatbelts - I added the pilot's belts without too much difficulty although I left out several parts that were just too tiny for me to work on - remember shaky hands, etc.? Then a couple days ago, when I had most of the parts of the cockpit ready to assemble, I did so without having added the seatbelts to the gunner's chair Embarrassed. Yesterday I made an attempt to add the belts that are attached to the aluminum floor and draped over the gunner's seat. I think I spent at least a frustrating hour trying to pre-bend them in a way that would allow them to drape over the seat and lie more or less flat on the floor of the pit. Getting them in there after having glued the sides of the cockpit together was a lesson in paying more attention to thinking ahead Smile.

I'm not very neat and tidy - I try, it just isn't in my DNA to do the fastitiously realistic work I see done on this site all the time. But I'm enjoying myself immensly while trying to get this stringbag together.

Mike

First shot of bench
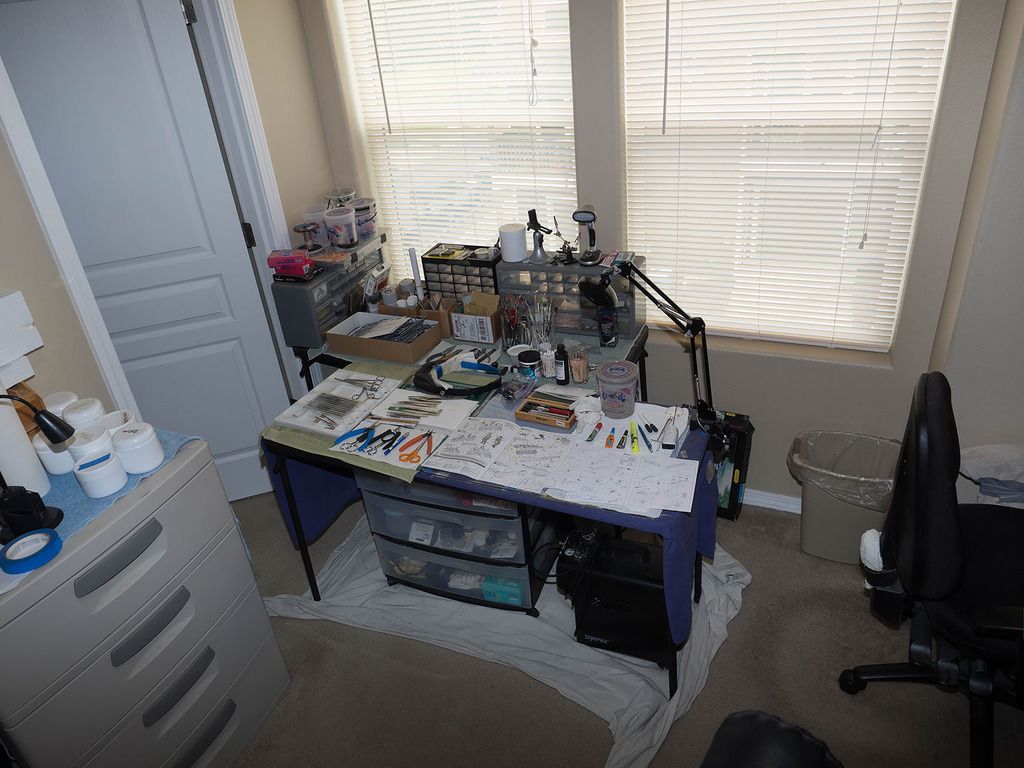

Wider shot of bench and desks - shot #2


Paint booth and bathroom - shot #4


Hobby room closet stash - shot #5


Mike

"Le temps est un grand maître, mais malheureusement, il tue tous ses élèves."

Hector Berlioz

  • Member since
    December 2010
  • From: Salem, Oregon
Posted by 1943Mike on Thursday, May 5, 2016 11:53 AM

Martin,

Please understand that this work in progress may be a bit too rough around the edges (read amaturish) for viewers with modeling skills such as yours.  

I've enjoyed watching several of your posts and try to pick up a tidbit of model building tips from your work as I do try from so many others on this site. I am, however, not in the same modeling ballpark.

I am expecting my build to be fun.

I just ordered some paint from Hobbylinc some of which is back ordered through the end of June so I may have to try mixing some of my existing paint stock for parts of the cockpit. Don't expect perfect color accuracy from this project.

As a child I went to summer camp near Kean, NH. I recall climbing Mt. Monadnock using the white dot trail. Are you anywhere near that part of the state?

Mike


Mike

"Le temps est un grand maître, mais malheureusement, il tue tous ses élèves."

Hector Berlioz

  • Member since
    April 2015
  • From: New Hampshire, USA
Posted by UKguyInUSA on Thursday, May 5, 2016 10:07 AM

Oh, a plane that I want in my wish-list....looks like a lovely kit, I'll be watching this one come together!


Cheers Smile

Martin

  • Member since
    October 2012
  • From: Mt. Washington, KY
Posted by Geezer on Tuesday, May 3, 2016 11:08 AM

Mike, if I can, you can! Some of the same ailments with hands, etc. Great fun, though. Looking forward to seeing your work.

www.spamodeler.com/forum/index.php 

Mediocraties - my favorite Greek model builder. 


  • Member since
    December 2010
  • From: Salem, Oregon
Posted by 1943Mike on Tuesday, May 3, 2016 10:33 AM

Redstang,

I was actually searching for the floatplane version but couldn't come up with one (at least in a reasonable price range).

Gamera,

I am certainly going to take my time on this puppy. I have a feeling it'll be a very entertaining/enjoyable build for me.

Nathan,

Cheers!! No, I don't think Cliff was into plastic models Beer.

Jay Jay,

Looks like our modeling seasons are reversed. Even with a chance for rain today I'll likely take a 3 to 5 mile walk in our wonderful Minto-Brown Island Park here in Salem today. After months of rain and cloudy weather any day that's likely to be mostly dry is a good day to get outside. Wink.

Theuns,

Thanks for chiming in. I hope this WIP won't be too much of a disappointment to many of you who are planning on dropping by.

Mike

Mike

"Le temps est un grand maître, mais malheureusement, il tue tous ses élèves."

Hector Berlioz

JOIN OUR COMMUNITY!

Our community is FREE to join. To participate you must either login or register for an account.

SEARCH FORUMS
FREE NEWSLETTER
By signing up you may also receive reader surveys and occasional special offers. We do not sell, rent or trade our email lists. View our Privacy Policy.