SEARCH FINESCALE.COM

Enter keywords or a search phrase below:

1/72 Italeri A-26B Finished

6385 views
77 replies
1 rating 2 rating 3 rating 4 rating 5 rating
  • Member since
    January 2009
  • From: hamburg michigan
Posted by fermis on Friday, July 22, 2016 9:53 PM

Revenant

Sweet!!! Real deal:


Woulda been cool if the kit included the HVAR racks.

  • Member since
    May 2016
Posted by Revenant on Friday, July 22, 2016 4:52 PM

  • Member since
    May 2016
Posted by Revenant on Friday, July 22, 2016 4:48 PM

fermis

Decals are done!

I'm just now starting to like this project!


Sweet!!! Real deal:

  • Member since
    January 2009
  • From: hamburg michigan
Posted by fermis on Friday, July 22, 2016 1:27 PM

Decals are done!

I'm just now starting to like this project!


  • Member since
    January 2009
  • From: hamburg michigan
Posted by fermis on Friday, July 22, 2016 8:25 AM

Finally!!!


  • Member since
    January 2015
  • From: Tumwater, WA.
Posted by M. Brindos on Monday, July 18, 2016 11:09 PM

Oh this is going to be good. I can feel the awesome coming. lol

- Mike Brindos "Lost Boy"

  • Member since
    May 2016
Posted by Revenant on Monday, July 18, 2016 9:44 PM

fermis


Revenant

Wow...fine work. How are you gonna replicate the sem-gloss black and exhaust staining on this thing?


Seems like a bluff to me...I think you finally met your match with this kit...just sayin...

  • Member since
    January 2009
  • From: hamburg michigan
Posted by fermis on Monday, July 18, 2016 4:33 PM

Revenant

Wow...fine work. How are you gonna replicate the sem-gloss black and exhaust staining on this thing?


  • Member since
    May 2016
Posted by Revenant on Monday, July 18, 2016 6:09 AM

Wow...fine work. How are you gonna replicate the sem-gloss black and exhaust staining on this thing?

  • Member since
    March 2015
  • From: Streetsboro, Ohio
Posted by Toshi on Monday, July 18, 2016 5:17 AM

[Quote] This thing has taken a lot more putty than I have ever used on anything.

Still, the extra effort will pay off once the first coat gets sprayed on.  You'll be pleased when this occurs!

Toshi

On The Bench: Revell 1/48 B-25 Mitchell


Married to the most caring, loving, understanding, and beautiful wife in the world.  Mrs. Toshi


  • Member since
    January 2009
  • From: hamburg michigan
Posted by fermis on Monday, July 18, 2016 5:02 AM

Almost ready to start painting!!!


This thing has taken a lot more putty than I have ever used on anything!

  • Member since
    March 2006
Posted by simpilot34 on Saturday, July 16, 2016 10:43 PM

It's a helicopter flight physics build, you are beating it into submission!!Propeller Fighting every inch of the way, you are winning the battle! Great work! Love the engine detail!!!.

Cheers, Lt. Cmdr. Richie "To be prepared for war, is one of the most effectual means of preserving the peace."-George Washington
  • Member since
    January 2009
  • From: hamburg michigan
Posted by fermis on Saturday, July 16, 2016 8:28 PM

Revenant


fermis

No worries... It's just plastic, I aint gonna let it kick me ***!!!


Hmmmmmm...


True story!!!


It's fighting the good fight....but...I fight a great fight!!!

  • Member since
    May 2016
Posted by Revenant on Saturday, July 16, 2016 4:29 PM

fermis

No worries... It's just plastic, I aint gonna let it kick me ***!!!


Hmmmmmm...

  • Member since
    May 2016
Posted by Revenant on Saturday, July 16, 2016 11:55 AM

fermis


Revenant

It might be a pain in the &@#$! but it sure looks impressive so far...are you gonna leave those engines exposed or what??? 


I'm leaning towards no. I'd need a month of Sundays, to be able to re-work things and add the details that it would need. This project is already a big enough pain in me ***...I'd just be a gluttun for punishment if I tried to open it up!


Well they'll look awesome anyways...MUCH better than those two-dimensional kit parts...MORE!!!

  • Member since
    January 2009
  • From: hamburg michigan
Posted by fermis on Saturday, July 16, 2016 10:47 AM

Revenant

It might be a pain in the &@#$! but it sure looks impressive so far...are you gonna leave those engines exposed or what??? 


I'm leaning towards no. I'd need a month of Sundays, to be able to re-work things and add the details that it would need. This project is already a big enough pain in me ***...I'd just be a gluttun for punishment if I tried to open it up!

  • Member since
    May 2016
Posted by Revenant on Saturday, July 16, 2016 8:11 AM

It might be a pain in the &@#$! but it sure looks impressive so far...are you gonna leave those engines exposed or what??? 

  • Member since
    January 2009
  • From: hamburg michigan
Posted by fermis on Saturday, July 16, 2016 7:43 AM

The nacelles have to be modified, to accommodate the Vector engines....


The engines a quite nice...fiddly as all get out, but nice. Problem is, there's no push rods...so I used aluminum tubing for those. The other problem...of course...they won't fit inside the nacelles, those will have to be ground down on the inside.

Fine copper wire for the ignition wires.


As it all sits right now.

I have to say...I absolutely hate that the main gears have to be installed before you get to the end....just furthering the PITA that is this kit.


What a left handed MESS!!!

  • Member since
    January 2009
  • From: hamburg michigan
Posted by fermis on Friday, July 15, 2016 8:59 PM

I have come to a conclusion....


The only joy I will get from this kit and its associated extras is....getting it the F off my bench!!!

  • Member since
    May 2016
Posted by Revenant on Thursday, July 14, 2016 8:42 PM

...anything going on in here? 

  • Member since
    February 2011
  • From: Bent River, IA
Posted by Reasoned on Friday, July 8, 2016 10:00 PM
Sweet fermis and the pile of PE makes it all the more impressive. I'm quite certain I'd have stomped the crap out of it by now.

Science is the pursiut of knowledge, faith is the pursuit of wisdom.  Peace be with you.

On the Tarmac: 1/48 Revell P-38

In the Hanger: A bunch of kits

  • Member since
    May 2016
Posted by Revenant on Friday, July 8, 2016 4:19 PM

rocker286

Fermis your Invader looks awesome! Keep up the good work! Are you going to make it a WWII bird or one that served in Korea?


Yeah, what scheme???

  • Member since
    November 2009
  • From: SW Virginia
Posted by Gamera on Friday, July 8, 2016 11:26 AM

Awesome Fermis!!! 

"I dream in fire but work in clay." -Arthur Machen


  • Member since
    May 2016
Posted by Revenant on Friday, July 8, 2016 5:40 AM

fermis

Thanks again, dudes!Toast


So far...no two pieces have gone together without fighting...and when they finally do go together...it's ugly!

I cut the rear, clear piece from the vac-form set......


BOOOOOOOOOOOOOOOOOOOOOOOOOOOOO
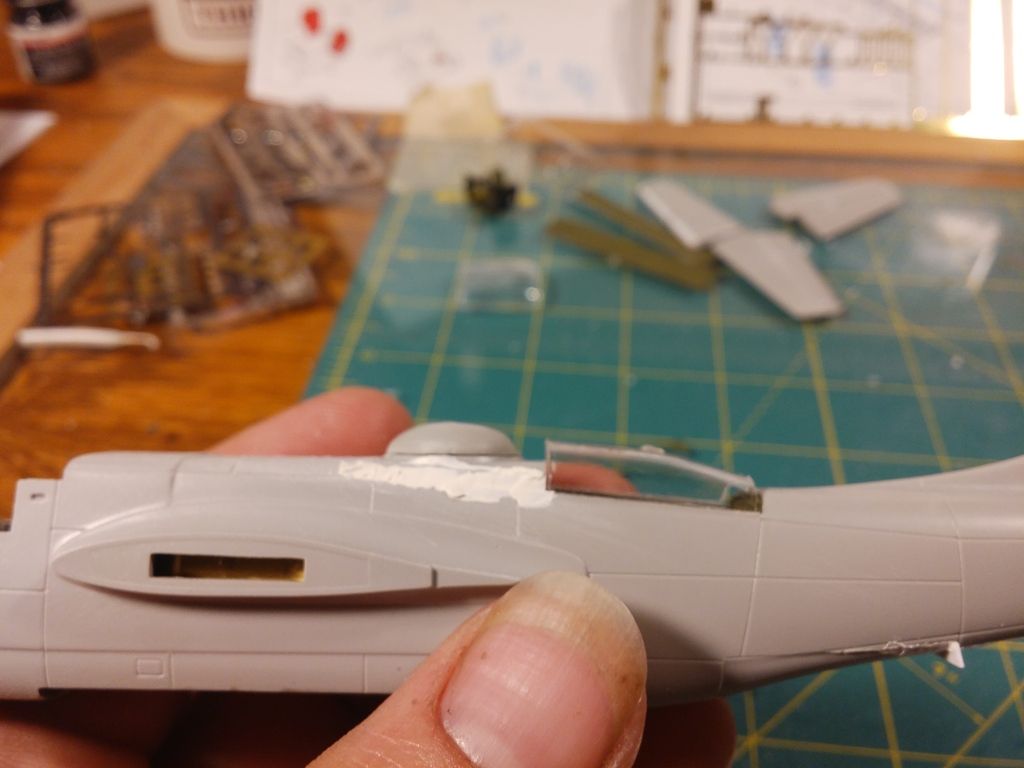


Kit part is a little better...
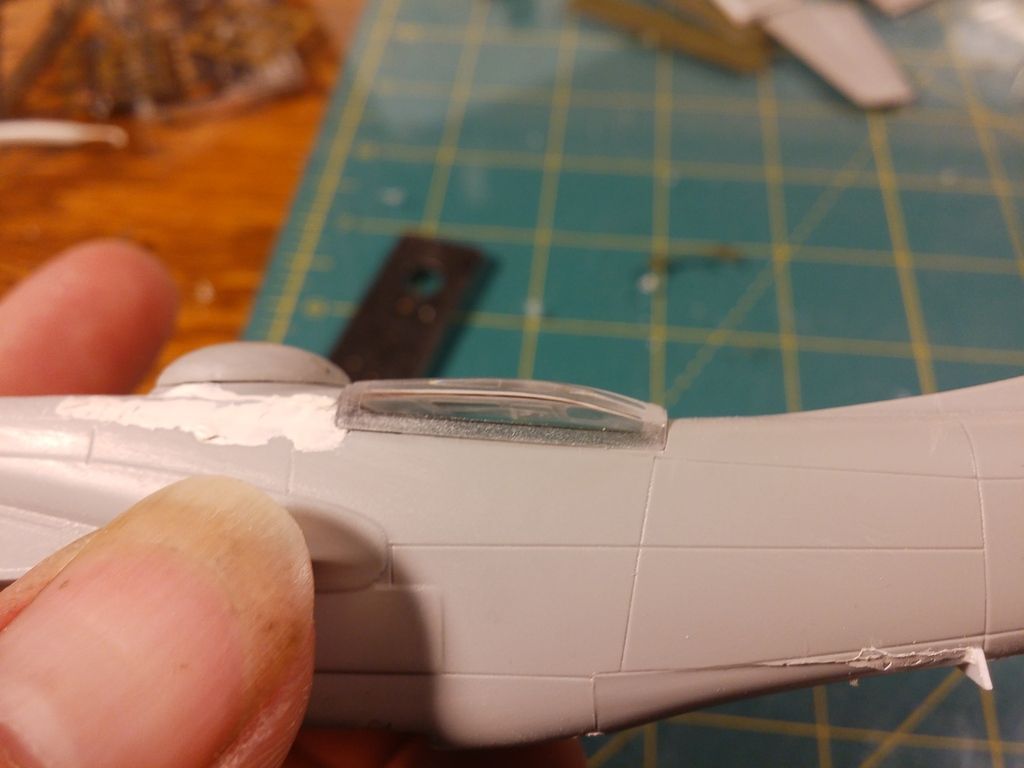


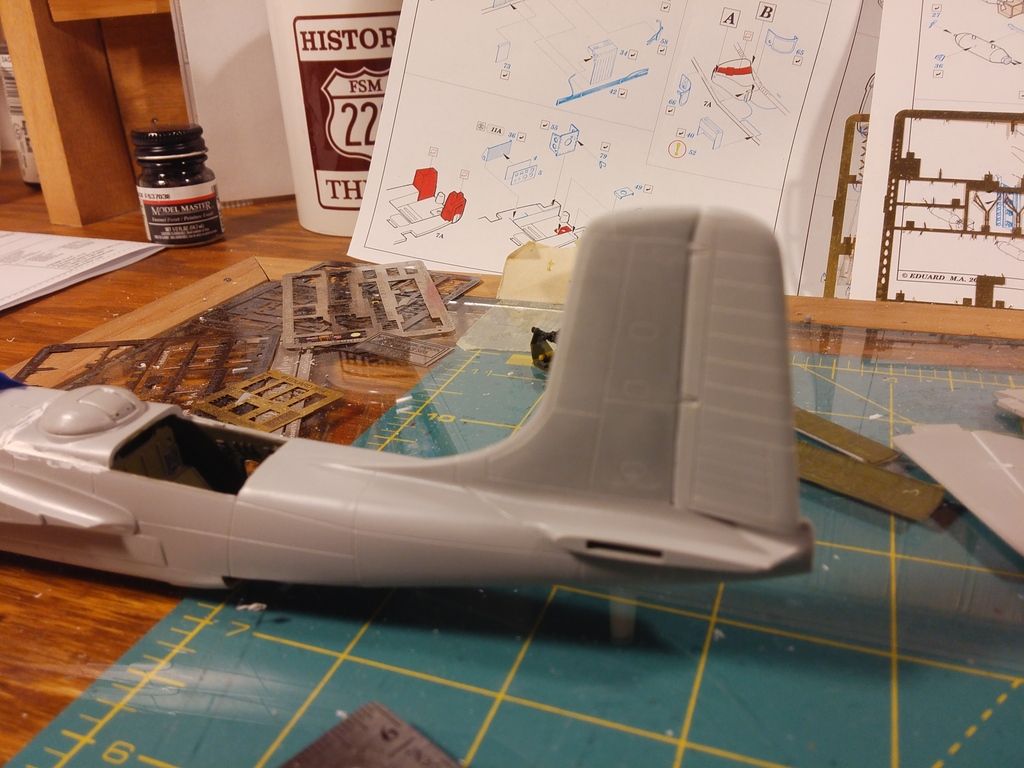
Still in the process of getting all the fuselage parts filled and sanded smooth.


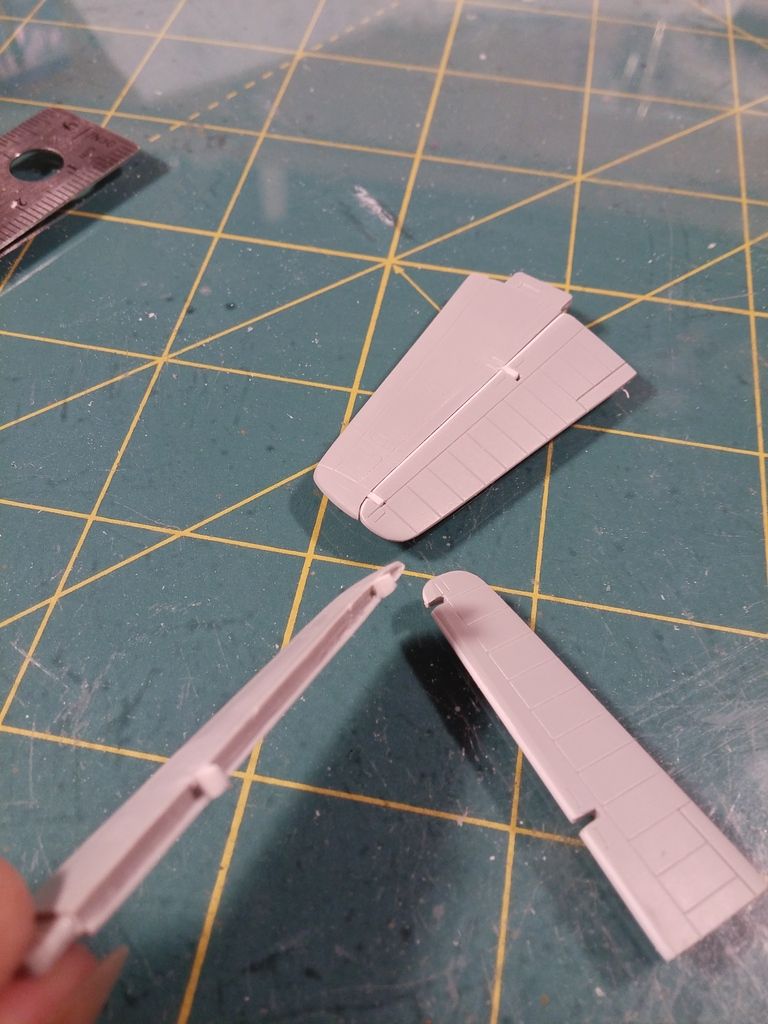
The tailplane/elevators are molded solid. I cut off the elevators, then carved a groove...tedious! 


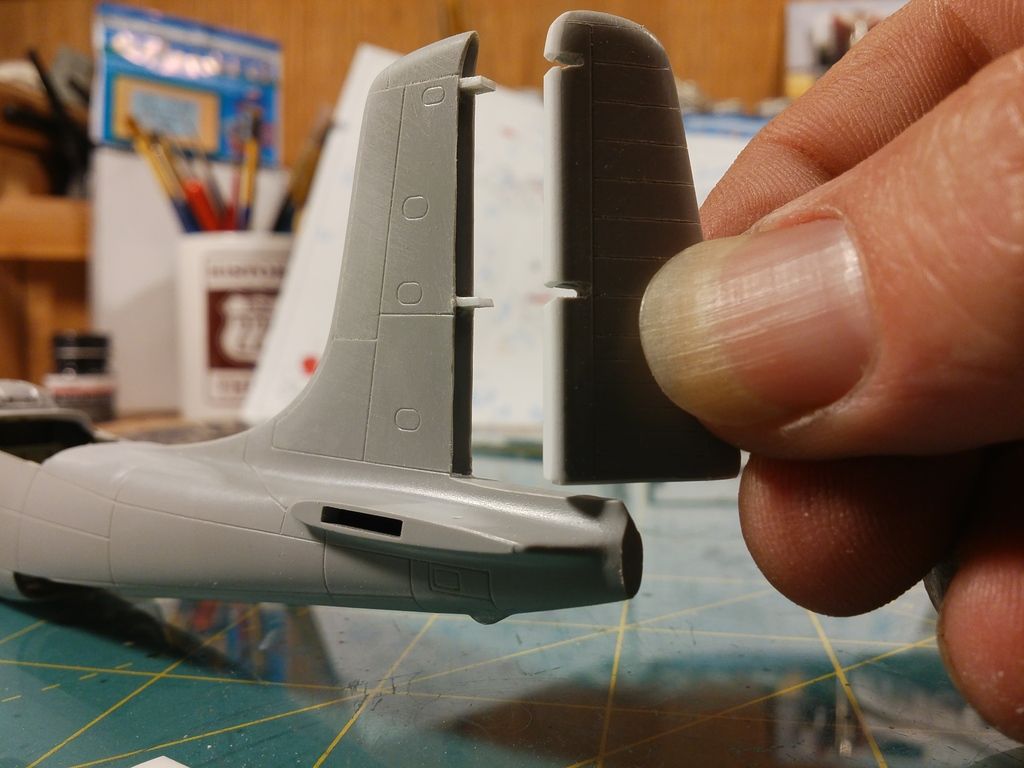
The rudder got the same treatment, but was much easier to bevel the inner edges before the fuse halves were glued up.


You gonna open up the top hatches above the cockpit or what?

  • Member since
    June 2010
  • From: Rochester, New York USA
Posted by rocker286 on Thursday, July 7, 2016 8:16 PM

Fermis your Invader looks awesome! Keep up the good work! Are you going to make it a WWII bird or one that served in Korea?

4badges

  • Member since
    July 2004
  • From: Sonora Desert
Posted by stikpusher on Thursday, July 7, 2016 7:16 PM

Yes for the control surfaces...


Bang Head for the vacuform stuff...


F is for FIRE, That burns down the whole town!

U is for URANIUM... BOMBS!

N is for NO SURVIVORS...

       - Plankton

LSM


  • Member since
    January 2009
  • From: hamburg michigan
Posted by fermis on Thursday, July 7, 2016 4:55 PM

Thanks again, dudes!Toast


So far...no two pieces have gone together without fighting...and when they finally do go together...it's ugly!

I cut the rear, clear piece from the vac-form set......


BOOOOOOOOOOOOOOOOOOOOOOOOOOOOO


Kit part is a little better...


Still in the process of getting all the fuselage parts filled and sanded smooth.


The tailplane/elevators are molded solid. I cut off the elevators, then carved a groove...tedious! 


The rudder got the same treatment, but was much easier to bevel the inner edges before the fuse halves were glued up.


  • Member since
    November 2003
  • From: Naples, FL
Posted by tempestjohnny on Saturday, July 2, 2016 11:42 AM

Revenant


simpilot34

WOW she's looking great!! Beautiful detailing!! AM goodies make a good kit even better!!Toast


This isn't bad for 1/48th scale...


This is 72nd scale


  • Member since
    May 2016
Posted by Revenant on Saturday, July 2, 2016 11:20 AM

simpilot34

WOW she's looking great!! Beautiful detailing!! AM goodies make a good kit even better!!Toast


This isn't bad for 1/48th scale...

  • Member since
    March 2006
Posted by simpilot34 on Saturday, July 2, 2016 5:52 AM

WOW she's looking great!! Beautiful detailing!! AM goodies make a good kit even better!!Toast

Cheers, Lt. Cmdr. Richie "To be prepared for war, is one of the most effectual means of preserving the peace."-George Washington
JOIN OUR COMMUNITY!

Our community is FREE to join. To participate you must either login or register for an account.

SEARCH FORUMS
FREE NEWSLETTER
By signing up you may also receive reader surveys and occasional special offers. We do not sell, rent or trade our email lists. View our Privacy Policy.