SEARCH FINESCALE.COM

Enter keywords or a search phrase below:

Second model: 1/48 Revellogram B-25J

3828 views
50 replies
1 rating 2 rating 3 rating 4 rating 5 rating
  • Member since
    November 2013
Second model: 1/48 Revellogram B-25J
Posted by bstarr3 on Monday, May 22, 2017 1:08 PM

This is my second model since taking the hobby back up recently. First one had lots of problems and learning experiences. Also learned that my 38 year old eyes prefer 48 scale to 72! Anyway, some pics of the Mitchell. I welcome criticisms and advice

Interior detail. (I know it won't be visible, but I wanted to practice)

Some additional weathering:

Bomb bay/wing spars in:

Detail wash on the nose gear:

Completed cockpit:

  • Member since
    January 2015
  • From: Tumwater, WA.
Posted by M. Brindos on Monday, May 22, 2017 1:51 PM

That is fabulous! It definitely looks like you have more experience than you are claiming. Very well done! I think I will be watching your progress with enthusiasm. :)

- Mike Brindos "Lost Boy"

  • Member since
    March 2015
  • From: Streetsboro, Ohio
Posted by Toshi on Monday, May 22, 2017 2:45 PM

You did a great job getting started.  I'm most impressed.

Toshi

On The Bench: Revell 1/48 B-25 Mitchell


Married to the most caring, loving, understanding, and beautiful wife in the world.  Mrs. Toshi


  • Member since
    November 2013
Posted by bstarr3 on Monday, May 22, 2017 2:46 PM

Cheers for the kind words! I did models when I was a kid, gave it up like many here when I was around 14, and just came back to it. Like I said I'm trying to practice on the detail work so what you see here is the result of hours of work - multiple washes in different colors, repeated rounds of drybrushing, continuing to go back to an area "one more time", etc.

I will say, this is my first time using an airbrush, and I will absolutely tell new modellers to jump in and invest in one. Just a quantum leap in what you can achieve with paints! I'm anxious about the exterior paint job and weathering but will continue to plug away at this and post pics of my progress.

  • Member since
    November 2013
Posted by bstarr3 on Monday, May 22, 2017 3:06 PM

Put together and filled/sanded the wings. I used Model Masters spray can white primer on one side. Went down rough and pebbly. Rust-Oleum Painters Touch 2x primer in black, however, went down a dream right out of the can. I recommend it highly.

Any advice on preserving raised details while sanding? I was going to cover over panel and rivet lines with thin masking tape strips.smoothing the primer shouldn't take much sanding, but I'm thinking ahead to fuselage, wing root, and nacelle seams/gaps that may take more filling and sanding.

  • Member since
    January 2015
  • From: Tumwater, WA.
Posted by M. Brindos on Monday, May 22, 2017 3:19 PM

Your story is not unlike so many of us here alright. I also started back up just after turning 39 and using my old hobby to wind down after work is what led me eventually start looking online for information. Since finding Genessis and FSM, among other forums, I've made significant progress in my skill levels.

I agree with you about investing in an airbrush as well. It opened up a whole new world of possibilities andit uses much less paint lol!

One more thing, about the repetition of going over those "areas" repeatedly... We all do that! Over and over again until you are happy with it. But look at those results! You should be very proud of that work because it is very well done!

Anyways, welcome! In a few months or a few more builds you're going to look back at this build and see how much progress you've made. You're going to be seriously good at this soon enough. I can see that.  :)

- Mike Brindos "Lost Boy"

  • Member since
    January 2015
  • From: Tumwater, WA.
Posted by M. Brindos on Monday, May 22, 2017 3:34 PM

Regular blue painters tape is a little thicker and resists sanding fairly well. You may still have to change it out if you have a lot of sanding to do in an area though.

I use Krylon Ultra Flat Black Camo, Rustoleum Flat Black, and Tamiya grey surface primers, all with excellent results.

When having to sand around raised surface details, sometimes you have to sacrifice them for a smooth join area. Sometimes you can add those details back. Stretched sprue can beused to add raised panel lines back. Some companies offer rivets as decals. There are options available and plenty of tricks and techniques to save those details or replace them.

- Mike Brindos "Lost Boy"

  • Member since
    August 2013
Posted by Jay Jay on Tuesday, May 23, 2017 9:59 AM

Welcome Sign Like you I have returned to the hobby I loved as a boy about 3 years ago.

A tip from your Uncle Jay ;

I have had good sucess restoring raised panel lines by sticking 2 strips of tape VERY close together and painting the gap with Mr. Surfacer 1000, letting it dry for 1/2 hour and carefully striping off the tape.


 I'm finally retired. Now time I got, money I don't.

  • Member since
    December 2002
  • From: Bury St Edmunds, Suffolk, England
Posted by Bish on Tuesday, May 23, 2017 10:04 AM

Some very nice work going into this.

If you do want to keep doing 72nd, an essential investment is an optivisor. Age and worn out eyes should be no bar to the One True Scale. Wink

I am a Norfolk man and i glory in being so


On the bench: Airfix 1/72nd Harrier GR.3/Fujimi 1/72nd Ju 87D-3

  • Member since
    November 2016
  • From: Maryland
Posted by iampiper13 on Tuesday, May 23, 2017 9:48 PM

Looking good! When I started this hobby back up again in Oct I started out with a 1/72 and at 53 yeah my eyes just couldnt do it lol

  • Member since
    February 2012
  • From: Olmsted Township, Ohio
Posted by lawdog114 on Wednesday, May 24, 2017 3:53 AM
Looking great.

 "Can you fly this plane and land it?...Surely you can't be serious....I am serious, and don't call me Shirley"


  • Member since
    November 2013
Posted by bstarr3 on Wednesday, May 24, 2017 4:22 PM

First problem:


The aft portion of the bombardier's compartment here sticks out past the bucket, so when I dry-fit it to the fuselage (which I haven't put together yet) it leaves about a 3mm gap. I guess im going to try to reapply glue to those joins, see if I can get them loose, and move the assembled parts forward in the bucket so it will mate cleanly to the fuselage. If it were an area that wasn't visible I'd sacrifice interior detail for clean seams. Unfortunately with that glass nose...


Also got the engine nacelles mated up to the wings. Did some trimming and sanding and they came together pretty well. There's a pretty large gap there on the underside. I read about someone using latex (not silicone) caulk for seams with good results. Im going to try it on this area that shouldnt show much. My plan is to go over the join with a wet qtip or finger and smooth it to the point that it doesn't need sanding. 


Also got the cockpit glued into the fuselage


  • Member since
    January 2015
  • From: Tumwater, WA.
Posted by M. Brindos on Wednesday, May 24, 2017 4:33 PM

I had similar gaps on my P-40. I used strips of Evergreen sheet styrene so I wouldn't lose the raised detail and sanding was minimized with no putty. I still ended up sanding a little and losing a bit of detail, but the connection is most assuredly more solid.

You could give that a shot instead of latex caulking.

- Mike Brindos "Lost Boy"

  • Member since
    August 2015
  • From: the redlands Fl
Posted by crown r n7 on Wednesday, May 24, 2017 4:35 PM

Awesome job  I be watching this.


 Nick.

  • Member since
    November 2013
Posted by bstarr3 on Wednesday, May 24, 2017 5:30 PM

M. Brindos

I had similar gaps on my P-40. I used strips of Evergreen sheet styrene so I wouldn't lose the raised detail and sanding was minimized with no putty. I still ended up sanding a little and losing a bit of detail, but the connection is most assuredly more solid.

You could give that a shot instead of latex caulking.


Unfortunately I don't have any stock styrene, nor do I have a local hobby store. So I have to identify options that don't involve a one week turnaround ordering from online. I'll report on the caulk. On old thread I read on here suggested that it worked quite well

  • Member since
    January 2015
  • From: Tumwater, WA.
Posted by M. Brindos on Wednesday, May 24, 2017 5:36 PM

Old credit cards work well as a substitute for sheet styrene, but I'm curious about the latex anyways lol. If it does work out well it may just solve a few of my problems as well.  :) 

- Mike Brindos "Lost Boy"

  • Member since
    November 2013
Posted by bstarr3 on Thursday, May 25, 2017 1:16 PM

the caulk worked beautifully! Fills the seam nicely, and you can wipe excess away with a wet qtip so there's nothing to sand away. The advantage over plastic putty or Bondo is that it's completely nonreactive with the plastic. It does shrink down a little. If you were looking for a completely flush seam it might take a few layers. I wanted to leave a seam here because it's a seam in real life, but just to fill the big gap was there.

Before:


After:


  • Member since
    January 2015
  • From: Tumwater, WA.
Posted by M. Brindos on Thursday, May 25, 2017 1:22 PM

That's convinced me! I'll be looking for some latex caulk now.  Thanks!

- Mike Brindos "Lost Boy"

  • Member since
    November 2013
Posted by bstarr3 on Thursday, May 25, 2017 1:25 PM

hmm. Don't know why the after picture didn't post. I'll try to fix it later. I bought Ace brand latex painters caulk, huge tube for $2. Couldn't find any in the little toothpaste tubes that didn't have silicone in it, so had to use the kind that uses a gun.

  • Member since
    December 2002
  • From: Lyons Colorado, USA
Posted by Ray Marotta on Thursday, May 25, 2017 1:42 PM
You should have plenty of scrap sprue your kit's parts came on. Stretch that out and fill your large gaps with it. PLENTY of info about stretching sprue on this forum.

 ]


  • Member since
    January 2015
  • From: Tumwater, WA.
Posted by M. Brindos on Thursday, May 25, 2017 1:43 PM

The after picture is showing. No small tubes, eh? Guess that means I'll have a vast supply of gap filler for a looooonnng time lol.

- Mike Brindos "Lost Boy"

  • Member since
    November 2013
Posted by bstarr3 on Thursday, May 25, 2017 2:06 PM

Tried stretched sprue on a tailplane gap on my first kit. Ended up with a very sloppy joint and sanding off all my detail just to get the excess glue smooth. I do need to practice that technique. Might try it somewhere on this model if I find the appropriate spot.

Also, took apart and reassembled the bombardier's compartment and it sits much more cleanly against the fuselage. There's still going to be a pretty good seam/gap to fill, but it's manageable. Im not looking forward to putting g together the fuselage halves. Looks like there is going to be quite a bit of seam work there. Waiting for my Touch n Flow to arrive in the mail next week for that part.

Meanwhile, putting resin gun barrels on and masking the glass. Probably painting and detailing the engines too. Any advice on painting the 50 cals?

  • Member since
    January 2015
  • From: Tumwater, WA.
Posted by M. Brindos on Thursday, May 25, 2017 6:17 PM

Yeah! Paint them flat black and rub them down with a graphite pencil. If you can find an old lead pencil theeffect is not as stark, but wil look the same after a clear coat.

Easy, effective, and looks perfectly like the real finish.

- Mike Brindos "Lost Boy"

  • Member since
    November 2013
Posted by bstarr3 on Thursday, May 25, 2017 6:36 PM
Cool. So just a regular pencil? Or one of those fancy ones from the art store? Am I hitting just the high points, like drybrushing, or giving it an all-over coat of graphite?
  • Member since
    January 2015
  • From: Tumwater, WA.
Posted by M. Brindos on Thursday, May 25, 2017 6:44 PM

Just a standard pencil works fine. The softer art ones are easier to grind down if you want to brush it on though. Hit the highlights or, as I do, rub down the entire thing. You won't be able to get all of the crevices, but you don't needs to. "Try it, you'll like it" lol. I do this on all gun barrels. Its just the most realistic finish for them IMHO.

You can even black wash over it for filling in the deep areas!

- Mike Brindos "Lost Boy"

  • Member since
    January 2017
  • From: Colorado Springs
Posted by mawright20 on Thursday, May 25, 2017 7:36 PM
You are the Man! You just saved some of my biggest headaches...
  • Member since
    January 2015
  • From: Tumwater, WA.
Posted by M. Brindos on Thursday, May 25, 2017 8:06 PM

The gap filling latex painter's caulk? I can't imagine machines guns are all that troublesome. Lol!

- Mike Brindos "Lost Boy"

  • Member since
    August 2016
Posted by Keyda81 on Thursday, May 25, 2017 8:19 PM

I may have to give the caulk thing a try myself!  I've been using perfect plastic putty, and I really love it.  But if I run out I know what to try!

Nice looking build so far!  I'll be watching.

  • Member since
    November 2013
Posted by bstarr3 on Sunday, May 28, 2017 11:52 AM

Update: the caulk has shrunk down a little more after a couple days, so I would recommend two applications for any use, knowing that it's going to receed somewhat.  

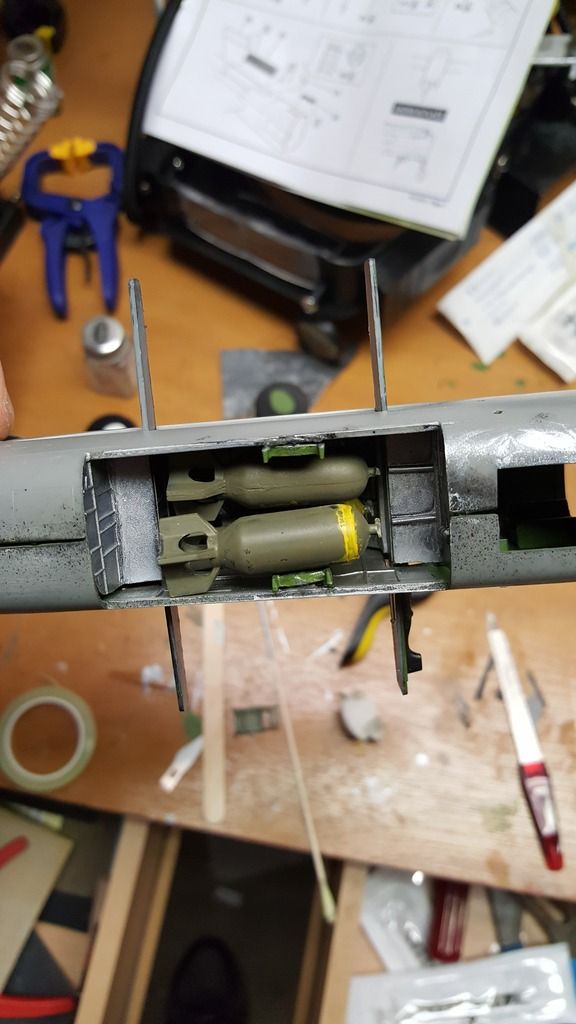
Bomb racks and sloppily-painted bombs installed:
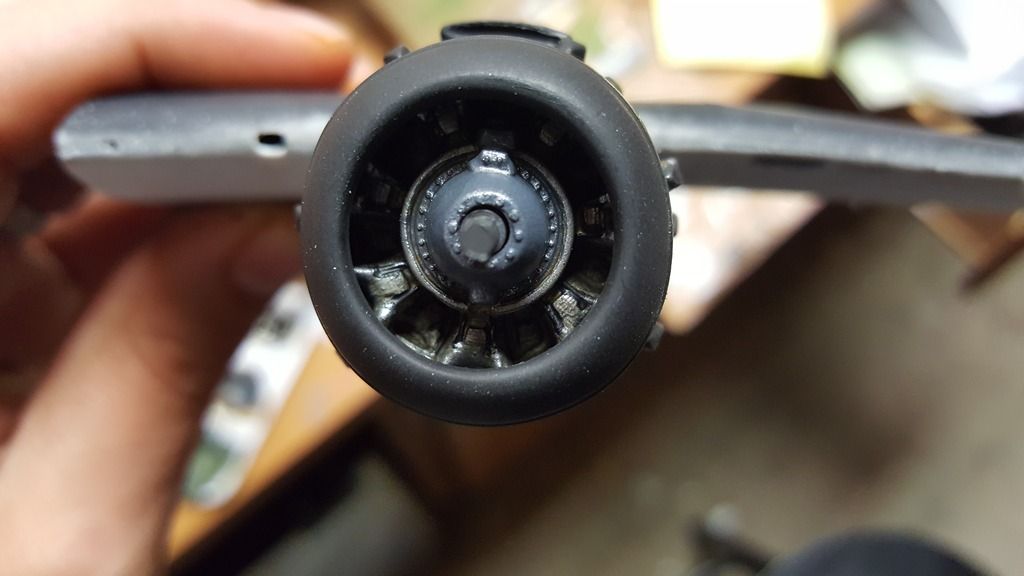
Engines painted and detailed, installed with cowlings onto engine nacelles:
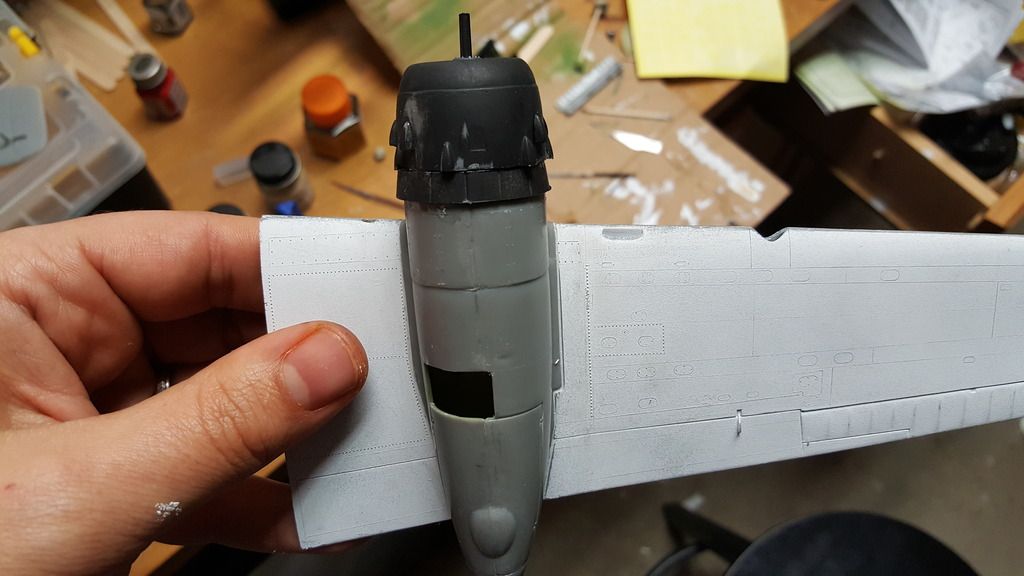
With the wings completed, I think I'm going to try spraying the OD/NG on these. My only pause is that I'm going to have to mix the grey, since I don't have any, and I'm not sure I can make it an exact match when I mix the rest for the fuselage.  

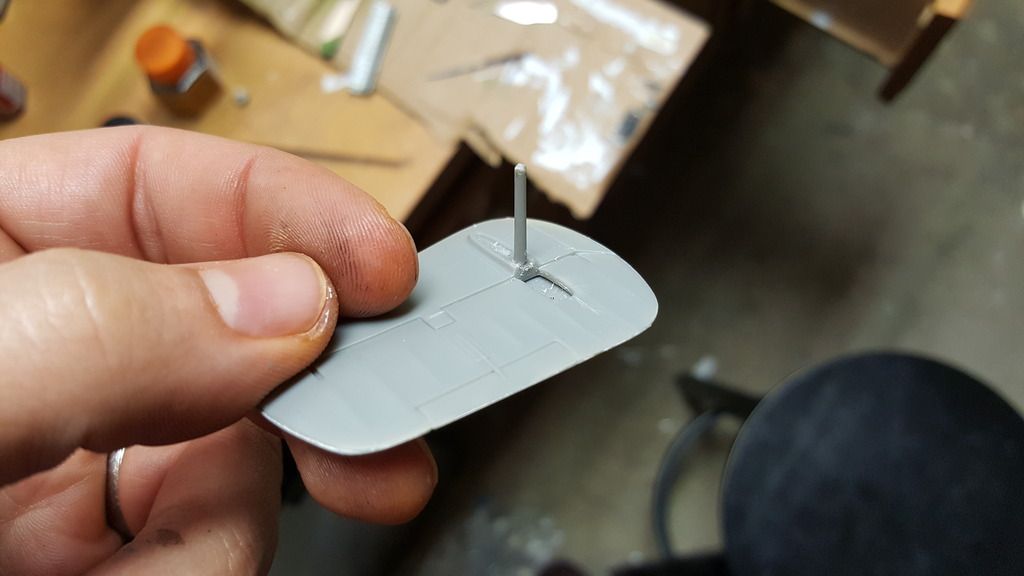
This little post was broken out of the box. Replaced it with stretched sprue.  Hopefully it'll be strong:
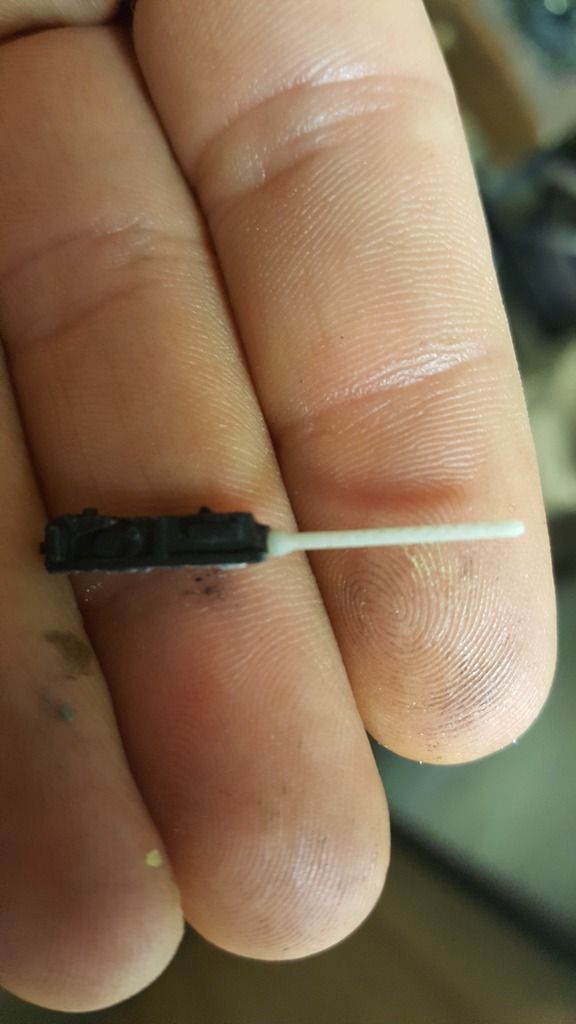
Bought quick boost barrells.  Unfortunately, the set I got's for the B-25B, which means there are only seven barrels instead of the 19 on this bird.  I'm going to use them on the nose mounted guns and the waist guns.  
Also sadly found the mask set I ordered was for the -B model, meaning it's not very useful for the canopies on my J.  I'm going to experiment with a couple of things, since fortunately this kit comes with two complete sets of clear.  Has anybody ever tried painting over the whole canopy and picking the paint off of the clear glass with a toothpick?  As tedious as applying a pre-cut masking set seems, using tape and cutting each window out individually seems even more so.  

  • Member since
    January 2017
  • From: Colorado Springs
Posted by mawright20 on Sunday, May 28, 2017 5:43 PM
I have built three of these kits. For some reason as you can see from your pics, the bombs don't seem to fit well into the bay. I've made the move to paint a yellow base on the bombs, thin tape around the front end and overpaint with OD to finish the colors.
JOIN OUR COMMUNITY!

Our community is FREE to join. To participate you must either login or register for an account.

SEARCH FORUMS
FREE NEWSLETTER
By signing up you may also receive reader surveys and occasional special offers. We do not sell, rent or trade our email lists. View our Privacy Policy.