SEARCH FINESCALE.COM

Enter keywords or a search phrase below:

Squadron Products/Encore Models 1/48 F-84F THUNDERSTREAK

8275 views
33 replies
1 rating 2 rating 3 rating 4 rating 5 rating
  • Member since
    July 2003
  • From: Cincinnati, Ohio
Squadron Products/Encore Models 1/48 F-84F THUNDERSTREAK
Posted by ridleusmc on Sunday, August 12, 2018 2:09 PM

Hello Everybody,

Vallejo's new line of Metal Color Acrylics had inspired me to try a natural metal finish aircraft.  I'm just one of those modelers that prefers the ease of acrylics, and I was always a little put-off by enamels and lacquers.  I read FSM's article using Vallejo Metal Color to paint an F-86 Sabre.  The article made it sound a little difficult.  Then I saw a Flory Model's review of the paint.  I got the impression that Vallejo's products were the easiest way of doing natural metal without the smell of enamels or lacquers.  I decided to try it.    

I wanted the subject to be an US Air Force jet.  I considered everything from the P-80 to the century series.  I wanted a classic.  The F-84F had a sporty look, and the Hobby Boss kit was decently reviewed.  The Squadron Products' special edition used the Hobby Boss plastic, which I discovered by watching kit reviews.  The Squadron kit also came with a resin seat, and there were cheap kits on Amazon.  In fact, the Squadron special edition was cheaper than the Hobby Boss kit.  It was a no-brainer. 
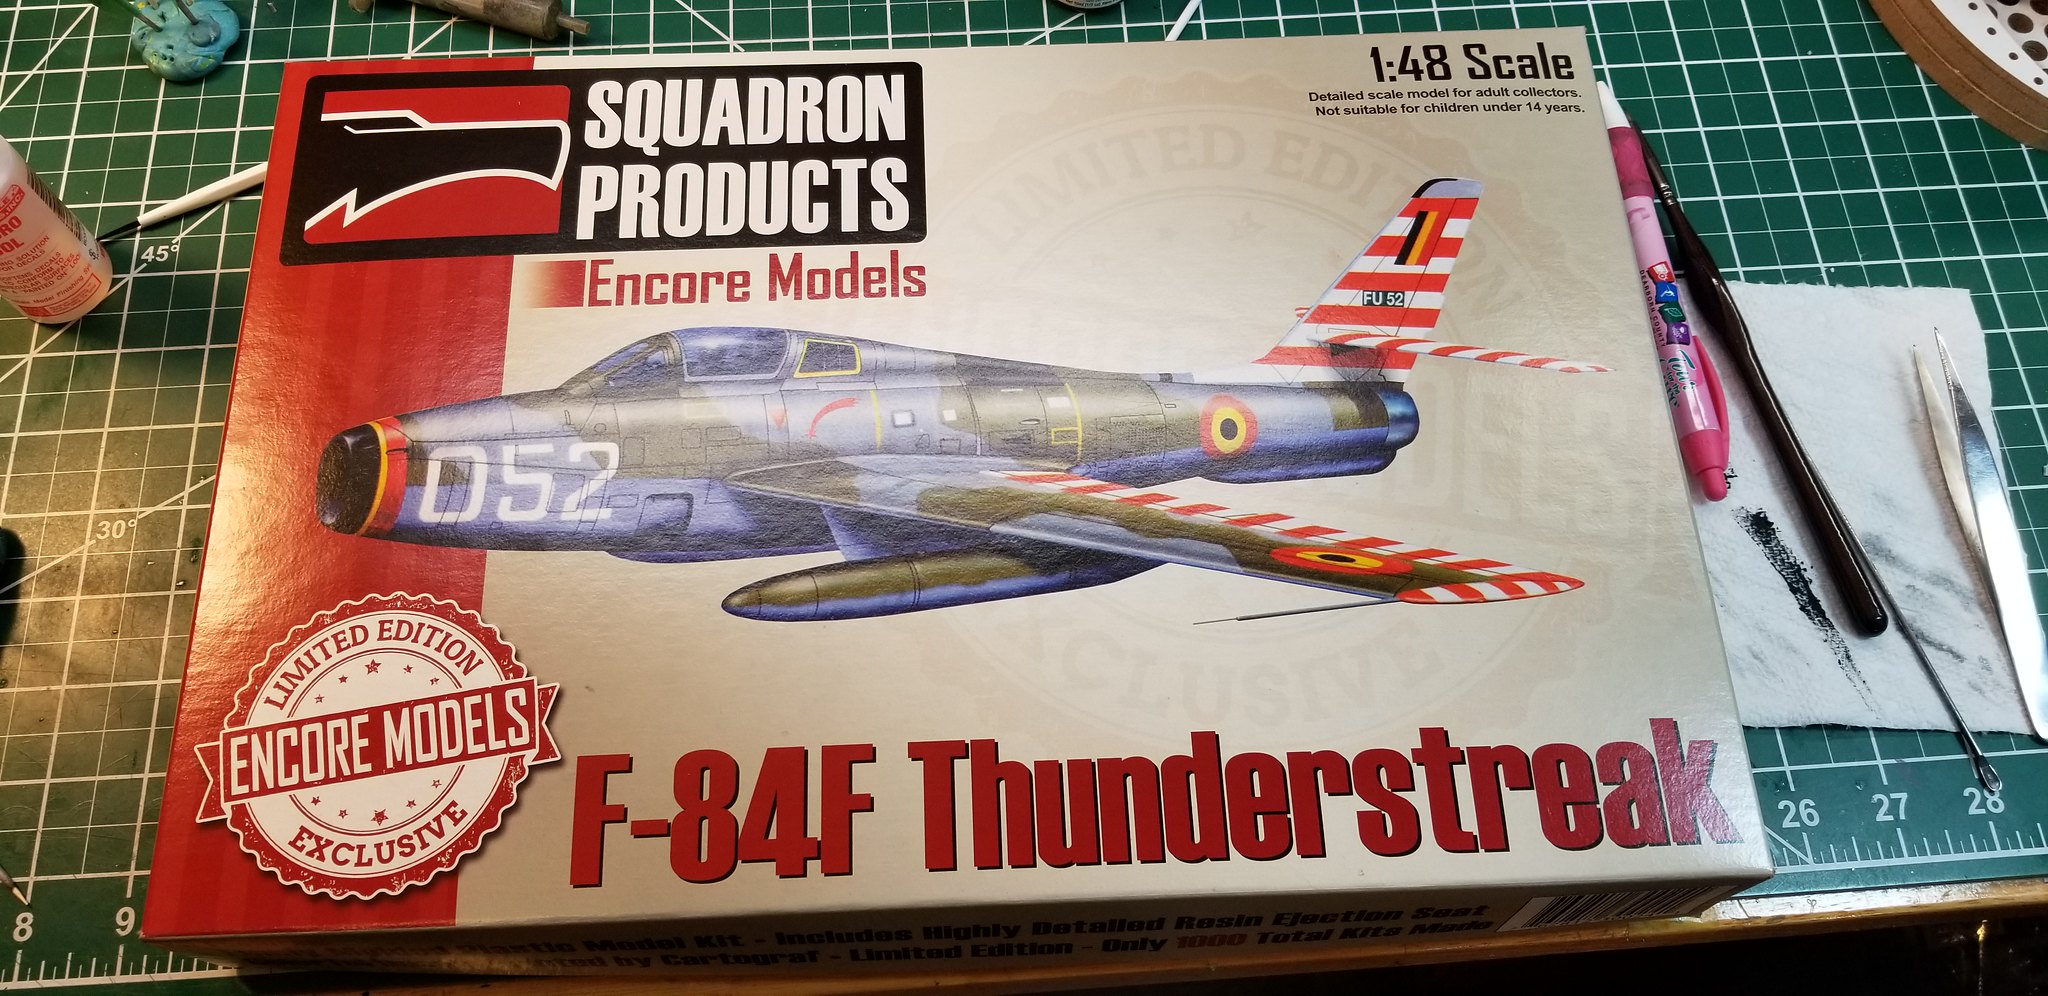
 20180627_010230 by Christopher Ridle, on Flickr

Decals for a beautiful NMF USAF bird were in the kit. 
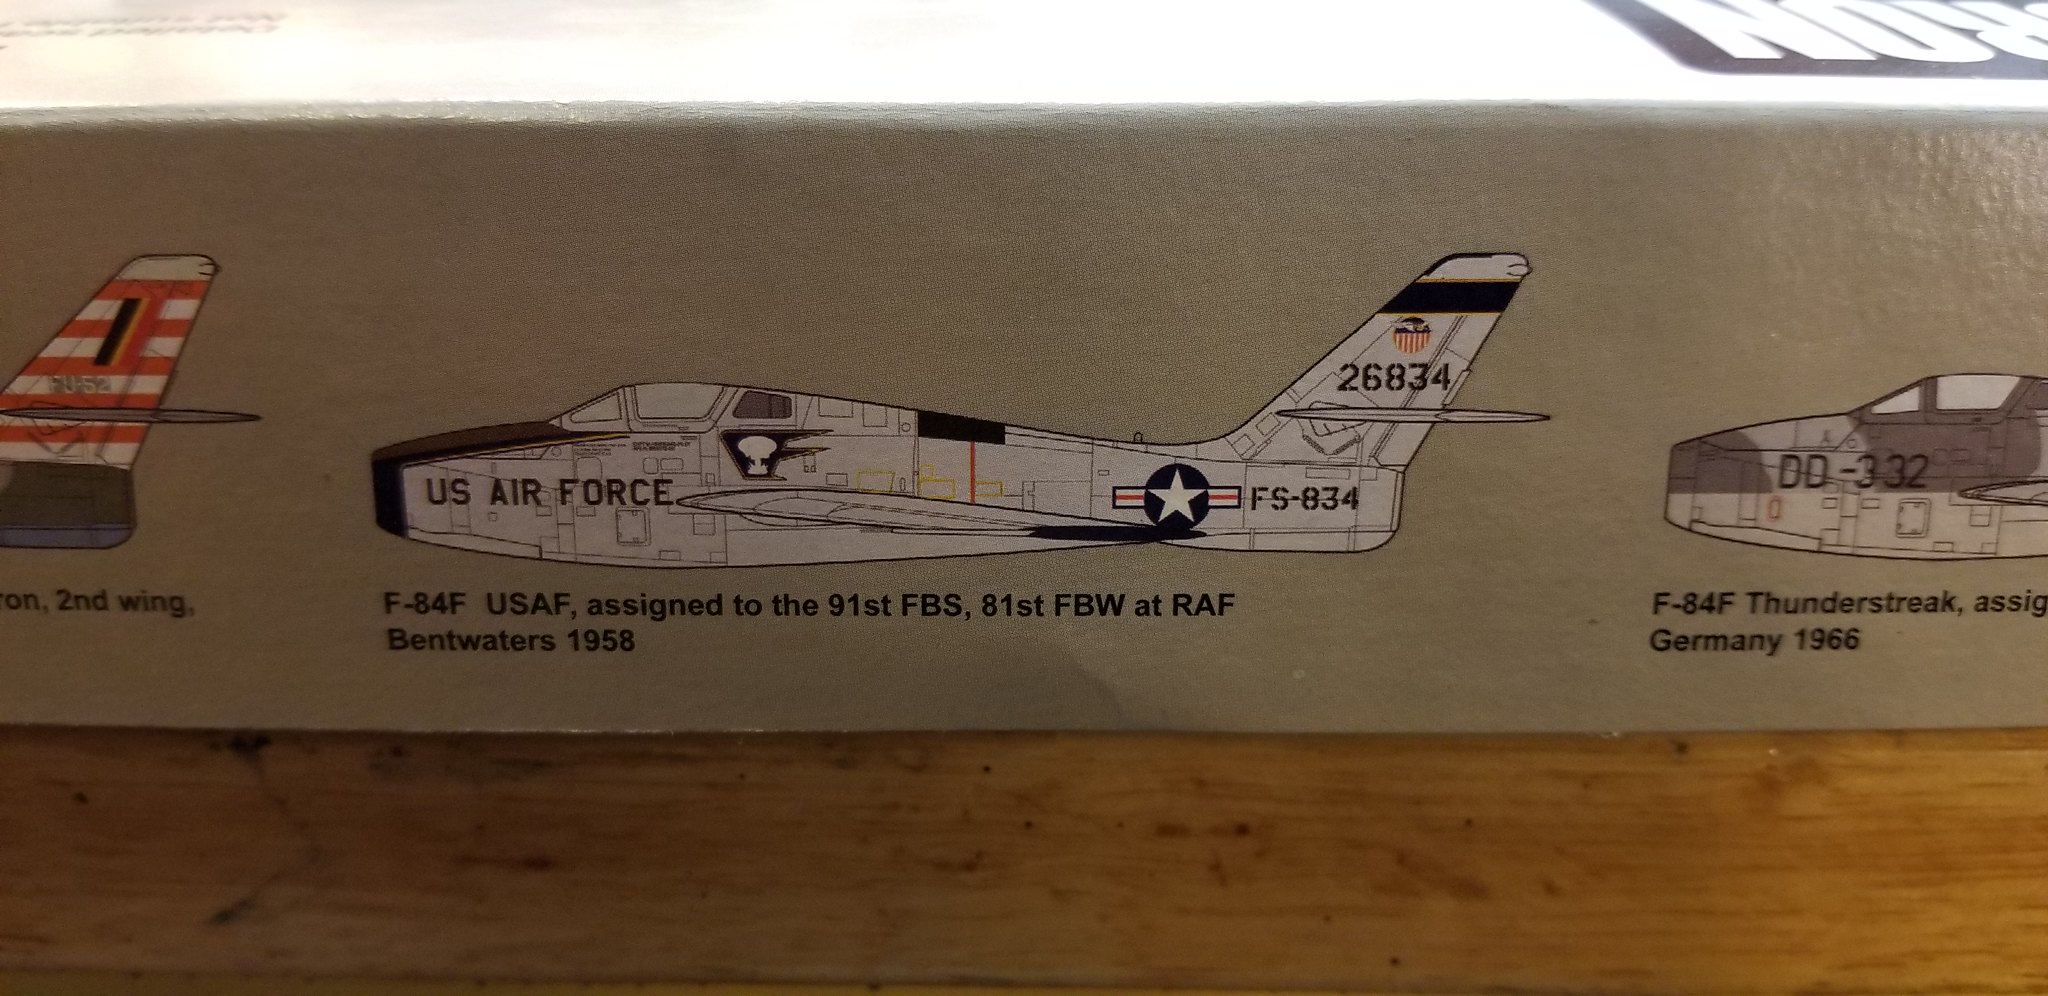
 20180627_010245 by Christopher Ridle, on Flickr

The resin seat was quite nicely molded, but the rest of the cockpit was pretty basic.
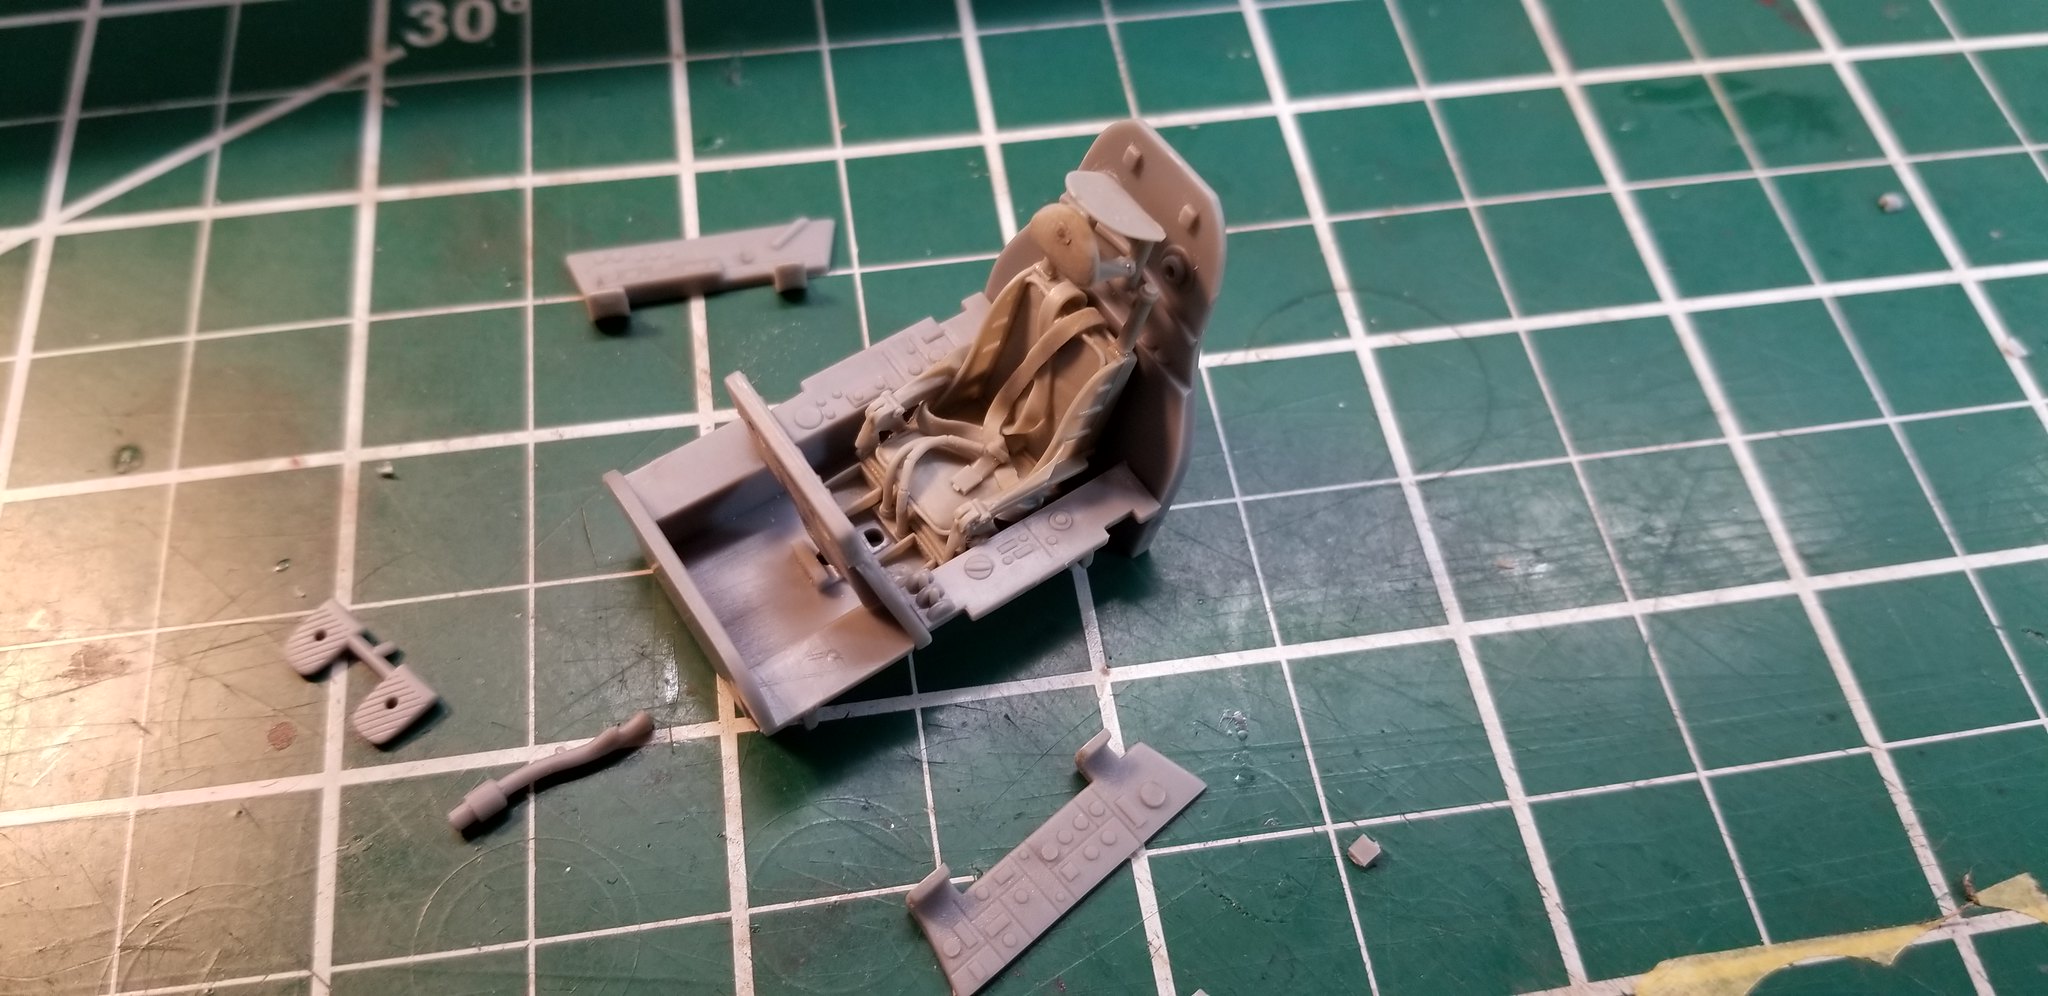
 20180703_012849 by Christopher Ridle, on Flickr

However, I was happy with the build up.  The controls can't really be seen after build-up anyway.

 20180705_000436 by Christopher Ridle, on Flickr

The seat should be visible when the kit is complete.

 20180705_000518 by Christopher Ridle, on Flickr

The kit built up quickly and easily.  There were steps and seams in the usual spots, but nothing very large or challenging.

 20180718_190751 by Christopher Ridle, on Flickr

Vallejo's Polyurethane black primer (77.660) was not easy to use.  It clogs airbrushes.  Experimentation with thinner and flow-improver did not make it easier to use.  Eventually, I settled on a ratio that was about 2:1, primer to thinner with a drop of flow improver.  It would still clog my airbrush, but I could deal with it.  I'd swab the nozzle often with a thinner-soaked Q-tip.  I don't think I'll use the product again.  Tamiya's X-1 Gloss Black could do the job with greater ease. 

 20180720_211546 by Christopher Ridle, on Flickr

There was a spot where the primer sputtered out of my airbrush.  The polyurethane has a tendancey to peal instead of sand.  So removing such imperfections takes a great deal of work. 

 20180720_211601 by Christopher Ridle, on Flickr  

Eventually, I was happy with the gloss black primer coat.

 20180720_212118 by Christopher Ridle, on Flickr

I gave the model an Aluminum (77.701) coat, then I gave it a dusting of Duraluminum (77.702).  The landing gear, flaps, speed brake panels and aft panel (around exhaust) got Semi-Matte Aluminum (77.716).  The landing gear door interiors and speed brake well interiors got Dull Aluminum (77.717).  The engine exhaust got Jet Exhaust (77.713).  The paint itself was very easy to use.  I used a 2:1 paint to thinner, and it worked rather well for all colors.   

 20180725_231133 by Christopher Ridle, on Flickr

 20180725_231105 by Christopher Ridle, on Flickr
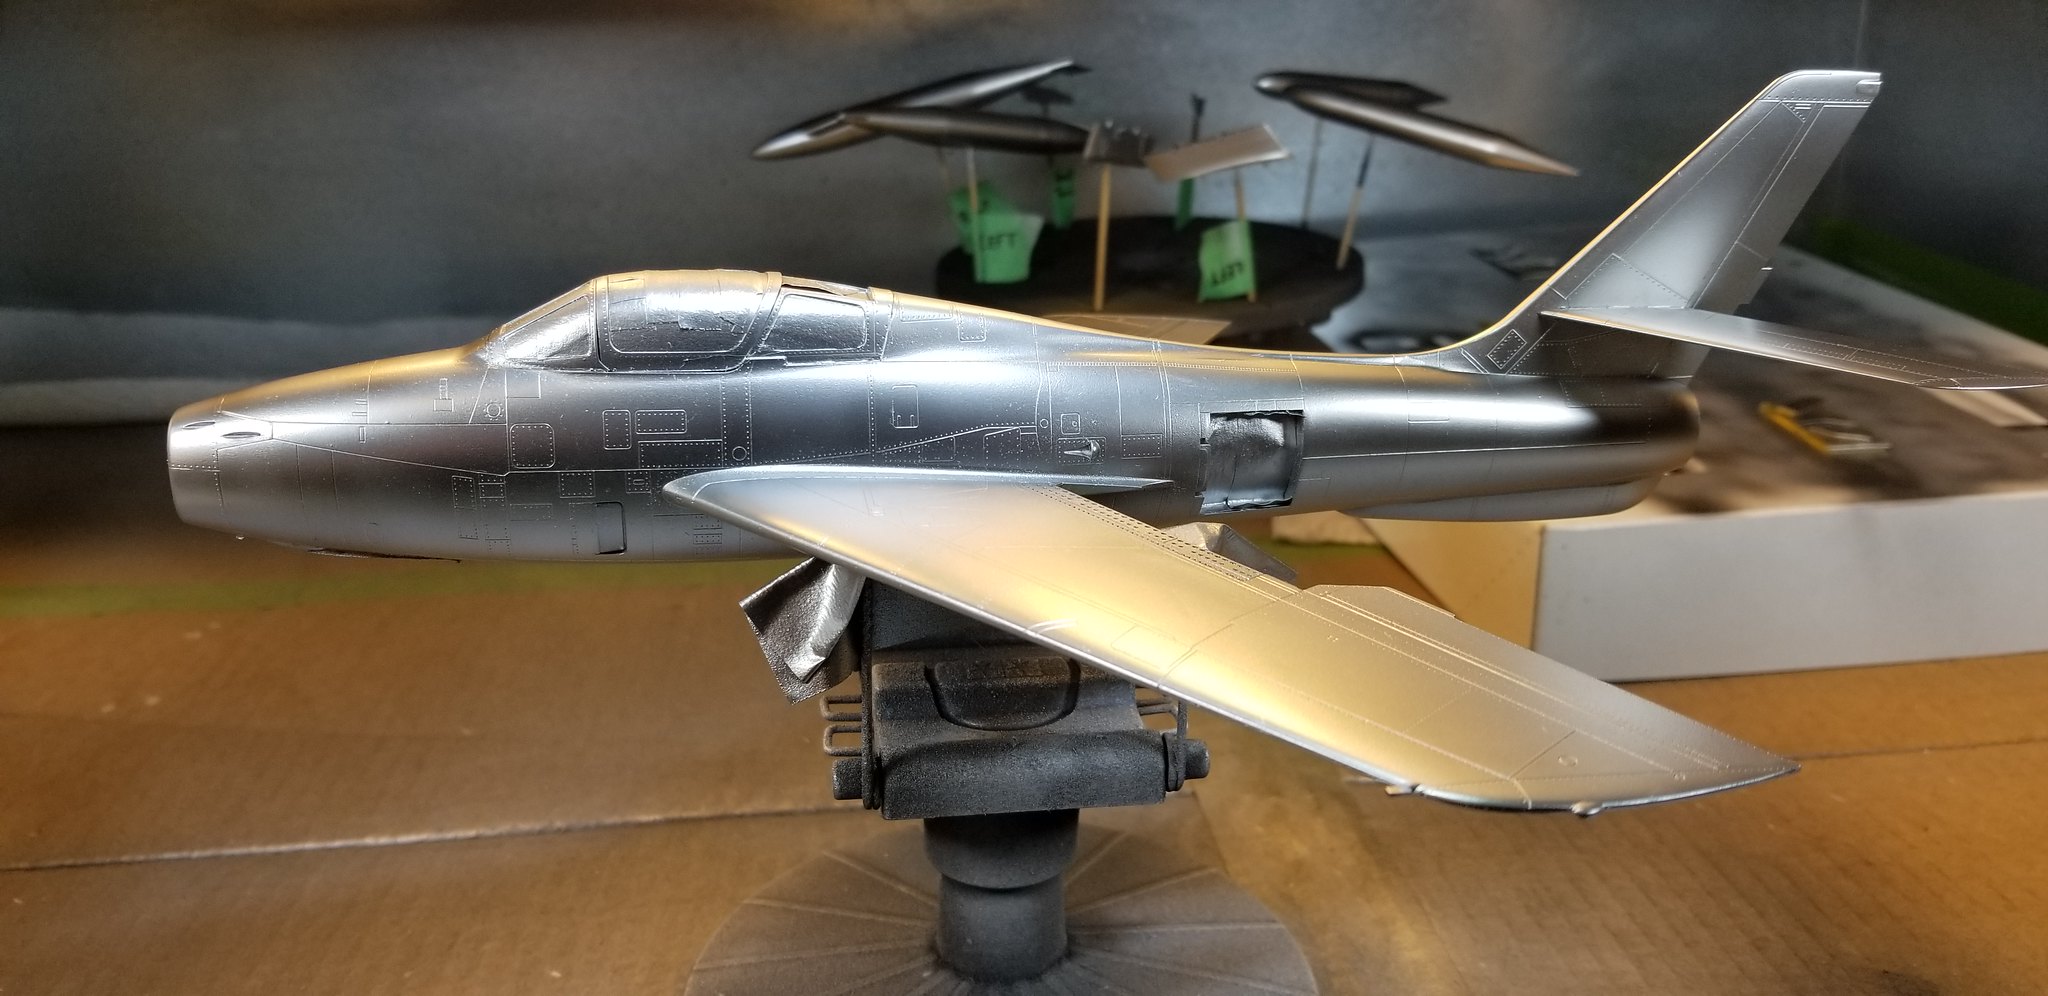
 20180725_231142 by Christopher Ridle, on Flickr

The decals were great, with the exception of the nose decal.  The decal included the blue band that wrapped around the intake.  It also incorporated the olive drab anti-glare panel.  The blue portions were fine, but the OD section wouldn't settle down over the curves of the plane.  

 20180727_231225 by Christopher Ridle, on Flickr

 20180727_231232 by Christopher Ridle, on Flickr

I worked them a great deal, but I couldn't get the folds to settle down.

 20180729_203940 by Christopher Ridle, on Flickr

Finally, I sanded off the offending folds.  After a clear coat, I carefully masked the anti-glare panel, and I painted the whole OD area.  

 20180729_203958 by Christopher Ridle, on Flickr

I was pretty happy with how things were going.

 20180731_203711 by Christopher Ridle, on Flickr

Flory Model's Dark Dirt wash was used for weathering.  This was my first try with this stuff.  I experimented on a fuel tank before touching the plane.  I really like the stuff.  It's recommended to cover the whole model.  Let it dry, and then remove the excess with a moistened cloth and Q-tips.  It worked well.  It makes for an ugly model while it dries.   

 20180806_153904 by Christopher Ridle, on Flickr

 20180806_155324 by Christopher Ridle, on Flickr

I like the results, and I didn't think the plane needed anything else.  

 20180806_204758 by Christopher Ridle, on Flickr

I should've weighted the nose, but I didn't.  The thing was a major tail-sitter after I installed the landing gear.  I drilled holes into the large fuel tanks, and rolled BB's to their noses.  Then, I squirted some CA glue in them to hold the BB's.  The holes are just under the mount pylons.  

After I got her sitting nice, I started working on the last bits.  This includes the canopy, the pitot tube, and the landing gear doors.  I decided to model the flaps up and the air-brakes closed, because this matches the majority of the reference pics with aircraft sitting on the tarmac.  

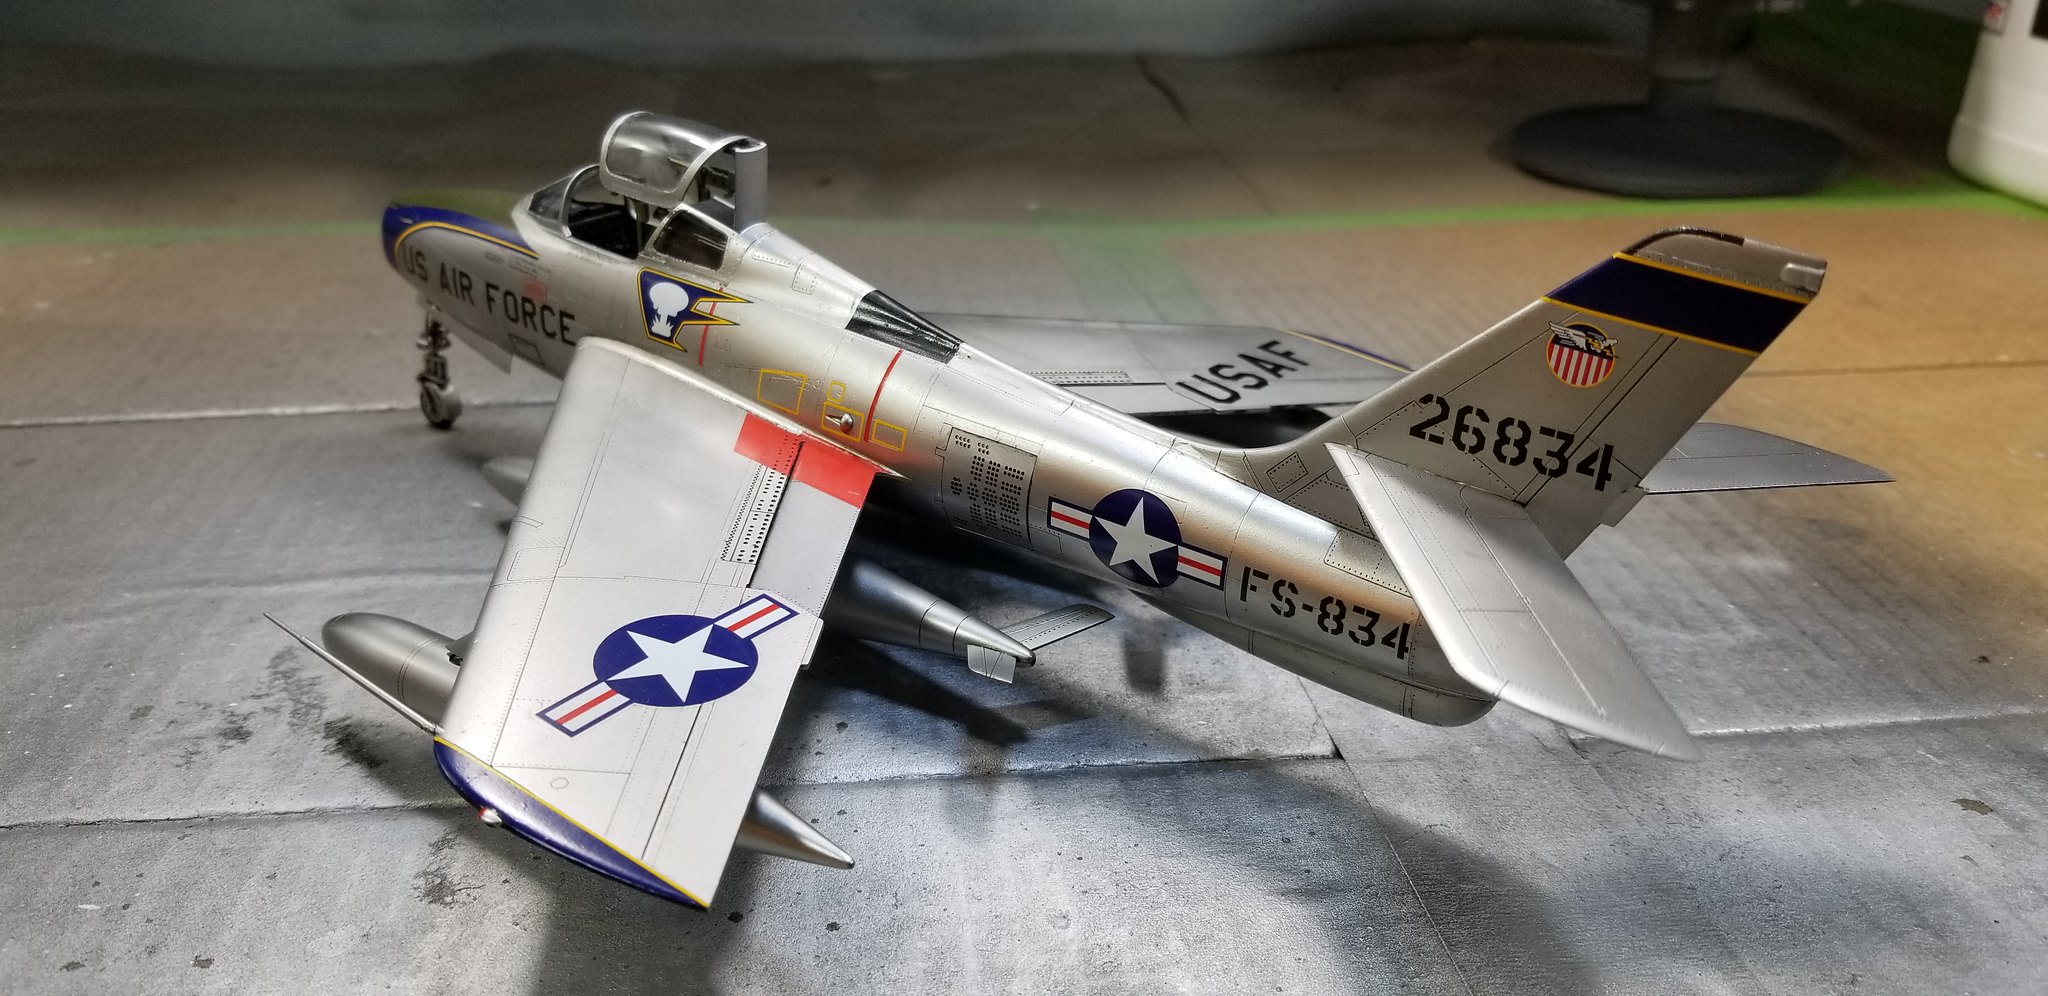
I'm pretty happy with this one.  Its NMF gives it a presence in my case.  It catches the eye when I walk into the room.  

 20180808_185036 by Christopher Ridle, on Flickr
 20180808_185052 by Christopher Ridle, on Flickr

 20180808_185152 by Christopher Ridle, on Flickr

 20180808_185112 by Christopher Ridle, on Flickr

 20180808_185127 by Christopher Ridle, on Flickr

 20180808_185140 by Christopher Ridle, on Flickr

 20180808_185210 by Christopher Ridle, on Flickr

 20180808_185226 by Christopher Ridle, on Flickr

 20180808_185245 by Christopher Ridle, on Flickr

 20180808_185258 by Christopher Ridle, on Flickr

 20180808_185322 by Christopher Ridle, on Flickr

 20180808_185428 by Christopher Ridle, on Flickr

  • Member since
    August 2012
  • From: Parker City, IN.
Posted by Rambo on Sunday, August 12, 2018 2:27 PM
Beautiful build and great nm finish.

Clint

  • Member since
    July 2003
  • From: Cincinnati, Ohio
Posted by ridleusmc on Sunday, August 12, 2018 2:29 PM

Thank you Rambo!  

It's good to know that I don't have to fear the metal.

  • Member since
    November 2003
  • From: State of Mississippi. State motto: Virtute et armis (By valor and arms)
Posted by mississippivol on Sunday, August 12, 2018 3:37 PM
Turned out great!
  • Member since
    July 2003
  • From: Cincinnati, Ohio
Posted by ridleusmc on Sunday, August 12, 2018 4:14 PM

Thank you Mississippivol!

  • Member since
    April 2015
Posted by Mopar Madness on Sunday, August 12, 2018 6:18 PM

Very cool!   I’m not brave enough to try a metallic finish, yours looks outstanding! 

Chad

God, Family, Models...

At the plate: 1/48 Airfix Bf109 & 1/35 Tamiya Famo

On deck: Who knows!

  • Member since
    February 2005
  • From: Cleveland, OH
Posted by RadMax8 on Sunday, August 12, 2018 6:49 PM

Wow this turned out really nice! The detail of your documentation is fantastic as well. 

I feel your pain with acrylic primers... I recently started using some paints from Mission Models and figured I’d give their primer a go. My biggest problem was that it was a nightmare to clean out of my airbrush! The thinner provided by Mission Models didnt even touch it. Had to use lacquer thinner, which kind of defeated the purpose.

Anyway, thanks for sharing! You did a great job. 

  • Member since
    November 2003
  • From: Naples, FL
Posted by tempestjohnny on Sunday, August 12, 2018 7:03 PM
Great build Chris. Now you need a Thunderjet next to it.


  • Member since
    December 2010
  • From: Salem, Oregon
Posted by 1943Mike on Sunday, August 12, 2018 8:52 PM

Ended up as an excellent build! Kudos.

Noticed that you use the same A/B I use for 95% of my painting - Badger 105 Patriot.

Mike

"Le temps est un grand maître, mais malheureusement, il tue tous ses élèves."

Hector Berlioz

  • Member since
    December 2002
  • From: Northern California
Posted by jeaton01 on Sunday, August 12, 2018 11:37 PM

Slick looking model!

Very brave masking that antiglare panel, glad you got away with that.

John

To see build logs for my models:  http://goldeneramodel.com/mymodels/mymodels.html


  • Member since
    July 2003
  • From: Cincinnati, Ohio
Posted by ridleusmc on Monday, August 13, 2018 12:05 AM

Mopar Madness

Very cool!   I’m not brave enough to try a metallic finish, yours looks outstanding! 


Thank you Chad.  Honestly, I wasn't that brave either.  I started watching videos and that boosted my confidence.  Then, I started spraying metal colors on a piece of Evergreen stock, and that boosted my confidence further.  

  • Member since
    July 2003
  • From: Cincinnati, Ohio
Posted by ridleusmc on Monday, August 13, 2018 12:07 AM

RadMax8

Wow this turned out really nice! The detail of your documentation is fantastic as well. 

I feel your pain with acrylic primers... I recently started using some paints from Mission Models and figured I’d give their primer a go. My biggest problem was that it was a nightmare to clean out of my airbrush! The thinner provided by Mission Models didnt even touch it. Had to use lacquer thinner, which kind of defeated the purpose.

Anyway, thanks for sharing! You did a great job. 


Thank you Max, 

These thinners are a pain.  I think next time, I'll just prime it with Tamiya X-1.  

  • Member since
    July 2003
  • From: Cincinnati, Ohio
Posted by ridleusmc on Monday, August 13, 2018 12:09 AM

tempestjohnny
Great build Chris. Now you need a Thunderjet next to it.
 

Thank you tempestjohnny, 

I really like the Tamiya Thunderjet kit.  You're right, a Thunderjet would look great next to the Thunderstreak.  Maybe I can fit a Thunderflash in there too.  

  • Member since
    April 2003
  • From: USA
Posted by keavdog on Monday, August 13, 2018 12:17 AM

Really nice build.  The NMF turned out great.  I have the ancient monogram kit of this subject and I'm considering upgrading.  Do you have any comparison? 

Thanks,

John

  • Member since
    July 2003
  • From: Cincinnati, Ohio
Posted by ridleusmc on Monday, August 13, 2018 12:29 AM

1943Mike

Ended up as an excellent build! Kudos.

Noticed that you use the same A/B I use for 95% of my painting - Badger 105 Patriot.


Thank you Mike.  I have two Badgers.  I've gotten use to using my 155 Anthem for most color applications.  I find the 105 Patriot is great for the Vallejo Metal Color range.  Vallejo recommends high pressure for the metallic acrylics, but I've sided with the reviewers.  They advocate for low pressure, and the gravity feed of the 105 Patriot works great for the stuff at low pressure.  

  • Member since
    July 2003
  • From: Cincinnati, Ohio
Posted by ridleusmc on Monday, August 13, 2018 12:33 AM

jeaton01

Slick looking model!

Very brave masking that antiglare panel, glad you got away with that.


I made sure I put a good coat of Future down, and I let it dry for a day before I tried it.  I also applied the masking tape to my hand a few times to wear down its tackyness.  After I was done applying paint, I peeled the tape away as gingerly as possible. 

Thank you jeaton!


  • Member since
    July 2003
  • From: Cincinnati, Ohio
Posted by ridleusmc on Monday, August 13, 2018 12:41 AM

keavdog

Really nice build.  The NMF turned out great.  I have the ancient monogram kit of this subject and I'm considering upgrading.  Do you have any comparison? 


Thank you John, 

No, I never really considered the Monogram kit.  I did read a review from modeling madness:

http://www.modelingmadness.com/scott/korean/84fpreview.htm

I like the newer kits.  I'm a little spoiled with the recessed panel lines and rivet detail.  

  • Member since
    May 2013
  • From: From the Mit, but live in Mason, O high ho
Posted by hogfanfs on Monday, August 13, 2018 7:05 AM

Chris, 

Great finish on this Thunderstreak. The NMF turned out fantastic! 

 Bruce


 On the bench:  1/48 Eduard MiG-21MF

                        1/35 Takom Merkava Mk.I


  • Member since
    November 2009
  • From: Twin Cities of Minnesota
Posted by Don Stauffer on Monday, August 13, 2018 8:19 AM

Looks great!  Yeah, the new NMF finishes are great.  Better than any paint, and easier than foil!


Don Stauffer in Minnesota

  • Member since
    July 2003
  • From: Cincinnati, Ohio
Posted by ridleusmc on Monday, August 13, 2018 3:43 PM

hogfanfs

Chris, 

Great finish on this Thunderstreak. The NMF turned out fantastic! 


Thanks Bruce!  I'm so enthused about metallic finishes, that I'm doing another straight away.  I do have to admit, Vallejo's Metal Color range is just shy of $10 a bottle.   

  • Member since
    July 2003
  • From: Cincinnati, Ohio
Posted by ridleusmc on Monday, August 13, 2018 3:44 PM

Don Stauffer

Looks great!  Yeah, the new NMF finishes are great.  Better than any paint, and easier than foil!


Thank you Don!  

I can believe they are easier than foil.  I can't wrap a sandwich without making a mess. 

  • Member since
    May 2013
  • From: From the Mit, but live in Mason, O high ho
Posted by hogfanfs on Monday, August 13, 2018 4:04 PM

ridleusmc


Thanks Bruce!  I'm so enthused about metallic finishes, that I'm doing another straight away.  I do have to admit, Vallejo's Metal Color range is just shy of $10 a bottle.   


Ok, inquiring minds want to know, which aircraft is next? LOL


 Bruce


 On the bench:  1/48 Eduard MiG-21MF

                        1/35 Takom Merkava Mk.I


  • Member since
    July 2003
  • From: Cincinnati, Ohio
Posted by ridleusmc on Tuesday, August 14, 2018 2:13 AM

Next up is Eduard's Polish MIG-21 PFM.  It's a "Weekend Edition."  I have no idea why they call it a "Weekend Edition."  The box has several weekends in it.  

  • Member since
    June 2017
  • From: Winter Park, FL
Posted by fotofrank on Tuesday, August 14, 2018 7:27 AM

Chris, I read your thread with great interest! I'm a real fan of natural metal finishes. The first one I did was a Monogram T-6 done as a Korean War LT-6G Mosquito using Alclad metallic lacquer. It came out so-so. I have a few kits under construction right now that are slated for NMF. A Monogram USAF T-28A, a Hobbycraft P-36A, and a Monogram P-51B (F-6B actually). These Vallejo acrylics seem much easier to use than the Alclad lacquer. I'm going to get more information on these colors. Thanks for sharing your build with us. Very informative.

P.S.: What about using Mr. Color Leveling Thinner with these paints?

OK. In the stash: Way too much to build in one lifetime...

  • Member since
    November 2009
  • From: Twin Cities of Minnesota
Posted by Don Stauffer on Tuesday, August 14, 2018 9:08 AM

fotofrank

Chris, I read your thread with great interest! I'm a real fan of natural metal finishes. The first one I did was a Monogram T-6 done as a Korean War LT-6G Mosquito using Alclad metallic lacquer. It came out so-so. I have a few kits under construction right now that are slated for NMF. A Monogram USAF T-28A, a Hobbycraft P-36A, and a Monogram P-51B (F-6B actually). These Vallejo acrylics seem much easier to use than the Alclad lacquer. I'm going to get more information on these colors. Thanks for sharing your build with us. Very informative.

P.S.: What about using Mr. Color Leveling Thinner with these paints?


I have used the Vallejo and the Alclad both.  I figured enamel is a doomed product and I'd better learn to use acrylics.  I do NOT like the Vallejo black undercoat.  However, I did use the Vallejo aluminum over gloss black enamel and it worked fine. I will continue to use Alclad for now, because I like their choice of three shades of sheen.


Don Stauffer in Minnesota

  • Member since
    December 2010
  • From: Salem, Oregon
Posted by 1943Mike on Tuesday, August 14, 2018 11:30 AM

Chris,

I have the same two Badgers as you. I also have the Iwata HP-C Plus for finer detail work.

About a month ago I bought some of the Vallejo metallic color acrylic paints.

Two questions:

1) To me it looks like the NMF turned out great! Do you like them? I realize you have issues with the primer, but the paints in general?

2) Looking at the bio you posted you were a helicopter mechanic. I've never built one but my brother was in Viet Nam (1968-1969) (I was drafted in the spring of '65 but found to be 4F because of an infected pilonidal cyst Big Smile) so I thought I might build a Huey for him one day. The only helicopter model I now have in my stash is Kitty Hawk's Huey. There was an article on it in FineScale in the February 2018 issue. I would think it will be OK. Any comments on that particular kit?


Mike

"Le temps est un grand maître, mais malheureusement, il tue tous ses élèves."

Hector Berlioz

  • Member since
    July 2003
  • From: Cincinnati, Ohio
Posted by ridleusmc on Wednesday, August 15, 2018 1:52 AM

fotofrank

Chris, I read your thread with great interest! I'm a real fan of natural metal finishes. The first one I did was a Monogram T-6 done as a Korean War LT-6G Mosquito using Alclad metallic lacquer. It came out so-so. I have a few kits under construction right now that are slated for NMF. A Monogram USAF T-28A, a Hobbycraft P-36A, and a Monogram P-51B (F-6B actually). These Vallejo acrylics seem much easier to use than the Alclad lacquer. I'm going to get more information on these colors. Thanks for sharing your build with us. Very informative.

P.S.: What about using Mr. Color Leveling Thinner with these paints?


I found some videos from Flory Models on youtube.  One was a good review of the paints.  The reviewer sprayed the various colors side-by-side on a paint mule model.  I've been watching Flory Model videos a great deal lately.    

I did some metallic spraying today on my Mig without thinner.  The pressure was a little higher, and they worked fine without thinner.  I can't advise on Mr. Color Leveling thinner.  I've only tried that thinner once with non-metallic paint.  

  • Member since
    July 2003
  • From: Cincinnati, Ohio
Posted by ridleusmc on Wednesday, August 15, 2018 1:53 AM

Don Stauffer


fotofrank

Chris, I read your thread with great interest! I'm a real fan of natural metal finishes. The first one I did was a Monogram T-6 done as a Korean War LT-6G Mosquito using Alclad metallic lacquer. It came out so-so. I have a few kits under construction right now that are slated for NMF. A Monogram USAF T-28A, a Hobbycraft P-36A, and a Monogram P-51B (F-6B actually). These Vallejo acrylics seem much easier to use than the Alclad lacquer. I'm going to get more information on these colors. Thanks for sharing your build with us. Very informative.

P.S.: What about using Mr. Color Leveling Thinner with these paints?


I have used the Vallejo and the Alclad both.  I figured enamel is a doomed product and I'd better learn to use acrylics.  I do NOT like the Vallejo black undercoat.  However, I did use the Vallejo aluminum over gloss black enamel and it worked fine. I will continue to use Alclad for now, because I like their choice of three shades of sheen.


Yeah, that primer is horrible!  It was the worst stuff I've ever put in my airbrush.  

  • Member since
    July 2003
  • From: Cincinnati, Ohio
Posted by ridleusmc on Wednesday, August 15, 2018 2:04 AM

1943Mike

Two questions:

1) To me it looks like the NMF turned out great! Do you like them? I realize you have issues with the primer, but the paints in general?

2) Looking at the bio you posted you were a helicopter mechanic. I've never built one but my brother was in Viet Nam (1968-1969) (I was drafted in the spring of '65 but found to be 4F because of an infected pilonidal cyst Big Smile) so I thought I might build a Huey for him one day. The only helicopter model I now have in my stash is Kitty Hawk's Huey. There was an article on it in FineScale in the February 2018 issue. I would think it will be OK. Any comments on that particular kit? 

I like the paints themselves.  It's like anything new.  I have to learn how to use it.  I'm learning, and the process was much easier on my Mig today than it was on the Thunderstreak.  It's good stuff, but I've experimented on a couple of pieces of Evergreen stock before I sprayed my model. 

I don't know much about the Kitty Hawk kit.  KH has a bad reputation, but the newer kits are said to be better than the old ones.  I've never built a KH kit myself.  They do produce interesting subjects.  I think this new Huey is supposed to be one of their better kits.  

  • Member since
    March 2008
  • From: Cincinnati, Ohio USA
Posted by Drew Cook on Wednesday, August 15, 2018 5:17 PM

Chris,

Great looking Thunderstreak! 

If you, or any other Thunderstreak fans, haven't read Richard Bach's great book Stranger to the Ground, about his document-pouch-delivering night flight from England to Germany to France in a New Jersey Air National Guard F-84F during a European deployment in the early '60s, you owe it yourself to do so. It's the most detail-oriented book I've ever read about flying.    

JOIN OUR COMMUNITY!

Our community is FREE to join. To participate you must either login or register for an account.

SEARCH FORUMS
FREE NEWSLETTER
By signing up you may also receive reader surveys and occasional special offers. We do not sell, rent or trade our email lists. View our Privacy Policy.