SEARCH FINESCALE.COM

Enter keywords or a search phrase below:

IMS IV : The Return of the Stash

150981 views
303 replies
1 rating 2 rating 3 rating 4 rating 5 rating
  • Member since
    February 2004
  • From: Second City
Posted by arki30 on Saturday, March 6, 2010 4:22 PM

John, gorgeous work all around.  The amount of detail is fantastic.  Well done. Yes

Building Now:

1/48 Academy Bf-109G6 - 100%

1/48 Tamiya F4U-1A - 5%

Upcoming:

1/48 Revell F-14D

  • Member since
    August 2006
  • From: Cygnus X-1
Posted by ogrejohn on Saturday, March 6, 2010 4:25 PM

Gamera, Jeremy and Arki, thank you very much!

  • Member since
    February 2005
  • From: Nashotah, WI
Posted by Glamdring on Saturday, March 20, 2010 9:41 PM

I cracked open the Borodino and set some glue to the hull.  As I mentioned, there was some pretty ugly warping.  Took a lot of patience, glue and clothespins to get it right.  And putty. It didn't turn out too bad.

The Bow- Where it looks all chewed up each half was pealing away from each other.  I had to load it up with cement and stick a clothespin on that.

After the puttying:

I have primer drying on it now.  We'll find out how bad my seam filling skills have atrophied, since I haven't had to work on a seam like that in 5 or 6 years!

Robert 

"I can't get ahead no matter how hard I try, I'm gettin' really good at barely gettin' by"

  • Member since
    February 2004
  • From: Second City
Posted by arki30 on Friday, April 16, 2010 10:04 AM

Okay, ready to finally start on this GB.  This is the 1/48 Kinetic E-2C Hawkeye, with Fightertown Decals VAW-124 Bear Aces, Eduard canopy masks, Royale Resin wheels, and newly released metal landing gear from Scale Aircraft Conversions.  I went with the metal landing gear solely because this bird requires 50 grams(!!!) of weight in the nose.  I'm a little concerned about the ability of the kit gear to hold up over the long term, so I upgraded.

Building Now:

1/48 Academy Bf-109G6 - 100%

1/48 Tamiya F4U-1A - 5%

Upcoming:

1/48 Revell F-14D

  • Member since
    January 2006
  • From: Liverpool, NY
Posted by Upstate John on Friday, April 16, 2010 11:32 AM

arki30

I'm really looking forward to seeing this build progress.  Navy aircraft are my favorites with the patrol/ECM aircraft being the best.  I've heard this is a really good kit and should make up into an impressive model.  Hopefully you can do lots of photos. It would be nice to see some photos of the sprues.

Good Luck,

John


“Having a positive mental attitude is asking how something can be done rather than saying it can't be done.”

On the Bench:  1/ 72 Hasagawa P2V-7 and 1/96 Lindberg HP Victor


  • Member since
    November 2009
  • From: SW Virginia
Posted by Gamera on Friday, April 16, 2010 1:39 PM

Glamdring: looks like you've got the warp under control. I haven't built a ship model in years, you guys are putting me in the mood to try one again.

Arki: I've three of Kinetic's F-16s in my stash. They look like great kits but I haven't started any yet. Looking forward to seeing how your kit fits.

Did a little work on the Reliant's hanger bay. Since I've got the two resin shuttlecraft I'm going to try to display the starboard bay open, Since the Reliant's bays were never shown I'm having to make it up as go using the Big-E's hanger as a reference.  And I keep getting distracted by easier GBs. Going on vacation this coming week, hopefully it will recharge my batteries. 

"I dream in fire but work in clay." -Arthur Machen


  • Member since
    February 2004
  • From: Second City
Posted by arki30 on Friday, April 16, 2010 9:03 PM

Upstate John

...It would be nice to see some photos of the sprues.

At your request.  There are a fair number of sprues.

Building Now:

1/48 Academy Bf-109G6 - 100%

1/48 Tamiya F4U-1A - 5%

Upcoming:

1/48 Revell F-14D

  • Member since
    January 2006
  • From: Liverpool, NY
Posted by Upstate John on Sunday, April 18, 2010 2:05 PM

Thanks arki30


That is a nice looking kit.  Does look like lots of parts so it should be a fun build.  From what I've read the wing fold is very nice with good detail.  Thanks for the photos!

Best Regards,

John


“Having a positive mental attitude is asking how something can be done rather than saying it can't be done.”

On the Bench:  1/ 72 Hasagawa P2V-7 and 1/96 Lindberg HP Victor


  • Member since
    February 2005
  • From: Nashotah, WI
Posted by Glamdring on Thursday, April 22, 2010 9:01 PM

Updates to the Borodino:


The topdeck:

A truly fascinating paint scheme.  I'm going to hit the black with a drybrush of a dark gray, and maybe a lighter gray as well.  It's too dark and all the details are getting drowned out.  I wanted to use Grimey Black for those parts, but naturally Hobbytown was out.  Then I'm going to re-touch the scratches on the deck at the stern.

Robert 

"I can't get ahead no matter how hard I try, I'm gettin' really good at barely gettin' by"

  • Member since
    February 2004
  • From: Second City
Posted by arki30 on Monday, May 3, 2010 8:27 PM

Quick update.  Cockpit is painted and assembled.  Detail isn't overwhelming, but that's just fine since most of it will be hard to see once the fuselage is closed up anyway.

Detail at the side entry door is painted and installed as well.

And I've started to place the lead weight around the cockpit.  Some will go in front, some will go behind the bulkhead, and I'll place some extra in the engine nacelles.  All told, approx. 60 grams worth.

Building Now:

1/48 Academy Bf-109G6 - 100%

1/48 Tamiya F4U-1A - 5%

Upcoming:

1/48 Revell F-14D

  • Member since
    November 2009
  • From: SW Virginia
Posted by Gamera on Thursday, May 6, 2010 9:58 AM

Glamdring and Arki- great looking progress!

"I dream in fire but work in clay." -Arthur Machen


  • Member since
    February 2004
  • From: Second City
Posted by arki30 on Friday, May 7, 2010 9:41 AM
Thanks Gamera. Fuselage is now closed up with 50 grams of lead weight in the nose. Additional weight will go in the engine nacelles. Main wing center section is assembled, along with the tail top and bottom halves. Detail at the wing fold is quite nice. Next is to attach the center wing section to the fuselage.

Building Now:

1/48 Academy Bf-109G6 - 100%

1/48 Tamiya F4U-1A - 5%

Upcoming:

1/48 Revell F-14D

  • Member since
    January 2006
  • From: Liverpool, NY
Posted by Upstate John on Friday, May 7, 2010 11:41 AM

arki30

Very nice work and fast too!!  The wing fold detail is so fantastic  it would be a shame to close it up.

Great job and thanks for the photos and updates.


John


“Having a positive mental attitude is asking how something can be done rather than saying it can't be done.”

On the Bench:  1/ 72 Hasagawa P2V-7 and 1/96 Lindberg HP Victor


  • Member since
    October 2007
  • From: Rhode Island
Posted by jmabx on Friday, May 7, 2010 4:09 PM

Nice work so far Arki... the cockpit looks great. That thing sure is taking alot of weight! Surprise

Jeremy    Propeller


  • Member since
    February 2003
  • From: Montreal, Quebec, Canada
Posted by superbear on Sunday, May 9, 2010 9:18 AM

Hi All first off my appologies for not being a big participant in this GB my 1:1 aircraft have been keeping me busier than I would wish coupled with a nasty bit of bronchitis and well... enough said.

I have been catching up with the posts and see some good progress well done.

John a very well done to youBow Down , your S-100 it looks fantastic,
Arki looks good so far, how much weight total do you think you will need to keep the nose down?

Despite all the stuff going on I have been moving the P-61 forward. I'll post pics later.

Cheers
Marc

Marc
  • Member since
    February 2003
  • From: Montreal, Quebec, Canada
Posted by superbear on Sunday, May 9, 2010 9:25 AM

Here are some progress pics of the P-61B

Here are the side walls and panels

Here with the flight deck and radar operators position installed.

Fuselage and wings installed

and now with the twin booms it's starting to look like a P-61.

So far this kit is building up nicely with minimal fit issues. Well that's it for now thanks for looking.

Cheers
Bear


Marc
  • Member since
    February 2004
  • From: Second City
Posted by arki30 on Monday, May 10, 2010 5:41 PM

Upstate John

it would be a shame to close it up.

Not planning on it.  I'm definitely building this with the wings folded.  A) because it looks cool, and B) because it's too big to display it with the wings out!

Thanks for the comments all.

Bear, I don't envy you the P-61.  I've heard the fit is a...bear.  No pun intended.  Good progress on the cockpit, and in response to your question regarding weight for the E-2C, directions call for 50 grams.  But reading various other build logs indicate that may not be enough once the radar goes on.  So I've bumped it up to 60 grams.

Building Now:

1/48 Academy Bf-109G6 - 100%

1/48 Tamiya F4U-1A - 5%

Upcoming:

1/48 Revell F-14D

  • Member since
    February 2003
  • From: Montreal, Quebec, Canada
Posted by superbear on Monday, May 10, 2010 6:20 PM

Thanks Arki.  Actualy the fit on this kit is not bad at all as opposed to the Valom Devastator I built for IMS3.  The wings, fuselage and tail booms go together with minimal filling it's when you attache the booms to the wings that the bear comes out Whistling

Cheers

Bear

Marc
  • Member since
    February 2004
  • From: Second City
Posted by arki30 on Sunday, May 16, 2010 3:38 PM

Slow progress, but progress nonetheless update.

Center wing section is attached to the fuselage, as well as the distinct tail surfaces.

Fit on the kit is hit or miss.  Some things are great, others...well should be better given the new status of this kit.  The rear portion of center wing section is less wide than the fuselage receiver is, thus giving a goofy joint.

Nothing that can't be fixed, but frustrating nonetheless.

Fuselage windows were inserted from the inside before the fuselage halves were closed up.  I then managed to push one back into said fuselage while handling.  D'oh!  I managed to get the loose window back out, but haven't figured out how to fix it with everything closed up.  Might have to use Krystal Klear to create the window. 

I've just begun looking at the nacelle assemblies.  Right away I'm disappointed with the ejection pin marks on the wheel well floor.  These will be impossible to fill with putty given the surrounding grid.  Someone else on another forum placed styrene in each square, which is clever but tedious.  I may punt on fixing these since they'll be buried under the landing gear anyways.

Building Now:

1/48 Academy Bf-109G6 - 100%

1/48 Tamiya F4U-1A - 5%

Upcoming:

1/48 Revell F-14D

  • Member since
    October 2007
  • From: Rhode Island
Posted by jmabx on Sunday, May 16, 2010 7:25 PM

She's coming together Arki. Shame about the fit. You would think it would go together a little better than that for the price of the kit. I would still like to have one though.

I've finished up some projects and it's about time I started on the Italeri 1/48 Tornado IDS. I'll get started on her this week and I will post progress pics as soon as I start cutting sprue.

Jeremy    Propeller


  • Member since
    November 2009
  • From: SW Virginia
Posted by Gamera on Sunday, May 16, 2010 11:11 PM

Arki- looking good!

I've had some success filling injection pin marks with Mr. Surfacer or some other thin liquid putty material.

"I dream in fire but work in clay." -Arthur Machen


  • Member since
    February 2005
  • From: Nashotah, WI
Posted by Glamdring on Monday, May 17, 2010 9:32 PM

Bear - That is a sweet Black Widow.  I love the plane, but I fear building it myself.

Arki - Great job on that kit!  Quite disappointing about the fit of some of it.

I have a quick update on the Borodino.  Glued the decks in and started adding some of the structure.  Still some fit issues, but it is nothing that can't be overcome.

Robert 

"I can't get ahead no matter how hard I try, I'm gettin' really good at barely gettin' by"

  • Member since
    October 2007
  • From: Rhode Island
Posted by jmabx on Friday, May 28, 2010 5:53 PM

The Borodino looks good! Seeing it next to the paint bottles, well, it's much smaller than I thought it was. Nice job!

Found some goodies in the mailbox so that I might spruce up the Tornado a little...

And now that I have my toys and broke sprue, I've found that my light ghost grey for the cockpit has dried up! Boo Hoo  I'm going to try and mix something up with what I have on hand so critics be warned... it might be close! I'll have some progress pics for you when the paint starts flying.

Jeremy    Propeller


  • Member since
    February 2004
  • From: Second City
Posted by arki30 on Monday, May 31, 2010 5:51 PM

I take it you have another Tornado in the stash?  Or will?  Big Smile  The Paragon stuff is nice, I have the exhausts for my own Tornado, whenever I get to it.

Progress on my end has still been slow.  No pictures this time, I'm working steadily on seams and assembling the nacelles.  Should have some pics by next weekend.

Building Now:

1/48 Academy Bf-109G6 - 100%

1/48 Tamiya F4U-1A - 5%

Upcoming:

1/48 Revell F-14D

  • Member since
    October 2007
  • From: Rhode Island
Posted by jmabx on Monday, May 31, 2010 8:37 PM

Yes Arki... I have the Tornado ADV in the stash also. I haven't decided if I want to build them together or not.

The Paragon seats look nice. It was a toss up between the Paragon and Neomega seats. I think the Paragons won out due to being cheaper. If Aires made a set, I would have them... I love their resin parts. Big Smile

Jeremy    Propeller


  • Member since
    October 2007
  • From: Rhode Island
Posted by jmabx on Saturday, June 5, 2010 11:06 PM

Finally picked up some paint and got to work! Here's the pieces that make up the cockpit...

And the kit seat next to the Paragon seat. Other than the horrible seat belts, the kit seats aren't all that bad.

With a little paint, the details on the Pragon seat really pop out!

I painted everything nice, nice and gave it all a couple of coats of Future to prep it for an oil wash. I applied the wash of thinned black oil and when I went to wipe it off, things went horrible wrong! The thinner had eaten through the Future and softened the paint underneath. When I tried to wipe off the wash, the paint started to come off too. Yikes!  I'm going to leave it as is and hit it with a flat coat tomorrow. It looks bad, but not so bad that I can't live with it. I guess this one will have the canopy closed for sure.  Boo Hoo

Oh well... these things happen. Black Eye

Jeremy    Propeller


  • Member since
    January 2006
  • From: Liverpool, NY
Posted by Upstate John on Sunday, June 6, 2010 11:21 AM

Hi All!

Some real nice work going on here. 

arki30:  The E2C is looking very nice.  Looks like a lot of work to the wing join cleaned up.

glamdring:  The Borodino is really shaping up.  I also thought it was much larger. 

jmabx:  The detail parts add a lot  I'm looking forward trying some in the future.  Great cockpit!  The issues you mention certainly don't seem obvious to me.

Here are some photos of my progress on the F7U Cutlass.
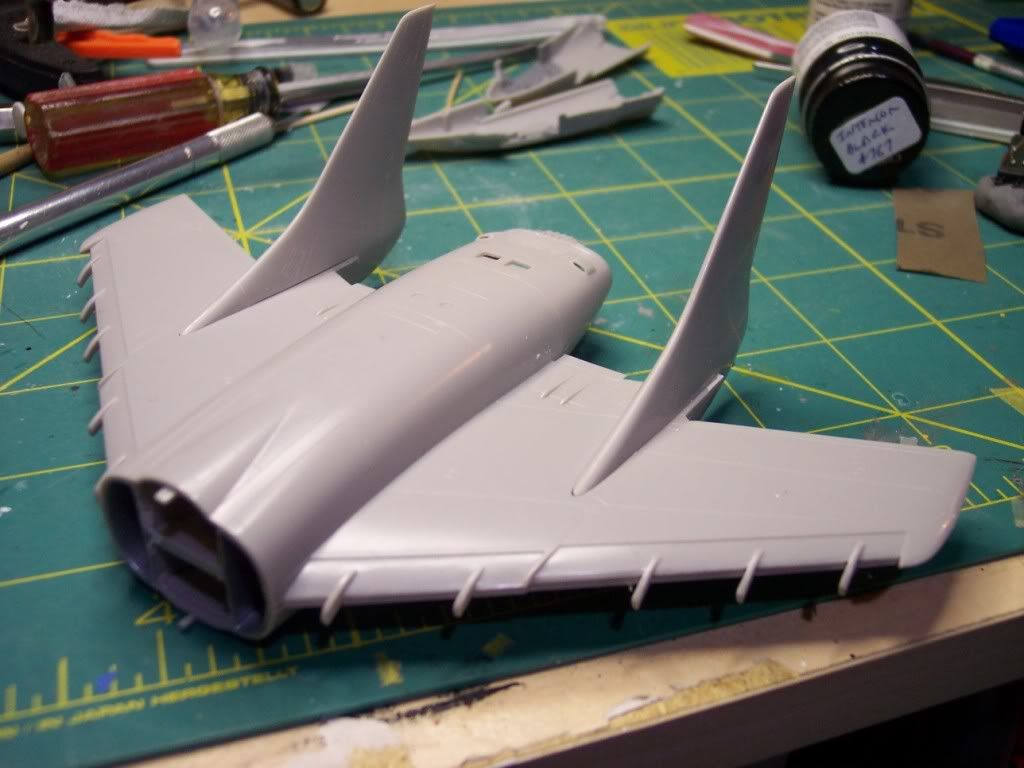
Main fuselage and wing.  I opened up the scoops on the aft top of the fuselage.  Forgot to do the bottom ones.  Oh well.
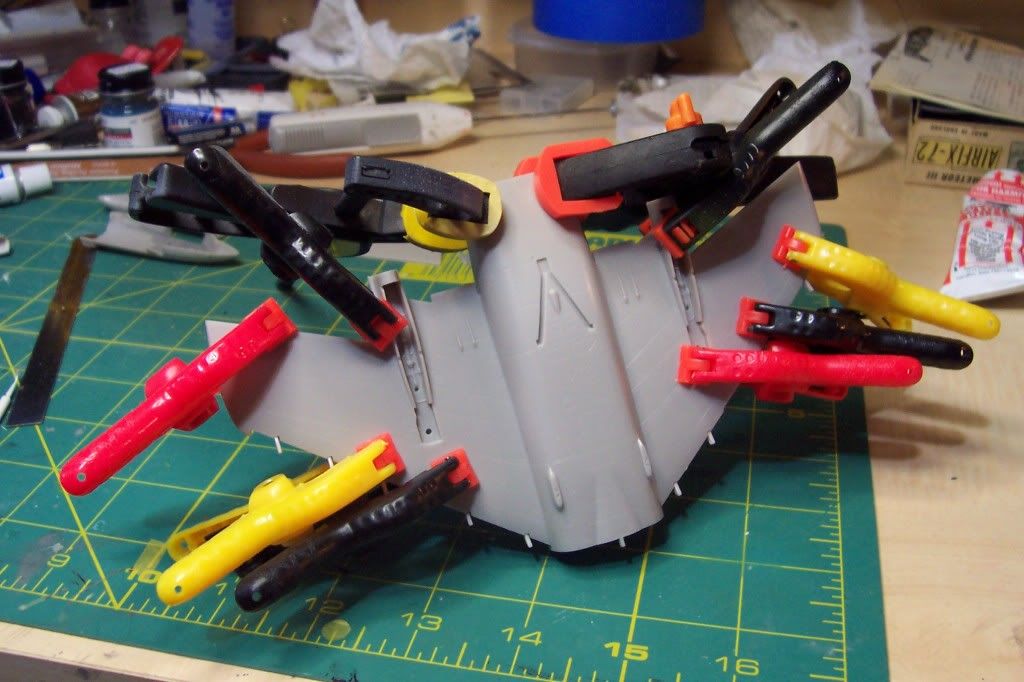
Lots of clamps to keep things lined up.
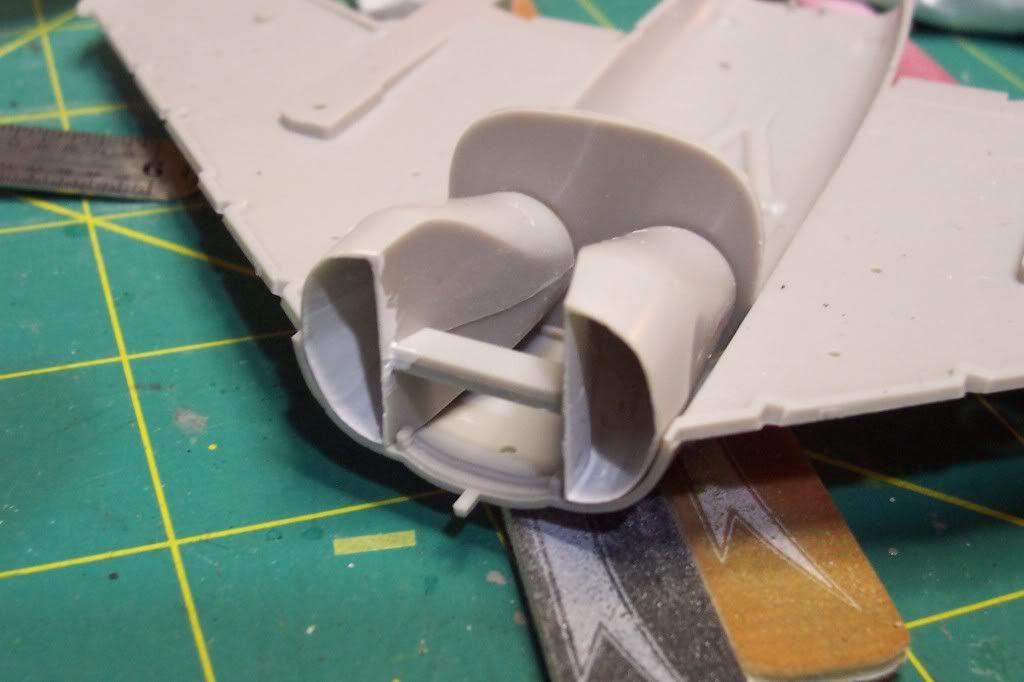
My first experience with intake trunking.  The seem was very difficult to get to.  Got it the best I could.
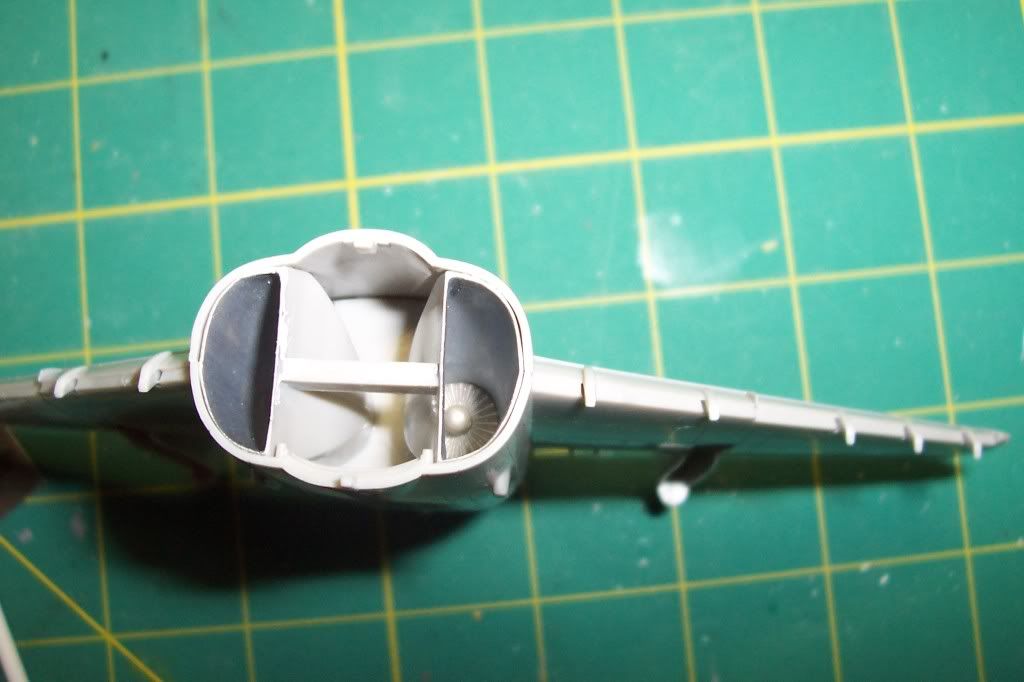
The vertical fins don't fit very well.  Lots of filler and sanding here.
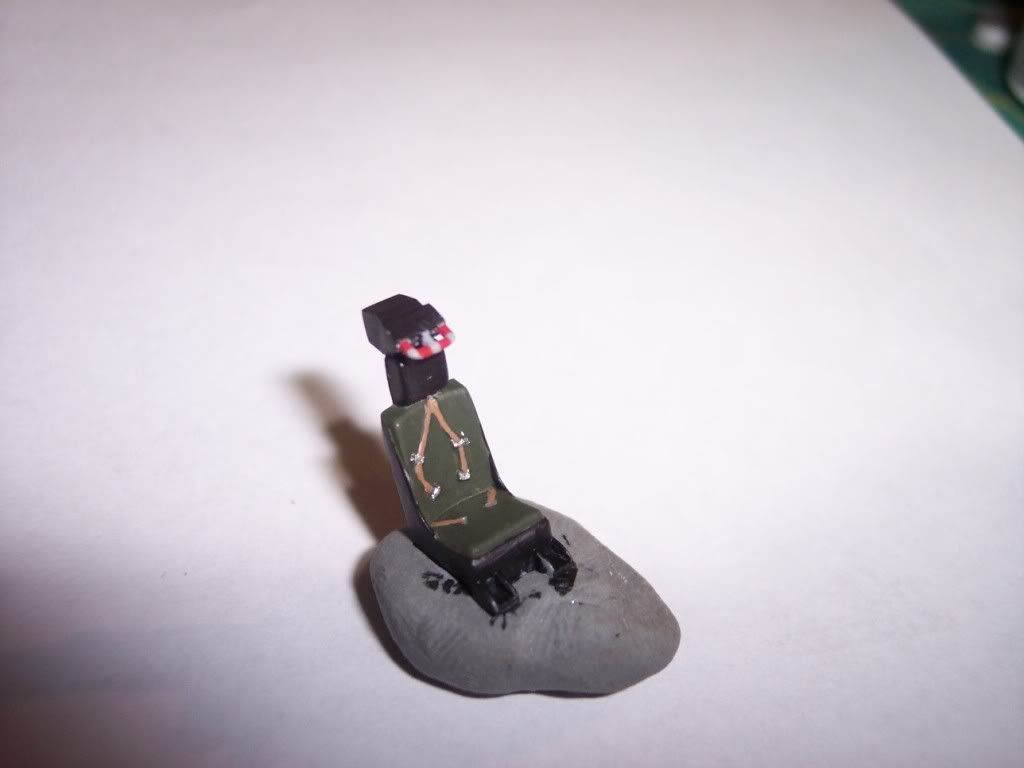
Not real sure of the colors for the ejection seat.  Looking to improve the next time.

Thats it for now.  Working on the cockpit and vertical fin fit. 

Regards, John


“Having a positive mental attitude is asking how something can be done rather than saying it can't be done.”

On the Bench:  1/ 72 Hasagawa P2V-7 and 1/96 Lindberg HP Victor


  • Member since
    January 2006
  • From: Liverpool, NY
Posted by Upstate John on Sunday, June 6, 2010 11:25 AM

Here is the vertical fin photo.  Put the wrong one in on the previous post.  I guess I need to do a new post rather than reply so I can preview.


“Having a positive mental attitude is asking how something can be done rather than saying it can't be done.”

On the Bench:  1/ 72 Hasagawa P2V-7 and 1/96 Lindberg HP Victor


  • Member since
    October 2007
  • From: Rhode Island
Posted by jmabx on Saturday, June 12, 2010 5:32 PM

The Cutlass is looking good John. Those things are so ugly that you just have to love 'em!!! Hmm

I've managed to get some more work done on the Tornado. The main assemblies are together awaiting seam sanding and filling. Starting to look like it should!

 The resin looks pretty good but sure added alot of weight to the rear.


Mockup

 Still plenty of work to do before the paint goes on! Stick out tongue


Jeremy    Propeller


  • Member since
    October 2007
  • From: Rhode Island
Posted by jmabx on Sunday, June 13, 2010 3:53 PM

I was looking at the rear of this monster and although the resin goodies look great, it still didn't look right... toy-like. The rear end of the Tornado is a very busy area with the reverse thruster mechanism and such. I set out to liven it up a little. I'm not looking to accurately reproduce the real thing, just kinda catch the flavor of it.

So, from this...

To this... Blind Fold

I started by opening up this hole. I don't know what it's for but it's there. I filed down the plastic on the inside so that it looked more like sheetmetal than thick plastic.


Then I glued down the reverse thruster actuator and added the overlapping lower panel that the kit doesn't represent well... cut from thin sheet styrene.


Just doing that made a 100% difference. Next was to reshape and scribe the reverse thruster plates. Hard to notice but the corrected one is on the left.

Finished that up, scribed a couple panel lines and added some rivets. Now it looks much better! When I get some paint on it, it should really look great!


Somewhere along the way, I broke off the starboard stabilator.  Boo Hoo 

Jeremy    Propeller


JOIN OUR COMMUNITY!

Our community is FREE to join. To participate you must either login or register for an account.

SEARCH FORUMS
FREE NEWSLETTER
By signing up you may also receive reader surveys and occasional special offers. We do not sell, rent or trade our email lists. View our Privacy Policy.