SEARCH FINESCALE.COM

Enter keywords or a search phrase below:

Weathering GB - 2/1/2011 - 1/31/2012

24487363 views
861 replies
1 rating 2 rating 3 rating 4 rating 5 rating
  • Member since
    February 2006
  • From: Smithers, BC, Canada
Posted by ruddratt on Thursday, January 27, 2011 6:54 PM

Sweet!!! Now that's what we're talking about! Yes  Doogs, are you going to paint the cowling separately before installation? Looks like masking around those gun barrels would be a nightmare.


Mike

 "We have our own ammunition. It's filled with paint. When we fire it, it makes pretty pictures....scares the hell outta people."


  • Member since
    July 2010
Posted by jbrady on Thursday, January 27, 2011 9:36 PM

ruddrat: I can't wait to see that scheme built up... I'd love to do a bi-plane but I don't think I could do it justice.

Doogs: Love the exhaust. I assume the gap at the front of the cowl is because of the tape at the back. Yeah the gun staining is a little wide. I'm not sure yet what I'm going to do about it.

What is the general opinion of Tamiya decals. I used the kit decals for the first time and they just don't want to conform to the surface detail. I'm thinking of soaking the whole model in Micro Sol overnight (that's a joke... sort of).


  • Member since
    January 2011
  • From: Springfield, MA
Posted by TigerEP1 on Friday, January 28, 2011 8:06 AM

Well i have begun the long process of weathering this StuG, started with the rust/pin wash lots more to do but I wanted to show you where i am at with it:


Enjoy!

On the bench:

1/35th Tamiya Willi's MB


  • Member since
    June 2003
  • From: Garland, TX
Posted by pepper kay on Friday, January 28, 2011 9:09 AM

Hi All:

Thanks for all the feedback re projects I'm working on ...

I forgot to post a picture of the GB&P dragster in toto, so here 'tis ... dirtying up process starts this afternoon ... and the comment about bigger engines than needed is apopos with this car ... back in the early '60's, this Keith Black engine was cranking out 1,700 horsepower ... as an aside, Keith Black now does Merlins for P-51 restorations ... too cool ... Cool

Also, a model I finished several days ago of my '34 Ford pickup truck ... bought it, very used obviously, for $25 when I was 13 years old ... where I grew up, one could drive as soon as they reached the pedals of any vehicle available to them ... so, here's my first ride ... I found a very faded Kodachrome of it and finished the kit - AMT 1/25 scale - to match the photo ... I later sold it for $100 Iwhen I was 16) and thought that I'd scored big time - buy for $25 ~ sell for $100 ...

If I only knew then what I know now ...Crying ... with the 100 bucks and more that I'd saved, I bought my '57 Chevy Bel Air Sport Coupe (which I still own), so I guess not keeping the truck was OK ...

Lastly, a RNAF Sea Fury from the Korean War period ... I used powders on the exhaust areas and when I sprayed the flat coat on to seal everything, the powder turned to polka dots ...

Any ideas as to why ?? ...

Thanks,

pepper


  • Member since
    July 2010
Posted by jbrady on Friday, January 28, 2011 9:14 AM

I decaled the model last night. I want to start the weathering process with all marking in place. The kit decals were a bear to melt into the surface and I do have some silvering. An aside... I saw a post on another forum about Tamiya and other kit maker's decals. The moderator was under the impression that kit decals are as thick as they are so that the casual modeler can use them without too many problems... something to think about.

This is what happened after I applied the first fading coat... I toned down the width of the gunfire staining and a lot of the silvering is now unoticeable

Next is a gloss coat and pin wash for the panel lines... more later.


  • Member since
    July 2010
Posted by jbrady on Friday, January 28, 2011 9:25 AM

Pepper: The dust particles from the pastels clumped together when they got wet... use the pastels last. Use a blending brush and they should settle into the dull finish. You probably cna't handle the model very much but at least you won't get the clumping.


  • Member since
    June 2003
  • From: Garland, TX
Posted by pepper kay on Friday, January 28, 2011 9:25 AM

Lookin' mighty fine, sez me !! ...

pepper

  • Member since
    June 2003
  • From: Garland, TX
Posted by pepper kay on Friday, January 28, 2011 9:37 AM

jbrady

Pepper: The dust particles from the pastels clumped together when they got wet... use the pastels last. Use a blending brush and they should settle into the dull finish. You probably cna't handle the model very much but at least you won't get the clumping.

OK-dokey ... I'll try that on my 'test mule' big P-47 that I keep and try various techniques on ... gonna get right out there, spray a wing with Dullcote and after it's dry, will dust on some powders ...

Handling is no problem as once 'it' is on the shelf, that's where 'it' stays ...

Thanks for the tip ...

pepper

  • Member since
    June 2010
  • From: Austin, TX
Posted by DoogsATX on Friday, January 28, 2011 9:47 AM

jbrady

Pepper: The dust particles from the pastels clumped together when they got wet... use the pastels last. Use a blending brush and they should settle into the dull finish. You probably cna't handle the model very much but at least you won't get the clumping.

This. Also, how wet did you lay it on? A bunch of light, misting coats would be the best approach if you HAVE to put a clear coat on top of your pastels/pigments. 

On the Bench: 1/32 Trumpeter P-47 | 1/32 Hasegawa Bf 109G | 1/144 Eduard MiG-21MF x2

On Deck:  1/350 HMS Dreadnought

Blog/Completed Builds: doogsmodels.com


  • Member since
    June 2003
  • From: Garland, TX
Posted by pepper kay on Friday, January 28, 2011 9:50 AM

DoogsATX


This. Also, how wet did you lay it on? A bunch of light, misting coats would be the best approach if you HAVE to put a clear coat on top of your pastels/pigments. 

I just 'dust' it on ... several very light coats ... nothing more, nothing less ...,

pepper

  • Member since
    June 2010
  • From: Austin, TX
Posted by DoogsATX on Friday, January 28, 2011 9:50 AM

jbrady - the F4F is looking nice! I'm in total agreement about Tamiya decals. They're overly thick. Curiously, I tend to break more of them than I do aftermarket decals because the ones I've used recently have been so reluctant to loosen from the decal sheet. 

The fading approach is a great way to kill silvering, especially on simpler paint schemes. Only time I've ever had it go disastrously wrong was on my La-5, but the more I think about it, the more I'm convinced that was due to the strange and unforgiving properties of White Ensign enamels. Color register is great, but I really don't like the performance characteristics of those paints. 

On the Bench: 1/32 Trumpeter P-47 | 1/32 Hasegawa Bf 109G | 1/144 Eduard MiG-21MF x2

On Deck:  1/350 HMS Dreadnought

Blog/Completed Builds: doogsmodels.com


  • Member since
    June 2010
  • From: Austin, TX
Posted by DoogsATX on Friday, January 28, 2011 9:53 AM

TigerEP1

Well i have begun the long process of weathering this StuG, started with the rust/pin wash lots more to do but I wanted to show you where i am at with it:

Enjoy!

Tiger - I'm confused...are you planning to use a salt or hairspray method to reveal the rusting through the final paint scheme, or is this one supposed to be black? 

On the Bench: 1/32 Trumpeter P-47 | 1/32 Hasegawa Bf 109G | 1/144 Eduard MiG-21MF x2

On Deck:  1/350 HMS Dreadnought

Blog/Completed Builds: doogsmodels.com


  • Member since
    June 2010
  • From: Austin, TX
Posted by DoogsATX on Friday, January 28, 2011 10:05 AM

The 109's just about reached the end of the assembly road! I still have to install the drop tank mount. Very seriously considering using the Dragon parts instead (and certainly their tank). I also need to install the upper IP and gunsight, but I didn't get things mostly wrapped up until late, and I do need some alertness for work.

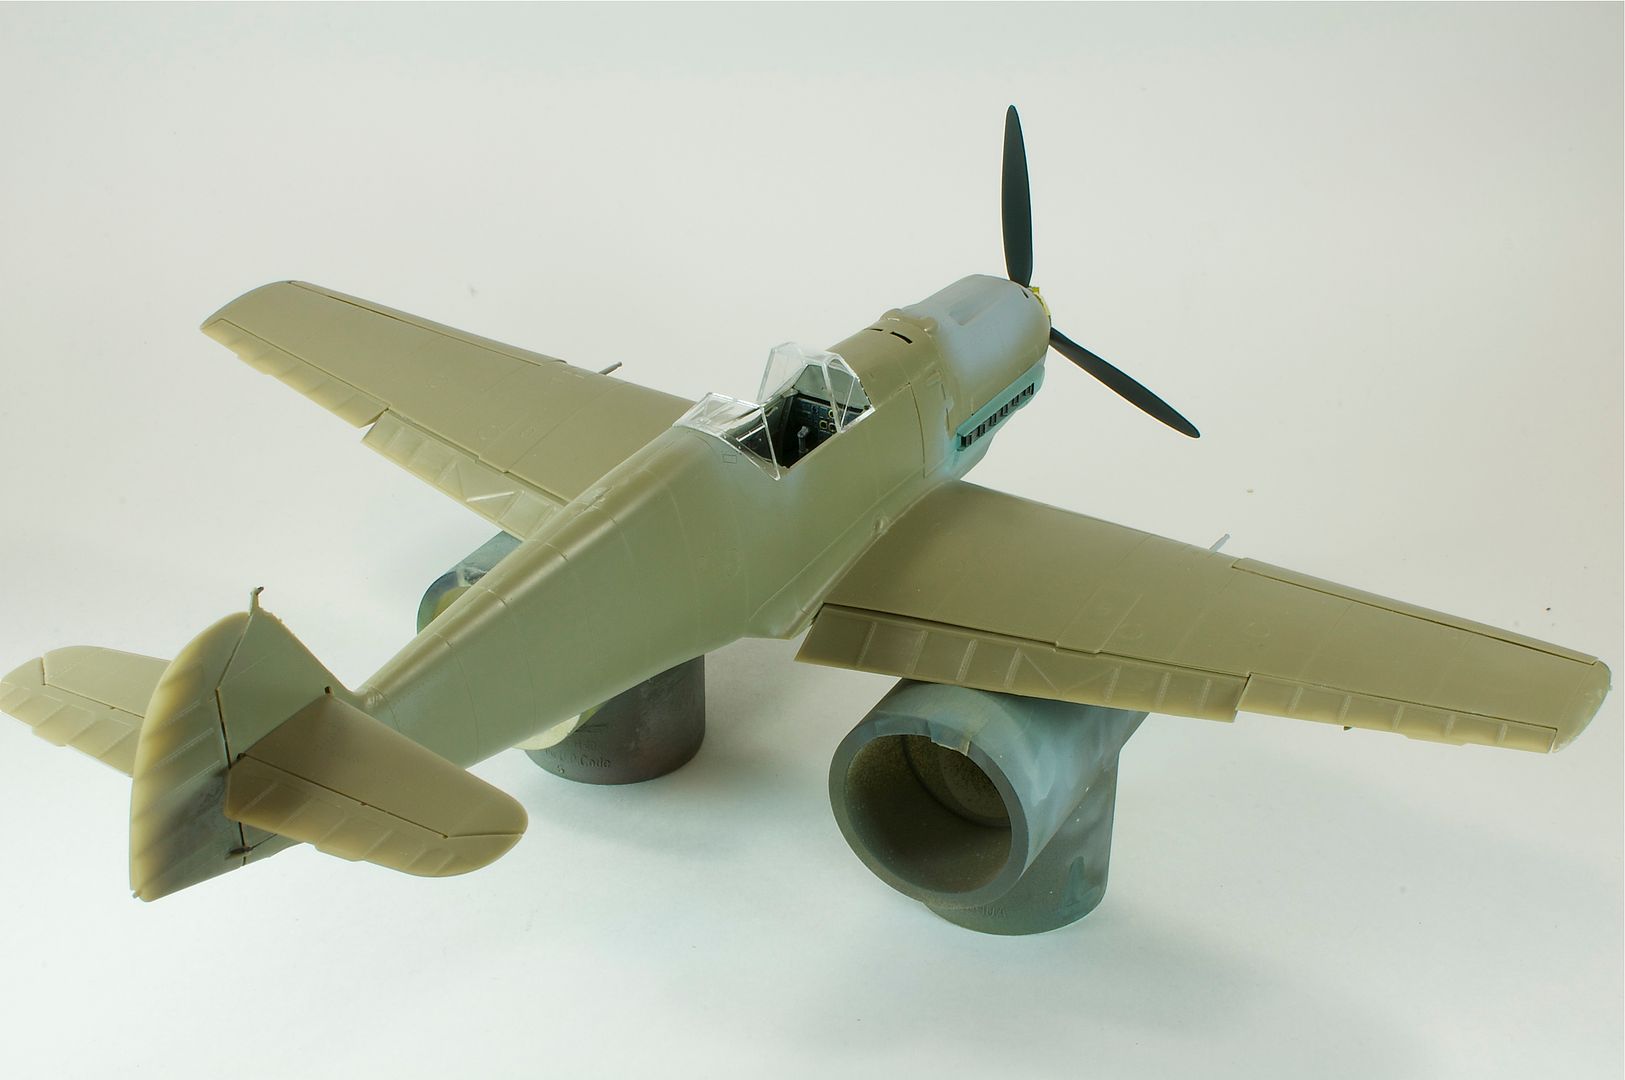
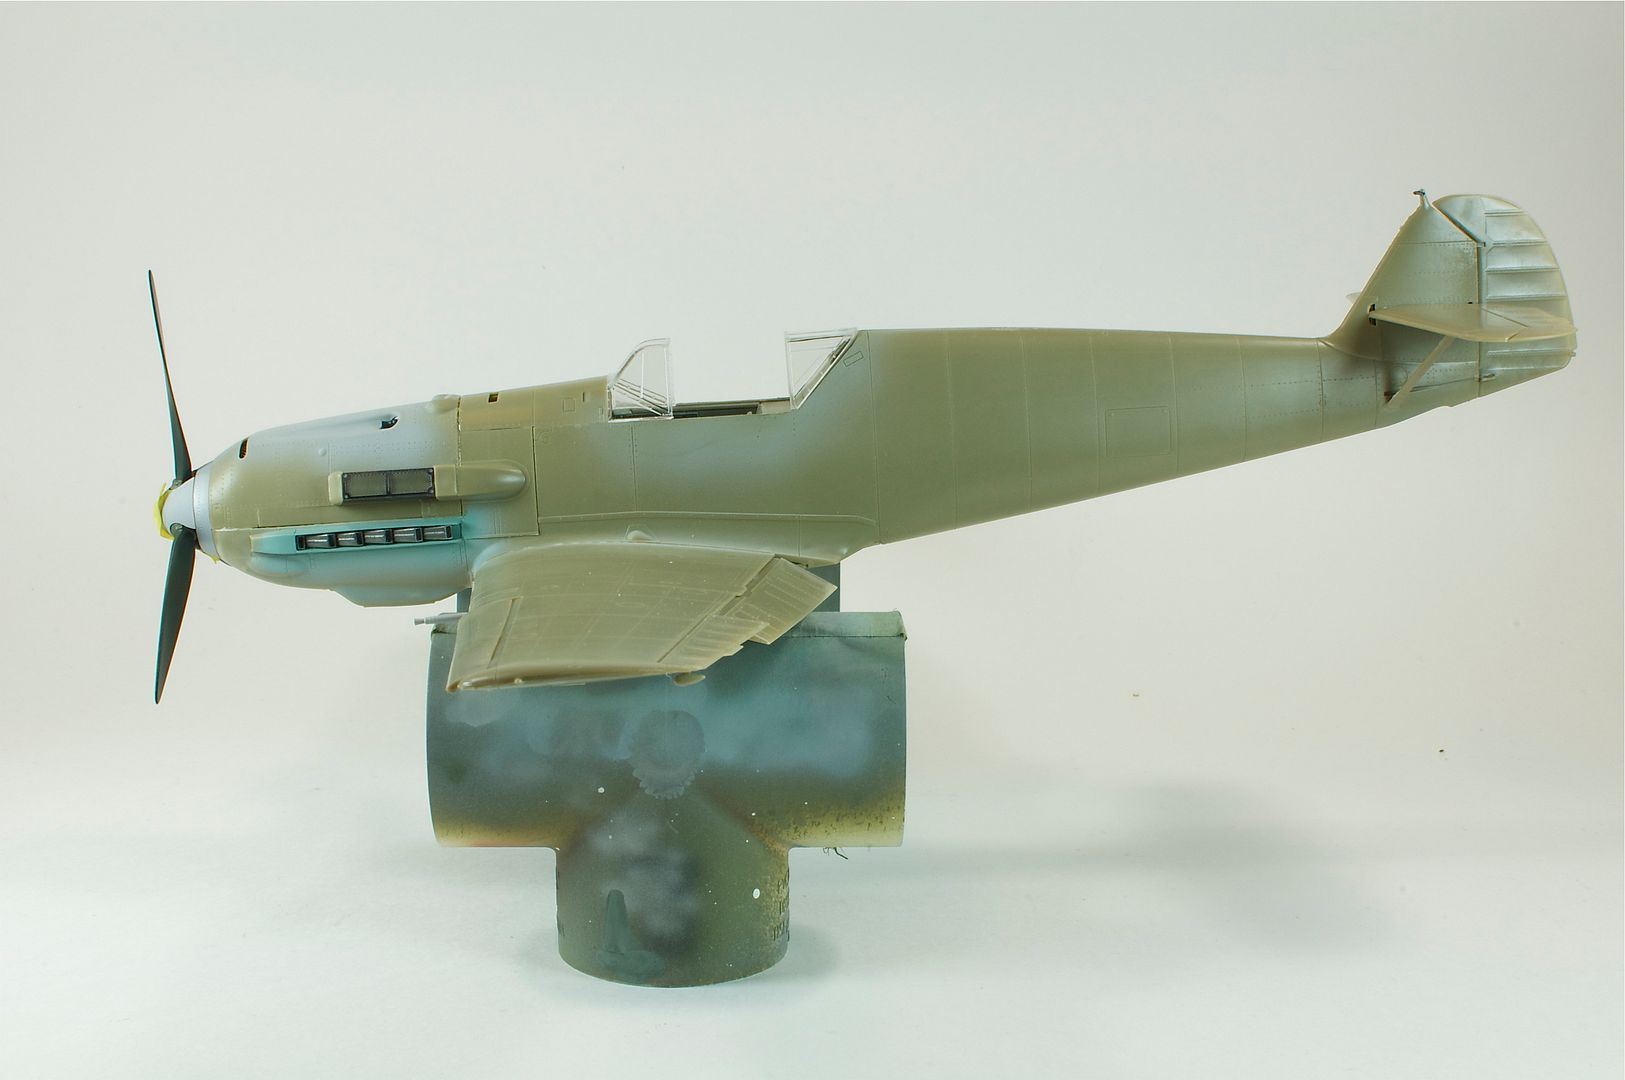
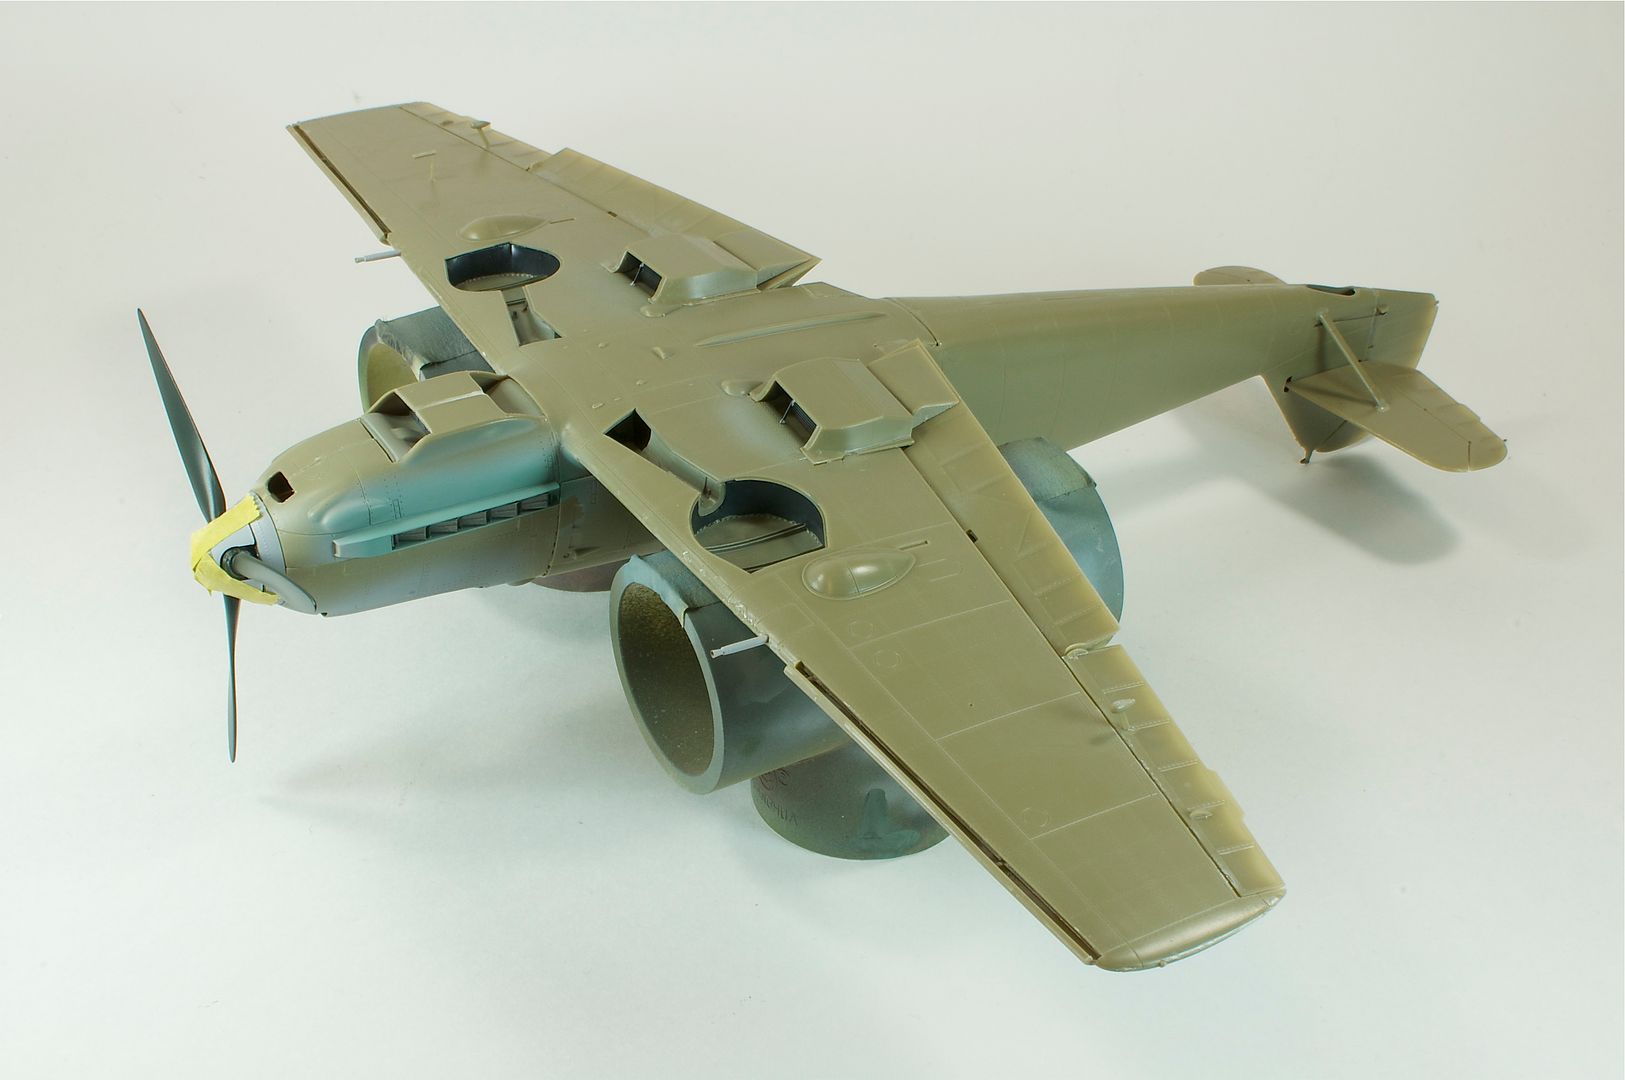
Other than that, here's the E-7 95% built:

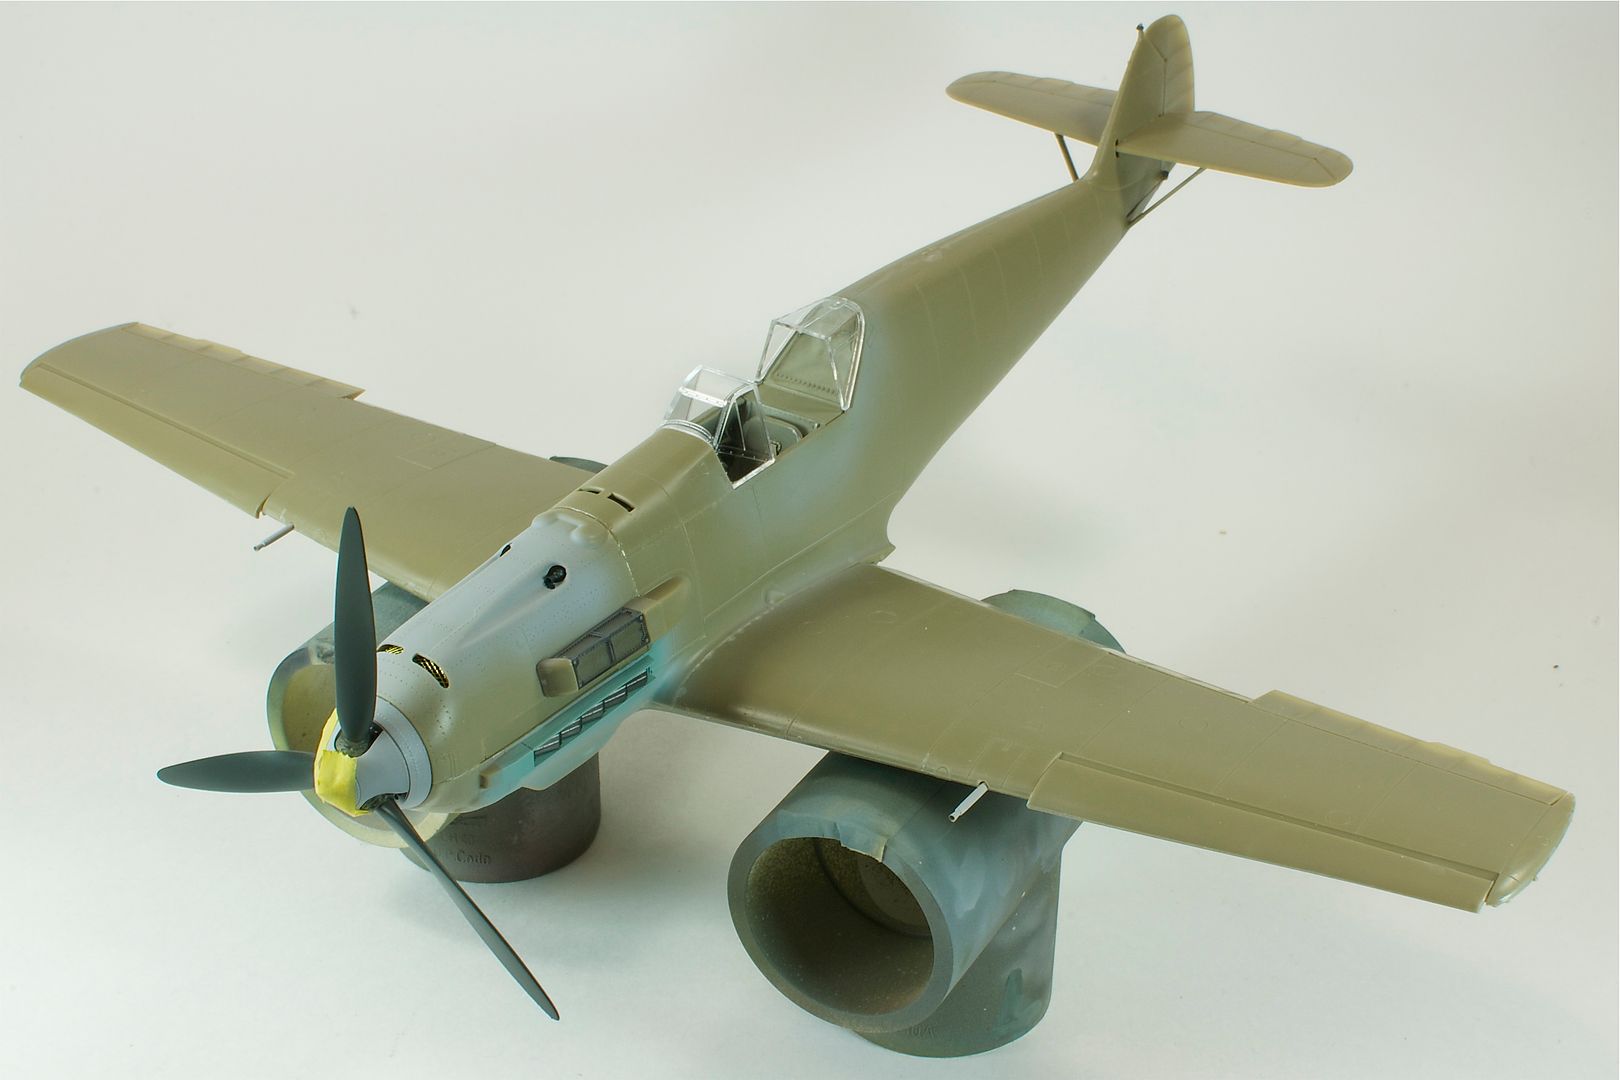
The clear parts fit exceptionally well. I think the main canopy may be a touch too long to fit between the windscreen and rear glass, but it's tough to tell since every test fit resulted in me knocking the rear glass off the plane. I'll have to fix those in place and then test.

I also need to figure out a way to fix the aerial mast to the rear glass with enough strength to bear a taut radio wire. Hmm.

Here's the bottom. Mostly solid. That chin scoop is still nasty IMO.

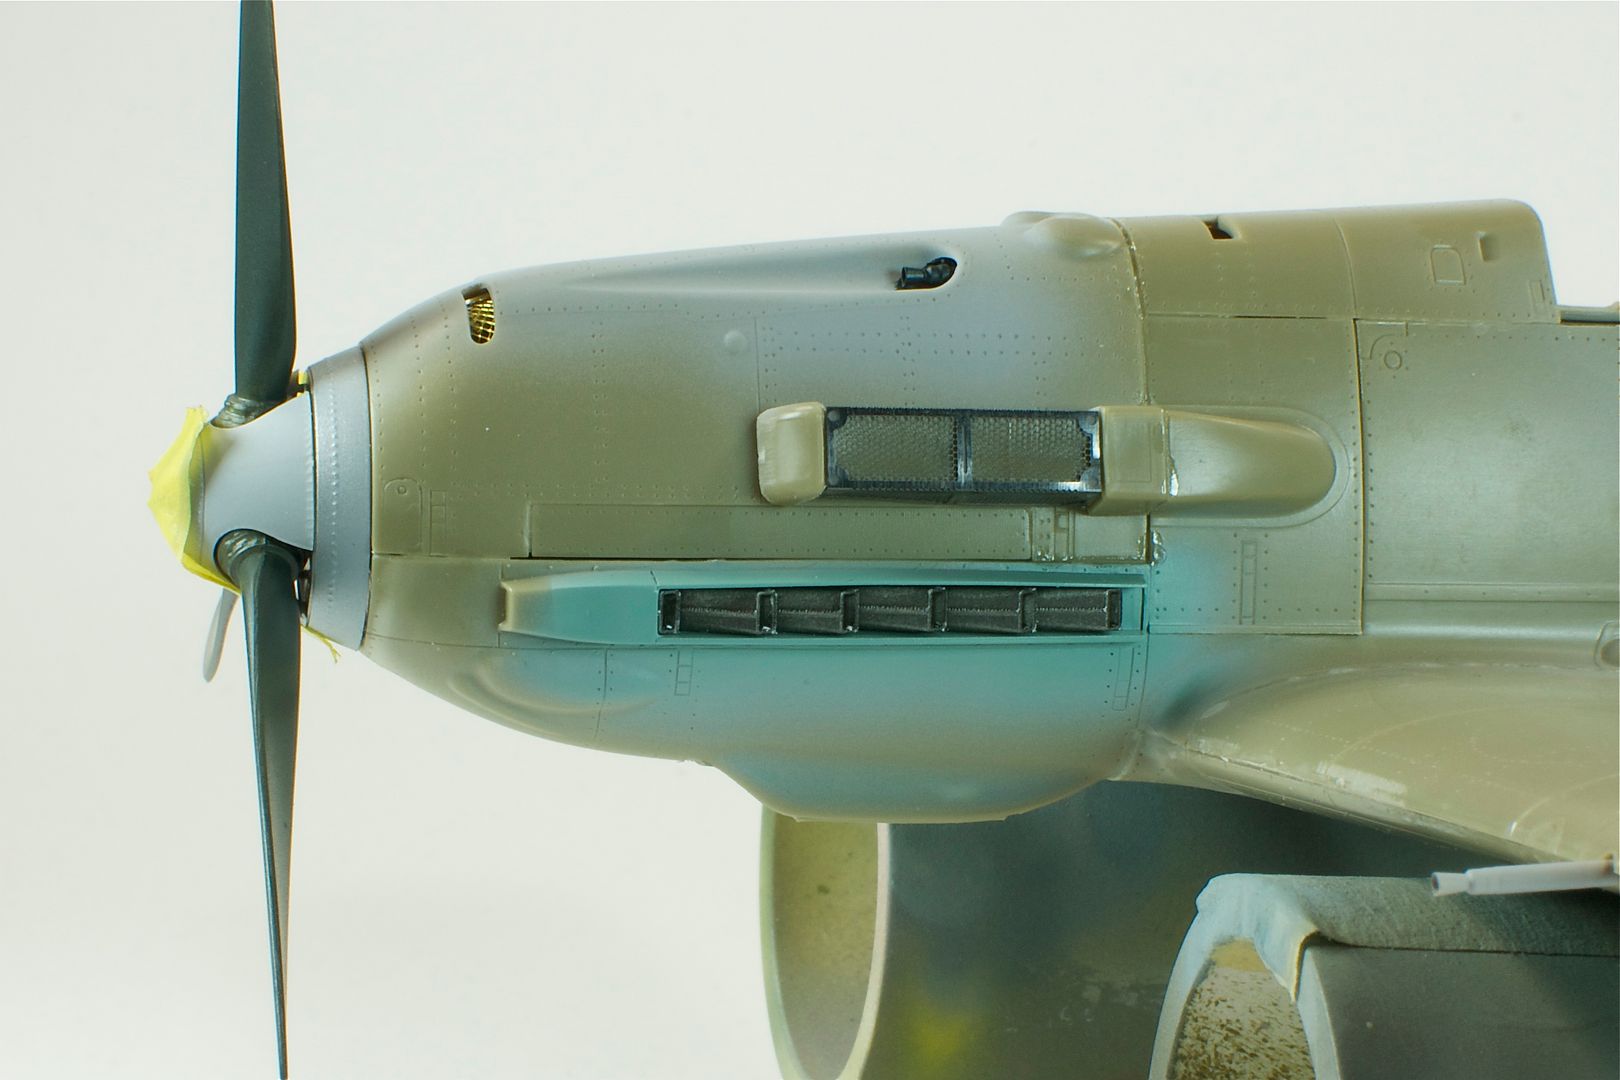
Close-up of the cowl and propeller. Really, really impressed with the Gunze Mr. Color paints I've used thus far. The prop may be the single best finish I've ever managed.

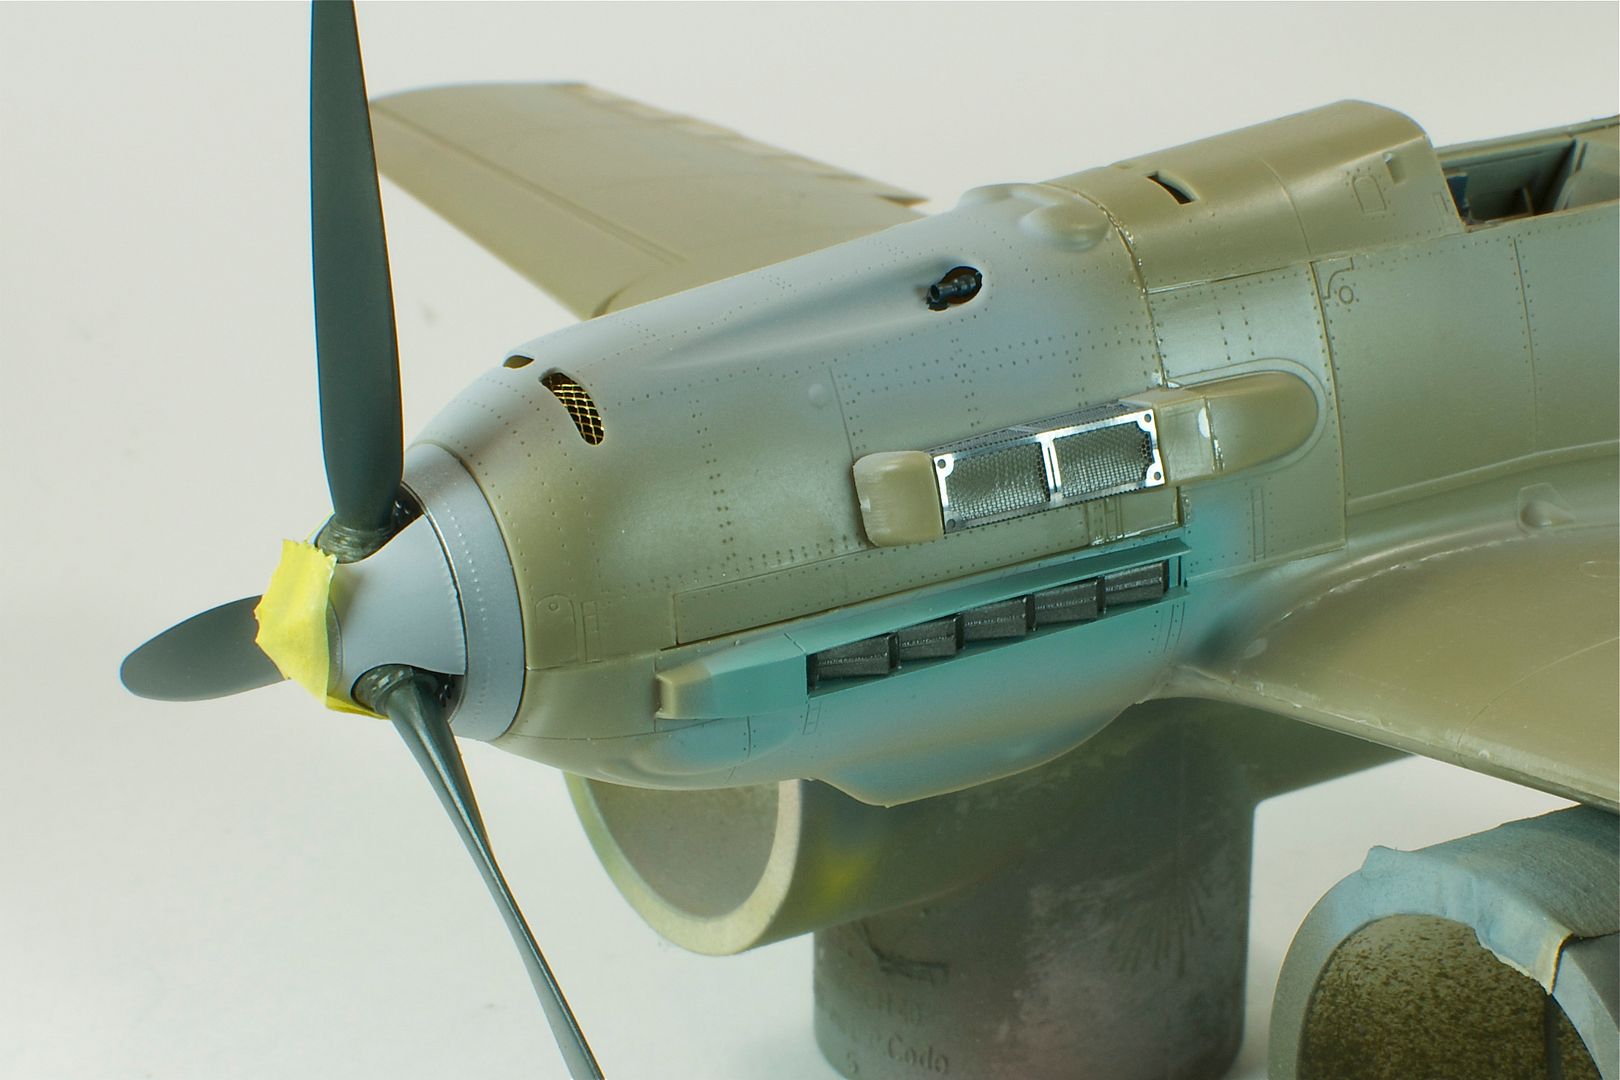
Other cowl notes. I used some thick strip styrene at the back lower corners to keep the cowl from wandering in. Amazingly it worked! I also wan't happy with the holes up top, so I shoved some brass mesh in there backed by some black cardboard. No mesh in the real plane - just a view into the engine (which strikes me as really dumb for a Trop model), so, yay for gizmology!

20mm cannon out of the Master 109E armament set. These things are far and away superior to the Eduard guns, but I probably won't use them on the Dragon E-4, whose guns are actually hollowed out!

On the Bench: 1/32 Trumpeter P-47 | 1/32 Hasegawa Bf 109G | 1/144 Eduard MiG-21MF x2

On Deck:  1/350 HMS Dreadnought

Blog/Completed Builds: doogsmodels.com


  • Member since
    June 2010
  • From: Austin, TX
Posted by DoogsATX on Friday, January 28, 2011 10:09 AM

pepper kay


 DoogsATX:


This. Also, how wet did you lay it on? A bunch of light, misting coats would be the best approach if you HAVE to put a clear coat on top of your pastels/pigments. 


I just 'dust' it on ... several very light coats ... nothing more, nothing less ...,

pepper

Another question. Sorry, just trying to build up my own knowledge a bit here. What kind of surface do you put the pastels on? Flat or gloss? 

On the Bench: 1/32 Trumpeter P-47 | 1/32 Hasegawa Bf 109G | 1/144 Eduard MiG-21MF x2

On Deck:  1/350 HMS Dreadnought

Blog/Completed Builds: doogsmodels.com


  • Member since
    June 2003
  • From: Garland, TX
Posted by pepper kay on Friday, January 28, 2011 10:34 AM

DoogsATX
 

 DoogsATX:  


Another question. Sorry, just trying to build up my own knowledge a bit here. What kind of surface do you put the pastels on? Flat or gloss? 

I put them on over the gloss coat ... I gloss coat, then add the decals ... then,  the pastel powders ...

Then I mist on a light Dullcote coat to seal the decals and powder(s) ...

From now on, I guess I'll shoot the flat finish and then add the powdersf ...

pepper

  • Member since
    June 2010
  • From: Austin, TX
Posted by DoogsATX on Friday, January 28, 2011 10:42 AM

Ah, there we go. Yeah I always put pastels over a flat coat. Lots more micro crevices for them to settle into, so they don't flow and clump when they get a top coat.

On the Bench: 1/32 Trumpeter P-47 | 1/32 Hasegawa Bf 109G | 1/144 Eduard MiG-21MF x2

On Deck:  1/350 HMS Dreadnought

Blog/Completed Builds: doogsmodels.com


  • Member since
    June 2003
  • From: Garland, TX
Posted by pepper kay on Friday, January 28, 2011 11:05 AM

DoogsATX

Ah, there we go. Yeah I always put pastels over a flat coat. Lots more micro crevices for them to settle into, so they don't flow and clump when they get a top coat.

Heya, heya ... never thought of that and I'll bet you're right ... so --- next one will get the flat coat to seal decals, then the powders and then a light misting of flat again ...

Gonna try that right now on my P-47 test rig ... results to follow and be posted ...

pepper

On the workbench - 1/48 F-86F-30 ~ 1/48 F-7F-3 Tigercat 

 1/48 F-8F-1 Bearcat ~ 1/24 GB & P dragster ~ 1/35 Panther V

  • Member since
    January 2011
  • From: Springfield, MA
Posted by TigerEP1 on Friday, January 28, 2011 2:19 PM

Doogs,

 It is not black , German Grey probably looks darker in the pics. Tho a black tank would be cool in my book it's certainly would not be correct. As i have only weathered one modern tank I am winging it on this one,

Remember I don't have access to all of the tools most people do so I am making do with what i have. Plus this things a touch larger than my jeep...lol so it's scaring me a little as I am afraid I am going to ruin it and not in a good way...lol

On the bench:

1/35th Tamiya Willi's MB


  • Member since
    October 2010
  • From: Hobart, Australia
Posted by Casper the Chihuahua on Friday, January 28, 2011 3:14 PM

Hey Doogs that's a great lookin' bid! Can't wait to get to my Bf 109 at some point! Smile

Cheers

On the bench: A-4F 1/32 Hasegawa

Just deployed: F6F-5N Hellcat Nightfighter 1/48 Eduard

Up next: A6-E Intruder 1/48 Revell

  • Member since
    June 2010
  • From: Austin, TX
Posted by DoogsATX on Friday, January 28, 2011 3:37 PM

Tiger - ah, gotcha. I took it for black because it reminded me of my Sherman's NATO black base:

Casper - thanks man! It's been a fun build for the most part. Having to employ all of my willpower to get through the filling and sanding now...it's my least favorite part of any build and that Dragon E-4 is extremely tempting!

On the Bench: 1/32 Trumpeter P-47 | 1/32 Hasegawa Bf 109G | 1/144 Eduard MiG-21MF x2

On Deck:  1/350 HMS Dreadnought

Blog/Completed Builds: doogsmodels.com


  • Member since
    May 2003
  • From: fort mill SC
Posted by Robert92562 on Friday, January 28, 2011 8:30 PM

Wow, this is going to be some GB. I feel way behind already. Since I build mostly armor and cars, I have chosen to build some aircraft.

1st up Tamiya's 1/48 BF 109E-4 Trop. The JG 26 version as called out in the Instruction. I'm not sure on how heavy I will go with the weathering but it will be weathered for sure.

Any one know about aftermarket parts for this model?

On deck is a Tamiya 1/48 F-51 Mustang. weathering the bare metal paint should be fun.

Will post some startup pic's very soon.

Bob

  • Member since
    January 2011
  • From: Springfield, MA
Posted by TigerEP1 on Friday, January 28, 2011 8:35 PM

Doogs,

No worries man, sorry if i sounded offended. I have had hell week and it just got to me. I can see what ya man about the nato black, it does look damn close.

Ill try to get some better pics in a bit!


BTW i never did say how awesome your 109 is turning out. You are a talented man Doogs!


Robert,

Welcome to the GB! Looking forward to seeing your progress.


On the bench:

1/35th Tamiya Willi's MB


  • Member since
    January 2011
  • From: Springfield, MA
Posted by TigerEP1 on Friday, January 28, 2011 8:51 PM

As promised better pics:

The tracks are not done nor are they attached atm, the hull is also not attached as it will be easier for me to add the tracks etc.

Still lots more to do I'm thinking this will be a city bound stug that has seen heavy rain for long periods of time, possibly something from  Stalingrad or the like.


Thoughts, comments etc?

On the bench:

1/35th Tamiya Willi's MB


  • Member since
    July 2008
  • From: USA California
Posted by vetteman42 on Friday, January 28, 2011 9:10 PM

I like it TigerEP1 YesYes

Randy So many to build.......So little time

  • Member since
    July 2010
Posted by jbrady on Friday, January 28, 2011 9:54 PM

Pepper I found another way to get polka-dot effects. I did a wash to bring out the panel lines. The next step was supposed to be using a gloss coat to seal the wash then a final fading coat. I had a major brain fart and forgot to seal the wash. NEVER lay down an enamel coat over Pro Modeler washes. I'll try and post some clear pics of the mess if the sun comes out tomorrow but I think I ruined this one.

The only saving grace is that the sub assemblies can be salvaged. I added anothe Tamiya F4F to an order I had with Scale Hobbiest. Just glad this build hasn't started yet.


  • Member since
    January 2011
  • From: Springfield, MA
Posted by TigerEP1 on Saturday, January 29, 2011 12:04 AM

Sneak peak :)

On the bench:

1/35th Tamiya Willi's MB


  • Member since
    May 2005
  • From: Dublin Rep Of Ireland
Posted by terry35 on Saturday, January 29, 2011 5:04 PM

Well I've had a good read through the pages and I must say that the GB is really shaping up, progress, finished and people just starting.

Tiger great work on the Stug, comming together well.

J. Brady, great work on the wildcat, I can already imagine scenes from the Battle Of Midway, weathered fighters trying to make the carriers.

Doogs the 109 is trooping along well, you have a great scope to your weathering because of its operational enviornment.

Jon that 190 is terrific, can imagine it resting peacefully in a forest somewhere like in the Youtube video.

Terry.

  • Member since
    May 2005
  • From: Dublin Rep Of Ireland
Posted by terry35 on Saturday, January 29, 2011 5:17 PM

Well update Time for me.

First the bulkhead, Ihave over rusted this, there are two doors attached here later, an inner and outer. i decided that my vehicle maybe is the one evaluated back in England, so she is a couple of years old at this stage and well travelled.

I need to get to the next stage with this which will involve pigments.

A close up of the door way,

Just matched up to the floor to try keep some continunity to the weathering.

The driving/crew stations.

The start of the interior/upper shell. just brown paint at this stage,

Firstly stippled with a sponge//piece of foam.

Bigger bits hand painted in.

I gave the lower hull a quick wash of raw umber just to see how the detail stands out. I also gave it a quick streaking just to give myself a start. The streaking was just a piece of foam pulled through the wash.

THe wash dried.

Thanks for dropping by.

Regards,

Terry.


  • Member since
    July 2010
Posted by jbrady on Saturday, January 29, 2011 6:54 PM

terry35: That is jaw dropping stuff. If I had just looked at those pics, without any context, I would have thought I was looking at some rust bucket piece of armor.

That is one wildcat that won't be making it home. I have completely ruined the surface. I have another kit on order and should be back to where I was yesterday in a week or so.


  • Member since
    May 2005
  • From: Dublin Rep Of Ireland
Posted by terry35 on Saturday, January 29, 2011 7:10 PM

Thanks for the compliments. Really sorry to hear about the cat, she was comming along with great potential.

Terry.

JOIN OUR COMMUNITY!

Our community is FREE to join. To participate you must either login or register for an account.

SEARCH FORUMS
FREE NEWSLETTER
By signing up you may also receive reader surveys and occasional special offers. We do not sell, rent or trade our email lists. View our Privacy Policy.