SEARCH FINESCALE.COM

Enter keywords or a search phrase below:

Spitfire GB

151310 views
933 replies
1 rating 2 rating 3 rating 4 rating 5 rating
  • Member since
    October 2010
  • From: Hobart, Australia
Posted by Casper the Chihuahua on Tuesday, April 24, 2012 9:44 PM

Thunderbolt379

Casper -- I well know the fiddle involved in soft-masking, so well done. Isn't the lighter camo shade a bit pale? It's not Middle Stone, but a more ivory or clay shade, which I've seen used but on Spits in US service. Will those be the markings???

Cheers, Mike/TB379

Hi Mike, I'm actually doing an Italian stationed squadron in the British service. I had a look at the box art at my local LHS when I bought the paint and I matched it to FS 33531 which apparently is the right shade. The Tamiya colour was a little darker than I wanted. This matches the box art more closely and the panel lines underneath show through it very nicely.

Besides I don't think any Spit pilots will showing up to my digs to dispute the shade anytime soon! Wink

Cheers

On the bench: A-4F 1/32 Hasegawa

Just deployed: F6F-5N Hellcat Nightfighter 1/48 Eduard

Up next: A6-E Intruder 1/48 Revell

  • Member since
    April 2005
Posted by Thunderbolt379 on Tuesday, April 24, 2012 9:50 PM

Okay, a most interesting scheme then! Maybe they toned down the topside colours for the high altitude jobs? There were so many variations!

Cheers, Mike/TB379

http://worldinminiature.blogspot.com/

  • Member since
    October 2010
  • From: Hobart, Australia
Posted by Casper the Chihuahua on Tuesday, April 24, 2012 11:29 PM

Last shot for the day. I've got to gloss up the underneath and let it cure for decaling in a couple of days. The engine fits beautifully, the prop is just resting there for show. I forgot to insert the poly-cap before I sealed it up. Oops...! I'll just have to glue it on. Not like it's gonna be spinning or anything.

Cheers

On the bench: A-4F 1/32 Hasegawa

Just deployed: F6F-5N Hellcat Nightfighter 1/48 Eduard

Up next: A6-E Intruder 1/48 Revell

  • Member since
    April 2005
Posted by Thunderbolt379 on Wednesday, April 25, 2012 12:05 AM

Looking VERY good, Casper!

TB379

http://worldinminiature.blogspot.com/

  • Member since
    April 2006
  • From: ON, Canada
Posted by jgeratic on Wednesday, April 25, 2012 1:38 AM

Mike - you are welcome for the links.

Casper - I must admit I too did a double take at the light base coat you did.  I looked up the FS number you supplied and it is actually the Israeli Air Force  version for their middlestone.
Personally I'd be leery of relying on box art as a colour sample.   The British Air Ministry was very strict about colours and aircraft were always painted at the factory before delivery  (exception would be the Malta blue/grey schemes).  By the time these Spitfires were gifted to the Italians, they certainly would be faded and weathered from use.

Very obscure subject you have chosen, but there are b/w photos and some text to be found on the net - although I couldn't find anything about the Mk VIII.  I'm just say'n, at the end of the day it is your model.

regards,
Jack

  • Member since
    October 2010
  • From: Hobart, Australia
Posted by Casper the Chihuahua on Wednesday, April 25, 2012 2:01 AM

Hi,

    This is the paint suggested in the Tamiya instructions, TS-46. As I didn't want to use a rattlecan I looked for a pot version. A couple of forums I found suggested the FS 33531 and the H72. It also is a little darker in real life. My iPhone camera is a little too good and compensates a bit too well. When the weathering and decals are done I'll see how it looks.

Cheers

On the bench: A-4F 1/32 Hasegawa

Just deployed: F6F-5N Hellcat Nightfighter 1/48 Eduard

Up next: A6-E Intruder 1/48 Revell

  • Member since
    November 2006
  • From: Coastal Maine
Posted by dupes on Wednesday, April 25, 2012 9:54 AM

Hey fellas - quick status update. This is the Hasegawa 1/48 Mk.IXc in 1/48th. Started in on Saturday afternoon, had the construction done by the end of the day Sunday. Bottom color (PRU blue) sprayed on Monday, then masked and sprayed both the upper color (Medium Gray), and a lightened version in the centers of the upper panels on Tuesday night. Hit it with a coat of Future this morning before work so that could dry...starting in on the decaling tonight!

You can see the markings I'm using at the bottom of the Eagle Strike sheet in the pics.

  • Member since
    November 2006
  • From: Coastal Maine
Posted by dupes on Wednesday, April 25, 2012 9:56 AM

Hmmmm...works a bit better if I actually show the pics, eh? Whistling

Sorry for the cluttered backdrop. Finishing my basement to move the whole production facility down there, and my photo booth isn't set up currently. I'll get it out when it's time for finished pics for sure!

  • Member since
    December 2009
Posted by ww2psycho on Friday, April 27, 2012 7:24 AM

That looks really nice!

  • Member since
    October 2010
  • From: Hobart, Australia
Posted by Casper the Chihuahua on Friday, April 27, 2012 9:10 PM

Finished the Spit. Great kit, a real pleasure to build. The colours came out a little lighter than I expected but some of the weathering I have done will help with this. Also it must be said, despite the excellent engineering from Tamiya on this kit, the decals leave a lot to be desired! The roundels were simply awful, too thick and almost impossible to bed down. I used so much Microsol to get these puppies to sit down. Way too thick, the under-wing roundels look not great.

Anyway, here are some pics.

Cheers

On the bench: A-4F 1/32 Hasegawa

Just deployed: F6F-5N Hellcat Nightfighter 1/48 Eduard

Up next: A6-E Intruder 1/48 Revell

  • Member since
    October 2005
  • From: New Port Richey
Spitfire GB
Posted by deattilio on Friday, April 27, 2012 9:15 PM

That is one fine looking Spitfire Casper.


WIP:
Trying to get my hobby stuff sorted - just moved and still unpacking.


"Gator, Green Catskill....Charlie On Time"


  • Member since
    April 2005
Posted by Thunderbolt379 on Friday, April 27, 2012 9:54 PM

Casper, that is one stupendous piece of work! Green with envy! I looked at this kit at the LHS yesterday, Tamiya seem to have four Spits in this scale now, and they range here from $140 to $196, so for the moment I'll be drooling from afar!

I picked up the canopy masks for both my projects yesterday, so expect some action on the Academy Mk XIV in the not too distant future...

Mike/TB379

http://worldinminiature.blogspot.com/

  • Member since
    September 2009
  • From: Guam
Posted by sub revolution on Friday, April 27, 2012 10:12 PM

Excellent build, casper! I like the colors.

NEW SIG

  • Member since
    November 2006
  • From: Coastal Maine
Posted by dupes on Thursday, May 3, 2012 3:58 PM

Casper - great looking Spit! Toast

Is it just me, or do the pointy-winged variants (I never remember what wing type that is) look strange?

  • Member since
    November 2006
  • From: Coastal Maine
Posted by dupes on Thursday, May 3, 2012 4:00 PM

Wrapped up my 1/48 IXc a couple of days ago, got a single shot for you:

Still transitioning from my office down to my very-soon-to-be-finished basement studio, so no photobooth for me right now. Will try to get some more pics up once I'm "moved in"!

  • Member since
    December 2009
Posted by ww2psycho on Thursday, May 3, 2012 5:11 PM

Very nice! I'll post both of your pics on the first page by the end of the week.

  • Member since
    April 2005
Posted by Thunderbolt379 on Thursday, May 3, 2012 6:34 PM

Dupes -- that's a sweet job! I love that desert scheme! AM markings, or did they come with thekit?

Cheers, M/TB379

http://worldinminiature.blogspot.com/

  • Member since
    September 2009
  • From: Guam
Posted by sub revolution on Thursday, May 3, 2012 6:37 PM

Well done! Looks like a well used bird! And I think you're right about the pointy wing tips. I had never seen (or at least noticed) them until this thread.

NEW SIG

  • Member since
    November 2006
  • From: Coastal Maine
Posted by dupes on Thursday, May 3, 2012 7:31 PM

Hey, thanks guys! Big Smile

Thunderbolt - they're eagle strike decals...if you go to the top of the page, you can see them beneath the spit in WIP pics I posted.

  • Member since
    April 2005
Posted by Thunderbolt379 on Thursday, May 3, 2012 7:42 PM

Ah! Gotchga! Looks like ES 48-228? Must see if I can rustle up that one, it's a most eye-catching yet simple scheme. Is the kit Hasegawa, ICM or Occidental? I'm building the Has Vb right now and the wing joint was less than inspiring...

M/TB379

http://worldinminiature.blogspot.com/

  • Member since
    January 2012
  • From: East Peoria, IL
Posted by stoutfella on Friday, June 29, 2012 12:33 PM

Greetings,

Any chance I could still get in on this build? I'm about to start the Tamiya Mk 1. I know I'm 3 months tardy to the party, so I'll understand if it's too late.

Cheers,

Stoutfella

On the bench: 1/48 Tamiya Bristol Beaufighter

On deck: 1/48 Tamiya P51-B

  • Member since
    April 2005
Posted by Thunderbolt379 on Friday, July 6, 2012 8:20 PM

My 18" codes and black serial decals (Fantasy Printshop) have come in for the Academy XIV, I have the insignia, now all I need is stencil data and I can completely avoid the disastrious Academy decals. Does anyone have recommendations for 1:48 Spitfire Mk XIV stencil data? I thought I located some by TechMod but I can't find them now...

M/TB379

http://worldinminiature.blogspot.com/

  • Member since
    April 2006
  • From: ON, Canada
Posted by jgeratic on Saturday, July 7, 2012 1:16 AM

Hannants shows they have 5+ of the Techmod brand in stock.

regards,

Jack

  • Member since
    April 2005
Posted by Thunderbolt379 on Saturday, July 7, 2012 3:10 AM

Thanks, Jack, I ordered them up right away.

Cheers, Mike/TB379

http://worldinminiature.blogspot.com/

  • Member since
    January 2012
  • From: East Peoria, IL
Posted by stoutfella on Wednesday, July 11, 2012 9:42 AM

Greetings,

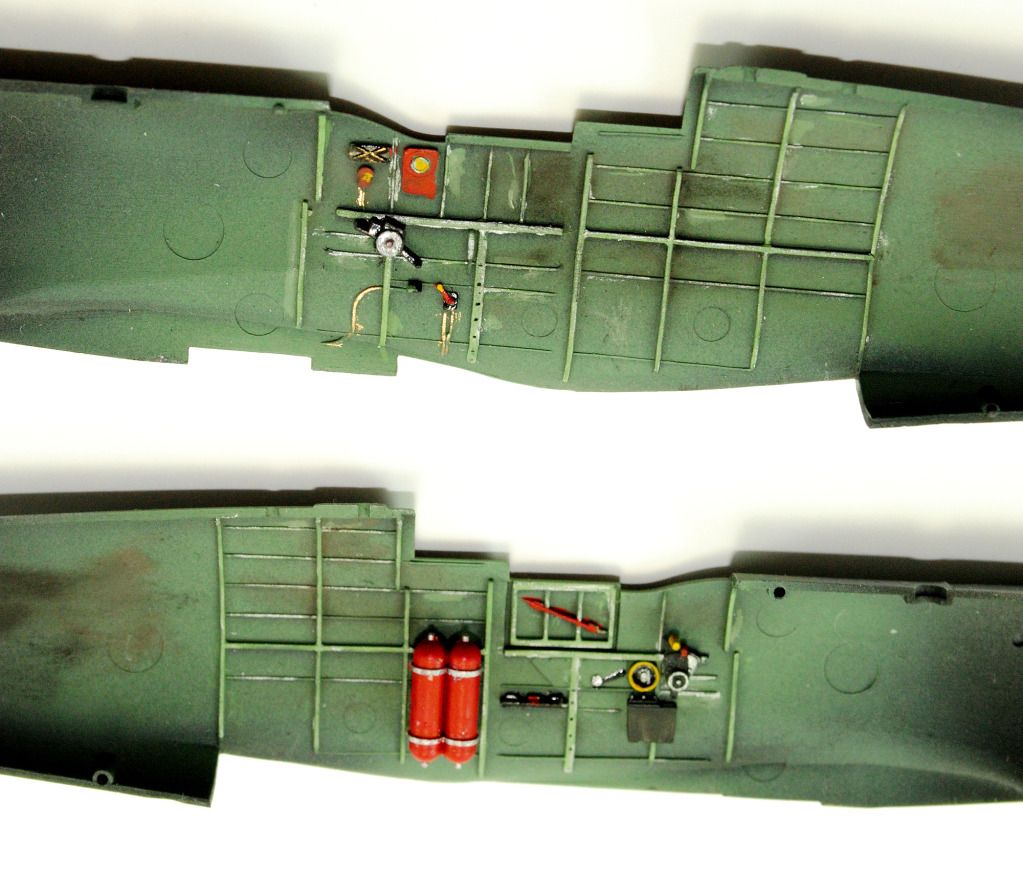
ww2psycho has graciously allowed me to join the build, even though I'm a few months late to the party. I figured I was building the kit anyway, so I might as well share. I'm doing Tamiya's 1/48th Spitfire Mk I, done up in the markings and red spinner of No. 66 Squadron Leader Rupert "Lucky" Leigh. I picked up an Extradecal sheet for this kit after my first experience with cardboard-thick Tamiya decals on a previous build.

It'll also be my first experience with resin parts, having picked up a seat, prop/spinner and exhausts from Ultracast. I immediately found I wasn't prepared for how delicate these parts were, and my first act was to snap off the Sutton harness above the seat, never to be found again. I may try to fabricate a replacement if I get ambitious.
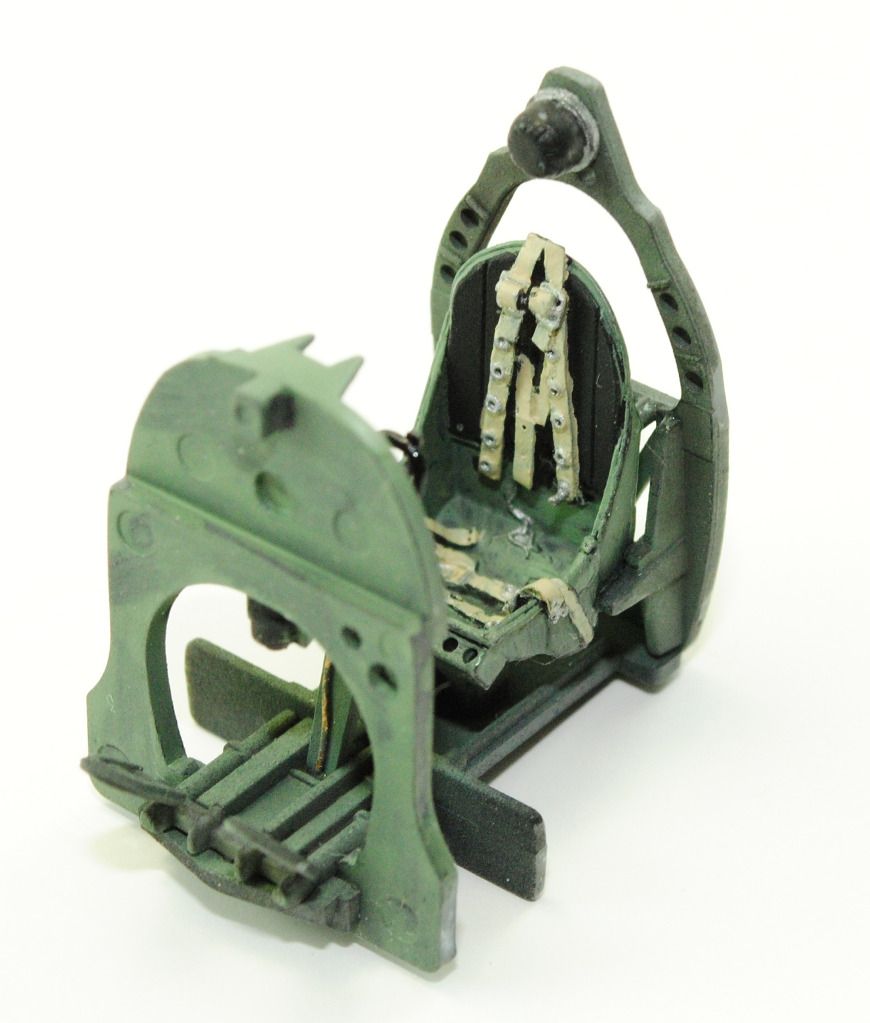
I'd thought about painting the seat in some sort of brown to simulate the Bakelite or whatever plastic was used for many Spitfire seats, but I determined that this plane first flew in January 1940, when the seats were still metal, so interior green it was.

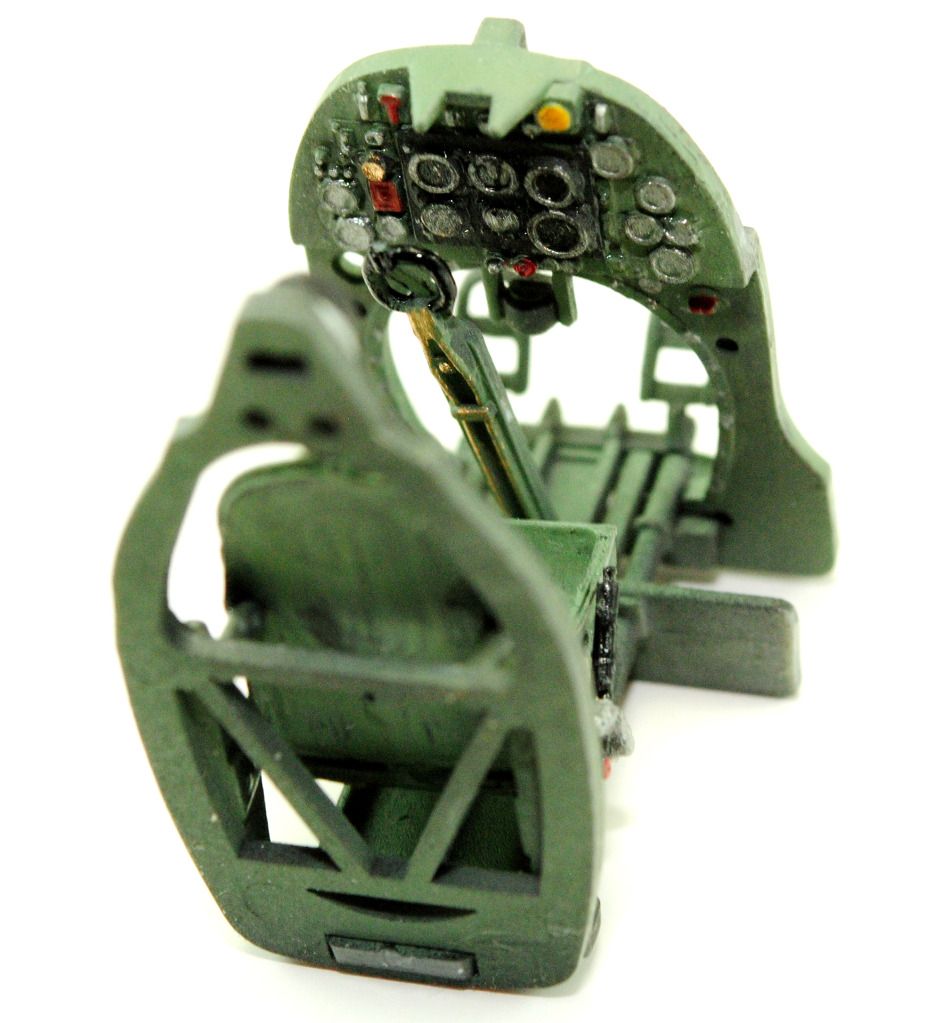
Here are a couple of more shots of progress so far. Just before taking these pictures, I went to retrieve the cockpit from the kitchen table where I'm forced to work at the moment, and discovered to my horror that it was gone.Surprise Apparently, the cats didn't pay attention to my stern warnings to not play with my toys. I eventually found it behind one of the litter boxes. In three pieces. Fortunately, nothing had snapped and I was able to make it right fairly easily.  But I really do need to find friendlier modeling quarters soon.
Cheers,

Stoutfella

On the bench: 1/48 Tamiya Bristol Beaufighter

On deck: 1/48 Tamiya P51-B

  • Member since
    September 2003
  • From: AandF in the Badger State
Posted by checkmateking02 on Wednesday, July 11, 2012 5:29 PM

Cats are the bane of modeling.  Outstanding cockpit!


  • Member since
    January 2012
  • From: East Peoria, IL
Posted by stoutfella on Tuesday, July 17, 2012 8:58 AM

Greetings,

Much progress on my Spitfire over the weekend. This is my third Tamiya kit in a row and I'm getting spoiled. The fit's maybe not quite as spot-on perfect as the P-51D, but it's not far off. I used just a touch of filler on a couple of spots on the underside wing-fuselage joints, but otherwise it was just some sanding and smoothing.

Masking for the paint shop. This is the first time I've tried masking and attaching the canopies first, rather than stuffing tissue and masking tape into the cockpit.

I sprayed MM enamel RAF Sky for the bottom color. I sprayed the same paint as a primer coat on the topside, as well:

Then masked the bottom in preparation for the base color topside of

MM acrylic Dark Earth:

Next post will describe camo masking.

Cheers,

Stoutfella

On the bench: 1/48 Tamiya Bristol Beaufighter

On deck: 1/48 Tamiya P51-B

  • Member since
    January 2012
  • From: East Peoria, IL
Posted by stoutfella on Wednesday, July 18, 2012 10:49 AM

Greetings,

After spraying the topside with MM acrylic dark earth, it was time to mask for the camouflage. A big shout-out here to jeaton01 for his wonderful templates. I printed them out and had intended to then use them as a guide to cut Frisket airbrush film for the actual masks. Fortunately, I tried a test with the Frisket on the undersides of the horizontal stabilizers before I dove in to the whole project. When I peeled off the film, it left a nasty, sticky residue on the paint. I was able to get just about all of it off by repeatedly pressing pieces of masking tape to it, lifting the residue little by little. But no way was I going to try this stuff on the whole plane now. So I went with Plan B. I cut out the paper template pieces and taped them in place, cutting a few of the smaller pieces directly out of masking tape:

I sprayed over the masks with Badger dark green acrylic, which went on very nicely. I think I'm also finally starting to get the right thickness in my paint mix. The answer was to thin it out a lot more than I had been and spray at a lower pressure -- 10 to 12 psi instead of 20. I'm getting thin, even coats now.

Next up, decals and fiddly bits (landing gear, prop, exhausts, etc.).

Cheers,

Stoutfella

On the bench: 1/48 Tamiya Bristol Beaufighter

On deck: 1/48 Tamiya P51-B

  • Member since
    September 2003
  • From: AandF in the Badger State
Posted by checkmateking02 on Wednesday, July 18, 2012 5:45 PM

Very nice looking camouflage.


  • Member since
    April 2005
Posted by Thunderbolt379 on Wednesday, July 18, 2012 6:35 PM

I second the motion, Stoutfella, she's looking very nice. the thin, even coats really make the surface detail speak for itself.

M/TB379

http://worldinminiature.blogspot.com/

JOIN OUR COMMUNITY!

Our community is FREE to join. To participate you must either login or register for an account.

SEARCH FORUMS
FREE NEWSLETTER
By signing up you may also receive reader surveys and occasional special offers. We do not sell, rent or trade our email lists. View our Privacy Policy.