SEARCH FINESCALE.COM

Enter keywords or a search phrase below:

The OFFICIAL Panzer III and Its Variants GB

298874 views
2308 replies
1 rating 2 rating 3 rating 4 rating 5 rating
  • Member since
    April 2009
  • From: Carmel, IN
Posted by deafpanzer on Monday, January 2, 2012 11:14 AM

Guys- I am so happy to report that I have been at my work bench for last days finally after few weeks of break... worked mostly on the figures.  They are almost done... only little more on the flesh and details on the uniform. 

Unfortunately I can not post pictures... system error is not allowing me to do this.  Are you experiencing the same thing at this moment?

Andy

  • Member since
    April 2009
  • From: Carmel, IN
Posted by deafpanzer on Monday, January 2, 2012 11:08 AM

DaveB- Glad you had nice holidays.  Too bad most of us have to return to work tomorrow... looking forward to your next update. 

Armor86- Agree with others... nice looking Pz III!  AMPS national event is coming to Auburn, IN in spring.  This is something you don't to miss if you are few hours drive away.  I plan to attend of course!


Andy

  • Member since
    March 2003
  • From: Western North Carolina
Posted by Tojo72 on Monday, January 2, 2012 10:03 AM

Armor86,nice job,I like the dusty look

  • Member since
    December 2009
  • From: NE Ohio
Posted by DaveB on Monday, January 2, 2012 9:50 AM

Gentleman, 

I hope everyone had an enjoyable holiday season and Santa was good to you. I've been absent from the forum for a while but have made great progress on my Su-76i conversion. I have photos I'll post later today of the work so far.

 Dave

  • Member since
    May 2011
  • From: Illinois
Posted by armor86 on Sunday, January 1, 2012 1:12 PM

stikpusher - Thanks again on the comment - the tarp / rolled canvas came from a accessory detail kit from Legend - online item / ebay and were resin ... the key is on how their painted up, washed and dry brushed .... I have Legend Pz.Kpfw. III Stowage set (Xmas gift) and will used some pieces with both the Pz III Ausf. J Initial - Russian Front and I'm so working on an older Dragon Imperial Series Pz III Ausf. G - North Africa theme. Armor86. Big Smile


Dan

  • Member since
    July 2004
  • From: Sonora Desert
Posted by stikpusher on Sunday, January 1, 2012 1:49 AM

Thank you 86Wink Your Mk.IV F1 is quite a beautiful piece of workYes I presume those tarps are scratch built? They are way too nice for any plastic or resinStick out tongue After seeing yours I think I need a snub nose 75mm DAK Mk IV as well...Hmm I'm looking forward to your Mk III here!


F is for FIRE, That burns down the whole town!

U is for URANIUM... BOMBS!

N is for NO SURVIVORS...

       - Plankton

LSM


  • Member since
    May 2011
  • From: Illinois
Posted by armor86 on Sunday, January 1, 2012 1:25 AM

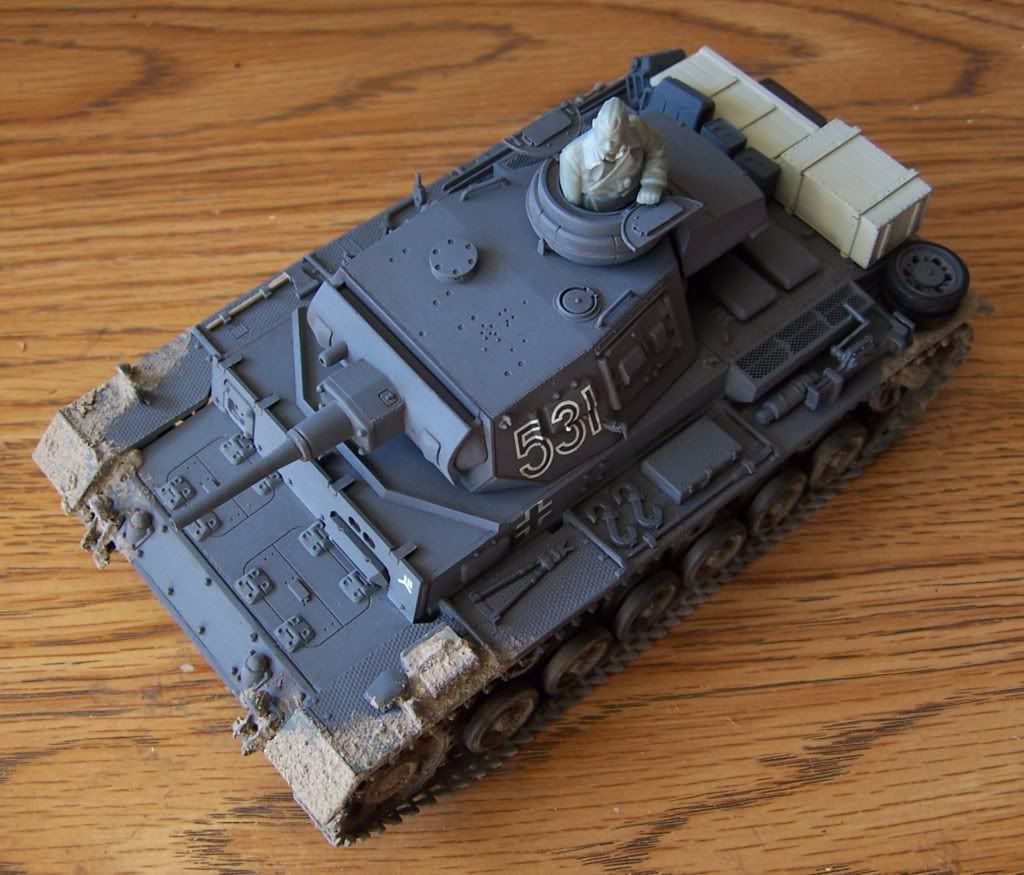
stikpusher - thanks - 531 turned out great ... next up on mine is painting road wheel rubber, rear lights, exhaust and tools. Need to dry fit road wheels before assembling the magic track. Finished a Pz IV Ausf. F1 and used a figure ... photo below. Armor86


Dan

  • Member since
    May 2011
  • From: Illinois
Posted by armor86 on Sunday, January 1, 2012 12:53 AM

Deafpanzer - thanks for the note, live in the Midwest (Illinois); occasionally I will travel out on business to Northern Virginia and South Carolina. Earlier this year I was detailed outside D.C. and spent three months and took advantage of several scale model clubs meetings and events.  Don't have any local IPMS or AMS unless one travels to St. Louis or Chicago. Armor86


Dan

  • Member since
    July 2004
  • From: Sonora Desert
Posted by stikpusher on Saturday, December 31, 2011 8:23 PM

Satch, it started pretty dark, but between the Matte coat, weathering, and probably the camera flash too, it lightened up a couple notches... I think the darkest Panzer Gray I have in my paints would either be Testors or Humbrol. Both are pretty dark.

Bill, thank you for the compliment. There are so many beautiful builds here.Stick out tongue


F is for FIRE, That burns down the whole town!

U is for URANIUM... BOMBS!

N is for NO SURVIVORS...

       - Plankton

LSM


  • Member since
    February 2003
  • From: Allentown, PA
Posted by BaBill212 on Saturday, December 31, 2011 8:03 PM

stik,,,     looking real fine indeed


Andy,,,,,    thank YOU    my friend

And    a Happy New Year to you and all the other friends in the GB as well............       

Be safe everyone!


Bill

Enjoy the ride!


  • Member since
    July 2004
  • From: Sonora Desert
Posted by stikpusher on Saturday, December 31, 2011 7:59 PM

DP..."Wash me"?  that is too funny! But yes, that part of the look is what I was trying to achieve... That final dusting ties it all together... the mud is close to what I wanted but not quite there... but  yes, one the TC is done I will work on a better picture with him in the hatch.Geeked

Doog, I'm glad you saw what was concealed under the Raw Sienna dusting. Washes, dry brushing,  the color variations... all the good stuffWink


F is for FIRE, That burns down the whole town!

U is for URANIUM... BOMBS!

N is for NO SURVIVORS...

       - Plankton

LSM


  • Member since
    September 2009
  • From: Spring Branch, TX
Posted by satch_ip on Saturday, December 31, 2011 7:58 PM

Hoorah Stick!  Nice job.  Your gray is much lighter than what I used, Vallejo German Gris.

Satch

  • Member since
    January 2007
Posted by the doog on Saturday, December 31, 2011 7:26 PM

deafpanzer


http://i72.photobucket.com/albums/i181/stikpusher/models/Model%20WIPs/005-76.jpgL

NOW I see the painting, stikpusher! Yeah, that definitely makes a difference in what I would have critiqued!

These pictures portray it in a much more flattering light! Smile

  • Member since
    April 2009
  • From: Carmel, IN
Posted by deafpanzer on Saturday, December 31, 2011 7:26 PM

Guys- You have been GREAT!  Thank you for making my GB fun as it has been six months already!  Wanted to say Happy New Year and I look forward to next six months!


Andy

  • Member since
    April 2009
  • From: Carmel, IN
Posted by deafpanzer on Saturday, December 31, 2011 7:25 PM

86- You are definitely on roll on this.  Where are you located?  Nice color on the Panzer... Yes

Stik- Adding a figure or two to a vehicle is a must for me.  Glad you are working on that tank commander.  Looking forward to see it complieted.

Boy, your Panzer III came out just great.  I have to admit I was concerned about your method but it worked great!  Love the dirt... I want to write 'wash me' on your Panzer!  It has been fun having you with us and I look forward doing it again in future group builds.

It would be great if you can take your Pz outside or closer to window for natural light next time you take pictures when the tank commander is done?  

Andy

  • Member since
    July 2004
  • From: Sonora Desert
Posted by stikpusher on Saturday, December 31, 2011 6:06 PM

Well, I am calling this one done for the GB. Aside from the commander figure that is. I have really enjoyed participating here.

Once I get the TC painted up properly I will post one more pic with him mounted in the hatch.

Thanks for having me here Wink


F is for FIRE, That burns down the whole town!

U is for URANIUM... BOMBS!

N is for NO SURVIVORS...

       - Plankton

LSM


  • Member since
    July 2004
  • From: Sonora Desert
Posted by stikpusher on Saturday, December 31, 2011 4:29 PM

Yes Very nice progress 86! I am looking forward to seeing what is next with your Mk III.

I had my progress in two steps today. First off was the beginnings of painting the TC half figure. I figure between washes and dry brushing, he will not be ready until tomorrowTime

Then it was attach and paint a stretched sprue antenna and airbrush a coat of Raw Umber over the lower hull mud and running gear...

Afterwards was a break for food and then the final airbrush coat on the lower hull mud and running great followed by a light overall dusting of Raw Sienna... Those are in my completed pics to come next postWhistling


F is for FIRE, That burns down the whole town!

U is for URANIUM... BOMBS!

N is for NO SURVIVORS...

       - Plankton

LSM


  • Member since
    May 2011
  • From: Illinois
Posted by armor86 on Saturday, December 31, 2011 12:47 PM

Now some daylight, enclosed photos using natural light for a better judge of color with lighter grey tones to give it some wear look ....  last day of the year ... Armor86


More light ... 

Happy New Year! Big Smile


Dan

  • Member since
    May 2011
  • From: Illinois
Posted by armor86 on Saturday, December 31, 2011 2:47 AM

Used Tamiya Surface Primer and airbrushed base color (German Grey) - several photos below. I've used many different brands of paint and for this project I've tried out ModelMakerZ ... didn't need to thin it and provided a good finish, building up the finish with numerous passes. After allowing sometime to dry sprayed same color but added a little white and continued to airbrush but only on high points where the paint would have faded. Purchased ModelMakerZ direct from a guy who travels around sells his products at regional IPMS shows. 

Normally I will spray a coat of future (pledge) over the complete model, apply decals, then washes, color modulation (using enamel paints), dry brushing (rust / water stains) and last pigments (mud / dirt / rust). Armor86 Smile


Dan

  • Member since
    July 2004
  • From: Sonora Desert
Posted by stikpusher on Friday, December 30, 2011 8:18 PM

Before there were washes... before there were pigments... before there was color modualtion... there was dry brushing. The oldest technique that I have been using although I did not for a long time use it  as a "high lighter" but rather for straight up weathering. Once again I used enamels due to the longer drying time and better control I get with them.

I don't know why that pic came out different in hue than the others. The settings on the camera and computer photo program are the same. Perhaps it was because I held the camera closer to the model. That is actually how the Panzer looks to the Mk I eyeball rather than the more bluish hue of the other pics.


F is for FIRE, That burns down the whole town!

U is for URANIUM... BOMBS!

N is for NO SURVIVORS...

       - Plankton

LSM


  • Member since
    April 2009
  • From: Carmel, IN
Posted by deafpanzer on Friday, December 30, 2011 7:56 PM

Stik- WOW!  Great process especially after the highlighting job.  This is something I haven't done to any of my builds.  I should give it a try one day.  I usually use graphite pencil.  Always learning a new trick here at FSM. 

I have to say that your last picture came out better than the rest.  Less blueish if you have noticed?  That looked better... did you use flash?

http://i72.photobucket.com/albums/i181/stikpusher/models/Model%20WIPs/005-76.jpgL

Andy

  • Member since
    July 2004
  • From: Sonora Desert
Posted by stikpusher on Friday, December 30, 2011 5:45 PM

Yes I like the way that the Humbrol Matt Clear tones down the washes and blends in the decals.

Many little things finished today. First off I did drybrush of Dark Gull Gray to hit the detail highlights...

and I finished up the washes and detail painting on the stowage boxes and drybrushed tools and spare track links, then glued it all in place with Gator Glue

A close up of the stowage

and I drilled out the bores, painted, dry brush highlighted , and attached the co ax and hull Machine Guns...

Tomorrow will be the final weathering. I intend to be done for New Years.


F is for FIRE, That burns down the whole town!

U is for URANIUM... BOMBS!

N is for NO SURVIVORS...

       - Plankton

LSM


  • Member since
    April 2009
  • From: Carmel, IN
Posted by deafpanzer on Friday, December 30, 2011 12:48 PM

stikpusher

 deafpanzer:

 One day I will get rid of all enamel paint so I don't have to worry about my lungs and flammable stuff around my work bench. 


Blasphemy!!!! They can have my enamels when they pry then from my cold dead cancerous fingers...DeadWink

Stik- LOL!  I don't blame ya... who knows I will change my mind again.  Now your Pz III is REALLY looking good.  That ENAMEL flat clear has done a great job like Rob said. 

Chazzer- Are you out there?  Hope your surgery went well.  We all are thinking about you and your book of course.  Big Smile

Andy

  • Member since
    October 2009
Posted by PANZERWAFFE on Thursday, December 29, 2011 9:41 PM

That matt ENAMEL really brought things together.  "Know one's taking my enamels either  Super AngryThe extra gear and commander looks really good, like the layout of it.  It fits perfectly Yes

Rob

  • Member since
    July 2004
  • From: Sonora Desert
Posted by stikpusher on Thursday, December 29, 2011 4:41 PM

deafpanzer

 One day I will get rid of all enamel paint so I don't have to worry about my lungs and flammable stuff around my work bench. 

Blasphemy!!!! They can have my enamels when they pry then from my cold dead cancerous fingers...DeadWink

Today's sitrep- I airbrushed on a coat of Humbrol enamel Matt Clear. I love that stuff!!!
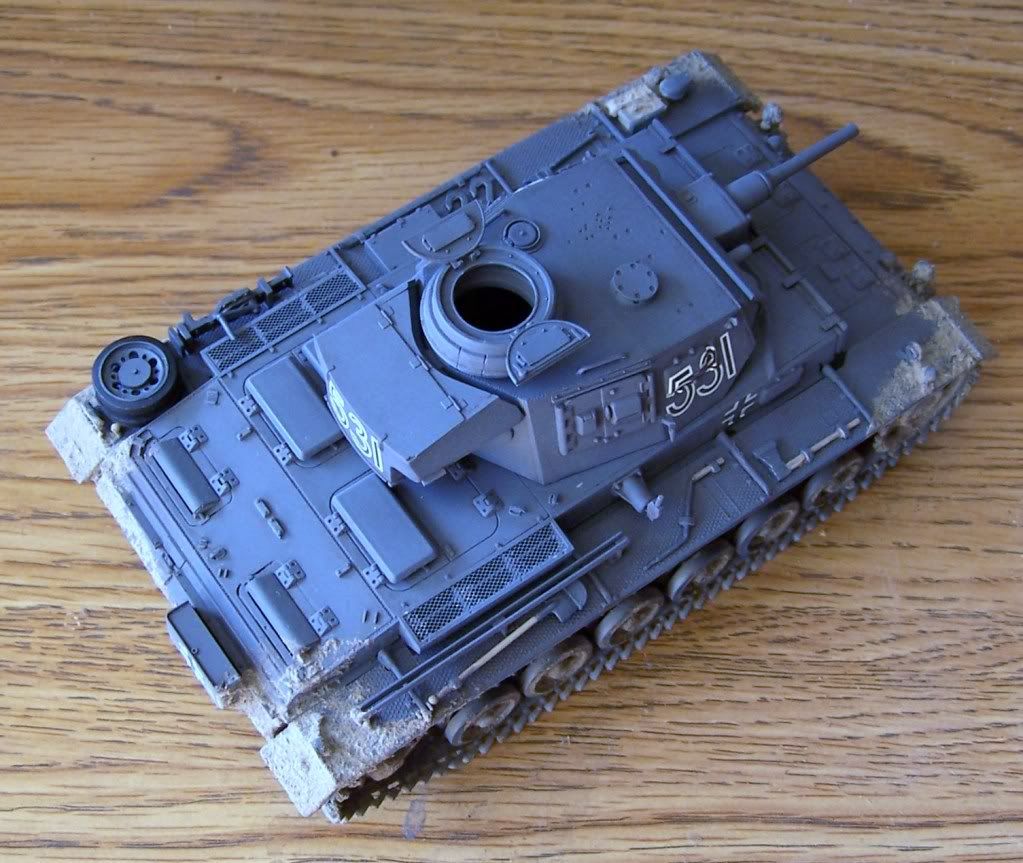
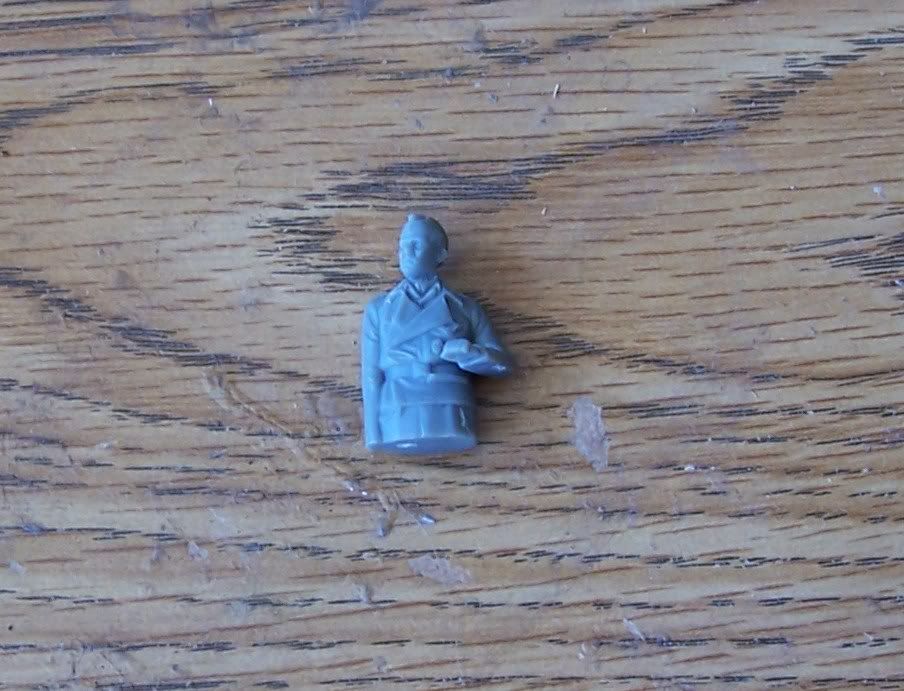
and I found a TC half figure in my spares bin from the Tri Star SP gun set that will work perfect...
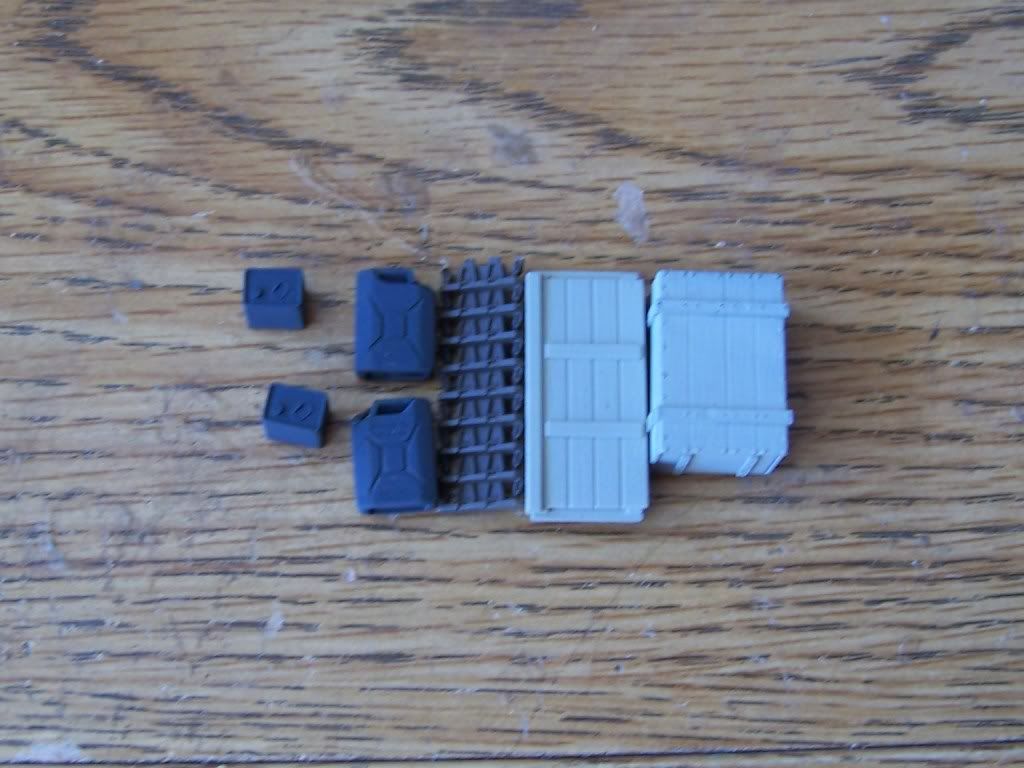
and this is the stowage I have planned, a couple wood boxes, some spare tracks, jerry and oil cans...
I also will add  five stahlhelms, but they are not painted yet...

Here is how I plan to mount the stowage...
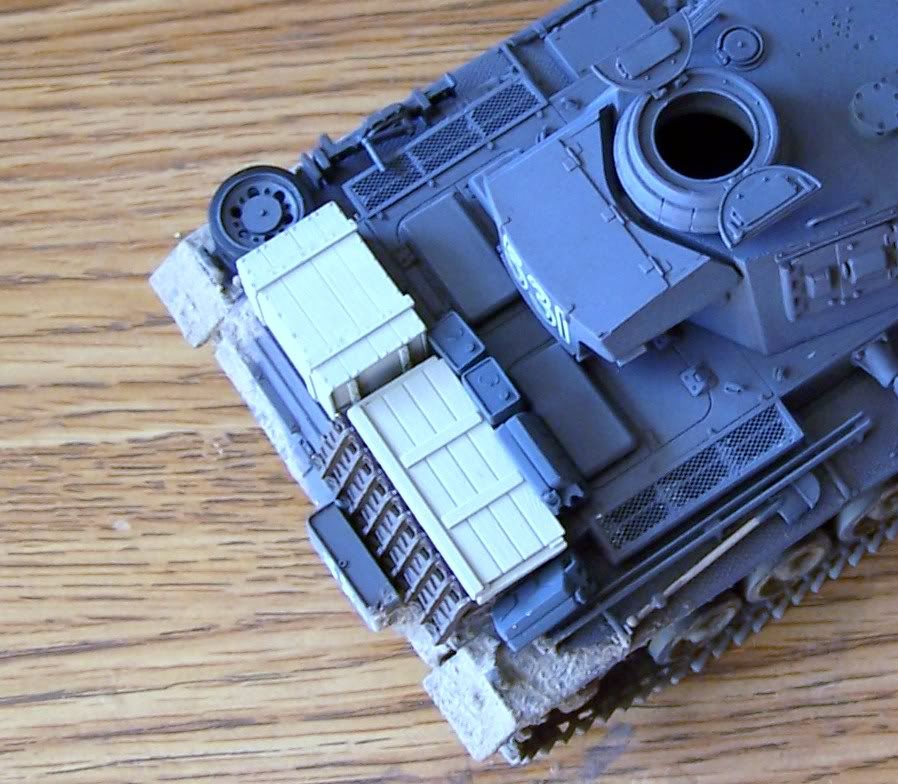
and a shot of how it should all look in the end...
Tomorrow, drybrushing highlights on the Panzer Gray, detail and attachment of the stowage, machine gun barrels... and get ready for final weathering painting...


F is for FIRE, That burns down the whole town!

U is for URANIUM... BOMBS!

N is for NO SURVIVORS...

       - Plankton

LSM


  • Member since
    March 2006
  • From: Right Side of a Left State
Posted by Shellback on Thursday, December 29, 2011 4:11 PM

Andy , its inconsiderate of you to show off your new models , just sayin ..................you should think of my feeelings before doing that ...............................Crying.....................Embarrassed......................Crying

  • Member since
    April 2009
  • From: Carmel, IN
Posted by deafpanzer on Thursday, December 29, 2011 10:44 AM

86- Looks like you are all set to have it primed and painted!  I haven't tried Vallejo on armor yet but I use those on the figures all the times.   One day I will get rid of all enamel paint so I don't have to worry about my lungs and flammable stuff around my work bench. 

Rob- I was able to get most of the books directly from HobbyLink Japan.  They never list #6 for some reason and it wasn't easy finding one on eBay.  Right now it shows all books except for #6 is on back order so it looks like they will be available within 4-6 weeks? 

http://www.hlj.com/scripts/hljlist?Word=achtung+panzer+series&Dae=All&Series=All&Dis=2

I am very satisfied with those Achtung Panzer books and I hope I don't have to buy any more reference books for German armor except for SPGs.   Right now I need to get reference books on American armor especially Sherman...

Andy

  • Member since
    October 2009
Posted by PANZERWAFFE on Thursday, December 29, 2011 10:13 AM

86 - Looking really good and look forward too the paint.

STIK - Great progress Yes  She is getting really close now.

ANDY - Nice score of kits.  I got that M4A2 also.  Still have not one single Achtung Panzer Book Crying  Nice you have completed your set Yes

Rob

  • Member since
    February 2003
  • From: Allentown, PA
Posted by BaBill212 on Thursday, December 29, 2011 5:20 AM

Andy,,      I am with you on that!            We'll have to make plans Yes  Beer  Yes

Enjoy the ride!


  • Member since
    May 2011
  • From: Illinois
Posted by armor86 on Thursday, December 29, 2011 1:57 AM

Pz III Ausf J initial - Preparing for it's first primer coat - dark grey hull / turret ... the road wheels have already been given a coat of red primer on the inside half and the outside halves are ready ... bench photos ... Tamiya paint is hard to come by still ... however I have a large stock, and have gather several Vallejo Model Colors - German Grey and Dark Grey, Panzer Aces Dark Rubber (Road Wheels), Tamiya Color XF-64, and some paint by ModelMakerZ Airbrush Ready Paint Dark Grey .... I have used the Vallejo Model Color with thiner and works well. Armor 86 


Dan

JOIN OUR COMMUNITY!

Our community is FREE to join. To participate you must either login or register for an account.

SEARCH FORUMS
FREE NEWSLETTER
By signing up you may also receive reader surveys and occasional special offers. We do not sell, rent or trade our email lists. View our Privacy Policy.