SEARCH FINESCALE.COM

Enter keywords or a search phrase below:

Japanese GB 2011-2012

204037 views
2250 replies
1 rating 2 rating 3 rating 4 rating 5 rating
  • Member since
    November 2009
  • From: SW Virginia
Posted by Gamera on Monday, October 17, 2011 9:39 AM

Jailcop: She's looking good to me! She's going to look great with decals.

"I dream in fire but work in clay." -Arthur Machen


  • Member since
    October 2008
  • From: italy
Posted by bsyamato on Monday, October 17, 2011 10:06 AM

potchip

Good work folks.

All that's needed is some AA guns to shoot those birds down. Knowing Japanese AA it probably wouldn't work but then again Japanese birds were made of firecrackers.

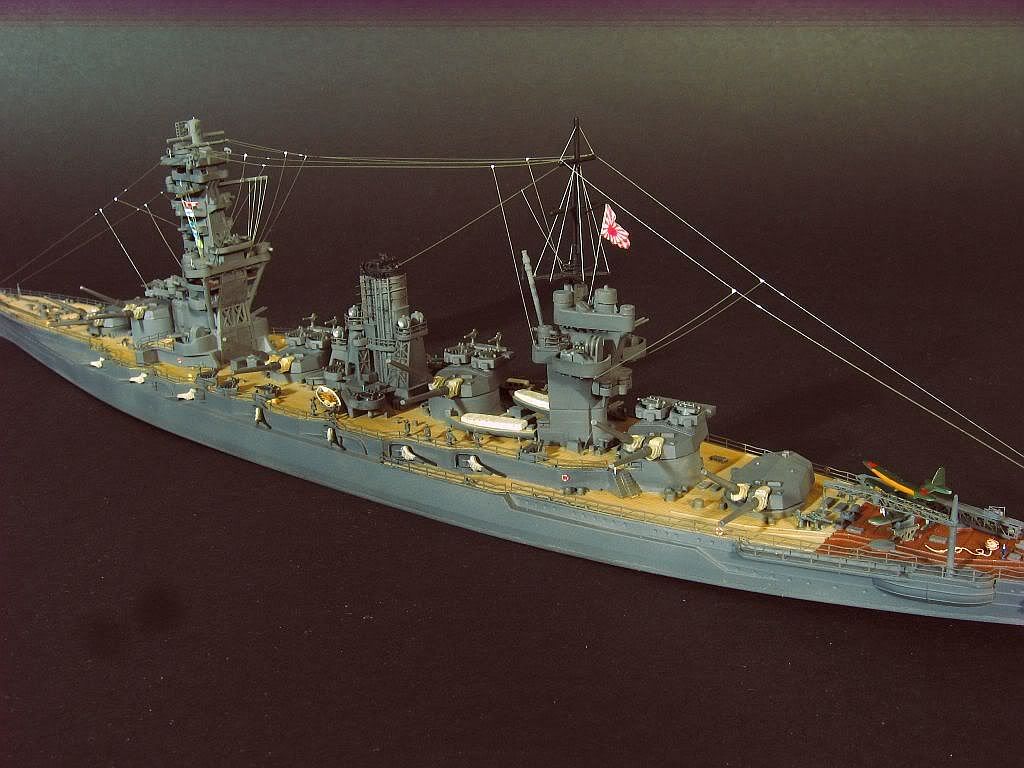
This is my cheerful for this group build - Fuso being the ancient name of Japan...

http://i1184.photobucket.com/albums/z329/potchippy/fuso2.jpg

magnific fuso potchip, i built a kirishima 1/700 some times ago, with less results

You're sure about the old japan name was fuso? i remember was Yamato the old japan name (or probably in a different era)


Jailcop nice future paint even less a finger Beer

  • Member since
    September 2011
  • From: Watertown, NY
Posted by JailCop on Monday, October 17, 2011 10:10 AM

Thanks, I'll try to get a pic or two of the finger up! lol


Also, what would you guys recommend I use to run the antenna?  I have some 4 pound fishing line I could use...

  • Member since
    March 2010
  • From: Democratic Peoples Republic of Illinois
Posted by Hercmech on Monday, October 17, 2011 10:15 AM

I use nylon clear sewing thread now for antennas. It works well and responds to gentle heating.


13151015

  • Member since
    March 2003
  • From: Rain USA, Vancouver WA
Posted by tigerman on Monday, October 17, 2011 12:54 PM

Too much going on to keep up.

Potchip, I need much more on that Fuso. Is there a WIP in ships?

Len, good looking porcupine. I had no idea they carried torpedoes.

Trey, you're a machine. You just keep whipping these planes out.

Keep it up all.

   http://i7.photobucket.com/albums/y269/wing_nut_5o/PANZERJAGERGB.jpg

 Eric 

  • Member since
    August 2009
  • From: Borlando Fla home of the rat
Posted by TREYZX10R on Monday, October 17, 2011 7:10 PM

Thanks fellas and Jailcop that color looks perfect nice work

I've got the silver base down . I'm thinking of going with the  343 Naval scheme its pretty simple and after the last mottle its time to do a basic 2 tone scheme.

heres a pic of aircraft 'A' .I'll be doing 'C' sqdr ldr Oshibuti's aircraft

  • Member since
    September 2011
  • From: Watertown, NY
Posted by JailCop on Monday, October 17, 2011 7:20 PM

Thanks, it looked a bit too green for me.


I just put the decals down on the base coat of future, would you guys do the clay wash next or another coat of future?  Can I just seal the decals with the future and do the wash, then clear flat coat?

  • Member since
    August 2009
  • From: Borlando Fla home of the rat
Posted by TREYZX10R on Monday, October 17, 2011 7:49 PM

Yes you can ,I usually do put a coat of clear over the decals before a wash and then after the weathering give it a dose of dullcoat.

  • Member since
    September 2011
  • From: Watertown, NY
Posted by JailCop on Monday, October 17, 2011 7:52 PM

Thanks, lets hope it comes out nice!

  • Member since
    July 2003
  • From: Pennsylvania
Posted by jay12472 on Tuesday, October 18, 2011 6:41 AM

Wow Great work Guys

Trey the Cockpit and nmf look great on the Shiden

Jailcop I usually recoat the decals and then weather also

Needbeer  nice start on the Dinah

Hercmech Great work on yours I love the brown toopped ones

Potchip very nice ships nice to see something other than aircraft

I have the day off today so will be working and get those pictures up

Jason


  • Member since
    March 2010
  • From: Democratic Peoples Republic of Illinois
Posted by Hercmech on Tuesday, October 18, 2011 7:28 AM

Just an update on my KI-46. Went to put on the decals last night and they completly fell apart. I tried using the Micro decal film on them and they still were no use. So I painted on the Hinomarus and the yello ID bands and I ordered a decal sheet for the other stuff.Sad


13151015

  • Member since
    November 2009
  • From: SW Virginia
Posted by Gamera on Tuesday, October 18, 2011 7:34 AM

Trey: Terrific, looks like you've got the whole NM thing down.

Jailcop: As other folks have stated, I'd spray some clear gloss like Future over the decals to protect them from the wash. Then a coat of matte over everything as your last step to even everything out and as the final protective coat.

Jason: Cool, looking forward to seeing how she's coming along.

Herc: Ack! Sorry, to hear that, at least the Japanese markings are fairly easy to mask and spray. I've been painting the yellow ID bands for some time, I can never get the decal ones to look right.

"I dream in fire but work in clay." -Arthur Machen


  • Member since
    September 2011
  • From: Watertown, NY
Posted by JailCop on Tuesday, October 18, 2011 7:37 AM

Herc:  My Tamiya kit did the same thing with a couple of the decals, soaked for 3 minutes and still tore when I removed them.  Luckily they were mostly salvageable, and what wasn't I tried to make look like weathering and normal abuse.


Gamera:  Thanks, I brushed a coat of Future over the decals last night, then put the wash on this morning.  I'll be wiping the dry wash off here soon, I'll post pics before final clear coat. 

  • Member since
    October 2008
  • From: italy
Posted by bsyamato on Tuesday, October 18, 2011 8:37 AM

Jailcop, not using future but is the same steps i use. gloss coat, decals, gloss coat, whashing, finishing coat

Another great NMF  Trey Yes

finally get the opportunity to take outdoor pictures

Gamera the last for the wall Propeller

EDIT


  • Member since
    March 2010
  • From: Democratic Peoples Republic of Illinois
Posted by Hercmech on Tuesday, October 18, 2011 8:40 AM

bsyamato:

It looked awesome before but in the, it is stunning. Great build!


13151015

  • Member since
    April 2005
  • From: Monster Island-but vacationing in So. Fla
Posted by carsanab on Tuesday, October 18, 2011 9:54 AM

Well the pit is done....added some drybrushing and washed the sides a bit....ready to close this Oscar up and start on the engine.

GRL

 Photobucket

  • Member since
    March 2010
  • From: Democratic Peoples Republic of Illinois
Posted by Hercmech on Tuesday, October 18, 2011 10:03 AM

GRL,

What did you use to make the belts? Your pit looks awesome.


13151015

  • Member since
    November 2009
  • From: SW Virginia
Posted by Gamera on Tuesday, October 18, 2011 10:26 AM

Bsyamato: Beautiful job! Posting your last photo to the front page if that's good with you.

Big-Z: Sharp looking cockpit! Like most nicely detailed cockpits it's a shame you won't be able to see much of it once the plane is closed up.

"I dream in fire but work in clay." -Arthur Machen


  • Member since
    October 2008
  • From: italy
Posted by bsyamato on Tuesday, October 18, 2011 10:27 AM

Hercmech

bsyamato:

It looked awesome before but in the, it is stunning. Great build!

thanx Herc Yes

Great cockpit on fire Carsanab Toast

  • Member since
    April 2005
  • From: Monster Island-but vacationing in So. Fla
Posted by carsanab on Tuesday, October 18, 2011 11:08 AM

Hercmech

GRL,

What did you use to make the belts? Your pit looks awesome.

Mech...the belts are Eduard PE....painted with Tamiya Flat Earth....some of the other fiddl bits are also PE and I added the wire...

 Photobucket

  • Member since
    March 2010
  • From: Democratic Peoples Republic of Illinois
Posted by Hercmech on Tuesday, October 18, 2011 11:27 AM

carsanab

 Hercmech:

GRL,

What did you use to make the belts? Your pit looks awesome.


Mech...the belts are Eduard PE....painted with Tamiya Flat Earth....some of the other fiddl bits are also PE and I added the wire...

Thanks brother...


13151015

  • Member since
    July 2003
  • From: Pennsylvania
Posted by jay12472 on Tuesday, October 18, 2011 11:30 AM

Great job on the pit

The sun really makes the plane pop

Well here are the pics

Jason


  • Member since
    March 2010
  • From: Democratic Peoples Republic of Illinois
Posted by Hercmech on Tuesday, October 18, 2011 11:39 AM

Jason,

Nice loooking build... those Hinomarus really pop


13151015

  • Member since
    October 2008
  • From: italy
Posted by bsyamato on Tuesday, October 18, 2011 11:57 AM

Gamera

Bsyamato: Beautiful job! Posting your last photo to the front page if that's good with you.

Big-Z: Sharp looking cockpit! Like most nicely detailed cockpits it's a shame you won't be able to see much of it once the plane is closed up.

yes, it work Cool

and here come the raiden Jay Yes

i'm surfin between the fujimi kits for the next ( at the end the lower cost between 1/72 kits Huh? )

try to fit more than one or two in the same order and keep an acceptable final price with supplies.

candidates are the va, the claude, the ida and the jill! what's your advice between these subjects?

If i go crazy i can consider this aargh!!! 

  • Member since
    September 2011
  • From: Watertown, NY
Posted by JailCop on Tuesday, October 18, 2011 3:13 PM

Well folks, I'm calling this one done:


The Tamiya 1:48 scale Lt. Cdr. Shigeru Itaya, Akagi Aircraft Carrier Fighter Group, 1941 Mitsubishi A6M2 Zero

This was also my first attempt at weathering with a wash, so please be gentle! lol

  • Member since
    November 2009
  • From: SW Virginia
Posted by Gamera on Tuesday, October 18, 2011 3:22 PM

Jason: She looks good to me, almost done!

Jailcop: Beautiful work there, I think you nailed the right colour for the paint and the weathering came out great! Hope the second photo is ok for the front page, if you'd rather have the other just yell at me.

Bsyamato: They all sound cool. The Hasegawa Mavis is the same age and series as Len's Emily.


"I dream in fire but work in clay." -Arthur Machen


  • Member since
    March 2010
  • From: Democratic Peoples Republic of Illinois
Posted by Hercmech on Tuesday, October 18, 2011 3:25 PM

Nice work Jailcop


13151015

  • Member since
    September 2011
  • From: Watertown, NY
thanks
Posted by JailCop on Tuesday, October 18, 2011 3:29 PM

Thanks guys, Gamera, either picture is fine with me.  It would have been better, but the white glue was still wet on the canopy and the antenna broke Super Angry

  • Member since
    August 2011
  • From: Panhandle Fl
Posted by Noah T on Tuesday, October 18, 2011 5:06 PM

Jailcop: Looks good, a solid llooking build. Weathering is nice, not too much, not factory fresh.


On the bench: 72nd scale P51D, P47D Razorback

---Everything Is What It Is, And Not Another Thing.---

  • Member since
    October 2008
  • From: italy
Posted by bsyamato on Tuesday, October 18, 2011 7:04 PM
JailCop magnific finished "nine fingers" zero !! the panel lines looks good even to me. Gamera (the first on the list obliviously is the val, not the va) my heart is sure for the mavis, know not easy kit, but main problem are the 38 € price!! that end the budget for othe supplies.. raised panels can be rescribbed, details scratched but i can't scratch money :-( best way is to choice two of the four and after (two or more months) place an order for the green hasegawa beast !
JOIN OUR COMMUNITY!

Our community is FREE to join. To participate you must either login or register for an account.

SEARCH FORUMS
FREE NEWSLETTER
By signing up you may also receive reader surveys and occasional special offers. We do not sell, rent or trade our email lists. View our Privacy Policy.