SEARCH FINESCALE.COM

Enter keywords or a search phrase below:

Japanese GB 2011-2012

203067 views
2250 replies
1 rating 2 rating 3 rating 4 rating 5 rating
  • Member since
    August 2009
  • From: Borlando Fla home of the rat
Posted by TREYZX10R on Thursday, October 20, 2011 8:38 PM

I got some washing done


while I was waiting for the wash to dry I played around with the Ki84 pics

  • Member since
    July 2003
  • From: Pennsylvania
Posted by jay12472 on Friday, October 21, 2011 7:09 AM

1/72 Nell by hasegawa

jason


  • Member since
    November 2009
  • From: SW Virginia
Posted by Gamera on Friday, October 21, 2011 9:15 AM

Trey: Love how the NM is coming out, the wash makes the detail pop even more Yes

"I dream in fire but work in clay." -Arthur Machen


  • Member since
    October 2008
  • From: italy
Posted by bsyamato on Friday, October 21, 2011 10:09 AM

troublemaker66


 Gamera:


Len, really cool subject, all that masking- that's why I generally just do fighters Wink


Yep, that`s the ONLY reason I`ll buy a 1/72 kit these days, interesting or not-oft modeled subjects. I like building fighters too but how many Zeros and Mustangs can a person build!?! Those bomber windows are way bigger in 1/48!


one of both Whistling or the second or the third to just replace with better ones . 

You all have really great patience with these canopy masking , i avoid even this step,one of few advantages to paint with brushes.

Trey magnific looking old pictures YesYes nice washing too

  • Member since
    December 2002
  • From: NYC, USA
Posted by waikong on Friday, October 21, 2011 10:50 AM

Trey, looking nice!

My website: http://waihobbies.wkhc.net


  • Member since
    August 2009
  • From: Borlando Fla home of the rat
Posted by TREYZX10R on Friday, October 21, 2011 7:20 PM

Thanks fellas, I did the salt method again,little more suttle this time compared to the Zeke

  • Member since
    March 2003
  • From: Rain USA, Vancouver WA
Posted by tigerman on Saturday, October 22, 2011 12:48 AM

Shame to have to cover up the majority of that metal finish. Yet, I don't think the George was ever in NMF was it?


   http://i7.photobucket.com/albums/y269/wing_nut_5o/PANZERJAGERGB.jpg

 Eric 

  • Member since
    October 2008
  • From: italy
Posted by bsyamato on Saturday, October 22, 2011 5:05 AM

Magnific salting Trey Yes someday want to try this tecnique with some of older planes without airbrush

  • Member since
    August 2009
  • From: Borlando Fla home of the rat
Posted by TREYZX10R on Saturday, October 22, 2011 7:09 AM

Eric thanks yes it was painful covering up the nmf,kind of like super detailing an office that wo'nt be seen again lol. The only nmf that I found while researching this build was the early prototype ,another was solid orange.

Bsyamato thanks .you should do the salt method its a lot of fun!

  • Member since
    February 2011
  • From: Sedona AZ
Posted by AZKevin on Saturday, October 22, 2011 3:49 PM

Trey,

Very nicely done!!

 - you guys are convincing me that I really need to try this method of weathering.

Kevin A. Lawton

Dept. of History

Dept. of Quaternary Sciences

Northern Arizona University

Flagstaff, AZ

  • Member since
    February 2011
  • From: Sedona AZ
Posted by AZKevin on Saturday, October 22, 2011 5:26 PM

Didn't many N1K2 George's have NMF undersurafces?? 

Kevin A. Lawton

Dept. of History

Dept. of Quaternary Sciences

Northern Arizona University

Flagstaff, AZ

  • Member since
    July 2007
  • From: Southern New Jersey
Posted by troublemaker66 on Saturday, October 22, 2011 5:45 PM

From the references I used building my George it seems all had NMF bottoms but I`m sure 1 or 2 had paint underneathe.

Len Pytlewski

  • Member since
    July 2003
  • From: Pennsylvania
Posted by jay12472 on Saturday, October 22, 2011 7:13 PM

Trey great work on the salt. I read some where of someone using sugar also it gave it a little smoother

finish around the edges

Jason

  • Member since
    July 2007
  • From: Southern New Jersey
Posted by troublemaker66 on Saturday, October 22, 2011 7:36 PM

jay12472

Trey great work on the salt. I read some where of someone using sugar also it gave it a little smoother

finish around the edges

Jason

Wouldn`t sugar melt and turn into a sticky mess?  Just sayin`.

Len Pytlewski

  • Member since
    October 2008
  • From: italy
Posted by bsyamato on Saturday, October 22, 2011 7:37 PM

I fear in all cases the hairspray under the final paint  Black Eye 

tests needed 

  • Member since
    July 2007
  • From: Southern New Jersey
Posted by troublemaker66 on Saturday, October 22, 2011 9:33 PM

Does anyone have English instructions for Finemolds Judy, kit # FA-4:5800? The box art is in black and white and is a Judy with an in-line engine. I need them mostly for painting the cockpit....some things are labeled in English but most are not.

Thanks in advance,

Len

Len Pytlewski

  • Member since
    February 2011
  • From: Sedona AZ
A little more progress on the Ki-94-II
Posted by AZKevin on Saturday, October 22, 2011 10:51 PM

I've made some progress on the RS models Ki-94-II and stared the AZ Models Ki-78 'Ken'.  I'll post some photos of the Ki-78 in a bit.

First of all here is the fuselage closed up, wings and tail surfaces, and some ducts/intakes underneath added.  there were some minor seams to fill, but pretty good fit for a low pressure kit.  There is some serious clean-up needed to eliminate mold seams, however.

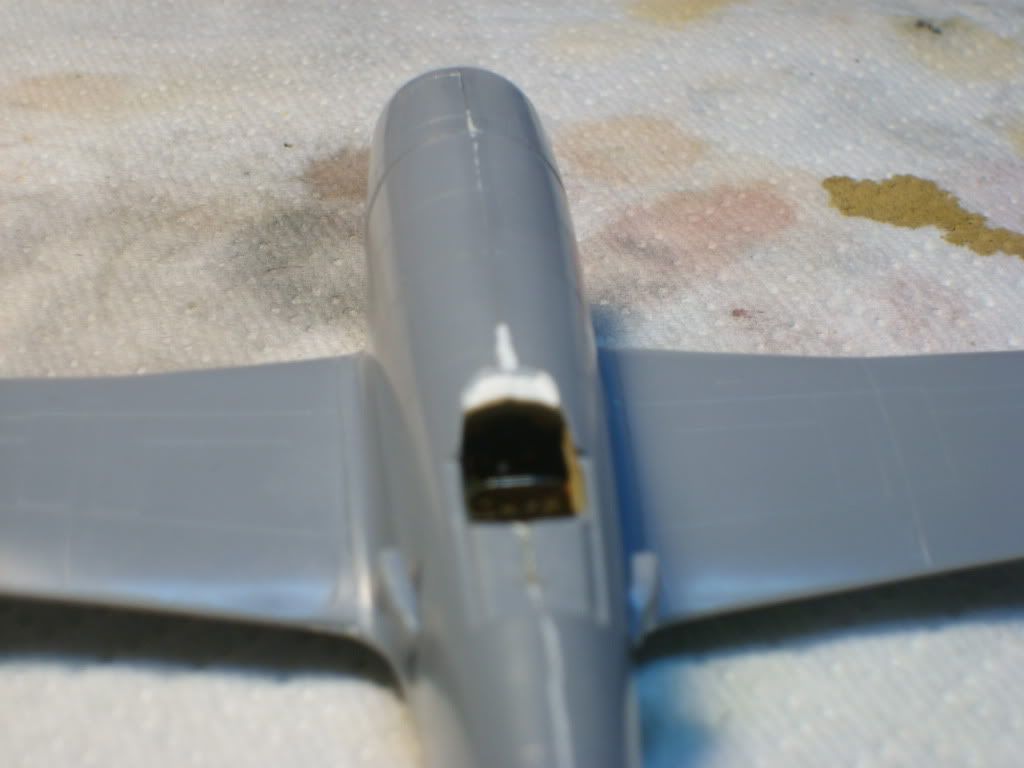
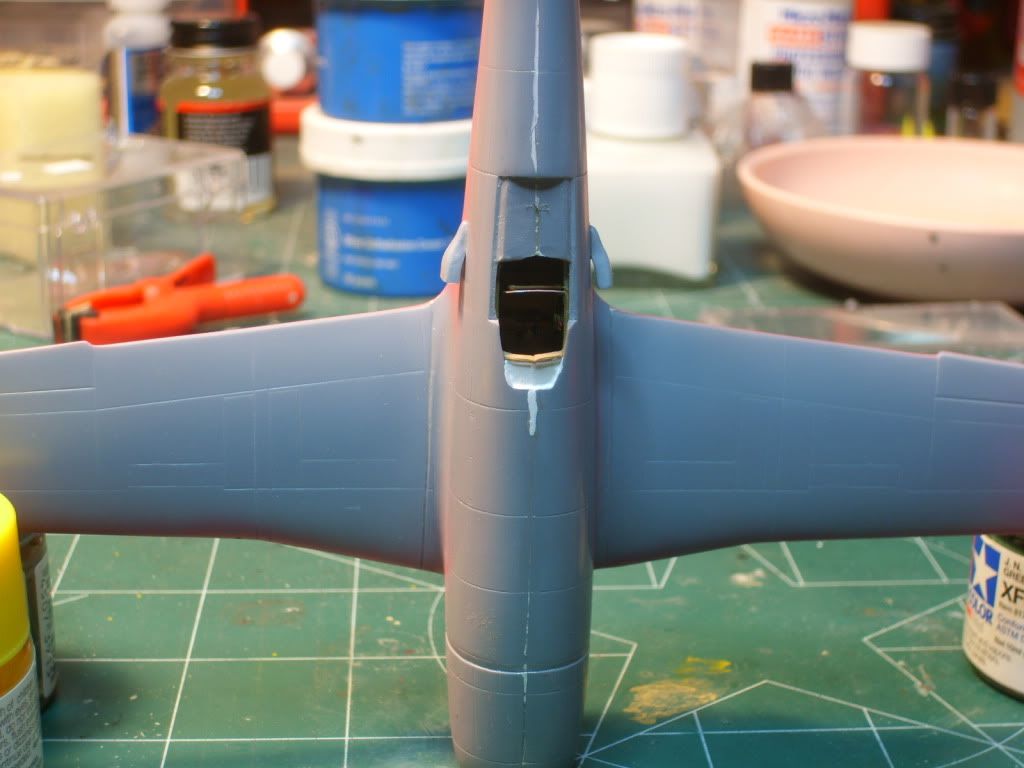
The cockpit coaming area still needs some filling with putty.  Since there is no extant aircraft with which to check, I'm assuming the area between the cockpit opening and the forward fuselage would have been smooth.  Of course I could be wrong, it's been know to happen....occasionallyHmm.

Then off to the paint shop:  First a little pink!

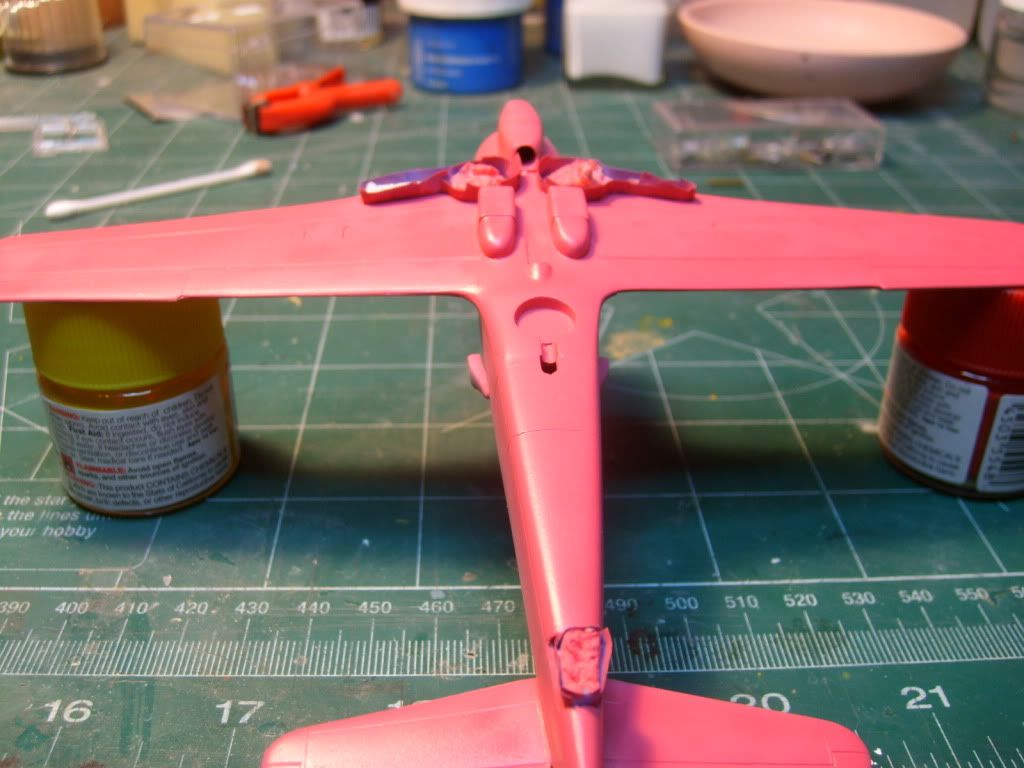
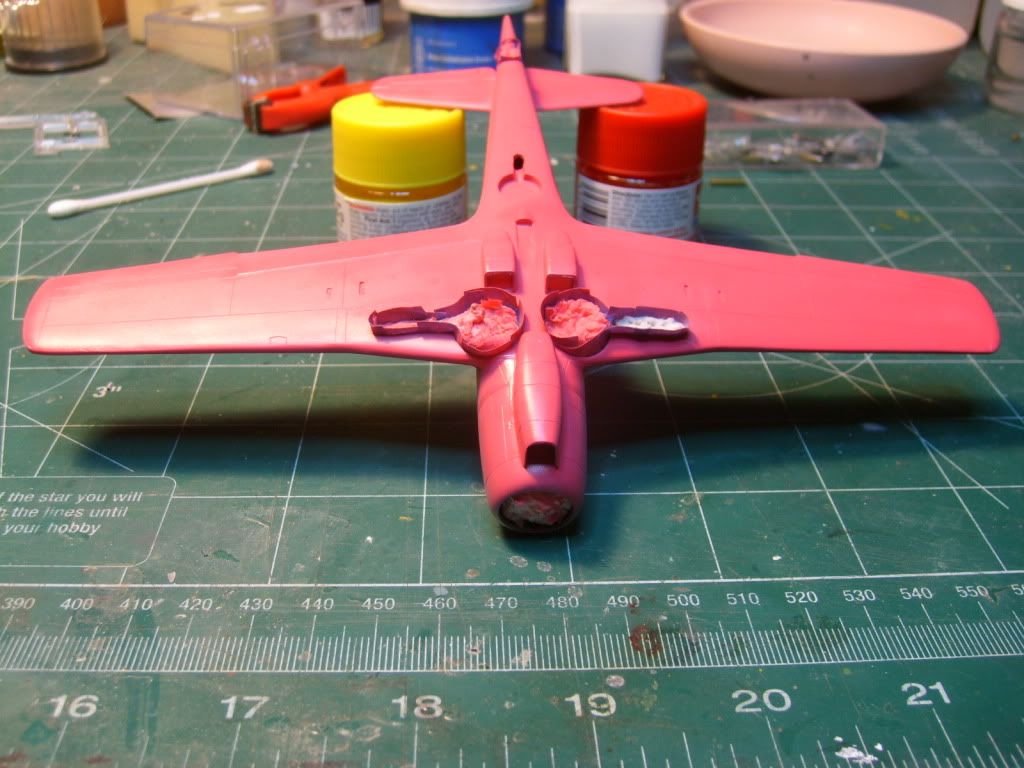
Yes pink - I read somewhere, maybe here, that pink works very well as a primer under orange.

Then some orange, in this case Floquil CN Orange (I used CN (Canadian Northern orange) railroad paint because the hobby shop didn't have just 'Reefer Orange').   I also used the Floquil enamel because I wanted to try spraying enamel over acylic.  So far no problems.  Floquil enamels (slightly thinned) spray GREAT !!!!!!


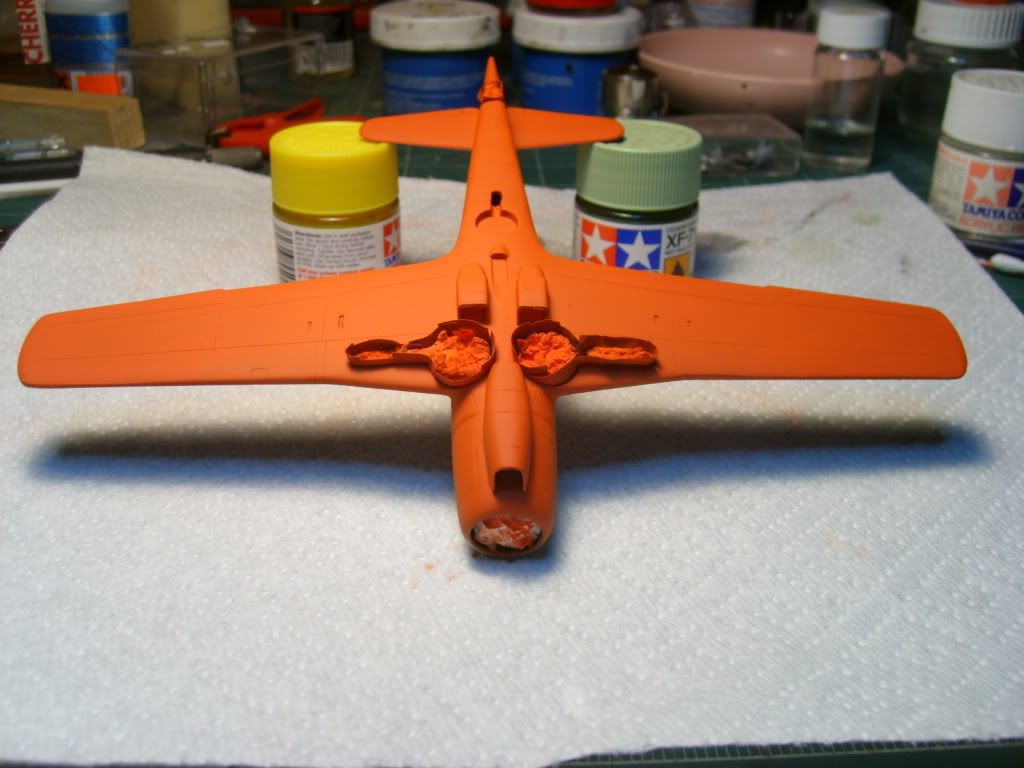
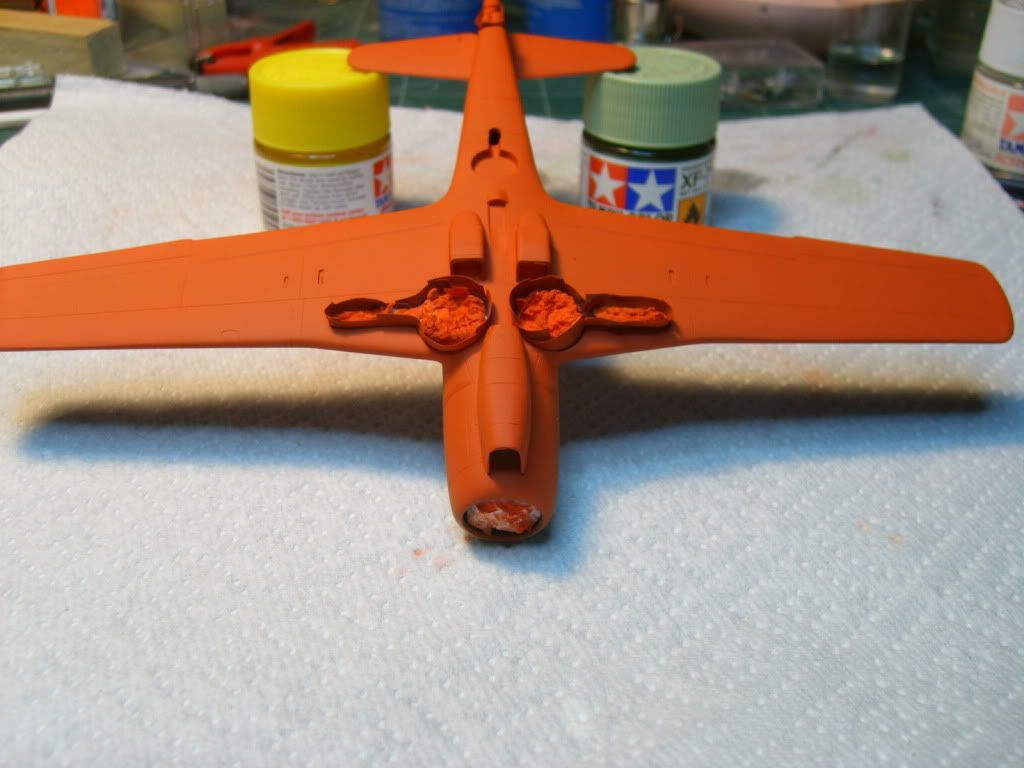
Sorry some of the photos aren't really clear - still learning the fine art of close-up photography.  But I think you get the general idea!  I'll post more soon.

Kevin

Kevin A. Lawton

Dept. of History

Dept. of Quaternary Sciences

Northern Arizona University

Flagstaff, AZ

  • Member since
    October 2008
  • From: italy
Posted by bsyamato on Sunday, October 23, 2011 10:33 AM

magnific orange finish Yes the pink seems work reaaly good

  • Member since
    August 2009
  • From: Borlando Fla home of the rat
Posted by TREYZX10R on Sunday, October 23, 2011 1:19 PM

Kevin the orange is outstanding ,nice tip about the pink base!

I got the prop blurs in the post they are pretty easy to work with. I lopped off the props with the razor saw and then notched the hubs to accept the blurs

..

  • Member since
    July 2003
  • From: Pennsylvania
Posted by jay12472 on Sunday, October 23, 2011 4:00 PM

Len I have one for Fa-6 kit. I'm not sure it will help though

Jason

  • Member since
    July 2007
  • From: Southern New Jersey
Posted by troublemaker66 on Sunday, October 23, 2011 6:01 PM

jay12472

Len I have one for Fa-6 kit. I'm not sure it will help though

Jason

Is it for a -1 Judy? I have the in-line engine version. I really only need to know what colors to paint all the stuff in the cockpit. I see the color numbers, I think they`re Humbrol or Mr Color paint numbers. Some of the numbers have the color printed in English next to it. The cockpit colors are on a side bar, listed in Japanese....I know there`s a few parts that need to be painted flat black  [33] but my Japanese is a little rusty...Big SmileI`m guessing all the Judy` innards were painted pretty much the same. Can you post a shot of the cockpit part of the instructions? Maybe just let me know what to paint the parts by parts number? I`m no "rivet counter" but I like to be close. Thanks for your help Jason, I appreciate it very much.

Len


Len Pytlewski

  • Member since
    August 2011
  • From: Perth, WA
Posted by NeedBeer on Sunday, October 23, 2011 6:29 PM

Progress on "Dinah" this weekend:

Despite my misgivings on 1/72 am very satisfied with results here - pre shading & panel lines have come out well

Colors

- instructions said "dark brown" but using their color mix end result was light green(?), I used flat earth with a few drops of flat black for first coat, second coat used less black for fading effect

- underside one coat sky grey (instead of grey green)

Len: thanks for masking advice , will have to wait a few days to see results

Ready for gloss coat tonight, decals tomorrow


WiP

1/24 Hawker Hurricane Mk I

1/48 F-22 Raptor; F-22 Idolmaster,  DH Vampire, Saab Gripen 

1/72 C-130 Hercules; Vulcan 

1/350 Bismarck


  • Member since
    August 2011
  • From: Perth, WA
Posted by NeedBeer on Sunday, October 23, 2011 6:41 PM

Dabbled with outdoor photography this weekend (thanks for idea Trey & Bysyamto):

Here's my Hamp, still got some work to do on the canopy (not seating very well) but otherwise all done. Early morning light helps show the weathering & wash effect which I couldnt get with the indoor shots

Spa cover makes a good tarmac 

Next experiment - my 10 yo son is helping with black & white shots

WiP

1/24 Hawker Hurricane Mk I

1/48 F-22 Raptor; F-22 Idolmaster,  DH Vampire, Saab Gripen 

1/72 C-130 Hercules; Vulcan 

1/350 Bismarck


  • Member since
    August 2009
  • From: Borlando Fla home of the rat
Posted by TREYZX10R on Sunday, October 23, 2011 8:14 PM

Needbeer the paint work on the Dinah is great. Really like the 'inflight' pics of the Hamp

I'm calling it finished

and some outdoor shots

any and all comments critiques most welcome

  • Member since
    February 2011
  • From: Sedona AZ
Posted by AZKevin on Sunday, October 23, 2011 10:55 PM

This may not be much help, but My copy of the FAOW Judy title has a color cutaway drawing of a D4Y1 with the cockpit interior in a light brown like the Ki-61's.  Closest paint I have in the drwaer is Tamiya XF-59 'Desert Yellow'.

Kevin A. Lawton

Dept. of History

Dept. of Quaternary Sciences

Northern Arizona University

Flagstaff, AZ

  • Member since
    March 2003
  • From: Rain USA, Vancouver WA
Posted by tigerman on Sunday, October 23, 2011 11:30 PM

Nice build Trey, you frickin machine man!

Lovely paint job on that Dinah Needbeer.

   http://i7.photobucket.com/albums/y269/wing_nut_5o/PANZERJAGERGB.jpg

 Eric 

  • Member since
    October 2008
  • From: italy
Posted by bsyamato on Monday, October 24, 2011 6:01 AM

NeedBeer Great out door shots Beer and the dinah looks great !! 

Trey's heavy industries  Ltd. new model Bow Down magnific!!

  • Member since
    December 2002
  • From: NYC, USA
Posted by waikong on Monday, October 24, 2011 8:14 AM

Needbear & Trey, love those 'inflight' shots. Great looking builds.

My website: http://waihobbies.wkhc.net


  • Member since
    March 2010
  • From: Democratic Peoples Republic of Illinois
Posted by Hercmech on Monday, October 24, 2011 8:24 AM

Nice progress every one.

Loving the orange underbelly.

The Dinah is looking great.

And:

Trey, You the man...enough said.


13151015

JOIN OUR COMMUNITY!

Our community is FREE to join. To participate you must either login or register for an account.

SEARCH FORUMS
FREE NEWSLETTER
By signing up you may also receive reader surveys and occasional special offers. We do not sell, rent or trade our email lists. View our Privacy Policy.