SEARCH FINESCALE.COM

Enter keywords or a search phrase below:

Blitzkrieg in the West (France 1940) Sept. 18 2011 - March 1 2012

144689 views
2290 replies
1 rating 2 rating 3 rating 4 rating 5 rating
  • Member since
    November 2008
  • From: Jefferson City, MO
Posted by iraqiwildman on Monday, January 16, 2012 8:23 AM

treadwell

Hi Iraqiwildman  : )

super nice job with the @ $ $  end detail on your panzer ! tiny chain gives me fits, but you pulled it off beautifully..

Pardon my old eyes , but are they PE chain or 42 LPI ? .....in any case they look awesome Beer

nice work man

treadCool


I used 2 pieces of thin wire and twisted them together, then flattened it between a razor blade and glass.

Thanks for the comments on the paint. I hope to darken it some more with washes. I have also noticed that the gloss coat and dull coat will also darken it some more. It is also going to get a dust build up on it.

Tim Wilding

  • Member since
    November 2009
  • From: SW Virginia
Posted by Gamera on Monday, January 16, 2012 7:39 AM

Tim: Wow, that looks great! She's really coming together.

Tread: I have to wonder what part of the 109 and how??? Not quite as crazy as ground strafing P-47s coming back with small trees stuck in the wing but pretty darn close Indifferent

"I dream in fire but work in clay." -Arthur Machen


  • Member since
    March 2003
  • From: Rain USA, Vancouver WA
Posted by tigerman on Sunday, January 15, 2012 10:37 PM

Great paint job Tim.

   http://i7.photobucket.com/albums/y269/wing_nut_5o/PANZERJAGERGB.jpg

 Eric 

  • Member since
    September 2005
  • From: beacon falls , Ct.
Posted by treadwell on Sunday, January 15, 2012 8:00 PM

tread @ bobbaily  :  )

thank you man ! 

How did the canopy come out  ?   ....AOK I am sure !

guess what is stuck to the rear elevators on this picture of my father's Martin Marauder ..?

if you guessed Me 109 you would be correct. I swear to God. Varient unknown... pic from 1944 in England


treadCool


  • Member since
    September 2005
  • From: beacon falls , Ct.
Posted by treadwell on Sunday, January 15, 2012 7:10 PM

Hi Iraqiwildman  : )

super nice job with the @ $ $  end detail on your panzer ! tiny chain gives me fits, but you pulled it off beautifully..

Pardon my old eyes , but are they PE chain or 42 LPI ? .....in any case they look awesome Beer

nice work man

treadCool


  • Member since
    March 2006
  • From: Right Side of a Left State
Posted by Shellback on Sunday, January 15, 2012 6:40 PM

Tim , that looks great .Yes

  • Member since
    November 2003
  • From: Nashville, TN area
Posted by bobbaily on Sunday, January 15, 2012 5:32 PM

Tread-I'm enjoying seeing the Bis come to life.  I really regret not picking one up off the clearance rack at Hobby Lobby when I had the chance but I thought to myself...."when am I ever going to want to build a French tank?"

Tim-great paint work....very nice.  Your Pz is coming together nicely.

Bill-outstanding work....great to watch your Panzer come to life.

Well, I finally broke down and masked the canopy....almost as much fun as painting road wheels for a Tiger or Panther.  I really wish I had ordered an Eduard mask.....the framing is not that prominent so there may be a lot of cleanup.    I'm off tomorrow so hopefully I'll get the canopy painted, flaps attached and an oil wash on the 109.

Bob


  • Member since
    November 2008
  • From: Jefferson City, MO
Posted by iraqiwildman on Sunday, January 15, 2012 5:13 PM

Bill, looking great. A raw sienna wash is great on darker basecoats. I started using it on olive drab and it sure gives it a dusty look.

I got the Tamiya German Grey basecoat laid down today. I lighten it with Tamiya JN Grey. After laying this basecoat, I lighted even more and dropped to 12 psi and sprayed the panel centers and anything sticking up to highlight it.


Now it was time for the camo. I used Tamiya red brown lighten with buff in about a 1-1 ratio with Tamiya thinner. I then kind of created my own pattern, trying not to cover more the 1/3 of the tank. I used about 10-12 psi and sprayed very slowing and closly. I also sprayed 2 roadwheels on each side, but for got to take a picture of those. I then used the basecoat in a 1 to 2 ratio with thinner and oversprayed the tank to help blend the camo in.


Tomorrow will be the Future gloss coat and then on to decals.


See ya later,

Tim Wilding

  • Member since
    September 2005
  • From: beacon falls , Ct.
Posted by treadwell on Sunday, January 15, 2012 2:15 PM

Thanks Eric :  )     means alot to me coming from you.


  • Member since
    March 2003
  • From: Rain USA, Vancouver WA
Posted by tigerman on Sunday, January 15, 2012 1:45 PM

Hope you can make it Bill. Seems like you're closing in.

   http://i7.photobucket.com/albums/y269/wing_nut_5o/PANZERJAGERGB.jpg

 Eric 

  • Member since
    September 2005
  • From: beacon falls , Ct.
Posted by treadwell on Sunday, January 15, 2012 1:29 PM

Hey guys.. :  )

thanks for the kind words on my silly putty job... everything will tone down quite a bit once the weathering begins : )

treadCool


  • Member since
    September 2005
  • From: beacon falls , Ct.
Posted by treadwell on Sunday, January 15, 2012 1:25 PM

Hi Bill , first off, thanks for the kind words, and may I say your Pz is looking awesome as ever !...

being a football fan also, it is really almost imopossible to get something done AND watch the playoffs...

everytime I leave the room to try and do something my wife yells ' INTERCEPTION' or TOUCHDOWN !'  I come back and the playing slows a bit, I try to sneak away and I'll be dammed if doesn't happen again  Crying.....LOL

I am tring to work on the decals so I can begin weathering...

good luck gettin' anything done !

treadCool


  • Member since
    March 2006
  • From: Right Side of a Left State
Posted by Shellback on Sunday, January 15, 2012 1:25 PM

Bill , good to see you got some time to work on the Pz. . thanks for sharing your techniques .Yes

  • Member since
    July 2004
  • From: Texas
Posted by wbill76 on Sunday, January 15, 2012 11:55 AM

Tread, nice work on the putty masking and camo pattern!

BeerTim, glad to be of service, the pull chains you've created look the part perfectly.

It's been a struggle to get time back at the bench with the end of the year activity, work on my MBA classes, and the start of the NFL playoffs...but I managed to get some more progress done and start the weathering stages.

First up were the tracks, I applied an airbrushed base coat of MM enamel Burnt Umber and let that cure overnight. Then I dry brushed some MM enamel Steel to give it a metallic look and applied a highly thinned wash of MM enamel Raw Umber to tone down the steel and blend things together.

I also started in on the hull weathering. I applied an overall wash of MM enamel Raw Sienna with a round 0 sable brush. This will get combined with the dot filtering process that is next to provide a dusty/streaky finish to the base camo pattern.

My goal is to get this one completely finished in the course of the next week or so, hopefully I can deliver on that expectation barring any unforeseen circumstances.

  • Member since
    March 2006
  • From: Right Side of a Left State
Posted by Shellback on Sunday, January 15, 2012 12:00 AM

Tim ,thats the down side of our hobby isnt it ...................it melts so easily .No

Good looking detailing on the Pz. Yes


  • Member since
    November 2008
  • From: Jefferson City, MO
Posted by iraqiwildman on Saturday, January 14, 2012 10:19 PM

Thanks, guys.

Super detailing is cool until I realized I knocked the tow pin chain off when pre-shading. It's long gone now, so time to twist some more wire to make a new chain. The thin wire from my old laptop power cord works great for small chains.


Tim Wilding

  • Member since
    March 2003
  • From: Rain USA, Vancouver WA
Posted by tigerman on Saturday, January 14, 2012 8:54 PM

Good to see so much positive production guys.

   http://i7.photobucket.com/albums/y269/wing_nut_5o/PANZERJAGERGB.jpg

 Eric 

  • Member since
    February 2003
  • From: Allentown, PA
Posted by BaBill212 on Saturday, January 14, 2012 8:11 PM

Tread,,,  you have done a great job on that camo....  very nice indeed!   Sorry to hear about the hooks, but a nice rebound for sure.

iraqi,,   excellent work on the pz II          super detailing,      I just luv that stuff!

Enjoy the ride!


  • Member since
    November 2009
  • From: SW Virginia
Posted by Gamera on Saturday, January 14, 2012 7:28 PM

Tread & IWM: Hey, those look great guys!


"I dream in fire but work in clay." -Arthur Machen


  • Member since
    October 2009
Posted by PANZERWAFFE on Saturday, January 14, 2012 7:12 PM

WILDMAN - Thats looking sharp.  Really like that shot of the rear, nice details you have back there.

Rob

  • Member since
    November 2008
  • From: Jefferson City, MO
Posted by iraqiwildman on Saturday, January 14, 2012 7:03 PM

Shellback, I melted  some tracks that way, put the lamp right on top of the vinyl track to straighten them and kind of forgot about them for an hour or so.

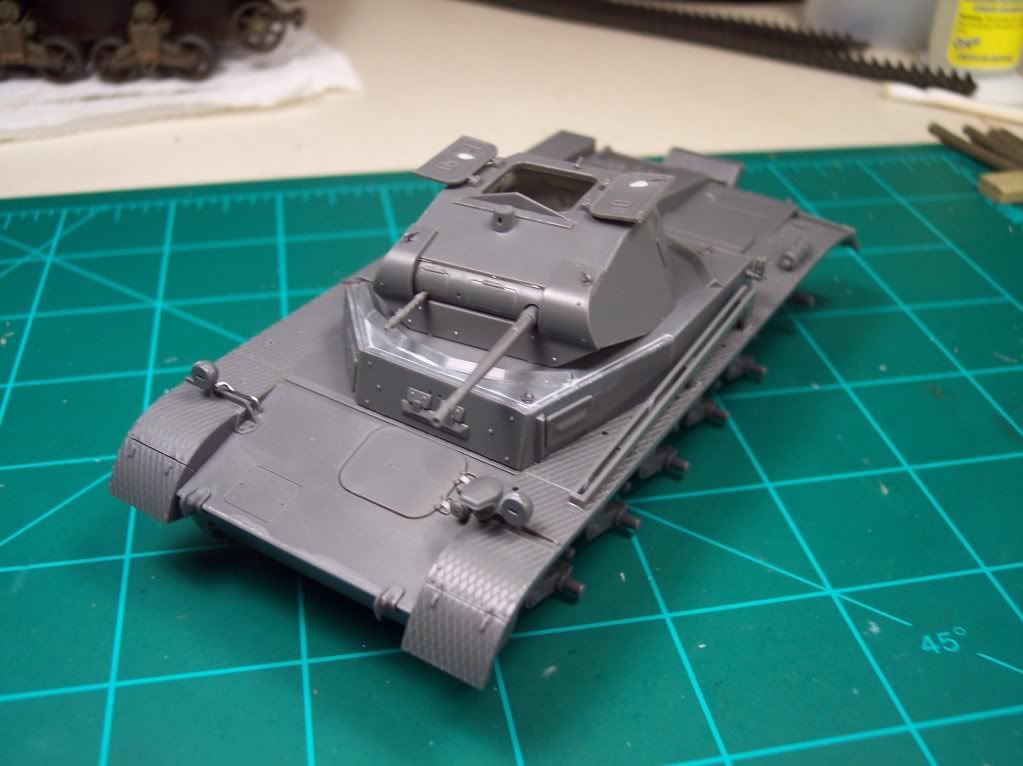
I've am ready for the base coat on my Panzer II. Added some headlight wiring and chains on the tow pin and smoke discharger. Thanks to wild Bill for the photo help on these. this Tamiya kit is building up very nicely without hardly any fit problems.


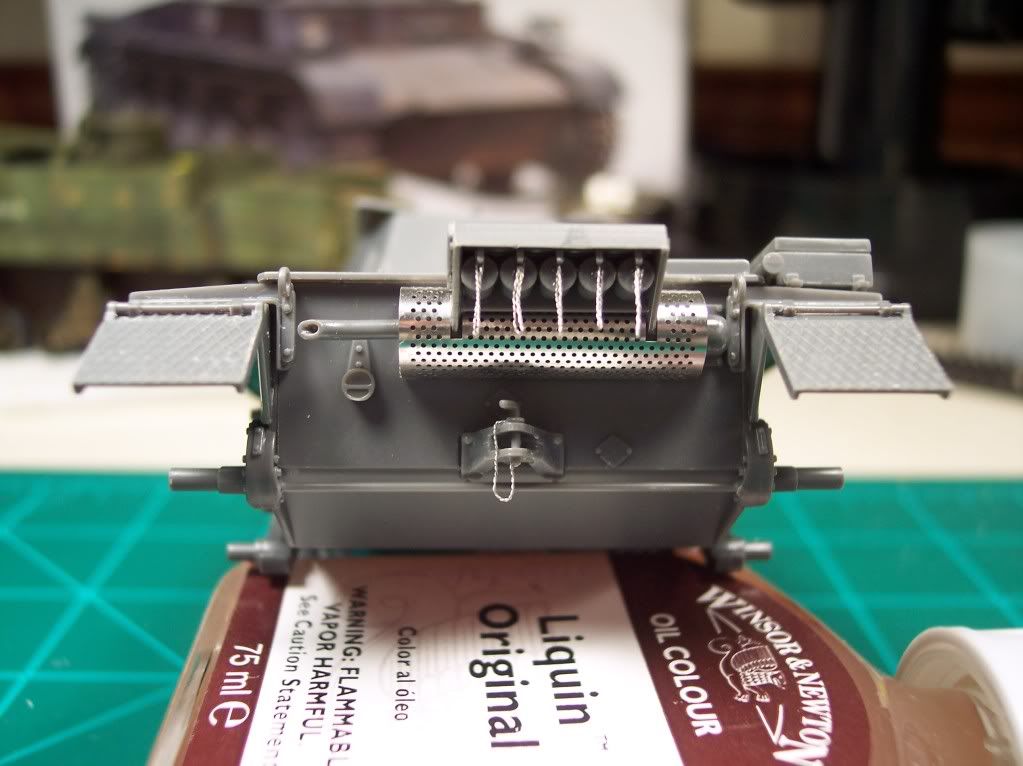
Had to us some Mr Surfacer on a gap on the frontal armor. These Panzer II has bolted on armor for France, but this gap was for the original armor. I let tke gap for the bolted on armor, since I would think this would be prominent.


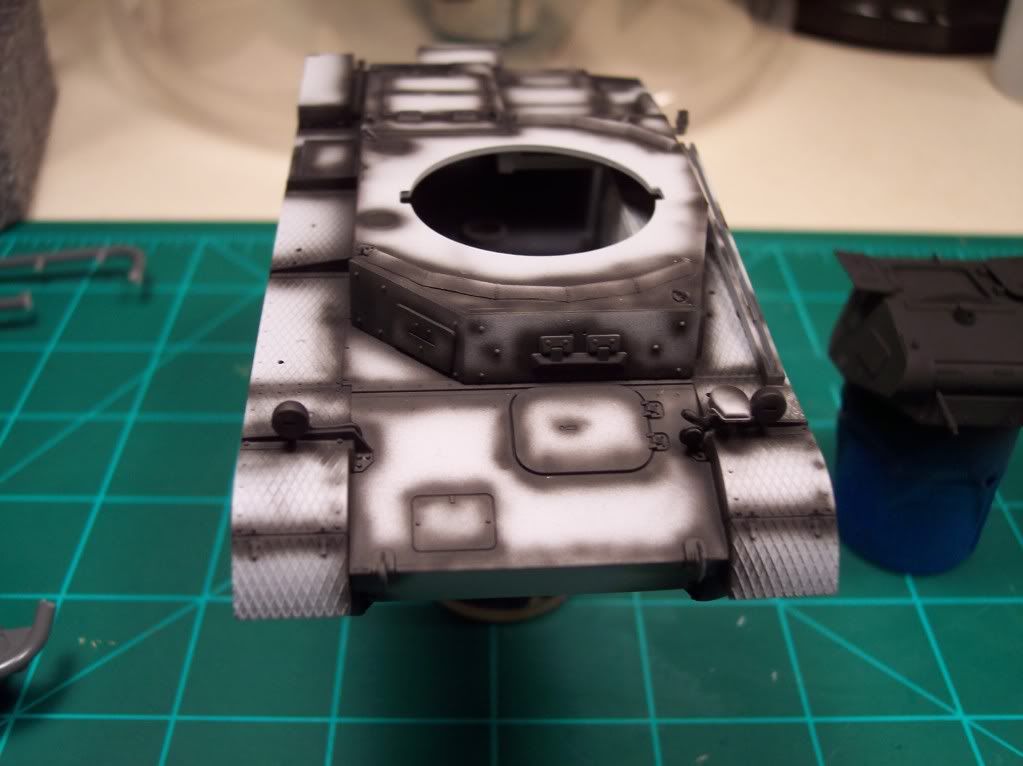
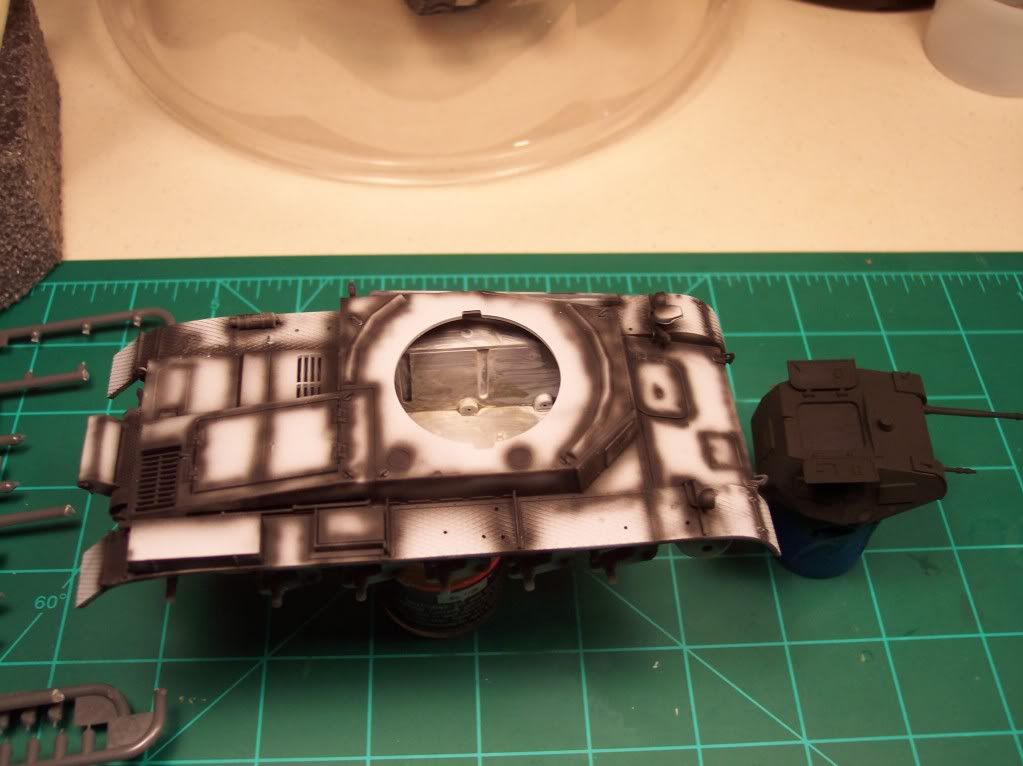
I primed with Mr Surfacer 1200 thinner with lacquer thinner, about a 1 to 2 ratio. I have never used this before, but I really like the sandable finish Mr Surfacer gives me. Only thing, I had to airbrush it outside in 30 degree weather. Also did the black preshading, but I forget the turret inside when I was priming so that got just a black primer coat.


Sprayed the wheels black and will use a cirle templete to paint the hubs.


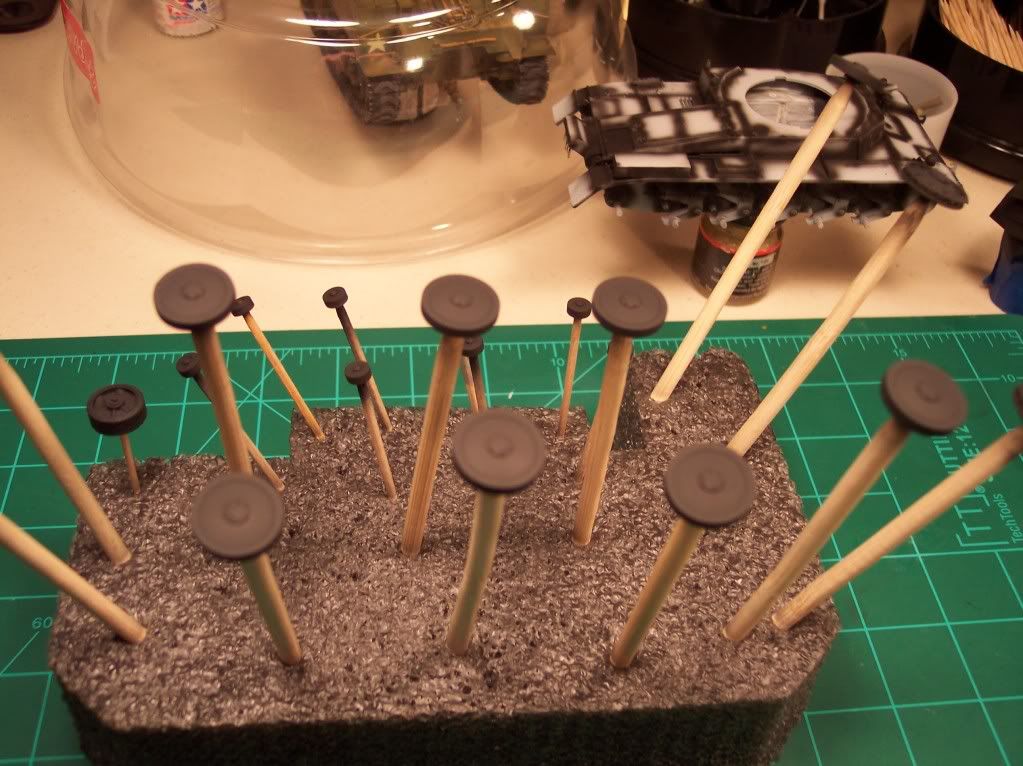
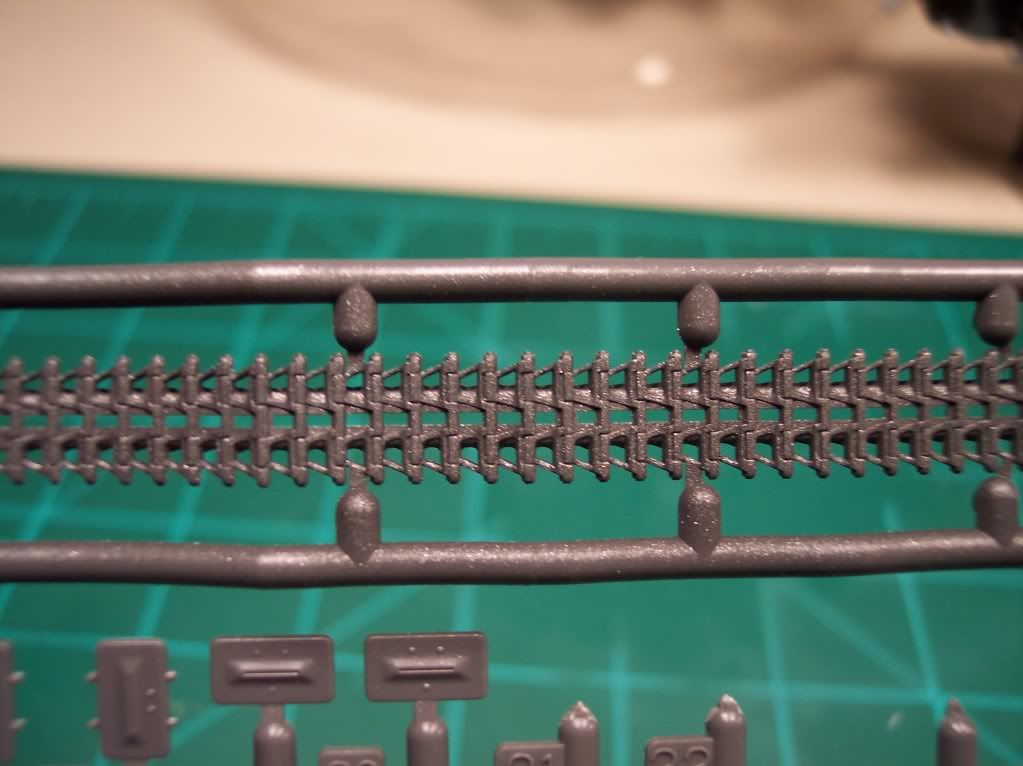
Mixed up a black, blue and metallic grey coat for the tracks and sprayed those on the sprue. They will be the last thing I install.


Hopefully tomorrow I will get the grey basecoat and the brown camo on.

Have a good weekend,

Tim Wilding

  • Member since
    October 2009
Posted by PANZERWAFFE on Saturday, January 14, 2012 6:16 PM

Great looking paintYes  Was going to ask what happened to the turret hooks but you have explained.  Can not tell at all of the problems you had, nice work on the repairBeer  Had originally just thought you had removed them before painting.  Your turret texture really came out good.  Not to much but just enough to show, well done.

Rob

  • Member since
    April 2005
  • From: Piscataway, NJ!
Posted by wing_nut on Saturday, January 14, 2012 5:34 PM

That really looks nice tread.  The silly putty did the trick alright.  Too bad about the turret set back.  Darn things are hard enough to move along then all of a sudden sometimes you have to go backward.

Marc  

  • Member since
    March 2006
  • From: Right Side of a Left State
Posted by Shellback on Saturday, January 14, 2012 5:31 PM

Tread , wow , i like the camo !Yes

  • Member since
    March 2006
  • From: Right Side of a Left State
Posted by Shellback on Saturday, January 14, 2012 5:28 PM

Dave , I tried a couple of CFL in my adjustable arm lamps but i was disappointed in the results . I used a couple of 100w CFL's that i had handy and that wasnt enough light i'm thinkin . I havent checked any further into finding a higher wattage CFL . I like using the adjustable arm lamps i have now but i do need to get a better set up . Any ideas you have about better llighting i will be glad to listen too .Yes

I did get a couple of pics before the melt down though . It was built for this G.B. Its the old Testors Pz.1.

  • Member since
    September 2005
  • From: beacon falls , Ct.
Posted by treadwell on Saturday, January 14, 2012 4:23 PM


Hi guys..... finally some bench time..... this will be 'Bourrasque' when she is finished.

I let the silly putty sit over night after application as it seems to naturally seek low points, plus I used a brush to push it into all low spots on the sides. I was surprised... when I unmasked there was not even one place that even needs touch-up.... no bleed through anywhere... taking time with this step really paid off especially considering I have never used  it before.... I was also quite happy with how easily it 'un-maskes '....even around delicate parts .... any way here are the pics, I didn't spend much time on them, just wanted to give you an idea ...since I have the time today, I want to try and get the tracks finished,too..... ( while watching NFL playoffs... LOL )

here are the pics... the bellows for the radio was already base painted and I just set it in for the pics.

thanks for looking,

treadCool

P.S. I almost forgot to mention my 'OOPS' story....you will notice the are no turret hooks on the sides ...this is because the blue 'heart' decal goes right on top of them...in removing them, one side got severely gaffed with the exacto blade blade resulting in a complete turret re-do including casting numbers and casting texture... lucky the kit comes with extra hooks....the decals can now be applied and I will cement the new hooks over them and blend in with paint


  • Member since
    December 2009
  • From: NE Ohio
Posted by DaveB on Friday, January 13, 2012 4:26 PM

Carl, that's really sad. I can just imagine your reaction. I think the neighbors 200 feet away would have heard me screaming from the basement.  Know what you mean about those high wattage photo lamps.  I use a 500 watt for my overhead light and it  generates a lot of heat in a hurry.  Even the smaller tungsten fill lights get hot. I'm thinking about trying some higher wattage compact fluorescents. It would be  "flat" lighting and I'm not sure of the color temperature but at least no worry about meltdowns. Have you ever shot using CF lighting?

  • Member since
    March 2006
  • From: Right Side of a Left State
Posted by Shellback on Friday, January 13, 2012 3:51 PM

Dave , when i took that pic i didnt realize that the model was melted until i looked at the pic in the view finder . Imagine my shock ! I looked at the actual model and couldnt believe it ! After a few seconds of being stupified my immediate reaction was , like Gamera said , blam !!!!! Here's what was left after the blam effect . I brushed the remains into this empty box . It now resides in some trash dump far far away .

What happened that while taking pics of the model i left  it unattended under a high wattage light . I dont do that anymore . I turn off the lamp as soon as i stop taking pics . a lotta time and patience went to the dump that day .

  • Member since
    July 2004
  • From: Texas
Posted by wbill76 on Friday, January 13, 2012 2:10 PM

Rob,

Yep, this makes 2 down and only 9 more to go! Big Smile

  • Member since
    December 2009
  • From: NE Ohio
Posted by DaveB on Friday, January 13, 2012 9:57 AM

Gamera Okay, now you have really piqued my interest. If the carnage wasn't caused by placing a desk lamp too close for too long (my method) just how did you do it?  PM me if it's too good a technique to share with everyoneWink

JOIN OUR COMMUNITY!

Our community is FREE to join. To participate you must either login or register for an account.

SEARCH FORUMS
FREE NEWSLETTER
By signing up you may also receive reader surveys and occasional special offers. We do not sell, rent or trade our email lists. View our Privacy Policy.