SEARCH FINESCALE.COM

Enter keywords or a search phrase below:

The Ostfront GBII - 2011/12

44100 views
247 replies
1 rating 2 rating 3 rating 4 rating 5 rating
  • Member since
    June 2009
  • From: Netherlands
Posted by kermit on Saturday, April 28, 2012 10:44 PM

Sub Revolution,

Could have sworn i replied already...Embarrassed My bad...

Ofcourse you can change your build, i will get right on it! And don't sweat it, i have been postponing and almost completely shelving my Tiger build too and dropped out of a fair amount of GB's myself. It just happens...

The way i see it: This is still a hobby and is supposed to be fun. If for any reason you can't or don't feel like building a model, simply don't. No guns to your head and no pressure! Wink

Richard

"Success is the ability to go from one failure to another with no loss of enthusiasm." - Sir Winston Churchill

  • Member since
    July 2006
  • From: San Francisco Bay Area
Posted by bufflehead on Sunday, April 29, 2012 11:58 PM

Sorry to be gone for so long fellas!  Been quite busy with other things, spring being here and all!  I've got a bit of an update on the BT-5:

Got the weathering done on the lower hull, which had to be done before I installed the tracks.  I used mostly Bragdon "Dust Bowl Brown" pigment for the lighter dust color.  I like this better than most of the MIG pigments as those sometimes look too orange or yellow.  However, I still used the MIG pigments...adding them on top of the Bragdon to impart a gritty, grungy look.  Mostly Russian Earth, Dark Mud and a bit of Europe Dust.  Then topped it all off with some MIG Oil and Grease Stain Mixture in select areas.  I may add a bit more pigments to the wheels before the end....

Remember that curve that developed when building the MasterClub workable tracks?

To fix that I pinned the assembled track runs to a piece of foamboard, keeping them as straight as possible.

Then I just sat them outside in the sun for a couple of hours!  It was pretty warm here last Satuday and I figured the heat would soften the tracks enough to remove the curve.  When done I placed them in the freezer for 5 minutes to make them hold their shape.  When I finally removed them the curve was mostly gone!  Yay!

I sprayed them with Humbrol Metalcote "Gunmetal", which is a buffable metallic enamel, and then gave them a heavy wash with Track Brown MIG pigment.  Then I used a soft brush to remove some of the pigments and followed with some buffing with a stiff bristle brush, using only the side of the bristles to buff the underlying Metalcote to a nice metal sheen. 

I still need to dirty and dust up the tracks, but that's where she stands as of now.

Ernest

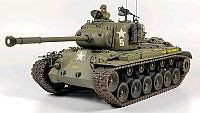
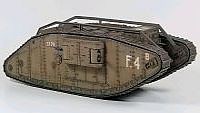
Last Armor Build - 1/35 Dragon M-26A1, 1/35 Emhar Mk.IV Female


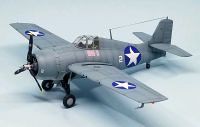
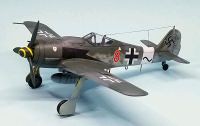
Last Aircraft Builds - Hobby Boss 1/72 F4F Wildcat & FW-190A8


  • Member since
    September 2009
  • From: Guam
Posted by sub revolution on Thursday, May 17, 2012 2:51 PM

Nice looking tank! Well weathered but looks like it still has many more miles on it.

With my IL-2 about to go to the paint booth (aka the porch) it's about time to start looking at my diminutive P-39. I mentioned before that the kit came with a Soviet option, but...

SDC16325

After a closer look, I'm really not crazy about the markings. Not sure why, they just don't look "right" to me. This criticism has also been made by other people who have built the kit, that I've found. However...

SDC16327

Between the kit-supplied (below) and aftermarket (above) decals sheets for the IL-2, I have enough red stars and other goodies to decal a whole squadron of 1/72 aircraft! So all that being said, Richard i don't know how much of a stickler you are for exact accuracy, but if it's ok with you I would like to use these decals and reference photos to put together a scheme that "looks right" to me. Maybe something more like the second entry here: http://airfixtributeforum.myfastforum.org/archive/hobbyboss-1-72-p-39n-airacobra-80234__o_t__t_15313.html

Anyway, should be getting started soon, and the IL-2 kit makes this one look easy!

Thanks

NEW SIG

  • Member since
    September 2009
  • From: Guam
Posted by sub revolution on Sunday, May 27, 2012 9:23 PM

Nice long weekend here stateside has meant some nice bench time for me. Got the P-39 going, and at this rate, this simple kit might be ready to paint by tuesday!

Pretty sparse cockpit, but I imagine the real thing probably was too!

SDC16353

Lots of pieces lined up like a tiny jigsaw puzzle...

SDC16354

Fuselage is glued up now. Tricky part will be getting those little landing gear doors to stay in place. More later!

Thanks

NEW SIG

  • Member since
    July 2006
  • From: San Francisco Bay Area
Posted by bufflehead on Sunday, May 27, 2012 11:20 PM

Hey sub, the P-39 is looking good!  Good luck with the landing gear doors!

Even though its a nice loong weekend, I've been spending all my bench time on a Carro Armato M-13/40 for another GB and the BT-5 is currently on hold.  Sad because its' nearly 95% done!  Ah well.....

Ernest

Last Armor Build - 1/35 Dragon M-26A1, 1/35 Emhar Mk.IV Female


Last Aircraft Builds - Hobby Boss 1/72 F4F Wildcat & FW-190A8


  • Member since
    September 2009
  • From: Guam
Posted by sub revolution on Tuesday, May 29, 2012 12:26 AM

Update!

Tiny jigsaw puzzle is put together now. Here's the snuggly nestled cockpit before the canopy went on:

SDC16360

All buttoned up:

SDC16362

This is the second model in a row that I've had trouble with the alignment of all the pieces in the cockpit area. Had to shave a couple parts down a bit, then some gentle wrestling got them all in there. However I did have to flow some clear glue along all the canopy pieces as they had some nasty gaps that would be a big no-no for airbrushing!

SDC16363

Landing gear doors were surprisingly easy! Took some tweezer work on the front ones, and a little creativity with masking tape for the wing wells, but it all worked.

As predicted, looks like I will be able to start throwing paint tomorrow! For those on the 1942 GB, I definitely will NOT be weathering this one as much as the Sturmovik! That was nuts!

Thanks

NEW SIG

  • Member since
    June 2009
  • From: Netherlands
Posted by kermit on Tuesday, May 29, 2012 10:36 AM

Sub,

Looking sweet there! I started a promodeler P39 a little while back with the same intention of slapping some red stars on it. It is somewhat small even in 1/48.... But yours looks awesome sofar, love the belts.

Richard

"Success is the ability to go from one failure to another with no loss of enthusiasm." - Sir Winston Churchill

  • Member since
    September 2009
  • From: Guam
Posted by sub revolution on Friday, June 8, 2012 11:50 PM

All quiet on the Ostfront?

Paint is on, coat of future is on as well. Going out of town for the weekend, so the future will have plenty of time to dry before I start playing with decals.

SDC16399

Nothing fancy, just "Underside Grey" and "Field Drab." Looks close enough to what I would expect.

Thanks,  -Budd

NEW SIG

  • Member since
    June 2009
  • From: Netherlands
Posted by kermit on Saturday, June 9, 2012 4:39 AM

It seems a bit quiet around these parts for the time being.... But we still got months to go so who knowsWink

I just love that shade of drab! Is that model master paint judging from the background jars? If so, what number is it?

Richard

"Success is the ability to go from one failure to another with no loss of enthusiasm." - Sir Winston Churchill

  • Member since
    September 2009
  • From: Guam
Posted by sub revolution on Saturday, June 9, 2012 4:52 AM

yeah, it's model master. I had to look up the numbers because I've honestly never used them! Wink Most of the time I will check the name, then flip the jar over to see what the color looks like. Some people say not to do that, but it usually works for me. Anyway...

The gray is 2121 and the drab is 1702

NEW SIG

  • Member since
    December 2006
  • From: t.r.f. mn.
Posted by detailfreak on Saturday, June 23, 2012 11:00 AM

 Just a bump to get some exposure so to speak.

[View:http://s172.photobucket.com/albums/w1/g-earl828/]  http://i158.photobucket.com/albums/t104/cycledupes/1000Roadwheels4BuildBadge.jpg

  • Member since
    July 2006
  • From: San Francisco Bay Area
Posted by bufflehead on Saturday, June 23, 2012 4:18 PM

Good bump df!  Reminds me to finish up the BT-5 that's almost complete!  Maybe this weekend??

Ernest

Last Armor Build - 1/35 Dragon M-26A1, 1/35 Emhar Mk.IV Female


Last Aircraft Builds - Hobby Boss 1/72 F4F Wildcat & FW-190A8


  • Member since
    June 2009
  • From: Netherlands
Posted by kermit on Saturday, June 23, 2012 4:33 PM

detailfreak,

Good call. I don't know what happened. Last year was a GB filled with non stop activity...

Richard

"Success is the ability to go from one failure to another with no loss of enthusiasm." - Sir Winston Churchill

  • Member since
    December 2006
  • From: t.r.f. mn.
Posted by detailfreak on Saturday, June 23, 2012 5:25 PM

                            Busy summer so far my friends,and it seems that there is always another project round the corner.LOL Except that one

[View:http://s172.photobucket.com/albums/w1/g-earl828/]  http://i158.photobucket.com/albums/t104/cycledupes/1000Roadwheels4BuildBadge.jpg

  • Member since
    November 2008
  • From: Jefferson City, MO
Posted by iraqiwildman on Saturday, June 23, 2012 8:32 PM

Darn, I totally missed this GP and I just primer and pre-shaded Cyber-Hobby's SIG 33. Would have loved to join it. I am going to paint her like a Stalingrad gun and add a few of the figures. I built this assault gun over the last few weeks. Oh well. maybe next year. I have enjoyed looking at the other builds here, very nice.

Tim Wilding

  • Member since
    September 2009
  • From: Guam
Posted by sub revolution on Sunday, June 24, 2012 9:02 PM

I'm still here!

In the middle of another transition, so my progress is slow, and my internet abilities are bad at best. But here it is:

SDC17084

Decals are on, as you can see, and I have now given it a wash for panel lines and weather effect. I may not be able to put up another pic for a while, but I will try to at least keep you guys posted! Oh and one thing I noticed, The tail stars don't have a white border like the wing stars, which makes them harder to see. My bad. I think those were painted on first, and the wing stars were added later... Yeah, that's what happened...

Thanks, -Budd

NEW SIG

  • Member since
    April 2005
  • From: Australia
Posted by taxtp on Sunday, July 1, 2012 3:03 AM

I've got an Italeri 1/72 Me 109G-6, and one of the options is for an aircraft that was based in Pilsen, i nthe now Czech Republic. Is that Eastern Front enough ? If it is, I'd like to go with it for this GB please.

Looks like a nice little kit.

Cheers

Tony

I'm just taking it one GB at a time.

  • Member since
    July 2006
  • From: San Francisco Bay Area
Posted by bufflehead on Sunday, July 1, 2012 1:02 PM

Hey Budd, the P-39 is coming along great!  Luv the red stars on it!  I was wondering what those things were mid-fuselage then realized they are the engine exhausts, the P-39 having a mid engine design!  I was watching "Great Planes" on the Military Channel this morning and noticed a bare metal P-39 in the background and, sure enough, my eyes focused on the mid-fuselage engine exhausts! Stick out tongue  BTW, the episode was on the B-29 Super Fortress.

Ernest

Last Armor Build - 1/35 Dragon M-26A1, 1/35 Emhar Mk.IV Female


Last Aircraft Builds - Hobby Boss 1/72 F4F Wildcat & FW-190A8


  • Member since
    July 2006
  • From: San Francisco Bay Area
Posted by bufflehead on Sunday, July 8, 2012 2:09 PM

Pretty quiet on the Eastern Front, but I've got some action from my side!  I finally finished the Italeri 1/35 BT-5, done up in early war colors (I think!).  Painted with Tamiya acrylics, washes and filters courtesy of MIG, pigments from Bragdon. 

Here you go:  The Soviet Union's MIGHTY BT-5 fast cavalry tank! Whistling  I hope you like it.


I'm going to post these plus a few more photos in the Armor forum, if you're interested.

Up next:  Tamiya 1/35 GAZ67B Russian Field Car


Ernest

Last Armor Build - 1/35 Dragon M-26A1, 1/35 Emhar Mk.IV Female


Last Aircraft Builds - Hobby Boss 1/72 F4F Wildcat & FW-190A8


  • Member since
    June 2010
  • From: Austin, TX
Posted by DoogsATX on Thursday, July 12, 2012 10:59 AM

Wow! That BT-5 is gorgeous!

Don't know if anyone here has seen, but some new Chinese kitmaker's just released a Tupolev Tu-2 in 1/48! Quality looks solid, 270 parts, all for a whopping $25.99 on LuckyModel!

I've ordered one because, at that price, hell yes. Options to expose the ASh-82s? Sprue shots that show detail levels on par with Trumpy, Eduard etc (would've give them Tamiya or latest-from-DML grades, but close)? 

Don't know that I'll get to build this bad boy before the GB runs out, but wanted to alert others to it in case anyone else wants to take a chance on what could be one of the best kit bargains in some time.

On the Bench: 1/32 Trumpeter P-47 | 1/32 Hasegawa Bf 109G | 1/144 Eduard MiG-21MF x2

On Deck:  1/350 HMS Dreadnought

Blog/Completed Builds: doogsmodels.com


  • Member since
    April 2005
  • From: Australia
Posted by taxtp on Thursday, July 12, 2012 4:48 PM

That BT-5 looks outstanding, I've just spent some time going over the photos again.

The Tu-2 is not the right scale for me, but thanks for the heads up Doogs.

Cheers

Tony

I'm just taking it one GB at a time.

  • Member since
    June 2009
  • From: Netherlands
Posted by kermit on Friday, July 13, 2012 12:56 PM

Ernest,

My apologies for not replying sooner. What can i say.... i have been waiting to see your model completed and behold, .... what a whopper!!

I am simply awe struck with it and i am gleaming with pride to see it proudly displayed in the Ostfront GB. Three cheers and a big Hurray for you!YesYesYes

More of that please Stick out tongue

Richard

"Success is the ability to go from one failure to another with no loss of enthusiasm." - Sir Winston Churchill

  • Member since
    July 2008
  • From: USA California
Posted by vetteman42 on Friday, July 13, 2012 1:15 PM

WOW!!!!!!!!!!!! NIce BT-5 man YesYes I cant get behind building tanks but sure like seeing well done builds for sure.

Kermit I gotta build something not as intense as what I have going, the B-29 and the house sprint car. I feel overwhelmed by them at the moment. Would Revell's 1/48 Ju-87D Stuka fit in here ?

Randy So many to build.......So little time

  • Member since
    June 2009
  • From: Netherlands
Posted by kermit on Friday, July 13, 2012 1:29 PM

Randy,

Ofcourse you can do just about anything on my watch LOL. I will list your build ASAP. If you need some good interior shots i could help you out if you want.

I took the revellogram JU87D boxing with me during a visit to the states...kinda scr*wed mine up but its a nice kit for a soft price. Good decompression building material i agree.

Richard

"Success is the ability to go from one failure to another with no loss of enthusiasm." - Sir Winston Churchill

  • Member since
    July 2006
  • From: San Francisco Bay Area
Posted by bufflehead on Friday, July 13, 2012 11:02 PM

doogs - thanks!  I'm glad you liked the BT-5.  Hopefully I'll have a couple more builds to add to the GB!  The Tu-2 looks great and for only $25.99!! Wow!  I wonder who makes that kit?

Tony - thanks for checking it out and your nice comments. 

Richard - It took a while but I finally got that old kit done!  It turned out almost as I envisioned the completed build from the beginning.  I'm very proud myself to have participated in your GB and to have been able to present something worthy here.  Thanks for hosting the GB and for having me!

Randy - I'm not an AC guy, but I do love a well built and painted aircraft model!  I'm glad you liked my little green tank!

So I've started on the Tamiya 1/35 GAZ67B Russian Field Car:

Lower chassis and suspension consists of only 7 parts!  Detail is very basic and, being an old kit, is laden with mold seams and some pin marks, but nothing that can't be ovecome.

The wheels are also very simple, but detailed enough for me!  Strange that there are none of the usual Tamiya poly caps for the wheels, just plastic inserts that allow the tires to rotate.  Oh well, can't have everything!

When assembled the inner side of the wheels have a gap that I'm sure shouldn't be there.  The gap is where the tire sidewall should be as the hubs are easily discernable in the molding.  I'll have to fill those gaps with either putty or stretched sprue and sand smooth. 


I think I counted a total of 67 parts which is quite a change from most of the kits I've build lately.  Also, I will be doing this mostly OOB with only some light scratchbuilding to either correct mistakes or improve some of the basic detailing.  I have absolutely no AM parts for this kit...mostly because I couldn't find any!! Stick out tongue

Ernest

Last Armor Build - 1/35 Dragon M-26A1, 1/35 Emhar Mk.IV Female
     

Last Aircraft Builds - Hobby Boss 1/72 F4F Wildcat & FW-190A8


  • Member since
    July 2008
  • From: USA California
Posted by vetteman42 on Tuesday, July 17, 2012 12:58 AM

Kermit thank you sir and for the screen shots too Bow DownBow Down Our host rocks dont he.

Bifflehead looks like I am going to be watching this next build of yours also.

Randy So many to build.......So little time

  • Member since
    July 2006
  • From: San Francisco Bay Area
Posted by bufflehead on Tuesday, July 24, 2012 11:28 PM

Man, we can't let all those other GBs dominate the GB forums!! Pirate  So here's another update on the Tamiya GAZ67B!

Gaps in the wheels filled with stretched sprue (except for one where I used .010 strip styrene) and sanded smooth:

Undercarriage done.  Cleaning up all the mold seams took a while, but otherwise it was pretty easy.

The only improvement I made here was the front bumper.  It was just too basic and clunky looking so I cut it off and replaced it with 1/8" Evergreen channel, which was nearly a perfect fit and then detailed it with some Grandt Line rivets.

The simple interior is done.  I cut off the molded on brake/clutch pedals and replaced with some leftover PE from an SD.KFZ.251 set that I didn't use.  The gas pedal was made with some other PE scraps.  Also, I replaced the stick shift with one made from brass rod and shaped styrene knob.

The hood/grill/fender assembly was built with no modifications.


Major assemblies dryfitted together.  Side panels are also cleaned up and ready to install.

The rear panel is cleaned up.  I cut off the molded on tie downs and wil replace with PE from an Aber tie down set.

Its coming together! 

Ernest

Last Armor Build - 1/35 Dragon M-26A1, 1/35 Emhar Mk.IV Female
     

Last Aircraft Builds - Hobby Boss 1/72 F4F Wildcat & FW-190A8
     

  • Member since
    April 2005
  • From: Australia
Posted by taxtp on Wednesday, July 25, 2012 5:17 AM

Nice...

Like the scratchbuilt bumper Ernest.

I'm preparing to kick into this GB with my 109 in the next few days.

Cheers

Tony

I'm just taking it one GB at a time.

  • Member since
    July 2006
  • From: San Francisco Bay Area
Posted by bufflehead on Sunday, July 29, 2012 12:41 AM

Thanks Tony!!  

So I went crazy and decided to have this little guy tow a little guy!  Came across this on EvilBay for pretty cheap and figured it would look good behind the GAZ67B

It just shipped Thursday so I might get it early next week.  If not I won't be able to work on it until late the following week as I'll be out of town.  I planning on building it OOB....but you know how that goes!!

Ernest

Last Armor Build - 1/35 Dragon M-26A1, 1/35 Emhar Mk.IV Female


Last Aircraft Builds - Hobby Boss 1/72 F4F Wildcat & FW-190A8
     

  • Member since
    September 2009
  • From: Guam
Posted by sub revolution on Saturday, August 4, 2012 6:51 AM

Buffle- That tank is fantastic!! The rust looks perfect and my eyes are just drawn to that chain on the front... It looks so real! And that field car looks like a neat build as well. Wish I had found that when I was looking for a Jeep to get my son...

Doogs- Someday I will do a Tu-2, but in 1/72. In the meantime, I expect some good photos from your trip!

So my P-39 is done. I finally got back to my real home and am getting settled in/caught up on everything. I finished it a while back but couldn't get on the internet. Will post pictures soon.

Thanks, Budd

NEW SIG

JOIN OUR COMMUNITY!

Our community is FREE to join. To participate you must either login or register for an account.

SEARCH FORUMS
FREE NEWSLETTER
By signing up you may also receive reader surveys and occasional special offers. We do not sell, rent or trade our email lists. View our Privacy Policy.