SEARCH FINESCALE.COM

Enter keywords or a search phrase below:

Big Beautiful Jugs - OFFICIAL P-47 GROUP BUILD

200751 views
1248 replies
1 rating 2 rating 3 rating 4 rating 5 rating
G-J
  • Member since
    July 2012
Posted by G-J on Tuesday, November 20, 2012 6:06 PM

DoogsATX

It's been almost a year since I built my last Revellogram Jug so I'm not 100%, but I believe those are the fuel lines and they're just supposed to sit against the fuselage.

Awesome, thanks.  Since there is a tiny hole in the tank, I wasn't sure if it was to be connected.

On the bench:  Tamyia Mosquito Mk. VI for the '44 group build.  Yes, still.

On deck: 

  • Member since
    November 2009
  • From: SW Virginia
Posted by Gamera on Tuesday, November 20, 2012 1:18 PM

SF: Looks good to me! Don't see that much putty, I should have taken some photos of my Promodeler P-47N during construction, all the white areas on the underside are putty. I think the model is about 34.24% putty by composition: 

Wish I'd went with the Academy P-47N now, but oh well. Still almost finished, there's a small rough area right under the left side of the cockpit and I'm trying to sand it out and repaint without messing up the decals. 

And Doogs, I do have to disagree a teeny bit- I still like the Hasegawa P-47D. If the Tamiya kit is a perfect 10 then the Hasegawa is a 9 at least. I see your point about not messing around with second rate kits but with the Tamiya jug as king of the hill the Hasegawa can be picked up cheap at shows, so if you're on a budget it can be a very decent choice. 

"I dream in fire but work in clay." -Arthur Machen


  • Member since
    June 2010
  • From: Austin, TX
Posted by DoogsATX on Tuesday, November 20, 2012 12:00 PM

Coming along nicely, stoutfella!

But FWIW I totally agree with your closing assessment - it's exactly why I recommend people considering a 1/48 Jug either go with the Tamiya, or the old Monogram. One's an excellent value and a fun, simple build, and the other an absolute masterpiece. The Academy strikes me (granted, I've only played with the -N) as an exercise in complete averageness.

On the Bench: 1/32 Trumpeter P-47 | 1/32 Hasegawa Bf 109G | 1/144 Eduard MiG-21MF x2

On Deck:  1/350 HMS Dreadnought

Blog/Completed Builds: doogsmodels.com


  • Member since
    January 2012
  • From: East Peoria, IL
Posted by stoutfella on Tuesday, November 20, 2012 11:55 AM

Greetings,

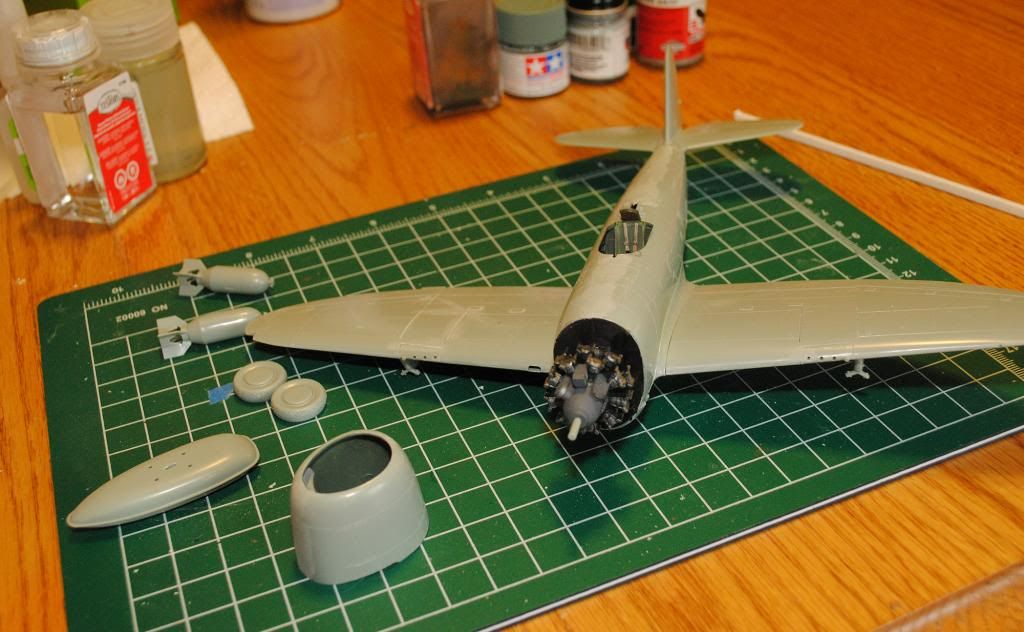
A bit of progress on my Academy Gabreski Jug.

Fuselage buttoned up, wings and stabilizers attached:
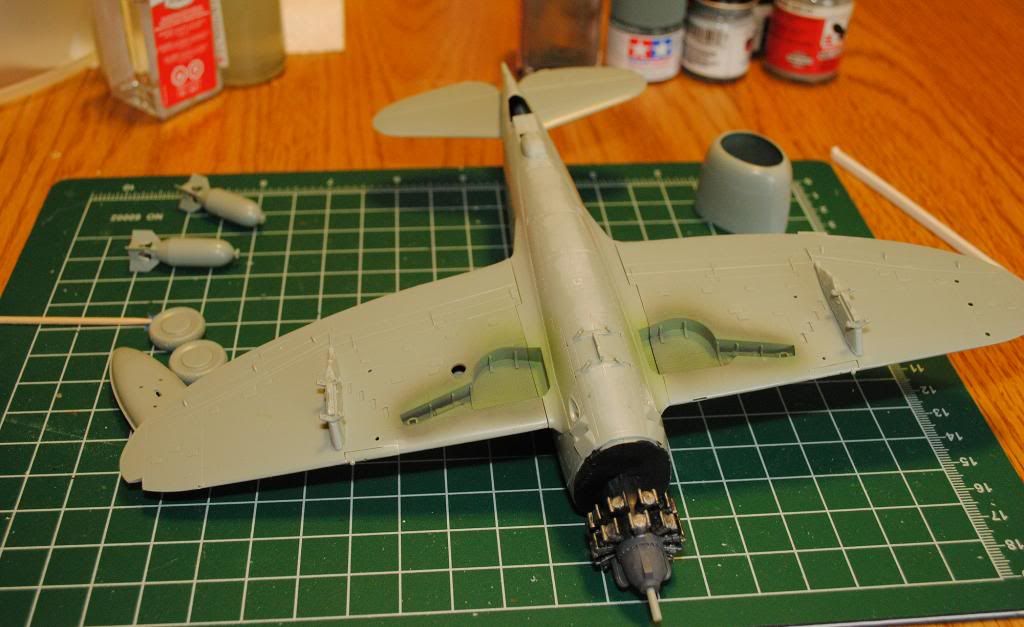
Underside. I later filled in the gaps in wheel wells:
Engine. I feel pretty inadequate here after Gamera's amazing wiring job:

And a wing shot with the ill-fitting gun bay door glued in placed, since I decided against going for a detail set to replace the kit's sparse gun array:
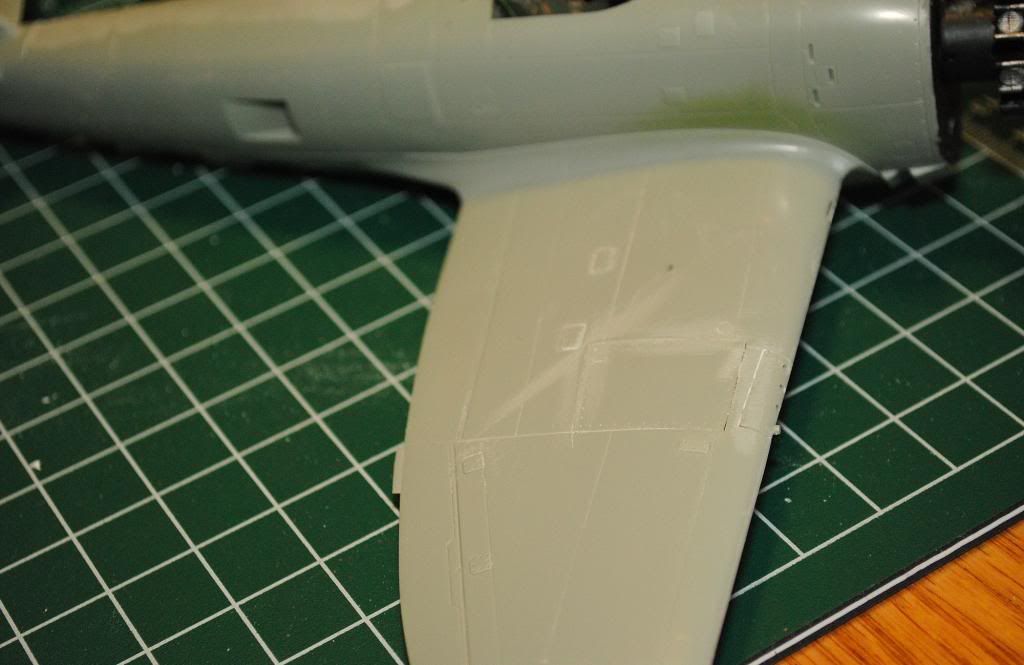
General observations on the kit so far: Well, once again, it ain't no Tamiya job. Overall fit was pretty good and the lines look good. But it seems either not enough or perhaps too much thought went into some of the fiddly bits, in particular those gun bay doors, which don't quite sit flush. Once you've got 'em glued in place, there's not much for it. Trying to sand them flush will obliterate the detail and filling won't address the fit issue. And the gun fairing inserts seem like a good concept, since it allows the correct staggered holes for blast tubes. But they just don't fit worth a crap. I fiddled 'em in best I could, but I'm not impressed. Guess that's my overall observation here. The kit's OK, but not up to Tamiya's standards. Yeah, I've gotten spoiled, but Tamiya's precision allows me to concentrate on the finish work, which is what I really enjoy, rather than mucking around with filler and trying to make the best of something that's not quite right. And as long as I'm at it: Really, Academy, does everything  have to require gluing two pieces together -- cowling, tires, stabilizers, etc.? Other companies have managed to produce these in one piece quite successfully, or as assemblies that make sense. For example, tire and hub assemblies that don't require you to glue two tire halves together, then sand away a seam and that nice tread detail and still have to mask off or freehand the hubs.

Anyway, all for now. I'm moving into the paint shop. Updates to come.

Cheers,

Stoutfella

On the bench: 1/48 Tamiya Bristol Beaufighter

On deck: 1/48 Tamiya P51-B

  • Member since
    June 2010
  • From: Austin, TX
Posted by DoogsATX on Tuesday, November 20, 2012 9:41 AM

It's been almost a year since I built my last Revellogram Jug so I'm not 100%, but I believe those are the fuel lines and they're just supposed to sit against the fuselage.

On the Bench: 1/32 Trumpeter P-47 | 1/32 Hasegawa Bf 109G | 1/144 Eduard MiG-21MF x2

On Deck:  1/350 HMS Dreadnought

Blog/Completed Builds: doogsmodels.com


G-J
  • Member since
    July 2012
Posted by G-J on Tuesday, November 20, 2012 8:20 AM

Folks,

Probably a simple question here (or one I hope has a simple answer.) I'm attaching the bombs, rocket launchers and external fuel tank to the bottom of the plane.  The fuel tank has a place where it is recessed to fit onto the hard point.  And there is a tiny hole, which looks to attach to (one of) the little prongs sticking up from the plane.  Is there supposed to be a second hole in the tank that the second prong attaches into?  Or am I missing how to attach the fuel tank?

(Step 5, page 8 of the Revell P-47D Thunderbolt Razorback kit for those keeping score at home.)

Thanks.

On the bench:  Tamyia Mosquito Mk. VI for the '44 group build.  Yes, still.

On deck: 

  • Member since
    November 2009
  • From: SW Virginia
Posted by Gamera on Monday, November 19, 2012 8:53 AM

Doogs: She looks so good I want to climb in there and fool around with the controls, I swear the dials look they they actually work!

Geof: Thanks, can't take the credit, as I said check out Lawdog's post on wiring radials on the aircraft forum. I just followed his instructions, more tedium than hard work.

BTW: Just applied the yellow trim to the nose of the P-47D, hopefully it will look ok and I'll be able to get to the anti-glare panel and then the NM finish. More photos when I get something to show.

"I dream in fire but work in clay." -Arthur Machen


  • Member since
    January 2012
  • From: East Peoria, IL
Posted by stoutfella on Monday, November 19, 2012 1:49 AM

Hey Geof: What colors and brands did you use on your Gabreski? I know it's been asked and answered a zillion times, but I wondered what your interpretation was.

Cheers,

Stoutfella

On the bench: 1/48 Tamiya Bristol Beaufighter

On deck: 1/48 Tamiya P51-B

  • Member since
    December 2010
  • From: Colorado Springs
Posted by Geof on Sunday, November 18, 2012 11:27 AM

Looks great all around guys! Doogs, nice pit, but a question... Why the blue for the instrument panel? Gamera... Killer motor work man! Inspires me to do more on mine... BUT I swore OOB period! Should have mine wrapped up today... Pics tonight hopefully!

Photobucket

On the Bench: Tamiya's 1/48 A-10a Thunderbolt 

In the Hangar:  Hmmm???


  • Member since
    June 2010
  • From: Austin, TX
Posted by DoogsATX on Sunday, November 18, 2012 8:50 AM

Trying this one more time in the clear light of day.

On the Bench: 1/32 Trumpeter P-47 | 1/32 Hasegawa Bf 109G | 1/144 Eduard MiG-21MF x2

On Deck:  1/350 HMS Dreadnought

Blog/Completed Builds: doogsmodels.com


  • Member since
    June 2010
  • From: Austin, TX
Posted by DoogsATX on Sunday, November 18, 2012 2:46 AM

Aaaaaarrrgh WTF? 

Screw it - just go HERE to check 'em out.

On the Bench: 1/32 Trumpeter P-47 | 1/32 Hasegawa Bf 109G | 1/144 Eduard MiG-21MF x2

On Deck:  1/350 HMS Dreadnought

Blog/Completed Builds: doogsmodels.com


  • Member since
    June 2010
  • From: Austin, TX
Posted by DoogsATX on Sunday, November 18, 2012 2:43 AM

Ugh. Stupid rich formatting. And since when does edit mean can't delete?

Let's try that again.

and...cockpit's done!

On the Bench: 1/32 Trumpeter P-47 | 1/32 Hasegawa Bf 109G | 1/144 Eduard MiG-21MF x2

On Deck:  1/350 HMS Dreadnought

Blog/Completed Builds: doogsmodels.com


  • Member since
    June 2010
  • From: Austin, TX
Posted by DoogsATX on Sunday, November 18, 2012 2:40 AM

On the Bench: 1/32 Trumpeter P-47 | 1/32 Hasegawa Bf 109G | 1/144 Eduard MiG-21MF x2

On Deck:  1/350 HMS Dreadnought

Blog/Completed Builds: doogsmodels.com


  • Member since
    January 2012
  • From: East Peoria, IL
Posted by stoutfella on Saturday, November 17, 2012 9:23 AM

Bow Down Good lord, Doogs! I surrender! That's fabulous!

Cheers,

Stoutfella

On the bench: 1/48 Tamiya Bristol Beaufighter

On deck: 1/48 Tamiya P51-B

  • Member since
    June 2010
  • From: Austin, TX
Posted by DoogsATX on Saturday, November 17, 2012 2:50 AM

More work on Le Jug this evening. First up, the gunsight.

The Mk.VIII gunsight Trumpeter provides is way overscale. To the point that I noticed, which means it's huge. Probably like 1/24. So I sourced a resin replacement from Master Detail. But I liked the mounting truss Eduard packs with their interior set, so I cobbled the two together.

Then primed and painted the whole thing Vallejo Black.

In the office, I got the seat mounted, the HGW harness installed, the oxygen hose finished up, and the rudder pedals attached to the instrument panel. 

On the Bench: 1/32 Trumpeter P-47 | 1/32 Hasegawa Bf 109G | 1/144 Eduard MiG-21MF x2

On Deck:  1/350 HMS Dreadnought

Blog/Completed Builds: doogsmodels.com


  • Member since
    November 2009
  • From: SW Virginia
Posted by Gamera on Friday, November 16, 2012 1:55 PM

Looks great Doogs! Looking forward to seeing those cool fabric seatbelts installed.

"I dream in fire but work in clay." -Arthur Machen


  • Member since
    June 2010
  • From: Austin, TX
Posted by DoogsATX on Friday, November 16, 2012 10:18 AM

The Le Jug continues apace...got a lot done in the pit last night. Think I'll probably be mounting up the seat and harness this evening. Still a ways to go on the IP and the gunsight (got a resin Mk.VIII on order), but it's getting there.

On the Bench: 1/32 Trumpeter P-47 | 1/32 Hasegawa Bf 109G | 1/144 Eduard MiG-21MF x2

On Deck:  1/350 HMS Dreadnought

Blog/Completed Builds: doogsmodels.com


  • Member since
    June 2010
  • From: Austin, TX
Posted by DoogsATX on Thursday, November 15, 2012 10:58 AM

lawdog114

Gamera, nice job on that R-2800!  I'm glad someone has gotten use out of the rigging technique.  Doogs, heres the link to the tutorial when you start the mill on your Trump kit.  BTW, the brass micro tubing has become a permanent staple on my bench for all my machine gunning needsYes.

http://cs.finescale.com/fsm/modeling_subjects/f/2/t/149327.aspx

Joe

Awesome - yeah the Trumpeter mill is going to be an epic thing when the time comes...figure I'll tackle it right after the cockpit. Too bad there's no styrene tubing to be had that small...it'd be nice to have something to trap the wire into. 

And yeah, that microtubing is the bee's knees, isn't it?!? 

On the Bench: 1/32 Trumpeter P-47 | 1/32 Hasegawa Bf 109G | 1/144 Eduard MiG-21MF x2

On Deck:  1/350 HMS Dreadnought

Blog/Completed Builds: doogsmodels.com


  • Member since
    November 2009
  • From: SW Virginia
Posted by Gamera on Thursday, November 15, 2012 9:46 AM

Thanks guys!

And Joe, big thanks to you, great walk-though on wiring radials, I have it bookmarked on my phone and had it up for reference while wiring her. Bow Down

Definably going to give it a whirl on some more radials in the future! 

"I dream in fire but work in clay." -Arthur Machen


  • Member since
    February 2012
  • From: Olmsted Township, Ohio
Posted by lawdog114 on Thursday, November 15, 2012 8:16 AM

Gamera, nice job on that R-2800!  I'm glad someone has gotten use out of the rigging technique.  Doogs, heres the link to the tutorial when you start the mill on your Trump kit.  BTW, the brass micro tubing has become a permanent staple on my bench for all my machine gunning needsYes.

http://cs.finescale.com/fsm/modeling_subjects/f/2/t/149327.aspx

Joe

 "Can you fly this plane and land it?...Surely you can't be serious....I am serious, and don't call me Shirley"


  • Member since
    June 2010
  • From: Austin, TX
Posted by DoogsATX on Thursday, November 15, 2012 1:53 AM

Excellent work, Gamera! Need to go find Lawdog's tutorial again...planning to use it for the Trumpy.

Slog of a night getting the HGW belts together...but man do they look sweet. Definitely more detail than the RB Productions belts I'm using on my 109...

On the Bench: 1/32 Trumpeter P-47 | 1/32 Hasegawa Bf 109G | 1/144 Eduard MiG-21MF x2

On Deck:  1/350 HMS Dreadnought

Blog/Completed Builds: doogsmodels.com


  • Member since
    November 2009
  • From: SW Virginia
Posted by Gamera on Wednesday, November 14, 2012 9:49 PM

Hey thanks guys, actually I surprised even myself. As I said Lawdog posted a tuturial over on the aircraft section with a complete walkthough. I'd post a link but I'm typing on my phone right now.

G-J : hang n there. Been praying for you guys, hopefully things will straighten out before too much longer.

"I dream in fire but work in clay." -Arthur Machen


  • Member since
    January 2012
  • From: East Peoria, IL
Posted by stoutfella on Wednesday, November 14, 2012 9:27 PM

Gamera: Very, very nice work. I just finished the engine on my Gabreski Jug. It, um, doesn't look like yours Wink

Cheers,

Stoutfella

On the bench: 1/48 Tamiya Bristol Beaufighter

On deck: 1/48 Tamiya P51-B

G-J
  • Member since
    July 2012
Posted by G-J on Wednesday, November 14, 2012 1:39 PM

That is one SWEET looking engine!

Sorry I haven't been around much, Sandy did a number on our area; we were without power 12 days.  I'm in the home-stretch of finishing up my jug.  It was pretty cold in our house for almost a week and I hope the paint bottles survived.

On the bench:  Tamyia Mosquito Mk. VI for the '44 group build.  Yes, still.

On deck: 

  • Member since
    November 2009
  • From: SW Virginia
Posted by Gamera on Tuesday, November 13, 2012 9:46 PM

Ok photos of the wired engine for the Tamiya P-47D, I used Lawdog's article on how to do it:

The Promodeler P-47N is about 97%, going to be pretty busy later this week but will try to get her posted before too much longer though.

"I dream in fire but work in clay." -Arthur Machen


  • Member since
    June 2010
  • From: Austin, TX
Posted by DoogsATX on Tuesday, November 13, 2012 2:01 AM

Cockpit got its Dull Dark Green tonight in the form of Tamiya XF-26 Deep Green over a base of XF-1 Flat Black.

On the Bench: 1/32 Trumpeter P-47 | 1/32 Hasegawa Bf 109G | 1/144 Eduard MiG-21MF x2

On Deck:  1/350 HMS Dreadnought

Blog/Completed Builds: doogsmodels.com


  • Member since
    June 2010
  • From: Austin, TX
Posted by DoogsATX on Tuesday, November 13, 2012 2:00 AM

Geof

Doogs... That thing is huge! I must admit to having an issue building and dealing with interior stuff that would never be seen... But impressive to say the least!

The thing is a beast, for sure! And yeah, I've got issues having to build things that can't possibly be seen. That's why, when I discovered that the plumbing wasn't required to hold the cockpit in place, I literally threw my head back and laughed like a supervillain!

On the Bench: 1/32 Trumpeter P-47 | 1/32 Hasegawa Bf 109G | 1/144 Eduard MiG-21MF x2

On Deck:  1/350 HMS Dreadnought

Blog/Completed Builds: doogsmodels.com


  • Member since
    December 2010
  • From: Colorado Springs
Posted by Geof on Tuesday, November 13, 2012 12:30 AM

Doogs... That thing is huge! I must admit to having an issue building and dealing with interior stuff that would never be seen... But impressive to say the least!

Photobucket

On the Bench: Tamiya's 1/48 A-10a Thunderbolt 

In the Hangar:  Hmmm???


  • Member since
    November 2009
  • From: SW Virginia
Posted by Gamera on Monday, November 12, 2012 7:26 PM

Looks great Doogs! The pe seat is really a big improvement. Neat feature on the transparent cowling to show off the giant mill, I assume you're going to just paint over it?

"I dream in fire but work in clay." -Arthur Machen


  • Member since
    December 2010
  • From: Colorado Springs
Posted by Geof on Monday, November 12, 2012 7:13 PM

Stoutfella,

Closed... No detailing added on this one. Just wasn't in the mood after the months of work on my 109 dio project.

The process to paint (mask... the painting is easy!) the borders is a little tedious, but worth it IMO. First lay out the stripe widths across the fuselage. They are about 10mm wide each. Paint them white and leave that mask in place. Then cut your tape in strips, filling in the white to allow about 1-1.5mm around the border and then paint your black. Just be sure your edges are tight and spray relatively dry, straight perpendicular to the tape. This avoids running black under the tape and onto the white.

Photobucket

On the Bench: Tamiya's 1/48 A-10a Thunderbolt 

In the Hangar:  Hmmm???


JOIN OUR COMMUNITY!

Our community is FREE to join. To participate you must either login or register for an account.

SEARCH FORUMS
FREE NEWSLETTER
By signing up you may also receive reader surveys and occasional special offers. We do not sell, rent or trade our email lists. View our Privacy Policy.