SEARCH FINESCALE.COM

Enter keywords or a search phrase below:

B-36 Peacemaker Group Build

173795 views
818 replies
1 rating 2 rating 3 rating 4 rating 5 rating
  • Member since
    November 2013
Posted by Teutonic222 on Sunday, November 24, 2013 10:30 PM

Hello lajntx. I didn't forget about the white painted canopy, but thanks for the reminder. I was wondering if the interior colors changed for what I'll call ergonomic reasons. Locomotive cabs, old steamers and modern diesel electrics, have interior cab colors similar to what is shown in my photo (slightly bluish green). I think it is easier on the eyes than OD green. I don't know of any reason why landing gear bays would be any color other than Zinc Chromate green. It's just a protective coating for aluminum. There is a good write up on zinc chromate here: www.colorserver.net/.../history-zinc-chromate.htm

Yes, I worked for a major aerospace and defense subcontractor. I was working on the leading edge flight control system for the F-16 as well as some GD/FW projects that will remain nameless. I didn't realize they had a company historian. I'll see if I can track him or her down. At the time, I would drive past the B-36 parked on the side of the entrance road and marvel at it. I also used to marvel at the quality of the BBQ at the joint near the entrance to GD/FW. Don't know if it's still there, but they had great pulled pork. I swear the wood cords stacked up along the back of the building was what held the building up. The parking lot looked like the Ho Chi Minh trail -- all cratered. I used to also have dinner with one of the GD/FW flight control engineers at the Black-eyed Pea in Fort Worth.

Egads, who would have thought this model would have turned into this level of research and detail?

  • Member since
    September 2011
  • From: North Texas
Posted by lajntx on Sunday, November 24, 2013 9:44 PM

Teutonic222

lajntx, thanks for the firsthand knowledge on the restoration team members. I buy your assessment of their attention to detail completely. Zinc chromate green it is and a plethora of other greens for the cockpit interior. At least it makes for a slightly less drab model cockpit. Good thing too because I had purchased a bottle of Polly S Signal Green for that bluish green color for seat and some of the other metal parts.

I'm probably driving everyone nuts regarding the landing gear. I somehow doubt I'm going to find the original design engineer for that part, so I'll be moving forward with a best guess.

2 things:

1. As for the coloring of the interior. Dont forget that the Featherweight J`s had the white painted outer canopy to help keep it cool during the hot Texas Summers at Biggs AFB. I`m wondering myself if the interiors of the later model J`s didnt have a slightly different color for temperature reasons, because it does seem like when I`ve seen pictures of the older ones there was ALOT more of that chromite green.

2. Arent you associated with GD in some way? Or have/had a working relationship with them in the past? I`m willing to bet you could probably call the company`s historian/archival dept and get copies of those engineering diagrams

B-36 Peacemaker Builds 

On the Bench: B-36 paint test  fusealge & RB-36E assembly test build

In Que: YB-36 Conversion Build & B-36 carries B-58 Airframe to Wright Patterson

Conceptual Planning: RB-36 X-15 Mothership

  • Member since
    December 2002
  • From: Northern California
Posted by jeaton01 on Sunday, November 24, 2013 9:42 PM

I can't remember if I've posted a link to the page I have on the B-36 before, there are some interior photos of the Castle B-36 there:

http://www.yolo.net/~jeaton/Propplanes/b-36/b-36.htm

John

To see build logs for my models:  http://goldeneramodel.com/mymodels/mymodels.html


  • Member since
    November 2013
Posted by Teutonic222 on Sunday, November 24, 2013 9:27 PM

lajntx, thanks for the firsthand knowledge on the restoration team members. I buy your assessment of their attention to detail completely. Zinc chromate green it is and a plethora of other greens for the cockpit interior. At least it makes for a slightly less drab model cockpit. Good thing too because I had purchased a bottle of Polly S Signal Green for that bluish green color for seat and some of the other metal parts.

I'm probably driving everyone nuts regarding the landing gear. I somehow doubt I'm going to find the original design engineer for that part, so I'll be moving forward with a best guess.

  • Member since
    November 2013
Posted by Teutonic222 on Sunday, November 24, 2013 9:14 PM

Hello John:

I agree with you completely (including your comment about the "expert." I am confident the beam that attaches the axles does pivot in the middle. Or maybe better said, I think it is two beams, one for the front axle and one for the rear axle, and they both pivot about the landing gear strut. This is, at least, the way I envision the landing gear design. The other possibility would be one beam with both axles attached, but still pivoting about the strut. Either way should work and distribute the load.

Regards,

  • Member since
    December 2002
  • From: Northern California
Posted by jeaton01 on Sunday, November 24, 2013 6:56 PM

I agree that the loads need to be equal on touchdown, Teutonic, however I do not understand how that is possible unless the beam that the fore and aft wheels are attached to pivots at its center at the bottom of the main strut.  If the aft half of the strut were fixed and the forward part moves then the load on the forward part is always going to be determined by the force of whatever mechanism is forcing it down.

I wish we could find the section of the maintenance manual that concerns the landing gear.

And as you know, an expert is someone from out of town with a briefcase.

John

To see build logs for my models:  http://goldeneramodel.com/mymodels/mymodels.html


  • Member since
    September 2011
  • From: North Texas
Posted by lajntx on Sunday, November 24, 2013 6:20 PM

Teutonic222

I have another question regarding landing gear bay colors. Initially comments and indications were that they were chromate green. Then I heard OD green. Looking at the photo below (from the Virtual Tour section of the Cybermodeler site for the B-36) it looks chromate green with an OD ladder. Was this correct, or is this the result of restoration painting (correctly done or incorrectly done)? As I noted in a previous post to this site, the interior photos also looking overly blue, which I attributed to computer monitors usually having a distinct blue cast. I would think, as was commented in this post to one of my previous questions, that OD would be correct. However, after reexamining the virtual tour photos, there are other area clearly painted OD green. Thus, I continue to be stumped.

I`ll stay out of the landing gear debate and go with whatever you deem reasonable unless I hear differently from my B-36 sources ( if I hear back from them )

As to the coloring if the interior, and such, I have no first hand knowledge. However, when the local team here was restoring the last B-36 in FTW, they also had been working on the cockpit and such before it was trucked to PIMA. Knowing what I know about the team members.... and their sticklerness for it being right....If they painted it that way...then I`m  99.999999999999999...........% certain then that was the color it was when it was in service, and would be willing to wage my own money against  any bets that it wasnt.

B-36 Peacemaker Builds 

On the Bench: B-36 paint test  fusealge & RB-36E assembly test build

In Que: YB-36 Conversion Build & B-36 carries B-58 Airframe to Wright Patterson

Conceptual Planning: RB-36 X-15 Mothership

  • Member since
    November 2013
Posted by Teutonic222 on Sunday, November 24, 2013 4:49 PM

Here is my latest, corrected drawing of the main landing gear in "landed" and "in flight" views. I'm not sure how correct it is. I'd appreciate anyone with some knowledge or better dimensions to let me know.

I'm having a little confusion with the following oleo issue.

  1. All photos of the B-36J at Pima show the oleo rod fully retracted into the cylinder.
  2. All photos of the white-painted museum landing gear show the oleo rod fully retracted into the cylinder.
  3. All photos in Wachsmuth's book on pg 48 show the oleo rod extended.

My interpretation is that in item 3, above, the landing gear is under maintenance and the fixed link is not attached (look at lower right-hand photo). Thus, the oleo rod can extend because the equalizer is now free from the fixed link.

My interpretation from item 2, above, is that although this photo would show a landing gear under load (similar to in-flight and deployed), the shear weight of the unit is pushing on the oleo rod which is not under pressure because it is not connected to the hydraulics and is probably empty of fluid. The result is that the resulting droop angle in the photo is probably a little bit more than would occur in flight.

I think item 1, above, is a correct view when landed.

  • Member since
    November 2013
Posted by Teutonic222 on Sunday, November 24, 2013 3:46 PM

I have another question regarding landing gear bay colors. Initially comments and indications were that they were chromate green. Then I heard OD green. Looking at the photo below (from the Virtual Tour section of the Cybermodeler site for the B-36) it looks chromate green with an OD ladder. Was this correct, or is this the result of restoration painting (correctly done or incorrectly done)? As I noted in a previous post to this site, the interior photos also looking overly blue, which I attributed to computer monitors usually having a distinct blue cast. I would think, as was commented in this post to one of my previous questions, that OD would be correct. However, after reexamining the virtual tour photos, there are other area clearly painted OD green. Thus, I continue to be stumped.

I also wanted to comment on the landing gear photo (the one in the museum painted white). I believe they installed the positioning jack upside down. Looking at every other photo of B-36 landing gear, the positioning jack (the small cylinder above the oleo), the rod in pointing down and the cylinder is on the top. The museum landing gear has these positions reversed.

  • Member since
    November 2013
Posted by Teutonic222 on Sunday, November 24, 2013 12:18 PM

I have started creating some of the drawings that can be used for making additional super detail decals using inkjet printable decal sheets. I'll post drawings as work progresses. I used Wachsmuth's bomb bay cable lowering hole information and template (pg 55 and 67) to create both an open (black dots) and closed (gray dots with black outlines) to simulate the holes. I also added nacelle and flap numbers and the anti-ice dump holes on the top of the vertical stabilizer (there is one set of four ducts on each side; I show three so there is an extra). The Monogram model has them molded into the horizontal stabs, but not the vertical. I figured a decal was the better way to show it than trying to modify the plastic.

  • Member since
    November 2013
Posted by Teutonic222 on Sunday, November 24, 2013 12:12 PM

Hi jeaton01. Thanks for the photos. You subtly and correctly pointed out the error in my drawing, which I will redo. For some brain dead reason, I had reversed the oleo position, placing it in the forward spot, rather than the aft location. Gee, after looking at who knows how many photos, I still drew it wrong.

I'll recalculate and redraw. However, I think my landing gear explanation on loading is still correct -- basically, each axle needs to handle full load on impact with the runway. I will still reiterate, however, that I am not a landing gear expert and bow to anyone else's expertise on the matter.

Thanks again.

  • Member since
    September 2011
  • From: North Texas
Posted by lajntx on Saturday, November 23, 2013 11:46 PM

Teutonic222

As a side note, there have been some pretty interesting landing gear concepts over the years. The B-36 tracked bogie certainly has to be one of them. My father was also involved in a concept for landing gear where they would spool up the wheels using a hydrostatic transmission (similar to those used on large off-road construction and mining equipment), so when the wheels touched down, they were already at or near the landing rotational speed. The concept was to reduce the wear and extend the life of aircraft tires and hopefully prevent blow outs. The concept didn't go anywhere because of the weight penalties, but it was a valient attempt during the time when people actually built and tested stuff in real life. Now I'm sounding like an old guy reliving the "good ole days."

And on that note... Here is a video from the "good ole days" when the tracked gear was being tested in real  life vs being simulated on a computer with data imputs mandated from upper management determined to either make or break a program. Hmm

B-36 Peacemaker Builds 

On the Bench: B-36 paint test  fusealge & RB-36E assembly test build

In Que: YB-36 Conversion Build & B-36 carries B-58 Airframe to Wright Patterson

Conceptual Planning: RB-36 X-15 Mothership

  • Member since
    December 2002
  • From: Northern California
Posted by jeaton01 on Saturday, November 23, 2013 6:11 PM

I found a couple of pictures, one is interesting because it shows the gear in the in flight position, with the upper beam visible.

Finally, here is a link with a small boy in front of the landing gear at Pima, I think.

http://www.flickr.com/photos/barryfackler/5581272455/

John

To see build logs for my models:  http://goldeneramodel.com/mymodels/mymodels.html


  • Member since
    November 2013
Posted by Teutonic222 on Saturday, November 23, 2013 4:40 PM

I never worked on landing gear, but I believe the beam further up the strut (known as the equalizer) is designed to equalize the loads on the front and rear bogie axles. The oleo on the front would be used as the "shock absorber", but is tied via the equalizer beam to a rod that is connected to the rear bogie axle. In any case, each axle would need to handle the dynamic landing loads independently since only one of the wheel-axle combination touches down at initial impact with the runway on landing. Shortly after touchdown, the other wheel-axle combination would contact the runway and the dynamic loading is reduced to something approaching static load. Again, I'm not a landing gear guy, but I worked with a lot of similar type of loading scenarios for flight control systems and think this would be similar ... or not.

As a side note, there have been some pretty interesting landing gear concepts over the years. The B-36 tracked bogie certainly has to be one of them. My father was also involved in a concept for landing gear where they would spool up the wheels using a hydrostatic transmission (similar to those used on large off-road construction and mining equipment), so when the wheels touched down, they were already at or near the landing rotational speed. The concept was to reduce the wear and extend the life of aircraft tires and hopefully prevent blow outs. The concept didn't go anywhere because of the weight penalties, but it was a valient attempt during the time when people actually built and tested stuff in real life. Now I'm sounding like an old guy reliving the "good ole days."

  • Member since
    December 2002
  • From: Northern California
Posted by jeaton01 on Saturday, November 23, 2013 2:37 PM

I find it hard to think that the rear set of wheels is not articulated on the same beam as the front, pivoting at the center of the main strut, as that would make the loads different on the front and rear set of wheels, and the load on the front wheels would have to be controlled by the strut mechanism.  That would be difficult and odd.

The takeoff in England would have been at a heavier weight and the runway may have been shorter as it was not built for a B-36, most likely.  That would explain the higher angle of the fuselage at liftoff, as compared to the flight to Fairchild AFB.  Looks like they went to maximum pitch a little early and waited for liftoff in England.

John

To see build logs for my models:  http://goldeneramodel.com/mymodels/mymodels.html


  • Member since
    September 2011
  • From: North Texas
Posted by lajntx on Friday, November 22, 2013 10:16 PM

Teutonic222

Reasoned, you probably can't see it from the video, but the rear turret gunners have their feet extending through a hatch in the bottom of the fuselage and they are madly pushing off to keep the tail end from dragging. :)

Were they named Fred & Barney from Bedrock?

I think the take offs in the England film were the results of "hot dogging" it for the news reel cameras.

In this film in the begining watch the take off in the opening scene from Carswell as the bomber casually rolls down the runway.  Then scroll to to 46:15 to watch the take off described about the last B-36 at the turn over ceremony, and notice how it quickly takes off from the same runway

http://www.cowtown.net/proweb/last_one.htm

The last B-36 was delivered during a public ceremony by retired Gen. Joseph T. McNarney, Convair president, and accepted by Maj. Gen. Francis H. Griswold, vice commander of SAC.

Mason Ripp, navigator on the flight to Spokane, recalls that after the ceremonial speeches were concluded, the crew ran to the plane, started the engines much quicker than normal, took off and then buzzed the reviewing stand after a screaming dive.   They then set a new speed record for the flight from Carswell to Fairchild.  Maj. Laurence M. Nickerson, 33, of Thorndike, Maine, was aircraft commander and headed the 13-man crew.


B-36 Peacemaker Builds 

On the Bench: B-36 paint test  fusealge & RB-36E assembly test build

In Que: YB-36 Conversion Build & B-36 carries B-58 Airframe to Wright Patterson

Conceptual Planning: RB-36 X-15 Mothership

  • Member since
    November 2013
Posted by Teutonic222 on Friday, November 22, 2013 12:13 PM

Reasoned, you probably can't see it from the video, but the rear turret gunners have their feet extending through a hatch in the bottom of the fuselage and they are madly pushing off to keep the tail end from dragging. :)

  • Member since
    November 2013
Posted by Teutonic222 on Friday, November 22, 2013 12:11 PM

Hah! This coming from the guy with 18 kits.

  • Member since
    February 2011
  • From: Bent River, IA
Posted by Reasoned on Friday, November 22, 2013 7:00 AM

After watching that take off reel, I never realized just how close the tail section came to touching the ground if she nosed-up too quick!

Science is the pursiut of knowledge, faith is the pursuit of wisdom.  Peace be with you.

On the Tarmac: 1/48 Revell P-38

In the Hanger: A bunch of kits

  • Member since
    September 2011
  • From: North Texas
Posted by lajntx on Thursday, November 21, 2013 11:10 PM

Teutonic222

Well, HTML and Direct codes don't work. Now we'll try IMG. I'm really not this much of a dolt.

Hmmm, maybe I better bring to your attention that the rolled tubes the wheels connect too were hollow as well. You might lose sleep over missing that detail. Stick out tongue

B-36 Peacemaker Builds 

On the Bench: B-36 paint test  fusealge & RB-36E assembly test build

In Que: YB-36 Conversion Build & B-36 carries B-58 Airframe to Wright Patterson

Conceptual Planning: RB-36 X-15 Mothership

  • Member since
    September 2011
  • From: North Texas
Posted by lajntx on Thursday, November 21, 2013 11:00 PM

This "Zabruder film" is probably your best bet.... any photos I get, I`ll send to you. But watch them start taking off at 1:20... You may like what you see


B-36 Peacemaker Builds 

On the Bench: B-36 paint test  fusealge & RB-36E assembly test build

In Que: YB-36 Conversion Build & B-36 carries B-58 Airframe to Wright Patterson

Conceptual Planning: RB-36 X-15 Mothership

  • Member since
    November 2013
Posted by Teutonic222 on Thursday, November 21, 2013 9:25 PM

Well, HTML and Direct codes don't work. Now we'll try IMG. I'm really not this much of a dolt.

  • Member since
    November 2013
Posted by Teutonic222 on Thursday, November 21, 2013 9:24 PM

Geez, Flickr just changed the look of their site. Took me forever to find the controls and obviously, the link didn't work. Can't find the two types of coding anymore. We'll try photobucket.

http://i1012.photobucket.com/albums/af241/mlundquist1/B-36LandingGearAngles_zps6730f3e4.jpg

  • Member since
    November 2013
Posted by Teutonic222 on Thursday, November 21, 2013 9:18 PM

Boy, any in-flight photos would help. The problems are resolution, lighting, and profile. I found four photographs for measuring wheel droop. My rudimentary measurements were relatively consistent, averaging 9.8 degrees forward droop. The problem is the beam. Only one photo showed it and it was about as good as the Zabruder film. My best measurement was a shift in beam angle from 25 degrees (which I could measure from the model and Scale Aircraft die cast piece) to 16.5 degrees from the poor photo. The shadows were killing me, plus none of the photos show the aircraft full-on profile, so I'm dealing with some perspective issues, although I think I canceled them out.

I wrote to Chris again at Click2detail regarding the drooped landing gear. He said it is a bit more complex than the Featherweight windows, but he thought it was a good suggestion and will discuss it with his team. I'll let the group know if he goes ahead with it.

He also sent me a sneak peak at the Featherweight window. They will 3D print a sample and test fit it. I suspect it will be done soon.

Here is my drawing of the landing gear.

<a href="http://www.flickr.com/photos/25391811@N02/10987824616" title="B-36 Landing Gear Angles by mlundy, on Flickr"><img src="//farm3.staticflickr.com/2868/10987824616_75d4ea0427_b.jpg" width="960" height="720" alt="B-36 Landing Gear Angles"></a>

  • Member since
    September 2011
  • From: North Texas
Posted by lajntx on Thursday, November 21, 2013 7:03 PM

Teutonic222

Thanks lajntx. You must have a whole bomb wing there. I'll try to keep Dr. Mengele out of the room when I start working on the crew modifications.

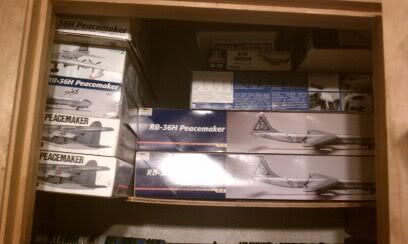
I have 18 kits ranging from scrap kits, ones I am working on, and some just sitting there still sealed appriciating in value. I may not own the most kits.... But I am pretty sure I am in the top 5 collectors of it. Smile

I'm trying to find a better resolution photo of the landing gear in flight mode to see how much the beam angle is different compared to when in landed mode. If the angle of the beam doesn't change much, I think I'll go with just modifying the bogie and related oleos. Or I might just screw it and change it to a pontoon plane. :)

Here is a link to one sitting on display, that is a good place to start for the details and how it looks when it is not attached to the plane

http://www.skytamer.com/1.2/2002/2031.jpg

I`m going to send a request to the person I know that has all of the photos, and is the go to source when a book is needed illustrations and see what he has. Not sure how clear we will find since we are talking 1950`s camera technology taking pictures of a moving object far away in the sky though

B-36 Peacemaker Builds 

On the Bench: B-36 paint test  fusealge & RB-36E assembly test build

In Que: YB-36 Conversion Build & B-36 carries B-58 Airframe to Wright Patterson

Conceptual Planning: RB-36 X-15 Mothership

  • Member since
    November 2013
Posted by Teutonic222 on Thursday, November 21, 2013 8:55 AM

Thanks lajntx. You must have a whole bomb wing there. I'll try to keep Dr. Mengele out of the room when I start working on the crew modifications.

I'm trying to find a better resolution photo of the landing gear in flight mode to see how much the beam angle is different compared to when in landed mode. If the angle of the beam doesn't change much, I think I'll go with just modifying the bogie and related oleos. Or I might just screw it and change it to a pontoon plane. :)

  • Member since
    September 2011
  • From: North Texas
Posted by lajntx on Wednesday, November 20, 2013 11:34 PM

Teutonic222

I appreciate your efforts to pull together the reference material for the decals/notice sheet. My Wachsmuth book showed up today. Haven't had much time to look at it, so I don't know if it would have photos of positions for the notices. Anything that helps identify where they go is great. I can ultimately create a set of instructions that combines all the loose reference materials. I hope the German Revell decal sheet and instruction booklet identified where some of the notices belong (correctly).

Regarding the crew, I'm thinking four of the pilot types and two of the FE station crew. It's a bit of a guess at this point. The FE crew member has the advantage of the bent arm not being attached to the leg and the other arm removable and re-positionable. The pilot has the advantage of both arms being tight against the body. I know that I'll be fitting them into some constricted spaces and will need conduct some heavy modifications to get them to fit while also looking somewhat correct. Thanks again.

I've also been thinking about the landing gear. Two concepts: 1) massive sawing and repositioning to get the bogie to hang right and the toggle beam to also sit on an angle, or; 2) only modifiying the bogie. Concept one is ultimately correct, but requires a lot more work, has more opportunity for a *** up, and the toggle beam might actually look a little strange since it now would be on an even greater angle (correct, but sometimes in modeling making you have to play tricks to make the eye see things correctly). Concept two would be easier and I think has the same visual impact, but isn't 100% correct.

Am sending you 3 sets of crew ( 12 ) , and 3 sets of main gear. That should give you plenty of plastic bodies to commit war crimes errrr... I mean " voluntary experimental medical proceedures" on. 2 sets of main gear to experiment on...and one set to send back to me for my inflight build when you perfect it.

B-36 Peacemaker Builds 

On the Bench: B-36 paint test  fusealge & RB-36E assembly test build

In Que: YB-36 Conversion Build & B-36 carries B-58 Airframe to Wright Patterson

Conceptual Planning: RB-36 X-15 Mothership

  • Member since
    November 2013
Posted by Teutonic222 on Wednesday, November 20, 2013 10:56 PM

I'm trying. I'm usually a big picture/high altitude guy, but I periodically do a dive down to ground level and focus on the details. My poor brain can't keep up.

I'll take pictures once the work starts. I've got to do some scaling off of photos to make sure I'm getting close to the right dimensions. The good news is very few people will ever know about any of the mistakes.

  • Member since
    September 2011
  • From: North Texas
Posted by lajntx on Wednesday, November 20, 2013 10:19 PM

Here we are about an hour after the second coat was applied and you can see how well the paint is "form fitting" as it dries showing every little imperfection and all legitimate details very clearly.

NOTE: held piece up to a bright light to see details better and thus why the green looks yellow

B-36 Peacemaker Builds 

On the Bench: B-36 paint test  fusealge & RB-36E assembly test build

In Que: YB-36 Conversion Build & B-36 carries B-58 Airframe to Wright Patterson

Conceptual Planning: RB-36 X-15 Mothership

  • Member since
    September 2011
  • From: North Texas
Posted by lajntx on Wednesday, November 20, 2013 10:05 PM

Teutonic222

So which green did you end up using?

#1920 - Army Green

B-36 Peacemaker Builds 

On the Bench: B-36 paint test  fusealge & RB-36E assembly test build

In Que: YB-36 Conversion Build & B-36 carries B-58 Airframe to Wright Patterson

Conceptual Planning: RB-36 X-15 Mothership

JOIN OUR COMMUNITY!

Our community is FREE to join. To participate you must either login or register for an account.

SEARCH FORUMS
FREE NEWSLETTER
By signing up you may also receive reader surveys and occasional special offers. We do not sell, rent or trade our email lists. View our Privacy Policy.