SEARCH FINESCALE.COM

Enter keywords or a search phrase below:

B-36 Peacemaker Group Build

173796 views
818 replies
1 rating 2 rating 3 rating 4 rating 5 rating
  • Member since
    September 2011
  • From: North Texas
Posted by lajntx on Saturday, November 9, 2013 9:56 PM

Teutonic222

Hello lajntx! Thanks for all of the helpful info.

 I want to ensure that the aircraft coming in for a landing (which will be cruising at about 7-1/2') is not without a full crew (at least in the front pressurized cockpit. Can't make any promises for the a** end of the plane. Let me know how you would like to handle it.

Are you going to add in the exhaust smudge on the engine pods and fuel leak stains to the white anti-flash underbelly for a real-life experience? Stick out tongue

B-36 Peacemaker Builds 

On the Bench: B-36 paint test  fusealge & RB-36E assembly test build

In Que: YB-36 Conversion Build & B-36 carries B-58 Airframe to Wright Patterson

Conceptual Planning: RB-36 X-15 Mothership

  • Member since
    September 2011
  • From: North Texas
Posted by lajntx on Saturday, November 9, 2013 9:49 PM

NP.

For the figures, just send me a message with your address and I`ll drop them in the mail in the next week or two when I get home.

The Wachsmuth book is a bit pricy but generally can be found on ebay in the $15-$30 range used -- pending of course how many listings there are at the time.

Go to b-36.net and join the discussion board. You`ll find B-36 veterans there than can answer most of your questions on the stenciling

Here`s some interesting things for you:

http://www.youtube.com/watch?v=VmG5uTVvS2c

Scroll to the 46:13 mark and you will see the actual delivery ceremony and take off of The City of Ft Worth when delivered to the AF and assigned to the  92nd BW

You will notice that the aft fuselage isignias have not yet been painted on.

Here is a photo of it ( on the right ) early in service and painted in 92nd BW colors flying over the Pacific to Guam

You will notice that the FWD upper flat doors have boxes on them. Those were used to collect upper atmosphere samples of residual radiation fallout from all the atomic tests there were going on in the Pacific in the 1950`s

B-36 Peacemaker Builds 

On the Bench: B-36 paint test  fusealge & RB-36E assembly test build

In Que: YB-36 Conversion Build & B-36 carries B-58 Airframe to Wright Patterson

Conceptual Planning: RB-36 X-15 Mothership

  • Member since
    November 2013
Posted by Teutonic222 on Saturday, November 9, 2013 9:20 PM

Hey Reasoned. I'm glad I offered some inspiration to get back working on the paint removal. Have you tried Earl Scheib?

I also plan to conduct some test sprays using the Dura-color paints and see how they turn out. I'll post photos. It might be a couple of weeks.

Unrelated to the B-36, but I just docked my Space Shuttle to the Intermountain ISS kit yesterday. I'll post some shots to prove I have at least built two models before the B-36.

I appreciate everyone's interest in this spectacular aircraft, model and my personal efforts on bringing one of these models to life. My wife thinks I'm a goof, but it keeps me from carousing around.

BTW lajntx, I like the OSHA warning sign. I live in metro Detroit. We invented stupid.

  • Member since
    November 2013
Posted by Teutonic222 on Saturday, November 9, 2013 9:15 PM

Hello lajntx! Thanks for all of the helpful info.

If your offer still stands, I would be happy to take six crew members off of your hands. I'll be turning some into amputees and major rework, but I want to ensure that the aircraft coming in for a landing (which will be cruising at about 7-1/2') is not without a full crew (at least in the front pressurized cockpit. Can't make any promises for the a** end of the plane. Let me know how you would like to handle it.

I found a copy of Wachsmuth's book on eBay and it's on it way to me. I only saw three used and the best price was $29. There was, of course, a new one out there for about $200 in case anyone feels compelled to get a fresh copy.

I have both Warbirds decal sheets (City of Fort Worth and the walkway detail). I was not looking forward to masking black lines all over the place.

Once I determine more of the little notices, I'll trying printing them on inkjet decal sheet. If I recall from some photos, they would put the names of the crew on the side of the aircraft. If that's accurate I think I'll use my dad's name and his best friend as the lead pilots in honor of their contribution to the B-36.

I'm not yet sure how I'll handle the blisters. Out of the factory: 0 up; 2 below. At GD/FW: 4 up, none below. At Pima: 4 up, none below. I guess this is where I take artistic license.

Thanks for the wing "tip." I was thinking of adding brass U-channel for strengtheners. Sounds like it's not a bad idea. I have lead for the nose weight, so I'm ready for it. Just gotta figure out how many pounds to through in there. :)

I think my wife and I may take a drive to Wright-Pat to check out their B-36 live. Should be able to get a lot more pictures of notices and landing gear bays if they let me get that close. We used to live in Columbus (I worked for an aerospace and defense contractor there), but never got to the Dayton museum. It's about 3-1/2 hours from home now, but that's not too bad.

  • Member since
    February 2011
  • From: Bent River, IA
Posted by Reasoned on Friday, November 8, 2013 6:52 AM

LOL

Science is the pursiut of knowledge, faith is the pursuit of wisdom.  Peace be with you.

On the Tarmac: 1/48 Revell P-38

In the Hanger: A bunch of kits

  • Member since
    September 2011
  • From: North Texas
Posted by lajntx on Thursday, November 7, 2013 8:57 PM

I`m coming back as well. I finally replaced my computer ( lost everything - files, pictures, etc).

Oh BTW... The OSHA man was here today making sure my build area was up to spec to work on this kit. He said he was coming by your place in the next week or two to clear you as well. He did say that this kit does come with new safety posters which much be displayed prior to building it. Here is one of them:

B-36 Peacemaker Builds 

On the Bench: B-36 paint test  fusealge & RB-36E assembly test build

In Que: YB-36 Conversion Build & B-36 carries B-58 Airframe to Wright Patterson

Conceptual Planning: RB-36 X-15 Mothership

  • Member since
    February 2011
  • From: Bent River, IA
Posted by Reasoned on Thursday, November 7, 2013 8:50 PM

Hey lajntx, it's great to see a post from you!  I've been checking in now and then on FSM and saw this "new" entry in the B-36 GB, tried to answer best I could, glad you stopped by to clear things up since you're the resident B-36 expertWink.  After reading this, I'm getting motivated to complete the paint removal and finish the beast up.

Science is the pursiut of knowledge, faith is the pursuit of wisdom.  Peace be with you.

On the Tarmac: 1/48 Revell P-38

In the Hanger: A bunch of kits

  • Member since
    September 2011
  • From: North Texas
Posted by lajntx on Thursday, November 7, 2013 8:28 PM

Another thing to get if you are going to build the City of Ft Worth is this new sheet from warbirds which will give you all the insignias & numbers needed to build it as it was during it`s 1959 retirement

www.ebay.com/.../131032537646

B-36 Peacemaker Builds 

On the Bench: B-36 paint test  fusealge & RB-36E assembly test build

In Que: YB-36 Conversion Build & B-36 carries B-58 Airframe to Wright Patterson

Conceptual Planning: RB-36 X-15 Mothership

  • Member since
    September 2011
  • From: North Texas
Posted by lajntx on Thursday, November 7, 2013 8:25 PM

Teutonic222

Geez, more questions. 

What a good time to come back... lots of questions I can answer or put you into the right direction. As far as the painting aspect goes.... You`ll have to get those answers from someone else as painting isn`t my thing. Now as to the City of Ft Worth......  Here`s some " News you can use."

I`ll do  a multiquote of all your posts rather than do them one by one. :

I have a few questions.

1. What is the best color to use for the cockpit? I've visited the Virtual Tour of cybermodeler online and the green almost has a blue cast. Is this real or is it just a bad white balance during the photo shoot or band rendering on my monitor (I know cameras and monitors tend to lean towards the blue). I would suspect the color should be olive drab. If so, any particular Testor color?

The walls, floor, & seat frames should be OD Green with the seat cushions either some sort of red or blue. The panels, consuls, equipment should be black. There should be plenty of pictures in the resources links.

2. Should the landing gear bays and landing gear doors (insides) be olive drab too, zinc chromate green, or something else?

The were OD Green in real life... How new or weathered & used you want them to look is up to you.

1. Did the B-36 have a white light mounted on the vertical stab? I know they had port and starboard wing lights (at least I think I knew that). 

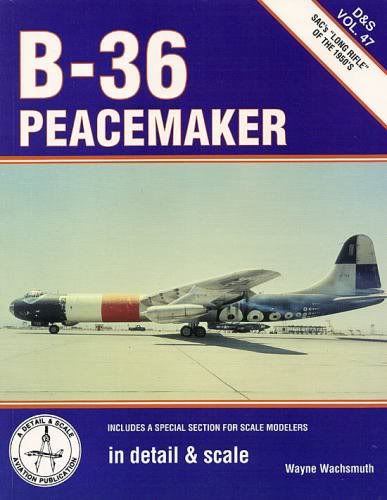
The 4 tail navigation lights had two each on both sides of the horizontal stabilizers. White inner, and Amber outer. The complete USAF technical drawing of the B-36`s exterior lighting is found on p.62 of B-36 Peacemaker in detail & scale by Wayne Wachsmuth. I cant repost the page on here due to copyright issues. You can find this book used fairly cheaply on ebay
2. I read in this post about some wing sagging in the model. Is this common and has anyone come up with a good solution? I was thinking of epoxying some brass U-channels in the wing and trying to figure out how to meld those up to the wing spars during assembly of the wings. I'm open to any suggestions.

Some have said it is a problem, and others have said they didnt have a problem. I think it comes down to certain kits and production runs. Considering this is a plastic model, any kind of support is going to give it help. On mine I simply found some # 2 pencils and used epoxy to attach them. A bonus is the lead stick is going to help as well. The biggest issue with this kit however is the center of gravity issue which needs to be fixed by putting some sort of ballast behind the cockpit to keep it from tilting back when sitting it on the table.
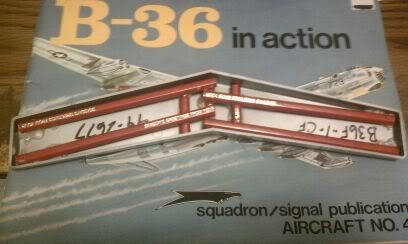


4. Has anyone super detailed the landing gear bays? I'm going bomb bays closed, but most gear bays look really devoid of detail, even though in real life they have a fair amount going on. The only shots I've seen are two photos on the cybermodeler site of the B-36J walk around (my plane). At a minimum I thought I could fake in some picture frame-type wire to duplicate hydraulic lines inside the bay.

The Wachsmuth book has the pictures you need in it.

Four more things.

1. My kit had only one broken propeller blade. The plastic gods must have been on my side.

You havent tried to build it yet, and you have insulted the plastic gods whom will teach you a lesson when it comes time to do the delicate work. Devil

2. On the www.planesofthepast.com/b36-pima-air-museum.htm site there is a photo of the port side of the plane near the pitot tube. There is some stenciling that says:

B-36-J-111-10-CF-52-2027

SERVICE THIS AIRCRAFT WITH GRADE

I 15/145 FUEL. IF NOT AVAILABLE T.O

NO. 06-41-1 WILL BE CONSULTED FOR

EMERGENCY ACTION.

SQ1

AUG-0

Unfortunately, some of the words are clipped off in the photo and I can't guess what is missing. I wanted to print out some of these types of decals, but needed the rest of the words.

Scratch what I posted earlier, there`s more too it and it`s going to take alot more squinting than I can do. You might want to send an email to PIMA and ask them to send you a copy of the text.

Here is another site that might help you

http://www.angelfire.com/dc/jinxx1/B36/B-36.html

3. Are there any other notices on the aircraft in addition to the ones included in Warbird decal sheet no. 72 003? The Warbird sheet has the "no step," "do not walk between lines," "fuel tank" and "oil tank" notices.

There are more such as plug indiacators, emergency exits, cut here in case of emergency, etc. There is no way to get these other than getting ahold of a 2002 Revell-Mongram Germany Kit with the decal sheet intact and in good useable condition. Expect to pay $75-$150 for this kit in that condition when it comes up on ebay. Also included will be the servicing & seriel stencils for the two craft the kit will produce. You can modify them or use them as templates to make your own
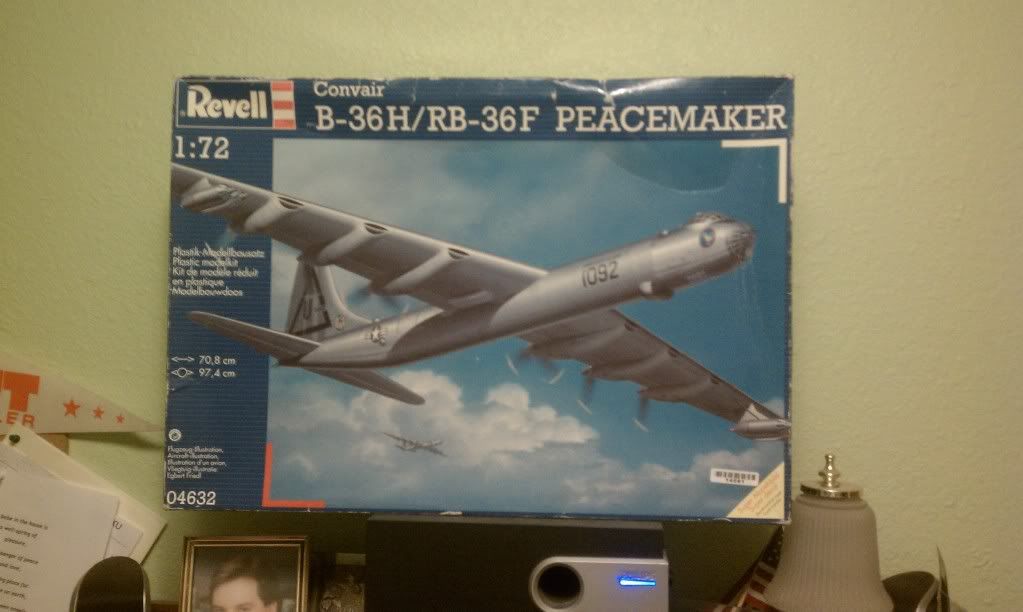

4. Where can one find some additional seated figures to augment the four that come with the model? It would be nice to fill out a few more of the seats.

Simple... They dont exhist unless you make them. If you will notice the seats in the lower bay are much smaller than the cockpit and the figures included. Thus, that is why I dont use the figures due to the scale issues with the lower nagation/radio deck. Ive got about 10 kits worth of figures if you want any of them.

Geez, more questions. The "City of Forth Worth" is a B-36J-III (Featherweight). I understand that the nose turret and internal turrets were removed, and the six blister windows were replaced with flush windows. However, looking at the photos of the plane parked at the old GD-FW site shows at least the top blisters in tact (can't say for sure about the bottom ones, although they appear to be flush). Is this a case where they couldn't find flush windows during restoration and used blisters, or something else?

Keen the eyes are with this one! All of your questions there are correct. You have also probably noticed that the craft as it currently sits at PIMA has even more blisters on it than were ever on it when it was in actual  serice. Most of the blisters were removed during the Featherweight program, and the J`s came out of the factory built on the Featherweight III standard with only the lower rear blisters so the engines could be monitored from the aft compartment. What happened happend was over the years as the plane  was moved from Amon Carter, to outside the gates of Carswell, and later into a storage hangar to undergo restoration was that the blisters were added to replace the flush ones until the flush ones could be restored/repaired/replaced. As you know, the museum in Ft Worth never happened, and it was carted up to PIMA where it was reassembled with the blisters on it. I`m told the actual flush pannels were sent with it, and PIMA never bothered to correct the issue when they put it back together.

B-36 Peacemaker Builds 

On the Bench: B-36 paint test  fusealge & RB-36E assembly test build

In Que: YB-36 Conversion Build & B-36 carries B-58 Airframe to Wright Patterson

Conceptual Planning: RB-36 X-15 Mothership

  • Member since
    November 2013
Posted by Teutonic222 on Thursday, November 7, 2013 6:23 PM

Geez, more questions. The "City of Forth Worth" is a B-36J-III (Featherweight). I understand that the nose turret and internal turrets were removed, and the six blister windows were replaced with flush windows. However, looking at the photos of the plane parked at the old GD-FW site shows at least the top blisters in tact (can't say for sure about the bottom ones, although they appear to be flush). Is this a case where they couldn't find flush windows during restoration and used blisters, or something else?

  • Member since
    November 2013
Posted by Teutonic222 on Thursday, November 7, 2013 6:07 PM

Four more things.

1. My kit had only one broken propeller blade. The plastic gods must have been on my side.

2. On the www.planesofthepast.com/b36-pima-air-museum.htm site there is a photo of the port side of the plane near the pitot tube. There is some stenciling that says:

B-36-J-111-10-CF-52-2027

SERVICE THIS AIRCRAFT WITH GRADE

I 15/145 FUEL. IF NOT AVAILABLE T.O

NO. 06-41-1 WILL BE CONSULTED FOR

EMERGENCY ACTION.

SQ1

AUG-0

Unfortunately, some of the words are clipped off in the photo and I can't guess what is missing. I wanted to print out some of these types of decals, but needed the rest of the words.

3. Are there any other notices on the aircraft in addition to the ones included in Warbird decal sheet no. 72 003? The Warbird sheet has the "no step," "do not walk between lines," "fuel tank" and "oil tank" notices.

4. Where can one find some additional seated figures to augment the four that come with the model? It would be nice to fill out a few more of the seats.

  • Member since
    November 2013
Posted by Teutonic222 on Thursday, November 7, 2013 1:15 PM

Thanks sanderson_91 and Reasoned. I appreciate the insight. As one might suspect, I have more questions. At least I'm not a newbie to aircraft, so I hope my questions won't be stupid. I worked in aerospace and defense for 15 years, grew up in the industry, and my brother was Navy air corps, so I had a lot of flight line viewing time growing up when we visited him at various NAS's. So here it goes:

1. Did the B-36 have a white light mounted on the vertical stab? I know they had port and starboard wing lights (at least I think I knew that). I used to paint marker lights and then clear coat, but I've used model railroad locomotive lights (little gem stones) to give some pop. A little drill out of the marker light position and then insert the gems. They really show off nicely. I recently finished the Intermountain International Space Station (1/144th) with the Space Shuttle docked (no marker lights), but the ISS has them (a la Star Trek). I worked on the ISS and a little on the shuttle, so they're now hanging in my office.

2. I read in this post about some wing sagging in the model. Is this common and has anyone come up with a good solution? I was thinking of epoxying some brass U-channels in the wing and trying to figure out how to meld those up to the wing spars during assembly of the wings. I'm open to any suggestions.

3. Have any of you tried the Dupli-color Chrome, Sliver Wheel Coating, or Stainless Steel Wheel Coating paints, as an alternative to Alclad or MM Metalizers? I know Dupli-color needs priming first so it doesn't craze the plastic. I bought some and plan to at least try out some test samples (if not for the B-36, then for something else).

4. Has anyone super detailed the landing gear bays? I'm going bomb bays closed, but most gear bays look really devoid of detail, even though in real life they have a fair amount going on. The only shots I've seen are two photos on the cybermodeler site of the B-36J walk around (my plane). At a minimum I thought I could fake in some picture frame-type wire to duplicate hydraulic lines inside the bay.

5. I have some significant rework of the glass. I've got my sandpaper, Brasso and toothpaste. Do most of you buff up the inside of the canopies too or just the exterior?

Thanks.

  • Member since
    February 2011
  • From: Bent River, IA
Posted by Reasoned on Tuesday, November 5, 2013 9:56 PM

Teutonic, first off heck yeah, this is a perpetual GB because once you start work on one of these beasts, a break is always in order to keep your sanityBig Smile!  So welcome!  Loved reading your personal story and tie-in regarding the "Mg Overcast".  As for your questions, it's been my understanding from research that the cockpit and any interior metal was standard ZC green.  I'll try and attach a link that has some pretty good model shots.  As for the exterior finish, Steve is correct that Alclad would probably give you the best finish options but if you read through this thread you may have seen the mess I made of it, which was my first try with it.  I made the mistake of using the B-36 as a test subject.  I have had good luck with MM Metalizers, so I wouldn't be afraid of them.  In fact that's what I'm using this go around (Al, Stainless and Mg).  The key with the "buffing" version is to buff out the loose paint then make sure you seal it with either the MM Sealer or use MM Gloss rattle can.  This just prevents getting the silver smear on everything once you touch it.  Good luck and look forward to seeing your progress.  I hope to get busy and back at the bench soon too.

http://www.network54.com/Forum/47751/message/1324147713/Monogram+B-36+Peacemaker+1-72+Scale

Science is the pursiut of knowledge, faith is the pursuit of wisdom.  Peace be with you.

On the Tarmac: 1/48 Revell P-38

In the Hanger: A bunch of kits

  • Member since
    December 2003
  • From: Charleston, SC
Posted by sanderson_91 on Monday, November 4, 2013 7:47 PM

Teutonic222,

I would recommend using Alclad II laquor paint instead of metalizers.  Sprue Brothers carries a large range of Alclad II colors.  You can seal with a clearcoat and then mask without worry of pulling up your color.  Here's a link: store.spruebrothers.com/.../1977.htm.  

Steve


  • Member since
    November 2013
Posted by Teutonic222 on Monday, November 4, 2013 1:17 PM

Well, I got my first post in on Metalizers and already have a change. Since the post I did more Metalizer research. I'm not sure I want to deal with the headaches of trying to successfully mask Metalizer (which apparently doesn't work well), dealing with decals (and clear coating over them), or the delicacies of handling. I'm pretty adept at modeling, but have never worked with Testors Metalizer and don't plan on working with Alclad.

Are there other alternative paints that will get me close to the aluminum and magnesium look, such as...?

   VHT Nu-cast Engine Coating: they are all rattle cans, but they have a color called "Cast Aluminum Look," which I suspect might be similar to magnesium. I'm concerned that it might spray too thick, although previous auto experience with VHT paints were pretty good.

   Dupli-Color Wheel Coating: comes in silver and graphite. Used to dress up worn out auto wheels (acrylic enamel). Claims to have a highly reflective metallic finish with superior adhesion to plastic.

   Eastwood Factory Gray High Temp Coating Spray: it says cast iron color, so it's probably way too dark, but at least my B-36 model could now withstand temps up to 1200 degrees.

I'm looking for a finish that is not as delicate as Metalizers and I can still mask and decal (and handle) carefully, but without paranoia of damage.

Thanks.

  • Member since
    November 2013
Posted by Teutonic222 on Monday, November 4, 2013 1:16 PM

Hello All:

I hope I can still get in on this forum. I just picked up a 1991 B-36 that I plan to model as City of Fort Worth. My dad and his best friend invented and designed the first alternator drive for the B-36. They both worked at Sundstrand. It was a $20 million contract in 1948 and put Sundstrand squarely into the aviation business. The alternator drive was, I believe, the first alternator-style device for generating on-board electricity. Prior to that planes used batteries or, I suspect, generators. The alternator drive allowed the variable speed from the engine to be converted to a constant speed output and thus efficient electrical generation. Thus, the B-36 has some emotional attachment to me. I even have his chromed B-36 desk ashtray.

I have a second attachment because I used to have business at GD/FW on a monthly basis and cruised past that B-36 every time I visited the plant. Truly a beautiful plane.There was also a great BBQ joint near the entrance. Thus, the City of Fort Worth seemed a natural.

I already have the diecast wheelsets by Scale Aircraft Conversion, the decals by Warbirds, the antenna wire by EZ Line, and plan to pick up the Click2Detail closed bomb bay doors (I'll be building wheels down).

I have a few questions.

1. What is the best color to use for the cockpit? I've visited the Virtual Tour of cybermodeler online and the green almost has a blue cast. Is this real or is it just a bad white balance during the photo shoot or band rendering on my monitor (I know cameras and monitors tend to lean towards the blue). I would suspect the color should be olive drab. If so, any particular Testor color?

2. Should the landing gear bays and landing gear doors (insides) be olive drab too, zinc chromate green, or something else?

3. I saw a previous posting that says Testors Metalizers are hard to mask over. Is this true? If so, are there any tips for making it easier or better. I plan to use Tamiya masking tape.

Thanks for your assistance. All 28 pages have been a great read.

I originally wrote this as a new post, but found out it doesn't place a new post into this forum.

Regards,

  • Member since
    December 2002
  • From: Northern California
Posted by jeaton01 on Sunday, September 15, 2013 10:50 PM

Oh, I'm still here too.  Finally finished all the work I was doing on the house and new workshop/storage shed and refinishing and insulating of my old workshop garage, so I'll be getting back to finishing my B-36 and a DH-9a soon.

John

To see build logs for my models:  http://goldeneramodel.com/mymodels/mymodels.html


  • Member since
    February 2011
  • From: Bent River, IA
Posted by Reasoned on Sunday, September 15, 2013 10:00 PM

Well, since it's been almost 2 months since the last post, figured I'd update.  FINALLY getting back to this build which involves stripping the initial botched Alclad finish off, what funIck!.  The Super Clean does make this job much easier than Simple Green but it is still a PIA.  Once I get it all cleaned up I'll post a pic of the plucked bird.  Fortunately, most of the other parts are already painted and ready to go on for final assembly but the real kicker is going to be the MASSIVE amount of paint finish followed by TONS of decal placements, given all the wing walk markings.  Anywho, I sure hope there are a few stragglers following this GB still, lajntx, Magoo, jeaton, boxcar?

Science is the pursiut of knowledge, faith is the pursuit of wisdom.  Peace be with you.

On the Tarmac: 1/48 Revell P-38

In the Hanger: A bunch of kits

  • Member since
    May 2009
  • From: Riverton, Wyoming
Posted by Andrew Magoo on Thursday, July 18, 2013 12:52 AM

I haven't been able to find an old B-52D kit on ebay or at a garage sale that some one has either put together or started and stopped so I can salvage the engine pods from it. Stripping the paint I used easy off oven cleaner and make sure it sits for an hour and that it doesn't dry out on you. If it starts to dry spray it again. Also make sure you  mask and plug holes and entry areas the oven cleaner raises issues with a new paint job. After an hour wash and scrub with dish soap detergent and a tooth brush. Magoo

  • Member since
    February 2011
  • From: Bent River, IA
Posted by Reasoned on Wednesday, July 17, 2013 9:53 PM

.44 mag shell case........ LOL, given the shortage of ammo out there I'm glad you found some!

Looking good magoo, glad to hear about eye situation.  I'd forgotten you were doing the B-60, so you got some serious modifications on the way.  Where did you find the additional engine pods?  Oh, and what did you strip the paint on your B-36 with?

Science is the pursiut of knowledge, faith is the pursuit of wisdom.  Peace be with you.

On the Tarmac: 1/48 Revell P-38

In the Hanger: A bunch of kits

  • Member since
    May 2009
  • From: Riverton, Wyoming
Posted by Andrew Magoo on Wednesday, July 17, 2013 3:53 AM

Next I liberally applied gap filling super glue to the plug and the camera bay door indentations and slide rail grooves.

When using gap filling super glue, after appling the setting agent you have to start sanding right away as fast as you are carefully able to do.

Next the gun blister holes. First I removed the gun sites.

Cutting a curved plug for the gun site blister holes wound up being easer that I though it would be. the bomb bay door material again came to my rescue. All I had to do was figure out a way to cut or stamp out some plugs. The more I looked at the holes the more I decided they were about the size of a .44 calibur bullett. Sure enough they were. so I took a .44 magnum shell case, hammer, and a piece of plywood and punched out some plugs.

Using a razor blade I cleaned up the edges by scraping off the burrs.

Next came installing the plugs. To keep the plugs from possibly falling through into the fuselage I used the green masking tape and gentley massaged the plug into place.

Then more super glue and I also filled in the door slide rails for the top gun turrets.

Then the back two.

The rear gun turret door slide rails were also filled with super glue and sanded flat.

This summer has been a busy one with not a lot of time to enjoy model work.

  • Member since
    May 2009
  • From: Riverton, Wyoming
Posted by Andrew Magoo on Wednesday, July 17, 2013 3:01 AM

Moving right along with the YB-60 next up the radom plug. I scribed along the inside of the plug and snapped off the excess material.

The hole in the fuselage was pretty rough and so was the plug. through several trimmings and dry fits the plug was ready for installation.

Using one of the  bomb bay doors I cut off a piece and then cut the short piece in half.

I used the two small half pieces as supports for the radom plug. I used gap filling super glue to glue the half pieces to the inside of the fuselage.

I had put too much pressure on one piece and not enough pressure on the other piece this required a small slice out of one to allow the plug to go down into the hole. the other side I used a small piece of scrap plastic to keep the plug from settling to deep into the hole.

Next I snapped the radom plug into place.

  • Member since
    May 2009
  • From: Riverton, Wyoming
Posted by Andrew Magoo on Wednesday, July 17, 2013 2:26 AM

Hi Reasoned, the eyes are way better 20/20 in the left and 20/30-40 in the right with tri-focal lenses of course. I do think it was lajntx that had the clear plug. The plug I used came with the conversion kit. I used it because my fuselage was already glued together because I used an already built B-36H as a base to build from. I will eventually scribe in the bomb bay doors when I get to that point. Magoo

  • Member since
    February 2011
  • From: Bent River, IA
Posted by Reasoned on Tuesday, July 16, 2013 10:12 PM

Hey Magoo good to hear from you, hope your eye issues are resolved and fantastic work!  Your cockpit figure detail looks pretty darn good from what I can see.  I think using the plug is the way to go, I originally wanted the bomb-bay closed but couldn't work it with the kit doors. Where did you come up with that from?  I see that it's a conversion kit but the plug I remember seeing was transparent looking........ I think.  It may have been in a previous post by lajntx.  BTW, anybody hear from him?

Science is the pursiut of knowledge, faith is the pursuit of wisdom.  Peace be with you.

On the Tarmac: 1/48 Revell P-38

In the Hanger: A bunch of kits

  • Member since
    May 2009
  • From: Riverton, Wyoming
Posted by Andrew Magoo on Tuesday, July 16, 2013 9:53 PM

I tried to sand off the paint from inside the bomb bay for better glue adhesion with a mesh sanding pad.

However, I wound up using a paper towel dampened with laquer thiner to take the paint off it was way faster.

I just did the lower area of the bomb bay.

Next was inserting the plug and three of the doors. I used the doors as filler material.

I had a centering issue so a piece of 0.030 inch thick plastic card stock was used on the right side to center the plug andfill the gap.

Using a straight edge to make sure thr plug/doors were level and flush with the fuselage I then started gluing the plug in place with gap filling super glue.

Both ends first.

Then the sides including in-between the card stock.

The next step was to fill in the gaps in the filler plug/doors with gap filling super glue.

Next was scribing along the excess plug material and card stock and snapping off the excess.

Thensanding the fill plug level with he fuselage. there were some hole that had to be filled in with super glue and resanded but it all went pretty smoothly.

  • Member since
    May 2009
  • From: Riverton, Wyoming
Posted by Andrew Magoo on Tuesday, July 16, 2013 6:45 PM

be back shortly, Magoo

  • Member since
    May 2009
  • From: Riverton, Wyoming
Posted by Andrew Magoo on Tuesday, July 16, 2013 6:44 PM

The conversion kit comes with a bomb bay plug and I think bomb bay doors. The plug is a little long so I trimmed both ends off rather than enlargening the bomb bay.

  • Member since
    May 2009
  • From: Riverton, Wyoming
Posted by Andrew Magoo on Tuesday, July 16, 2013 6:15 PM

I seem to only be able to post one picture at a time. What am I doing wrong? Magoo

  • Member since
    May 2009
  • From: Riverton, Wyoming
Posted by Andrew Magoo on Tuesday, July 16, 2013 6:11 PM

  • Member since
    May 2009
  • From: Riverton, Wyoming
Posted by Andrew Magoo on Tuesday, July 16, 2013 4:29 AM

Ok the rest of the document didn't post nor did the pictures... Hmmm?

JOIN OUR COMMUNITY!

Our community is FREE to join. To participate you must either login or register for an account.

SEARCH FORUMS
FREE NEWSLETTER
By signing up you may also receive reader surveys and occasional special offers. We do not sell, rent or trade our email lists. View our Privacy Policy.