SEARCH FINESCALE.COM

Enter keywords or a search phrase below:

That's Amore (Italian GB) Jan 1-June 30 2012

107077 views
898 replies
1 rating 2 rating 3 rating 4 rating 5 rating
  • Member since
    March 2003
  • From: Rain USA, Vancouver WA
Posted by tigerman on Wednesday, June 27, 2012 1:14 PM

That's a much more convincing look of weathering around the bolts then my Semovente Ernest. Looks great. Love the mufflers too.

Bsyamato, not sure what you mean? Yes you get the badge for finishing the build. It's on page 1.

   http://i7.photobucket.com/albums/y269/wing_nut_5o/PANZERJAGERGB.jpg

 Eric 

  • Member since
    December 2002
  • From: NYC, USA
Posted by waikong on Wednesday, June 27, 2012 11:26 AM

Ernest, looking really nice.

  • Member since
    October 2008
  • From: italy
Posted by bsyamato on Wednesday, June 27, 2012 8:48 AM

You did a perfect and clean work Ernest Bow Down

  • Member since
    July 2006
  • From: San Francisco Bay Area
Posted by bufflehead on Tuesday, June 26, 2012 11:48 PM

stik - the Autoblinda is coming along great!  I've got faith that you'll get it done in time!

Well, lets see how this works out with the new-look forum!

Update on the Zvezda M-13/40:  Decals applied and pinwash done while its still glossy.  The pinwash it purposely done on the darker side as I anticipate the flat coat and subsequent weathering to reduce the contrast quite a bit.

Work has progressed, but not yet been completed on the tools:

the mufflers: My camera always captures red and orange hues VERY vividly, hence the over rusty look.  They're actually more brown.

the fuel cans:   OOPS I totally jacked up the water can in the middle!!  Jack's great photo of the Italian water can shows it as a dark looking green, with a white strip and the ACQUA in black.  For some reason I thought it was a sand color with a dark green strip and white letters.....DOH!!Dunce

the MG:  The MG cradle fell off the turret and disappeared into the kit part Bermuda Triangle (which seems to be centralized just under my work bench!)  I can't blame the Carpet Monster since I have all wood floors.....Angry.  Probably means I won't mount the MG after all.  Maybe after the GB I'll find time to scratchbuild a replacement.


Work also done on the jack, the tow chain and the periscope, but I not enough to take pics.  Still aiming to hit that end date target!!


Ernest

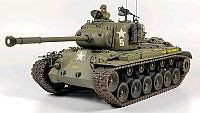
Last Armor Build - 1/35 Dragon M-26A1, 1/35 Emhar Mk.IV Female
     

Last Aircraft Builds - Hobby Boss 1/72 F4F Wildcat & FW-190A8


  • Member since
    October 2008
  • From: italy
Posted by bsyamato on Monday, June 25, 2012 5:56 AM

Well done Stik , i'm sure you can finish before the deadline Yes

Tigerman i could put on the badge? i forget about Indifferent

  • Member since
    July 2004
  • From: Sonora Desert
Posted by stikpusher on Monday, June 25, 2012 12:08 AM

Well if the weather had not been so nice on my past few weekends on my days off I would have been... but the good weather beckoned Paradiseand model building has taken a back seat lately...Whistling I may be able to get it in under the wire by midnite on the 30th... Thank goodness it is in a monotone scheme. I finished putting on all the PE this evening and the metal is now ready for primer coat.


F is for FIRE, That burns down the whole town!

U is for URANIUM... BOMBS!

N is for NO SURVIVORS...

       - Plankton

LSM


  • Member since
    March 2003
  • From: Rain USA, Vancouver WA
Posted by tigerman on Sunday, June 24, 2012 11:12 PM

For some reason, I thought you were finished Stik. Well good to see progress. Hope you can finish before the deadline.

   http://i7.photobucket.com/albums/y269/wing_nut_5o/PANZERJAGERGB.jpg

 Eric 

  • Member since
    July 2004
  • From: Sonora Desert
Posted by stikpusher on Sunday, June 24, 2012 10:08 PM

bufflehead

 jgeratic1:

Both methods though can look more spanish than realistic if over done. Cool

regards,

Jack


Jack, what do you mean by "spanish"?  Are you referring to the "Spanish" school of painting and weathering armor?

Well it's not the Spanish Inquisition... we were not expecting that here... Whistling

My Italian Job is almost ready for paint. I finsihed the armament, water cans, and ammo box today. I still need to add a few more little bits of photo etch over the next few days, then priming and painting will begin...

Anyways, the remaining unmounted water cans, PE sand channels, and ammo box- I dressed up the surface a bit with dragging a saw lade across the surface of the sides for wood grain.

Water cans installed on teh sides and main gun and machine gun mounted

and finally everything together


F is for FIRE, That burns down the whole town!

U is for URANIUM... BOMBS!

N is for NO SURVIVORS...

       - Plankton

LSM


  • Member since
    April 2006
  • From: ON, Canada
Posted by jgeratic on Sunday, June 24, 2012 3:48 AM

I think the first time I ever ran across the term spanish method was last year, on another forum - possibly Britmodeller.   I'm familiar with aircraft done this way,  not so much with armour, but I can certainly can see it done in that style as many techniques can cross over between the two categories. 

Nor am I aware of the exact definition or  who started it.  From what I can tell, the subject is painted up to be more a feast for the viewer's eye while realism is of secondary importance.  It looks very high contrast and the weathering is definitely not subtle. 

It really looks amazing and I've nothing against it.  Everyone is different and there is no correct way of finishing a model subject.  I think most proponents of this method realize they have gone beyond realism, and are more concerned with achieving that wow factor.  Unfortunately, some that are newer to the hobby, find it so staggering that they feel like throwing their current build into the trash - lol.

regards,

Jack

  • Member since
    July 2006
  • From: San Francisco Bay Area
Posted by bufflehead on Sunday, June 24, 2012 12:52 AM

jgeratic1

Both methods though can look more spanish than realistic if over done. Cool

regards,

Jack

Jack, what do you mean by "spanish"?  Are you referring to the "Spanish" school of painting and weathering armor?

Ernest

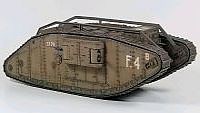
Last Armor Build - 1/35 Dragon M-26A1, 1/35 Emhar Mk.IV Female
     

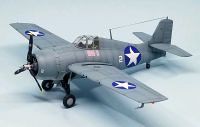
Last Aircraft Builds - Hobby Boss 1/72 F4F Wildcat & FW-190A8
     

  • Member since
    April 2006
  • From: ON, Canada
Posted by jgeratic on Saturday, June 23, 2012 7:14 PM

bufflehead

Thanks guys!  BTW is this PREshading or POSTshading?? 

I'd say it is pre-shading as it finished off with the main colour over top. 

Both methods though can look more spanish than realistic if over done. Cool

regards,

Jack

  • Member since
    July 2006
  • From: San Francisco Bay Area
Posted by bufflehead on Saturday, June 23, 2012 7:01 PM

Thanks guys!  BTW is this PREshading or POSTshading?? Confused  LOL! 

waikong, I've never tried doing the preshading on top of the primer, before the basecolor.  The last few times I did this I needed to get the base color on first to determine if my handmixed color was OK.  Same with this build.  Once the basecolor is deemed acceptable I add the shading.  I might try the primer/preshade on my next dunkelgrau panzer paint job since I pretty much know what color gray to use!  Plus gray paint over gray primer should be really easy.....AND would save that time consuming extra painting step as you mentioned!

Gloss coat applied to the M-13/40 last night.  I've been busy today doing chores, but I'm back a the bench now and will start adding the decals!  Pics tomorrow.

Ernest

Last Armor Build - 1/35 Dragon M-26A1, 1/35 Emhar Mk.IV Female


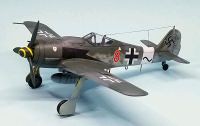
Last Aircraft Builds - Hobby Boss 1/72 F4F Wildcat & FW-190A8
     

  • Member since
    December 2002
  • From: NYC, USA
Posted by waikong on Friday, June 22, 2012 8:47 AM

Thanks, Buff - that's a nice effect on the tank. Have you ever thought about or tried forgoing the initial sand color and just lay the preshadin right on the primer? Seems like if you primer is a light color, that would work out and save a step? Just wondering - 'cause I'm bascially a lazy!

  • Member since
    October 2008
  • From: italy
Posted by bsyamato on Friday, June 22, 2012 8:04 AM

bufflehead


... Surprise  hehe!  Don't know much about Italian planes, but this one's obviouisly a beaut!  Love the camo and markings! 


Embarrassed it's not so long i know re-2001 -2002 existed ..


Great painting on the tank YesYes

  • Member since
    March 2003
  • From: Rain USA, Vancouver WA
Posted by tigerman on Friday, June 22, 2012 1:40 AM

Never tried that affect yet Ernest, but it does appear effective. I imagine it would work great for panel lines on A/C

   http://i7.photobucket.com/albums/y269/wing_nut_5o/PANZERJAGERGB.jpg

 Eric 

  • Member since
    July 2006
  • From: San Francisco Bay Area
Posted by bufflehead on Friday, June 22, 2012 12:10 AM

Dang!  Things are moving fast around here!

bsyamato - the Falco turned out great!  I also love the Italian plane against a real Italian backdrop! Yes

waikong - HUH?  Another Falco, but his one a bipe??   Surprise  hehe!  Don't know much about Italian planes, but this one's obviouisly a beaut!  Love the camo and markings! 

Still working on the M-13/40 and I'm determined to get her done by the end of the month!   After basecoating Italian Yellow Sand I lightened the color quite a bit and highlighted all the upper panels.  Followed this with my usual method of shading all nooks, corners, edges and even some rivets with a very dark brown using the AB. I know it looks terrible, but there's a method to my madness!! Propeller

Then its all blended back together with light mist coats of the first Yellow Sand base color.

I've been using this method for the last couple of years on single color tanks and really like it!  Next up is a gloss coat for the decals!

Ernest

Last Armor Build - 1/35 Dragon M-26A1, 1/35 Emhar Mk.IV Female


Last Aircraft Builds - Hobby Boss 1/72 F4F Wildcat & FW-190A8


  • Member since
    October 2008
  • From: italy
Posted by bsyamato on Thursday, June 21, 2012 4:04 PM

LOL Falco I and Falco II in the same page Big Smile

Good work Waikong

Thanx TD

  • Member since
    March 2006
Posted by TD4438 on Thursday, June 21, 2012 3:37 PM

Nice job bs and Waikong.

  • Member since
    December 2002
  • From: NYC, USA
Posted by waikong on Thursday, June 21, 2012 3:28 PM

Thanks for the comments.

Jack, the kit is pretty good, the only thing that's going to be a problem is thet structs length's aren't quite 'together'.  But then, it's a problem with most biplanes I've come across. I started with the inner structs, then two of the out structs are just a bit too short.. It reaches, but the pins will not fit entirely into their mating holes. I just added extra CA glue to close the gap.

  • Member since
    March 2003
  • From: Rain USA, Vancouver WA
Posted by tigerman on Thursday, June 21, 2012 1:03 PM

Waikong, glad you were able to slide this across the finish line in time. Definitely something I'm not used to seeing. Nice camo job on her.

   http://i7.photobucket.com/albums/y269/wing_nut_5o/PANZERJAGERGB.jpg

 Eric 

  • Member since
    April 2006
  • From: ON, Canada
Posted by jgeratic on Thursday, June 21, 2012 12:00 PM

waikong - I forgot you were doing this and then, all of a sudden, whomp there it is.  Very cool looking build.  Have this one in my stash, anything to look out for?

regards,

Jack

  • Member since
    December 2002
  • From: NYC, USA
Posted by waikong on Thursday, June 21, 2012 10:11 AM

A few more days left to the extended deadline, and I finally make it across the finish line. Here's my Cr.42 LW Falco - Italeri 1/48 kits - in Luftwaffe markings.

I have more finished and midbuild pictures here http://waihobbies.wkhc.net/models/cr42_Falco/cr42lw.html

Thanks everyone for a great GB.

  • Member since
    October 2008
  • From: italy
Posted by bsyamato on Wednesday, June 20, 2012 3:02 PM

Thanx guys really appreciated Bow Down

Jack i need a photobooth to take good inside pictures, the flash burn all the real colrs :( next time i'll try at least sunset pictures ,the above pictures was take about 12:30 am)

Eric what's about the veltro? it's impossible to finish it for the end of this month Embarrassed 

  • Member since
    April 2009
  • From: Carmel, IN
Posted by deafpanzer on Wednesday, June 20, 2012 2:16 PM

Bsyamato- Outstanding work on that wingy thing!!!

I am still following all of great builds here... keep them coming. Yes

Andy

  • Member since
    March 2003
  • From: Rain USA, Vancouver WA
Posted by tigerman on Wednesday, June 20, 2012 12:03 PM

Can't get any more real then an italian bird with a real Italian backdrop. Another nice entry to the GB.

   http://i7.photobucket.com/albums/y269/wing_nut_5o/PANZERJAGERGB.jpg

 Eric 

  • Member since
    April 2006
  • From: ON, Canada
Posted by jgeratic on Wednesday, June 20, 2012 11:25 AM

bsyamato - a gem of a build you got there.  Really like the tonal variations achieved with the green.  I actually prefer the indoor pictures, so which set of pics is more true to the colour you have used?

regards,

Jack

  • Member since
    October 2008
  • From: italy
Posted by bsyamato on Wednesday, June 20, 2012 8:53 AM

Here the finished production, needed to take the pictures rapidly ,sun was too hot Dead

here the complete gallery :D 

re-2001 gallery

really fun buil was Cool

  • Member since
    March 2003
  • From: Rain USA, Vancouver WA
Posted by tigerman on Wednesday, June 20, 2012 12:18 AM

Great work bsyamato and Ernest. Glad to see you guys still plugging away.

   http://i7.photobucket.com/albums/y269/wing_nut_5o/PANZERJAGERGB.jpg

 Eric 

  • Member since
    July 2006
  • From: San Francisco Bay Area
Posted by bufflehead on Wednesday, June 20, 2012 12:08 AM

bsyamato - looking good!  Luv the detail work!

All that work to get it together just to tear it apart for painting!  Primered with Tamiya Fine Surface Primer (light gray).

Base coated with a mix of Tamiya acrylics:  XF-60 Dark Yellow, XF-59 Desert Yellow, XF-2 Flat White, and XF-66 Light Gray  (percentage: 35/35/20/10).  It looks pretty good to me! 

Ernest

Last Armor Build - 1/35 Dragon M-26A1, 1/35 Emhar Mk.IV Female


Last Aircraft Builds - Hobby Boss 1/72 F4F Wildcat & FW-190A8


  • Member since
    October 2008
  • From: italy
Posted by bsyamato on Tuesday, June 19, 2012 6:27 PM

RRB good progress there Yes

bufflehead fine detail work Bow Down

Here last reggiane updates :

modified the main gears actuator

the two canopy pieces glued together 

other minor adjusts as pitot tubes replaced , last paints , glued all pieces , added vertical rudder trim actuator etc etc.. and the Falco II is ready to fly Propeller

tomorrow outdoor pictures (it's 1:26 AM and is har to find the sun switch DeadToast


JOIN OUR COMMUNITY!

Our community is FREE to join. To participate you must either login or register for an account.

SEARCH FORUMS
FREE NEWSLETTER
By signing up you may also receive reader surveys and occasional special offers. We do not sell, rent or trade our email lists. View our Privacy Policy.