SEARCH FINESCALE.COM

Enter keywords or a search phrase below:

First Annual Berny Memorial Group Build

225097 views
3649 replies
1 rating 2 rating 3 rating 4 rating 5 rating
  • Member since
    November 2009
  • From: SW Virginia
Posted by Gamera on Sunday, February 3, 2013 8:16 PM

Hey Ken, looks good! I hate to grind down detail parts like that to get them to fit, I'm scared I'll go a little too far!

"I dream in fire but work in clay." -Arthur Machen


  • Member since
    November 2010
  • From: Lafayette, Indiana
Posted by Son Of Medicine Man on Sunday, February 3, 2013 8:29 PM

Gamera

Hey Ken, looks good! I hate to grind down detail parts like that to get them to fit, I'm scared I'll go a little too far!

I know what you mean Cliff.  I have been taking care and going slow.

One thing I noticed is that all this resin has added a lot of weight to the front of this Phantom.  I don't know if I will need to worry about it sitting on it's tail!  Of course I will be adding resin exhaust so maybe I will have to worry about it.

Ken

  • Member since
    April 2012
  • From: USA
Posted by Striker8241 on Sunday, February 3, 2013 9:32 PM

Son Of Medicine Man

Hi Everyone!

I am still plugging away at shoehorning the cockpit, avionics bay, and front wheel bay into the fuselage.  The main problem is that the Aires cockpit instructions are quite lacking in what needs to be done to make it fit!  They make great cockpits but they sure could make better instructions!

~

I have been spending most of the evening filing, sanding, test fitting, repeat.  I have been also sanding on the inside of the fuselage.  It is getting pretty close but I am ready to call it a night.

Ken 

Wow! That is really looking good, Ken! Makes me want to start on my F-4!  Ahh, but F-111 first...Smile

Great job! Yes Yes

Russ


  • Member since
    June 2009
Posted by jimbot58 on Sunday, February 3, 2013 10:43 PM

Son Of Medicine Man

Hi Everyone!

I am still plugging away at shoehorning the cockpit, avionics bay, and front wheel bay into the fuselage.  The main problem is that the Aires cockpit instructions are quite lacking in what needs to be done to make it fit!  They make great cockpits but they sure could make better instructions!

Today I discovered that the ledge built into the fuselage that is behind the rear seat needs to be removed shown here:
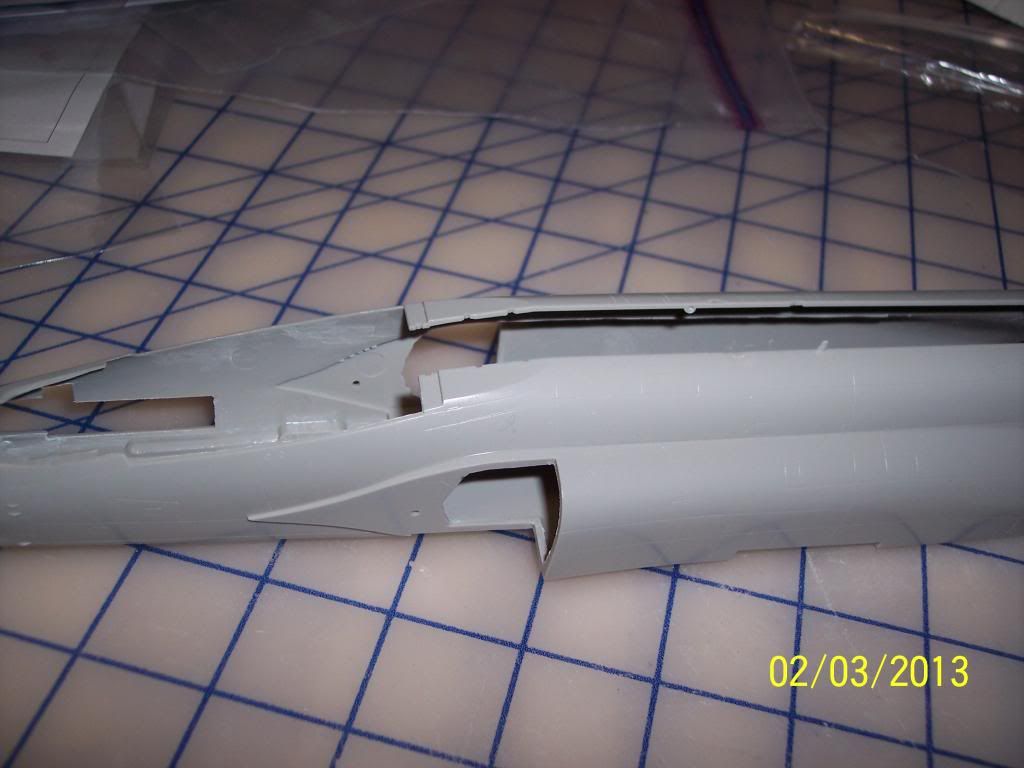
Here it is removed:
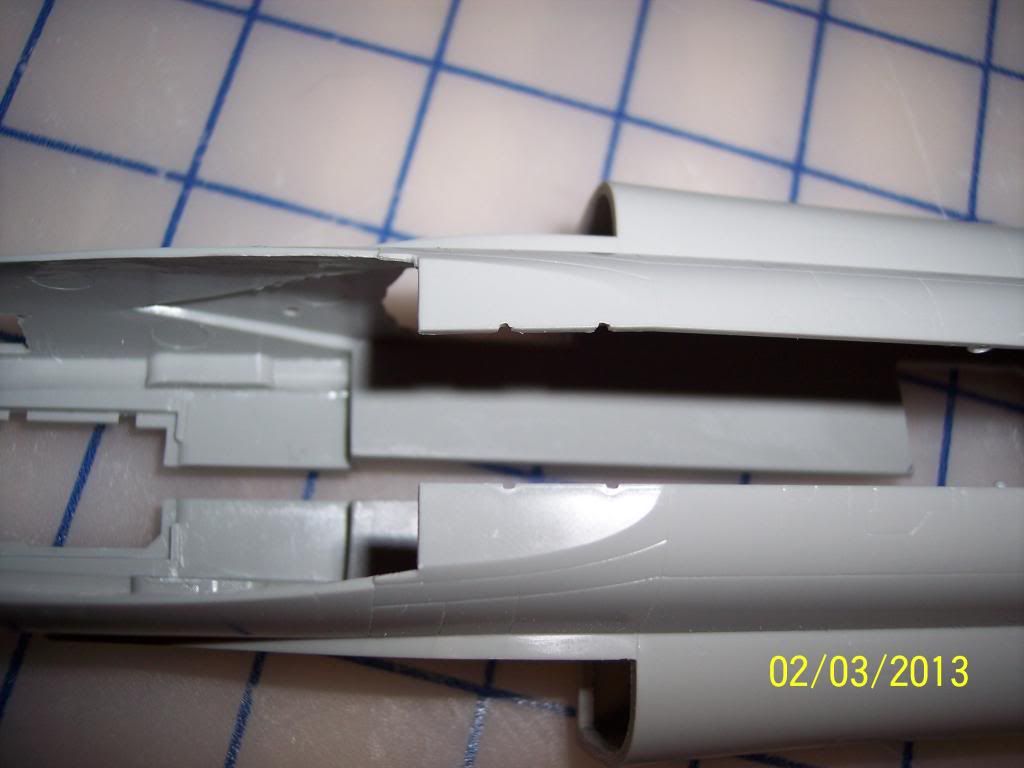
 

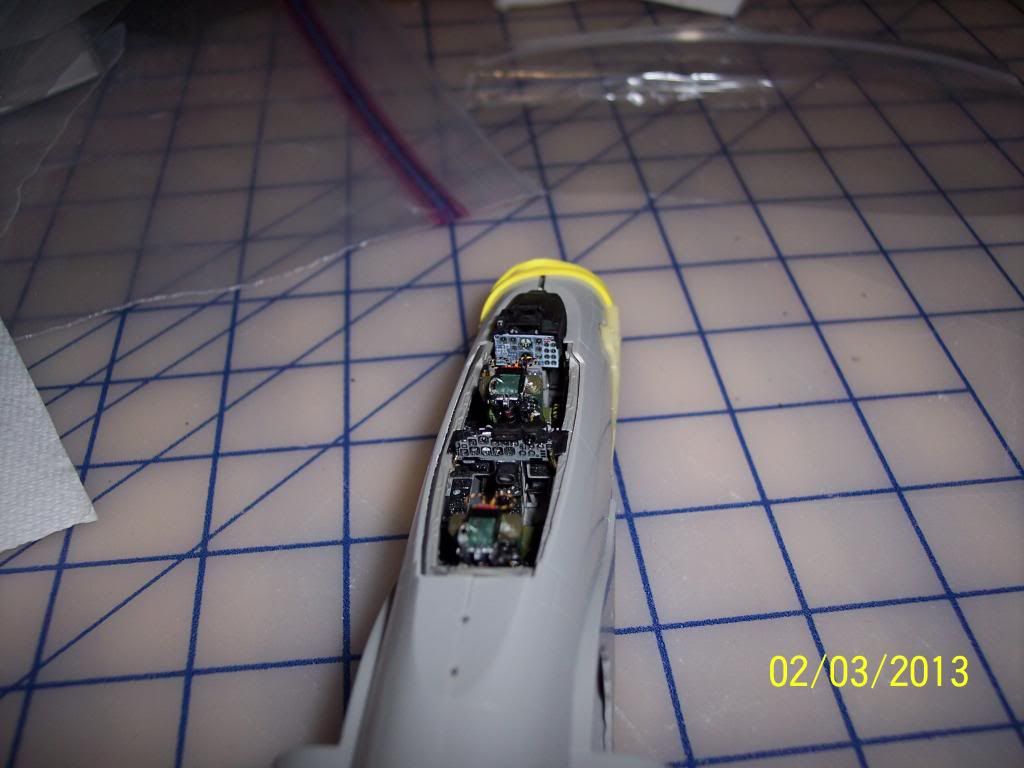
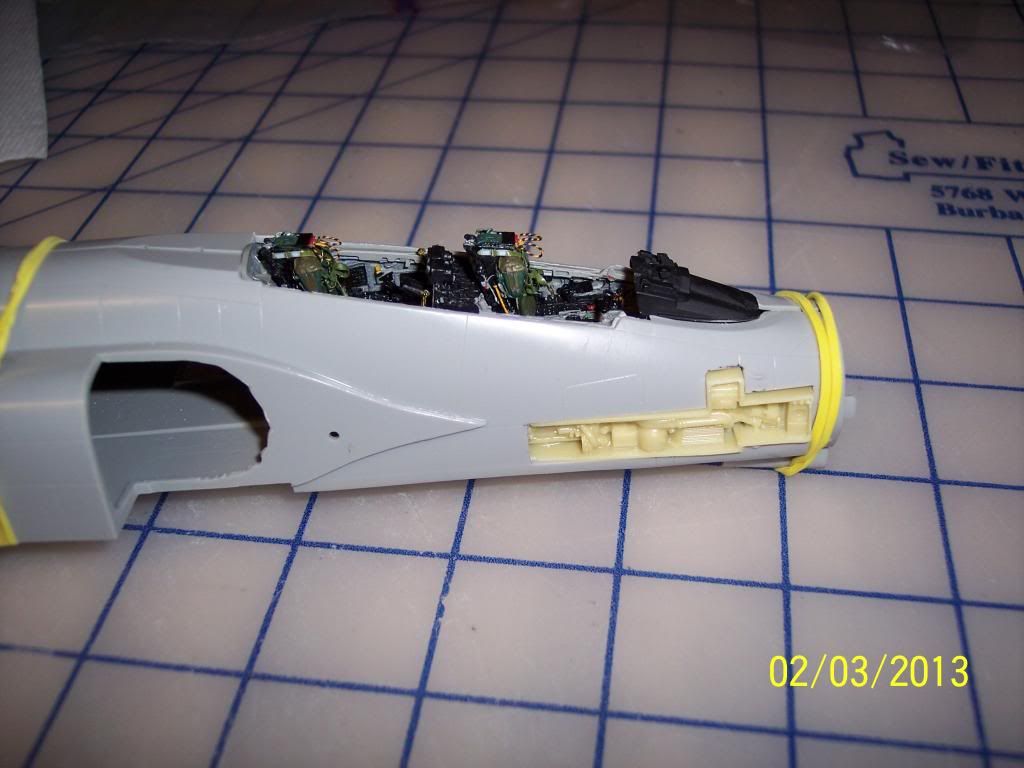
At this point I could finally get everything stuck into the fuselage and rubberband it together to get an idea how it was going to fit.  Here are a few shots:
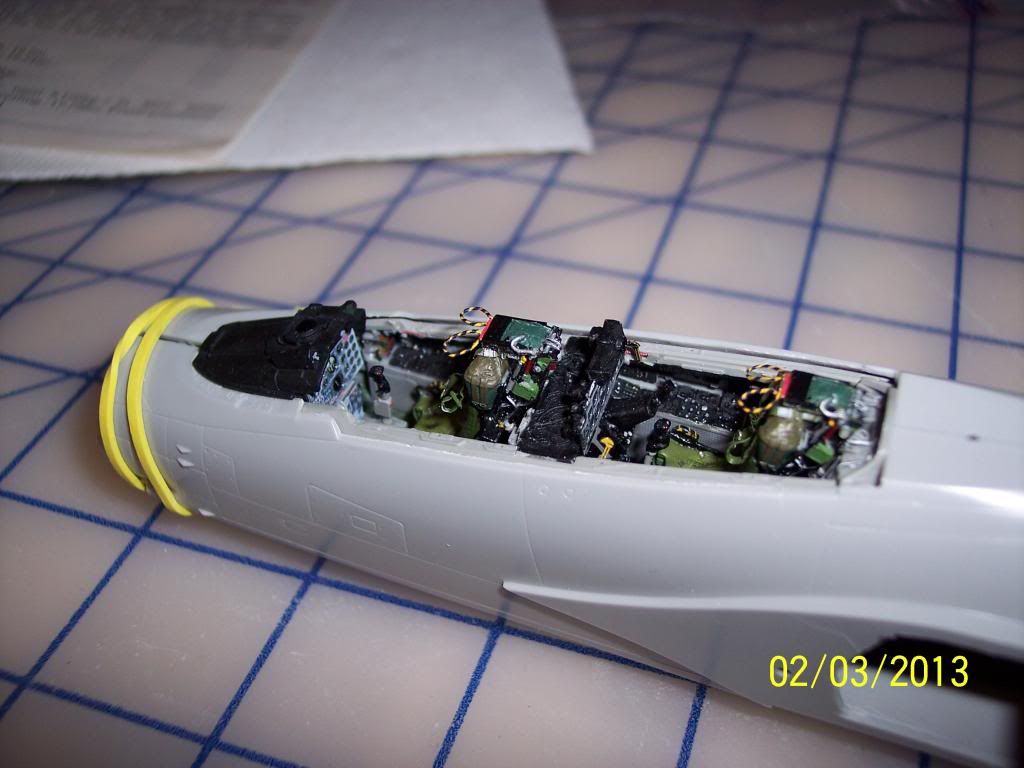
 

 As you might suspect, it is a bit crowded in there!  But I am surprised that it almost fits together.  I am pretty sure I will be able to make it all fit.  It is going to take some careful work.

The biggest thing is the avionics bay is wanting the same space as the cockpit.  Here is a picture peeking inside and you can see them against each other:
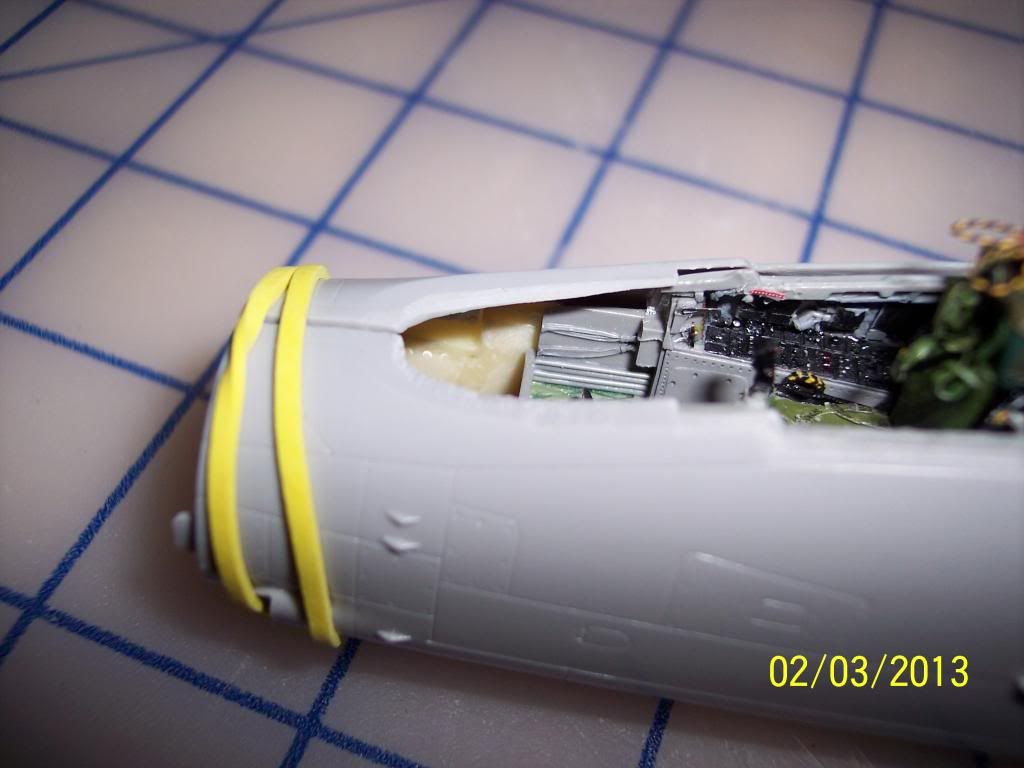
 This next picture shows where I have marked off the area that needs to be filed down to make room:
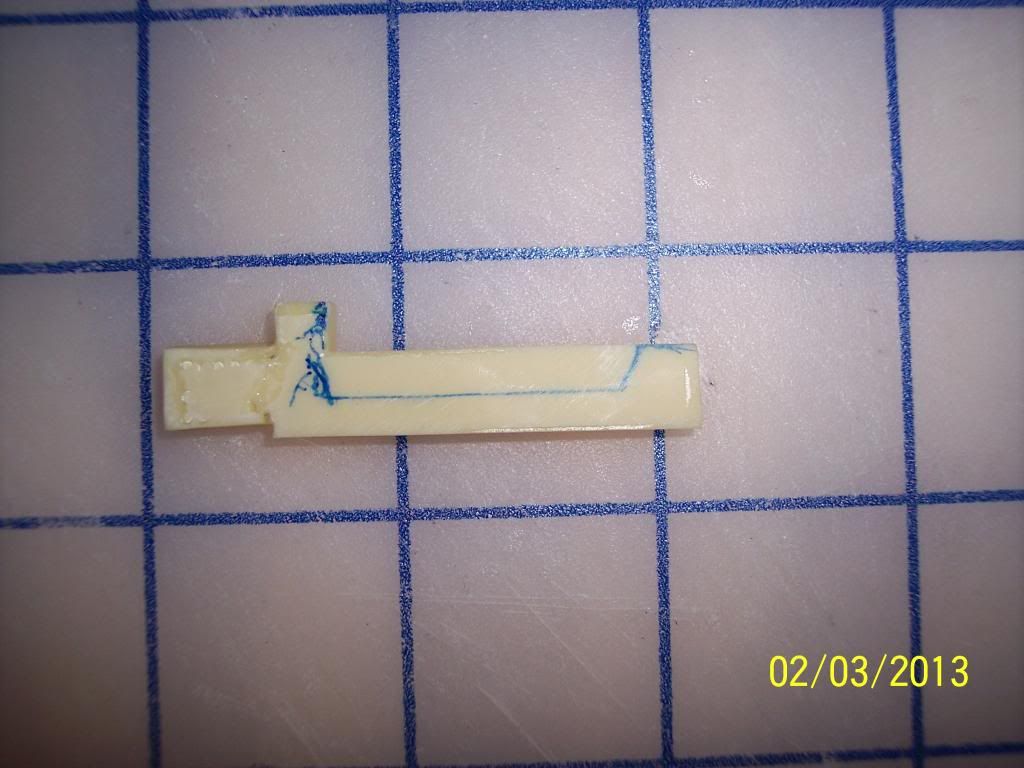
I have been spending most of the evening filing, sanding, test fitting, repeat.  I have been also sanding on the inside of the fuselage.  It is getting pretty close but I am ready to call it a night.

Ken 

That's a lot of work, Ken! Seems it might be easier to build a real one!

*******

On my workbench now:

It's all about classic cars now!

Why can't I find the "Any" key on my keyboard?


  • Member since
    November 2010
  • From: Lafayette, Indiana
Posted by Son Of Medicine Man on Monday, February 4, 2013 5:44 AM

Striker8241

Wow! That is really looking good, Ken! Makes me want to start on my F-4!  Ahh, but F-111 first...Smile

Great job! Yes Yes

Russ

Thank you Russ!  I know what you mean, I want to start on my B-52!  Smile 

Ken

  • Member since
    November 2010
  • From: Lafayette, Indiana
Posted by Son Of Medicine Man on Monday, February 4, 2013 5:48 AM

jimbot58


That's a lot of work, Ken! Seems it might be easier to build a real one!

Yes, it will be nice once I get the fuselage button up.

Ken

  • Member since
    April 2012
  • From: USA
Posted by Striker8241 on Monday, February 4, 2013 5:55 AM

The lighter side of aircraft maintenance... Big Smile

Here is a link to some actual Navy aircraft write-ups and the responses by the maintenance crews. We had a few of these too Smile

http://www.sense.net/~blaine/funstuff/maintenance.html

 Cheers,

Russ


  • Member since
    October 2010
  • From: Hoodsport, WA
Posted by Dogfish_7 on Monday, February 4, 2013 7:38 AM

Fantastic detail work on the *** pit!

Bruce

  • Member since
    November 2010
  • From: Lafayette, Indiana
Posted by Son Of Medicine Man on Monday, February 4, 2013 6:46 PM

Dogfish_7

Fantastic detail work on the *** pit!

Thank you Dogfish_7!

Ken

  • Member since
    November 2010
  • From: Lafayette, Indiana
Posted by Son Of Medicine Man on Monday, February 4, 2013 7:55 PM

Striker8241

The lighter side of aircraft maintenance... Big Smile

Here is a link to some actual Navy aircraft write-ups and the responses by the maintenance crews. We had a few of these too Smile

http://www.sense.net/~blaine/funstuff/maintenance.html

 Cheers,

Russ

Russ!  I about busted a gut laughing at those!  They are too funny!!  Thank you for sharing!

Ken

  • Member since
    November 2010
  • From: Lafayette, Indiana
Posted by Son Of Medicine Man on Monday, February 4, 2013 8:01 PM

Hi Everyone!

I spent the evening doing some more sanding, filing, test fitting, and repeat!  It is a slow tedious process.  I found that if you hold the resin up to a bright light you can tell when you are getting close to sanding through by seeing how much light comes through.  I don't dare sand anymore on the avionics bay piece.  I have more room I can sand on the cockpit base.  I also need to do more sanding on the inside of the fuselage.

Ken

  • Member since
    April 2012
  • From: USA
Posted by Striker8241 on Monday, February 4, 2013 8:24 PM

Ken,

You are welcome, bud Smile.  Good luck on fitting that tub.

Russ


  • Member since
    June 2009
Posted by jimbot58 on Tuesday, February 5, 2013 12:31 AM

Hi gang!

Been trying to finish the bottom of the A-7.

Here I upgraded the front gear by trimming off the landing lights, painted the flat surface silver, and then adding a drop of epoxy for a clear lens. The rest of the gear looks rougher than it is, this camera really seems to make things look worse than they are. (Therefore, I will never take my own picture with it!)

I also have touched it up a bit since I took this. I nicked the paint a few times while I carved off those molded in lenses.

Also chipping away at those struts and doors.

And painting wheels

And doors.

Like I said, up this close, some of the wash looks sort of sloppy, but step back to normal view of a 1/72 scale kit, and it looks fine, at least to my eyes anyway. Of course the real thing isn't all that pristine, is it?

Well off to do a little work for a bit before beddy-bye!

Jim

*******

On my workbench now:

It's all about classic cars now!

Why can't I find the "Any" key on my keyboard?


  • Member since
    November 2010
  • From: Lafayette, Indiana
Posted by Son Of Medicine Man on Tuesday, February 5, 2013 6:02 AM

jimbot58

Hi gang!

Been trying to finish the bottom of the A-7.

Here I upgraded the front gear by trimming off the landing lights, painted the flat surface silver, and then adding a drop of epoxy for a clear lens. The rest of the gear looks rougher than it is, this camera really seems to make things look worse than they are. (Therefore, I will never take my own picture with it!)

I also have touched it up a bit since I took this. I nicked the paint a few times while I carved off those molded in lenses.

Also chipping away at those struts and doors.

And painting wheels

And doors.

Like I said, up this close, some of the wash looks sort of sloppy, but step back to normal view of a 1/72 scale kit, and it looks fine, at least to my eyes anyway. Of course the real thing isn't all that pristine, is it?

Well off to do a little work for a bit before beddy-bye!

Jim

Nice work once again Jim!  Yes, I know exactly what you mean about the camera really showing the imperfections!  I have gotten used to it myself.  Comes from having a good camera!

Ken

  • Member since
    November 2009
  • From: SW Virginia
Posted by Gamera on Tuesday, February 5, 2013 7:23 AM

Jim: She's coming along nicely, ick I always tend to want to burn out at doing all these little things to finish off the kit.

Russ: Yeah those were really good I may end up using one or two of those in my sig lines in the future if it's ok with you?

"I dream in fire but work in clay." -Arthur Machen


  • Member since
    April 2012
  • From: USA
Posted by Striker8241 on Tuesday, February 5, 2013 10:46 AM

Gamera

Russ: Yeah those were really good I may end up using one or two of those in my sig lines in the future if it's ok with you?

 
Help yourself, bud. They're not mine so I can't say yea or nay Big Smile.
 
Russ


  • Member since
    February 2010
  • From: Ontario, Canada
Posted by Bockscar on Tuesday, February 5, 2013 9:56 PM

"Evidence Removed"

lol

"Did you charge this resignator, son? Where is the paper work?"

  • Member since
    September 2010
  • From: California
Posted by mikeymize on Tuesday, February 5, 2013 10:31 PM

Hey Jim, I think you may be your own worst critic cause it looks out of sight to me!

"Time you enjoy wasting is not wasted time".


  • Member since
    June 2009
Posted by jimbot58 on Tuesday, February 5, 2013 10:53 PM

mikeymize

Hey Jim, I think you may be your own worst critic cause it looks out of sight to me!

Sign of a perfectionist is a person who is most critical of themselves, I guess.Confused

*******

On my workbench now:

It's all about classic cars now!

Why can't I find the "Any" key on my keyboard?


  • Member since
    February 2010
  • From: Ontario, Canada
Posted by Bockscar on Tuesday, February 5, 2013 11:09 PM

Yeah Jim:

if it looks right from 10 feet away, it is right.

Great attention to detail on that landing gear.

I always loved that front assembly on the Crusaders/Corsairs.

We are all perfectionists here, most times we don't admit it.

When a guy shows up with a build or detail just a little more 'perfect,'

we obligingly tip our hats to a job, well done, JimYesYesYes

Dom

  • Member since
    June 2009
Posted by jimbot58 on Wednesday, February 6, 2013 3:12 AM

Thanks guys. I do what I can, I guess.

A bit more work on the gear: Cemented in place. You can see my exhaust tube for the air conditioning. Took hours to sand and file a piece of brass tubing down thin enough to look closer to scale. Several of my attempts collapsed on me, before I got it done.

A temporary jig with paint bottles and a jar lid to check the alignment of the gear. I also took out the piece of foam I used to protect the inner white portion of  the intake trunk. I read that the intake of the "D" was painted the exterior color further back as the white was too visible.

Pitot tubes will go on last so I don't break them.

Here is a bit of fun with the "High-contrast Monochrome" setting on the camera. We used to call that.... oh, yes! Black-and White!

And also, I assembled the Aim-9's. The opposing fins have to be cemented in, and HobbyBoss was able to mold in quite a bit of detail for this scale this way.

I can see I missed scraping a seem there on the upper missile! This camera does has its uses!

I seem to be making better progress than I first thought. Maybe I'll come closer to finishing it for the close of the build after all.

Jim

*******

On my workbench now:

It's all about classic cars now!

Why can't I find the "Any" key on my keyboard?


  • Member since
    November 2009
  • From: SW Virginia
Posted by Gamera on Wednesday, February 6, 2013 7:33 AM

Looks like she's coming right along to me Jim. Other than the gear doors and ordinance what's there left to do?

"I dream in fire but work in clay." -Arthur Machen


  • Member since
    November 2010
  • From: Lafayette, Indiana
Posted by Son Of Medicine Man on Wednesday, February 6, 2013 7:08 PM

Great work once again Jim!  I will keep saying this.  I just can't believe how you can do that in 1/72 scale.  Unbelievable!

Ken

  • Member since
    September 2010
  • From: California
Posted by mikeymize on Wednesday, February 6, 2013 11:00 PM

Jim. the Corsair II you've done is very well represented. The paint colors are spot on as near as I can remember especially the avionics bays and the wash in the panel lines makes everything pop out so nicely. One really gets a feel for how beefy the undercarriage is as well as the overall robust build of the jet. Thanks for the pics!

"Time you enjoy wasting is not wasted time".


  • Member since
    February 2010
  • From: Ontario, Canada
Posted by Bockscar on Thursday, February 7, 2013 7:31 PM

jimbot58

Thanks guys. I do what I can, I guess.

A bit more work on the gear: Cemented in place. You can see my exhaust tube for the air conditioning. Took hours to sand and file a piece of brass tubing down thin enough to look closer to scale. Several of my attempts collapsed on me, before I got it done.

Here is a bit of fun with the "High-contrast Monochrome" setting on the camera. We used to call that.... oh, yes! Black-and White!

And also, I assembled the Aim-9's. The opposing fins have to be cemented in, and HobbyBoss was able to mold in quite a bit of detail for this scale this way.

I can see I missed scraping a seem there on the upper missile! This camera does has its uses!

I seem to be making better progress than I first thought. Maybe I'll come closer to finishing it for the close of the build after all.

Jim

Jim, I used to have to check the lugs on the tractor-rigs I drove, so the weathering detail on those wheel bolts really pops for me.

Hey, after seeing the welds on the real air-conditioning tube, and the hand-bent metal, that brass looks

down-right clean!

That middle seam running down that Side-Winder looks realistic, like some kind of external wiring!....lol...

Maybe it's because I am a product of the 50's, but the B&W at first glance looks like the real deal.....it's always cool to get tricked for just a split second, that's what this hobby is all about.Cool

Dom

  • Member since
    June 2009
Posted by jimbot58 on Friday, February 8, 2013 2:17 AM

Ta-Da!

Baby got wheels and even some doors!

From below!

And my recent score:

No time now to work on it.

*******

On my workbench now:

It's all about classic cars now!

Why can't I find the "Any" key on my keyboard?


  • Member since
    November 2009
  • From: SW Virginia
Posted by Gamera on Friday, February 8, 2013 8:41 AM

Ohhhh nice work Jim! Still she looks almost done to me other than the ordinance you're working on now.  

"I dream in fire but work in clay." -Arthur Machen


  • Member since
    June 2009
Posted by jimbot58 on Sunday, February 10, 2013 3:40 PM

Well, still working on the fiddly bits.

Painting AIM-9's, and the tail hook. It gets a set of stripes that will be a pain.

FLIR pod and fuel tank. Configurations I was able to find shows the A-7D's carrying the pod under the right wing and the tank on the left. FLIR pods were normally carried by E's but 48 D's and some 2 seat K's were upgraded to carry the pod. I'm going to assume this D was one of the upgraded ones. Couldn't find much in the way of references as to the color of the pod, other than Navy birds and a few b&w and blurry color photos-so green it is. Also, not sure if this is the correct AIM for the D. I will have to check references. There is a clear lens goes in the front of the pod, so I put gloss black behind it.

MER' and some MK82's. Not sure if I will stay with this configuration or something different, such as an MK83 or 84 under each wing. 82's are done all the time.

Plus, I did start the 82's. Resources show the 7's would carry a 'slant 4' configuration with the inboard racks empty due to possible collisions with the fuel tanks on release, so only 8 are being done here.

Also doors going on here...

With one slight error; what color should that small door be? Ah, well! Back to the paint shop!

Too bad they didn't add any detail to the rear part of the wheel bay.

Jim

*******

On my workbench now:

It's all about classic cars now!

Why can't I find the "Any" key on my keyboard?


  • Member since
    November 2010
  • From: Lafayette, Indiana
Posted by Son Of Medicine Man on Sunday, February 10, 2013 4:32 PM

Excellent work Jim!  Yes  Yes  That is going to be a sweet looking A-7D when you are finished.

Ken

  • Member since
    November 2010
  • From: Lafayette, Indiana
Posted by Son Of Medicine Man on Sunday, February 10, 2013 4:41 PM

I am still working on sanding, filing, test fitting, and repeat.  It is getting closer.  I think I said that before!  Smile  I ran out of sand paper so I need to stop by the store and get some more.  My hands are sore.

Customizing!  I used to do it all the time with cars.  Dealing with things that did not want to fit and making them.  I think I will save it on future projects for kits I really want to have the extra detail on.  Of course I am really going overboard on this one.

Ken

JOIN OUR COMMUNITY!

Our community is FREE to join. To participate you must either login or register for an account.

SEARCH FORUMS
FREE NEWSLETTER
By signing up you may also receive reader surveys and occasional special offers. We do not sell, rent or trade our email lists. View our Privacy Policy.