SEARCH FINESCALE.COM

Enter keywords or a search phrase below:

Fw 190 Butcher Bird 2013 (extended to June 2014) Group Build

564941 views
5865 replies
1 rating 2 rating 3 rating 4 rating 5 rating
  • Member since
    December 2006
  • From: N. Georgia
Posted by Jester75 on Wednesday, June 26, 2013 12:03 PM

Clemens, you sir are  a mad man..........I like it!!

Eric


  • Member since
    April 2013
Posted by SchattenSpartan on Wednesday, June 26, 2013 11:52 AM

Here is the list:

  • 2 Fw190D (Eduard Dual combo)
  • Fw190D-9 (Eduard Weekend Edition)
  • Fw190A-8 (normal A-8 or A-8/R2)

Cheers, Clemens

  • Member since
    March 2012
  • From: Corpus Christi, Tx
Posted by mustang1989 on Wednesday, June 26, 2013 11:00 AM

Hey Clemens. Gimme a listing of what you have to add (I can't view pictures here at work) and I'll post them for you........Youre a better man than me pal, Joe


 Forum | Modelers Social Club Forum (proboards.com) 

  • Member since
    April 2013
Posted by SchattenSpartan on Wednesday, June 26, 2013 10:43 AM

How about throwing my D-9 Weekend Edition kit in the ring as well? 4 190s anyone?

  • Member since
    April 2013
Posted by SchattenSpartan on Wednesday, June 26, 2013 10:41 AM

That looks really nice, Eric! I wonder if the wing roots fit as well on my kit...

Joe: Put me down for a 4th Eduard 190 as well. I don't have it in my stash yet, but it's right on top of my shopping-list (just below the big B-17 announced by HK...). I still have to decide between the normal A-8 and the /R2... Stick out tongue

How about that? 3-times the fun/pain for me!!! Big Smile

I think I inhalated way too much glue-fumes...  Whistling

Cheers, Clemens (<= an Austrian completely gone mad...)

  • Member since
    March 2012
  • From: Corpus Christi, Tx
Posted by mustang1989 on Wednesday, June 26, 2013 9:35 AM

Right you are Nathan. I had alot of trouble out of that.


 Forum | Modelers Social Club Forum (proboards.com) 

  • Member since
    March 2010
  • From: MN
Posted by Nathan T on Wednesday, June 26, 2013 9:06 AM

Nice Jester. I guess you build enough of these Eduard 190s you're bound to get a good fitting one? Just watch out for the motor mount on the As, they may be too long and cause the engine fan to stick out of the cowling too far. Mustang can verify this. I think he had to shorten is engine mount before gluing it in??


  • Member since
    December 2006
  • From: N. Georgia
Posted by Jester75 on Wednesday, June 26, 2013 8:52 AM

Ahh, 2 Eduard Doras in one box, double the madness pleasure, double the pain fun. Grats on the addition Clemens, can't wait to see what you can do with those!!

Got a good bit done last night working on the A8. Got the pics taken and then was called away for a bit of an emergency so I didn't have time to post them so here goes today!

Work this evening started on trying to get the pit finished up and the fuse closed. All the pe goodies were added from the Eduard etch set. They really really need to make an adjustment on their RLM66, soon.
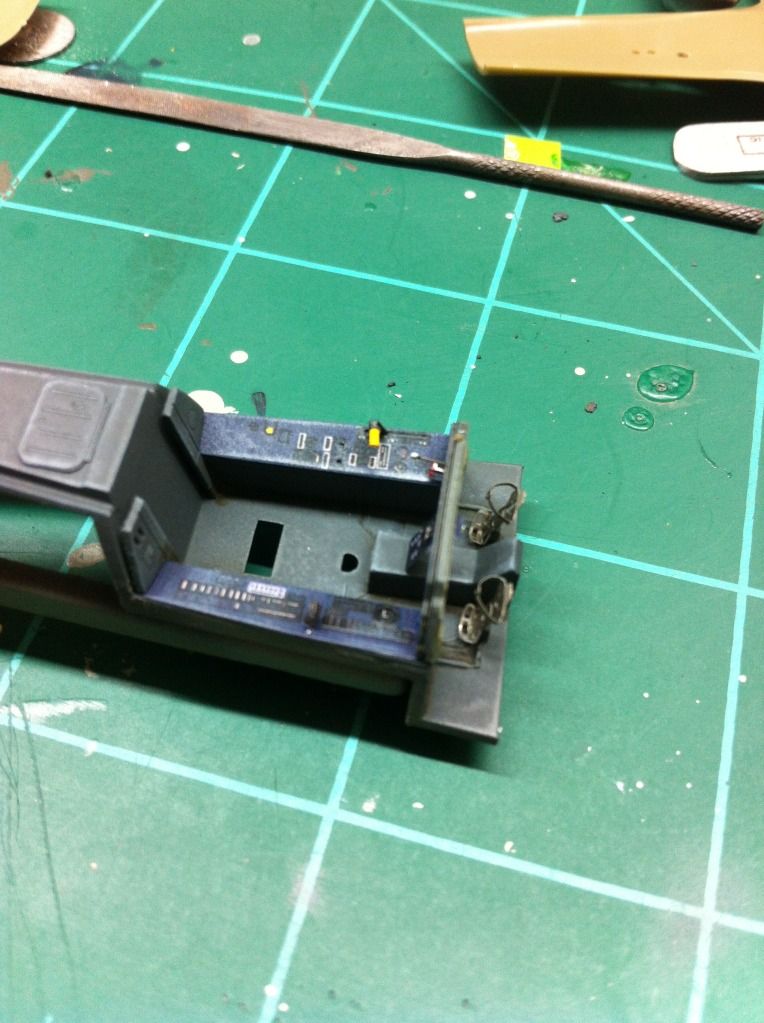
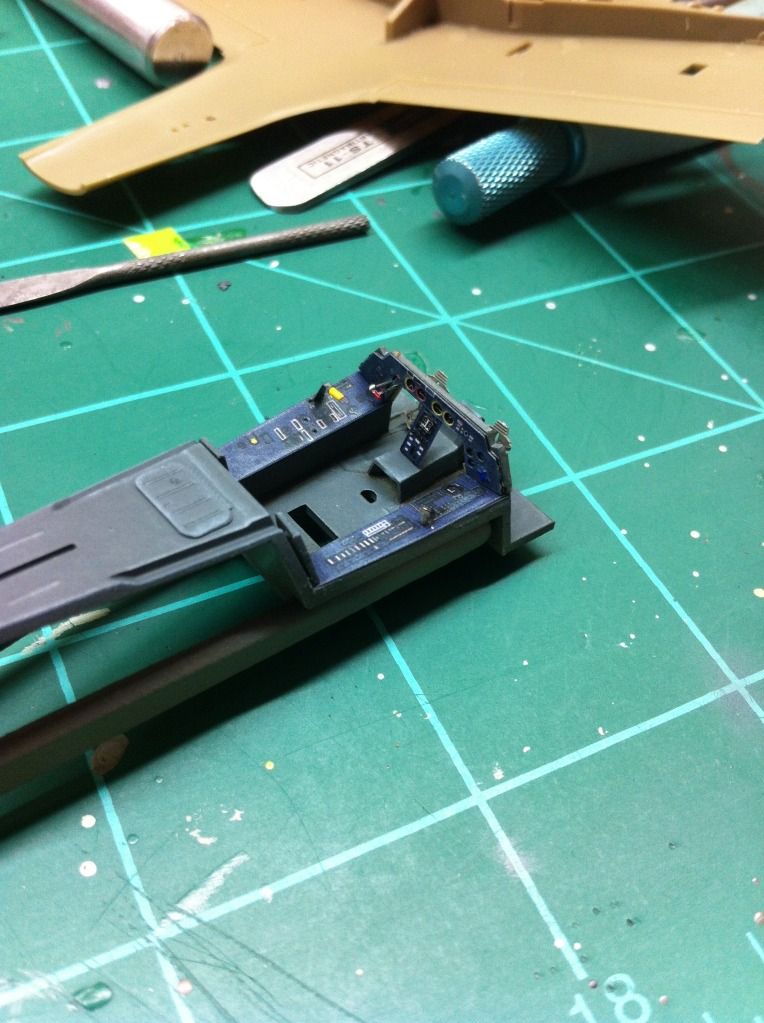
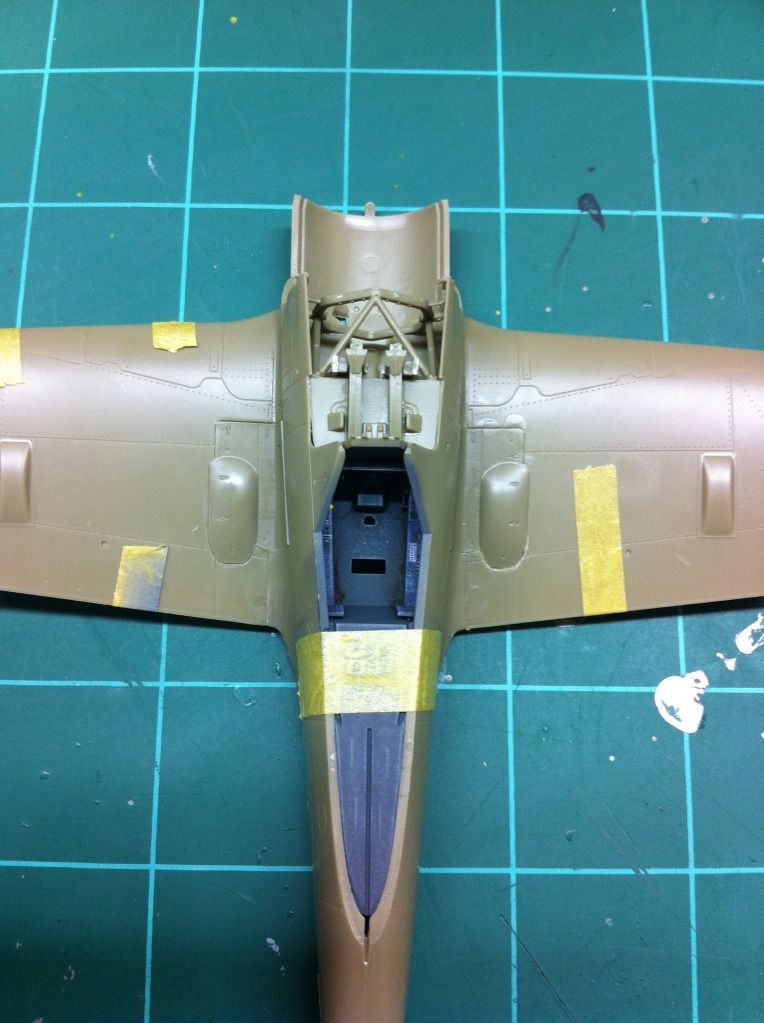
With that being done, it was inserted into the fuse from the rear and the fuse was glued up. Moving on to the wings, I like how Eduard did the cannon bays in the wing roots on teh A's better, The walls of the bay are in fact molded into the wing so their placement is exact. Had to drill out the ports for the outer cannons and the pitot and then attached the upper wings. Here it is test fit to the fuse with the cannons just makeshift installed to see how it looked.
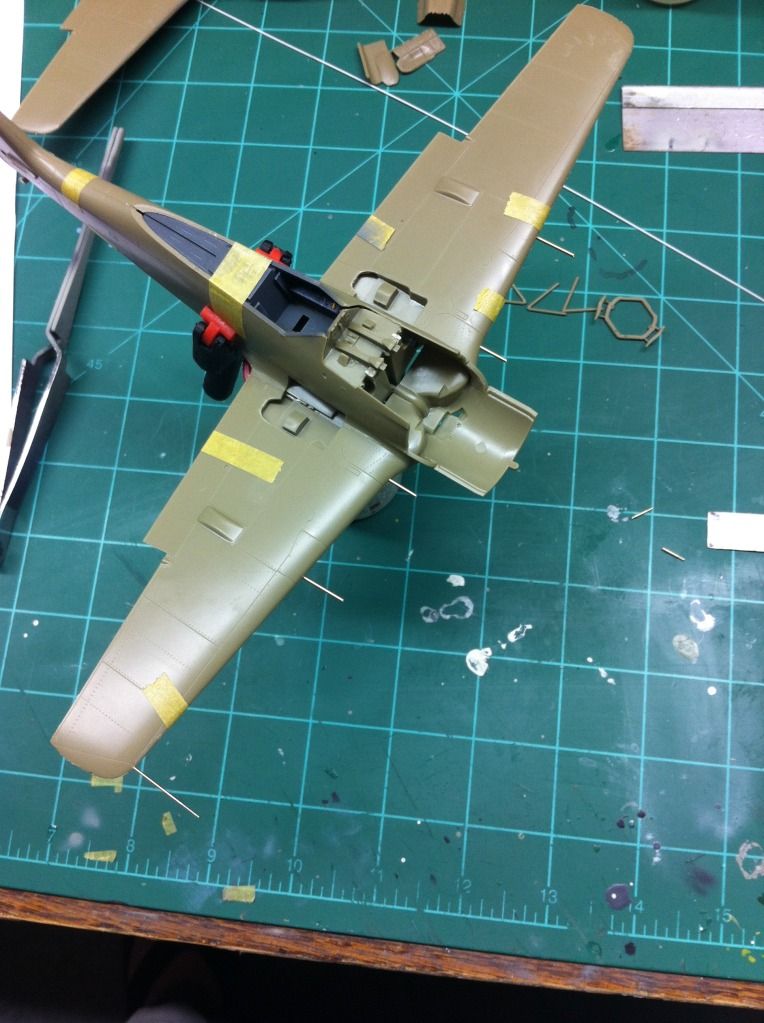
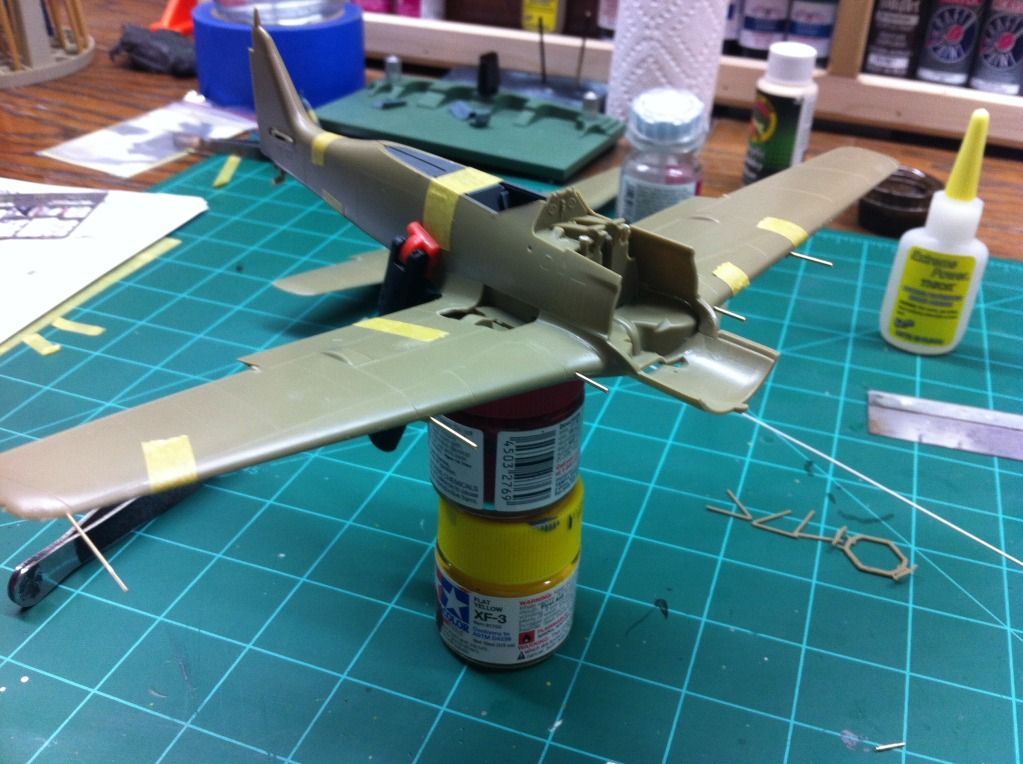
Looking pretty mean to me!!

Now, on the fit of the wing assembly to the main fuselage, and I know these are words you rarely hear when talking or reading about these kits............it may be the best wing root fit I have ever seen. And that is no joke, check it out!
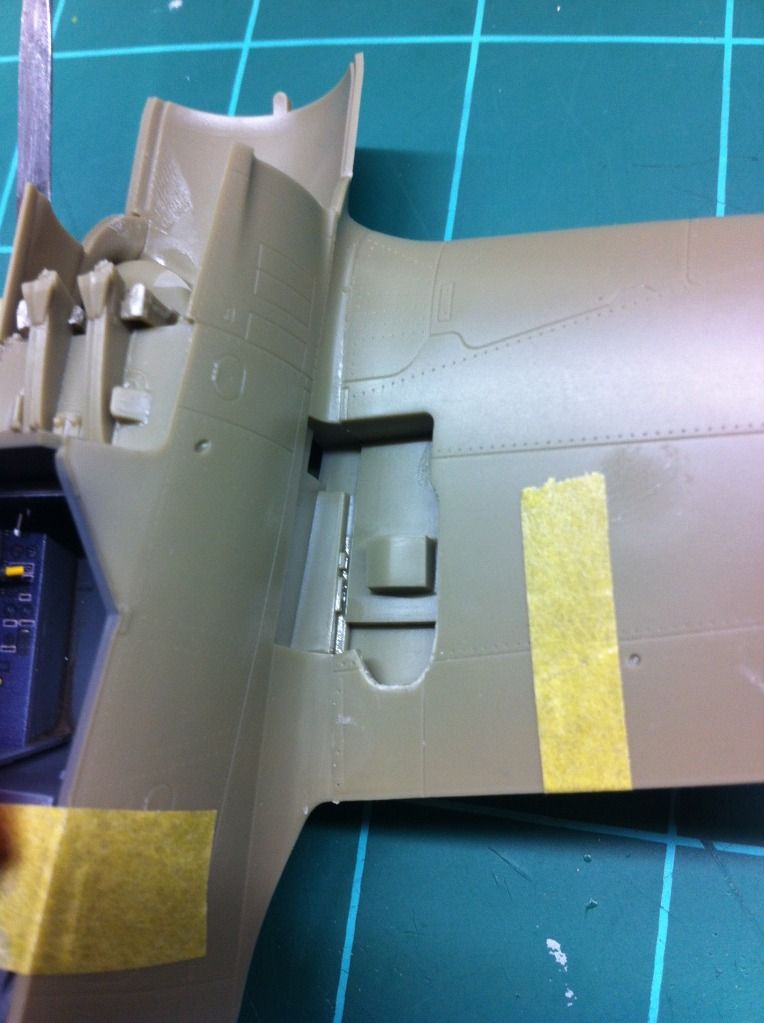
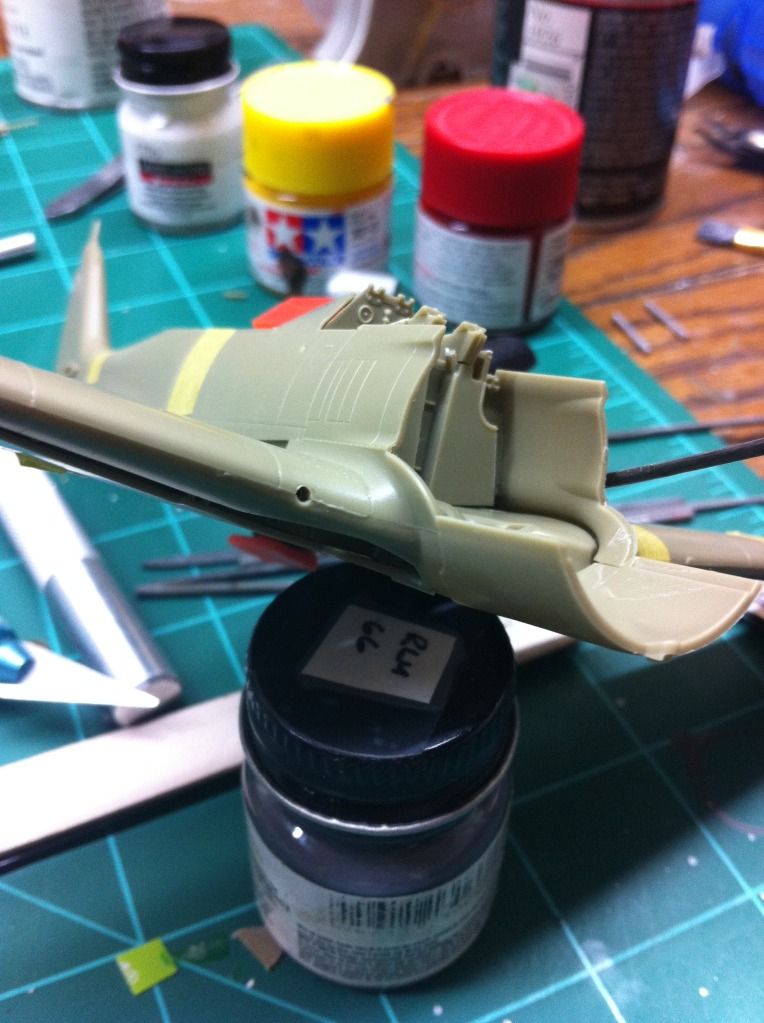
and even the gun covers on this kit were a very damn good fit.
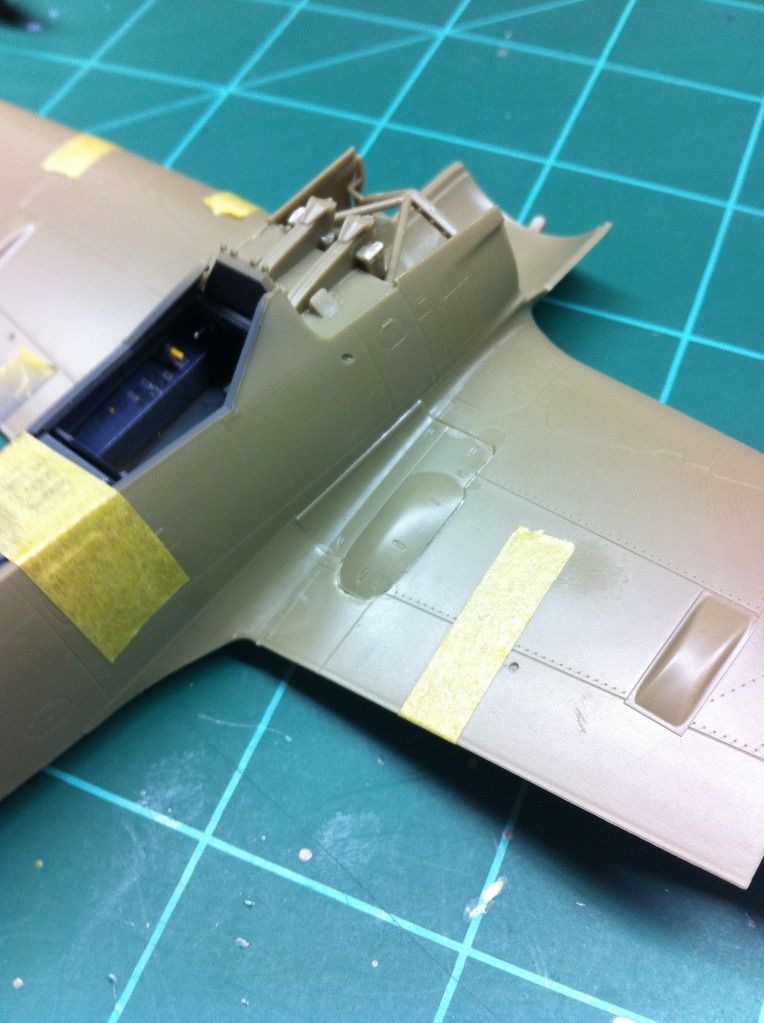
So having gotten to this point, I have been dying to get the engine mount system attached and get the bay painted and prepped for the engine. At first I though this whole assembly was very flimsy and too weak to support the engine. After glueing it in though, it was easy to see that the forward framework that the engine actually attaches to rests on top of the gear bay cover so it has a lot of support.
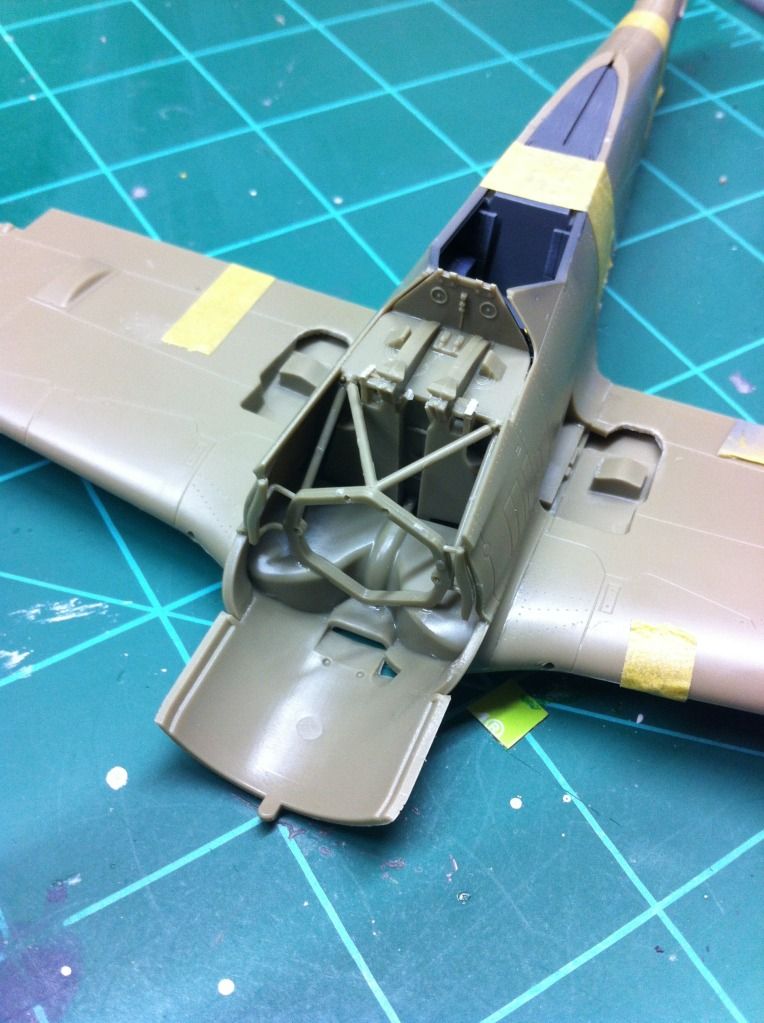
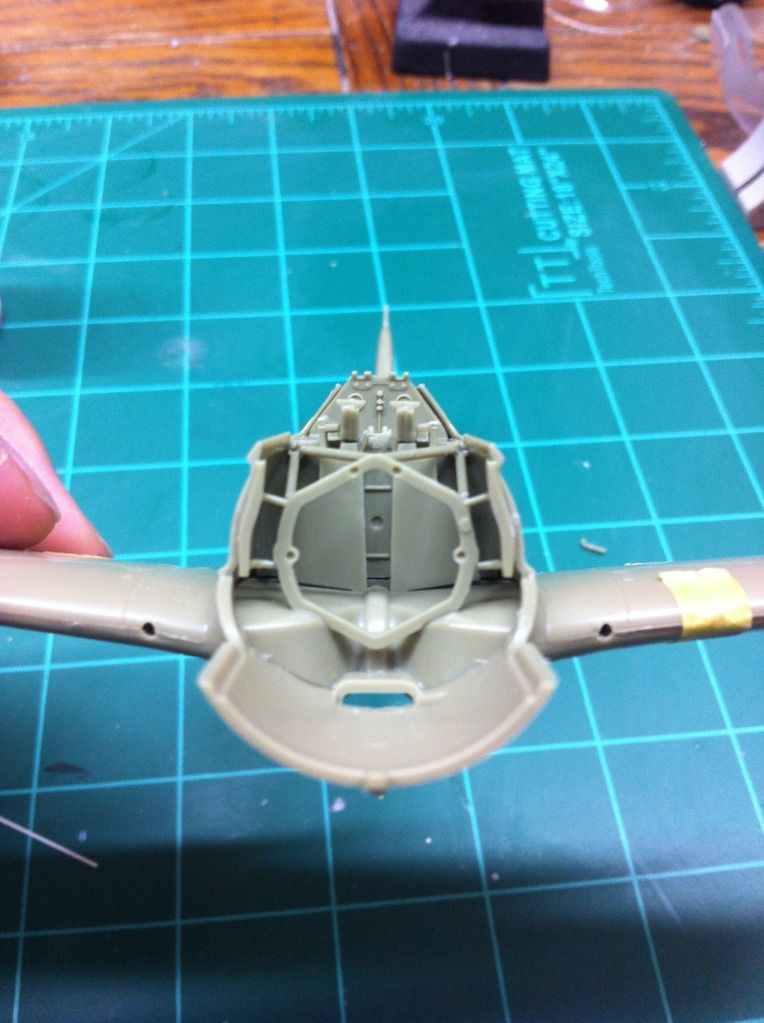
And that is where she stands now. Hoping to get some more bench time in tonight and get some paint on the engine bay, then start assembling the engine. I want to get this one caught up with the Dora and have them both in the paint booth at the same time, there is just so many more parts on this one. 

Eric


  • Member since
    April 2013
Posted by SchattenSpartan on Wednesday, June 26, 2013 3:49 AM

Doug: thank you very much!

Joe: I was talking about the R2 I've decided to replicate, like Nathan said already. Sorry for the confusion.

Nathan: Thanks for your help with the MG cover!


I made a little more progress:

The throttle lever is now glued in place, but it ripped apart at one of the bends, so it is just a PE strut with a styrene rod attached now. (you can't really see the difference though)

I installed the 2 remaining seatbelts as well and the pit is now finished.

Next step is painting and weathering the gear bays (just some heavy oil-washing) and glueing the wings together. Some dryfitting revealed a bad fit with some gaps and a slight step between the wing halves, probably because of all the detail parts glued in there (this cries for a lot of sanding).

I should be able to do all of that untill Wednesday, so stay tuned!


Oh, there's something else:

I got me some more 190s!!! This kit to be exact.

Hannants had a "special offer" for it: It was a second-hand kit in a damaged box, for only 32£! And let's be honest, who needs a friggin box?

So please count me in for those as well, Joe! I'll do one of the "Parrots" (red & white belly) and another one using AM decals (not sure on that one though). This will be a dual build as well.

Cheers, Clemens

  • Member since
    October 2008
  • From: Georgia
Posted by Rigidrider on Tuesday, June 25, 2013 8:08 PM

Eric and Clemens... Man... You two are kickin butt on those Eduards! Eric, great tip on the spreader... and Clemens, I read somewhere that most ALL of the hoods( gun deck covers) were known for being *** poor fits.That isnt an excuse to let it go cus like you I want it to fit right! But guy, for someone who claims to have no experiance your doing great. Makes me want to tear into mine! Keep up the great work guys! What a GB this has turned out to be!Take care all!

Doug

When Life Hands You A Bucket Of Lemons...

Make Lemonade!

Then Sell It Back At $2 Bucks A Glass...

  • Member since
    March 2010
  • From: MN
Posted by Nathan T on Tuesday, June 25, 2013 7:57 PM

I think he means his particular A-8/R2 had the cowl mg's removed, as many did to save weight.


  • Member since
    March 2012
  • From: Corpus Christi, Tx
Posted by mustang1989 on Tuesday, June 25, 2013 7:32 PM

SchattenSpartan

It sure does, Joe, but the R2 has no guns in there nor the ammo boxes for them, so it is kinda empty under the hood. The second reason for me to close it up is the following: I want the aircraft to remain closed up on the whole right side and some hatches opened on the left side, so you can see all the beautiful details Eduard provides us with!

Thats fair enough on wanting to leave it closed up. Just love displaying detail. Will add that the R2's did in fact have a pair of MG131's in the cowl.  You had me second guessing myself but I bounced it off of my references.


 Forum | Modelers Social Club Forum (proboards.com) 

  • Member since
    March 2010
  • From: MN
Posted by Nathan T on Tuesday, June 25, 2013 5:06 PM

Yes, those gap openings on the rear upper sides of the cowl gun cover are supposed to be there.


  • Member since
    April 2013
Posted by SchattenSpartan on Tuesday, June 25, 2013 4:26 PM

It sure does, Joe, but the R2 has no guns in there nor the ammo boxes for them, so it is kinda empty under the hood. The second reason for me to close it up is the following: I want the aircraft to remain closed up on the whole right side and some hatches opened on the left side, so you can see all the beautiful details Eduard provides us with!

  • Member since
    March 2012
  • From: Corpus Christi, Tx
Posted by mustang1989 on Tuesday, June 25, 2013 12:17 PM

I have to mention that the gun panel looks friggin awesome opened up! Theres alot of detail in that cowl gun bay!!


 Forum | Modelers Social Club Forum (proboards.com) 

  • Member since
    April 2013
Posted by SchattenSpartan on Tuesday, June 25, 2013 11:09 AM

Ok, thank you for your help! I think some stretched sprue should solve the problem...

  • Member since
    December 2006
  • From: N. Georgia
Posted by Jester75 on Tuesday, June 25, 2013 10:59 AM

Clemens, mine looks like it is going to align identically to yours. With the windscreen attached though it looks pretty good other than the missing hinges. I may just put some styrene bits in the gaps on mine to simulate hinges and be good with it.

Eric


  • Member since
    April 2013
Posted by SchattenSpartan on Tuesday, June 25, 2013 10:23 AM

Thanks for all the kind and motivating words, guys!

Eric, here are some pics with the cover taped in place the:

The sides of it align pretty good with the rest of the fuse and also with the windscreen. The only problem is the alignment with the bulkhead and the hinges. Are those gaps at the rear end of the cover supposed to be there? (3rd pic).

Cheers, Clemens

  • Member since
    March 2012
  • From: Corpus Christi, Tx
Posted by mustang1989 on Tuesday, June 25, 2013 9:47 AM

Nathan T
Clemens, looks like you're doing a better job on this tough kit than you think. It'll look good in the end too

I couldn't agree more with Nathan on that! These Eduard kits look Bad A as the progress continues. Speaking of which I'm jumping on mine tomorrow morning!!


 Forum | Modelers Social Club Forum (proboards.com) 

  • Member since
    March 2010
  • From: MN
Posted by Nathan T on Tuesday, June 25, 2013 8:57 AM

Jester, that's some wild progress you're making. You'll have some stunning looking models in the end.

Clemens, looks like you're doing a better job on this tough kit than you think. It'll look good in the end too.


  • Member since
    March 2012
  • From: Corpus Christi, Tx
Posted by mustang1989 on Tuesday, June 25, 2013 8:48 AM

Jester75

Clemens, I started out at 19 mm or so with my spreader. I measured the width of the fuse where the spreader was going to be placed while it was at rest with no pressure being exerted on it. From there it was sanding down accordingly after several test fits of the wing to make sure that it wasn't pushing out too far.

Well Eric that is one area that all of the warpage helped me out. My  fuselage was "pre spread" by the warpage so I didn't have to worry about that one. Say, there IS a silver lining in the clouds after all...lol.


 Forum | Modelers Social Club Forum (proboards.com) 

  • Member since
    April 2013
Posted by SchattenSpartan on Tuesday, June 25, 2013 8:45 AM

Thank you very much, Eric! I'll post the pic of the MG-cover in 1-2 hours (when I'm home again).

  • Member since
    December 2006
  • From: N. Georgia
Posted by Jester75 on Tuesday, June 25, 2013 7:23 AM

Clemens, I started out at 19 mm or so with my spreader. I measured the width of the fuse where the spreader was going to be placed while it was at rest with no pressure being exerted on it. From there it was sanding down accordingly after several test fits of the wing to make sure that it wasn't pushing out too far.

Eric


  • Member since
    April 2013
Posted by SchattenSpartan on Tuesday, June 25, 2013 6:41 AM

Thank you, Joe. I'll most likely go with the kit parts, as I want to keep this build OOP except for some gun barrels (Eduard put enough goodies in the box IMO). I'll just try to scratch-build some basic detail on the inside of the panel, so if anyone has some nice pics of it, please post them here. It would be a great help.

Cheers, Clemens

  • Member since
    March 2012
  • From: Corpus Christi, Tx
Posted by mustang1989 on Tuesday, June 25, 2013 6:24 AM

Clemens: The only way of opening up a panel with the basic kit is to do just what you are saying. Cut the panel off. After that you have two options: 1) use the panel you cut from the kit in displaying the panel open or use the photo etch panels provided in Eduard PE kit 48-556. That kit comes with a slew more PE than you will wanna use at this point though. I thought the same thing though. Eduard supplies a nice looking engine only to build it covered up in the build sheet!????


 Forum | Modelers Social Club Forum (proboards.com) 

  • Member since
    April 2013
Posted by SchattenSpartan on Tuesday, June 25, 2013 3:05 AM

Thanks for the kind words, folks!

Eric: hat length should the spreader bar be? I have the same gaps on the wing roots at my A8 (they are a bit larger)

Does someone of you guys know what I have to do to the engine covers, other than cutting them off? (what detail to add on the inside for example)? I want the one on the left cowl side to be open. I don't want it to be perfectly right, it just should look "right"...

Cheers, Clemens

  • Member since
    August 2009
  • From: MOAB, UTAH
Posted by JOE RIX on Monday, June 24, 2013 10:41 PM

Clemens - Hey Friend, do not be so hard on yourself. It appears to me, especially on the cockpit, that you are demonstrating some very excellent skills.  Your doing some really nice work and I'm enjoying you sharing your processes.

Eric - With all the brilliant tricks your pulling off you are no doubt going to be the "Go To" guy for building Eduard FW 190s. Simply great work on your part so far.

 I'm slowly "molding" the silly putty camo mask on to my F-8. For this complex pattern, coupled with using Gunze-Sangyo Mr. Color for the first time, I took out my test model and masked and sprayed a small copy test pattern. I have to admit I am falling in love with the Mr. Color paint. Thinned with Mr. Leveling Thinner this stuff goes on beautifully and behaves very nicely through my Badger Patriot.  

"Not only do I not know what's going on, I wouldn't know what to do about it if I did". George Carlin

  • Member since
    March 2012
  • From: Corpus Christi, Tx
Posted by mustang1989 on Monday, June 24, 2013 8:29 PM

Holy crap! Both of you guys gun platform/ firewalls are matching up perfectly with the fuselage sides from the top to bottom. I had to go through hell and back to get mine to do that! Of course my kit has been in the box since 07 in the garage. I'm convinced that has alot to do with my warpage woes. I'm getting through it though.

Clemens: You are doing great! Nice job on the cockpit and on the firewall area.

Eric: Youre making this look way too easy pal!


 Forum | Modelers Social Club Forum (proboards.com) 

  • Member since
    April 2013
Posted by SchattenSpartan on Monday, June 24, 2013 6:19 PM

I'll post a pic tomorrow after I get home. I'll go to bed now, 'cause it's already 1:17 am here in Austria... Sorry...

  • Member since
    December 2006
  • From: N. Georgia
Posted by Jester75 on Monday, June 24, 2013 6:11 PM

Thanks Clemens! For some reason, the Dora was kitted with different colored sprues. It is also the one that had the most flash and poorer quality moldings in general.

That bulkhead looks fine. Remembering mine, I dont think its suppose to be glued the the 'shelf' at exactly 90 degrees but at an angle. I hate to be a pain, but is there any way you can snap the hood on and get a side on pic?

Eric


JOIN OUR COMMUNITY!

Our community is FREE to join. To participate you must either login or register for an account.

SEARCH FORUMS
FREE NEWSLETTER
By signing up you may also receive reader surveys and occasional special offers. We do not sell, rent or trade our email lists. View our Privacy Policy.