SEARCH FINESCALE.COM

Enter keywords or a search phrase below:

Reich Defenders IV Group Build: Strike From Above

54576 views
513 replies
1 rating 2 rating 3 rating 4 rating 5 rating
  • Member since
    December 2002
  • From: Bury St Edmunds, Suffolk, England
Posted by Bish on Saturday, July 27, 2013 2:09 AM

That's looking good Mike. Those Fujimi canopies are tricky. Now to get some paint on her.

Not sure if you noticed, but the Me 262 is now done, if you want to add it to the front page. Its back on page 15.

I am a Norfolk man and i glory in being so


On the bench: Airfix 1/72nd Harrier GR.3/Fujimi 1/72nd Ju 87D-3

  • Member since
    April 2005
Posted by Thunderbolt379 on Friday, July 26, 2013 9:32 PM

Hi all,

Things have been quiet on the schlachtfleiger front lately but I've finally made some progress on the Fujimi Stuka. I was not terribly impressed with the way the Eduard masks went on and found myself fiddling with tiny pieces of tape under a powerful magnifying glass -- as you can imagine, a job like that would put anybody off for a while! Eventually I called it done, and have mounted the rear guns and canopy:

The canopy fit is not as good as I could have hoped for, I'll use some whiteglue in the visible seams. She's underway again, that's the main thing. I got some Maskol and have been using it to dress locator points, and have sourced the Acryls for RLM 04 and 71, I'll mix 76 and use Tamiya's shade for 70, darkened a bit. There's a lot of spot painting to do, the 66 for the canopy interior, the 04 areas, 70 on the prop and landing gear spats, and white for the spinner. No spiralschnauz decal is included so I'm looking at masking it, which is hard enough at the best of times, but the engineering of the kit obliges the prop to be attached from the git-go, blades included, so this promises to be a tour de force of masking...

Cheers, Mike

http://worldinminiature.blogspot.com/

  • Member since
    October 2008
  • From: Georgia
Posted by Rigidrider on Sunday, July 14, 2013 6:41 PM

I hear ya my friend, Thats the best way to describe how my figures look , is muddy or featurless. Any way, Good news is I located a Vallejo's paint supply near my area so I will buy a few and start to experament. And yes, practice makes perfect... Looking fwd to some more of your work! Take care

Doug (RR)

When Life Hands You A Bucket Of Lemons...

Make Lemonade!

Then Sell It Back At $2 Bucks A Glass...

  • Member since
    August 2012
Posted by AndrewW on Saturday, July 13, 2013 10:23 PM

Again, thanks for the compliments, Doug.  I know in the past I'd been trying and trying with pigments, washes and the figures just looked muddy.  Finally, I figured I'd just go slow, paint and take my time before I applied washes.  As I always do, I showed them to my girlfriend, asked her how they looked at the stage before washing, and she said stop there.  I think a lot of it is trial and error, and as I look back to my first figures 3 years ago, well, night and day.  Then I recall talking to a fellow in the hobby shop in my parents' town, and his advice 'less is more'.  The harder I try to make my aircraft and figures look better, the more I think of those three words.

Life is hard, it's even harder when you're stupid - John Wayne.


  • Member since
    October 2008
  • From: Georgia
Posted by Rigidrider on Wednesday, July 10, 2013 5:12 PM

Andrew,,, Thank you! The info is very helpful, I will begin anew my search for Vallejo's paint! Thank you again and I just hope I can someday achieve the look you have.

Take care...

Doug(RigidRider)

When Life Hands You A Bucket Of Lemons...

Make Lemonade!

Then Sell It Back At $2 Bucks A Glass...

  • Member since
    August 2012
Posted by AndrewW on Sunday, July 7, 2013 8:31 PM

I should add that the highlight layer is done with an EXTREMELY dry brush and that if I find my low and highlights too stark, I take my midtone and mix it similarly (thinner and gloss medium one to one, one drop of paint) using about four thinners and four medium to the one paint, and go over everything once again, giving lots of drying time inbetween to see how the color will settle out.

Sorry for the interrupted post, imagine, being called to do work at work instead of discussing model stuff!!! what has the world come to??!

Life is hard, it's even harder when you're stupid - John Wayne.


  • Member since
    August 2012
Posted by AndrewW on Sunday, July 7, 2013 8:17 PM

Ridgerider,

thank you for the compliment.  I was pleased with how the figures turned out as well.  I think all credit here is due to Vallejo paints.  I think the figures took a few hours each to paint.  I've found a local source for Vallejo in Canada, but if I'm not able to get there, I order from Wayland Games in the UK (I found them on google).

My process is:  assembly, of course.  A thin layer of Vallejo grey primer.  Next, I paint in my darks.  For flesh I use Vallejo's Panzer Aces Shadows Flesh as my dark, putting in a reasonable coating, not 100% coated, but most of it.  For the uniforms, I used Vallejo's Model Air RLM 66.  For the white T shirt I used Vallejo's RLM 05.  I let that dry about an hour, then I go at my mid tones.  For flesh I use Vallejo's Panzer Aces Flesh tone, the uniforms Vallejo's model air Medium Ocean Grey and for the white T shirt I used Model air white.  The mid tones, I approach with a 'heavy handed dry brush' mentality, leaving the recesses untouched.  I should add I take this same approach to their hair, dark all over, mid tone with a the same heavy handed mentality.  Finally, I do my light tones in several very thin layers.  I mix Vallejo's thinner with their gloss medium, one to one, and a drop of paint (for flesh, British Tanker Crew HIghlight, for uniforms Light Grey and for the T shirt more white) and coat and coat and coat until I'm happy.

Just trial and error, I guess.

Well, back to work.

Life is hard, it's even harder when you're stupid - John Wayne.


  • Member since
    April 2013
Posted by SchattenSpartan on Sunday, July 7, 2013 11:17 AM

Revell's  He111 kits are nice, I've seen one built up at my LHS yesterday (without paint on it) and it is really big (not as big as an B-17 though)

I reckon someone could convert one of the Trumpy kits to an U4 (the only difference should be the modified nose with the cannon and the different gear bay in the front), but I am not capable of doing such stuff... I guess one in 1/48 will be a nice addition to my stash though... HobbyBoss makes a kit of it for a really good price.

Cheers, Clemens

  • Member since
    December 2002
  • From: Bury St Edmunds, Suffolk, England
Posted by Bish on Sunday, July 7, 2013 11:02 AM

There are a few more in that scale I want to get. The 3 at the top of my list are the Revell He 111H-6, Trump Ju 87B and an He 219. I am still not sure if I should go for the Revell or ZM kit. I have heard the Revell has some issues, but I am not sure I can justify the price of the ZM. A U4 would be nice, I had to get a conversion for that in 72nd scale.

I am a Norfolk man and i glory in being so


On the bench: Airfix 1/72nd Harrier GR.3/Fujimi 1/72nd Ju 87D-3

  • Member since
    April 2013
Posted by SchattenSpartan on Sunday, July 7, 2013 10:59 AM

Ooh, that sounds nice! I still have to get me a 190. I am thinking of Zoukai Mura's Ta-152. It's not a "real" 190 by name, but it still qualifies as one IMO.

I am planning on buying me one of the Trumpy 262s as well. Probably a night-fighter (U1). A U4 would be awesome, but there is no kit of that bird available in 1/32nd...

  • Member since
    December 2002
  • From: Bury St Edmunds, Suffolk, England
Posted by Bish on Sunday, July 7, 2013 10:41 AM

Well I have 9 32nd kits, all German. 2 Hase 190's, an A-8 and D-9, the D-9 is the one I have the resin pit for. Then theres 3 109's. A Hase G-6 and F-4 and the CH E-4. Another Hase, the Ju 87G. 2 Revell, the Ju 88 and He 162 and finally the Trumpeter Me 262A-1a. I am just waiting until I can get my own model room so I have the display space before I build one.

I am a Norfolk man and i glory in being so


On the bench: Airfix 1/72nd Harrier GR.3/Fujimi 1/72nd Ju 87D-3

  • Member since
    April 2013
Posted by SchattenSpartan on Sunday, July 7, 2013 9:47 AM

May I ask what plane it is?

My first big AM project will be Hasegawa's Thunderbolt (that thing is big).

I decided not to use an AM pit because there was none available when I ordered everything. I think Eduard's PE set is a decent addition on it's own. (the kit's cockpit is not that bad anyway)

  • Member since
    December 2002
  • From: Bury St Edmunds, Suffolk, England
Posted by Bish on Sunday, July 7, 2013 9:37 AM

Thanks for the tip. I already have all the AM stuff I need for my 32nd builds. I have an Aires pit for one, but decided to go the Eduard PE route for the rest. I felt that the kit detail only needed a little improving rather than complete replacement.

I am sure there's enough small parts in those PE sets to keep my eyes from exploding.

I am a Norfolk man and i glory in being so


On the bench: Airfix 1/72nd Harrier GR.3/Fujimi 1/72nd Ju 87D-3

  • Member since
    April 2013
Posted by SchattenSpartan on Sunday, July 7, 2013 9:26 AM

Just a little tip for ya, Bish:

Get an Aires cockpit and maybe even some wheel-bays. THeir 32nd sets have a similar amount of really tiny stuff to paint as your 72nd kits Wink

Cheers, Clemens

  • Member since
    December 2002
  • From: Bury St Edmunds, Suffolk, England
Posted by Bish on Sunday, July 7, 2013 7:33 AM

Thanks Doug. We may joke and jest about scales, but as long as people are building, and enjoying it, that's the most important thing. I guess I can count myself lucky in that I am still able to build in this scale. And it suits me not only because I don't really know any difference, but as a dio builder, there's plenty of choice for accessories to go with the aircraft.

When I finally get to one of my 32nd builds, my brain is going to go into detail over load.

Figures are one of the areas that I struggle with. In 72nd, you can get away with pretty basic painting, unless you look real close, but in 35th scale, its really something I need to work on.

I am a Norfolk man and i glory in being so


On the bench: Airfix 1/72nd Harrier GR.3/Fujimi 1/72nd Ju 87D-3

  • Member since
    April 2013
Posted by SchattenSpartan on Sunday, July 7, 2013 7:22 AM

Thanks Doug! I chose 48th for my favorite scale. It is not too big, but the parts have a nice size to them... I do like 32nd kits as well. The number of those kits is constantly increasing. I have a Thunderbolt, Mustang, Zero, Harrier, Flanker and a B-25 in my stash. I want to get me a Fw190 and that big (huge would be a better term) B-17 from HK next.

All in all, my aircraft stash consists to 1/3rd of 1/32 birds and the other 2/3rds are 1/48.

Cheers, Clemens

  • Member since
    October 2008
  • From: Georgia
Posted by Rigidrider on Sunday, July 7, 2013 7:02 AM

Well let me please catch up here... Bish, Excellent finish! Your right about the newer 72nd kits being more detailed and a much greater array of AM parts. My problem is just that I just cant deal with the small (comparatively) parts any more. But some still can and you obviously are one who has the knack! Great work my friend.

Andrew... Your figures are outstanding! PLEASE fill me in on your technique and style of doing.I've tried and read and attempted, but have not yet hit on a style that worke for me. I hear alot of folks mention Humbolt paints,(?) I have not found an outlet here and may have to mail order if need be. Any info would be greatly appreciated!

Clemens, as always, your work is coming along nicely. You have a good eye for detail. Keep up the good work.

At my stage in lifes journey, I dont go below a 48th scale and prefer 32nds, but as like most of us dont really have the storage or display space. I also have 2, 24th scales to build and cant wait to tear into them but am trying to come up with a special reason to build. I once meet and befriended a B-24 navigator who had served with the "Mighty 8th" in 1943, and could I become lost for hours listening to him tell his stories! I built a replica of his craft for him, and it became more then just a model, it was a labor of love. Hes been gone for several years now. Any way friends, exceptional work as always!

Doug

When Life Hands You A Bucket Of Lemons...

Make Lemonade!

Then Sell It Back At $2 Bucks A Glass...

  • Member since
    April 2013
Posted by SchattenSpartan on Friday, July 5, 2013 2:02 PM

Thanks Bish!

The Razorback is the one for this GB. I realized that I posted in the wrong thread right after posting all the pics, but I left it in here, so you guys know why I was not working on the Razorback untill now... Embarrassed

  • Member since
    December 2002
  • From: Bury St Edmunds, Suffolk, England
Posted by Bish on Friday, July 5, 2013 1:56 PM

Nice looking Thunderbolts and great work on the pit. Which of those is for this GB.

I am a Norfolk man and i glory in being so


On the bench: Airfix 1/72nd Harrier GR.3/Fujimi 1/72nd Ju 87D-3

  • Member since
    April 2013
Posted by SchattenSpartan on Friday, July 5, 2013 5:38 AM

Thanks, sanderson!

  • Member since
    December 2003
  • From: Charleston, SC
Posted by sanderson_91 on Thursday, July 4, 2013 10:11 PM

Sweet looking cockpit Clemens!  The Tamiya Jug is an excellent kit!


  • Member since
    April 2013
Posted by SchattenSpartan on Thursday, July 4, 2013 6:53 PM

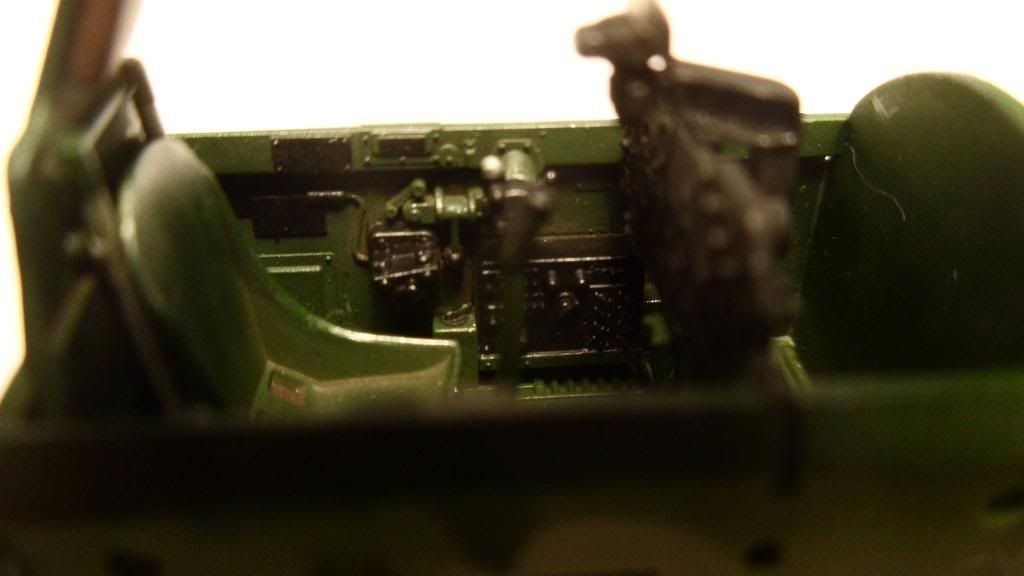
Update time! I got all the work on pit done (well, almost)...

I painted the The whole tub in Tamiya XF-26 mixed with some Gunze "Flat Black" to darken it down. Then The details are painted in various Vallejo Air colors.

I used two colors for drybrushing: XF-26 mixed with XF-4 for all green areas and XF-16 (Flat Aluminium) for all black areas and those areas that would show a lot of wear.

As a last stap I applied an oil-wash consisting of a 50/50 mix of black and burnt umber.

Here are the pics:

I had to remove a nasty mold line going right over the whole gun-sight:
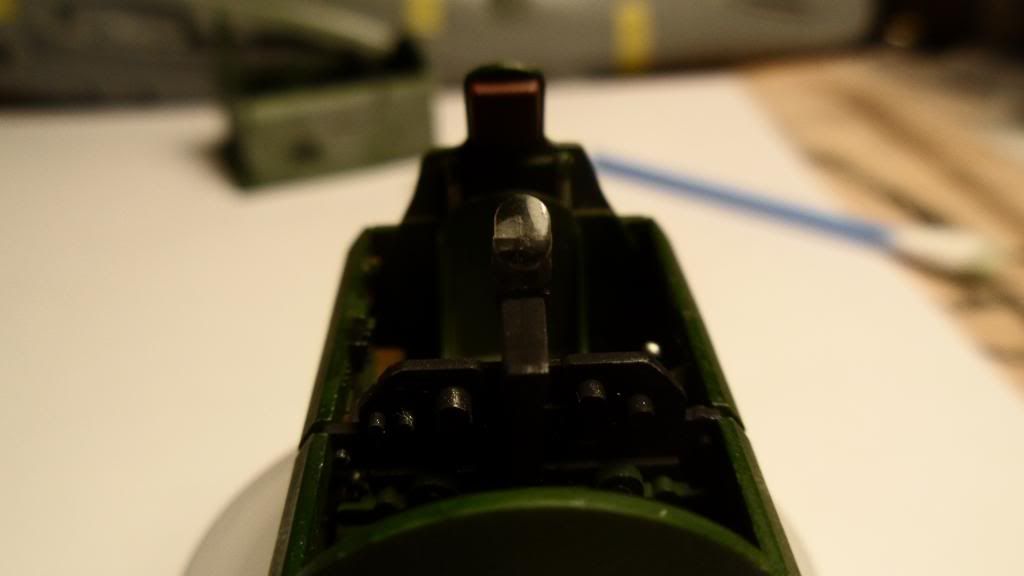
The Whole IP-assembly is removeable, because I have to add some wiring to it:
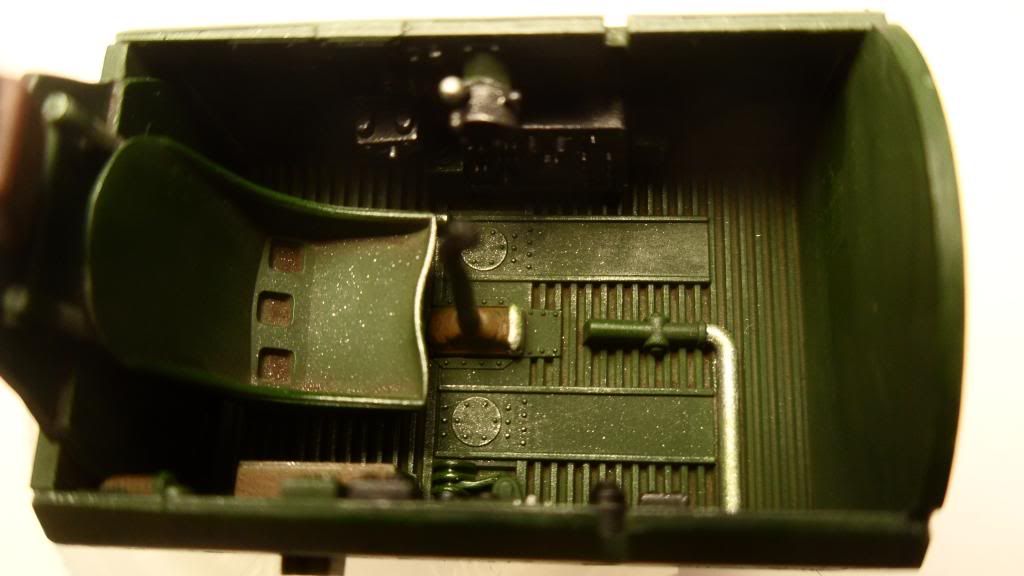
I still have to add the IP decal (the gunsight is just stuck on for the photo, so that I can remove it for applying the decal):

A side-by-side comparison with the cockpit tub of the 2nd Thunderbolt I'm building right now (Razorback). Note the missing gun-sight (I snapped it off when I applied the IP decal, but it is an easy fix). The IP is glued in place on the Razorback tub, as there is no wiring necessary with that one (it is not visible unlike on the Bubbletop):

There are 2 more kits on my bench atm (1/35 King Tiger to my right and 1/48 Fw190 to my left), so I had to sacrifice some of my working-area for the Thunderbolt kits:
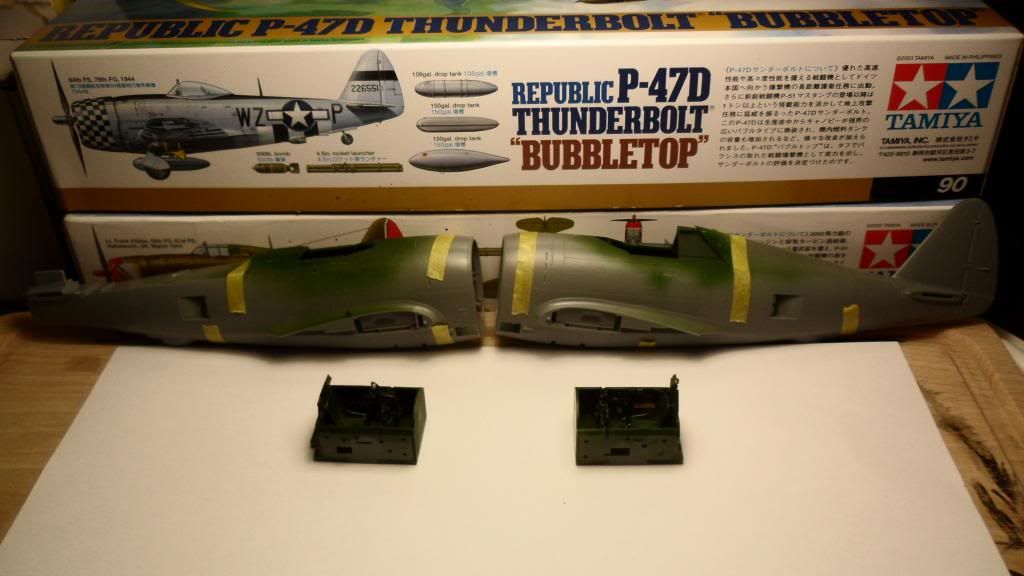
Please note that the green is much darker in person. My camera just screws up all the colors when the lighting is so bad... The 1st pic is probably the most accurate regarding the color (it's even a little bit darker IRL)

I hope you like it. This Pit took me about 6-7 hours to paint up and weather (not counting in the time the wash needed to dry) I really love building those Tamiya Thunderbolts! The are the best kits I've ever seen (together with their 1/32 Mustang).

Cheers, Clemens

  • Member since
    December 2002
  • From: Bury St Edmunds, Suffolk, England
Posted by Bish on Thursday, July 4, 2013 1:23 PM

Thanks sanderson.

I am a Norfolk man and i glory in being so


On the bench: Airfix 1/72nd Harrier GR.3/Fujimi 1/72nd Ju 87D-3

  • Member since
    December 2003
  • From: Charleston, SC
Posted by sanderson_91 on Thursday, July 4, 2013 1:16 PM

Bish - I really like you 262!  Excellent litle dio!


  • Member since
    April 2013
Posted by SchattenSpartan on Wednesday, July 3, 2013 5:55 PM

No progress on my side sadly, as I am building Tamiya's Bubbletop-jug for the First Time GB and the Longest Day GB (just a simple crossover) and I decided to build them sumultaneously, so I have to catch up with the other one first before moving on...

I should get that done untill tomorrow evening though...

Cheers, Clemens

  • Member since
    December 2011
Posted by stalkerfish on Wednesday, July 3, 2013 11:43 AM

The 110 is coming along very well. The decals are down and a wash has been applied. Final weathering and small details are going on in the near future. Pictures will be up soon.

In Progress: Dragon 1/35 Flakpanzer IV Ausf.G, HobbyBoss 1/48 Me 262

  • Member since
    April 2013
Posted by SchattenSpartan on Wednesday, July 3, 2013 5:26 AM

I am adding PE or resin most of the time as well to my 48th kits as well. Eduard for example even provides some nice basic PE stuff in their Prifipacks, so I just use that. One exception are Tamiya's kits though. I never felt like adding AM stuff to their cockpits other than a set of seatbelts, just because their kits are incredibly detailed (their Thunderbolt kits for example). They are almost as detailed as a resin pit. The cockpit of my Jug in this GB here is completely OOB. A more experienced Modeller can paint it up way better, of course, but the amount of details on those parts is stunning. The sidewalls are just one piece each and are really well detailed.

Cheers, Clemens

  • Member since
    December 2002
  • From: Bury St Edmunds, Suffolk, England
Posted by Bish on Tuesday, July 2, 2013 11:32 PM

It would be hard for me to make a comparison as I haven't seen any new 48th kits first hand. But I will say that the newer 72nd kits are probably better detailed than most people expect. The days of a bare cockpit with juts a seat and a pilot are long gone. But of course that doesn't mean they can't do with some extra's and I always add PE or a resin pit to give that extra detail. But most can be perfectly expectable OOB.

I am a Norfolk man and i glory in being so


On the bench: Airfix 1/72nd Harrier GR.3/Fujimi 1/72nd Ju 87D-3

  • Member since
    April 2013
Posted by SchattenSpartan on Tuesday, July 2, 2013 4:38 PM

You are making some truly amazing stuff in that small scale, Bish! I (and it seems like some other People as well) can'thelp it but think your work is 1/48 because of all that nice detail work you are doing...

I'm just curious: Are the newer 1/72 kits as well made as recent 1/48 kits? I'm thinking of stuff like Eduard's 190 series and Tamiya's Thunderbolts. Not going to start with 1/72 though. All those stuff is way too small for me LOL!

Cheers, Clemens

  • Member since
    December 2002
  • From: Bury St Edmunds, Suffolk, England
Posted by Bish on Tuesday, July 2, 2013 4:10 PM

Thanks Clemens, and glad you like the tut.

Now if only I had a £ for every time someone said they thought my builds were 48th over the past few months.  I could retire and actually have some chance of completing my stash before I go.

As I always say, I have ben building 72nd for over 20 years, so I don't really know any different.

I am a Norfolk man and i glory in being so


On the bench: Airfix 1/72nd Harrier GR.3/Fujimi 1/72nd Ju 87D-3

JOIN OUR COMMUNITY!

Our community is FREE to join. To participate you must either login or register for an account.

SEARCH FORUMS
FREE NEWSLETTER
By signing up you may also receive reader surveys and occasional special offers. We do not sell, rent or trade our email lists. View our Privacy Policy.