SEARCH FINESCALE.COM

Enter keywords or a search phrase below:

Reich Defenders IV Group Build: Strike From Above

54578 views
513 replies
1 rating 2 rating 3 rating 4 rating 5 rating
  • Member since
    April 2013
Posted by SchattenSpartan on Wednesday, January 29, 2014 7:40 AM

Doug: Thank you very much, borther! The paint has a bit of texture in certain areas (caused by me spraying the primer with too much pressure) but I think it doesn't really matter with 2 clear coats on top...

I got the area where I goofed up smooth again and I'll reprime/repaint it tonight.

Painting a Thunderbolt completely yellow feels kinda wrong, but it just looks so amazingly different and out-of-place when finished Big Smile

  • Member since
    October 2008
  • From: Georgia
Posted by Rigidrider on Wednesday, January 29, 2014 9:52 AM

Clemens, Thats not yellow... Thats YELLLLLLLOW! Ha! Regardless... Looking good.

Doug

When Life Hands You A Bucket Of Lemons...

Make Lemonade!

Then Sell It Back At $2 Bucks A Glass...

  • Member since
    April 2013
Posted by SchattenSpartan on Wednesday, January 29, 2014 11:31 AM

Doug: Nah, it's neither of them. It's RLM 04 Wink

I just finished priming the area and I'll give it an hour or 2 to dry and then It's time for the yellow again!

  • Member since
    December 2003
  • From: Charleston, SC
Posted by sanderson_91 on Friday, January 31, 2014 7:19 PM

Here's a quick update:

I have all of the decals on and need to add a layer of clear gloss and then a bit of weathering.  I won't be done tonight, but hopefully in the next few days.  

Steve


  • Member since
    April 2013
Posted by SchattenSpartan on Saturday, February 1, 2014 7:17 AM

I'm still messing around with the finish around the turbocharger. I won't get it to be super smooth again, but I think it looks good enough.

  • Member since
    April 2005
Posted by Thunderbolt379 on Saturday, February 1, 2014 7:24 AM

Hi guys,

January 31st was the nominal end date, but as always I'm more than happy for those still building to take all the time needed to turn in masterpieces, so -- nothing new past this point, but the GB is still very much underway!

Cheers, Mike/TB379

http://worldinminiature.blogspot.com/

  • Member since
    April 2013
Posted by SchattenSpartan on Saturday, February 1, 2014 7:28 AM

Thanks, Mike! I think I can finish her next week. I just hope I don't have any additional painting accidents...

  • Member since
    April 2005
Posted by Thunderbolt379 on Saturday, February 1, 2014 7:43 AM

No worries!

M/TB379

http://worldinminiature.blogspot.com/

  • Member since
    April 2013
Posted by SchattenSpartan on Monday, February 3, 2014 8:19 AM

I got that paint damage fixed now and I'll move on to spraying the OD. With a bit of luck, I should be able to post an update tonight.

  • Member since
    November 2003
  • From: Naples, FL
Posted by tempestjohnny on Monday, February 3, 2014 9:47 AM

Thanks Mike I should have mine done sometime this week


  • Member since
    April 2013
Posted by SchattenSpartan on Monday, February 3, 2014 10:04 AM

Guess what. I just ran out of masking tape. So much for the "bit of luck" part... I'll go to my LHS tomorrow and get me a few rolls of Tamiya tape. Normally I'd just freehand the camo or only mask off the edges of the pattern for a sharp edge like on my Jug, but yellow is so hard to touch up if anything goes wrong that I decided to mask the entire yellow area. I got the fuselage and tailplane masked, but i ran out of tape while I was masking off the wings...

  • Member since
    April 2005
  • From: Australia
Posted by taxtp on Tuesday, February 4, 2014 4:35 AM

I hate running out of supplies Clemens...

I'm back onto my Henschel now Mike, I reckon it will take under two weeks.

Cheers

Tony

I'm just taking it one GB at a time.

  • Member since
    April 2013
Posted by SchattenSpartan on Tuesday, February 4, 2014 4:50 PM

Time for another update on my yellow Jug!

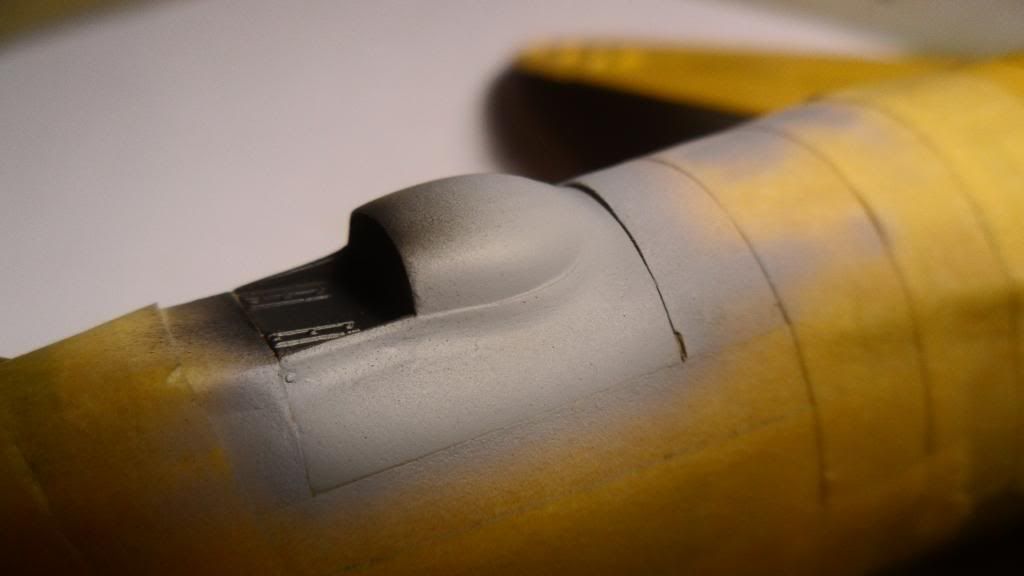
I'll start this one with some pics of the area I repainted:

This is how it looked after the first coat of primer:
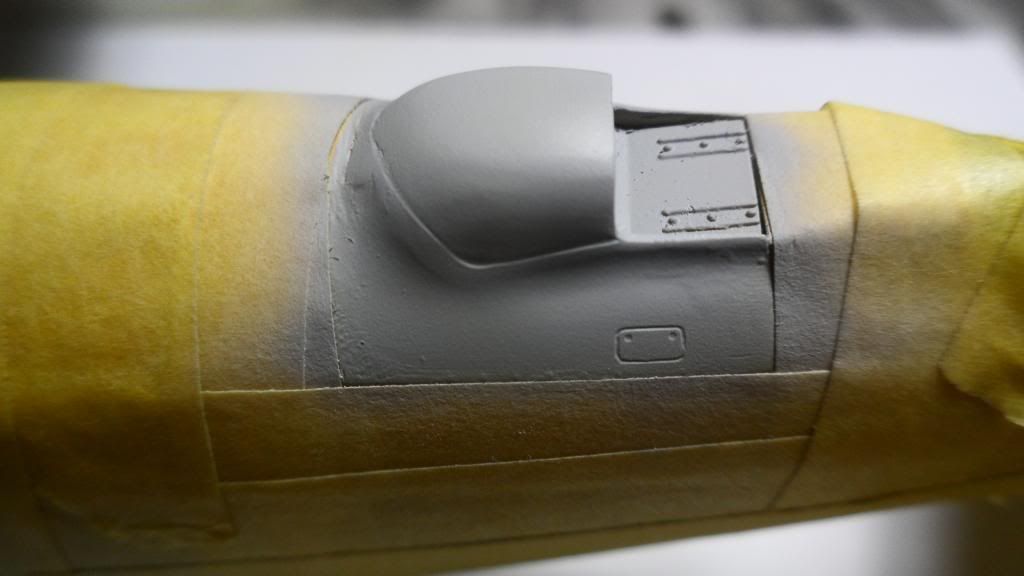
You were still able to see where the paint was damaged, so I sanded and reprimed it a couple of times. Here's a pic of how it looked after the 4th coat of primer (with lots of sanding and polishing between coats of course):
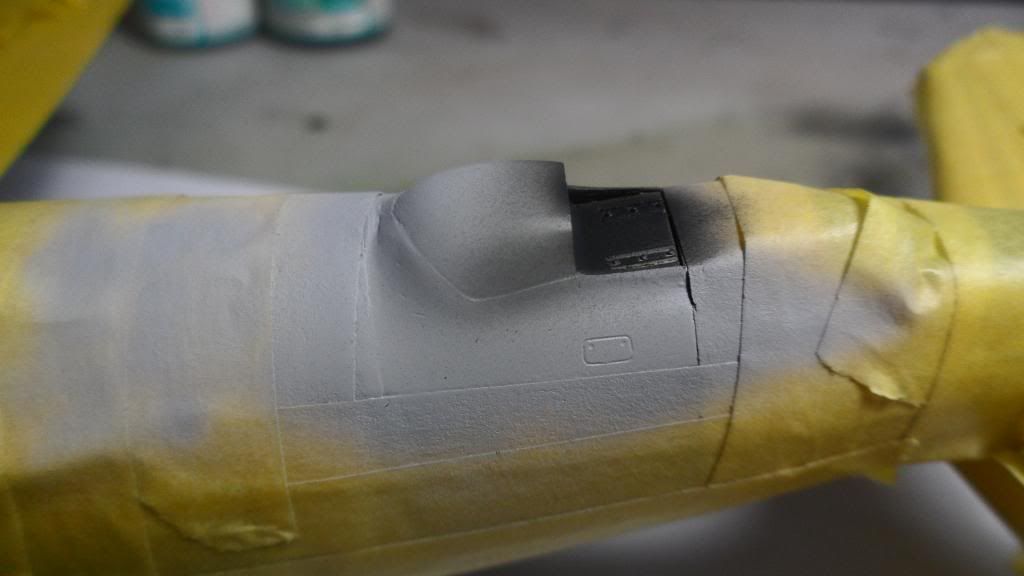
Still not perfectly smooth, but way better than the first try and good enough IMO.

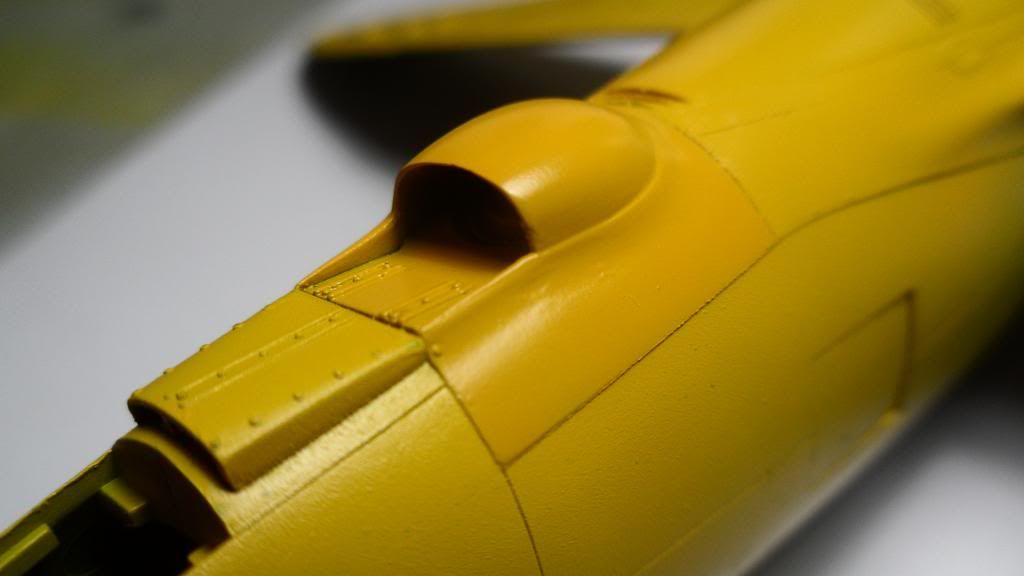
Then I sprayed severyl coats of yellow. I knew it was almost impossible to get the same shade of yellow, so I didn't bother at all and just did the opposite: I mixed a wee bit of Gunze clear red and yellow into the RLM 04 to make it appear a bit more orange tinted:
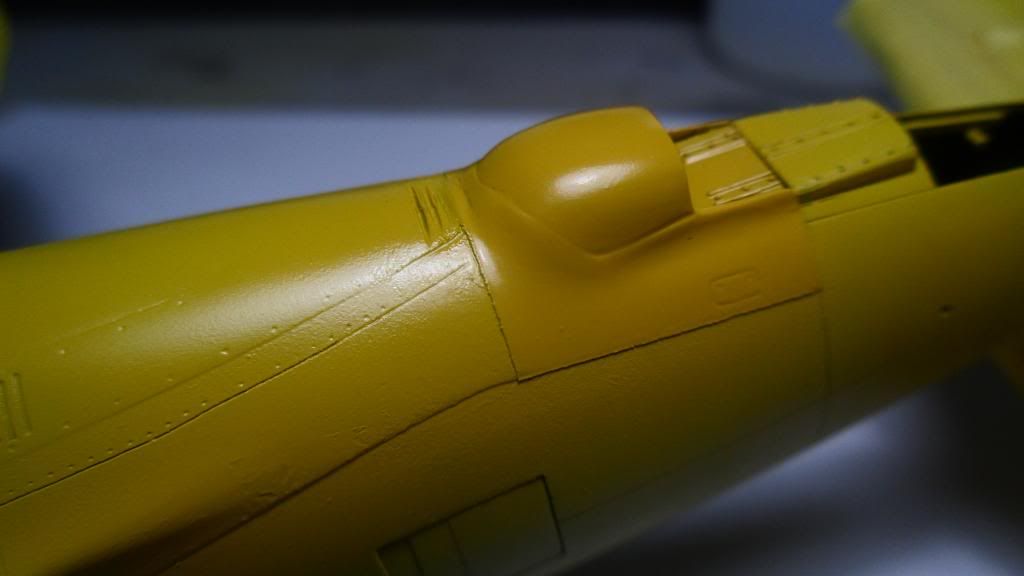
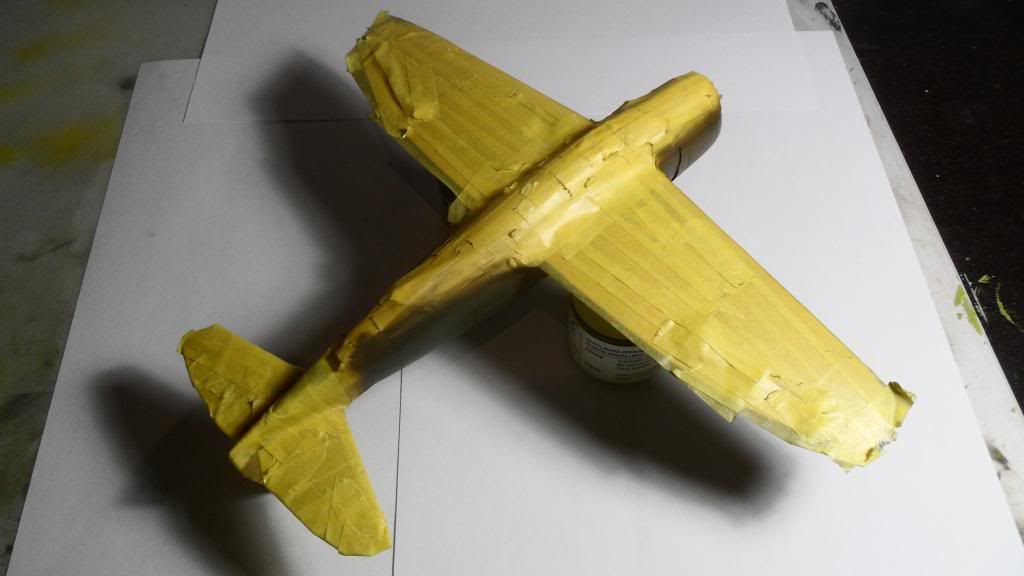
And some pics of all the masked area just to show the sheer amount of tamiya tape this bird is covered in:
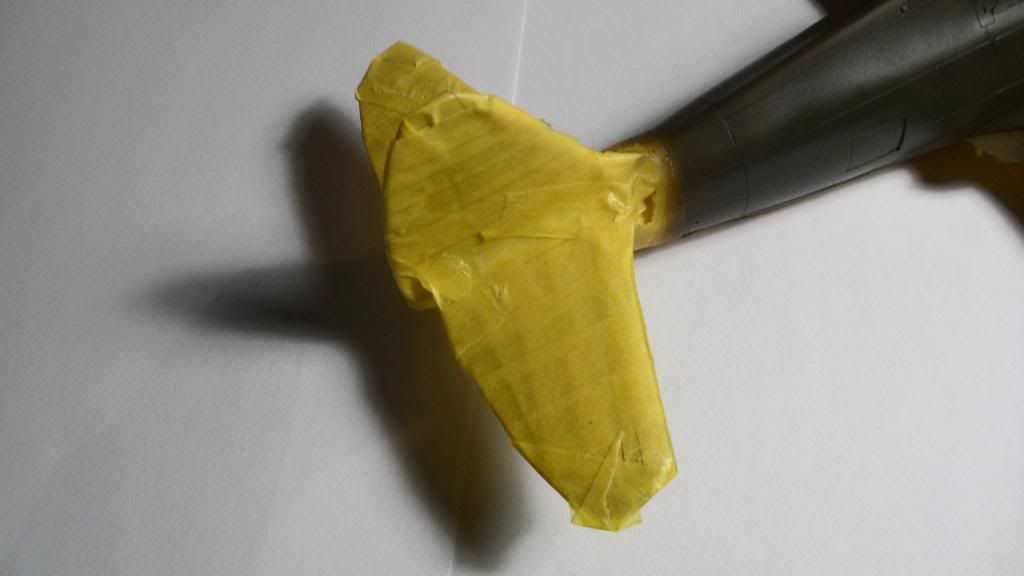
Now I'll remove all the tape and post another update in an hour or so. I just hope I didn't get any paint bleeding through... Indifferent 

  • Member since
    April 2005
  • From: Australia
Posted by taxtp on Tuesday, February 4, 2014 4:54 PM

Looks OK Clemens, hopefully no bleeds....

Cheers

Tony

I'm just taking it one GB at a time.

  • Member since
    April 2013
Posted by SchattenSpartan on Tuesday, February 4, 2014 5:32 PM

And Photobucket failed again! Bang Head

Let me try this again...


  • Member since
    April 2013
Posted by SchattenSpartan on Tuesday, February 4, 2014 5:40 PM

The masking tape is off and I think I did a pretty good job on this one:

Even the wing's leading edges have a nice and sharp line along them. That's a huge relief for me because it's the area i dreaded the most. It's nowhere near being perfectly straight, but i can live with the slight imperfections. I don't think the Germans were super cautious about getting those lines as neat as possible anyway:


You can make out some of the streaking in this pics, but it's much more visible in person (I really need a better camera):


I sprayed all the areas where the Thunderolt normally has the stars-and-bars with RLM 81 (Brown Violet). It looks like a very sloppy paint job, but i did this on purpose. First of all, a good part of the area will be covered with german insignia and I suppose it was just sprayed by a mechanic who just wanted to get the job done and didn't care how it looked as long as the stars weren't visible anymore:


One thing that did go wrong was me being too impatient to wait more than 12 hours for the yellow to dry:


You can see that the yellow paint has some texture to it. That's because the paint wasn't completely dry when I put on the tape. It's no biggie though as it's only some slight surface damage that looks way worse than it actually it. A bit of polishing should do the job and make everything smooth again.

I hope you like her...

Cheers, Clemens

  • Member since
    March 2010
  • From: MN
Posted by Nathan T on Tuesday, February 4, 2014 5:48 PM

Interesting colors on a T-bolt! Nice work.


  • Member since
    April 2005
Posted by Thunderbolt379 on Tuesday, February 4, 2014 6:02 PM

LOVE the preshading show-through Clemens! And that lading edge is straighter than most of mine ever are! The texture and finish are excellent!

M/TB379

http://worldinminiature.blogspot.com/

  • Member since
    April 2013
Posted by SchattenSpartan on Tuesday, February 4, 2014 6:12 PM

Thanks a bunch guys! Embarrassed

Nathan: It sure is something else. Painting the belly completely in yellow felt so wrong, but with the OD upper surfaces it's really starting to look like an interesting aircraft.

Mike: Thanks for the nice words about the leading edges. I normally use the 6mm tape for smaller areas like this, but I noticed that the 10mm tape works way better...

I'll polish the damaged yellow paint tomorrow and I should be able to get the clear coat on untill Tuesday evening...

If you guys see any pics of a Thunderbolt painted in a unique and/or interesting color scheme, just dare me to build it and I'll pick up another Tamiya kit. I'm always looking for an excuse to build one of them anyway (did I mention the P-47 is my favorite plane? Whistling)

  • Member since
    April 2005
  • From: Australia
Posted by taxtp on Thursday, February 6, 2014 2:15 PM

Hi Clemens,

Your Jug is looking the goods. The preshading is effective, and the issues you noted are not visible to me.

Here's another P-47 for you, I'm just using the box art t odemonstrate it, of course you'll do it in 1/48. As I understand it, it's painted in RAF Dark Green over Sky, or possibly even RAF Dark Green over Neutral Gray.

Go on, I dares ya !

Anyway, prrogress on my HS129. The first shows the canopy masking, ready for paint. The 2nd shows it with the schwarzgrun on. Now I'm masking the splinter pattern.

Cheers

Tony

I'm just taking it one GB at a time.

  • Member since
    April 2013
Posted by SchattenSpartan on Thursday, February 6, 2014 3:15 PM

That's one nice looking 129, Tony! Regarding that P-47: She looks like a normal P-47D with a bubble canopy to me (without a tail fillet, that is). Dark Green ove Sky sounds like a very interesting camo scheme. I still have a spare Tamiya P-47 in my stash. Yes, I did write "spare P-47". I'm the guy who is responsible for my LHS never having those Tamiya Jugs in stock - They only ordere one at a time and they don't do it very often, but whenever they do have one in stock, I pick it up. That's enough rambling for one post, let me finish this one with the following: "Challenge accepted!"

There's only one problem with this bird. The only decal sheet I could find is from Barracuda Decals and that sheet displays Eileen as a Razorback Jug with standard OD/NG camo...

  • Member since
    April 2013
Posted by SchattenSpartan on Thursday, February 6, 2014 3:20 PM

Nevermind my problem with the decals. I just did a quick google image search and I found a few nice pics of Eileen:

She looks almost the same in both pictures with the big exeption of one picture clearly showing a Razorback, while the other one shows a Bubbletop P-47. Is it possible that Eileen was field-modified with a bubble canopy? The green in the 2nd pic looks way too dark for OD as far as I can tell, which makes me believe that it is dark green. 

  • Member since
    April 2005
Posted by Thunderbolt379 on Thursday, February 6, 2014 4:40 PM

Hi SS -- I've been meaning to do Eileen myself, I have two of those Academy 72s in stock, and would love to do her larger. I think the razorback was lost and replaced with a bubbletop, it was a factory job to build them as one or the other, not a field mod... The colorscheme as I've researched was RAF dark Green over US Neutral Grey, an unusual choice and very visually engaging. The only question is whether the Academy decals are any use at all!

Cheers, M/TB379

http://worldinminiature.blogspot.com/

  • Member since
    April 2013
Posted by SchattenSpartan on Thursday, February 6, 2014 4:47 PM

I just found a company called "Maketar Masks". They have a mask set for the P-47 includeing the roundels and letters for the duselage code as well as serial number masks. Does anybody know if their masks are any good? They also porovide you with the option of cutting the masks out of vinyl instead of tape. Are there any advantages with vinyl compared to tape?

  • Member since
    December 2003
  • From: Charleston, SC
Posted by sanderson_91 on Thursday, February 6, 2014 8:43 PM

Hey Guys,

Have not had time to get to the 88 this week, but that Jug and 129 are looking great!

SS - I bought some masks from Maketar a few months ago.  I havent't used them yet but want to experiment with them soom.  I bought the vinyl masks because I think that if you are careful, you can use them more than once.  

Steve


  • Member since
    December 2003
  • From: Charleston, SC
Posted by sanderson_91 on Friday, February 7, 2014 7:33 PM

Here are some new photos of the 88.  Got a new camera and can finally take a half way decent photo.  I have the undersides weathered and have started the topsides.  I did run into an issue that has me confused.  I used Alclad Clear Gloss to clear coat and apply decals.  I applied two layers of the clear gloss after the decals went down but my wash ate through and started to damage the Tamiya acrylics.  My wash is Model Master acrylic burnt umber and wen almost dry I use cotton buds to remove with windex.  I thought the Alclad Clear Gloss was Laquer and that the acrylic wash/windex would not eat through the Gloss.  I couldn't really tell that this was happening until I started on the topside when the green came off on the cotton bud.  I've switched back to my usual method of Future and then the acrylic wash.  I need to add the rear two canopies and machine guns, plus some other small clear parts and then should be done.  Here are some photos

Still need to fine tune the camera skills, but these photos are way better than anything from my old camera.

Steve


  • Member since
    April 2005
Posted by Thunderbolt379 on Friday, February 7, 2014 7:45 PM

Steve, she looks fantastic!!! Very professional indeed! The chemistry problem doesn't show in the pics and I confess has me puzzled -- the dissimilar chemistry is supposed to be immune, though I remember once an oil wash in enamel thinner lifting an acrylic basecoat... Just once.

I look forward to listing this one on the honour wall!

Mike/TB379

http://worldinminiature.blogspot.com/

  • Member since
    April 2013
Posted by SchattenSpartan on Saturday, February 8, 2014 4:37 AM

First of all, your 88 looks bloody fantastic, Steve! I can relate to your Alclad problem. Let me tell you my experience with that stuff.

The first time I used Alclad's clear coat was when I built a whitewashed King Tiger. I used it to seal the camo pattern before the whitewash went on in order to allow me to remove the white paint without damaging the camo. I did a test on a piece of plastic sheet to see what solvents eat through the alclad clear coat:

  • Mr.Color Thinner (its a lacquer thinner, but I use it for their acrylics) went right through - no surprise here
  • Tamiya X20A Thinner (acrylic) ate through the clear coat too, but it wasn't as agressive
  • Revell Aqua Color Clean (strong acrylic cleaner) removed the clear coat very quickly
  • Turpentine (that one really surprised me) didn't go through comletely , but it diisolved the clear coat in some areas (looked really bad) where i did an oil wash. I sprayed another flat coats on top anyway so it didn't matter that much

There was only a single thinner that didn't harm the clear coat:

  • Vallejo Airbrush thinner (I used it together with Vallejo's white to create the whitewash effect). I cuold literally flood the surface in the thinner to remove the white paint and nothing happened to the clear coat or the paint below.

It turns out that Alclad clear coats dry rock-hard and very clear, but they can be removed/damaged with almost every solvent there is. They are perfect for the last clear coat on your model, but you can't really do a lot of weathering on top without destroying the finish. I still use them because I switched from oil washes to Flory washes for aircraft finishes. I only use poil washes on tanks and the interior of aircraft where I use no alclad clear coats.

I hope this helps. 

  • Member since
    March 2010
  • From: MN
Posted by Nathan T on Saturday, February 8, 2014 10:52 AM

Did you use The Enamel based Alclad Clear Kote? All I know is using Windex or rubbing alcohol in your wash is a big no no, no matter what type of paint you have underneath. Rubbing alcohol will dissolve Gunze Laqcuer. That said, your 88 looks amazing. Really nice paint and decal work. Can't wait to see it finished.


  • Member since
    April 2013
Posted by SchattenSpartan on Saturday, February 8, 2014 12:32 PM

Yeah, that's the one  use and I really like it. You just have to be very careful not to get the wrong solvent on top Wink

JOIN OUR COMMUNITY!

Our community is FREE to join. To participate you must either login or register for an account.

SEARCH FORUMS
FREE NEWSLETTER
By signing up you may also receive reader surveys and occasional special offers. We do not sell, rent or trade our email lists. View our Privacy Policy.