SEARCH FINESCALE.COM

Enter keywords or a search phrase below:

Reich Defenders IV Group Build: Strike From Above

54573 views
513 replies
1 rating 2 rating 3 rating 4 rating 5 rating
  • Member since
    April 2005
Posted by Thunderbolt379 on Saturday, May 25, 2013 11:43 PM

Okay, I went ahead and made a chocie, updating p1!

Cheers, Mike/TB379

http://worldinminiature.blogspot.com/

  • Member since
    April 2005
  • From: Australia
Posted by taxtp on Sunday, May 26, 2013 12:09 AM

That's an outstanding model Doug. My congratulations to you. The finish is excellent.

Cheers

Tony

I'm just taking it one GB at a time.

  • Member since
    December 2002
  • From: Bury St Edmunds, Suffolk, England
Posted by Bish on Sunday, May 26, 2013 12:45 AM

Lovely build Doug, that's a great finish.

There might be a slight delay on mine. I want to go with low viz markings including outline black crosses. But I didn't have any that I liked in my spares pile. But I managed to find an old set of Microscale decals so have ordered them. But they have to cross the pond. So in the meantime I am going to add all the other markings and work on the base and accessories.

I am a Norfolk man and i glory in being so


On the bench: Airfix 1/72nd Harrier GR.3/Fujimi 1/72nd Ju 87D-3

  • Member since
    October 2008
  • From: Georgia
Posted by Rigidrider on Sunday, May 26, 2013 7:26 AM

Thank you one and all... Thunderbolt, I'll leave the choice to you, Your the GB Admin, and you pick your favorite.

Tony, as always good to hear from you I'm not the most knowledgable on the larger luftwaffe (twin engine) aircraft and just try to reproduce what I can find to help, I just hope I was fairly close,

Bish, Don't it always seem to go that way, You try to be as accurate as possible and nomatter what you read, someone else has a diffefert picture or discription. Thats my problem too, What markings?,and you usually have to put together 2 or 3 sets to get close.

But any way, I watch these even though complete with my offering at the time, and what I like about this build is that there are so many interesting ideas and builds going on.

If OK and as time allows I have another Idea rattling around my brain pan that might fit in here!

Thanks

Doug (RR)

When Life Hands You A Bucket Of Lemons...

Make Lemonade!

Then Sell It Back At $2 Bucks A Glass...

  • Member since
    October 2008
  • From: Georgia
Posted by Rigidrider on Sunday, May 26, 2013 8:12 AM

OK guys... I'm sure this has been asked before, But PLEASE help a Dumb A** figure out how to add badges to signature page. When I try, is states that only 512 characters allowed. WTH? Also, I need to clean up the page where pictures have been removed by poster and now states not available, You can see the page... HELP!

When Life Hands You A Bucket Of Lemons...

Make Lemonade!

Then Sell It Back At $2 Bucks A Glass...

  • Member since
    December 2002
  • From: Bury St Edmunds, Suffolk, England
Posted by Bish on Sunday, May 26, 2013 8:14 AM

Try and get all your images into one, either a GIF image or one large image like the one I have my badges in. You should be able to just remove that link from your sig.

For my markings I don't have to worry about accuracy, for once, as its a what if scheme. I just didn't want to settle for the ones I have, which are ok, but not what I really wanted.

I am a Norfolk man and i glory in being so


On the bench: Airfix 1/72nd Harrier GR.3/Fujimi 1/72nd Ju 87D-3

  • Member since
    December 2003
  • From: Charleston, SC
Posted by sanderson_91 on Sunday, May 26, 2013 9:26 AM

Doug - really liking that 110!  Camo looks great! I've also been following the 190 build and you've got some really nice work going on there too!

Steve


  • Member since
    April 2013
Posted by SchattenSpartan on Sunday, May 26, 2013 12:19 PM

The cockpit of my Jug is now fully repainted and is awaiting some finishing touches here and there and a little bit of weathering. Stay tuned for an update today or tomorrow! I ordered two German 500kg bombs as well on Hannants.

Cheers Clemens

  • Member since
    April 2013
Posted by SchattenSpartan on Sunday, May 26, 2013 3:35 PM

UPDATE TIME!!!

Sorry for all the delays, I had very limited bench time lately. I'll have plenty of it the next weeks though (yay!)

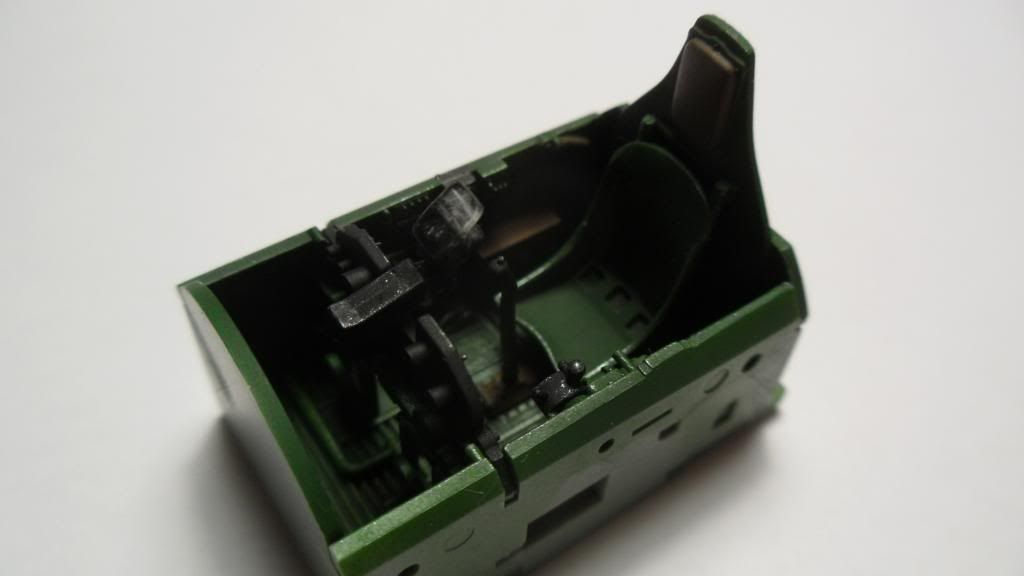
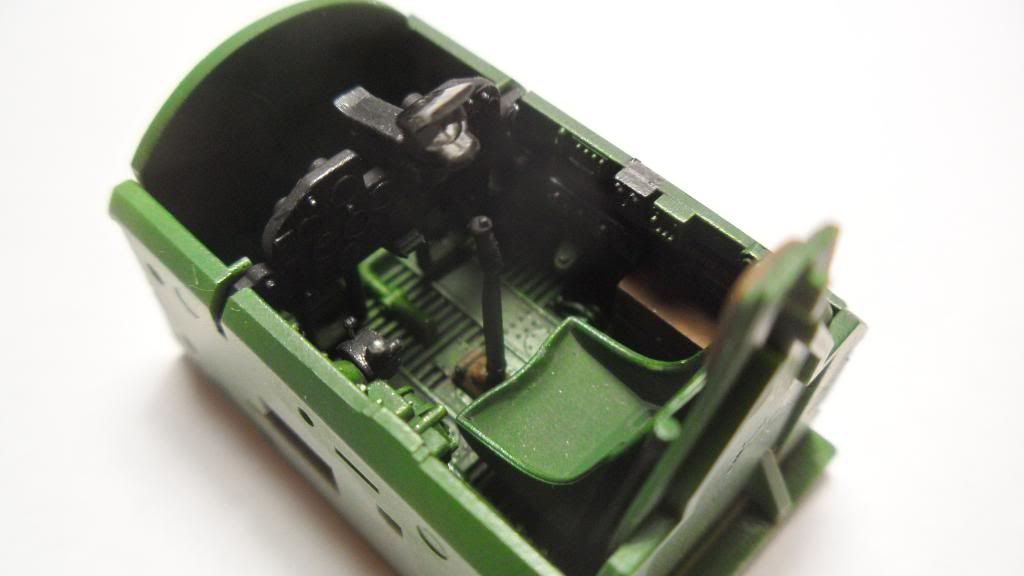
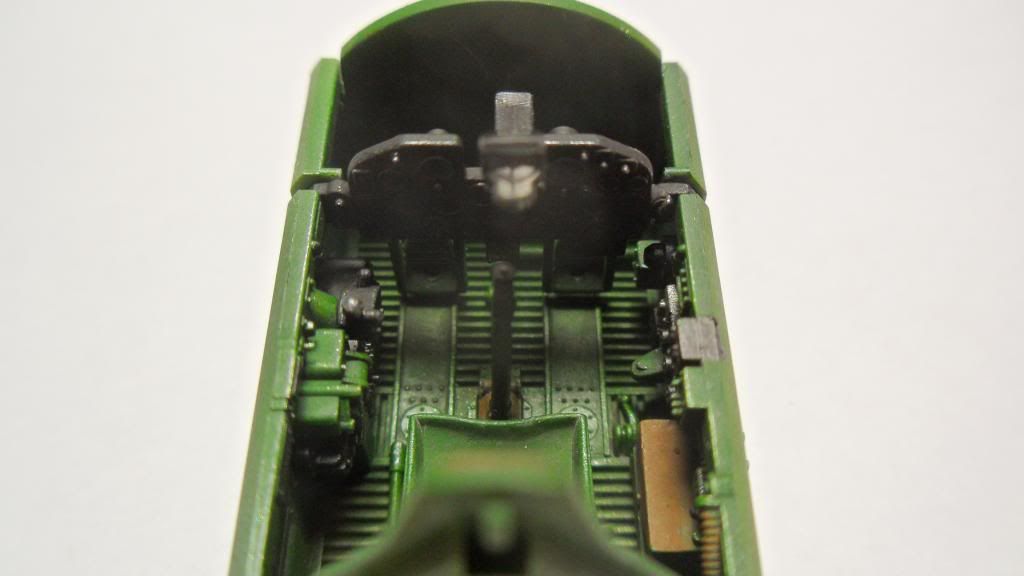
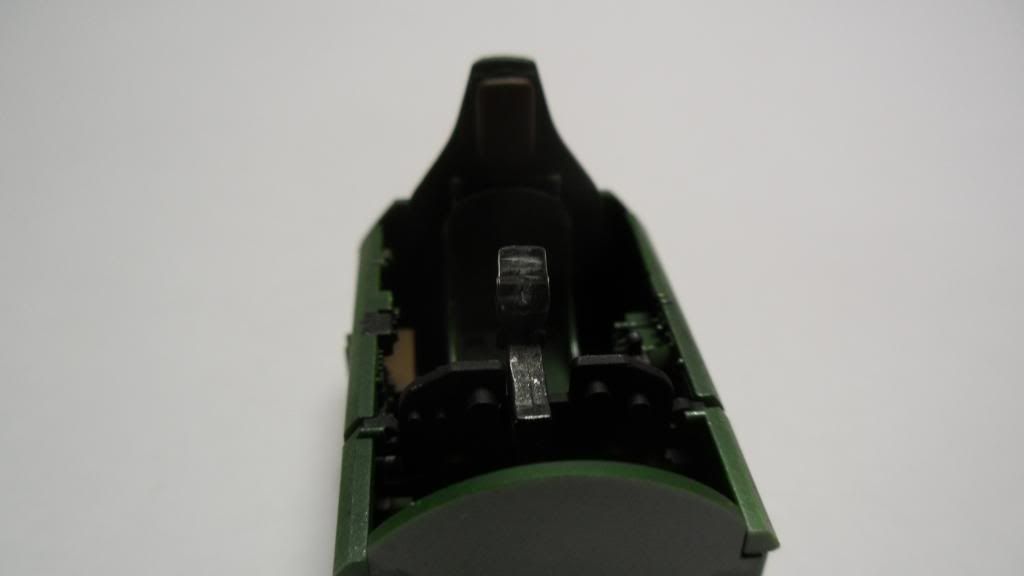
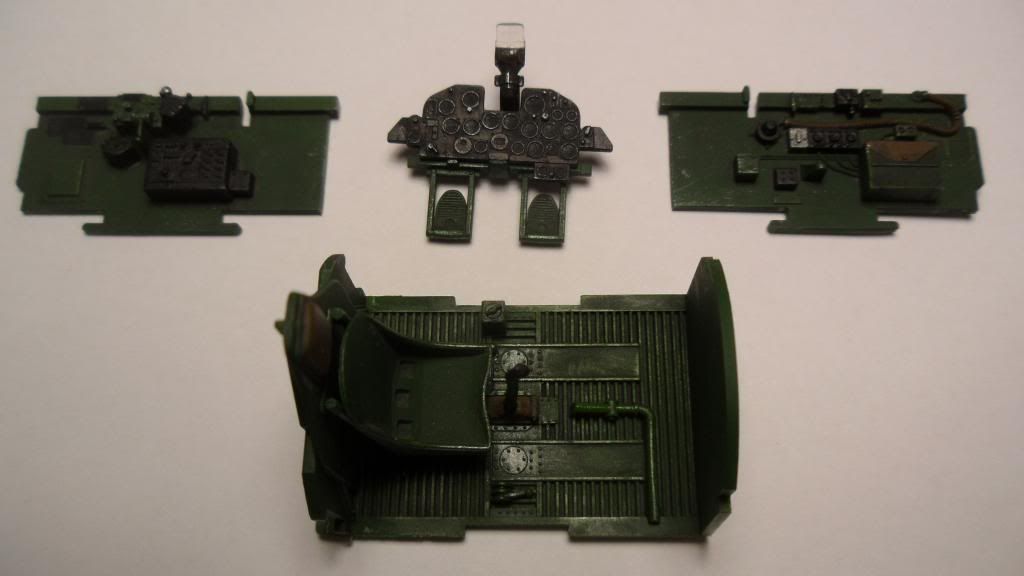
I finally managed to complete the cockpit of my german Jug (well, almost). The only things I'll have to add are the IP decal (i need some gloss varnish first) and the seatbelts (those HGW belts are some fiddly stuff)

I painted the pit in Tamiya XF-26 mixed with some Gunze H-12 to make it a bit darker (it fits the color of the real thing pretty well).  Tamiya and Gunze paints have their own thinners that don't work that well with the color of the other Company, so I thinned it with Revell Aqua Color Clean. This makes it a bit harder to get a nice finish than with regular thinners, but I think it turned out quite good.

Next steps were some detail painting with various Vallejo paints, a drybrushing with XF-16 mixed with some Dark Yellow (and some silver in a few spots) and a black oil wash.

But enough talking, now to the pics!

My camera didn't capture the color that well on all pics, but the first pic shows how it looks in reality.

The painted parts:
Everything glued together:
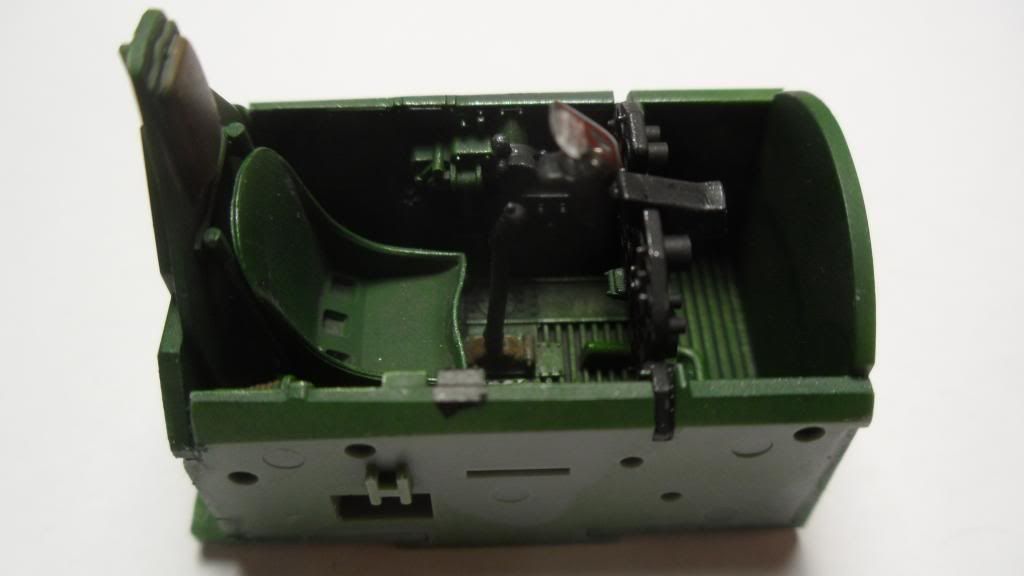


I hope you like it. It wasn't easy to get a nice and even coat of paint down with the rather unconventional mix of Tamiya and Gunze paints thinned with Revell's cleaning solution.

Cheers Clemens

  • Member since
    April 2013
Posted by SchattenSpartan on Sunday, May 26, 2013 3:42 PM

I had to edit the post to get the pics in there. It ended above the firat pic when I posted it first. This happened to me the second time now. Any Ideas what I am doing wrong?

  • Member since
    December 2002
  • From: Bury St Edmunds, Suffolk, England
Posted by Bish on Sunday, May 26, 2013 3:52 PM

Nice looking cockpit, that's some work in there.

I am a Norfolk man and i glory in being so


On the bench: Airfix 1/72nd Harrier GR.3/Fujimi 1/72nd Ju 87D-3

  • Member since
    April 2013
Posted by SchattenSpartan on Sunday, May 26, 2013 3:57 PM

Thank you very much, Bish! The most work went into getting that stupid paint mixture on the model without achieving a coarse texture. That Aqua Color Clean evaporates as soon at you pull the "trigger" on your airbrush, so as an advice from me: Don't use it if you don't have to... I ended up with a mix of 1 part paint and 4-5 parts thinner Bang Head. It is awesome for cleaning my airbrush though (Harder & Steenbeck Evolution Silverline Stick out tongue)

I spent about 5 hours on that cockpit. 30 mins of drybrushing, 30 mins for the oil wash, 1 hr for the details, 1 hour of careful airbrushing in very thin layers (green and black), a few minutes mixing the right shade of green and almost 2 frigging hours to get that damn paint/thinner ratio right! (I'll never use that Aqua Color Clean as a thinner!)

Cheers, Clemens

  • Member since
    October 2008
  • From: Georgia
Posted by Rigidrider on Sunday, May 26, 2013 8:25 PM

Steve... Thank you for the kind words... Very much appreciated.

Bish, I hear ya my friend, If you dont like em, it will always bug the soup out of you!

Clemens... Very nice work! You will remember this the next time! Excellent! Looking forward to the next pics!

When Life Hands You A Bucket Of Lemons...

Make Lemonade!

Then Sell It Back At $2 Bucks A Glass...

  • Member since
    April 2005
Posted by Thunderbolt379 on Sunday, May 26, 2013 9:25 PM

Clemens -- looking very good! The pit I often find frustrating because it blocks me from getting on with the airframe until I've fiddled with paint, and that can take a fair bit of mental self-control. You've got this one coming along nicely!

M/TB379

http://worldinminiature.blogspot.com/

  • Member since
    April 2013
Posted by SchattenSpartan on Monday, May 27, 2013 1:56 AM

Thank you very much guys!

Mike: I don't like spending too much time on cockpits either, but those Tamiya cockpits are so nice to build and paint, while being very detailed, so it's a joy working on them.

Cheers, Clemens

  • Member since
    April 2013
Posted by SchattenSpartan on Monday, May 27, 2013 9:50 AM

I just joined the cockpit with one of the fuse halves and I should be able to glue the fuse together today. Dunno if I can get on sanding the seam down though. Maybe I'll post another update today.

Cheers, Clemens

  • Member since
    December 2002
  • From: Bury St Edmunds, Suffolk, England
Posted by Bish on Wednesday, May 29, 2013 3:55 PM

Got all the decaling done as far as I can go. Just waiting on the crosses to arrive before adding those and the fuselage code.

In the meantime, I will add the undercarriage and get on with the base. 

I am a Norfolk man and i glory in being so


On the bench: Airfix 1/72nd Harrier GR.3/Fujimi 1/72nd Ju 87D-3

  • Member since
    April 2013
Posted by SchattenSpartan on Wednesday, May 29, 2013 4:09 PM

Looking really good, Bish! I can't make any progress on my Jug untill I get me some gloss varnish sadly...

Clemens

  • Member since
    December 2002
  • From: Bury St Edmunds, Suffolk, England
Posted by Bish on Sunday, June 2, 2013 2:28 AM

Thanks, i take it you are at the decal stage.

I am a Norfolk man and i glory in being so


On the bench: Airfix 1/72nd Harrier GR.3/Fujimi 1/72nd Ju 87D-3

  • Member since
    April 2013
Posted by SchattenSpartan on Sunday, June 2, 2013 6:10 AM

Nah, I'm not even close to decalling this bird. I need to get the IP decal on though. After that those nice, but fiddly HGW belts and some other stuff. It isn't even painted atm.

  • Member since
    August 2012
Posted by AndrewW on Monday, June 3, 2013 9:38 AM

Spartan,

the HGW belts are quite fiddly, but beautiful when finished.  My first set (the one I'm working on now) took me about three hours, but I was so happy with them at the end.

I've been picking away at the Wulf, and got one wing top down and the other halfway there.  I'll have a lot of putty work to do (which disappoints me with a Tamiya kit) but hopefully I'll have a photo or two later this week.  The big hurdle will be temporarily attaching the cowls so I can paint a bit, remove them, insert the engine and then reattach.  Seems an awkward way around it, but I want to paint without covering the exhausts in overspray.  Fingers crossed that white glue holds it well enough.

Life is hard, it's even harder when you're stupid - John Wayne.


  • Member since
    April 2013
Posted by SchattenSpartan on Monday, June 3, 2013 10:16 AM

I know, those HGW belts are really worth it.My Wildcat has a set of them in the pit already. I wish you much luck with the cowls and I'm looking forward to some pics!

Cheers, Clemens

  • Member since
    December 2002
  • From: Bury St Edmunds, Suffolk, England
Posted by Bish on Monday, June 17, 2013 1:45 AM

A quick update. I am still awaiting my decals to arrive from the US. Its been two weeks now and I am getting a little worried. I know its not the senders fault, I am guessing its down to Royal mail. I am also waiting for 2 kits I bought from Poland, which have been even longer.

So at the moment the 262 is stalled.

I am a Norfolk man and i glory in being so


On the bench: Airfix 1/72nd Harrier GR.3/Fujimi 1/72nd Ju 87D-3

  • Member since
    December 2002
  • From: Bury St Edmunds, Suffolk, England
Posted by Bish on Tuesday, June 18, 2013 1:03 PM

Its just come to my attention that I have been a real Muppet. I have been waiting over 2 weeks for those decals from the US, they seem to be stuck at UK customs. But I was just checking Hannants and found they have just what I want from Areomaster. Given I check Hannants almost every day, I can't believe I missed these. So I have just placed an order and hopefully they should be here Thurs or Fri.

You watch, the other ones will arrive tomorrow.

I am a Norfolk man and i glory in being so


On the bench: Airfix 1/72nd Harrier GR.3/Fujimi 1/72nd Ju 87D-3

  • Member since
    August 2012
Posted by AndrewW on Wednesday, June 19, 2013 9:22 AM

 Just thought I'd put up a quick post, I've not forgotten about this by any means, but carrying on two group builds at the same time has slowed progress on my Wulf.  Not at a standstill at all, but slowly working on putty around the wing roots and getting things to look right.  On the plus side, this morning I started mounting ailerons and over the last few days I'd given the cowling some thought.  I wound up thinking if I could get it painted before hand, then mount it, I would not risk overspraying all of my interior.  At any rate, here's the cowl and panels.  Next is painting the interior of the panels, getting my other aileron fixed down and finishing the filling work.  Then, finally, PRIMER!!!!

Life is hard, it's even harder when you're stupid - John Wayne.


  • Member since
    April 2013
Posted by SchattenSpartan on Wednesday, June 19, 2013 9:49 AM

That's looking very good, Andrew! Some very neat painting you did there! How is the Tamiya kit? I thought about getting their F-8 for this GB as well (the one with the bomb trailer), but I'm not too sure about it...

Cheers, Clemens

  • Member since
    August 2012
Posted by AndrewW on Wednesday, June 19, 2013 10:09 AM

Thanks, Clemens, the mottling was the hard part, but once I figured out thinning and pressure, not too bad.  Their F8 is nice, pretty much like any of their Wulfs, though I found a reasonable gap in the wing root (not sure if that was my fault or the kit) and have used a lot of aftermarket (CMK, which fits nicely), but otherwise, it goes together nicely.

Life is hard, it's even harder when you're stupid - John Wayne.


  • Member since
    December 2002
  • From: Bury St Edmunds, Suffolk, England
Posted by Bish on Friday, June 21, 2013 1:14 PM

My decals finally arrived today, both sets. I know have enough Crosses to equip the entire German air force. The Areo master ones are nice, but the old Microscale set has exactly what I want. So I will have this wrapped up soon.

I am a Norfolk man and i glory in being so


On the bench: Airfix 1/72nd Harrier GR.3/Fujimi 1/72nd Ju 87D-3

  • Member since
    August 2012
Posted by AndrewW on Friday, June 21, 2013 3:56 PM

Isn't that always the way, Bish.  When it rains it pours.  

I had a little time to get my ailerons fixed on, finish up my sanding work and shoot a layer of primer.  I even impressed managed enough time to get my RLM 05 and 76 painted up.  Please excuse the crumbs on the counter in the photo, I've put off cleaning up to get some paint laid in. 

I'd also put some time in over the last three months on three of the figures that will be working around her, shown below.

Next is the fuselage top and the wings, and since I've figured out my pressures and ratios for mottling, I should start on that next month as well.  This sunday is back to work, so I'll have to pick up at it when I get home again.  I'm very impressed by the Vallejo paints for their transparency so far.

Life is hard, it's even harder when you're stupid - John Wayne.


  • Member since
    December 2002
  • From: Bury St Edmunds, Suffolk, England
Posted by Bish on Saturday, June 22, 2013 7:59 AM

Isn't it just Andrew.

That's coming along nicely. I look forward to the mottling. I had put it off for a while before trying it. The hardest thing I found was finger control. I take it you work away from home. Well I know that feeling, I used to hate leaving a partly built kit for a few months. But it was always nice to get back to.

I am a Norfolk man and i glory in being so


On the bench: Airfix 1/72nd Harrier GR.3/Fujimi 1/72nd Ju 87D-3

JOIN OUR COMMUNITY!

Our community is FREE to join. To participate you must either login or register for an account.

SEARCH FORUMS
FREE NEWSLETTER
By signing up you may also receive reader surveys and occasional special offers. We do not sell, rent or trade our email lists. View our Privacy Policy.