SEARCH FINESCALE.COM

Enter keywords or a search phrase below:

1944 Group Build

132068 views
1959 replies
1 rating 2 rating 3 rating 4 rating 5 rating
  • Member since
    January 2013
  • From: Athens, Greece
Posted by Zvezda1980 on Thursday, December 25, 2014 5:21 AM

Merry Christmas to everyone fellows.

G-J excellent work on one of my favorite aircraft and one of the best models Tamiya has produced. Looking forward to your next stages.

1944 is rapidly reaching its dramatic finale and as the Western Allies are fighting hard in Ardennes, here in the East we are trying to deliver as many aircraft as possible for our upcoming winter offensive.

Thus...

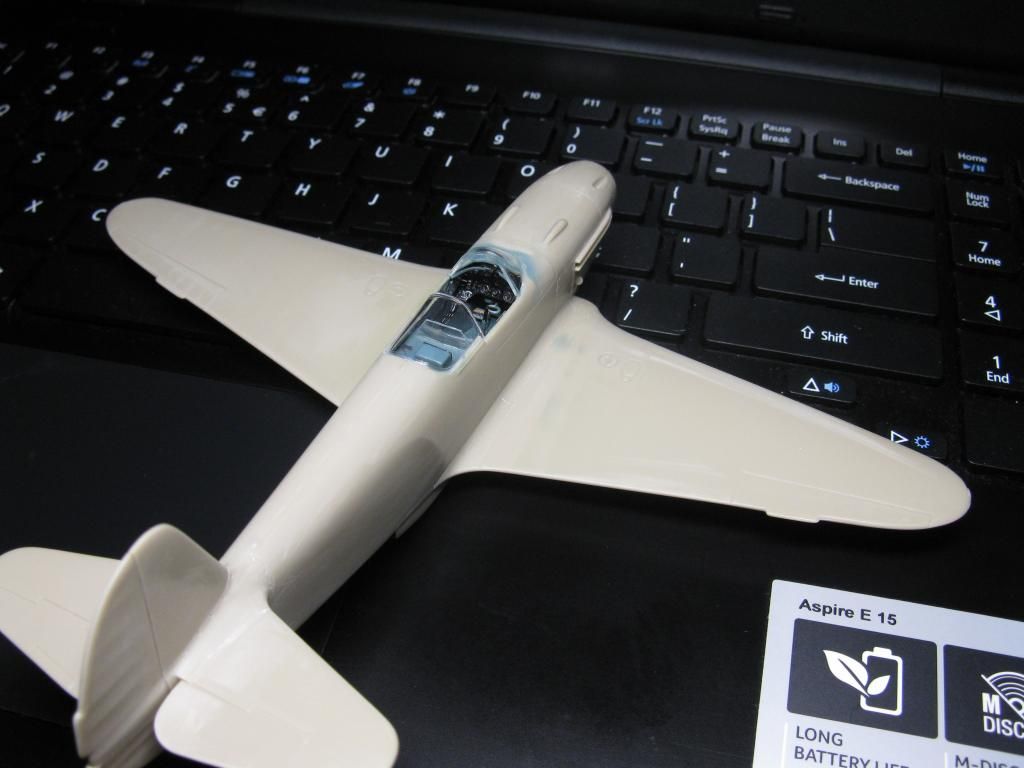
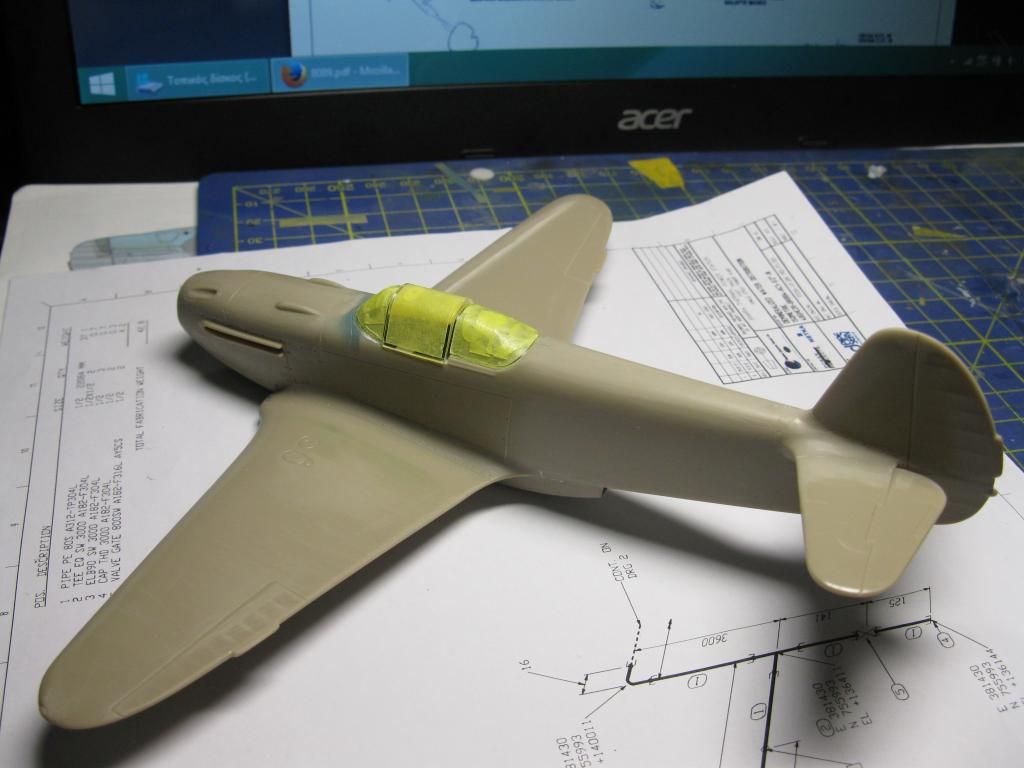
The little fighter was assembled complete. Some filler was needed in the stabilizers join. Otherwise fit is indeed excellent. Also, the minimal panels (wood construction rules!) kept rescribing to a minimum.

Some quick modifications were:

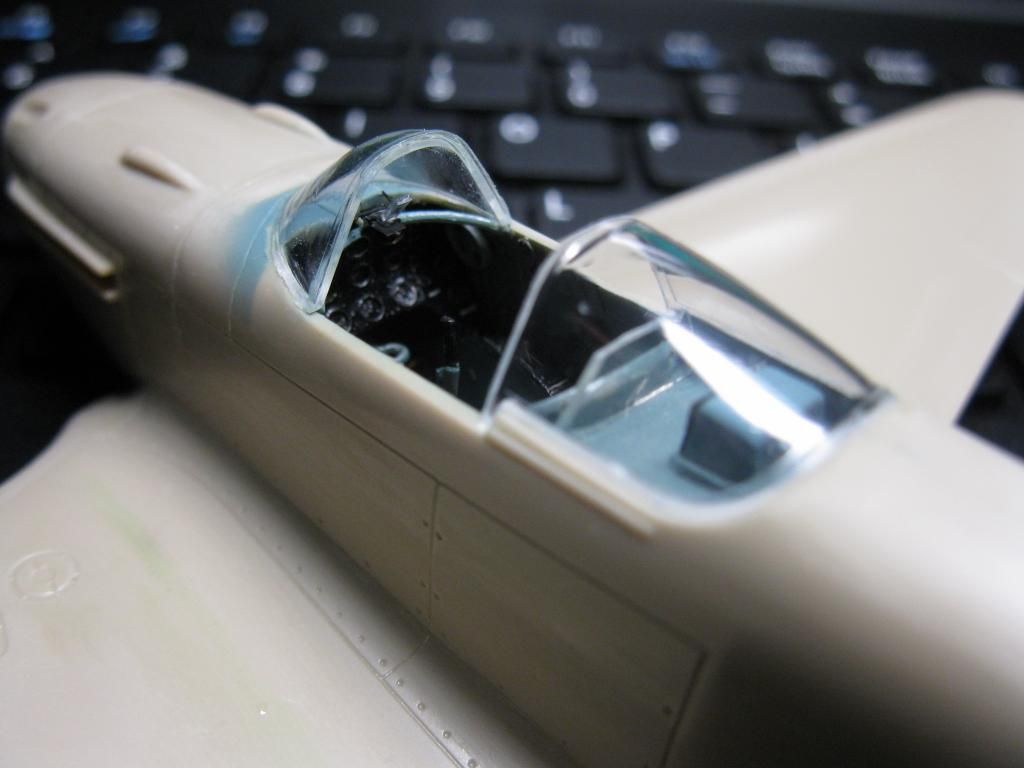
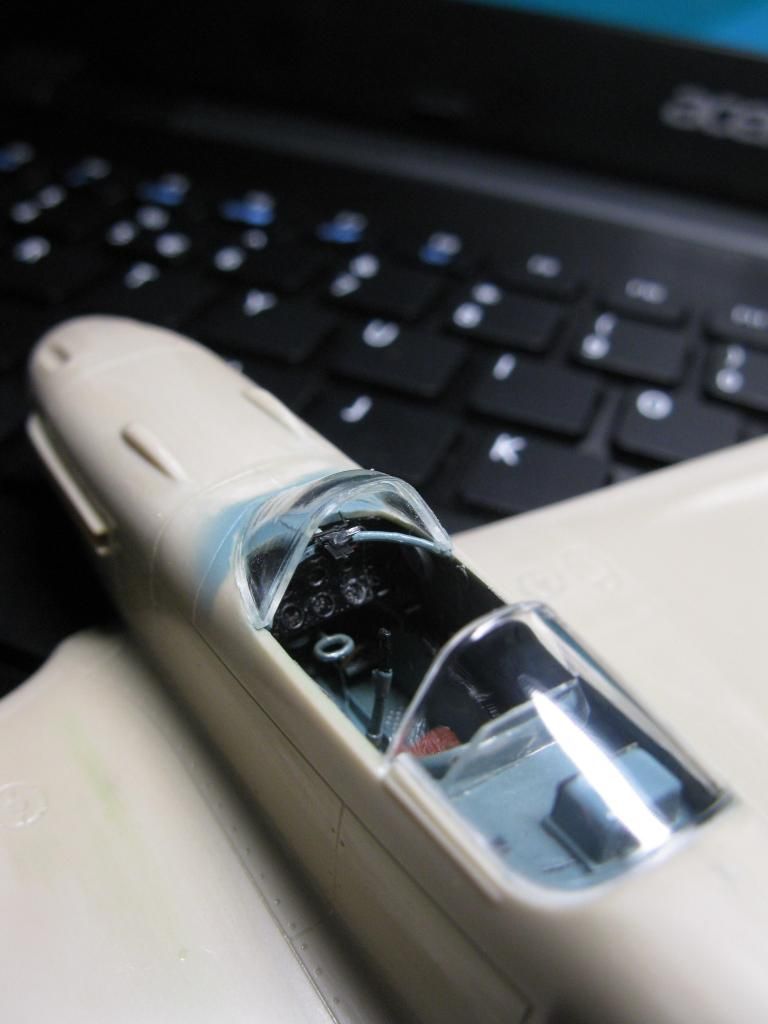
gunsight - the original is just a blob of clear plastic. A new one was made from small styrene strips and a strip of clear plastic and I think it looks more like something you can aim and shoot with.

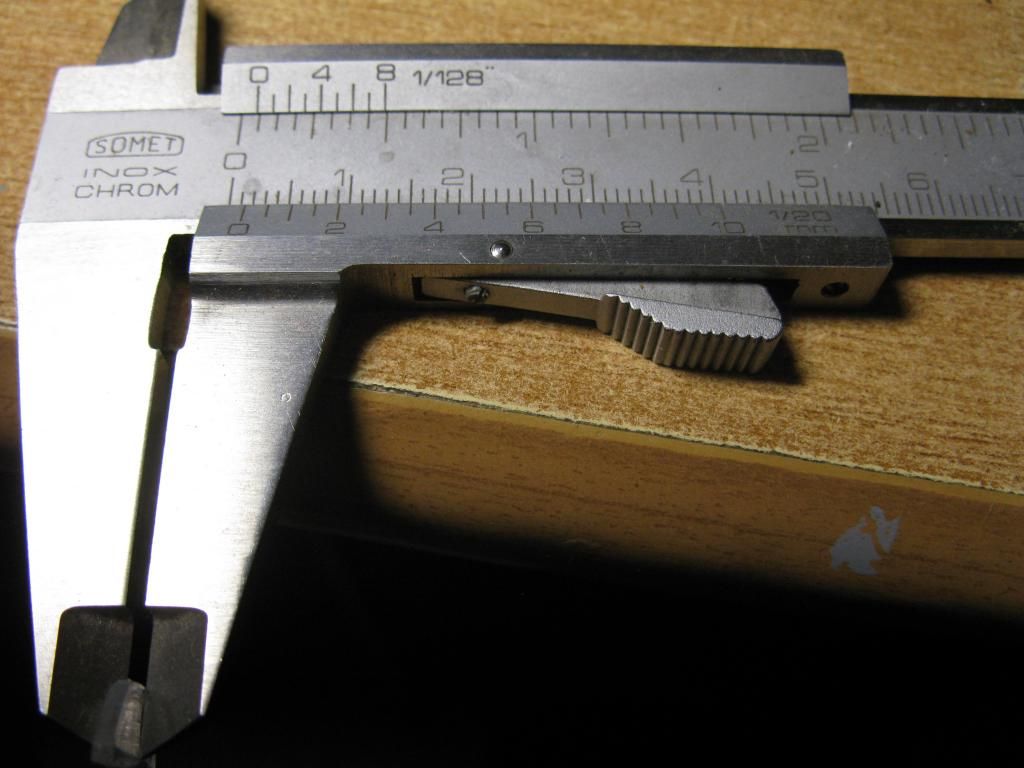
Also the plexiglass behind the pilots headrest was provided way too thick (1,5mm amounts to 72 mm in this scale). I was replaced with a thinner clear screen. Everything was done quickly so quality is not superb. Then the cockpit received an elementary wash and dry brushing.

Finally, the cowling machine gun outlets received a hole each  (the bullets have to get out through somewhere in order to hit those Me-109's)

After this the canopy and gear bays were masked.

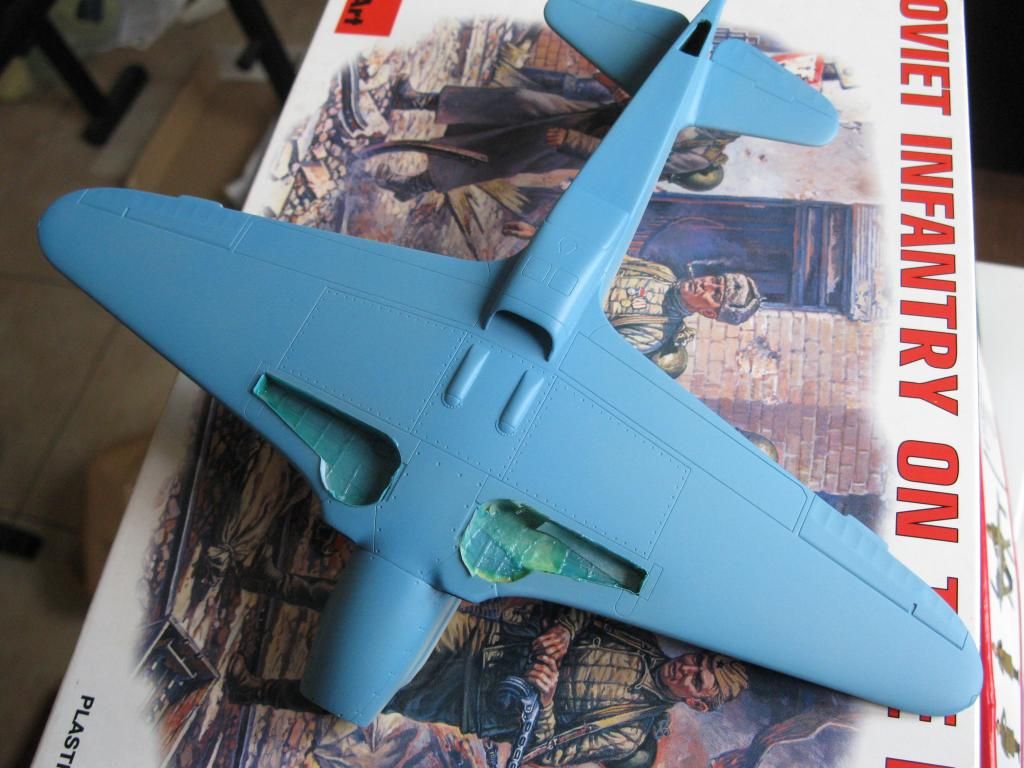
The undersides color was a mix of 70% RLM 65, 20% Bright Blue and 10% white for the scale effect.All Gunze acrylics.

This mix was airbrushed on the undersides and lower sides of the plane and now left to dry proprely.

Also wheels, landing gears, propellers etc were assembled and painted.

Comments and criticism are more than welcomed.

  • Member since
    December 2002
  • From: Bury St Edmunds, Suffolk, England
Posted by Bish on Thursday, December 25, 2014 6:01 AM

That looks really nice there Eric, I think the water colour looks pretty damn good. Do you have a link for those tutorials.

Nice work on the MiG, some nice details added there.

I am a Norfolk man and i glory in being so


On the bench: Airfix 1/72nd Harrier GR.3/Fujimi 1/72nd Ju 87D-3

  • Member since
    September 2003
  • From: AandF in the Badger State
Posted by checkmateking02 on Thursday, December 25, 2014 1:09 PM

Yes, very nice looking ship and plane!


  • Member since
    August 2009
  • From: MOAB, UTAH
Posted by JOE RIX on Thursday, December 25, 2014 1:31 PM

Eric: I really like the base you have done. Nice work

Zvez: Excellent progress! Tremendous detail and paint so far.

"Not only do I not know what's going on, I wouldn't know what to do about it if I did". George Carlin

  • Member since
    February 2010
  • From: Berkeley CA/St. Paul MN
Posted by EBergerud on Thursday, December 25, 2014 3:41 PM

There are several tutorials about making a water base - some could be used with any dio that included a harbor or even a river. On Model Warship you have a good list of them at http://www.shipmodels.info/mws_forum/viewtopic.php?f=4&t=37923 . Among those listed there, those made by Chris Flodberg are to my eyes the best. If you look, there's a YouTube link to a pair of video tutorials (about 8 min total, but very worthwhile) by Chris. (The guy's one of Canada's better known professional painters - as in pictures, not houses. I've always thought that many uber-modelers have a background in some kind of graphic arts - Mike Rinaldi and Mig Jimenez are examples - or something to do with makings things.) You can go on YouTube and search Chris Flodberg and you're right there. Also search "water effects" and you'll get many made by model railroad fans and war game players that illustrate using water effects on a land dio. 

Eric


A model boat is much cheaper than a real one and won't sink with you in it.

  • Member since
    April 2006
  • From: Denver, Colorado
Posted by waynec on Thursday, December 25, 2014 5:31 PM

the newest THE WEATHERING MAGAZINE is all about water

Никто не Забыт    (No one is Forgotten)
Ничто не Забыто  (Nothing is Forgotten)


  • Member since
    October 2009
  • From: Oil City, PA
Posted by greentracker98 on Friday, December 26, 2014 8:14 AM

Bish

Ken, thanks. And get it dug out, is that the one for the Hollywood GB. Nice to see the B-24 coming along.

Yes, its the Hollywood build. hmmm How many am I working on now and how many will I be starting real soon? I guess I can push the B-17s to back of the bench

I'm currently working on

1 B-24 Strawberry B...

2 Hollywood Halftrack

3 B-17 Chowhound

4 B-17 Shoo Shoo Shoo Baby

5 D-day Diorama. I am putting the P 38 lightening and the P 47 jug in this

And I'll be starting these real soon

1 Robert Johnson & his P 47

2 Egon Meyer & his FW 190

3 My Uncles Tank Destroyer

I want to build a launching ramp for the V 1 rocket too

Is this Enough?. Maybe I should ask. Is this Insane?

A.K.A. Ken                Making Modeling Great Again

  • Member since
    December 2002
  • From: Bury St Edmunds, Suffolk, England
Posted by Bish on Friday, December 26, 2014 8:30 AM

That's why I only do one at a time Wink

I am a Norfolk man and i glory in being so


On the bench: Airfix 1/72nd Harrier GR.3/Fujimi 1/72nd Ju 87D-3

  • Member since
    April 2006
  • From: Denver, Colorado
Posted by waynec on Friday, December 26, 2014 10:50 AM

i don't feel so bad now.

Никто не Забыт    (No one is Forgotten)
Ничто не Забыто  (Nothing is Forgotten)


  • Member since
    October 2009
  • From: Oil City, PA
Posted by greentracker98 on Friday, December 26, 2014 1:32 PM

LOL

A.K.A. Ken                Making Modeling Great Again

  • Member since
    February 2010
  • From: Berkeley CA/St. Paul MN
Posted by EBergerud on Friday, December 26, 2014 2:52 PM

It wasn't out a week ago or so. So now I've got more info to confuse me. I'd be surprised however if they spend a lot of time doing ocean water for ships. I buy very few kits these days because of my insane stash, but still pick up books and gadgets. I'm looking forward to the TankArt volume on weathering aircraft. (Wish they'd do ships. AK did a DVD on ships but it's a serious disappointment - it would be of some value if you wanted to weather severe damage or maybe a hulk. But they weathered their German cruiser like a Tiger and ships don't wear that way - salt water leaves a completely different impact - and chipping on a 1/350 DD?)

Eric


A model boat is much cheaper than a real one and won't sink with you in it.

  • Member since
    December 2002
  • From: Bury St Edmunds, Suffolk, England
Posted by Bish on Friday, December 26, 2014 4:44 PM

Some great info sharing here guys.

Just to remind you all, we have 5 full days left in the GB. If you still want to be counted and have not yet posted any WiP pics, now is your last chance.

I am a Norfolk man and i glory in being so


On the bench: Airfix 1/72nd Harrier GR.3/Fujimi 1/72nd Ju 87D-3

  • Member since
    May 2014
Posted by Nomad53 on Saturday, December 27, 2014 6:28 AM

Hey all,

I am trying to get the Missouri done in time. I have had some set backs in trying to get her finished. First off the rigging got real messed up on accident, the mast broke off again. One of the planes wings got broke off and I still have not got the stand painted.

My health has not been real good the past couple of weeks and that has set be back also. I will do me best to meet the dead line.

Good work everyone on your builds. There are some amazing modelers in this GB. I am proud to call you my friends.

Doug

Nomad53


  • Member since
    August 2009
  • From: MOAB, UTAH
Posted by JOE RIX on Saturday, December 27, 2014 8:39 AM

Greetings Everyone,

Unfortunately for me the gloss coat incident was a set back that I simply could not rectify in a timely manner in order to make it by the deadline. No worries though, I'm still plugging away at it, slowly but surely. It's all good too, as the Pacific Carrier GB is going to go a bit longer so I will be able to finish it for that. I will admit that the incident itself, coupled with holiday obligations really took the wind out of my sails for making a major push to attempt completion. With that all said, let me show you what I'm doing and how.

This is a not so good pic of what I'm dealing with:

This is what I am using to strip the paint. This stuff works remarkably well. I strongly suggest this as an addition to your bench for emergencies.

I start with some initial sanding to reduce the amount of paint /coating to be removed with the stripper. I then work on small sections at a time as it is messy and so I keep it manageable. It takes 2 or 3 applications to get the paint completely removed from an area. The benefit of the ELO is that you can remove paint without damaging any detail, you can remove paint/decals from effected areas only and it's relatively fast to do. It is important to note that you want to be in a very well ventilated area when working with this stuff.

And this is where I am currently at:

In between stripping sessions I have finished up the prop, landing gear/wheels and canopy:

So, as you can see, I'm not that far off from getting it all done. If you wish to watch this through to completion just tune into the Pacific Carrier GB.

Thank You Bish and Clemens for hosting such an awesome GB. And thanks to everyone else for contributing your unbelievable talents, skills and subjects. I have definitely learned a ton of stuff concerning a wide variety topics and techniques. You guys have been an absolute blast to build with.  I'm planning on participating in the 1945 GB. Still wrestling with a subject though.

Thank you for all the encouragement and positive feedback.

    Joe

"Not only do I not know what's going on, I wouldn't know what to do about it if I did". George Carlin

  • Member since
    October 2009
  • From: Oil City, PA
Posted by greentracker98 on Saturday, December 27, 2014 12:31 PM

Hi Everyone

Like another here, my health too hasn't been good lately

I'm going to try my best to finish the B24 Strawberry ... , But I won't have the decals by the deadline.

Happy New Year to all


A.K.A. Ken                Making Modeling Great Again

  • Member since
    December 2002
  • From: Bury St Edmunds, Suffolk, England
Posted by Bish on Saturday, December 27, 2014 12:35 PM

Joe, sorry to hear that. But as you have started, you may finish. That Polly Off seems an interesting and handy product. How many applications did it need to get it off.

Ken, Doug, no worries guys, looking forward to seeing those builds, and remember you don't have to finish by Thurs.

I am a Norfolk man and i glory in being so


On the bench: Airfix 1/72nd Harrier GR.3/Fujimi 1/72nd Ju 87D-3

  • Member since
    January 2014
  • From: Toronto
Posted by Rob S. on Saturday, December 27, 2014 12:54 PM

Dumb question..and it's prob been asked and answered (I missed it Embarrassed)..are we doing a 1945??? LOL

______________________________________________________________________________


On the Bench: Nothing on the go ATM

  • Member since
    August 2009
  • From: MOAB, UTAH
Posted by JOE RIX on Saturday, December 27, 2014 1:41 PM

Bish, Thanks for the grace on completion. The number of applications is really dependent on how thick a coating you are removing. It is taking me at least 2 applications to completely remove my paint. In my case it is a coat of primer, a coat of dark sea blue and a gloss coat. I apply a first brushing and then let it sit for a short bit while it softens the paint. It does not take long at all to do it's thing. I then wipe it off with a soft cloth and remove what I can. I then apply the second brushing and let sit again. Then I take an old paint brush soaked in ELO and start brushing off the remainder of the paint. Sometimes it requires a third treatment just get it all clean and to get into the panel lines. When complete I wipe it off with a soft cloth dipped in soapy water. Unfortunately, after my FW 190 and now this, I am becoming all to familiar with using ELO. Not really a good thing.

Rob, The '45 GB is indeed a go. Stik already has it posted in the GB forum. Hope you're intent on joining.

"Not only do I not know what's going on, I wouldn't know what to do about it if I did". George Carlin

  • Member since
    December 2002
  • From: Bury St Edmunds, Suffolk, England
Posted by Bish on Saturday, December 27, 2014 2:28 PM

Joe, thanks for the explanation. That answers my next question. Not something you want to use, but certainly useful when you need it. I have ruined at least one kit trying to remove a poor paint job.

Rob, already up and running.

cs.finescale.com/.../163030.aspx

Its being run by Stik and myself with Stik handling the roster. I think we are both glutens for punishment.

I am a Norfolk man and i glory in being so


On the bench: Airfix 1/72nd Harrier GR.3/Fujimi 1/72nd Ju 87D-3

  • Member since
    October 2009
  • From: Oil City, PA
Posted by greentracker98 on Saturday, December 27, 2014 2:29 PM

Bish, Thanks for the extra time. it will be done asap

A.K.A. Ken                Making Modeling Great Again

  • Member since
    December 2002
  • From: Bury St Edmunds, Suffolk, England
Posted by Bish on Saturday, December 27, 2014 2:30 PM

No worries, ken, that's now my SOP for any GB, no pint in being to strict is there. Its meant to be a fun hobby Bang Head

I am a Norfolk man and i glory in being so


On the bench: Airfix 1/72nd Harrier GR.3/Fujimi 1/72nd Ju 87D-3

  • Member since
    January 2014
  • From: Toronto
Posted by Rob S. on Saturday, December 27, 2014 3:54 PM

Thanks guys...I will certainly be a go for the 1945...just need to get something.

______________________________________________________________________________


On the Bench: Nothing on the go ATM

  • Member since
    January 2013
  • From: Athens, Greece
Posted by Zvezda1980 on Sunday, December 28, 2014 4:46 AM

Factory is working overtime to meet the deadline

Yesterday, camouflage upper colors were applied.

AMT-11 was 70% RLM65 +20% Tire Black +10% Light Grey

AMT-12 was 60% RLM65+30% Tire Black +5% Light Grey + 5% Bright Blue

All Gunze acrylics.

Then a gloss coat was applied as usual and left to dry.

I made no scientific research for the colors, I just tried for them to look 'right' based on a few profiles and photos I have.

  • Member since
    August 2009
  • From: MOAB, UTAH
Posted by JOE RIX on Sunday, December 28, 2014 9:53 AM

Gorgeous paint job Zvez! Really nicely done. Very clean and sharp. I'm no Soviet color expert so it looks dead on to me. Although I may have to get acquainted with them as I'm considering an Eduard La-7 for the "45 GB. Did you spray that by hand?

"Not only do I not know what's going on, I wouldn't know what to do about it if I did". George Carlin

  • Member since
    January 2014
  • From: Toronto
Posted by Rob S. on Sunday, December 28, 2014 10:44 AM

Great Job Zvezda...

______________________________________________________________________________


On the Bench: Nothing on the go ATM

  • Member since
    April 2013
Posted by SchattenSpartan on Sunday, December 28, 2014 11:08 AM

That's one gorgeous looking Yak, Zvezda!

  • Member since
    February 2010
  • From: Berkeley CA/St. Paul MN
Posted by EBergerud on Sunday, December 28, 2014 1:37 PM

Something went very wrong with the fist coat on an AM Avenger I did last year. I stripped it very clean with ISP. Blick sells "Acrylic Remover" for cleaning paint brushes and it's mostly ISP. Not sure how well it would do on enamels. Glad I did it though - it was a brilliant kit and the model turned out very nicely the second time around.

Eric


A model boat is much cheaper than a real one and won't sink with you in it.

  • Member since
    December 2002
  • From: Bury St Edmunds, Suffolk, England
Posted by Bish on Sunday, December 28, 2014 1:43 PM

Great work on that Zvezda, really nice job on the camo.

I am a Norfolk man and i glory in being so


On the bench: Airfix 1/72nd Harrier GR.3/Fujimi 1/72nd Ju 87D-3

  • Member since
    May 2014
Posted by Nomad53 on Sunday, December 28, 2014 2:29 PM

Well the Missouri is done.

I have learned some real lessons with this ship build.

Hope you like it. There are some major things wrong but at least I made it thru.

Doug

Nomad53


  • Member since
    September 2003
  • From: AandF in the Badger State
Posted by checkmateking02 on Sunday, December 28, 2014 2:46 PM

That is certainly an excellent job of painting, Zvezda.  You have really achieved something there!  Nice work!

And you, also, Doug.  Good to see Missouri finished.  The camouflage measure is very appealing and well-done!  Good for you, for sticking with it.    


JOIN OUR COMMUNITY!

Our community is FREE to join. To participate you must either login or register for an account.

SEARCH FORUMS
FREE NEWSLETTER
By signing up you may also receive reader surveys and occasional special offers. We do not sell, rent or trade our email lists. View our Privacy Policy.