SEARCH FINESCALE.COM

Enter keywords or a search phrase below:

100th Anniversary of WWI GB

75869 views
879 replies
1 rating 2 rating 3 rating 4 rating 5 rating
  • Member since
    April 2010
Posted by Theuns on Friday, March 13, 2015 5:39 AM

I have the Eduard 1/48 Neuport 11 aswell as the Eduard 1/48 Fokker d7 in the stach waiting to be built but I have to say the Neuport 28 was a very atractive airoplane :-)

Theuns

  • Member since
    April 2010
Posted by Theuns on Monday, April 13, 2015 11:50 AM

This GB still going? :-)

I have an ancient monogram Fokker D7 I might try my hand at.

Theuns

  • Member since
    September 2013
  • From: San Antonio, Texas
Posted by Marcus McBean on Monday, April 13, 2015 12:11 PM

Yes,  I am still have SMS Konig by ICM work in progress.  

Marcus

  • Member since
    December 2002
  • From: Bury St Edmunds, Suffolk, England
Posted by Bish on Monday, April 13, 2015 12:58 PM

Seems to have gone quiet like a lot of the GB's, but I am still planning on doing my build in a couple of months. I think ruddrat is running things at the moment.

I am a Norfolk man and i glory in being so


On the bench: Airfix 1/72nd Harrier GR.3/Fujimi 1/72nd Ju 87D-3

  • Member since
    August 2007
  • From: back country of SO-CAL, at the birth place of Naval Aviation
Posted by DUSTER on Friday, April 17, 2015 10:19 AM

OH my Gosh! there is somebody here!  I was worried I was all alone-alone-lone-lone.....

Good to see you guys I've been working on my Saint Chamond at a breakneck pace (for a snail). While progress is slow I'm making progress in increments--

-now if I could just quit thinking of "cool things" to do to it and just build the  thing, I could be done by this afternoon;  ain't gonna happen)

So, in the interest (mine any way) of the GB, heres a few  "work in progress" shots.

Jean Claude overseeing the work to date
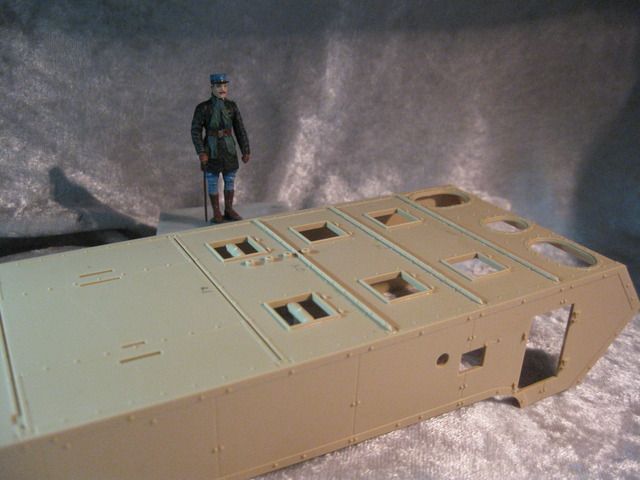
The pesky details are being "well done"-sorta
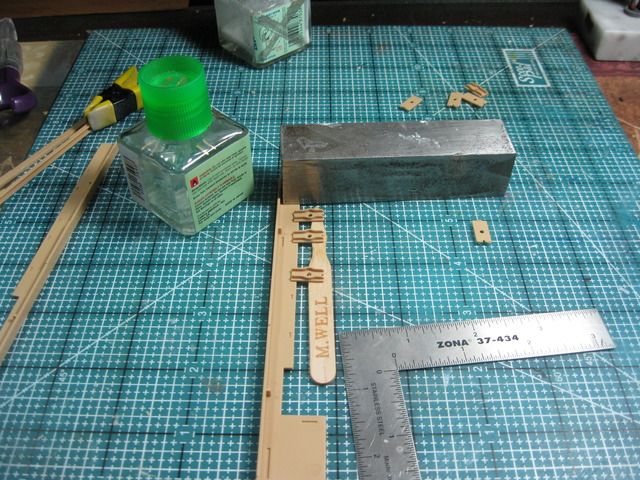

Jean Claude is becoming concerned that the quality is not up to standards  (c'est la vie-I say)
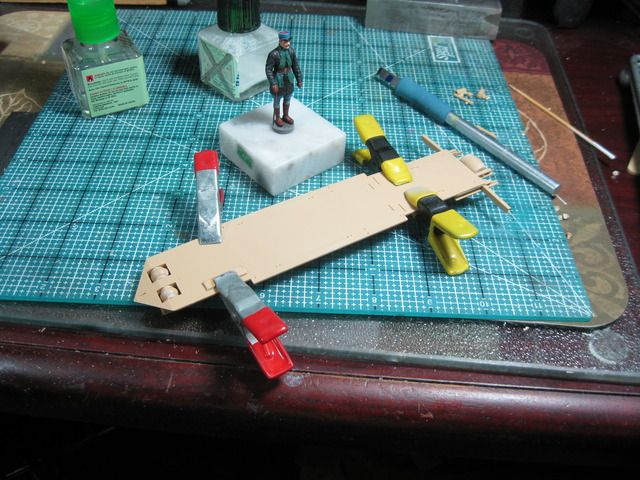
More to follow   after my coffee break.


Steve

Building the perfect model---just not quite yet  Confused

  • Member since
    April 2010
Posted by Theuns on Friday, April 17, 2015 10:45 AM

This monogram D-7 is so inacurate that it will just be a simple fun build.

The top wing section is totally wrong and needed loads of hot water to get the warps out .

Theuns

  • Member since
    September 2005
  • From: Central Nebraska
Posted by freem on Friday, April 17, 2015 10:55 PM

Theuns ......it will just be a simple fun build. Yes, we've heard that one before : /

I've decided to build my Emden in the 1914 grey scheme.  Any one know if there's any AM 10.5cm barrels out there.  Everything I have found has been discontinued.  Anyway I need to get her on the slips in the next couple of weeks.

Chris Christenson


  • Member since
    September 2013
  • From: San Antonio, Texas
Posted by Marcus McBean on Saturday, April 18, 2015 3:54 AM

Not in 40 caliber.  

  • Member since
    January 2014
  • From: Toronto
Posted by Rob S. on Saturday, April 18, 2015 6:40 AM

Jean Claude is a vicious task-master me thinks!! Eh, Duster?? Anyway, good progress....hey, it's progress on the Chamond...keep at 'er. Theuns, why, oh why, do you love to torture yourself Stick out tongue

______________________________________________________________________________


On the Bench: Nothing on the go ATM

  • Member since
    April 2010
Posted by Theuns on Saturday, April 18, 2015 8:37 AM

Good question... I must be a sucker for punnishment ;-)

I have the fuse ahlves together, the fit is not good but I will make it work.

The cockpit detail is OK-ish but I I will install the pilot to busy it up a bit

Theuns

  • Member since
    August 2007
  • From: back country of SO-CAL, at the birth place of Naval Aviation
Posted by DUSTER on Monday, April 20, 2015 1:58 AM

Thanks for the understanding sympathy RobS. He's a just but demanding overseer . Stick out tongue


Steve

Building the perfect model---just not quite yet  Confused

  • Member since
    July 2010
  • From: Tempe AZ
Posted by docidle on Friday, April 24, 2015 3:43 PM

It has been awhile since I posted some pictures on my Dreadnought build, so here is where I am at. I finally have all the PE on the decks and the base color laid down. The first photo shows the last of the PE on the deck, it seems a shame to cover it up, but there you have it. The gray you see in the final picture is a color test for the main hull.

Steve


  • Member since
    January 2014
  • From: Toronto
Posted by Rob S. on Friday, April 24, 2015 6:41 PM

Looks great thus far Steve...love the Dreadnought class of ships.

______________________________________________________________________________


On the Bench: Nothing on the go ATM

  • Member since
    July 2010
  • From: Tempe AZ
Posted by docidle on Saturday, April 25, 2015 5:26 PM

Thanks Rob. I agree the Dreadnoughts and pre-Dreadnoughts are all really cool looking.

Steve


  • Member since
    April 2006
  • From: ON, Canada
Posted by jgeratic on Monday, May 4, 2015 3:34 PM

Good to see there is some second wind to this one.  I've settled on a resin figure from Jon Smith Modellbau scaled at 54mm (1/32).  Casting quality looks very good in terms of blemishes, pinholes and such.  Included are three pages of instructions, with each piece of the soldier's gear described along with colour suggestions, all provided in paragraph form.

Most cleanup will be the pour plugs, and although those located at the bottom of the feet are designed so they insert into the base, the area in between the heels and sole should be hollowed out.  I just removed it all, and filled in the two holes in the base, and added some brass pins to attach the figure after painting. 

 Only other prep work was to add a button (green putty), and about three pinholes had to be filled in along the bottom edge of the greatcoat.   Since there is a spare head provided, I've also utilized some green putty to give a bit more character to the sides of the mustache.

regards,

Jack

  • Member since
    August 2007
  • From: back country of SO-CAL, at the birth place of Naval Aviation
Posted by DUSTER on Monday, May 11, 2015 7:20 AM

Good looking model and your additions make it look very cool.

Steve

Building the perfect model---just not quite yet  Confused

  • Member since
    April 2006
  • From: ON, Canada
Posted by jgeratic on Wednesday, May 13, 2015 4:34 PM

Steve - thanks!

Quick update on progress ... base is already complete, probably because all it needed was paint and no scratch building on my part.

regards,

Jack

  • Member since
    September 2013
  • From: San Antonio, Texas
Posted by Marcus McBean on Wednesday, May 13, 2015 5:41 PM

Looking nice.

  • Member since
    December 2003
  • From: 37deg 40.13' N 95deg 29.10'W
Posted by scottrc on Sunday, May 17, 2015 9:04 AM

Hello everyone,

I just started a Roden Albatros D.III and would like to join in.

Scott

  • Member since
    August 2007
  • From: back country of SO-CAL, at the birth place of Naval Aviation
Posted by DUSTER on Sunday, May 17, 2015 11:12 AM

 Welcome in,  the modeling is fine here.

Steve

Building the perfect model---just not quite yet  Confused

  • Member since
    December 2002
  • From: Bury St Edmunds, Suffolk, England
Posted by Bish on Sunday, May 17, 2015 12:18 PM

jack, lovely work on the figure as usual. What did you use for the puddle.

Scott, just jump on in, the GB is just running itself at the moment.

I am a Norfolk man and i glory in being so


On the bench: Airfix 1/72nd Harrier GR.3/Fujimi 1/72nd Ju 87D-3

  • Member since
    April 2006
  • From: ON, Canada
Posted by jgeratic on Sunday, May 17, 2015 10:34 PM

Scott - welcome aboard!

Marcus and Bish - thanks guys!

The puddle is several layers of acrylic future, I think I've put down four layers thus far.  The third one did have a little earth pigment mixed in.  Likely do one final clear layer after a flat spray coat of the entire build when completed.

regards,

Jack

  • Member since
    December 2002
  • From: Bury St Edmunds, Suffolk, England
Posted by Bish on Monday, May 18, 2015 12:56 AM

Jack, I take it you mean future as in the floor polish. Its a nice result, going to have to remember that one.

I am a Norfolk man and i glory in being so


On the bench: Airfix 1/72nd Harrier GR.3/Fujimi 1/72nd Ju 87D-3

  • Member since
    April 2010
Posted by Theuns on Monday, May 18, 2015 9:31 AM

I have been working on this 1/48 monogram Fokker D-7 but man the allignment is so poor! I needed to sand the one wingroot of the fuse so much just to get the bottom wing to line up acceptably....not having fun with this build...

Theuns

  • Member since
    December 2003
  • From: 37deg 40.13' N 95deg 29.10'W
Posted by scottrc on Monday, May 18, 2015 9:39 AM

Thanks everyone for the invite.

I just started working on the colors and I think I got the purple and green contrast correct.  This is my first WW1 plane.  Its going to be the purple/German green topsides, German pale blue bottoms, and natural wood fuse.  I'm primarily a ship builder so simulating wood and rigging puts me in a comfort zone with this kit.

What is the recommended filament diameter for rigging these 1/32 planes?

Scott

  • Member since
    December 2003
  • From: 37deg 40.13' N 95deg 29.10'W
Posted by scottrc on Saturday, May 23, 2015 12:03 PM

 The weather being bad over this holiday, I got started on the DIII.

  • Member since
    September 2013
  • From: San Antonio, Texas
Posted by Marcus McBean on Tuesday, June 30, 2015 8:08 PM

Well here are some of pictures of the SMS Konig I promised back in December.  I haven't been able to devote the time to this project as I would have liked.  The superstructures were a bear to put together, but now that they are completed I now should be able to move right along.

  • Member since
    September 2013
  • From: San Antonio, Texas
Posted by Marcus McBean on Tuesday, June 30, 2015 11:04 PM

For some reason only one of the pictures and a few broken sentences were posted.  So I will give it another try.

Finally was able to get the two superstructures assembled.  Each assembly was quite the challenge due to poor fitting pieces that required a lot putty and sanding to hid the seams.  There hasn't been a single piece that didn't require some type of effort to make it fit its mate.  I will never buy another ship kit from ICM.

The upper masts and yard arms were replaced with brass rod, either hollow or solid.  The plastic barrels for the main and secondary guns were replaced with brass barrels.  The deck is from ArtWox (my first one) which went on with only a few minor problems. 

Most of the launches and boats are ready for installation along with the life-rafts.  There a few minor paint touch ups to due and then I will be ready to add the washes weathering to bring out the detail and age.  I am expecting the rest of the build to go much faster. 

Will post new pictures after I finish with adding the washes.

Marcus

  • Member since
    December 2003
  • From: 37deg 40.13' N 95deg 29.10'W
Posted by scottrc on Monday, July 6, 2015 2:45 PM

Hi Marcus,  Nice clean looking build.

I need to also make an update.  I have not been able to get back to the Albatross build due to starting an extensive kitchen remodeling.   All the work being done by yours truly.  I will try to get some pictures posted as to there I am currently at soon.

Scott

  • Member since
    September 2013
  • From: San Antonio, Texas
Posted by Marcus McBean on Monday, July 6, 2015 3:09 PM

Thanks Scott, she not looking to clean now.  I started adding washes to weather her up some.  Will post new pictures soon.

Marcus

JOIN OUR COMMUNITY!

Our community is FREE to join. To participate you must either login or register for an account.

SEARCH FORUMS
FREE NEWSLETTER
By signing up you may also receive reader surveys and occasional special offers. We do not sell, rent or trade our email lists. View our Privacy Policy.