SEARCH FINESCALE.COM

Enter keywords or a search phrase below:

Aircraft Carrier GB 2016

24364 views
510 replies
1 rating 2 rating 3 rating 4 rating 5 rating
  • Member since
    March 2009
  • From: brisbane australia
Posted by surfsup on Wednesday, March 16, 2016 4:29 AM

Meanwhile more work has been done to the Hull of the Abe. Will have some more soon.....Cheers mark

If i was your wife, i'd poison your tea! If Iwas your husband, I would drink it! WINSTON CHURCHILL

  • Member since
    March 2009
  • From: brisbane australia
Posted by surfsup on Wednesday, March 16, 2016 4:17 AM

allan

Started on the island. Plotted the main structure from sheet styrene:


Then I cut them out:


Glued together the pieces:


The basic structure. Its by no means complete. A lot of details will have to be added.


Allan the work you have done is simply outstanding. Waiting to see some more......Cheers mark

If i was your wife, i'd poison your tea! If Iwas your husband, I would drink it! WINSTON CHURCHILL

  • Member since
    March 2009
  • From: brisbane australia
Posted by surfsup on Wednesday, March 16, 2016 3:58 AM

Looking very nice AS. Nice and clean.....Cheers Mark

If i was your wife, i'd poison your tea! If Iwas your husband, I would drink it! WINSTON CHURCHILL

  • Member since
    September 2006
  • From: san francisco,ca
Posted by raider-hall on Sunday, March 13, 2016 10:18 PM
Connie taking way too much of my time. Work on the fantail and other things. Post tomorrow.
  • Member since
    October 2006
  • From: Tucson, AZ
Posted by Archangel Shooter on Friday, March 11, 2016 6:29 AM

allan
Looking good, AS. Wont those chains be hardly visible when the ship is fully built?

True, they're barely visible and since they're glued in pretty good now and I don't want to damage anything, they're going to stay put.

Will be painting the bow and stern deck areas so to begin attachiing the flight deck.

 Your image is loading...

 On the bench: So many hanger queens.


  • Member since
    June 2003
  • From: Cavite, Philippines
Posted by allan on Friday, March 11, 2016 2:46 AM

No bucks, no Buck Rogers

  • Member since
    June 2003
  • From: Cavite, Philippines
Posted by allan on Friday, March 11, 2016 2:28 AM

GMorrison


allan

Looking good, AS.  Wont those chains be hardly visible when the ship is fully built?


But he'll know that they are there. A very important thing.


Very valid point. :)

No bucks, no Buck Rogers

  • Member since
    September 2012
Posted by GMorrison on Thursday, March 10, 2016 10:52 PM

allan

Looking good, AS.  Wont those chains be hardly visible when the ship is fully built?

But he'll know that they are there. A very important thing.

 Modeling is an excuse to buy books.


  • Member since
    June 2003
  • From: Cavite, Philippines
Posted by allan on Thursday, March 10, 2016 9:44 PM

Looking good, AS.  Wont those chains be hardly visible when the ship is fully built?


Im also slogging around on the fine details of the Chakri Naruebet. Will try to post WIP pics soon.

No bucks, no Buck Rogers

  • Member since
    October 2006
  • From: Tucson, AZ
Posted by Archangel Shooter on Tuesday, March 8, 2016 5:48 PM

Still slogging it out here on CV-14 and it's slowy coming together. My next build will be a 1/32 jet in which the PE parts are bigger to see!

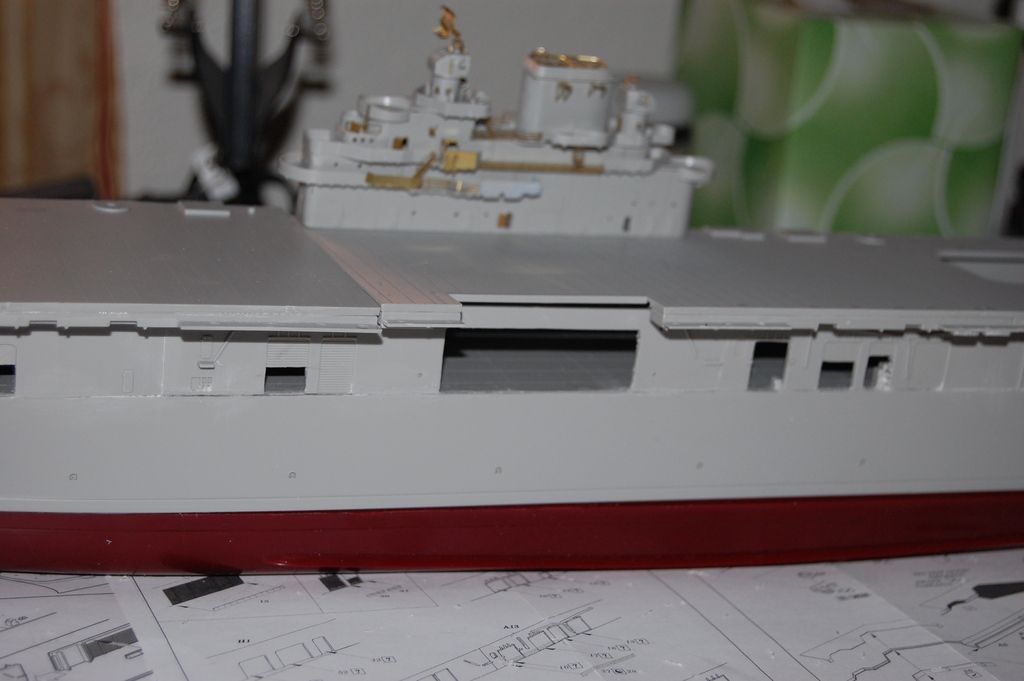
Been doing a lot of filling and sanding using Tamiya putty on much of the hanger walls that connects to the hull and other problem gaps. still got finishing sanding to do.

Odd that the kit didn't come with the anchor chains, even molded to the deck ones. And the Eduard PE chain piece just wouldn't cut it, looked like twisted paper.

I took some excess chain that I used for the Arizona kit and it looks fine on that kit but appears to large here so I'm going to replace this with something a tad smaller.
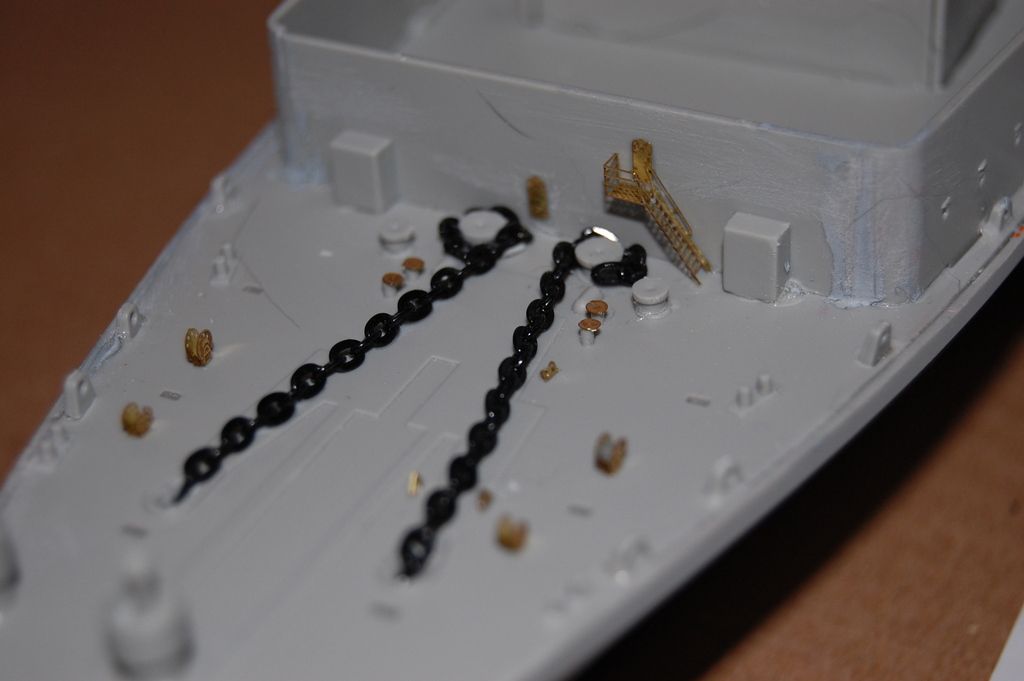
There's going to be a lot more PE going in here and I may add some extra detailing along the bulkheads.

So not to get too burned out with the PE on any one section of the kit, I been bounching around various areas doing a little bit here, a little bit there.

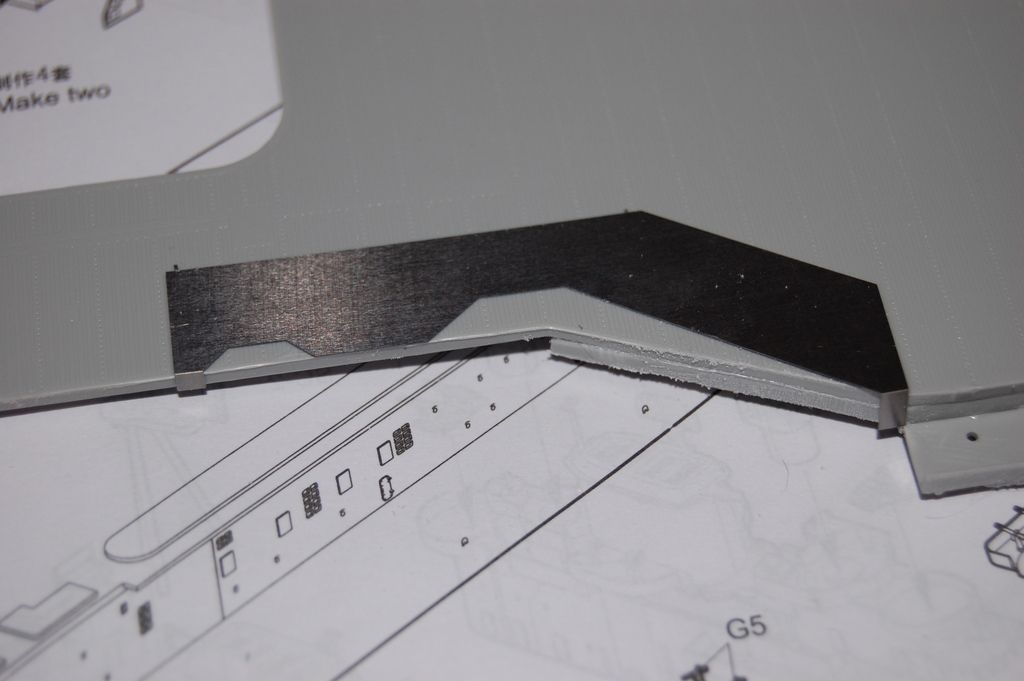
The Eduard set has a couple of templates to cut out a small portion of the Fwd and Aft flightdeck if you wanted to add a little extra in the detailing otherwise they have a PE piece which can be used instead. Wasn't too keen about chopping up the deck but I found a couple of top view aerial pics of the carrier and it matches the angles.

So I went for it, I first laid down the template.
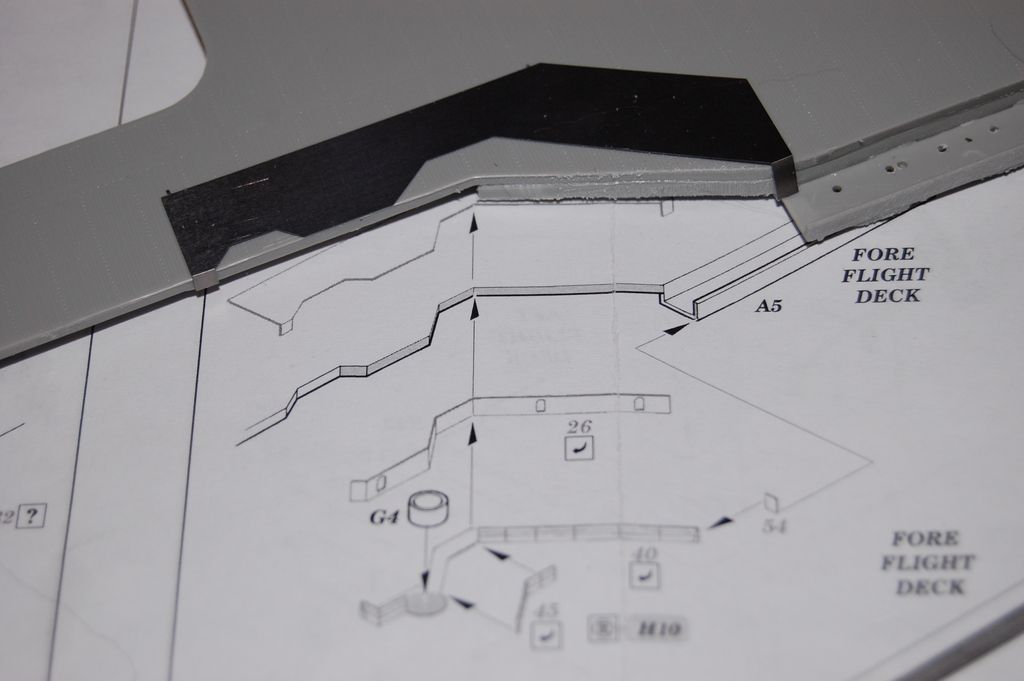
I traced the area to be cut with a black marker.

Then using an xacto I slowly scribed and cut out the area and sanded it smooth.
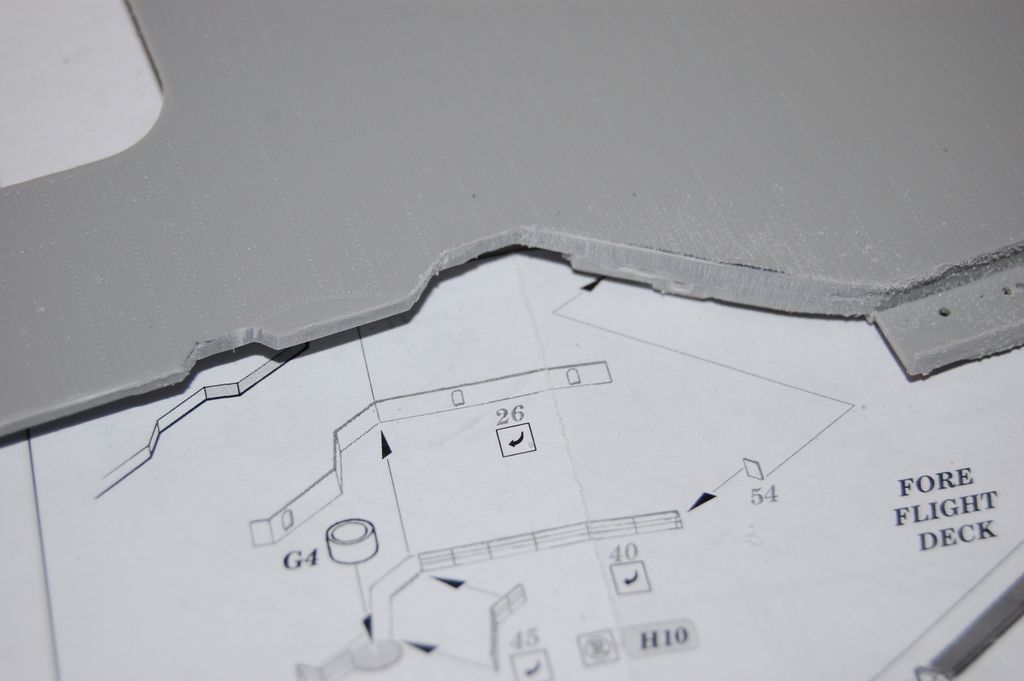
Just test fitting the major parts here and admiring it. I wasn't planning on opening up the hanger rolling doors figuring that would be time consuming and a real pain but it wasn't and it does give some greater depth to her than just one solid piece of grey hull.

Should have a few more progress pics in a couple of days.


 Your image is loading...

 On the bench: So many hanger queens.


  • Member since
    March 2008
Posted by Caveman on Monday, February 29, 2016 6:51 PM

Leather huh?  Sounds like a plan.  I will need to go get some.  Thanks for the input!

  • Member since
    June 2003
  • From: Rowland Heights, California
Posted by Duke Maddog on Monday, February 29, 2016 11:26 AM

When I built mine, I used Testor's Model Master Leather color as it more closely matched the coplor of the decks as seen in photos. One other person on another Forums from Russia also confirmed that I was extremely close so I left it. I've used the same color on all my Russian ships.


Hope this helps.

  • Member since
    March 2008
Posted by Caveman on Sunday, February 28, 2016 2:35 PM

Amazing work thus far guys.  Sorry, but life gets in the way sometimes but I am finally able to start and will post some pics. soon.  A quick question for ya.  I am waaaaay out of my element building a ship.  I am building the Admiral Kuznetsov from Trumpeter and the instructions are anything but clear.  I can't put my finger on the color for the tops of the superstructure and the outer decks.  Reference photos that I have seen make it appear anything from a bright orange to an anti-oxident hull red color.  Anyone know what they actually are?

  • Member since
    June 2003
  • From: Cavite, Philippines
Posted by allan on Thursday, February 25, 2016 8:38 PM

No bucks, no Buck Rogers

  • Member since
    June 2003
  • From: Rowland Heights, California
Posted by Duke Maddog on Wednesday, February 24, 2016 12:11 PM

Thanks Mark! I hope to get more done soon.


That is one big ship! It''s amazing how it dwarfs the Hyuga. 

  • Member since
    March 2009
  • From: brisbane australia
Posted by surfsup on Wednesday, February 24, 2016 1:56 AM

Off to a very nice start Duke. I am underway with work starting on the Hanger Deck. The Hyuga gives you a size comparison in 700 scale......Cheers Mark

If i was your wife, i'd poison your tea! If Iwas your husband, I would drink it! WINSTON CHURCHILL

  • Member since
    June 2003
  • From: Rowland Heights, California
Posted by Duke Maddog on Sunday, February 21, 2016 11:06 PM

Archangel Shooter

She's looking good Duke. Is she in 1/700th scale?


Thanks! Yes, this is 1/700. It is going together even better than my Kiev amd Minsk!

  • Member since
    December 2002
  • From: Bury St Edmunds, Suffolk, England
Posted by Bish on Sunday, February 21, 2016 4:53 PM

Some great work there. Really loking forward to seeing more of these come togetehr and them setting sail.

I am a Norfolk man and i glory in being so


On the bench: Airfix 1/72nd Harrier GR.3/Fujimi 1/72nd Ju 87D-3

  • Member since
    October 2006
  • From: Tucson, AZ
Posted by Archangel Shooter on Sunday, February 21, 2016 4:49 PM

She's looking good Duke. Is she in 1/700th scale?

 Your image is loading...

 On the bench: So many hanger queens.


  • Member since
    June 2003
  • From: Rowland Heights, California
Posted by Duke Maddog on Saturday, February 20, 2016 5:21 PM

Nice work guys!


I started my Russian Aircraft Carrier by adding all the tiny fiddly bits and decks along both sides of the carrier island first:


I left all the forward deck parts off since I was concerned they'd break when I finally added this to the main deck.

Next I cemented the interior hull pieces that needed to go on and then I added the main deck to the top of the hull. Since parts of the deck didn't line up with the upper hull too well, I took my time lining up the edges and hitting them with Tamiya Extra Thin as I went around the edges of this ship. Here's a couple shots of the deck completed. I placed the island on the deck to show how it will look when it is finally glued onto the deck. Right now, I'm leaving it off until it's time to paint:


Okay, that's all I have for now. I have a lot to do next week so I don't know how much I'll be able to get done beyond this. Until then, comments are welcome; thanks for looking in.

  • Member since
    June 2003
  • From: Cavite, Philippines
Posted by allan on Wednesday, February 17, 2016 11:22 PM

AS,

Thats how I cut out holes too. Nice going.


Mark,

Looking forward to your boat. The last Nimitz-class I built (before them 80s era Otaki 1/800 CVNs) is an Italeri 1/720 Stennis.  This kit should be far better.


No bucks, no Buck Rogers

  • Member since
    March 2009
  • From: brisbane australia
Posted by surfsup on Wednesday, February 17, 2016 1:40 AM

I love the work that has been going on here. Finally I can start as the P/E Set for the arrived after a 2 Week wait. Here we go with what I am building.......Cheers mark

If i was your wife, i'd poison your tea! If Iwas your husband, I would drink it! WINSTON CHURCHILL

  • Member since
    October 2006
  • From: Tucson, AZ
Posted by Archangel Shooter on Tuesday, February 16, 2016 12:42 AM

Just adding a few update pics. I'm taking a break from working on the island PE and back to the hull areas.

I swore I wouldn't open up the hanger deck doors so to save construction time but the second Eduard PE set for additional railings and catwalks came in and there were quit a few pieces for the open door's option, so instead of letting them go to waste I will use them.


Starting on the L/H outside elevator doors first by drilling holes along the doors edge. Trumpeter did not thinned the doors which would have made opening them up easier to do.


Then using an xacto knife, I slowly cut along the holes.


Sanding down along the rough edges.


Viewed from inside the hanger deck. You can see how thick the walls are. Will now have to detail and paint the lower hanger deck.

Actually it didn't take long to open this up and it was the largest door to do, maybe 20 minutes and was easier than I thought it would be. Since I didn't mess this attempt up I will open a few more tomorrow.

 Your image is loading...

 On the bench: So many hanger queens.


  • Member since
    June 2003
  • From: Cavite, Philippines
Posted by allan on Monday, February 15, 2016 7:55 PM

No bucks, no Buck Rogers

  • Member since
    September 2006
  • From: san francisco,ca
Posted by raider-hall on Saturday, February 13, 2016 7:28 AM
Thanks, are you getting the full hull or waterline?
  • Member since
    December 2003
  • From: 37deg 40.13' N 95deg 29.10'W
Posted by scottrc on Thursday, February 11, 2016 8:18 AM

Allen,  Love your work, and I want to try the epoxy clay method.

RH - Keep up the posts on the Wasp.  I also want to get this kit soon.


  • Member since
    September 2006
  • From: san francisco,ca
Posted by raider-hall on Wednesday, February 10, 2016 8:40 PM

checkmateking02

Nice to see, r-h.  Progress looks good.  Just aquired the 1/700 version of Wasp from Aoshima, so I'll be picking up some ideas from your build.


                                                                                                                 The 1/700 Corsair Armada Wasp in resin is what I'm copying from. The ISW 1/350 to me is just a enlarge version of the 1/700 kit.

  • Member since
    September 2006
  • From: san francisco,ca
Posted by raider-hall on Wednesday, February 10, 2016 8:36 PM

allan

Nice work on the hangar deck. Are you putting planes on it?


                                                                                                                   Yes,but just a few planes inside. Not going to do a all out detail deck.

  • Member since
    September 2003
  • From: AandF in the Badger State
Posted by checkmateking02 on Wednesday, February 10, 2016 3:12 PM

Nice to see, r-h.  Progress looks good.  Just aquired the 1/700 version of Wasp from Aoshima, so I'll be picking up some ideas from your build.


  • Member since
    June 2003
  • From: Cavite, Philippines
Posted by allan on Tuesday, February 9, 2016 9:55 PM

Nice work on the hangar deck. Are you putting planes on it?

No bucks, no Buck Rogers

JOIN OUR COMMUNITY!

Our community is FREE to join. To participate you must either login or register for an account.

SEARCH FORUMS
FREE NEWSLETTER
By signing up you may also receive reader surveys and occasional special offers. We do not sell, rent or trade our email lists. View our Privacy Policy.