SEARCH FINESCALE.COM

Enter keywords or a search phrase below:

Aircraft Carrier GB 2016

24364 views
510 replies
1 rating 2 rating 3 rating 4 rating 5 rating
  • Member since
    January 2014
  • From: Toronto
Posted by Rob S. on Thursday, April 28, 2016 5:38 AM

Fantastic build Allan!! Very inspirational....well done YesCoolYes

______________________________________________________________________________


On the Bench: Nothing on the go ATM

  • Member since
    June 2003
  • From: Cavite, Philippines
Posted by allan on Wednesday, April 27, 2016 4:50 PM

Thanks Bish and Mark!


Bish,


Well, well, well. A ship from you. This I gotta see. Well at least it's still got wings. Lol.

No bucks, no Buck Rogers

  • Member since
    December 2002
  • From: Bury St Edmunds, Suffolk, England
Posted by Bish on Wednesday, April 27, 2016 1:58 PM

allan

And Im calling her done. Put in some quality time over the last few days.  I think Ill get that GB badge now. lol.


Ill post more pics in the Ship Forum, but comments here are of course welcome.


Now thats a real nice ship. A build to be proud of allan.

I am a Norfolk man and i glory in being so


On the bench: Airfix 1/72nd Harrier GR.3/Fujimi 1/72nd Ju 87D-3

  • Member since
    December 2002
  • From: Bury St Edmunds, Suffolk, England
Posted by Bish on Wednesday, April 27, 2016 1:56 PM

Made a small start on the HMS Victorious. This kit dates from 1959, but i would not have expected it, thought it does have some poor fit, especially when joining the two hull halves.

I am not going over board with this build, just a little tidying up. My main aim is just to get a ship built and see if my choice of base turns out as well as it looks on otehr kits. I have a few other ships that i can get more enthusiatic about at a later date.

This is the kit, the 2008 boxing, bought as a gift by my otehr half who thought i should do a ship.

So far, i have got the hull together. There was a major step between the two halves underneath which needed some serious sanding.

And put some of the island together.

And Airfix's rather subtle approach for a location tab in the funnel.

And thats all. Not much, but its a start.

I am a Norfolk man and i glory in being so


On the bench: Airfix 1/72nd Harrier GR.3/Fujimi 1/72nd Ju 87D-3

  • Member since
    March 2009
  • From: brisbane australia
Posted by surfsup on Monday, April 25, 2016 12:03 AM

allan

And Im calling her done. Put in some quality time over the last few days.  I think Ill get that GB badge now. lol.


Ill post more pics in the Ship Forum, but comments here are of course welcome.


That is one superb Model Allan. Congrats on a great effort.....Cheers mark

If i was your wife, i'd poison your tea! If Iwas your husband, I would drink it! WINSTON CHURCHILL

  • Member since
    June 2003
  • From: Cavite, Philippines
Posted by allan on Sunday, April 24, 2016 9:03 PM

Thank you, Raider and Scott!


Yeah I was quite surprised at my pace too.  My last scratchbuild project, the smaller Philippine Navy LSV, took months longer to build.  I suppose its because of the rather stealthy nature of the Chakri's design that made it a quick build.  The side sponsons and details were actually the hardest part.

No bucks, no Buck Rogers

  • Member since
    September 2006
  • From: san francisco,ca
Posted by raider-hall on Sunday, April 24, 2016 1:07 PM
Man,you are good and fast. Great build!
  • Member since
    December 2003
  • From: 37deg 40.13' N 95deg 29.10'W
Posted by scottrc on Sunday, April 24, 2016 8:37 AM

Well Allan,  all I can say is WOW!  It was great to see how you built this from plastic sheets and strips.  Showing the steps on how you painted the flight deck markings was very informative. Great work.

Scott

  • Member since
    June 2003
  • From: Cavite, Philippines
Posted by allan on Sunday, April 24, 2016 7:51 AM

And Im calling her done. Put in some quality time over the last few days.  I think Ill get that GB badge now. lol.


Ill post more pics in the Ship Forum, but comments here are of course welcome.


No bucks, no Buck Rogers

  • Member since
    June 2003
  • From: Cavite, Philippines
Posted by allan on Wednesday, April 20, 2016 9:51 PM

Caveman

Looking great guys.  I'm on hold for a little bit while I wait for a new airbrush to arrive.  I think my trusty Cresendo has bit the dust for good this time.  Should have a new one in a few weeks.


Just bought a new one myself. Been happy with the old Tamiya HG trigger type, but thought Id try the (supposedly) even better HG trigger type Superfine.

Anyways, updates:

I scrounged about my spares depot for the appropriate deck crane tractor.  Couldnt find one that matched the tractor on the Chakri Naruebet. So ended up scratchbuilding that one too:


The S-70Bs. As with the AV-8s, I had to tread a fine line. The version of this ship has the Mistral/Sadral launchers.  When those were installed the AV-8s already sported a darker (decal sheets specify Gunship Gray which some photos also confirm but some photos show that color to easily fade).  I initially wanted to make MH-60s for this version but when those were ordered by the Thai government they had already withdrawn the AV-8s from active service.  I didnt want an AV-8-less carrier.  So anyway, the upgrades on the S-70Bs.  The helos were slightly reshaped, sponsons and external tanks added, the tail folded on one, and rotor blades replaced by parts cut out from a Tamiya Pla Paper sheet:


No bucks, no Buck Rogers

  • Member since
    March 2008
Posted by Caveman on Monday, April 18, 2016 8:27 PM

Looking great guys.  I'm on hold for a little bit while I wait for a new airbrush to arrive.  I think my trusty Cresendo has bit the dust for good this time.  Should have a new one in a few weeks.


  • Member since
    June 2003
  • From: Cavite, Philippines
Posted by allan on Monday, April 18, 2016 1:05 AM

More updates:


The island, after receiving a dark gray coat on the decks, and after masking off the deck areas. The railings were added after this.

After spraying:


Bridge windows painted:


Ive left out some of the details until near completion, including the mast.


No bucks, no Buck Rogers

  • Member since
    June 2003
  • From: Cavite, Philippines
Posted by allan on Sunday, April 17, 2016 10:02 PM

No bucks, no Buck Rogers

  • Member since
    March 2009
  • From: brisbane australia
Posted by surfsup on Friday, April 15, 2016 2:47 AM

They are looking like being great Builds Allan, Duke and Caveman. The Abe Lincoln has her Hull now Base Painted. Will have more Pics up soon.....Cheers mark

If i was your wife, i'd poison your tea! If Iwas your husband, I would drink it! WINSTON CHURCHILL

  • Member since
    March 2008
Posted by Caveman on Thursday, April 7, 2016 5:48 PM

My word.  I hope my striping turns out half as nice as that.  Great work.

  • Member since
    December 2003
  • From: 37deg 40.13' N 95deg 29.10'W
Posted by scottrc on Wednesday, April 6, 2016 9:23 PM

Great work Allen and Duke.

  • Member since
    June 2003
  • From: Cavite, Philippines
Posted by allan on Tuesday, April 5, 2016 11:04 PM

Great work, Mark, Raider, Duke and Caveman!  Sorry, been out for a while, but still clawing away at the Chakri Naruebet.


Duke,

Lookin good there. The thing I like about Russian ships is their color contrast. Nice!


So anyway, some updates. The current progress is actually a little more advanced than the pics Ill post today.  Ill just post the rest later so as not to flood the thread with way too much pics.


Ive decided to attach the island after painting. This is because much (about 95%) of the deck markings will be painted on rather than use decals (which arent available anyway).


The deck painting process started with a black base coat, after which the areas to be painted white or red/yellow stripes were given a gray primer.


The white was then painted on


The elevator areas were then sprayed first with yellow


Masking tape strips were then placed one by one on the yellow


The white and red/yellow stripes were then painstakingly masked off


The deck then received another coat of black


And a coat of the base deck gray, applied unevenly to replicate wear


And a lighter shade of the deck gray, again applied evenly to replicate wear


And the masks come off


This is by no means done. Ive since applied a few home made decals on the deck.  Ill post them later.


No bucks, no Buck Rogers

  • Member since
    June 2003
  • From: Rowland Heights, California
Posted by Duke Maddog on Monday, April 4, 2016 1:56 AM

Caveman, that is looking great! It's nice to know I'm not the only one making a Russian carrier!


My shipyards have been humming along these past few weeks, all of it was masking and painting the decks, hulls and superstructures. It was time to get my Russian aircraft carrier caught up. She needed a lot of masking and painting. So I started out by shooting the brown color on most of the decks of the main hull and island:


Then came the first masking on the Island and the main hull:


Then came the second color:


Third mask came next:


Followed by the third color for the main flight deck:


Finally, I masked off the flight deck section I'd painted last and then shot the grey all over the hull and superstructure. Here's the main hull all masked off:


Finally, after all the painting was done, I pulled off all five miles of tape. I was quite pleased with the results! First, here's the hull and decking:


And finally a shot of the hull and island dry-fit together:


Whew! That's all I have for now. Thanks for looking in, comments are welcome.


  • Member since
    March 2008
Posted by Caveman on Wednesday, March 30, 2016 9:12 PM

Well, I have made some progress.  Attached most of the parts to the hull and put some of the island together.  At this point I will begin to paint the leather deck colors or they will be closed in if I go much further.  This kit is really trying my patience with a new issue everyday.  The latest?  The decals are way out of register, so I will now have to paint all the deck markings.  They should look better anyway.  I had better get some more tape.......

  • Member since
    March 2009
  • From: brisbane australia
Posted by surfsup on Tuesday, March 29, 2016 9:39 AM

OK the Basic Hanger on the Abraham Lincoln is almost done. Just a bit more to add them time o close her up. More to show soon.....Cheers mark

If i was your wife, i'd poison your tea! If Iwas your husband, I would drink it! WINSTON CHURCHILL

  • Member since
    March 2009
  • From: brisbane australia
Posted by surfsup on Tuesday, March 29, 2016 9:35 AM

raider-hall

 Finally doing some work. Wood aft deck is not glue down.


I am liking what I am seeing my Friend......Cheers Mark

If i was your wife, i'd poison your tea! If Iwas your husband, I would drink it! WINSTON CHURCHILL

  • Member since
    March 2009
  • From: brisbane australia
Posted by surfsup on Tuesday, March 29, 2016 9:34 AM

Caveman

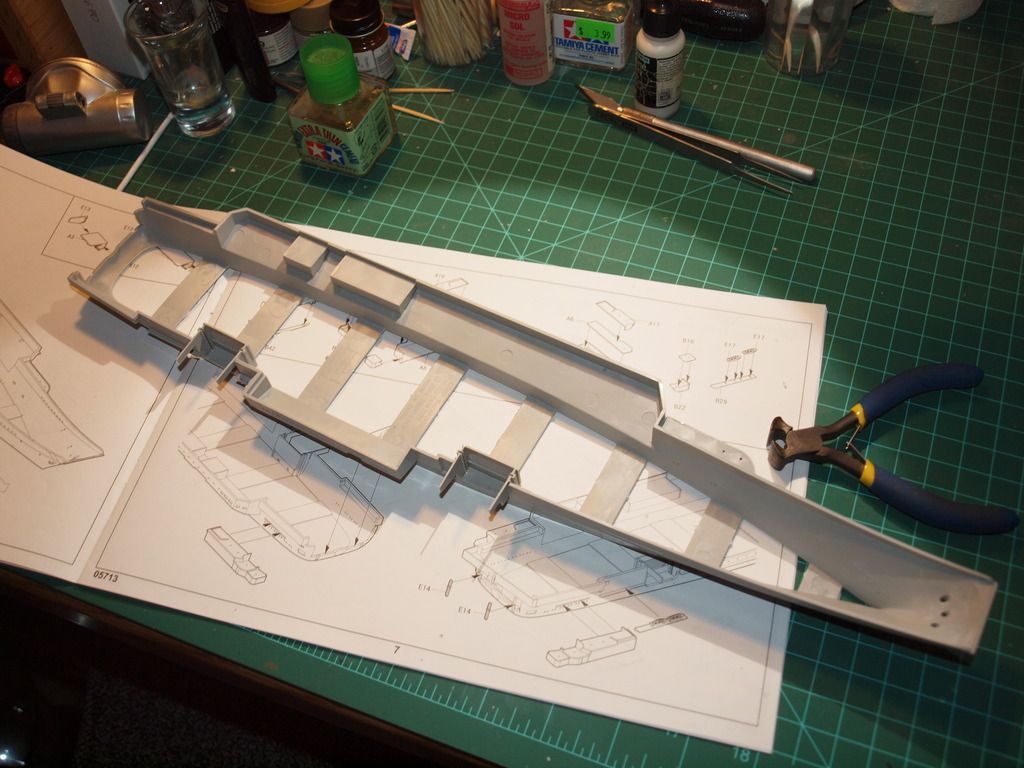
Well, I was finally able to start.  Right off the bat I have to say this is the most ill fitting kit that I have encountered in quite a while.  I have already used more filler than I have used in my last 5 builds.  My hats off to you ship builders, these parts are tiny!  I have elected to close both doors to the hanger deck as there are no internals to show and I don't feel confident in making my own.  Thanks again for the color recommendation, MM Leather will indeed look the part. 

I just started so not much to show yet, but I wanted to share the base that I milled out of a chunk of PVC.  It needs paint, but will enclose the plastic ocean that the kit provided quite nicely.  I also laser etched a nameplate for the kit.

More to follow.  Keep up the great work guys!


I know what you mean with this Kit. I also struggled with it. The Aircraft were not the only ones that almost flew......Cheers Mark

If i was your wife, i'd poison your tea! If Iwas your husband, I would drink it! WINSTON CHURCHILL

  • Member since
    September 2006
  • From: san francisco,ca
Posted by raider-hall on Monday, March 28, 2016 10:01 PM

Added a 40mm in the tub. Not surpose to be there. Also added the 5inch platform and shields on port and starboard. Alot of work on this thing.                                         

  • Member since
    September 2006
  • From: san francisco,ca
Posted by raider-hall on Monday, March 28, 2016 6:14 PM
I will have the photos tonight. Had to fix some things.
  • Member since
    March 2008
Posted by Caveman on Monday, March 28, 2016 4:50 PM

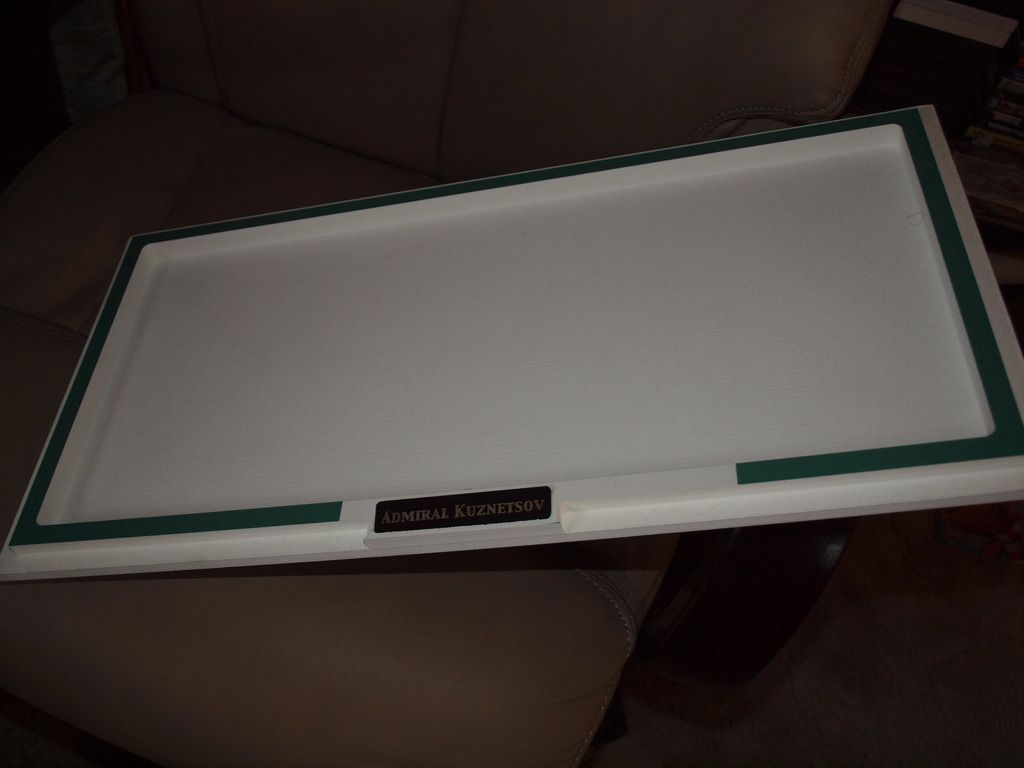
Well, I was finally able to start.  Right off the bat I have to say this is the most ill fitting kit that I have encountered in quite a while.  I have already used more filler than I have used in my last 5 builds.  My hats off to you ship builders, these parts are tiny!  I have elected to close both doors to the hanger deck as there are no internals to show and I don't feel confident in making my own.  Thanks again for the color recommendation, MM Leather will indeed look the part. 

I just started so not much to show yet, but I wanted to share the base that I milled out of a chunk of PVC.  It needs paint, but will enclose the plastic ocean that the kit provided quite nicely.  I also laser etched a nameplate for the kit.

More to follow.  Keep up the great work guys!
  • Member since
    September 2006
  • From: san francisco,ca
Posted by raider-hall on Saturday, March 26, 2016 10:18 PM

Added more detail to Wasp. Post tomorrow.

  • Member since
    December 2003
  • From: 37deg 40.13' N 95deg 29.10'W
Posted by scottrc on Wednesday, March 23, 2016 7:52 AM

Don't feel bad Duke, I have yet to start mine.

  • Member since
    June 2003
  • From: Rowland Heights, California
Posted by Duke Maddog on Tuesday, March 22, 2016 9:55 AM

Excellent work Raider! Looking good!


I haven't gotten much more done on mine yet. Maybe this week.

  • Member since
    September 2006
  • From: san francisco,ca
Posted by raider-hall on Monday, March 21, 2016 10:57 PM

 Finally doing some work. Wood aft deck is not glue down.

JOIN OUR COMMUNITY!

Our community is FREE to join. To participate you must either login or register for an account.

SEARCH FORUMS
FREE NEWSLETTER
By signing up you may also receive reader surveys and occasional special offers. We do not sell, rent or trade our email lists. View our Privacy Policy.