SEARCH FINESCALE.COM

Enter keywords or a search phrase below:

The official Submarine Warfare Group Build 2016 - 2017

26054 views
611 replies
1 rating 2 rating 3 rating 4 rating 5 rating
  • Member since
    July 2014
Posted by modelcrazy on Monday, July 17, 2017 9:04 AM

Looking forward to seeing it get across the finish line Mach.


There are 2 weeks left in the GB gentlemen. Some great work all around.

Steve

Building a kit from your stash is like cutting a head off a Hydra, two more take it's place.


http://www.spamodeler.com/forum/

  • Member since
    May 2011
  • From: Honolulu, Hawaii
Posted by Real G on Monday, July 17, 2017 5:33 PM

Steve,

The scratchbuilding fire isn't in me right now, so can I humbly sub (pun intended!) a Bronco Seehund in lieu of the Resurgam?

https://flic.kr/p/W7fUpJ] [/url]Seehund-01 by N.T. Izumi, on Flickr

https://flic.kr/p/WryLC3] [/url]Seehund-02 by N.T. Izumi, on Flickr

The Seehund pretty much fell together, so I figure I can get paint on it quickly  in time before the deadline.

“Ya ya ya, unicorn papoi!”

  • Member since
    July 2014
Posted by modelcrazy on Tuesday, July 18, 2017 10:56 AM

I know how you feel G. I updated the list. Looks like your moving right along.

Steve

Building a kit from your stash is like cutting a head off a Hydra, two more take it's place.


http://www.spamodeler.com/forum/

  • Member since
    May 2011
  • From: Honolulu, Hawaii
Posted by Real G on Wednesday, July 19, 2017 3:35 AM

Thank you!

“Ya ya ya, unicorn papoi!”

  • Member since
    May 2011
  • From: Honolulu, Hawaii
Posted by Real G on Thursday, July 20, 2017 5:43 PM

Okay onwards!

Bronco's Seehund has a fantastic one piece slide molded sail.

https://flic.kr/p/WryLmw] [/url]Seehund-04 by N.T. Izumi, on Flickr
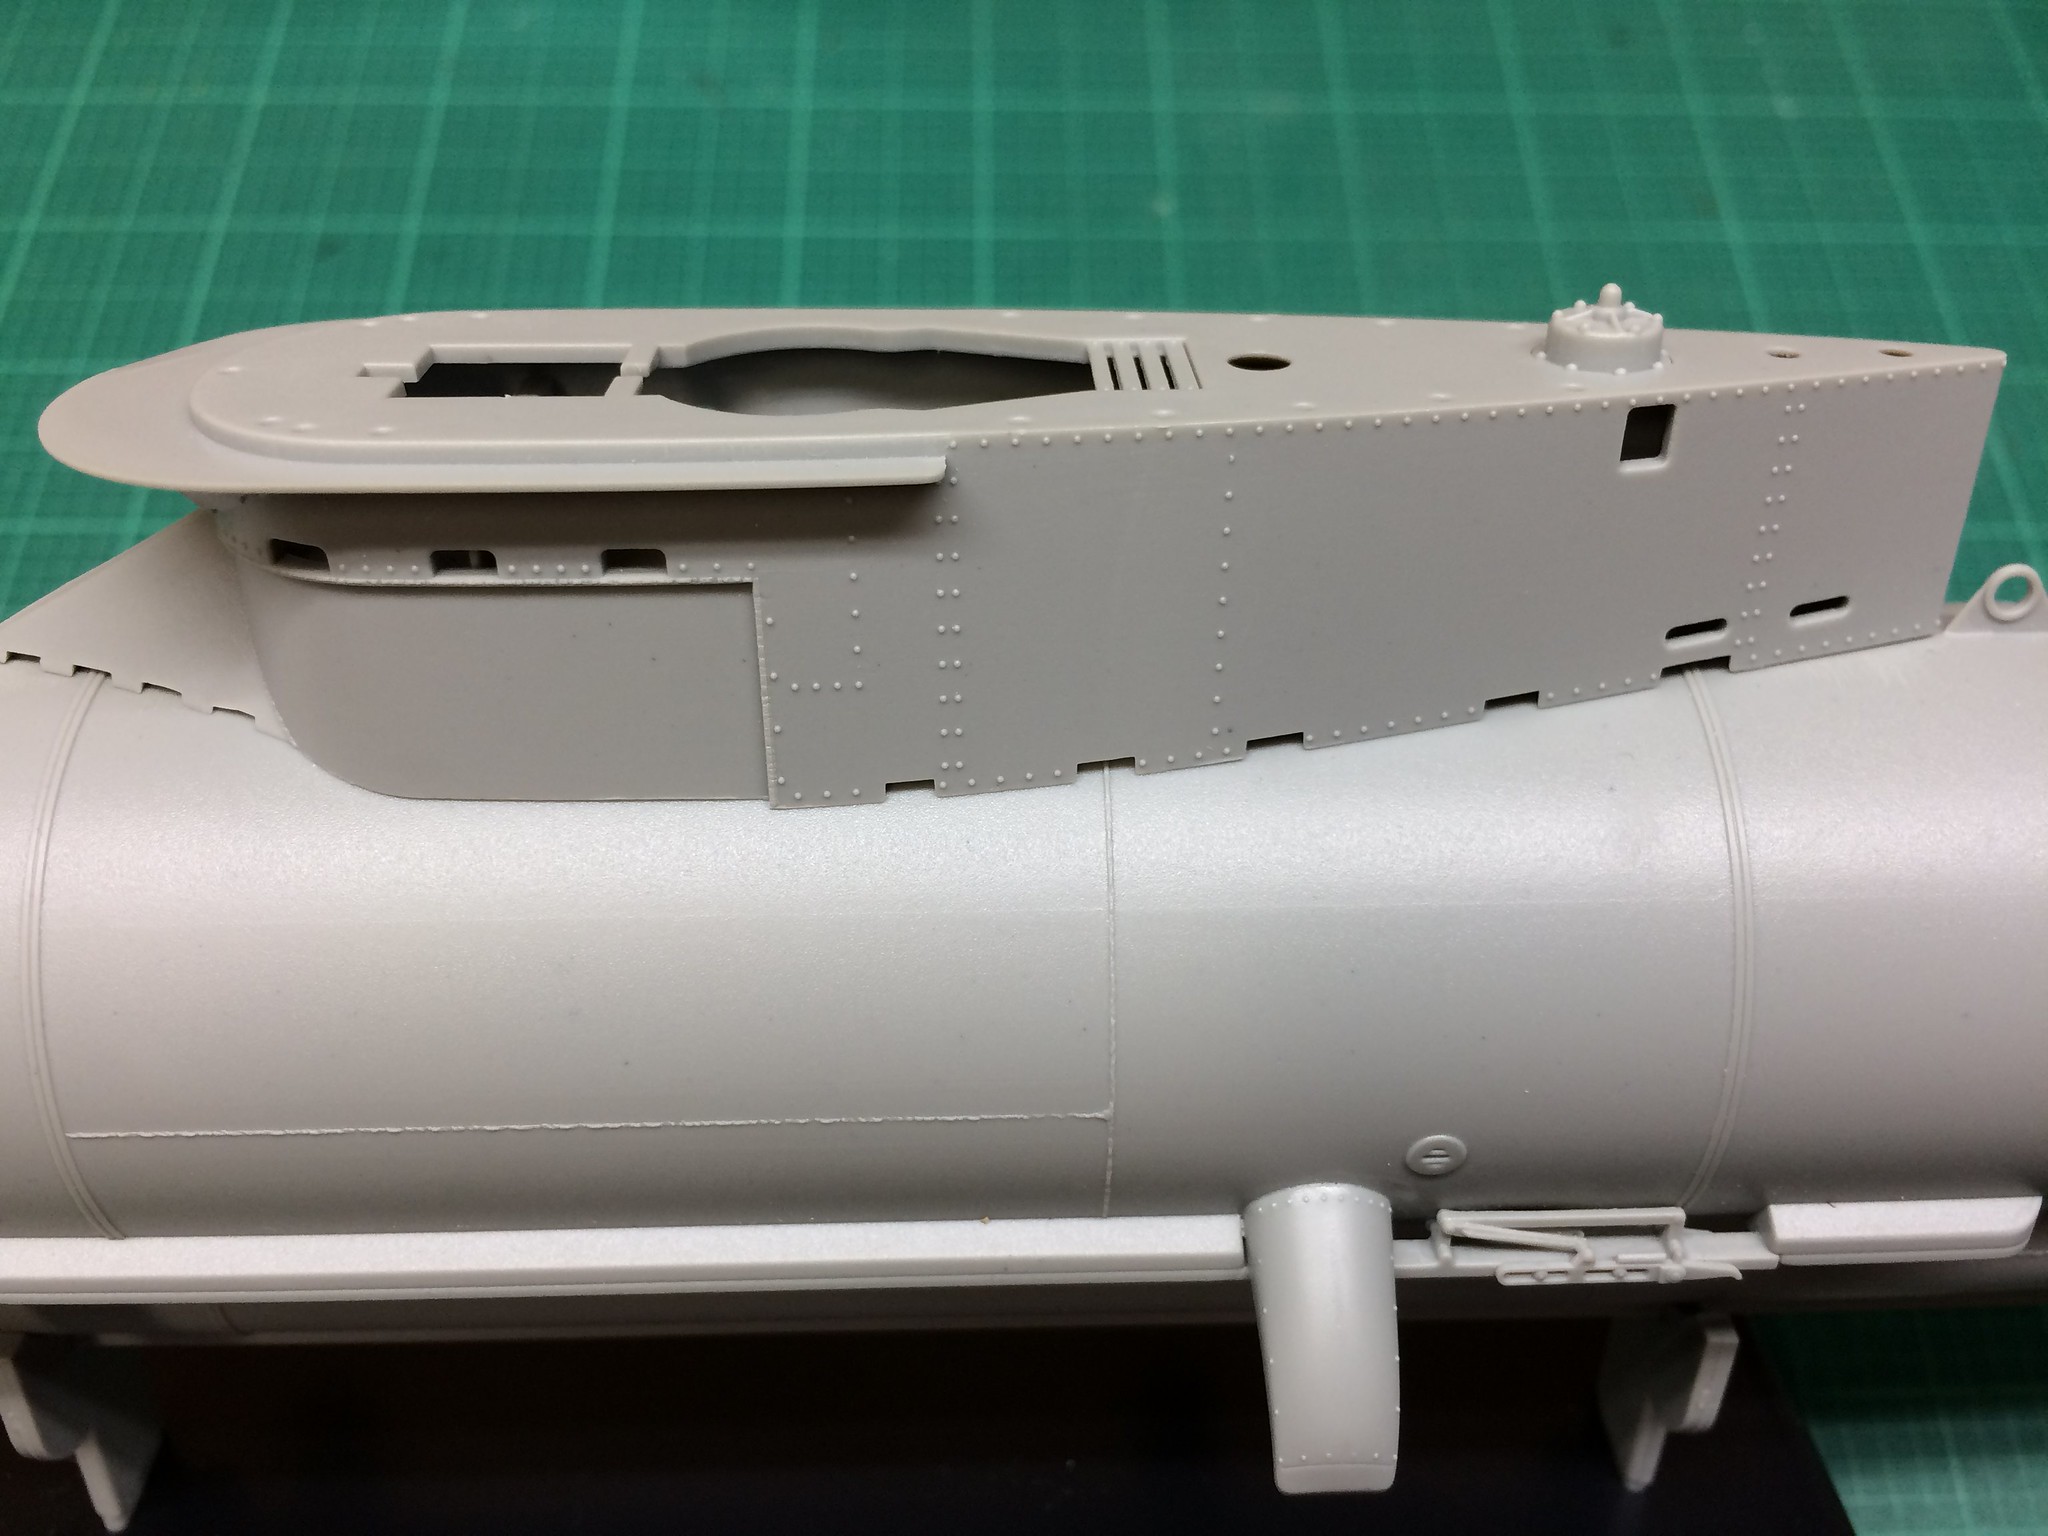
Fit is generally very good, but I could not get the hull halves to match under the stern.

https://flic.kr/p/W7fTmb] [/url]Seehund-06 by N.T. Izumi, on Flickr
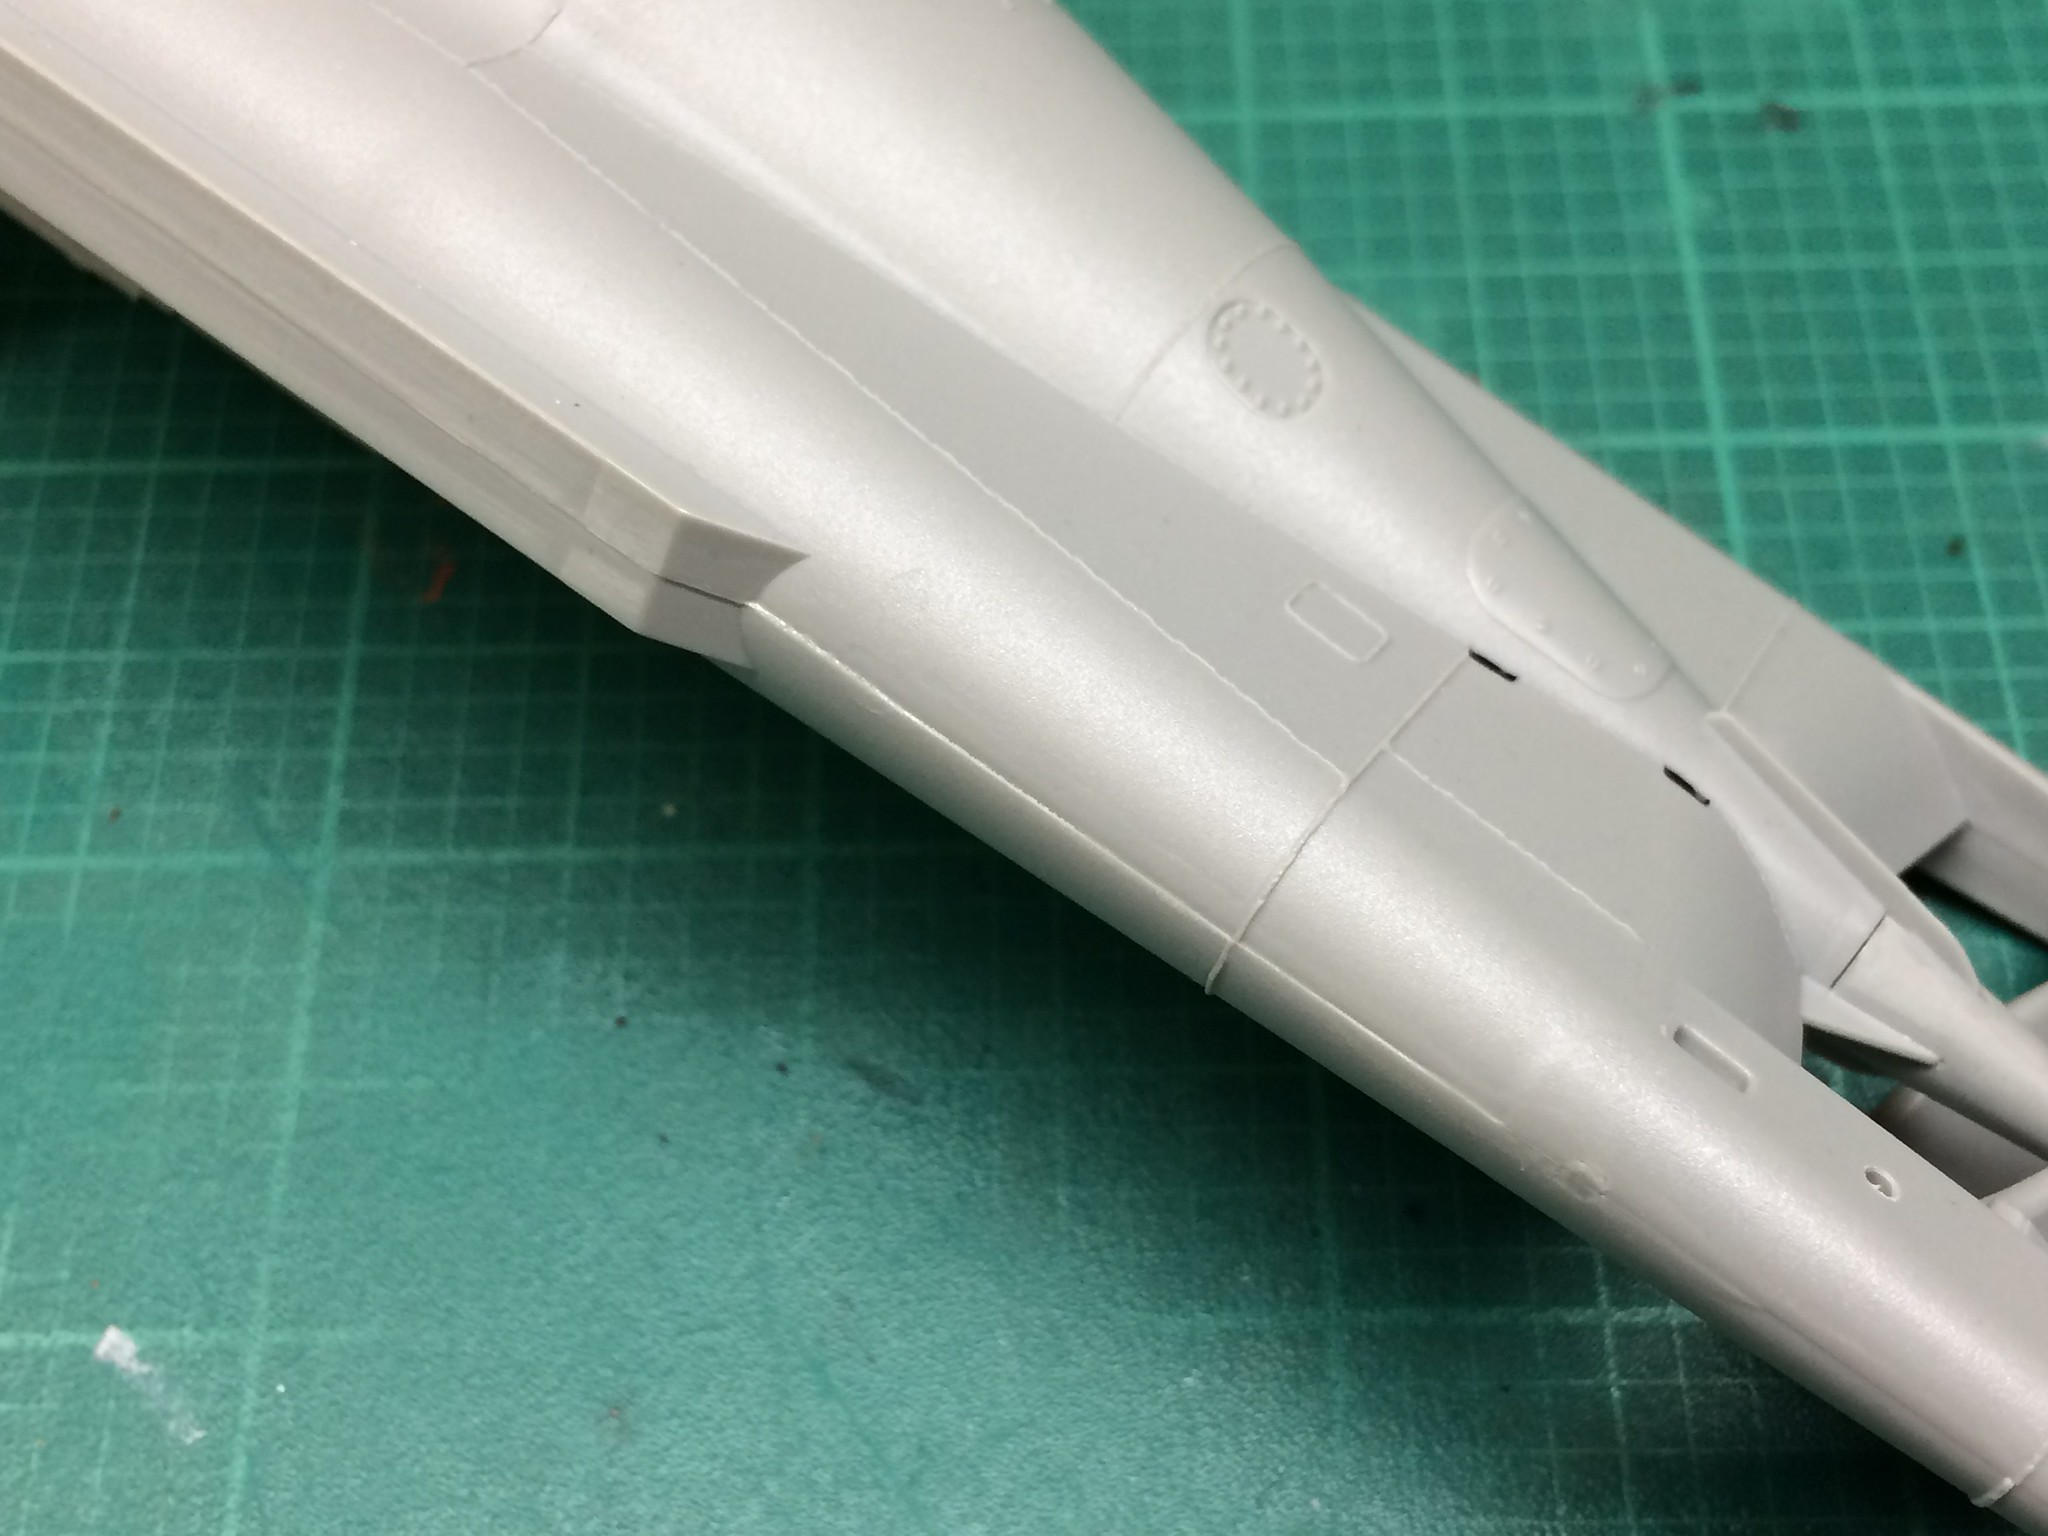
It's really minor though, considering that the rest of the parts fit perfectly.  Some putty will fix it.

https://flic.kr/p/W7fTP5] [/url]Seehund-03 by N.T. Izumi, on Flickr
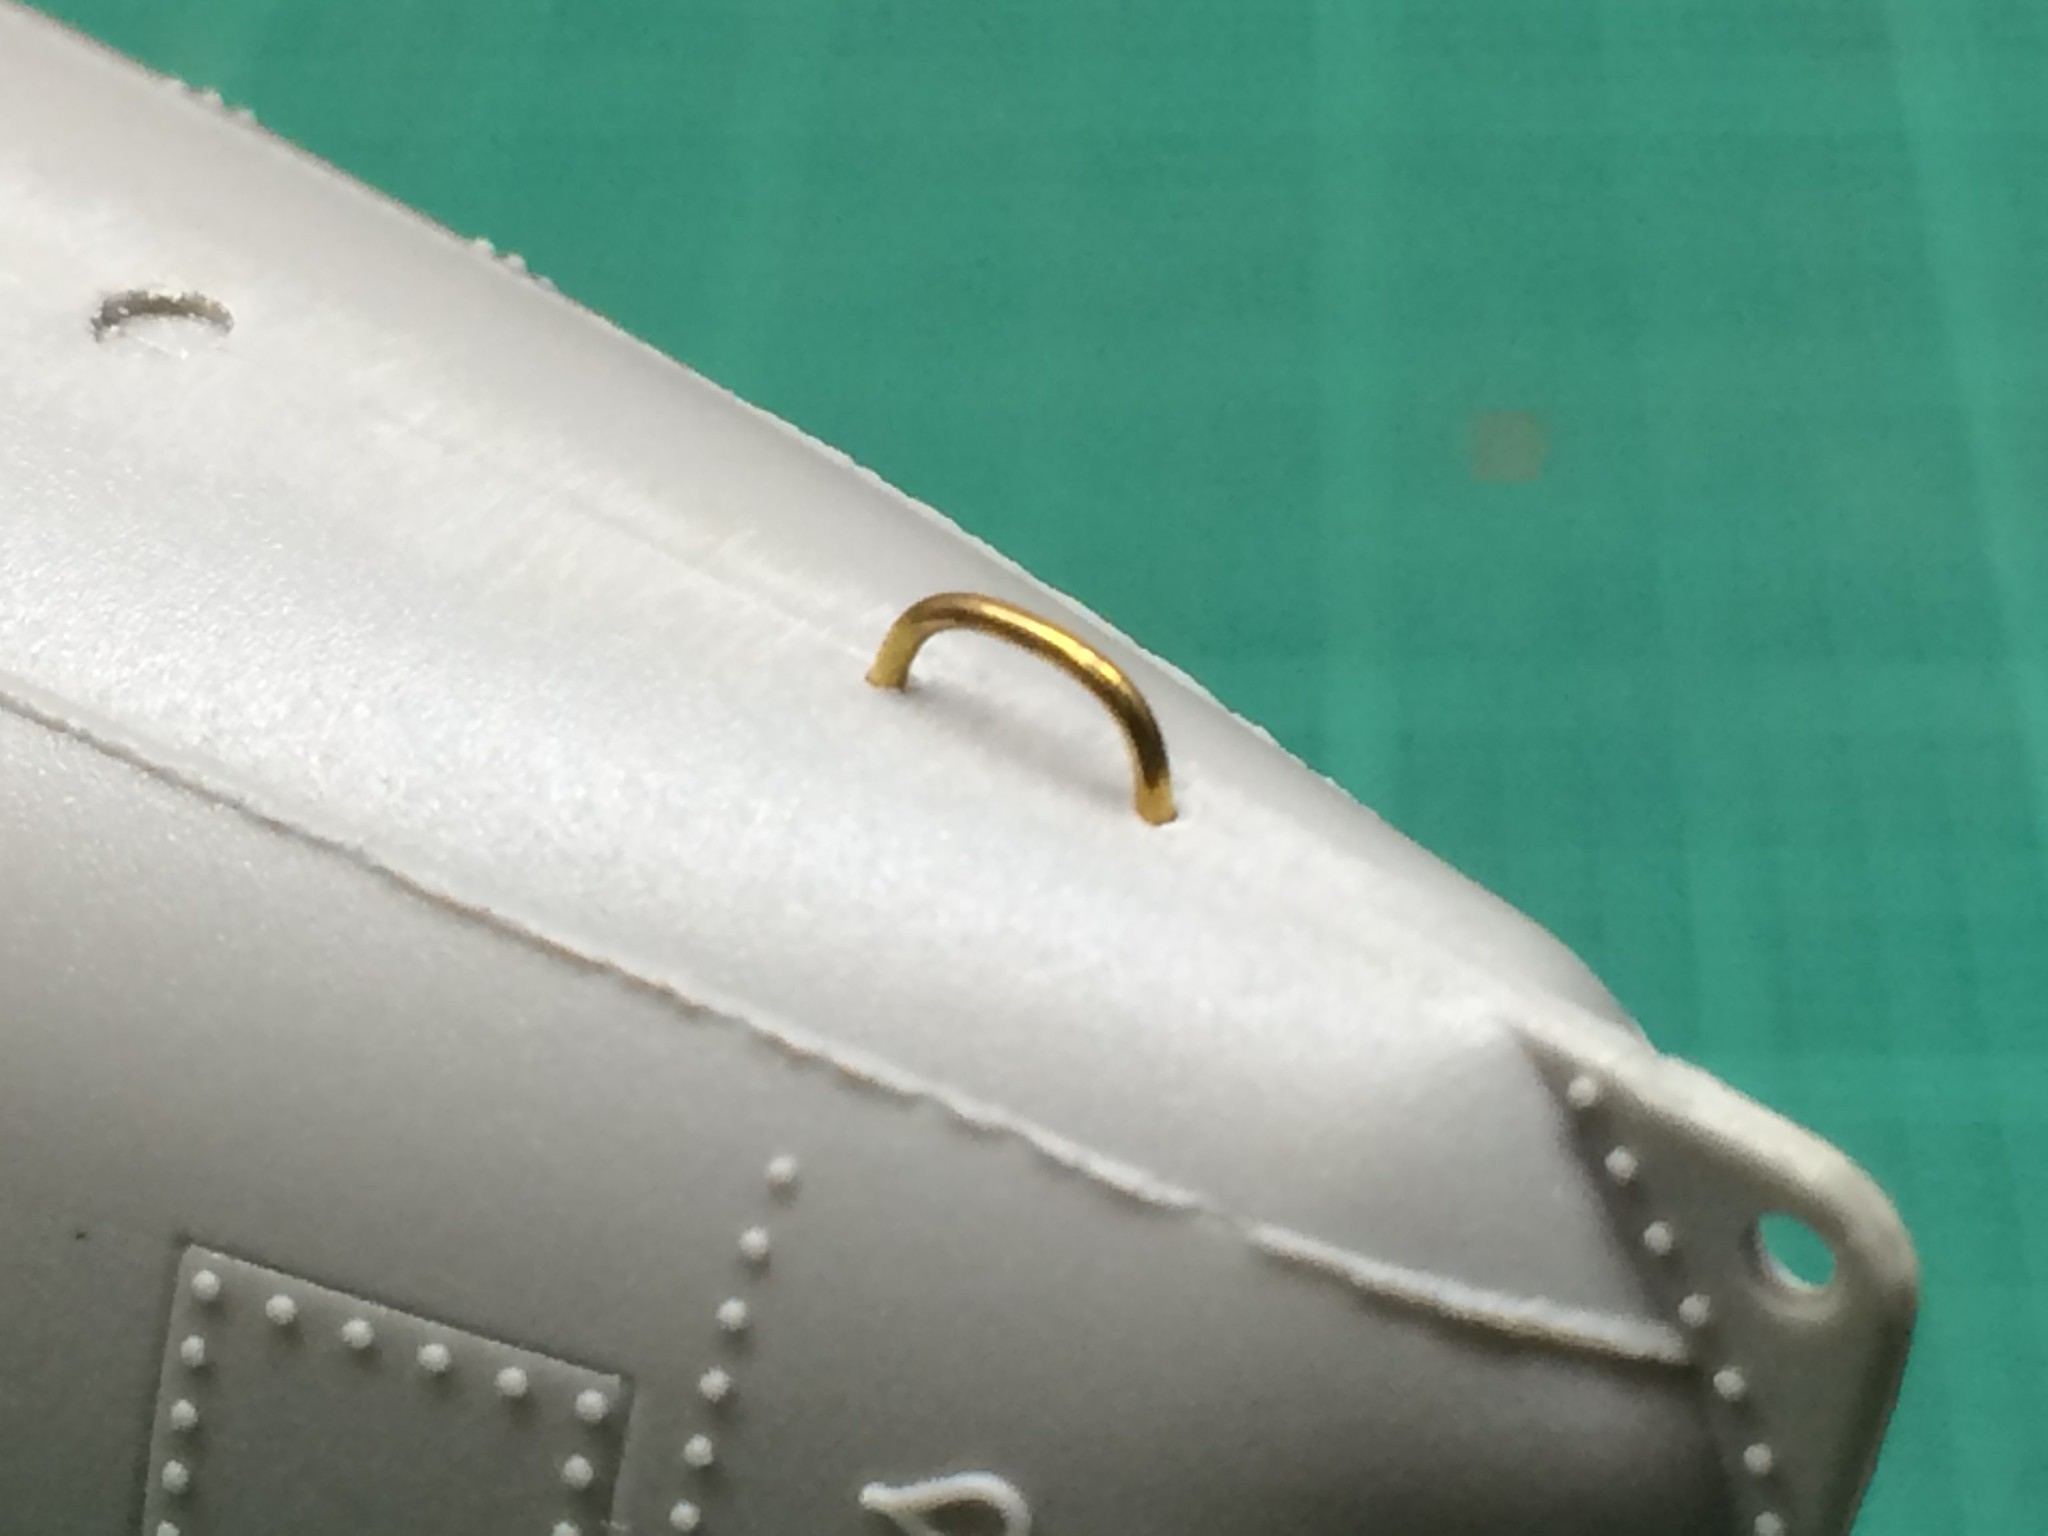
The bow and stern "grab handles" are molded on to one of the hull halves, and suffered damage while in the box.  They were cut off and replaced with brass wire.

https://flic.kr/p/WTNeUP] [/url]Seehund-09 by N.T. Izumi, on Flickr
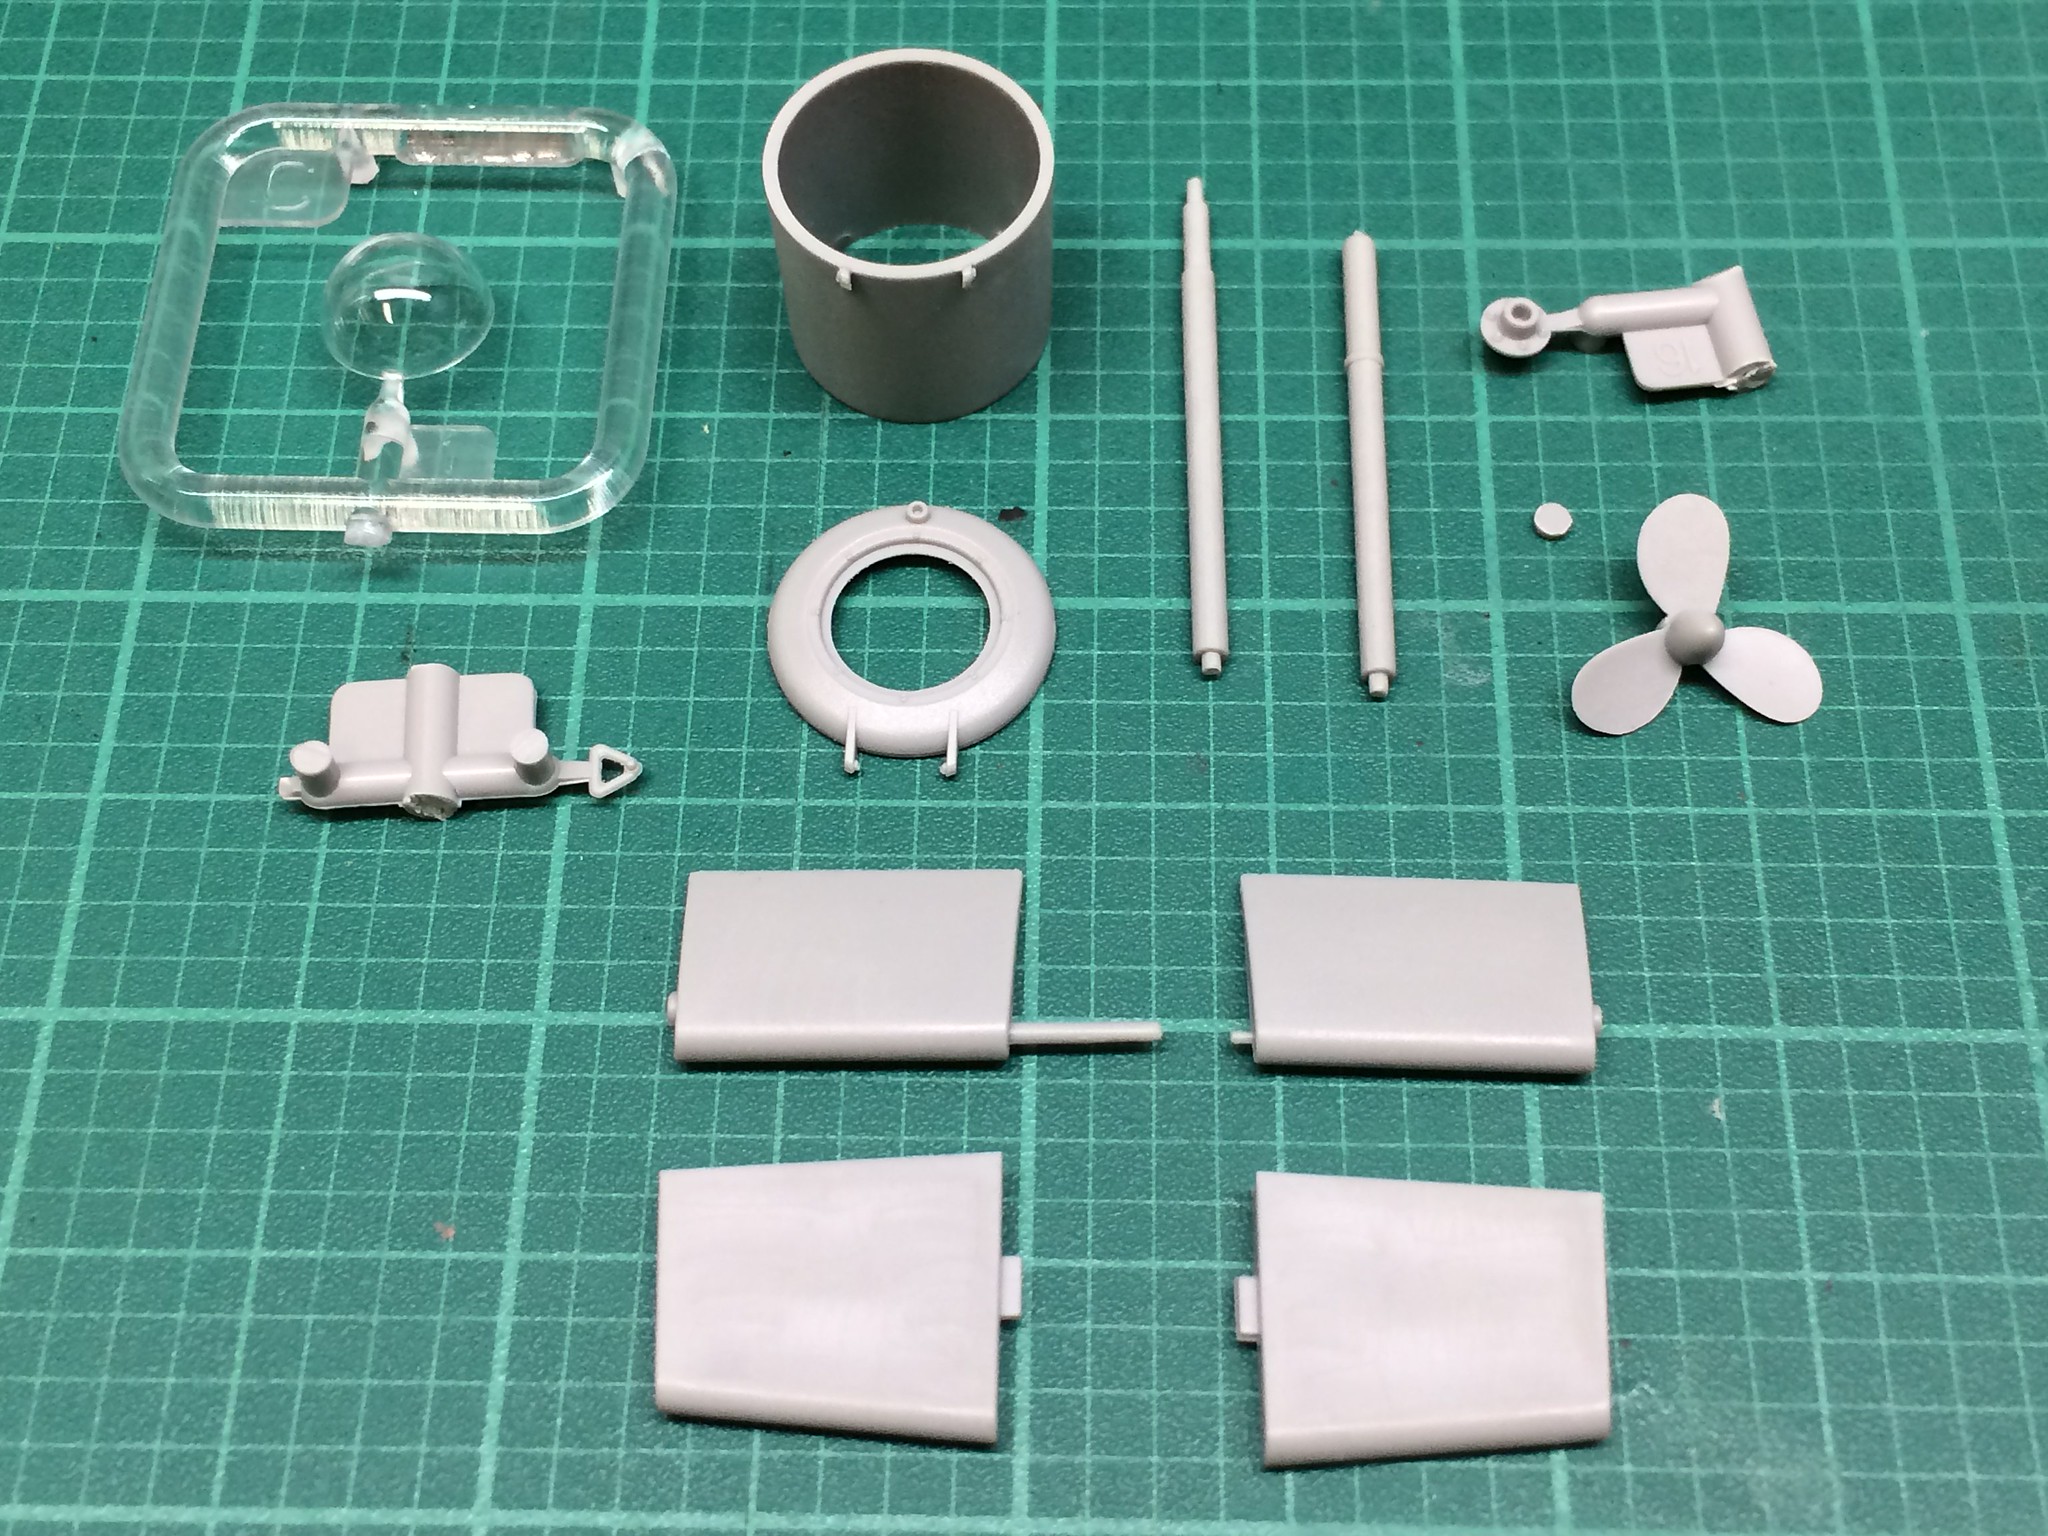
Only a few pieces remain to be attached to the hull.  The clear dome fits atop the crew entry hatch, and although there is no detail to see inside, the small opening will not reveal much.  The  dive planes have some rather nasty sink marks which will easily be filled with putty.  The periscope will need a head with a looken-peeper glass.

https://flic.kr/p/WTNfsc] [/url]Seehund-07 by N.T. Izumi, on Flickr

The torpedos are suspect in terms of accuracy, looking like fat hot dogs, with oval depressions representing the bolt holes that secure the warhead and drive sections to the main body.  This really bothered me, but I'm going to leave these alone.  Life is too short to get bogged down in the small details.  The G7 torpedos in the Italeri Biber kit look much closer to the real deal, having got the chance to inspect a real one at the Imperial War Museum in London.

https://flic.kr/p/qc5DZJ] [/url]IWM-German Torpedo-01 by N.T. Izumi, on Flickr
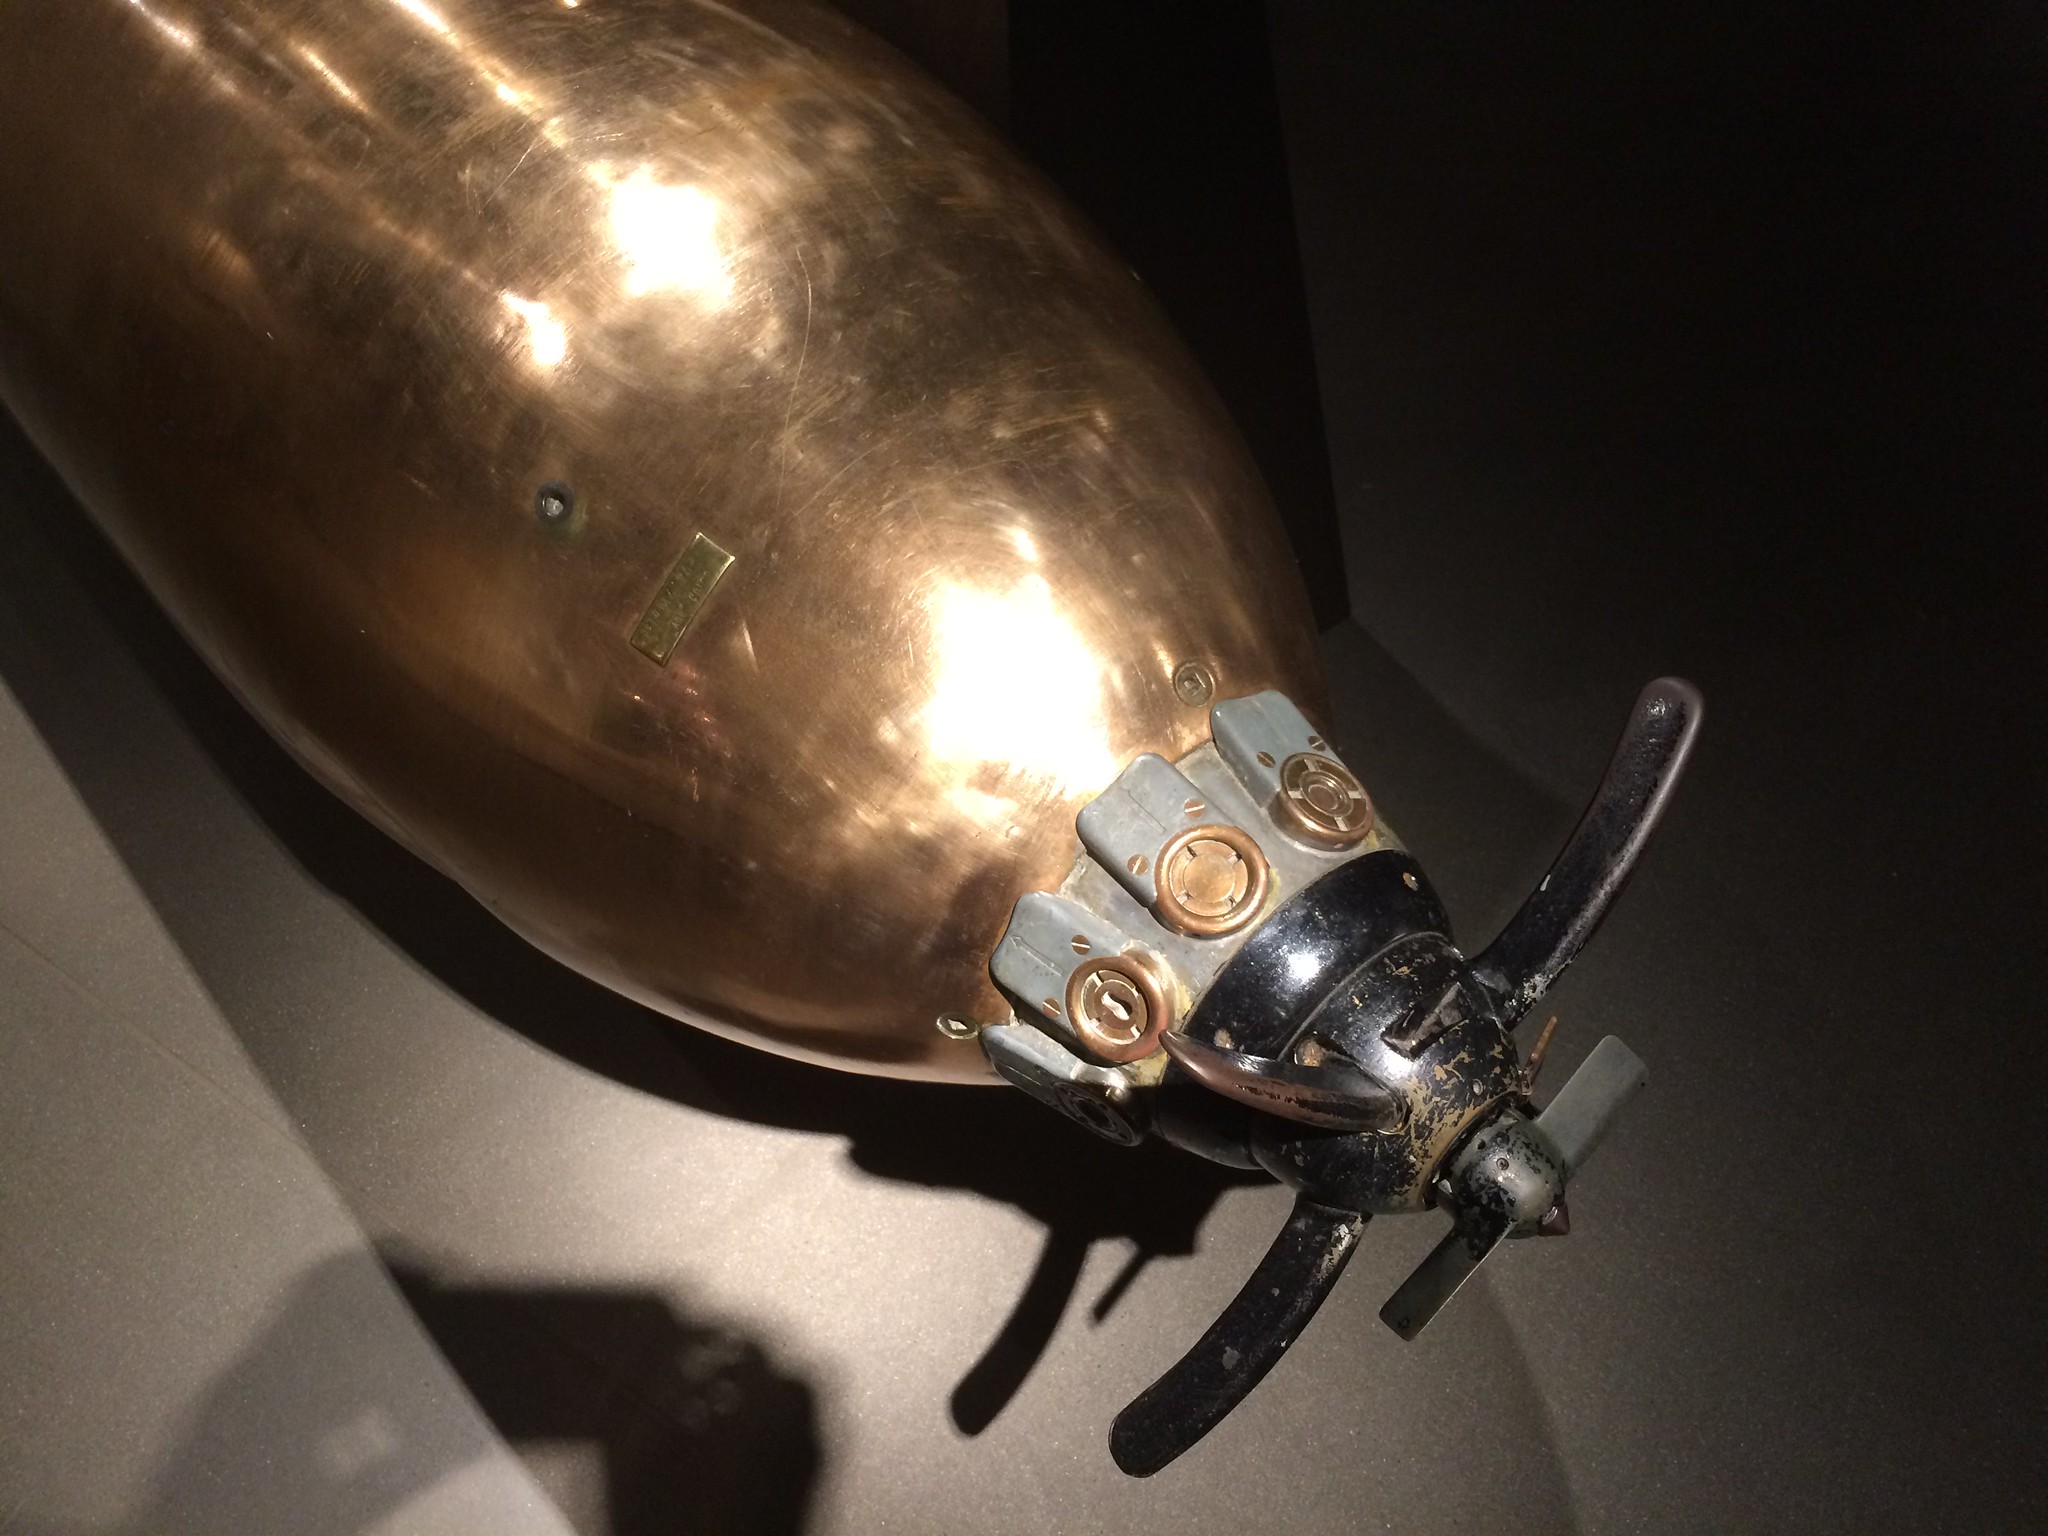
https://flic.kr/p/qc5Du5] [/url]IWM-German Torpedo-02 by N.T. Izumi, on Flickr
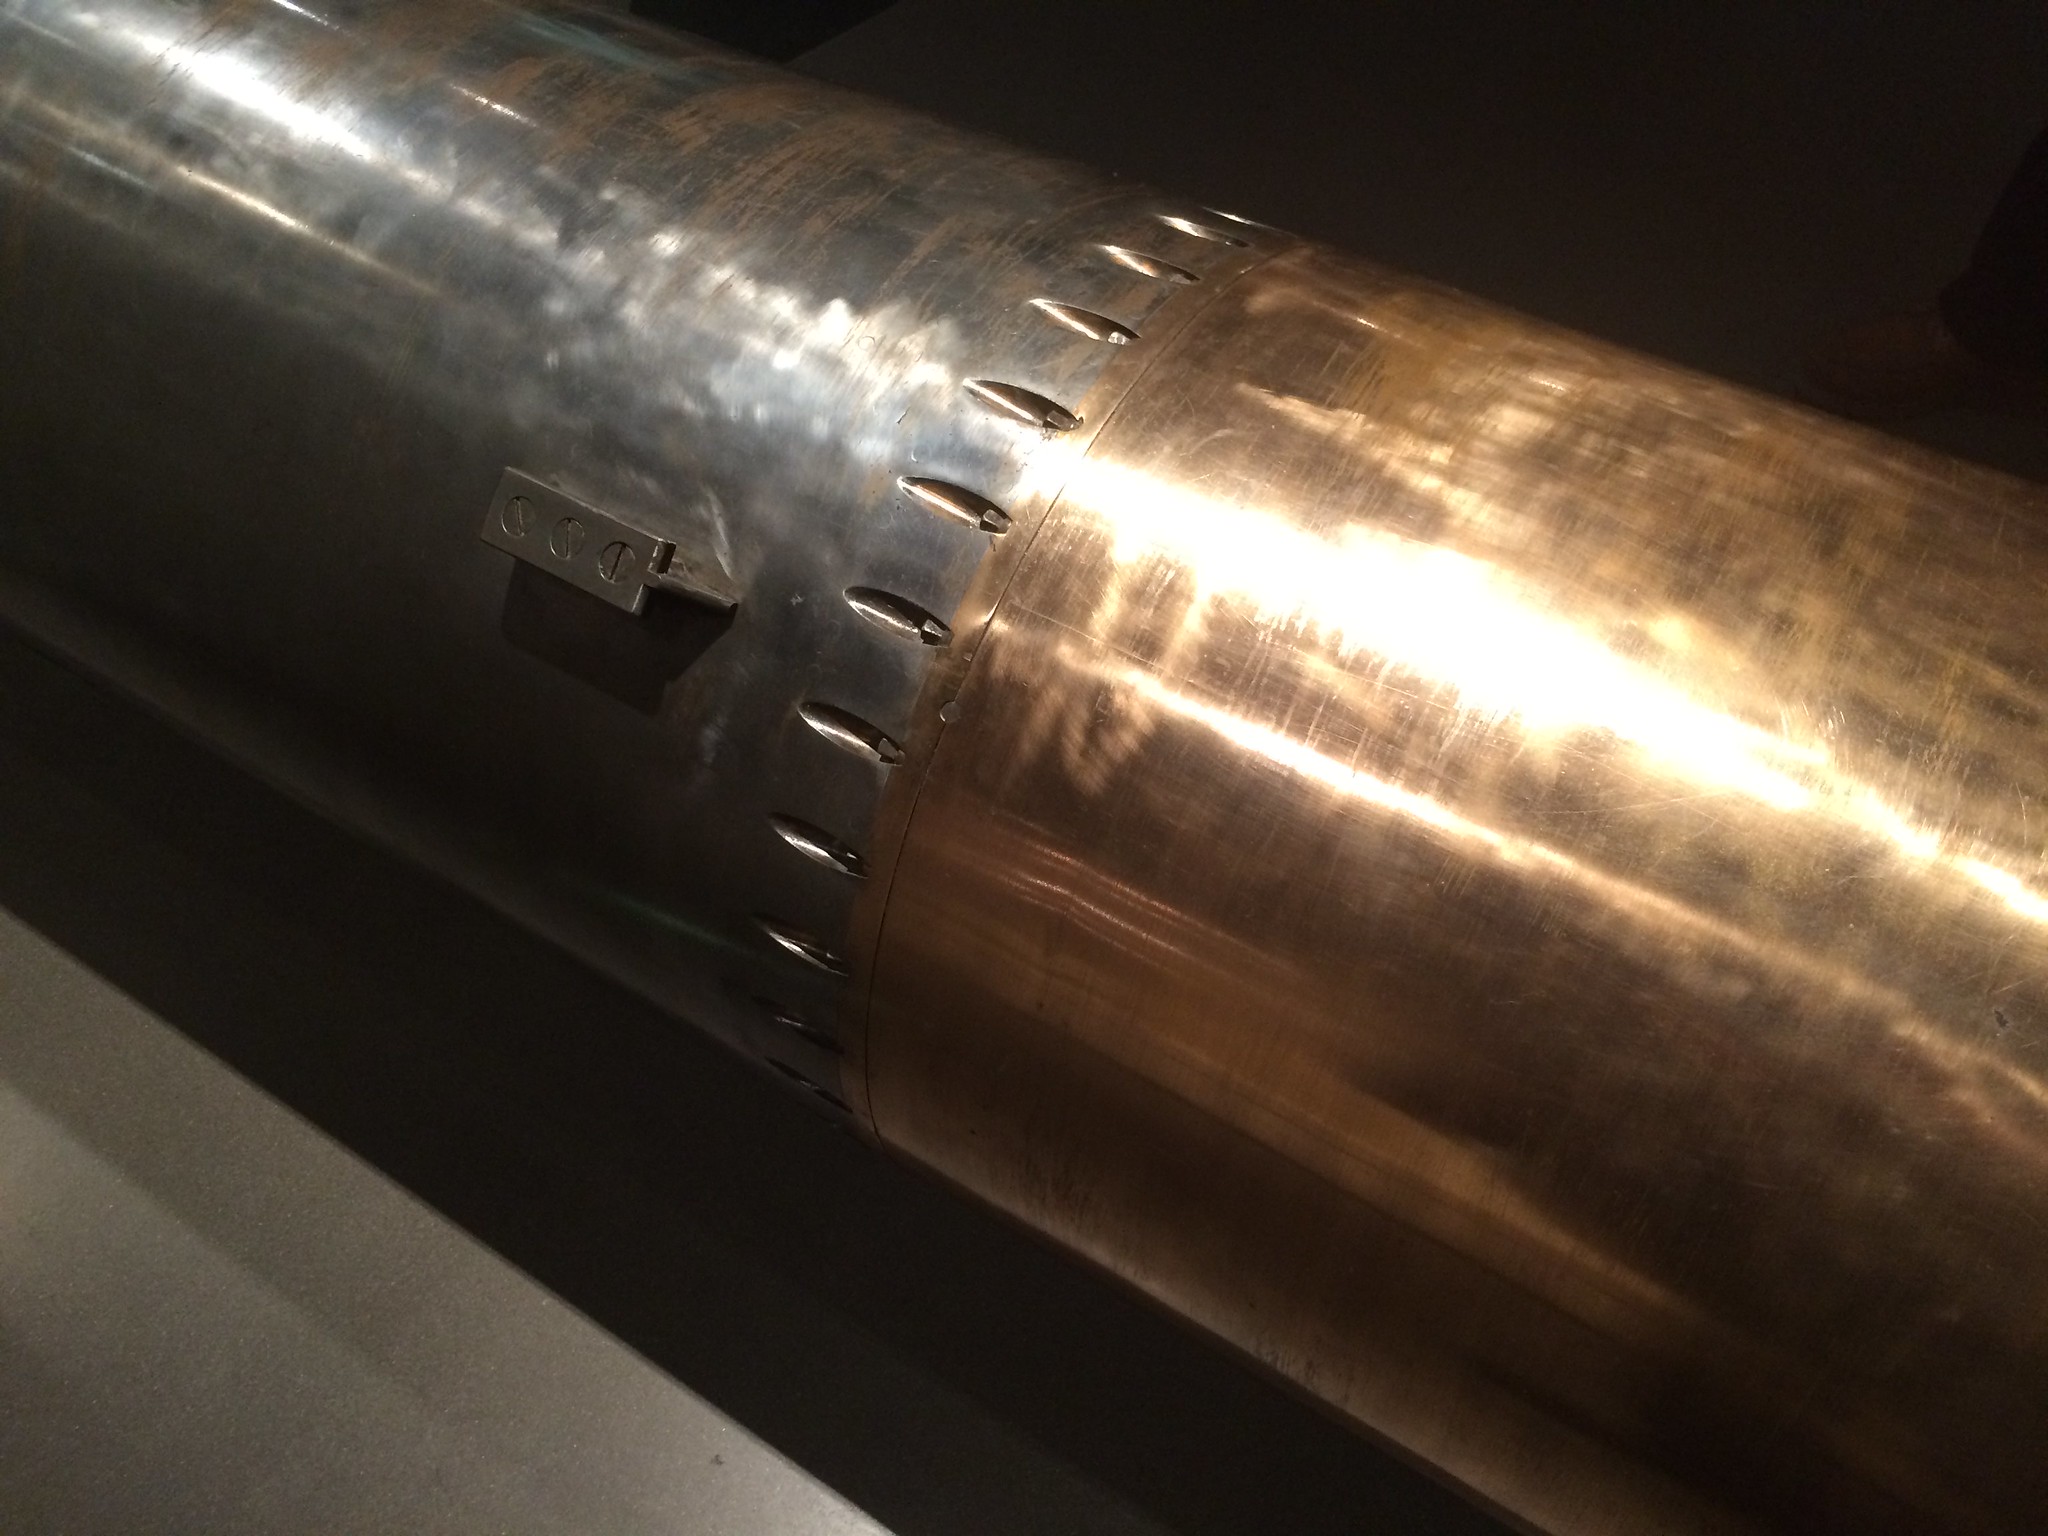
https://flic.kr/p/pUyTJu] [/url]IWM-German Torpedo-03 by N.T. Izumi, on Flickr
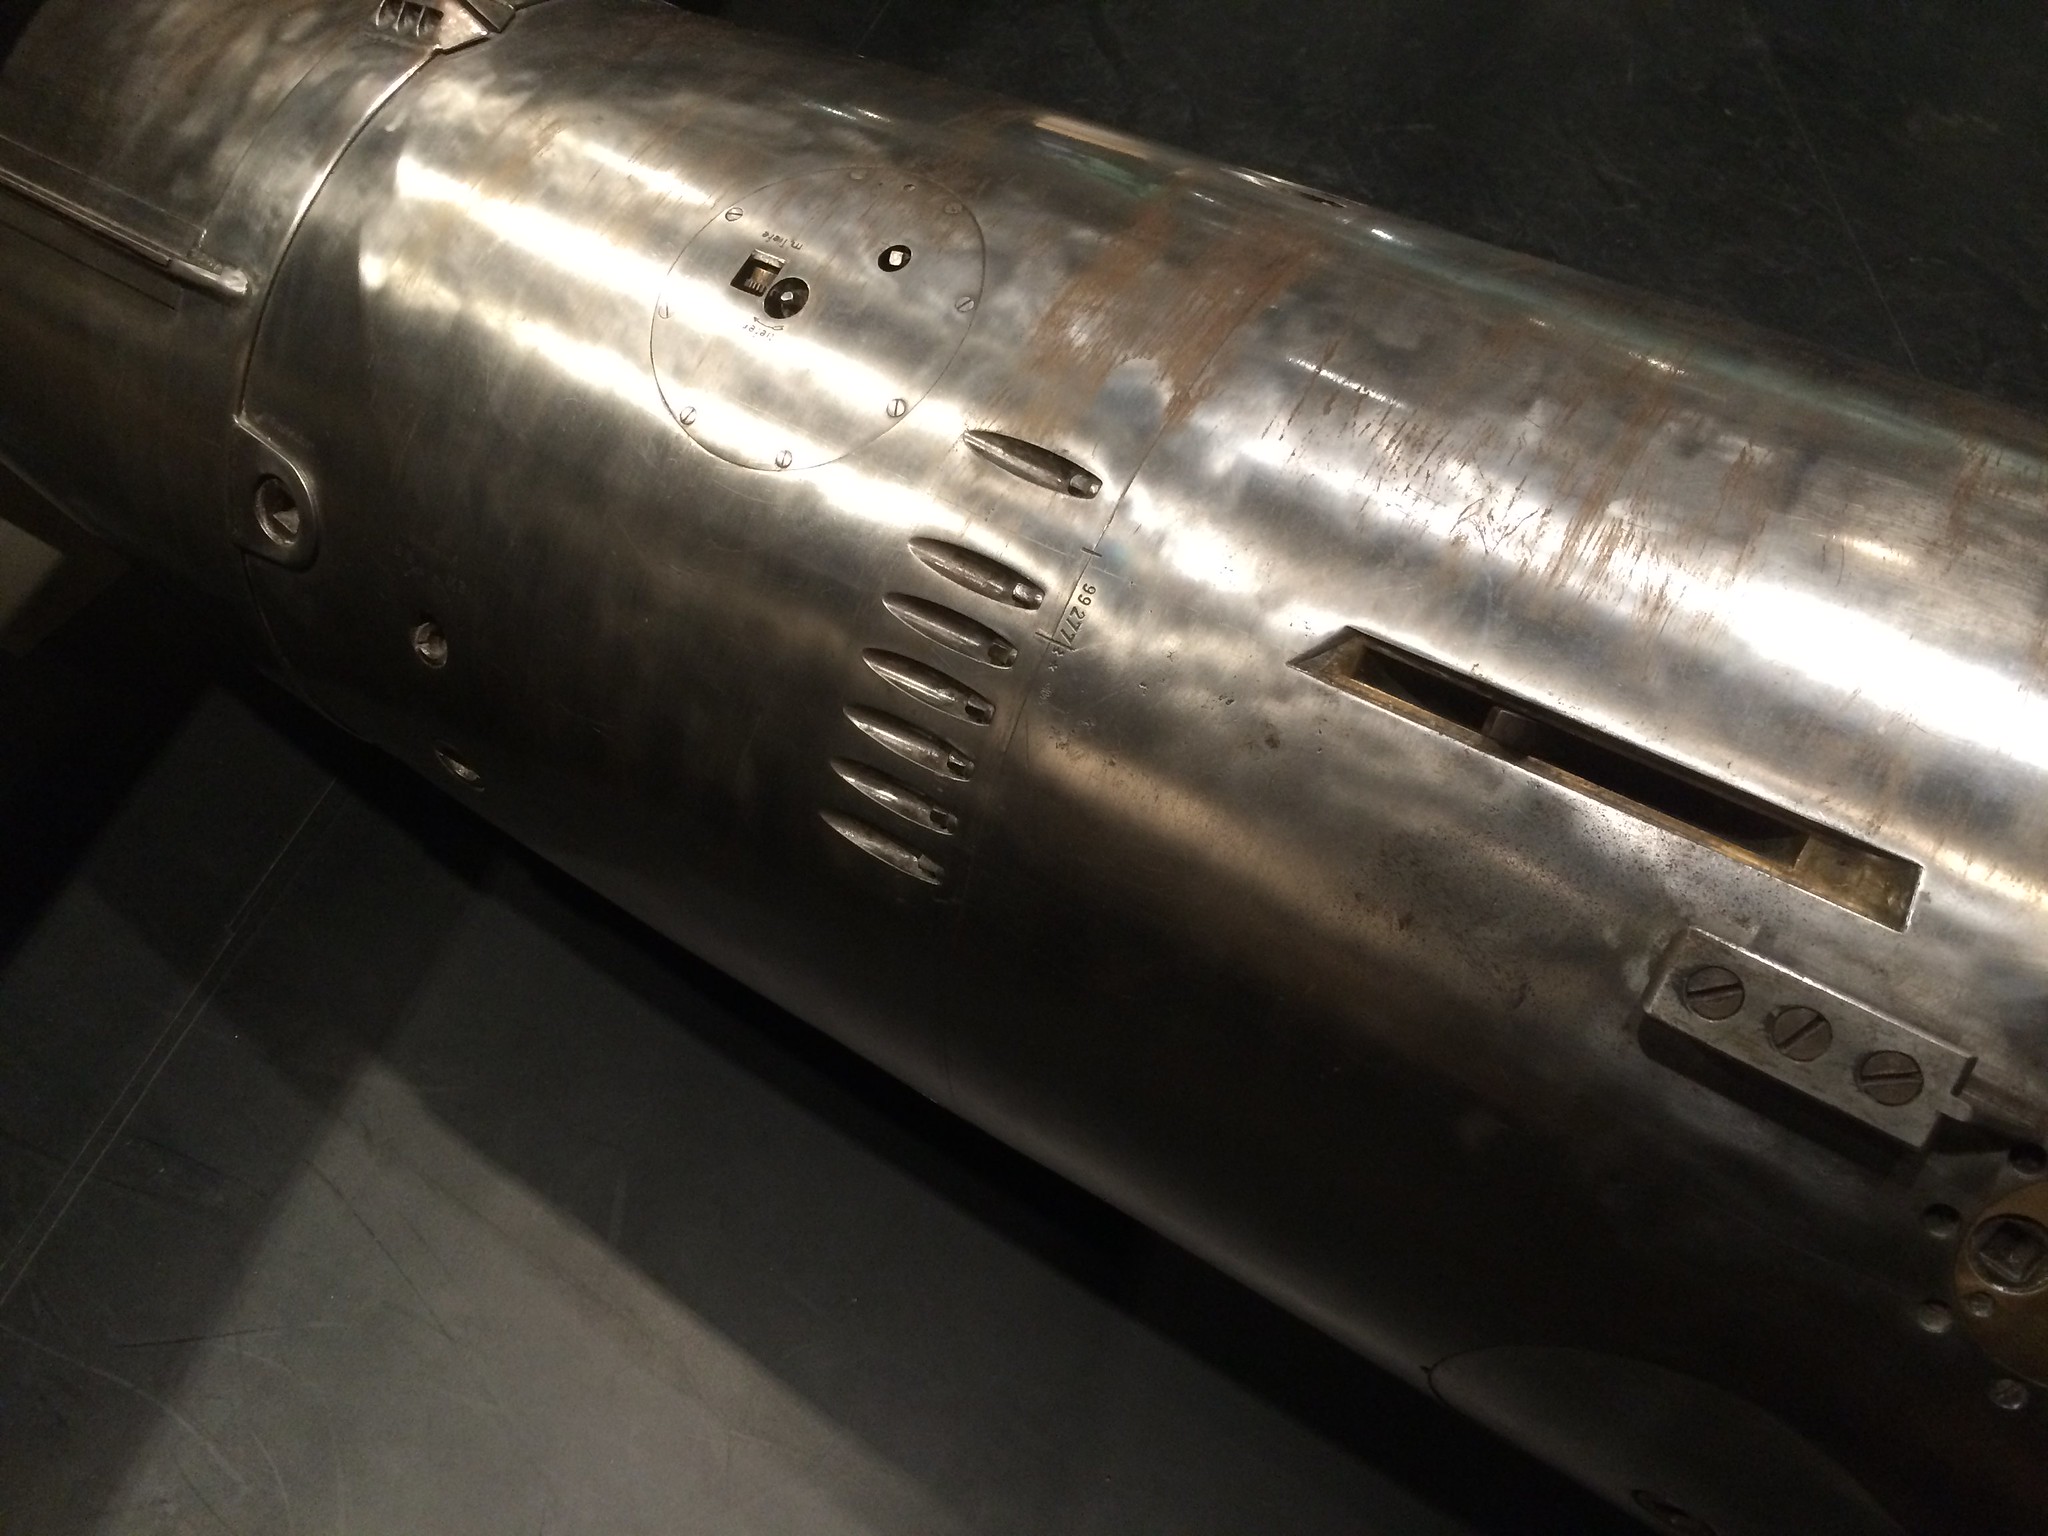
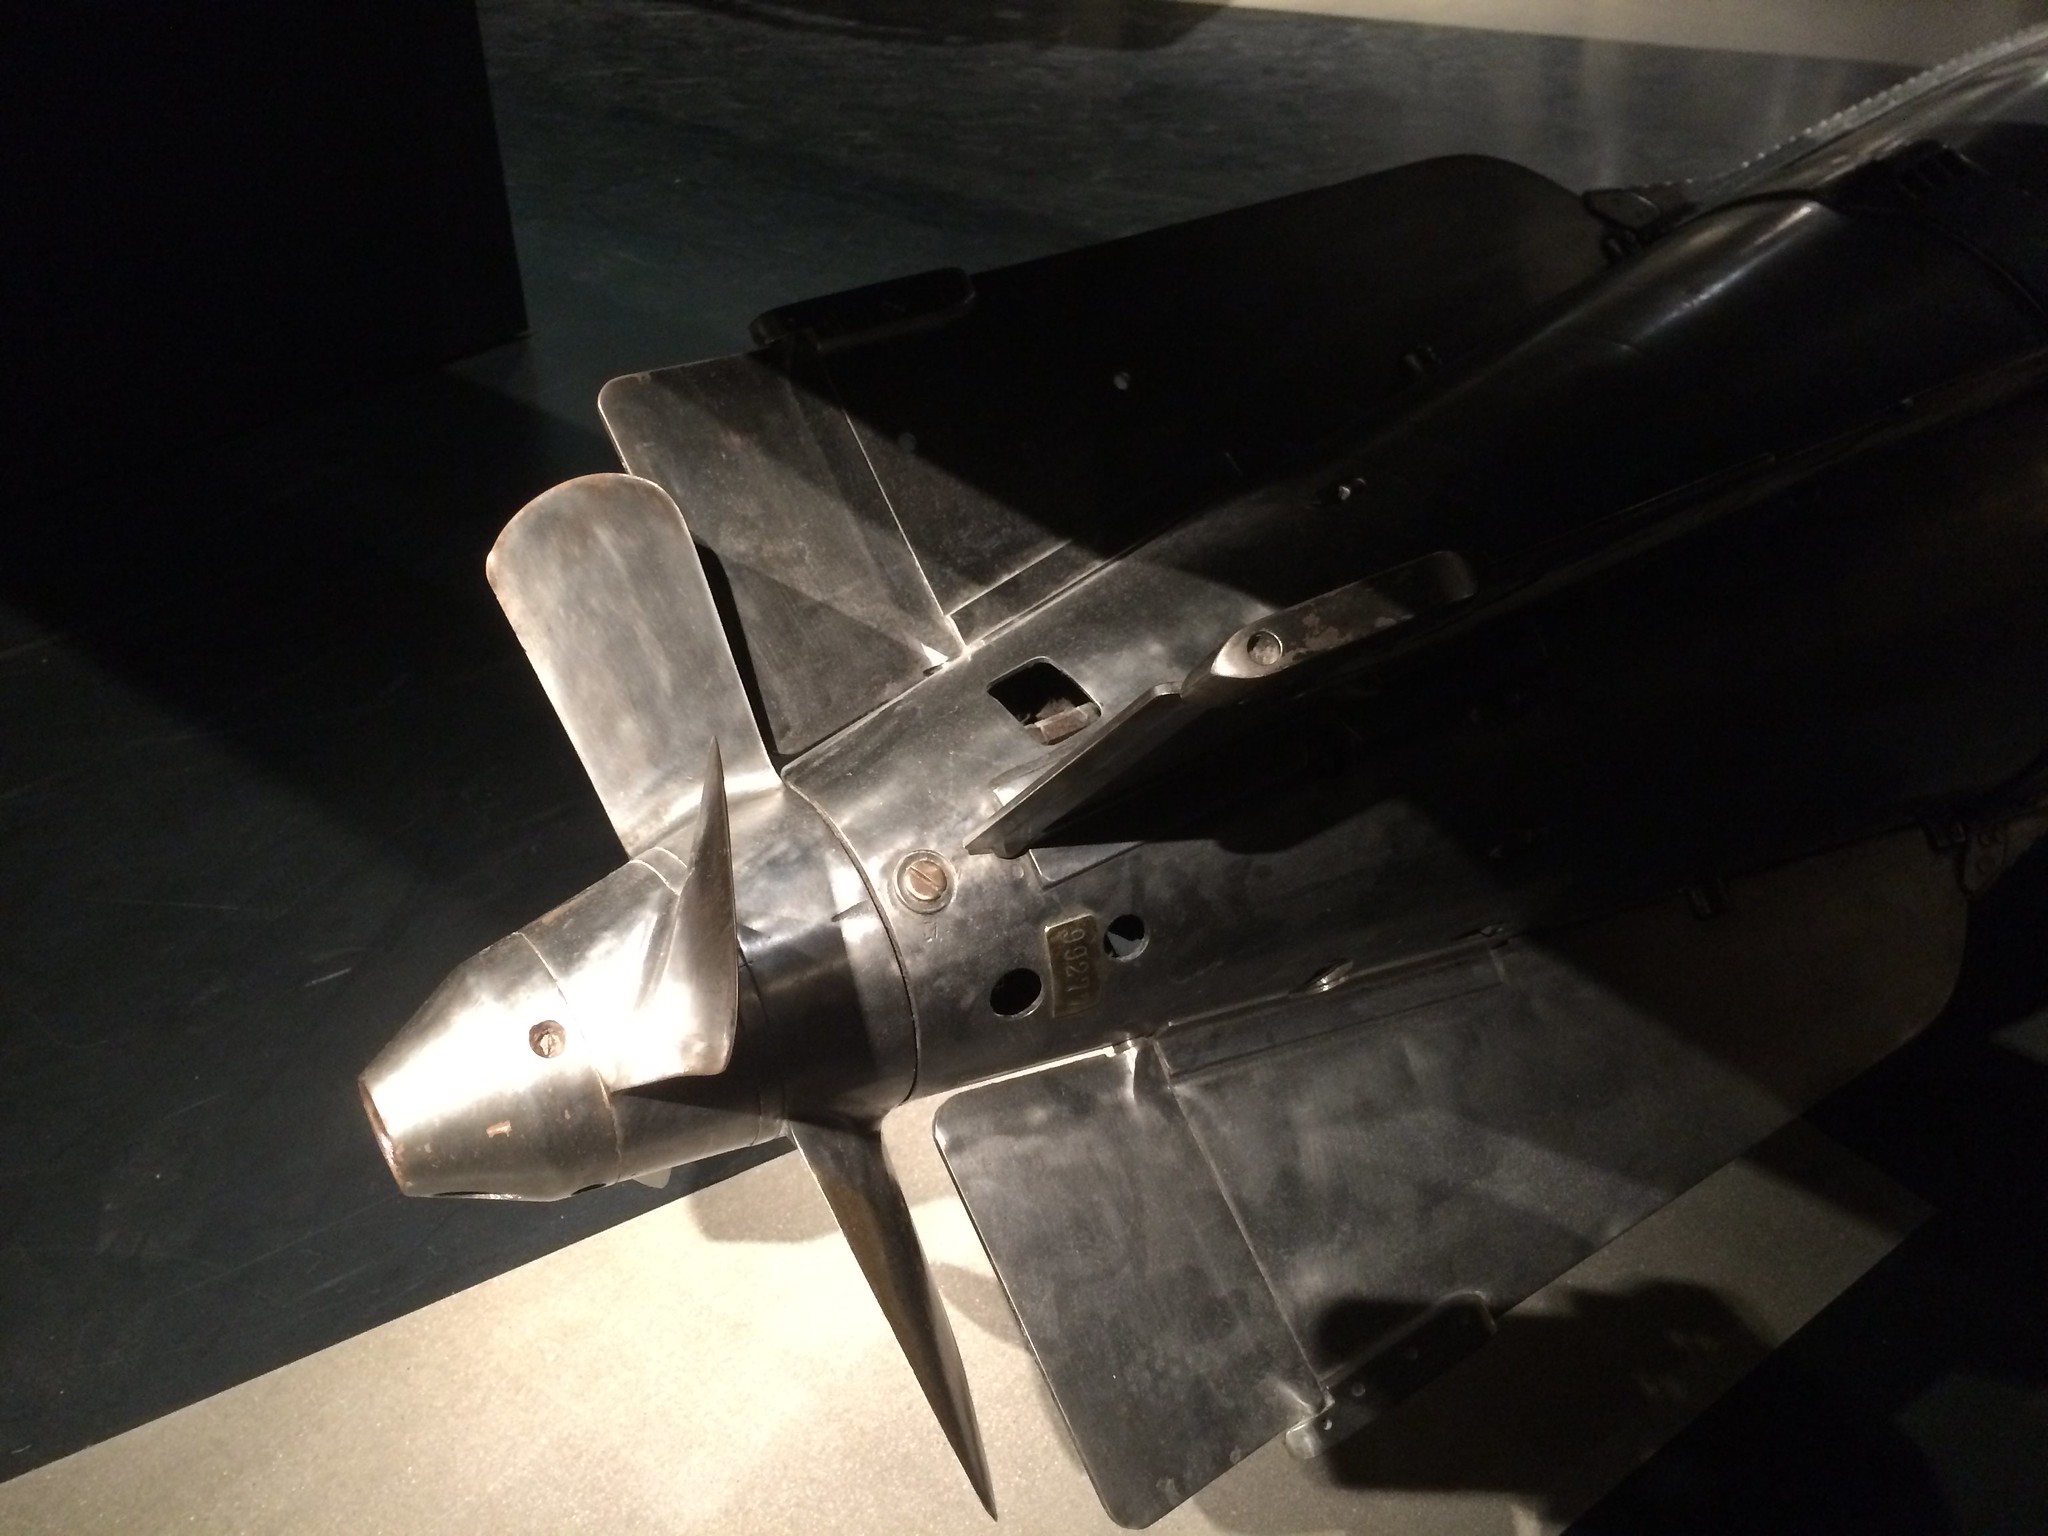
 IWM-German Torpedo-04 by N.T. Izumi, on Flickr

https://flic.kr/p/VEbBCV] [/url]Seehund-08 by N.T. Izumi, on Flickr
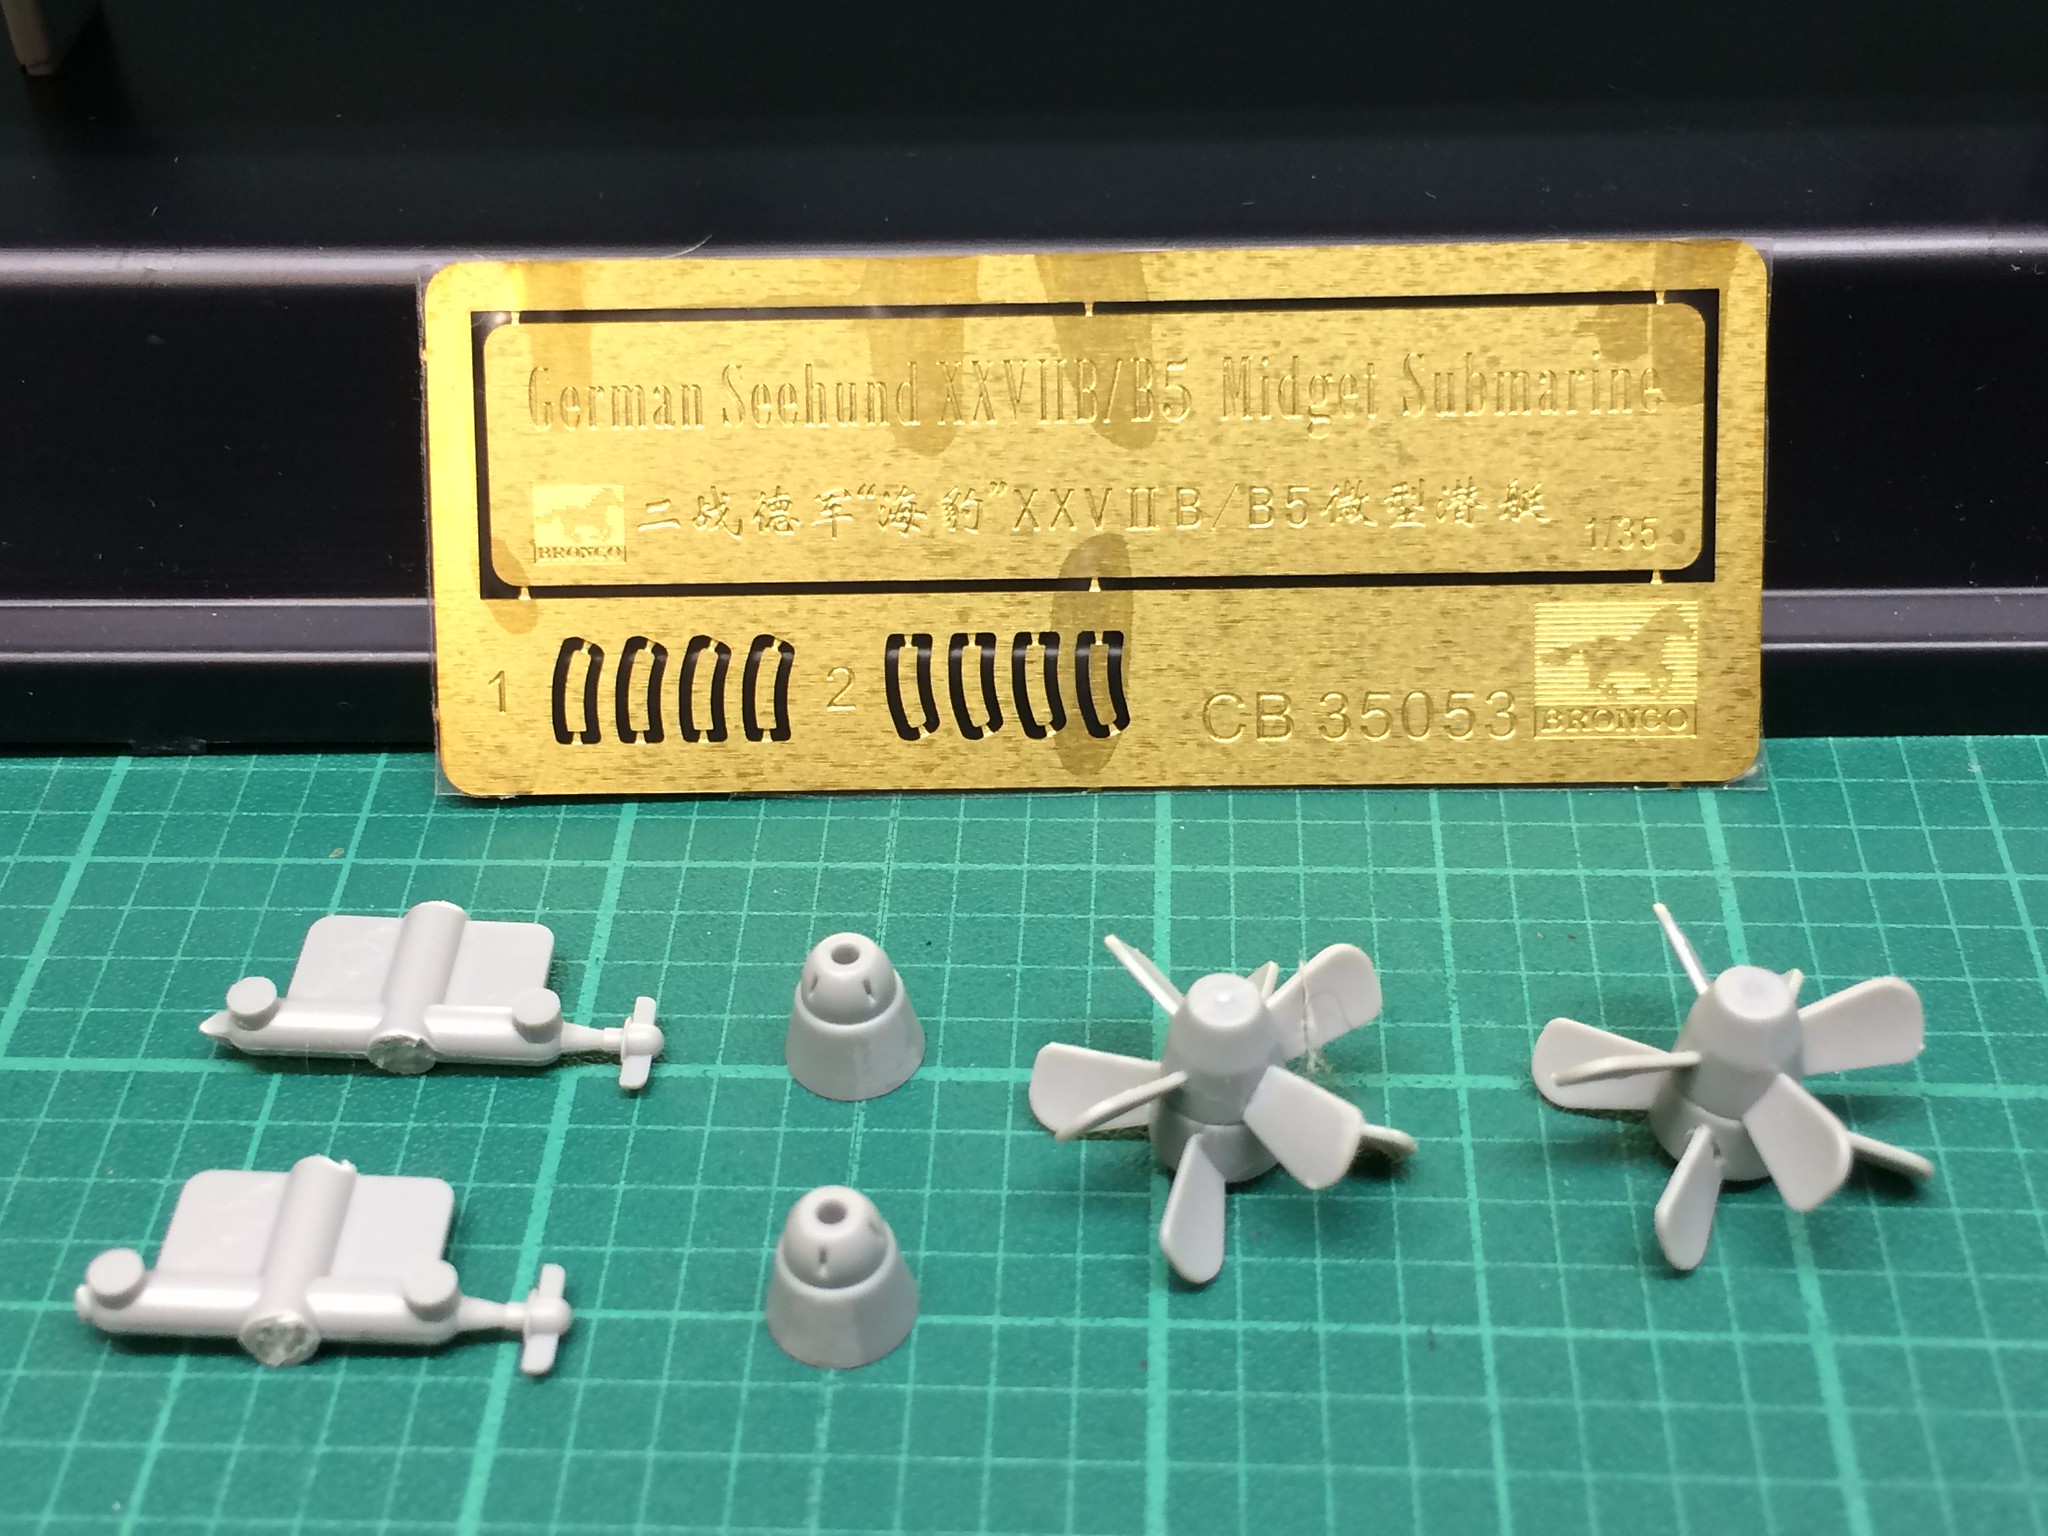
Again, only a few parts to add to complete the torpedos.  The PE mini-bananas are to be added to the impact fuse caps.

Planning to roll this out to the paint shop this weekend.


“Ya ya ya, unicorn papoi!”

  • Member since
    July 2014
Posted by modelcrazy on Friday, July 21, 2017 8:57 AM

That's looking great G. Nice repair on those grab handles and the PE for the torps look like they will really bring those up to standard.

Steve

Building a kit from your stash is like cutting a head off a Hydra, two more take it's place.


http://www.spamodeler.com/forum/

  • Member since
    March 2010
  • From: Boston
Posted by mach71 on Friday, July 21, 2017 2:38 PM

Great idea Real G!


It seams to have worked very good. 


Your Seehund is looking great!

  • Member since
    May 2011
  • From: Honolulu, Hawaii
Posted by Real G on Friday, July 21, 2017 5:08 PM

Super duper Mach 71!  Glad to be of help. Yes  The easiest way to get hot water for such times is to use a Pyrex measuring cup, fill it up, and microwave on high power for around 2-1/2 minutes.  When the water starts to cool, just pop the Pyrex back into the microwave.  It sure beats using the range!

I wonder how your Mikro-Mir Hunley compares to the old Verlinden resin kit?  How did the kit treat the torpedo spar mountng details?  That is one area that is still under debate regarding the real thing.  I built the Verlinden kit a while ago; it was a two-fer, with a full hull and waterline kit in the box.  I never got around to doing the waterline one. 

“Ya ya ya, unicorn papoi!”

  • Member since
    March 2010
  • From: Boston
Posted by mach71 on Friday, July 21, 2017 7:47 PM

I've never seen the Verlinden kit in person, So I can't answer about that.

The Mikro-Mir seems to have the correct torpedo orientation. The spar mounts on the bottom of the bow on a hinge point with a line adjusting the angle through the top of the bow.

This matches with what the people at the Hunley museum said.

Riging will be interesting.

  • Member since
    March 2010
  • From: Boston
Posted by mach71 on Saturday, July 22, 2017 5:06 PM

Making slow progress.


The prop shroud I made is too small. It fits inside the rudder housing,

but not around the prop. 

  • Member since
    July 2014
Posted by modelcrazy on Saturday, July 22, 2017 10:57 PM

That is looking nice Mach. The bow repair really turned out nice Yes

Steve

Building a kit from your stash is like cutting a head off a Hydra, two more take it's place.


http://www.spamodeler.com/forum/

  • Member since
    March 2010
  • From: Boston
Posted by mach71 on Monday, July 24, 2017 1:16 PM

Thanks!


Major construction is complete. I could not get the hatch hinges to look right,

They looked much too large for scale. I'm leaving them off for now. I might make 

some smaller ones later.


The PE included with the kit is VERY thick and hard to work with.


Tomorrow I'll try and get a coat of black paint on. With a bit of luck I'll make it

by the deadline!


  • Member since
    July 2014
Posted by modelcrazy on Monday, July 24, 2017 1:46 PM

What did they use to get those glass domes to seal I wonder?

Steve

Building a kit from your stash is like cutting a head off a Hydra, two more take it's place.


http://www.spamodeler.com/forum/

  • Member since
    March 2010
  • From: Boston
Posted by mach71 on Monday, July 24, 2017 3:07 PM

The Hatches? They are clear in the kit but were iron on the real Hunley.

They have dead lights on the top and front of the conning towers and on the top

of the hull.


BTW the clear hatches did not fit at all. They were about 1/16 too big all around.

Much sanding was needed.


  • Member since
    July 2014
Posted by modelcrazy on Monday, July 24, 2017 3:41 PM
Hatches, OK that makes sense. They looked like vision domes, which made sense to me a least.

Steve

Building a kit from your stash is like cutting a head off a Hydra, two more take it's place.


http://www.spamodeler.com/forum/

  • Member since
    March 2010
  • From: Boston
Posted by mach71 on Tuesday, July 25, 2017 12:58 PM

They probably could have used glass as the max diving depth was less than 100 ft. Probably closer to 50 ft. But glass would have been much more dangerous as the Hunley was shot at on her attack of the Housatonic.

One theory of her sinking was that one of the deadlights on the forward conning tower was shot out during the attack, but when I visited the Hunley museum I was told that was not true.

I have read that the weight of the iron hatches was enough to create a watertight seal just below the surface, though that seems improbable.

  • Member since
    March 2010
  • From: Boston
Posted by mach71 on Tuesday, July 25, 2017 4:04 PM

I got 2 coats of Tamiya semi gloss black on the Hunley today.


It's hard to capture a good image of something that is black, but I'm 

very happy with how the sub looks! The paint went on very nice. I'm

happy with how the rivet replacement came out.


I'll let the Hunley sit overnight and then I'll fill the deadlights with Krystal Klear

and rig the torpedo. Hopefully She will be done before the deadline!

  • Member since
    May 2011
  • From: Honolulu, Hawaii
Posted by Real G on Tuesday, July 25, 2017 5:59 PM

Looking good there Mach 71!  I used punched acetate for windows on my Verlinden kit, which look nice and flat like glass, but I should have painted the cut edges black, as they show after installation.

https://flic.kr/p/VJMPyV] [/url]Hunley-09 by N.T. Izumi, on Flickr

Meanwhile, the Seehund is getting ready for the paint shop.  I keep finding little spots that need attention.  Crew from an Italeri Biber have shown up to inspect progress.

https://flic.kr/p/WsEK89] [/url]Seehund-11 by N.T. Izumi, on Flickr

They are probably wondering when the heck their ride is going to the assembly shop!


“Ya ya ya, unicorn papoi!”

  • Member since
    March 2010
  • From: Boston
Posted by mach71 on Tuesday, July 25, 2017 6:37 PM

Your Seehund and Hunley look great!

  • Member since
    July 2010
  • From: Tempe AZ
Posted by docidle on Tuesday, July 25, 2017 11:33 PM

I FINALLY got my 20mms from Shapeways! Unfortunately, they are not the solid based ones I need; however, I am going to use them just the same and  finish up this puppy by the 31st. I also have to figure out what photo sharing  software I am going to be using so I can post again......

Steve 


  • Member since
    July 2014
Posted by modelcrazy on Wednesday, July 26, 2017 8:10 AM

The Hunley is looking great G, I also like those guys you bought.

Steve

Building a kit from your stash is like cutting a head off a Hydra, two more take it's place.


http://www.spamodeler.com/forum/

  • Member since
    March 2010
  • From: Boston
Posted by mach71 on Wednesday, July 26, 2017 1:20 PM

The Hunley is done! For now :-)


I'll get some photos up tonight.


  • Member since
    March 2010
  • From: Boston
Posted by mach71 on Wednesday, July 26, 2017 2:34 PM


I'm not sure how to get any better photos.

  • Member since
    May 2011
  • From: Honolulu, Hawaii
Posted by Real G on Wednesday, July 26, 2017 6:01 PM

Mach 71,

Subs sure are difficult to photograph aren't they?  What to do?  Cheat.

https://flic.kr/p/WUFKVQ] [/url]Hunley-02 by N.T. Izumi, on Flickr

https://flic.kr/p/WUFKrd] [/url]Hunley-06 by N.T. Izumi, on Flickr

Photgraph the model diagonally to get more of it into the frame, and in the specific case of the Hunley, take a separate photo of the torpedo spar.

Looking good, wish you well makng the deadline!  Ahem, now I have to go work on my model...

“Ya ya ya, unicorn papoi!”

  • Member since
    March 2010
  • From: Boston
Posted by mach71 on Thursday, July 27, 2017 11:49 AM

It's done. The only thing left is maybe some weathering/rust, but I like the new look.


It was repainted after the 1st and 2nd sinking so it's a realistic look.


If I were to build this kit again I would go with a slightly greyish look like you did.

It looks more scale.

  • Member since
    May 2011
  • From: Honolulu, Hawaii
Posted by Real G on Thursday, July 27, 2017 12:27 PM

Mach 71, my Hunley was actually painted with rattlecan black, then repeatedly treated with brown and grey washes to get that color.  I like Mikro-Mir's representation of the "torpedo" better than Verlinden's oil drum!

The Seehund now will have a crewman on board, thanks to the Biber.  I saw a fantastic on-line build of a Bronco Seehund that featured a crewman peering out of the hatch and I could not resist plagarizing the idea!  Besides, the guy I used had a kind of stiff unnatural pose.

https://flic.kr/p/XacuFX] [/url]Seehund-14 by N.T. Izumi, on Flickr

https://flic.kr/p/X5PSJo] [/url]Seehund-13 by N.T. Izumi, on Flickr

I just popped his arms off and in he went!  I take ages to paint figures, so I'll leave the entry tube loose to add him in later.  The Seehund is basically ready for paint now.

https://flic.kr/p/X9sVVF] [/url]Seehund-12 by N.T. Izumi, on Flickr

“Ya ya ya, unicorn papoi!”

  • Member since
    March 2010
  • From: Boston
Posted by mach71 on Thursday, July 27, 2017 12:47 PM

Real G,

Your crewmember in the bubble is a great addition!


I like your sugestion of washes to lighten the black a bit. Good idea.

The Micro mir kit is probably the most acurate, It looks like they used data

from the conservation of the real Hunley. The torpedo in the kit is the most likely

configuration used, but as there are no photos that survived no one really knows.

The one in the kit matches some of Singer's drawings.

  • Member since
    July 2014
Posted by modelcrazy on Thursday, July 27, 2017 1:48 PM

Mach, I got you on the front page. I put up two pictures to try to get a more complete view of it. Thank you for joining in and I think it turned out great Yes. I like the decision to go clean and repainted, just before re-launch.

Steve

Building a kit from your stash is like cutting a head off a Hydra, two more take it's place.


http://www.spamodeler.com/forum/

  • Member since
    July 2014
Posted by modelcrazy on Thursday, July 27, 2017 1:50 PM

G,

Did you want those pics up on the wall or were you going to take some more?

Steve

Building a kit from your stash is like cutting a head off a Hydra, two more take it's place.


http://www.spamodeler.com/forum/

  • Member since
    March 2010
  • From: Boston
Posted by mach71 on Thursday, July 27, 2017 2:00 PM

Thanks.


I'm glad I finished it in time!

JOIN OUR COMMUNITY!

Our community is FREE to join. To participate you must either login or register for an account.

SEARCH FORUMS
FREE NEWSLETTER
By signing up you may also receive reader surveys and occasional special offers. We do not sell, rent or trade our email lists. View our Privacy Policy.