SEARCH FINESCALE.COM

Enter keywords or a search phrase below:

Russian Armor Group Build November 2017 - November 2018

37816 views
940 replies
1 rating 2 rating 3 rating 4 rating 5 rating
  • Member since
    November 2009
  • From: SW Virginia
Posted by Gamera on Thursday, April 26, 2018 11:50 AM

Ernest: Thanks for walking us though that. Love the results. Yes

"I dream in fire but work in clay." -Arthur Machen


  • Member since
    September 2016
  • From: Albany, New York
Posted by ManCityFan on Thursday, April 26, 2018 8:20 AM

Ernest, that is a nice explanation of your process, and really helpful.  I am going to try this on my kit when I get a chance.  The effect looks realistic, and provides a nice variation on the base color.  You have excellent control with your use of paint.

Thanks for the explanation of your process.  I sort of understood this method before your post, but this really helped clarify the what and why.  It is much appreciated.

Now if I can get those nice thin coats of paint down, this will go a long way toward becoming a better model builder.  Big Smile

Dwayne or Dman or just D.  All comments are welcome on my builds. 

  • Member since
    October 2016
  • From: .O-H-I-O....
Posted by DasBeav on Wednesday, April 25, 2018 10:41 PM

Those are turning out great, Ernest. Can't wait to see the finished product.


 Sooner Born...Buckeye Bred.


  • Member since
    July 2006
  • From: San Francisco Bay Area
Posted by bufflehead on Wednesday, April 25, 2018 10:41 PM

MCF, Griffin, thanks for your comments!  I agree, the T-26 looks pretty nice with the B&W method.  I might have to use it more often!

I completed the base painting for the JS-3.  I used my standard (for now!Stick out tongue) method for this.  After the base coat I typically will hit all the shadow areas with a very dark shade of the base color.  Then I lighten the base color quite a bit with white and other light colors and use this for the highlights.  Finally I'll use either straight black or a very dark color for the panel lines... sort of like preshading on airplanes.  Finally I'll spray light thin coats of the final base color to blend everything in.  This final base color may be different than the original base color depending on what I want my final color to really look like.

Here's a progression pic of the process.  The final color was less green and a bit darker than the first base coat.  Also, you can see the effect is very similar to the B&W method, perhaps more subtle.

 I also gave the metal on the MG a coat of the same mix that I used for the panel lines. 

I think that's it for a few days.  Going out of town again and won't return until next week.

Ernest

Last Armor Build - 1/35 Dragon M-26A1, 1/35 Emhar Mk.IV Female


Last Aircraft Builds - Hobby Boss 1/72 F4F Wildcat & FW-190A8


  • Member since
    May 2015
Posted by Griffin25 on Tuesday, April 24, 2018 10:00 AM

I like that B&W preshading on the T-26. Definitely have to try that. Looks great.


Griffin

  • Member since
    September 2016
  • From: Albany, New York
Posted by ManCityFan on Tuesday, April 24, 2018 9:03 AM

Ernest, that is some skillful painting.  Both tanks look great, and I especially like how you got the B&W contrast on the T-26.  I have been too heavy handed with the base coat for that to work (add to list of skills that require patience).

This will be fun to see two methods of weathering, one with the B&W pre-shading, and one done after a good, but uniform base coat.  Please continue to show your process!

Dwayne or Dman or just D.  All comments are welcome on my builds. 

  • Member since
    July 2006
  • From: San Francisco Bay Area
Posted by bufflehead on Tuesday, April 24, 2018 12:27 AM

Gamera, MCF, thanks for your kind words.  Damage to my car in the accident was minor, just a dent in the tailgate.  Wasn't my fault so the other insurance company is paying for all damages...yay!  It will be fixed in a couple of weeks.

Base coats for the T-26 and JS-3 laid down this evening.  I found these new (to me) acrylic paints at the same Ace Hardware...AK Interactive Real Color line.  Among the bottle s I bought are the Russian Protective 4BO and the Russian Modern Green. 

For the T-26 I went with the "black&white" method.  The undercoat:

and used the Protective 4BO as the base color.  Thinned more than usual so I could lay down some light coats to build up the color without losing the B&W contrast underneath.

Used a 50/50 mix of the 4B0 and the Modern Green for the JS-3 straight over the gray primer.  I'll paint this with my usual method of highlighting/shading.

The base color is a bit brighter and greener than I expected, but that will tone down with the shading and weathering to come.


Ernest

Last Armor Build - 1/35 Dragon M-26A1, 1/35 Emhar Mk.IV Female


Last Aircraft Builds - Hobby Boss 1/72 F4F Wildcat & FW-190A8


  • Member since
    November 2009
  • From: SW Virginia
Posted by Gamera on Monday, April 23, 2018 11:18 AM

That's some inspiring work guys!

Dutchman: Looks great, looking forward to paint. 

Ernest: Ouch, sorry to hear about the car accident. Glad to hear you're okay and hope they've made some progress on getting your vehicle back in shape. Great job there on the tanks and tracks. That DShK 12.7MM looks amazing!

Kien: Very nice work! I've heard the Soviets looted all kinds of stuff like factory equipment, statues, even toilets. Probably just a few knapsacks or rolled up tarps should look better on your IS-II though.  

"I dream in fire but work in clay." -Arthur Machen


  • Member since
    September 2016
  • From: Albany, New York
Posted by ManCityFan on Monday, April 23, 2018 8:16 AM

Hey Kien, that IS-2 is looking really good!  I have not seen Russian tanks having much stowage in photos, which is odd, because pretty much every other nation has a ton of stuff crammed into any corner they can find room.  I don't think crew comfort really figures into their designs.  That said, use whatever you want.  I can't see them passing up crates of potatoes if they could "liberate" them.  Big Smile

Ernest, those tanks look good with primer on them.  Looking forward to the base coats.  You are making great progress on those kits.  

I may be able to finish up the Wildcat this week (phew!).  Just needs the landing gear, a flat coat, and last bits of weathering.  Then I can focus on weathering the KV-1, and start the SU-85, an old Tamiya kit with the holes in the bottom of the hull for motorizing.  Won't look anywhere near as good at Dutch's, but it's in the stash, and I still have plenty of Russian Green paint, so I will make a go of it.

Dwayne or Dman or just D.  All comments are welcome on my builds. 

  • Member since
    July 2006
  • From: San Francisco Bay Area
Posted by bufflehead on Sunday, April 22, 2018 7:07 PM

Griffin25

Ernest you got that MG kit at Ace Hardware?? It looks awesome. Dang I wish I knew about that kit I spent $19 on 2 resin Maxim's by Plusmodel and they were so so. 

Kien that JS is looking good. Love the markings. 


Yep!  Berkeley Ace Hardware has a pretty decent hobby section including scale models and accessories.  Never seen that in any other Ace.  The MiniArt kit was $24, but it does have those two cool Maxim MGs, plus the others.

Ernest

Last Armor Build - 1/35 Dragon M-26A1, 1/35 Emhar Mk.IV Female


Last Aircraft Builds - Hobby Boss 1/72 F4F Wildcat & FW-190A8


  • Member since
    July 2006
  • From: San Francisco Bay Area
Posted by bufflehead on Sunday, April 22, 2018 7:03 PM

Kien

Bufflehead, 

The gloss black primer is actually the exact same primer you used, but in gloss black. I like grey though, and will probably buy the same you have. Is using the gunze leveling thinner better than using any other lacquer thinner? 

Kien 


It comes in black?!?!   Oh, I need to get me some of that!

As for the thinner, never tried anything other than Mr. Hobby thinner for their own products, but I assume other lacquer thinners would work...??

Nice work on the JS-2!  Base color, stripes and markings look great!

Ernest

Last Armor Build - 1/35 Dragon M-26A1, 1/35 Emhar Mk.IV Female


Last Aircraft Builds - Hobby Boss 1/72 F4F Wildcat & FW-190A8


  • Member since
    May 2015
Posted by Griffin25 on Sunday, April 22, 2018 6:42 PM

Ernest you got that MG kit at Ace Hardware?? It looks awesome. Dang I wish I knew about that kit I spent $19 on 2 resin Maxim's by Plusmodel and they were so so. 

Kien that JS is looking good. Love the markings. 


Griffin

  • Member since
    September 2017
  • From: HTX
Posted by Kien on Sunday, April 22, 2018 5:58 PM

Bufflehead, 

The gloss black primer is actually the exact same primer you used, but in gloss black. I like grey though, and will probably buy the same you have. Is using the gunze leveling thinner better than using any other lacquer thinner? 

Kien 

 Youtube Channel:                                                       https://www.youtube.com/channel/UCkcc2P3-PluSdehvVCEKLdw

  • Member since
    September 2017
  • From: HTX
Posted by Kien on Sunday, April 22, 2018 5:53 PM

I have some more progress on the IS-2. Used tamiya olive green as the base color and then white with little buff for the turret stripes. 

I also have some value gear stowage but wasn’t sure whether to add it or not, I don’t really see many Russian tanks with stowage. I was thinking of adding a tarp or two, maybe a box, and the little potato crates. What would you all do? 

The model is ready for weathering now. 

Kien 

 Youtube Channel:                                                       https://www.youtube.com/channel/UCkcc2P3-PluSdehvVCEKLdw

  • Member since
    July 2006
  • From: San Francisco Bay Area
Posted by bufflehead on Sunday, April 22, 2018 3:24 PM

Been busy and missed some of the great work here!

Kien - never saw a gloss black primer before, but the JS-2 is looking good!  What a beast that tank is!

route62 - sweet winter camo job on the Alanger T-34!!  Its going to look fantastic when done!  BTW,  I love your salad tong model holder for painting!!

Dutch - all right!  Great work on the SU-85!  3D printing?  That's a whole new realm of model building!  Would have been handy for all the parts I've lost/destroyed over the years!

I was rear-ended in a car accident a couple of weeks ago and bench time was very limited due to strained back muscles, but its much better now and I've been able to finally complete assembly of all three models for this GB and primer them:

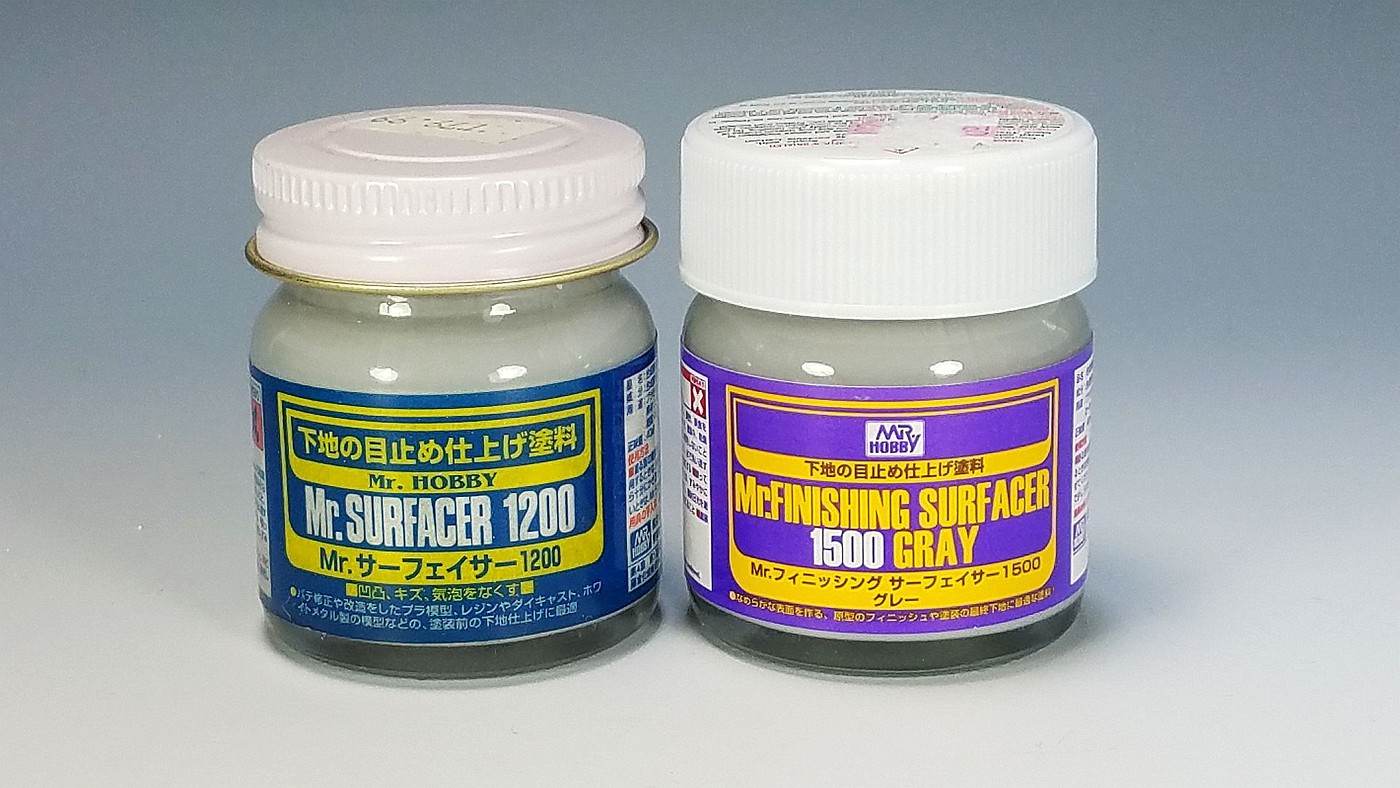
First, I found this awesome Mr. Hobby primer at the Ace Hardware in downtown Berkeley (yep, not far from famed UC Berkeley).  I normally use Mr. Surfacer 1200 which is the finest primer I've ever used, but this 1500 is crazy fine!  Cut with Mr. Hobby Color Thinner it layed down the smoothest, finest, tightest coat of primer I've seen.  It almost looks like bare plastic, except for the matte finish.

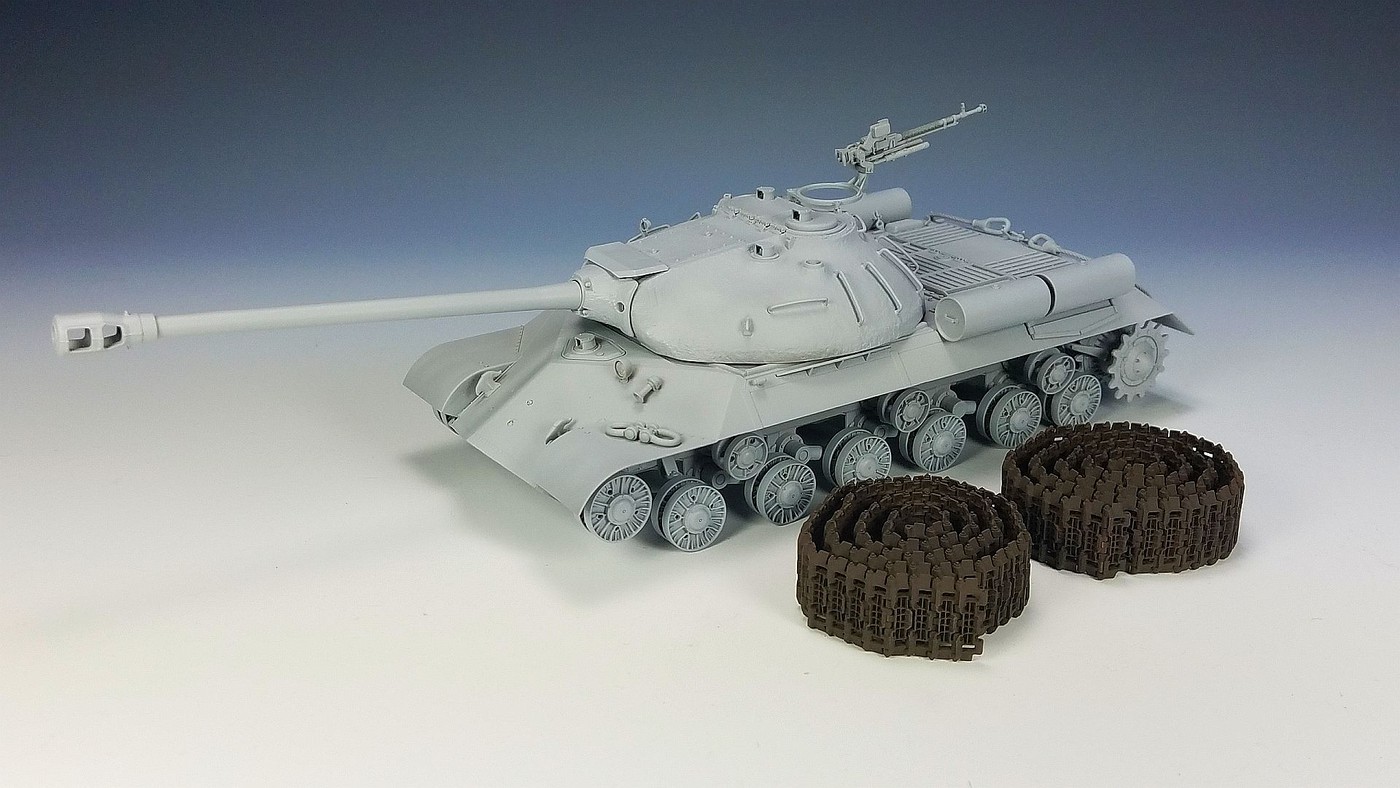
I used this primer on the Tamiya JS-3, but primered the tracks with a mix of Tamiya Acrylic Nato Black and Red Brown.  I don't like using lacquer or enamel based paints on workable tracks with tiny plastic pins...sometimes the paint is too "hot" and can weaken the pins causing them to break.  Never had this problem with acrylic paint.

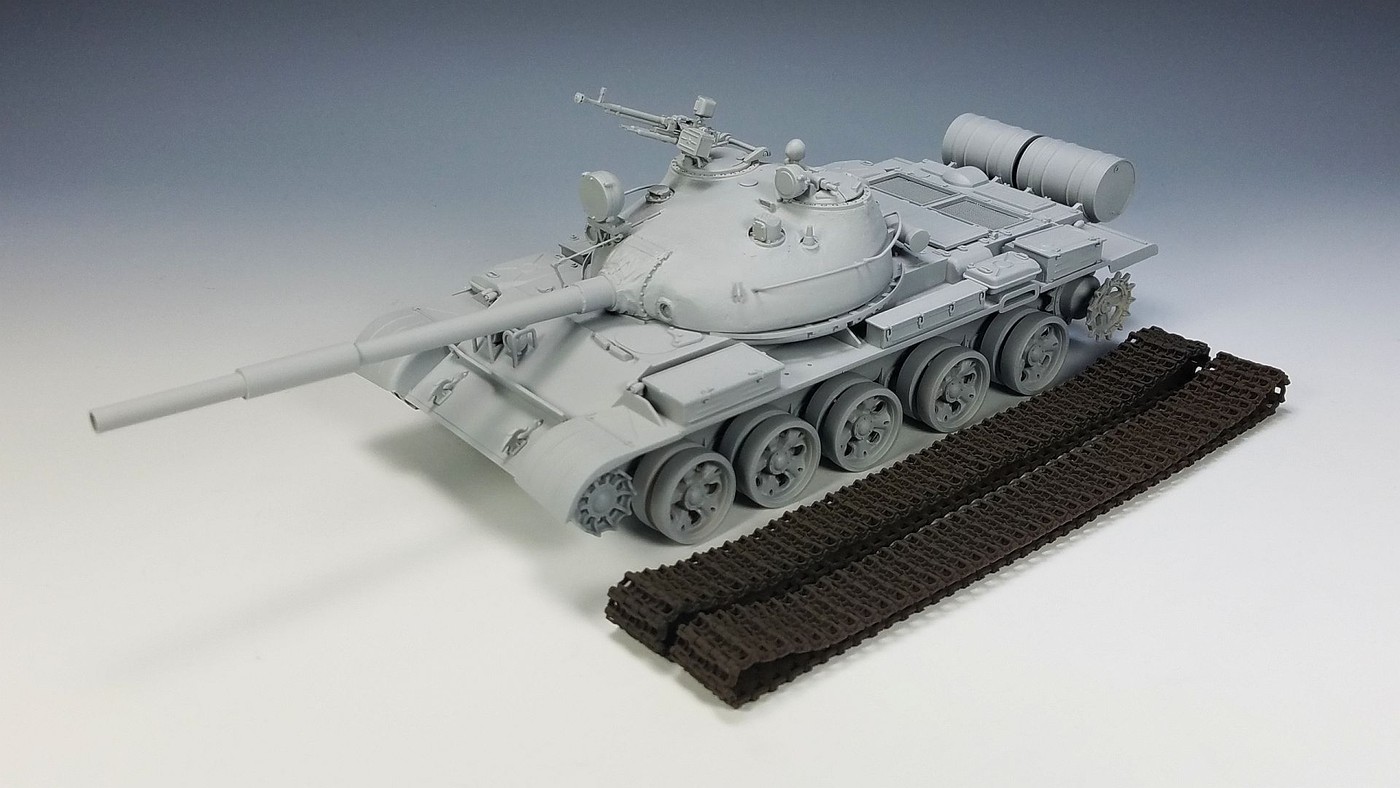
Same deal with the Tamiya T-62:

Oh, I also found this at that Ace Hardware and couldn't resist:

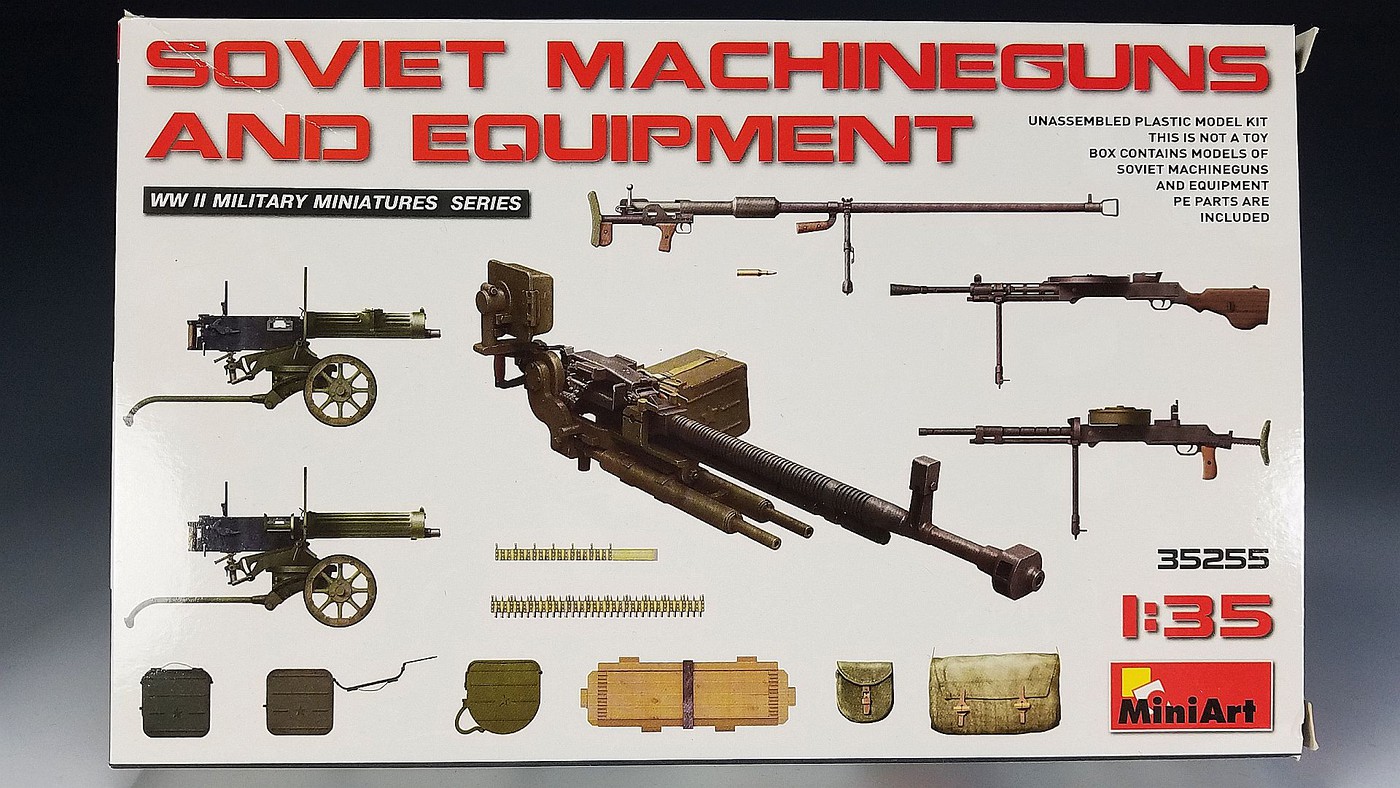
Now, I have to say that if you ever need the most detailed aftermarket Soviet DShK 12.7MM Mg then get this little kit!  But if you're not into tiny, finicky, multi-part assemblies, then skip it!!  Here's the assembled/primered mg compared with the kit MG:

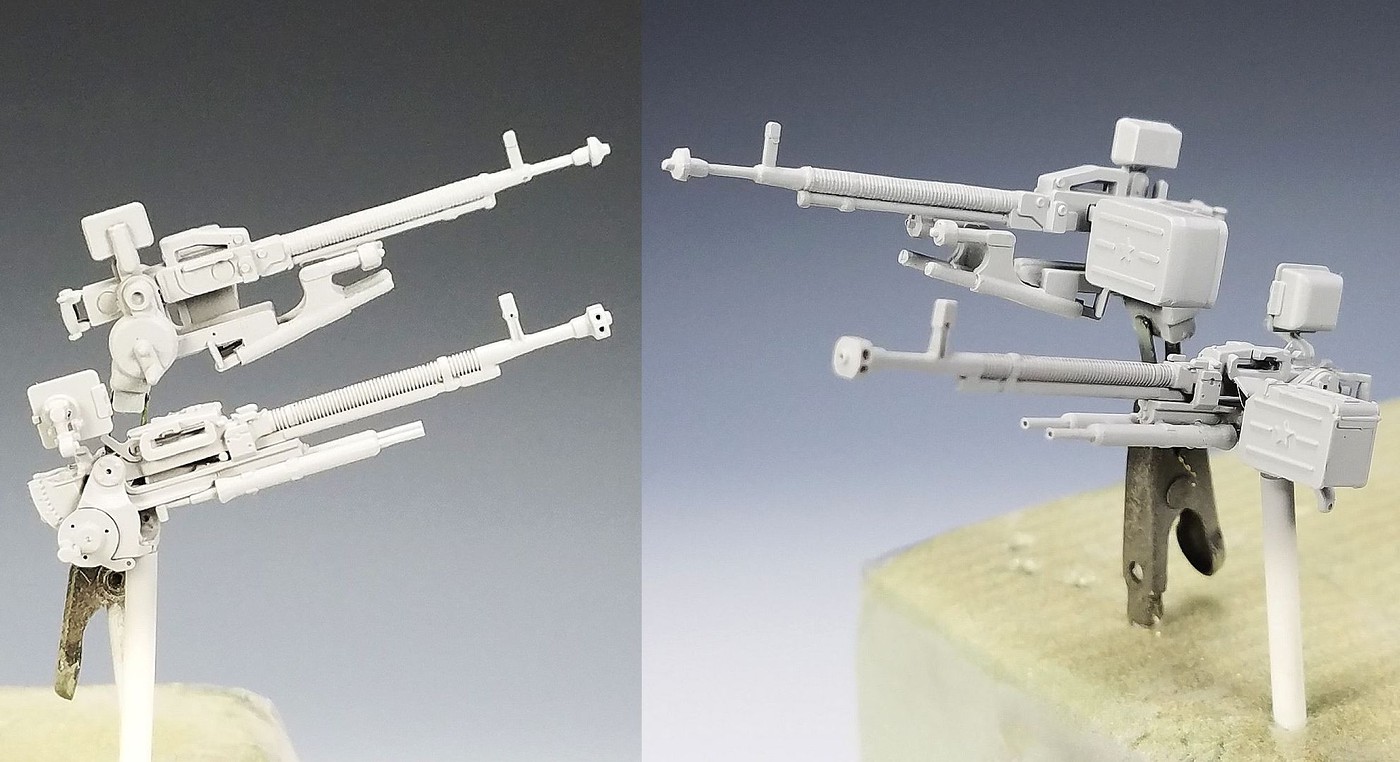
Can you believe that this little MG has 27 individual parts??  Some of them are very tiny PE parts that are almost impossible not to bend out of shape or accidentally fling them into oblivion.  One of the PE parts just broke in half and I had to scratchbuild a replacement (which turned out MUCH sturdier than the PE part!).  The glued attachment points of many of the parts are quite miniscule which makes the whole assembly VERY fragile!

Gamera, apparently this is the exact same MG assembly in your MiniArt T-44 kit...I trust your eyesight and patience are better than mine!!

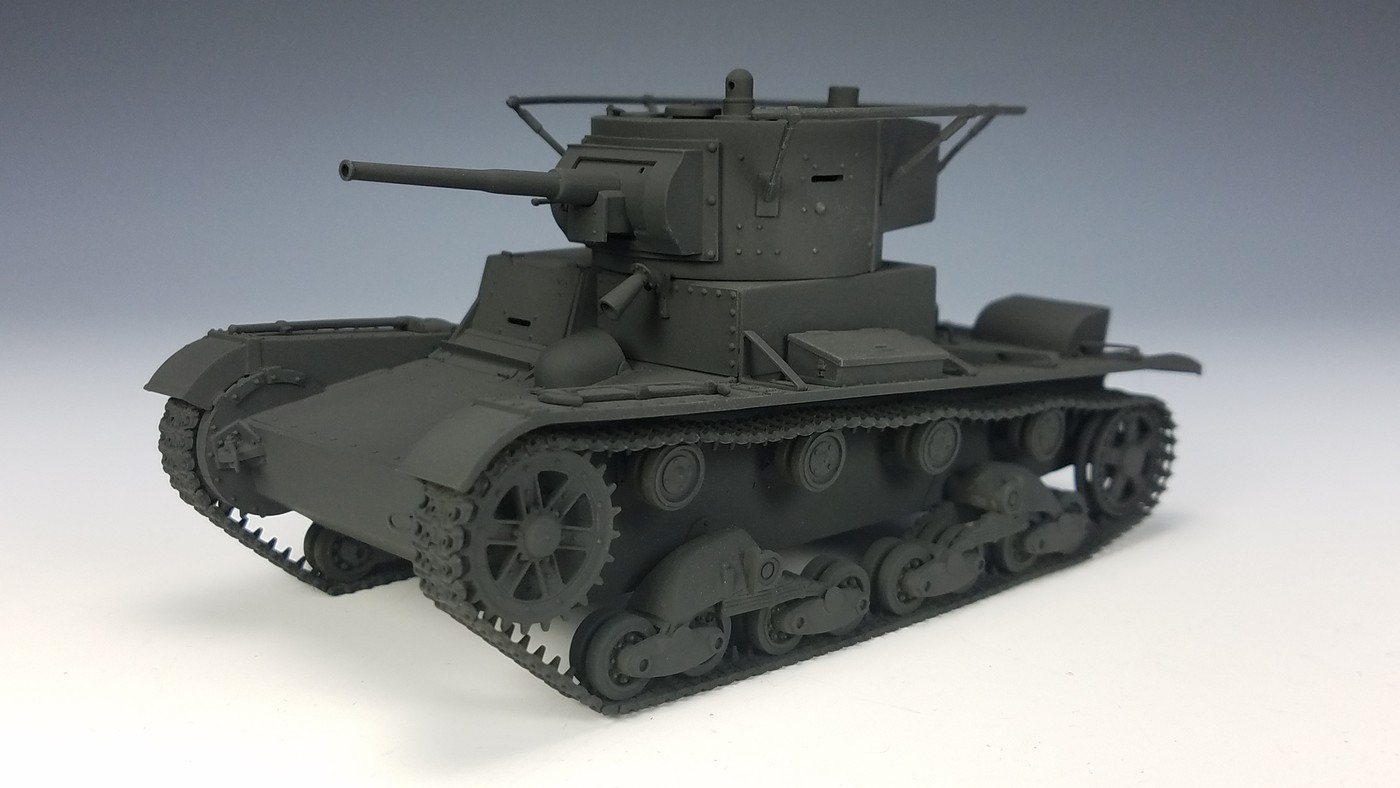
Finally, the Zvezda T-26.  I decided to add the turret antenna and instead of a gray primer, this one is primered with Tamiya Nato Black thinned with their lacquer thinner.  I am going to use the "black & white" method with this paint job and see how it compares with my usual method.

Let the base coloring begin!

Ernest

Last Armor Build - 1/35 Dragon M-26A1, 1/35 Emhar Mk.IV Female


Last Aircraft Builds - Hobby Boss 1/72 F4F Wildcat & FW-190A8


  • Member since
    September 2017
  • From: Netherlands
Posted by Sailing_Dutchman on Sunday, April 22, 2018 3:18 PM
I don't have a printer myself, but our library has one that prints on commission, so I use that.


  • Member since
    September 2016
  • From: Albany, New York
Posted by ManCityFan on Sunday, April 22, 2018 2:49 PM

Hey Dutch, that SU is looking great.  Excellent construction work.  I am a little jealous of the 3d printer.....maybe, some day.  Looking forward to seeing paint on that kit.  Really nice work there.

Dwayne or Dman or just D.  All comments are welcome on my builds. 

  • Member since
    May 2015
Posted by Griffin25 on Saturday, April 21, 2018 10:59 PM

That is a great looking build Dutch. 3d printed parts are out of my realm but that is cool! 


Griffin

  • Member since
    September 2017
  • From: Netherlands
Posted by Sailing_Dutchman on Saturday, April 21, 2018 7:47 PM

I have not been able to post for the past few weeks as I have been busy switching from postimage to flickr. As that is now about finished I can now post again, so here is an update on what I have been doing:

I replaced the supplied gun bearing with one I 3D printed:

The finished build:

After that I primed with Tamiya Liquid Surface Primer G cut 50:50 with Tamiya Laquer Thinner:


  • Member since
    November 2009
  • From: SW Virginia
Posted by Gamera on Monday, April 16, 2018 11:40 AM

Kien: Looks good! She looks very sinister in all black.

Route62: Great job, love the whitewash! 

"I dream in fire but work in clay." -Arthur Machen


  • Member since
    September 2017
  • From: HTX
Posted by Kien on Sunday, April 15, 2018 7:24 PM

Griffin25

Kien that is coming along nicely. What is the purpose of priming in gloss black? I've seen it for planes and aluminum finishes but not armor. I could learn something. 


Well I usually use a regular primer, but I don't really like the vallejo primer I have. So instead I just used an Alclad gloss black primer, which is the only one I have right now. I will probably buy a proper primer, most likely the Mr. Surfacer 1500 grey or black. 

Kien 

 Youtube Channel:                                                       https://www.youtube.com/channel/UCkcc2P3-PluSdehvVCEKLdw

  • Member since
    September 2016
  • From: Albany, New York
Posted by ManCityFan on Sunday, April 15, 2018 7:19 PM

Hey Kien, that IS2 is coming along well.  Looking forward to the base coat.

Route, that white wash came out fantastic!!  Really nice job there.


Dwayne or Dman or just D.  All comments are welcome on my builds. 

  • Member since
    December 2013
  • From: Orlando Florida
Posted by route62 on Sunday, April 15, 2018 7:15 PM

The winter camo was done using the hair spray technique, cheap dollar store hair spray with tamiya acrylic white on top.  Sealed it and went to town using several techniques both with oil and enamel paints to create all the weathering. 

I am a big advocate about using common art supplies for weathering.  I did not use any name brand weathering products from Mig or the like.  All the same effects can be acomplished with stuff found at arts/craft stores for a fraction of price and a ton more product.

Here is a little photo time line of the progress:

Assembly

Paint

Winter Camo

Weathering

  • Member since
    May 2015
Posted by Griffin25 on Sunday, April 15, 2018 6:52 PM

Holy smokes that looks great! However you did the white wash technique, if came out aces. You definitely have to put aftermarket tracks on that beauty!


Griffin

  • Member since
    December 2013
  • From: Orlando Florida
Posted by route62 on Sunday, April 15, 2018 6:21 PM

Almost done on this T-34.  I decided to go for winter war weary weathering.  Ordered some better tracks since the kit tracks were not worth using.  Once I get the tracks installed, some mud and dirt on the lower hull and pigment powders to finish it up.


  • Member since
    May 2015
Posted by Griffin25 on Sunday, April 15, 2018 9:16 AM

Kien that is coming along nicely. What is the purpose of priming in gloss black? I've seen it for planes and aluminum finishes but not armor. I could learn something. 


Griffin

  • Member since
    September 2017
  • From: HTX
Posted by Kien on Saturday, April 14, 2018 10:19 PM

I have just finished priming the model with a gloss black base. It's ready for painting now, I will be using the XF-58 olive green which seems to be a good shade. Then will ad the white stripes on the turret for the berlin IS2 markings. 

Kien

 Youtube Channel:                                                       https://www.youtube.com/channel/UCkcc2P3-PluSdehvVCEKLdw

  • Member since
    November 2009
  • From: SW Virginia
Posted by Gamera on Saturday, April 14, 2018 1:23 PM

DasBeav: Looks perfect to me!!! I wouldn't call her a beautiful tank but that's a beautiful model!

"I dream in fire but work in clay." -Arthur Machen


  • Member since
    July 2006
  • From: San Francisco Bay Area
Posted by bufflehead on Saturday, April 14, 2018 12:21 PM

DasBeav, the T-35 came out great!  You created a beauty despite all the kit and self inflicted problems (TBH I don't see anything)!  Love the color you used.  One thing I noticed is that the secondary turrets on the T-35 are basically the same as the turret on the T-26 (minus the rear overhang).  The ICM turrets look more detailed than the turret on my Zvezda T-26 kit.....not bad for a $15 kit!

Ernest

Last Armor Build - 1/35 Dragon M-26A1, 1/35 Emhar Mk.IV Female


Last Aircraft Builds - Hobby Boss 1/72 F4F Wildcat & FW-190A8


  • Member since
    October 2016
  • From: .O-H-I-O....
Posted by DasBeav on Saturday, April 14, 2018 10:12 AM

Thanks for the nice comments Griff and D-man.

The pics hide many of my mistakes. If I told you how I many things I screwed up you would laugh.

I definitely will check back in November. Taking the Spring/summer off from GBing.

 Sooner Born...Buckeye Bred.


JOIN OUR COMMUNITY!

Our community is FREE to join. To participate you must either login or register for an account.

SEARCH FORUMS
FREE NEWSLETTER
By signing up you may also receive reader surveys and occasional special offers. We do not sell, rent or trade our email lists. View our Privacy Policy.