SEARCH FINESCALE.COM

Enter keywords or a search phrase below:

80 Years of Airfix GB

115238 views
1664 replies
1 rating 2 rating 3 rating 4 rating 5 rating
  • Member since
    March 2017
Posted by Armor_Aficionado on Tuesday, July 9, 2019 5:27 PM
BTW, Bish, you can use that first picture of this series for the front page completion picture. Thanks!

  • Member since
    April 2015
Posted by Mopar Madness on Tuesday, July 9, 2019 7:08 PM

I sure like that P-40 AA!

Chad

God, Family, Models...

At the plate: 1/48 Airfix Bf109 & 1/35 Tamiya Famo

On deck: Who knows!

  • Member since
    March 2017
Posted by Armor_Aficionado on Tuesday, July 9, 2019 11:36 PM
Thanks, Mopar!

  • Member since
    June 2017
  • From: Winter Park, FL
Posted by fotofrank on Thursday, July 11, 2019 9:08 AM

I was going to have the F-80 sitting on its landing gear but the main gear appears to be just too fragile. I used my wife's new Dremel to cut a slot for the stand. What a great tool!! Shoulda had one of these a long time ago. Now that I've cut the slot I can attach the gear, bombs and tip-tanks. I should be done later today. Then I have to find another old Airfix kit to build.


OK. In the stash: Way too much to build in one lifetime...

  • Member since
    June 2017
  • From: Winter Park, FL
Posted by fotofrank on Thursday, July 11, 2019 11:45 AM

Well, here it is. Airfix 1/72 F-80C, "The Spirit of Hobo", 80 FBS, 8 FBW, Suwon, Korea, 1952. Looks like it will sit on its landing gear but I'm going to put it on a stand anyway. I'd like to find another kit so I can build it gear up. The overall color is Alclad Aluminum with MM O.D. and flat black. The kit decals were pretty much useless but I lucked into a set of Microscale decals that are an exact match to the kit decals. Too cool. I really like these early jets. Now I have to find another kit for my next contribution.


OK. In the stash: Way too much to build in one lifetime...

  • Member since
    December 2002
  • From: Bury St Edmunds, Suffolk, England
Posted by Bish on Thursday, July 11, 2019 2:49 PM

Very nicely finished on the P-40 AA, thanks for shareing that with us. And will do, i'll do the updates at the weekend.

I am a Norfolk man and i glory in being so


On the bench: Airfix 1/72nd Harrier GR.3/Fujimi 1/72nd Ju 87D-3

  • Member since
    December 2002
  • From: Bury St Edmunds, Suffolk, England
Posted by Bish on Thursday, July 11, 2019 2:51 PM

Very nice finish on that frank, good looking NMF.

I am a Norfolk man and i glory in being so


On the bench: Airfix 1/72nd Harrier GR.3/Fujimi 1/72nd Ju 87D-3

  • Member since
    April 2015
Posted by Mopar Madness on Thursday, July 11, 2019 6:42 PM

Great F-80 Frank!

Chad

God, Family, Models...

At the plate: 1/48 Airfix Bf109 & 1/35 Tamiya Famo

On deck: Who knows!

  • Member since
    June 2017
  • From: Winter Park, FL
Posted by fotofrank on Thursday, July 11, 2019 8:08 PM

Thanks, Bish. Thanks, Mopar. The F-80 has always been one of my favorites.

OK. In the stash: Way too much to build in one lifetime...

  • Member since
    August 2014
  • From: Willamette Valley, Oregon
Posted by goldhammer on Friday, July 12, 2019 4:39 PM

Finally blew an inch of shop dust off the box and got the cockpit placard decals on and ready to button up the fuselage.  

Going on a week long campout with my lady's bus driver's retirees group, in another week.  Since I don't have a lot in common with them, should give me plenty of time to work on the Mustang and the Santa GB.

Hoping it won't take me as long to finish this thing as Airfix has been in business......

  • Member since
    December 2002
  • From: Bury St Edmunds, Suffolk, England
Posted by Bish on Monday, July 15, 2019 3:34 PM

Assembely was done on my 111 and everything masked up ready for painting.

One of the things i have always like about this scheme is the contrast between the light grey RLM 63 and the 2 darker colours. When i painted the 63 i used the last of my older tins of Xtracolor. After adding the other 2 and removing the masks i noticed a couple of spots i had not masked properly and had some darker overspray. So i grabbed a newer tin of 63 and to my horror noticed it was a completly different colour, a darker grey green. Xtracolor have a habit of changing the shade of certain colours.So i sprayed a bit on to see just how different it was, knowing i didn't have any of the ligter colour left.

Before commiting i did a bit of checking. It turns out that 63 did come in the 2 shades and the grey green one is correct for this scheme. It explains some of the profiles in some of the books i have. So, i completly re-masked and re-did the 63. I'm a bit gutted as i did like the other colour, but i am geting used to it.

Next up the decals.

I am a Norfolk man and i glory in being so


On the bench: Airfix 1/72nd Harrier GR.3/Fujimi 1/72nd Ju 87D-3

  • Member since
    August 2014
  • From: Willamette Valley, Oregon
Posted by goldhammer on Monday, July 15, 2019 5:09 PM

Night and day difference in them, but not as "in your face" difference between all three on the aircraft and the original.


Will add some contrast in the display case as well.  I like it, will look great when finished, as usual with your work.

  • Member since
    April 2015
Posted by Mopar Madness on Monday, July 15, 2019 5:54 PM

Bish, love that early camo.

Chad

God, Family, Models...

At the plate: 1/48 Airfix Bf109 & 1/35 Tamiya Famo

On deck: Who knows!

  • Member since
    December 2002
  • From: Bury St Edmunds, Suffolk, England
Posted by Bish on Tuesday, July 16, 2019 4:13 AM

Cheers guys.

GH, i know just what you mean. And the darker colour does make more sense than the pale grey. But when you look at some photo's, i can see how the error was made in thinking it was the lighter colour.

I am a Norfolk man and i glory in being so


On the bench: Airfix 1/72nd Harrier GR.3/Fujimi 1/72nd Ju 87D-3

  • Member since
    December 2002
  • From: Bury St Edmunds, Suffolk, England
Posted by Bish on Sunday, July 21, 2019 5:12 AM

Time to wrap this one up. The decals went down nicely, a mix of Xtradecal for the markings and Airfix for the stencils. These were followed by exhaust staining and a light flory was.

The masks were then removed and finals bits added. The D/F loop was sctarch built with a bit of wire as the P-2 was not fitted with this and so the kit didn't have one.

The markings are a little confuseing. The unit badge and tail code 25 indicate KG 152, the E33 assigning it to the 3 Staffel, 3 Gruppe. But this Gruppe didn't operate the He 111. From what i can find, and according to the decal instructions, it belong to KG 255 and one source says it was one of a number loaned to 152 to make a properganda movie. Apparently this was called KG Lutzow, but from what i can find this was made in 1940. So maybe it was started in 38 and then finished off in 40 after the invasion of Poland, which is part of the movie.

And of course, a properganda movie would not be complete without a camerman there to capture the brave crew about to head out, maybe discussing who's going to be the star of the show.

Really pleased with how its turned out. A few fit issues, the canopy isn't perfect. But overall, a nice kit. And deffinetly a match for the more pricey Hase kits.

Thanks for looking.

I am a Norfolk man and i glory in being so


On the bench: Airfix 1/72nd Harrier GR.3/Fujimi 1/72nd Ju 87D-3

  • Member since
    June 2017
  • From: Winter Park, FL
Posted by fotofrank on Sunday, July 21, 2019 10:51 AM

Pretty nice, Bish. I like that the camouflage isn't the splinter camo typically seen on He-111s. I like the group of figures in conversation with each other. They add dimension to the display. Overall, a very nice display.

OK. In the stash: Way too much to build in one lifetime...

  • Member since
    December 2002
  • From: Bury St Edmunds, Suffolk, England
Posted by Bish on Sunday, July 21, 2019 10:53 AM

Cheers frank. I am wondring why the German switched to the 70/71 camo. This 3 colour scheme seems as though it would have been more effective.

I am a Norfolk man and i glory in being so


On the bench: Airfix 1/72nd Harrier GR.3/Fujimi 1/72nd Ju 87D-3

  • Member since
    December 2002
  • From: Northern California
Posted by jeaton01 on Sunday, July 21, 2019 9:45 PM

Very nice, Martin.  This color scheme is new to me as well.

John

To see build logs for my models:  http://goldeneramodel.com/mymodels/mymodels.html


  • Member since
    December 2002
  • From: Bury St Edmunds, Suffolk, England
Posted by Bish on Monday, July 22, 2019 6:29 AM

Cheers John. Some of my referance books actually make sense now. I thought it was just a case of dodgy printing.


Edit: Sorry frank, just noticed i haven't added you shooting start. I'll get onto that.

I am a Norfolk man and i glory in being so


On the bench: Airfix 1/72nd Harrier GR.3/Fujimi 1/72nd Ju 87D-3

  • Member since
    April 2015
Posted by Mopar Madness on Monday, July 22, 2019 7:50 PM

I’m calling this one done. A lot of scribing and patience went into this vintage Airfix classic. But, it Looks like a Ka-25 so I’m happy! Please use pic number 1 for the front page.  Thanks for looking!

Chad

God, Family, Models...

At the plate: 1/48 Airfix Bf109 & 1/35 Tamiya Famo

On deck: Who knows!

  • Member since
    December 2002
  • From: Northern California
Posted by jeaton01 on Monday, July 22, 2019 10:34 PM

Well done, Chad.

John

To see build logs for my models:  http://goldeneramodel.com/mymodels/mymodels.html


  • Member since
    December 2002
  • From: Bury St Edmunds, Suffolk, England
Posted by Bish on Tuesday, July 23, 2019 6:25 AM

Very nicely done Chad, thank you. Will update the front page.

I am a Norfolk man and i glory in being so


On the bench: Airfix 1/72nd Harrier GR.3/Fujimi 1/72nd Ju 87D-3

  • Member since
    June 2017
  • From: Winter Park, FL
Posted by fotofrank on Tuesday, July 23, 2019 1:26 PM

Bish

Edit: Sorry frank, just noticed i haven't added you shooting start. I'll get onto that.


I wasn't worried. I'm trying to come up with another kit to contribute to the group build...

OK. In the stash: Way too much to build in one lifetime...

  • Member since
    April 2015
Posted by Mopar Madness on Tuesday, July 23, 2019 6:08 PM

Thank you gents.  The bluetits are coming along.  Due to the complex shape and old age of the kit, the parts fit pretty poorly and result in some unsightly seams.  I tried to use squadron green puttybut the results were not satisfactory.  So instead of sanding down the birds and altering their natural shape, I’m going to fill gaps with two-part Milliput then use my rotary tool to re-scribe feathers. 

Chad

God, Family, Models...

At the plate: 1/48 Airfix Bf109 & 1/35 Tamiya Famo

On deck: Who knows!

  • Member since
    April 2015
Posted by Mopar Madness on Tuesday, July 23, 2019 6:23 PM

Bish, next on the bench will be the 1/72 1931 Supermarine S.6B.  Seems like a pretty simple kit, parts breakdown is minimal, should be an interesting subject but will require a certain amount of rigging.  

Chad

God, Family, Models...

At the plate: 1/48 Airfix Bf109 & 1/35 Tamiya Famo

On deck: Who knows!

  • Member since
    June 2017
  • From: Winter Park, FL
Posted by fotofrank on Tuesday, July 23, 2019 8:17 PM

Mopar, I'm looking forward to your S.6B build. I like obscure kits like this. Should be fun.

OK. In the stash: Way too much to build in one lifetime...

  • Member since
    July 2014
Posted by modelcrazy on Tuesday, July 23, 2019 8:25 PM

Getting through the stash I see Chad. Cool builds my friend.

Steve

Building a kit from your stash is like cutting a head off a Hydra, two more take it's place.


http://www.spamodeler.com/forum/

  • Member since
    April 2015
Posted by Mopar Madness on Tuesday, July 23, 2019 9:14 PM

Thanks guys! Steve, I’ve got a long way to go! Big Smile

Chad

God, Family, Models...

At the plate: 1/48 Airfix Bf109 & 1/35 Tamiya Famo

On deck: Who knows!

  • Member since
    June 2017
Posted by UnwaryPaladin on Wednesday, July 24, 2019 4:41 PM

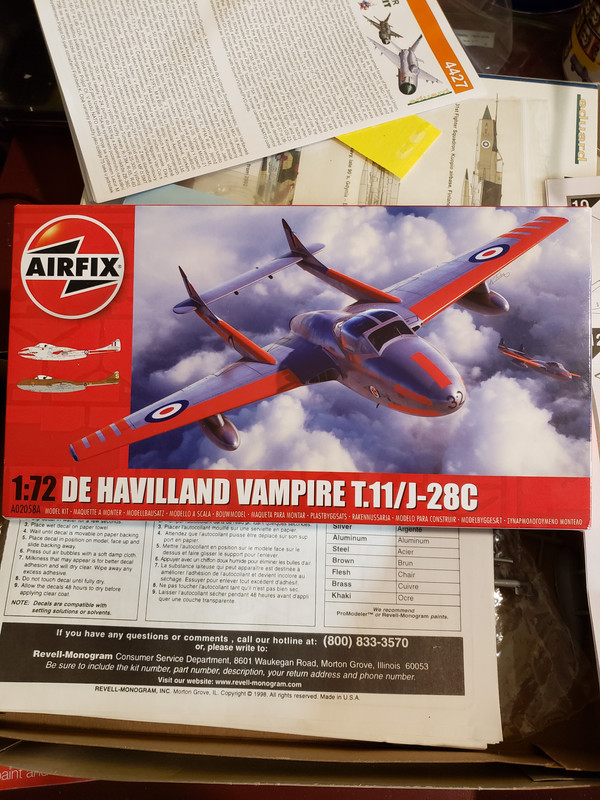
Ready to add a second kit to the GB! My son got me the 1/72 DeHaviland Vampire T.11 kit for Fathers Day. 
The kit builds up nicely, and quickly. Started with the cockpit, no surprises there. It goes together well, and with the black paint I guess there's not much to see. I added tape seat harnesses, painter's masking tape provided a close match to the blue in reference pictures. I also added the overhead handles for the ejection seats. Those were done with black and gold thread twisted together, then saturated with super glue. Some highlighting with a silver pencil, a wash on the seat belts with diluted black acrylic and it was ready to button up. 
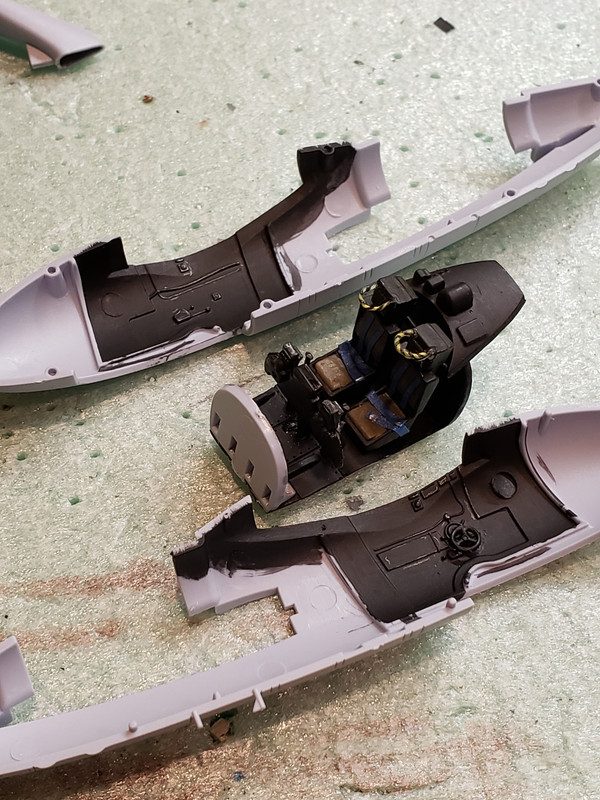
The cockpit fit very well into the fuselage halves, the locator spots built into the fuse sides were very helpful for a sure fit.
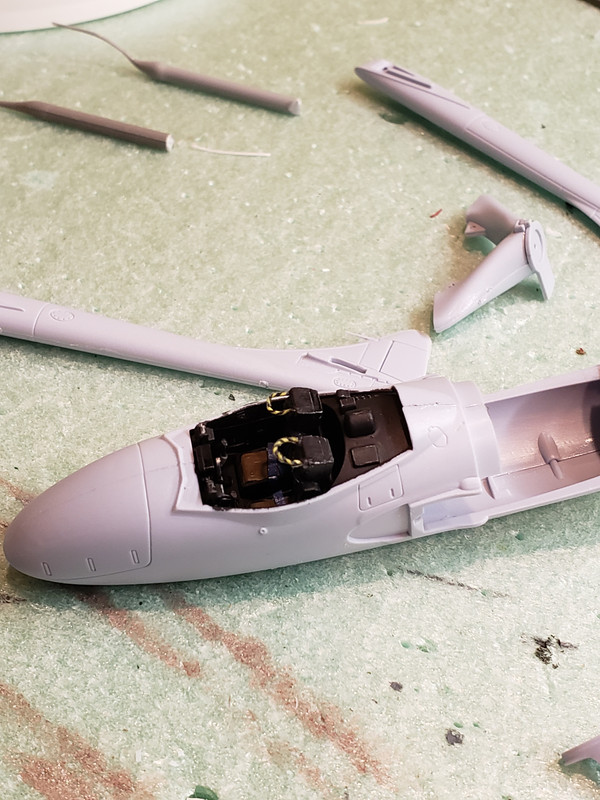
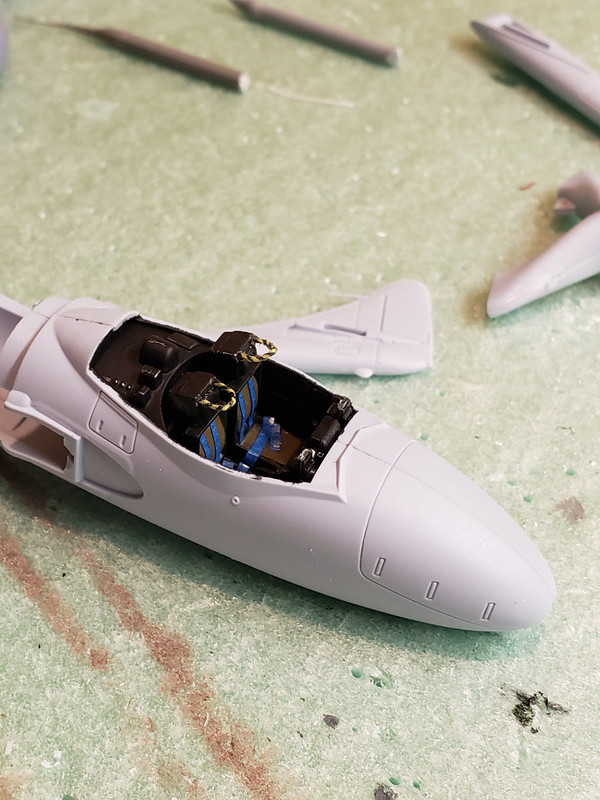
Intakes were next, be sure to seat them correctly because they will determine how well the wings fit.

Top wings were added, some gaps that will need a little putty.
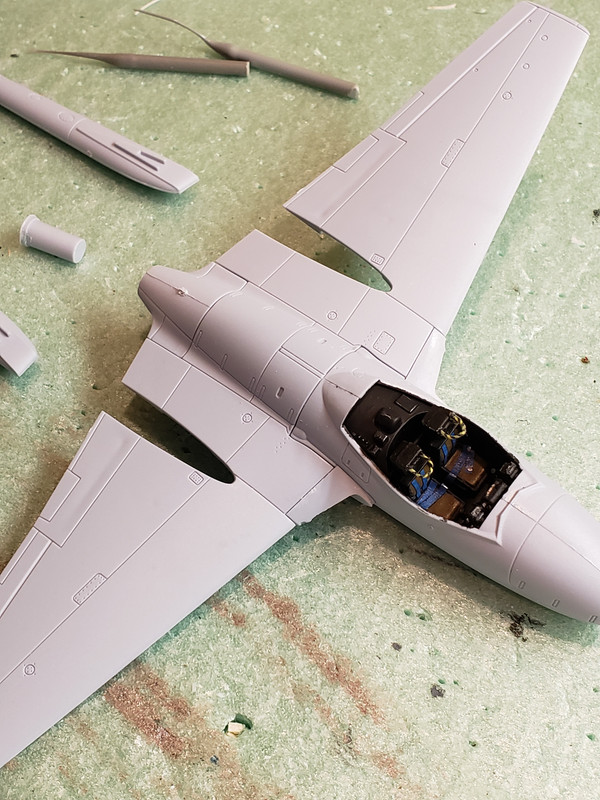
The booms are next, they fit together without trouble. 
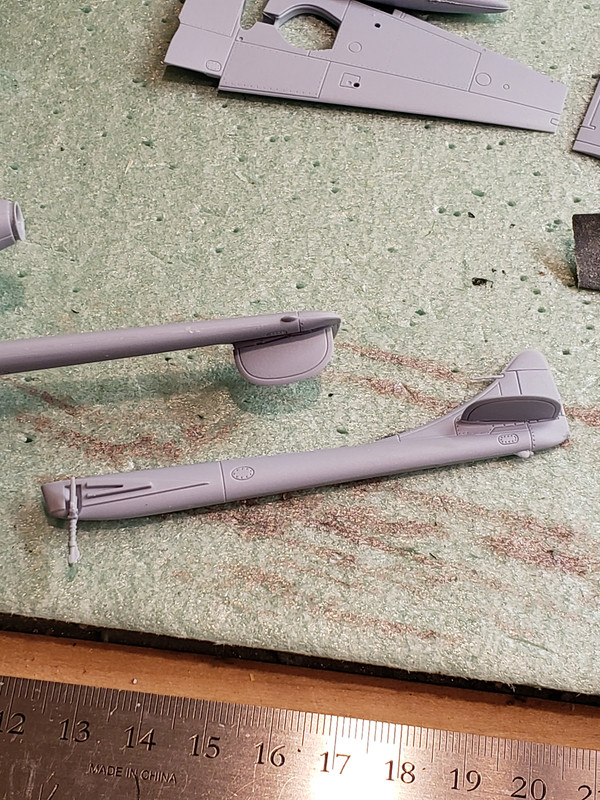
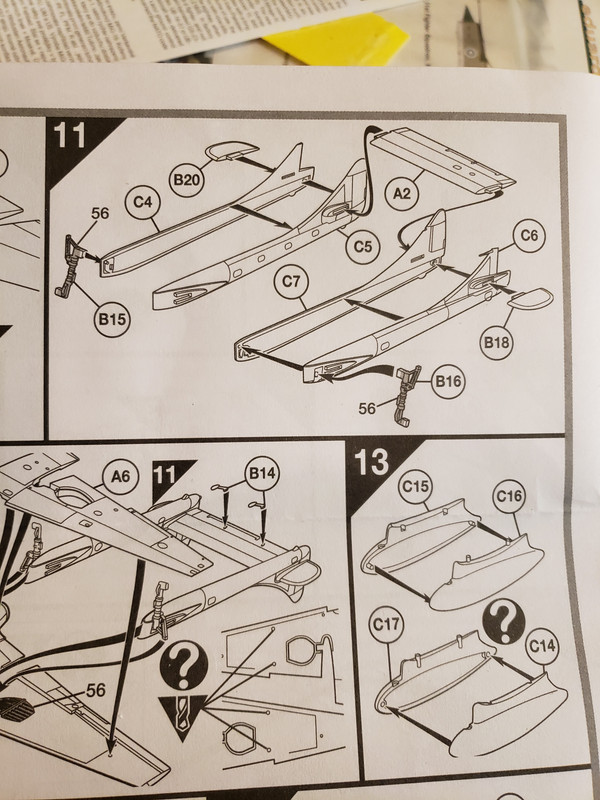
The instructions (step 11) have you adding the wheel struts now. I usually wait until last to add the struts, to avoid breaking them. FOLLOW THE DIRECTIONS. You won't get them in if you don't install them now. The kit engineering helps position them perfectly, so save yourself the trouble and install them now. 
The booms lock into place, very easy to align. I'm going to let them dry a bit before proceeding. 


  • Member since
    December 2002
  • From: Bury St Edmunds, Suffolk, England
Posted by Bish on Wednesday, July 24, 2019 4:50 PM

Nice start on the Vampire.


Front page is updated, if i am missing anything, please give me a kick.

I am a Norfolk man and i glory in being so


On the bench: Airfix 1/72nd Harrier GR.3/Fujimi 1/72nd Ju 87D-3

JOIN OUR COMMUNITY!

Our community is FREE to join. To participate you must either login or register for an account.

SEARCH FORUMS
FREE NEWSLETTER
By signing up you may also receive reader surveys and occasional special offers. We do not sell, rent or trade our email lists. View our Privacy Policy.